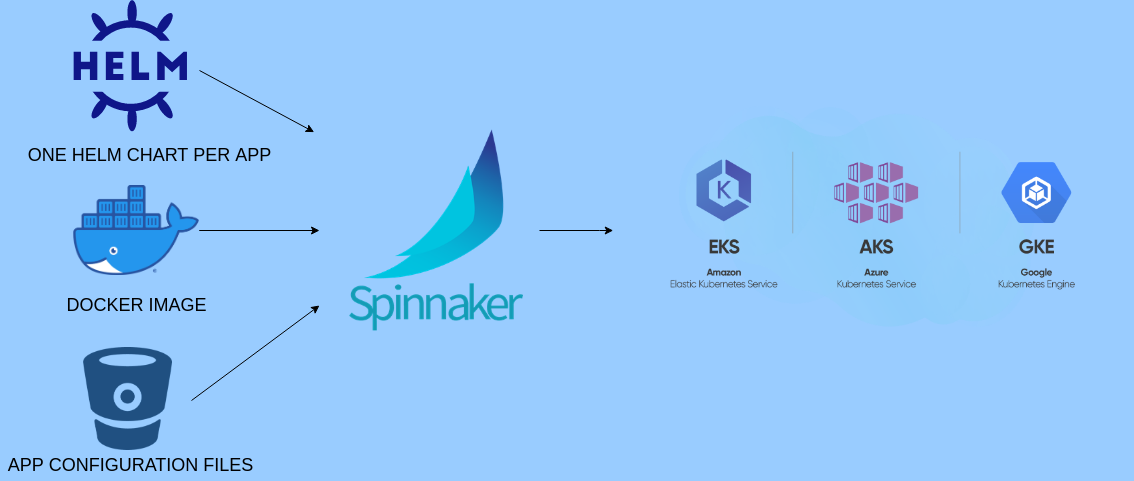
Hướng dẫn cấu hình Spinnaker deploy lên kubernetes dựa vào Helm.
Tạo Helm Chart theo hướng dẫn:
- https://phoenixnap.com/kb/create-helm-chart
- https://docs.bitnami.com/tutorials/create-your-first-helm-chart/
- https://tel4vn.edu.vn/blog/how-to-create-heml-chart-in-10-minutes/ (tài liệu tiếng việt)
Thực package helm bằng câu lệnh: helm package ./mychart
>>>>câu lệnh tạo 1 helm chart
helm create phoenixnap

>>>>.thực hiện sửa 1 số config theo như hướng dẫn https://phoenixnap.com/kb/create-helm-chart

>>>>> thực hiện chạy câu lệnh để deploy lên k8s thử
helm install phoenix-chart phoenixnap/ --values phoenixnap/values.yaml

>>>>>
kubectl get all
kubectl get --namespace default -o jsonpath="{.spec.ports[0].nodePort}" services phoenix-chart
kubectl get nodes --namespace default -o jsonpath="{.items[0].status.addresses[0].address}"

export NODE_PORT=$(kubectl get --namespace default -o jsonpath="{.spec.ports[0].nodePort}" services phoenix-chart)
export NODE_IP=$(kubectl get nodes --namespace default -o jsonpath="{.items[0].status.addresses[0].address}")
echo http://$NODE_IP:$NODE_PORT
>>>>>nhưng câu lệnh trên chỉ dùng để giúp bạn biết đường links để truy cập vào service được

helm package ./phoenixnap
Thực hiện create repo trên github và push github:
https://github.com/mrnim94/kubernetes-manifest.git
Thực hiện token trên github:
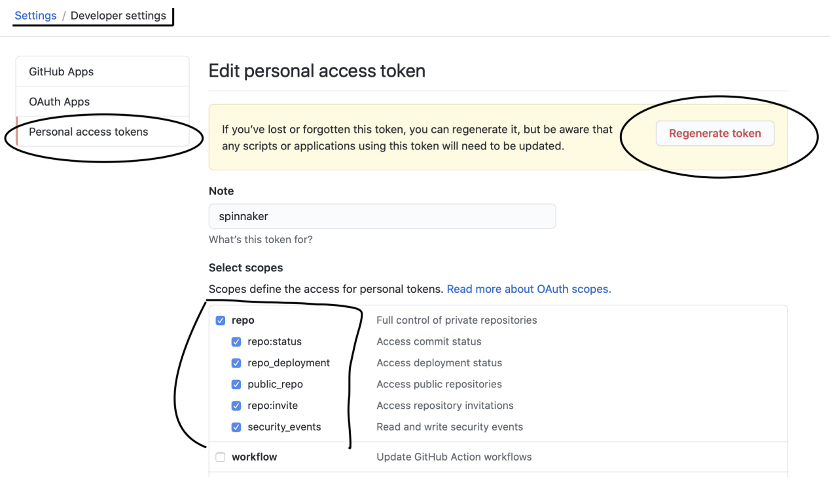
Sau khi có được token thực hiện enable-artifacts github
Thực hiện script này:
ubuntu@spinnaker-u16:~$ cat spinnaker-course/kubernetes/scripts/enable-artifacts.sh
#!/bin/bash
TOKEN_FILE=~/github-token
ARTIFACT_ACCOUNT_NAME=my-github-artifact-account

if [ ! -e "$TOKEN_FILE" ] ; then
  echo "token file does not exist"
  exit 1
fi

hal config features edit --artifacts true
hal config artifact github enable
hal config artifact github account add $ARTIFACT_ACCOUNT_NAME \
    --token-file $TOKEN_FILE

# webhook address: http://ip:8084/webhooks/git/github
Nhìn vào script trên chúng ta cần tạo file github-token và dán token github vào đây.
Sau khi chạy xong script thì chạy lệnh sau để apply:
sudo hal deploy apply
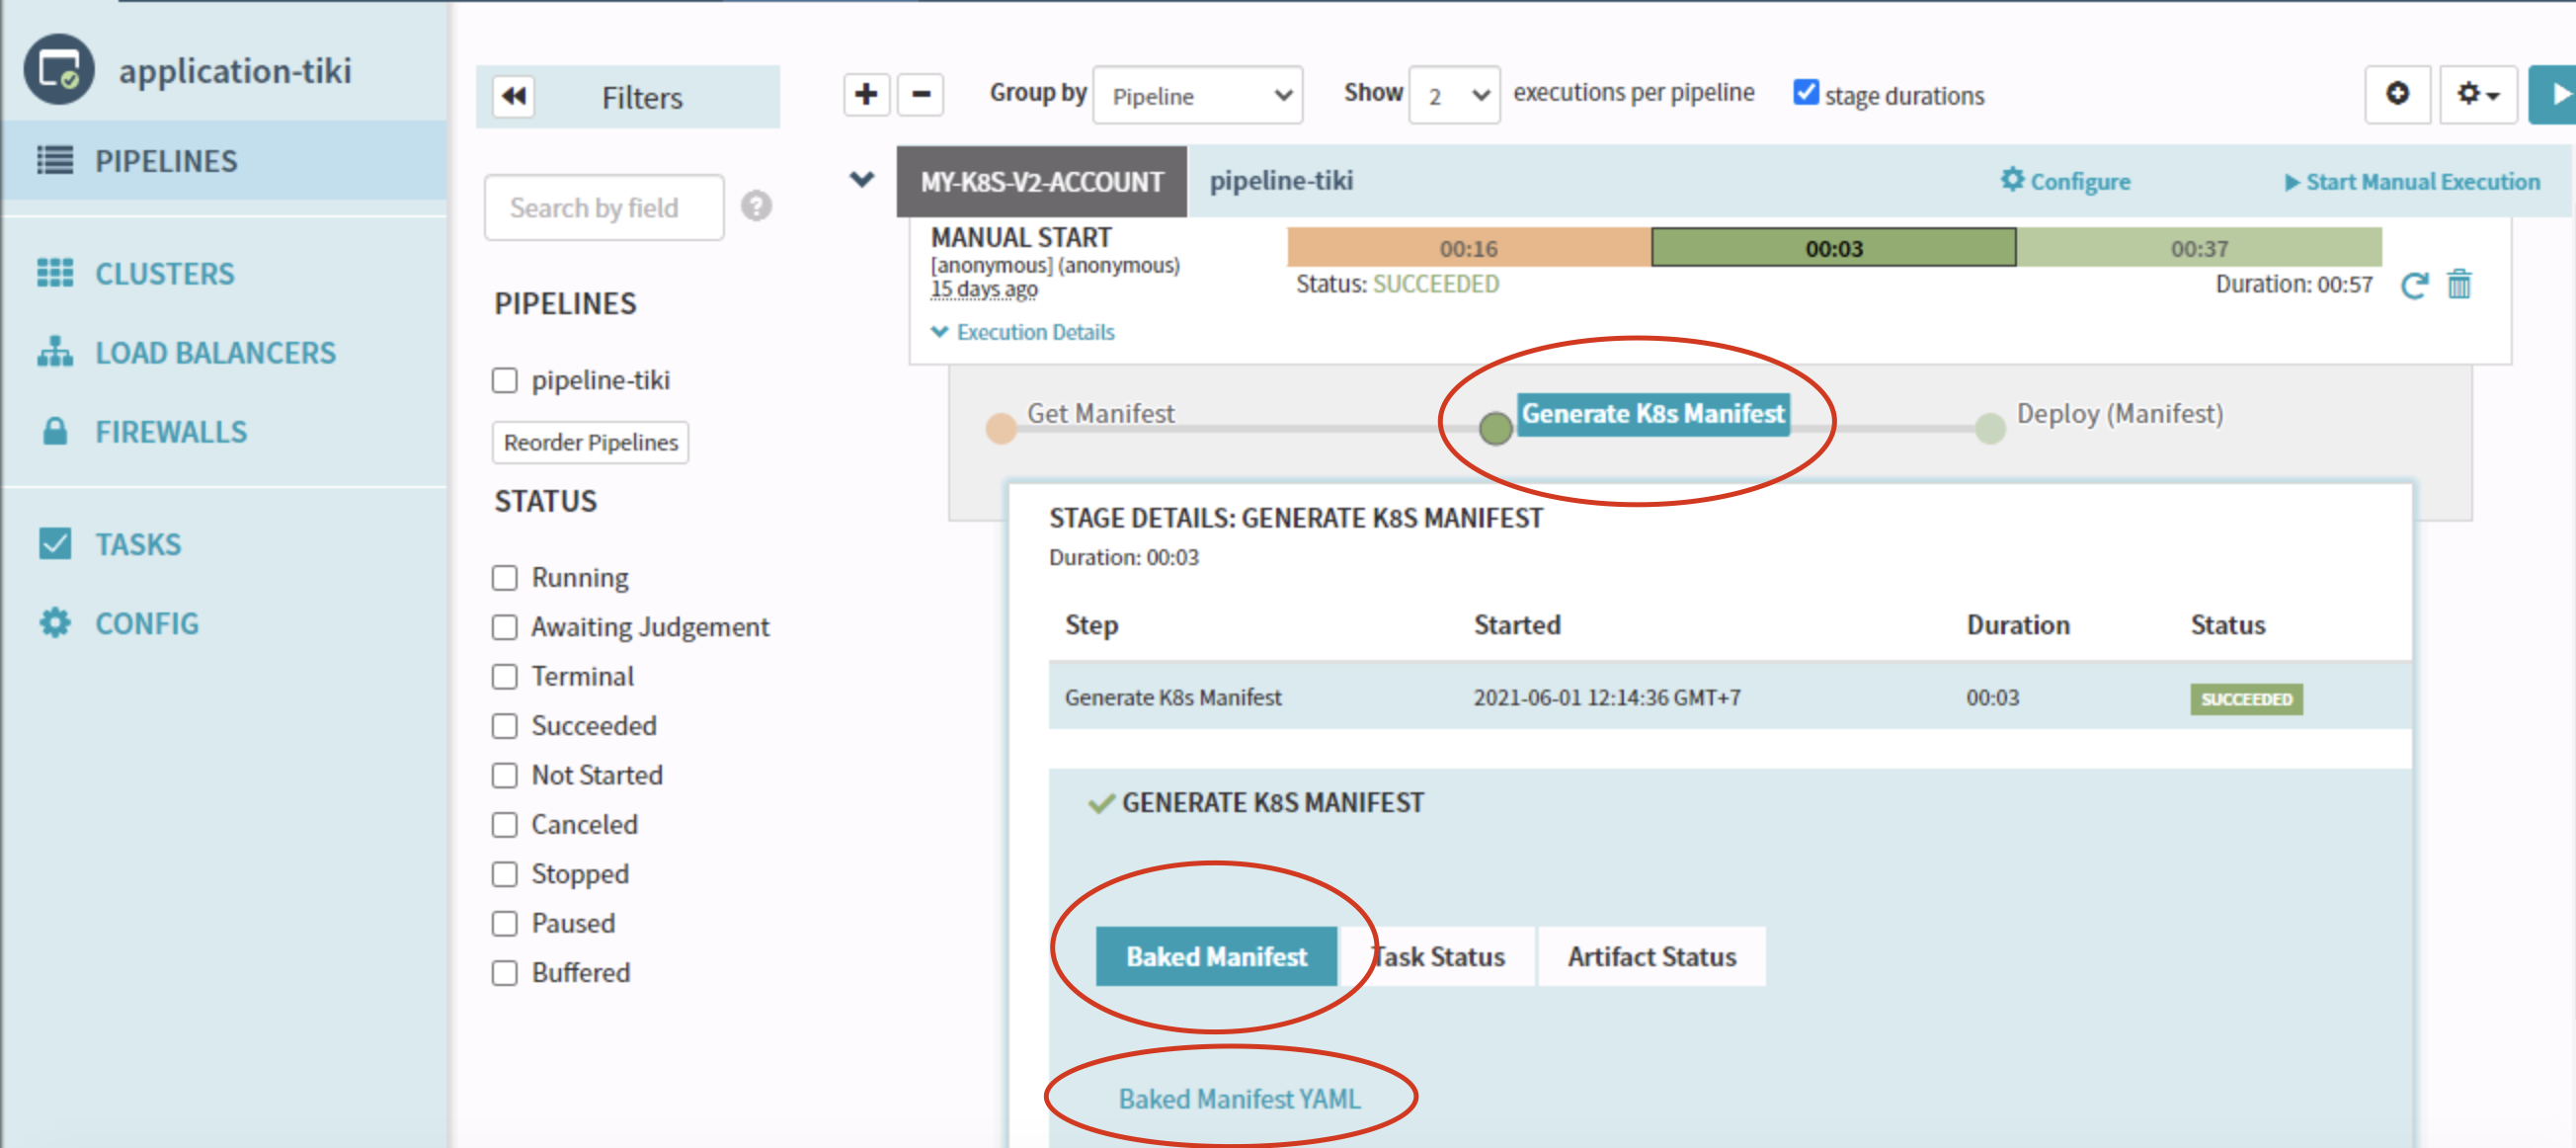
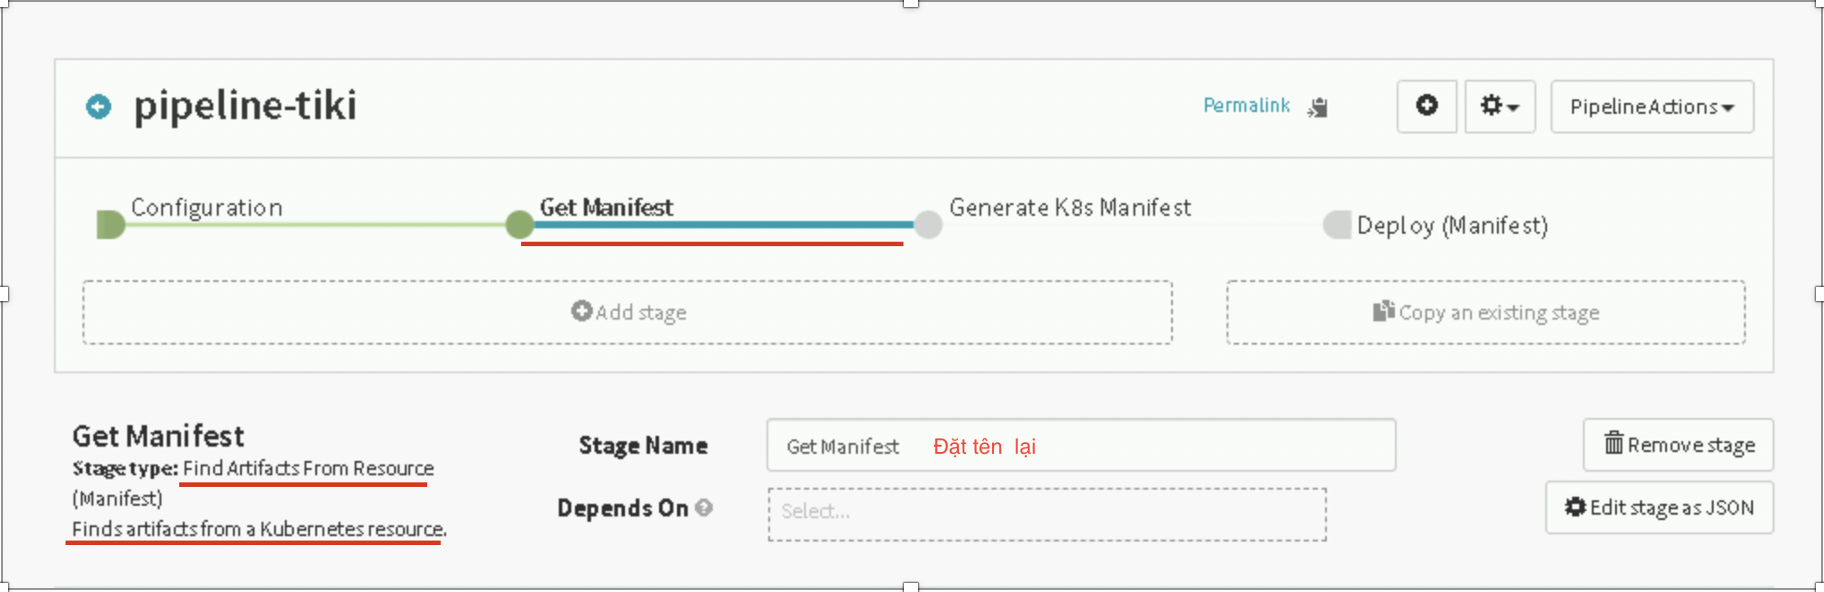
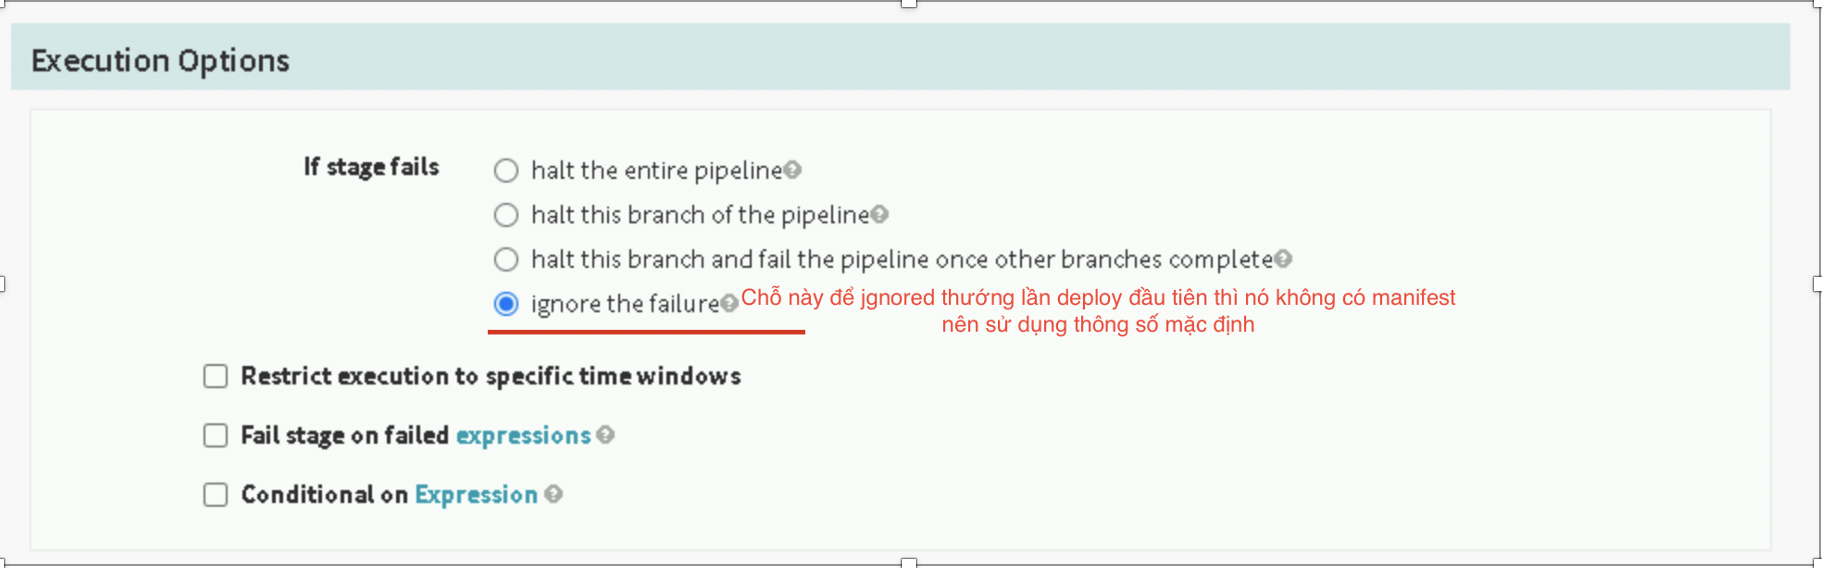
Thực hiện taọ manual 1 pipeline:

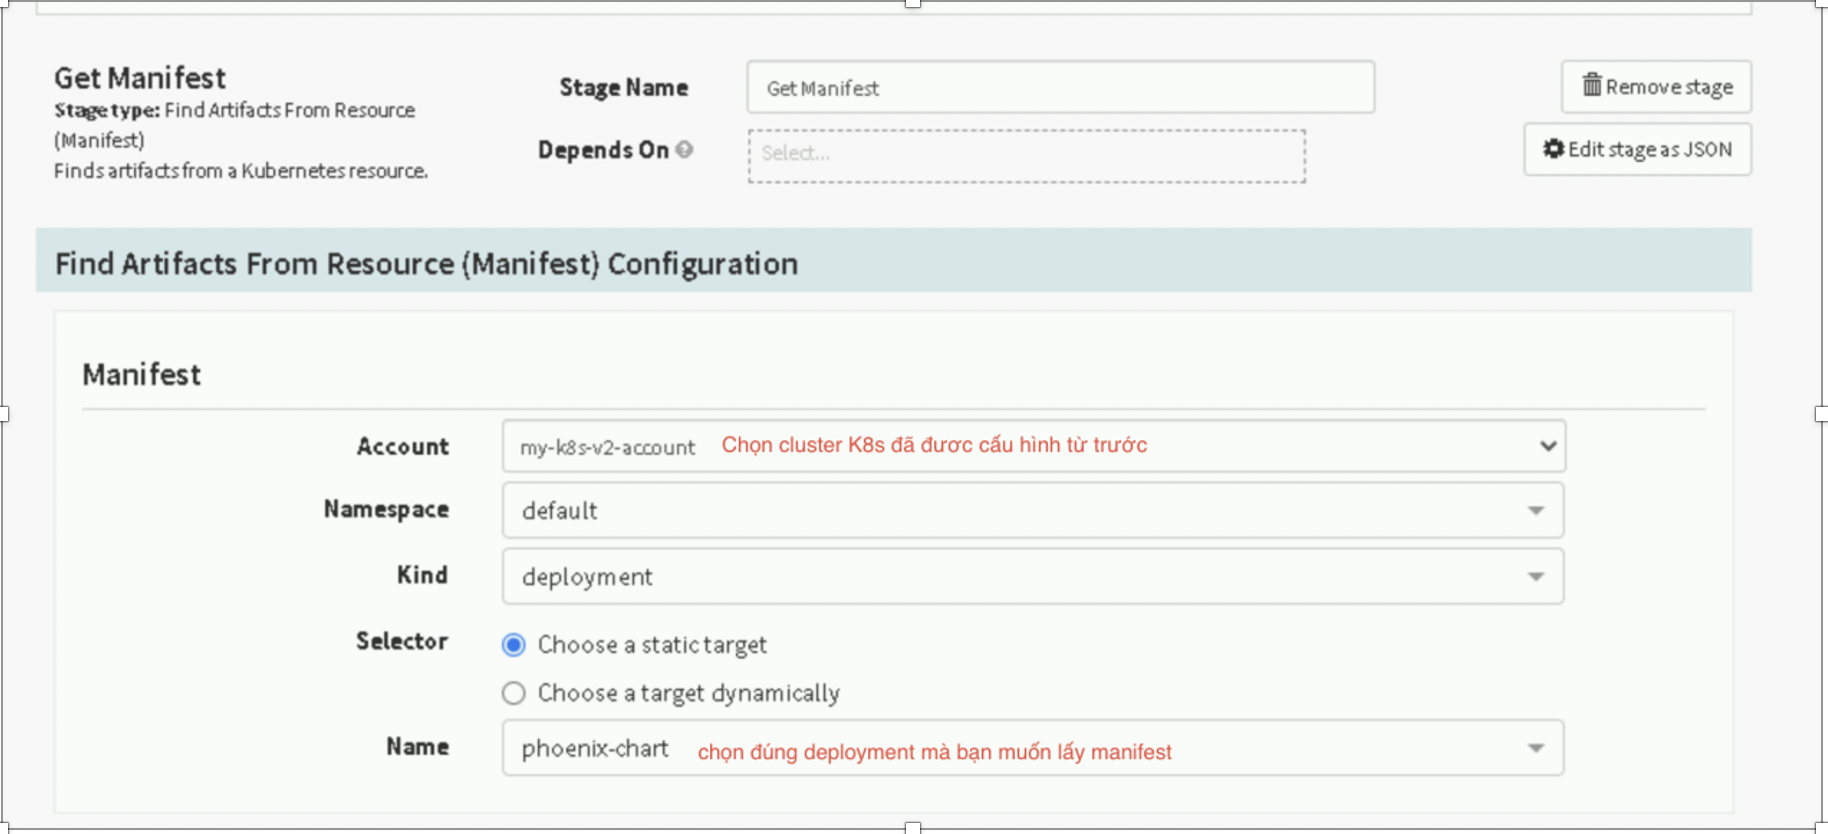
Ta quan tạo Get Manifest mực địch để lấy manifest để của deployment trước đó
Ví khi tạo 1 deployment mới thì nó giữ nguyên số re từ deploymet cũ đến deployment mới.
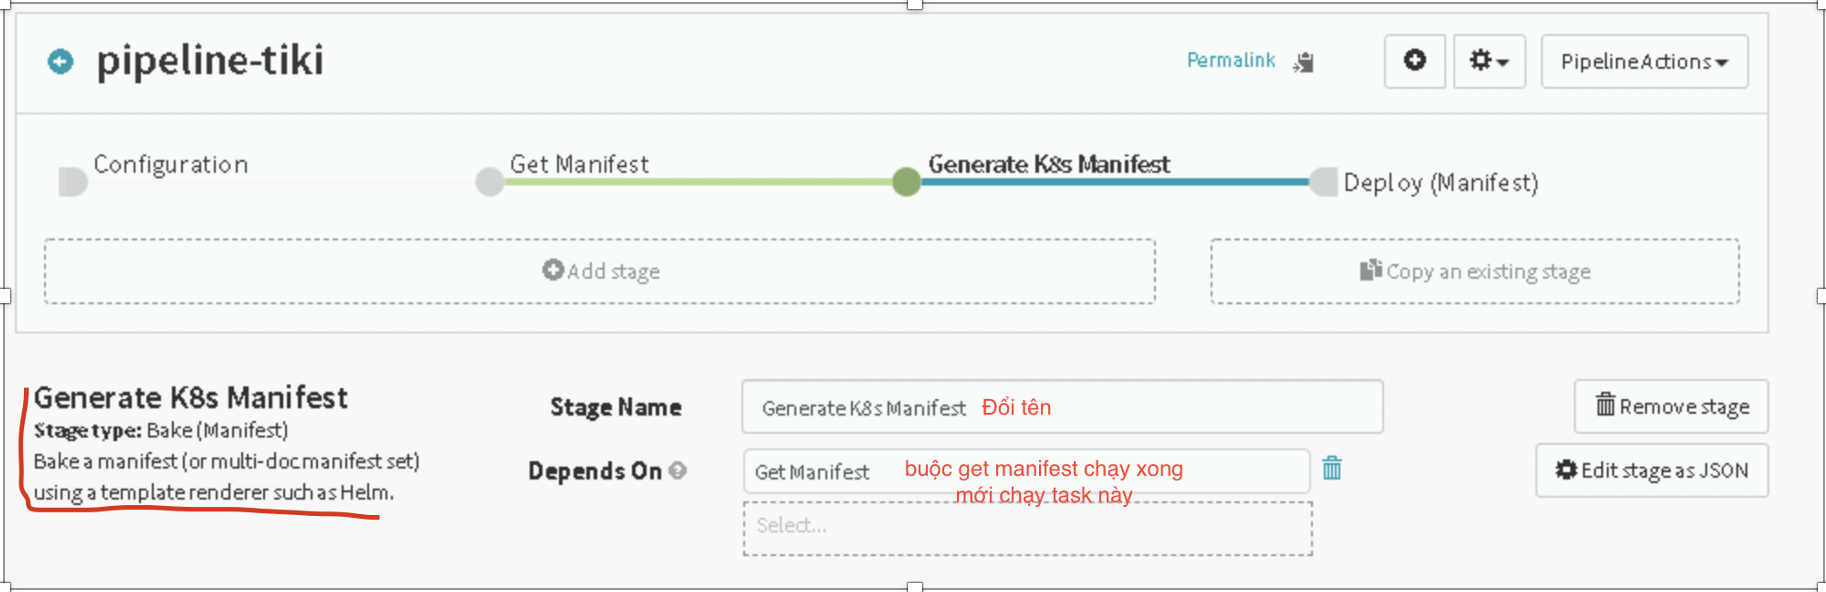
Giờ đến bước gen manifest bằng helm
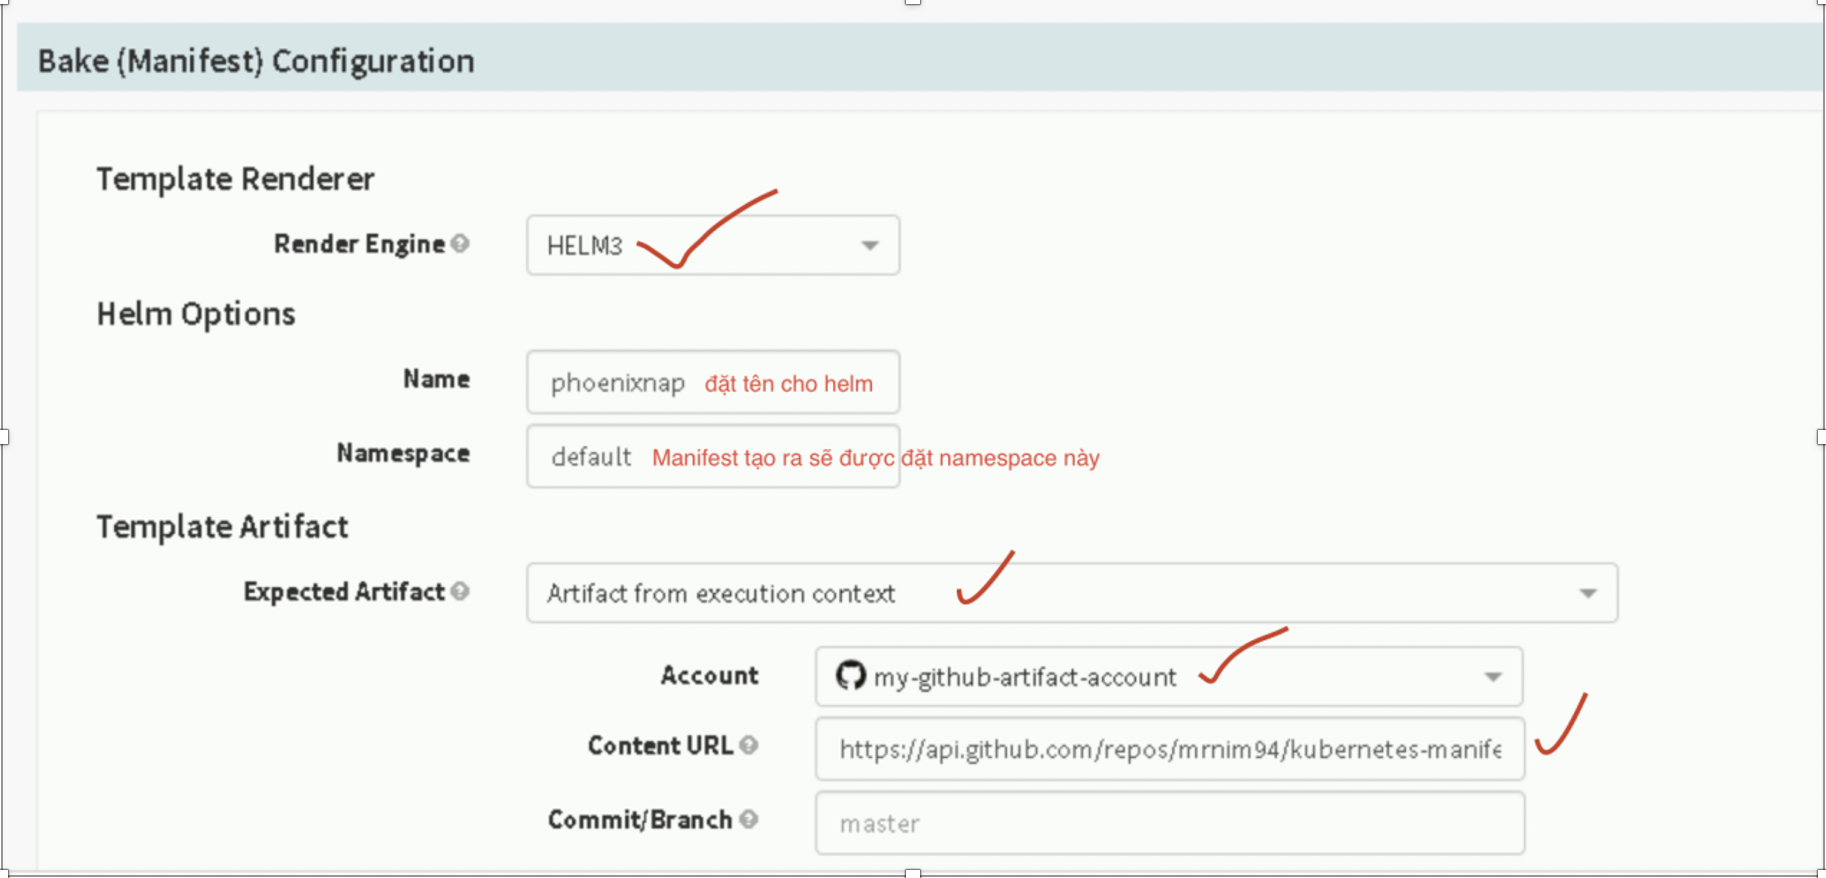
Ở phần content URL sẽ có số chú ý:
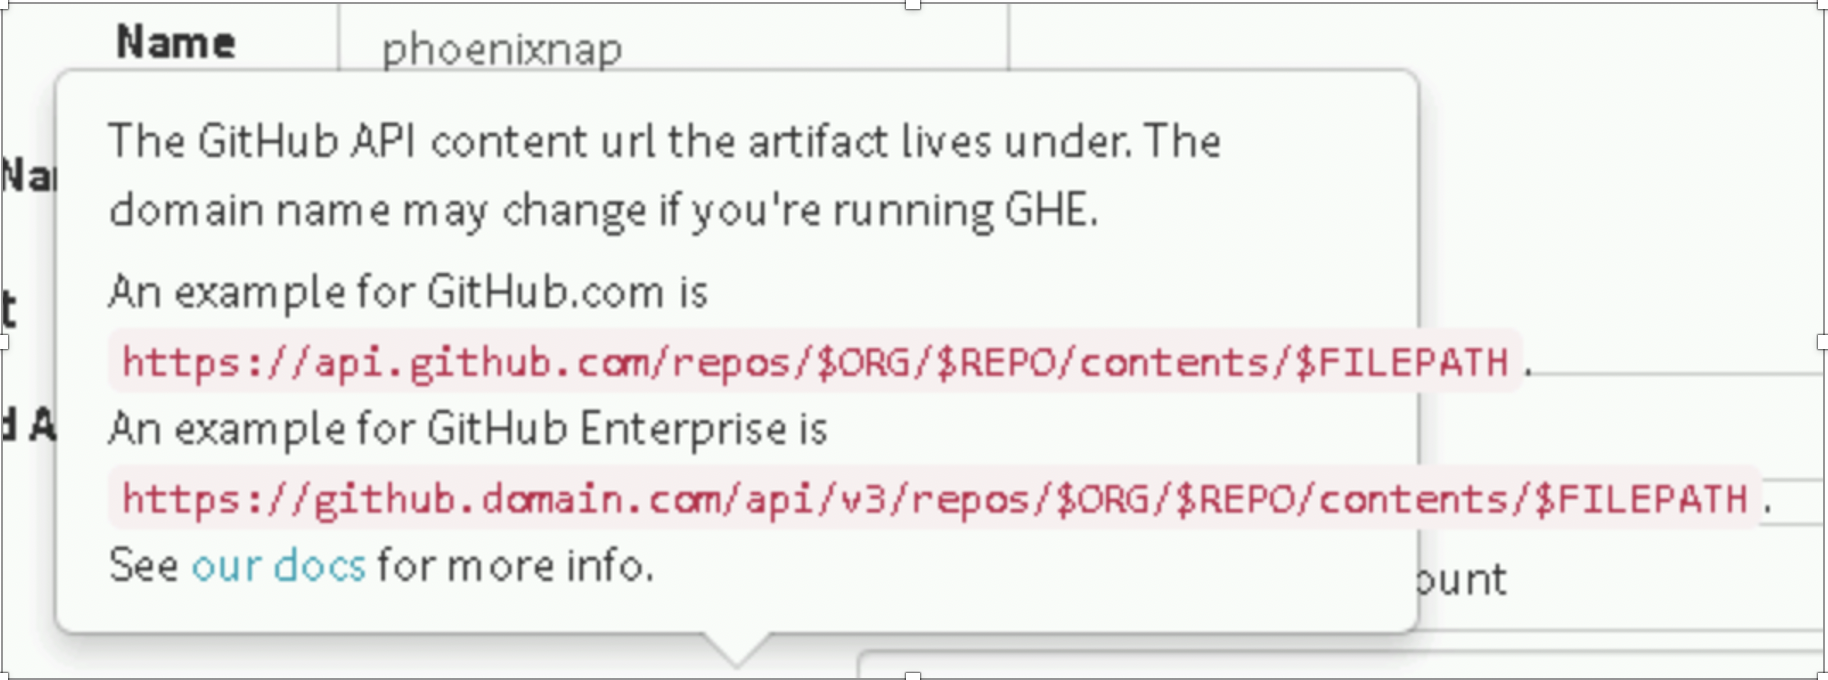
Chỗ này ta cần chỉ tới file package của helm:
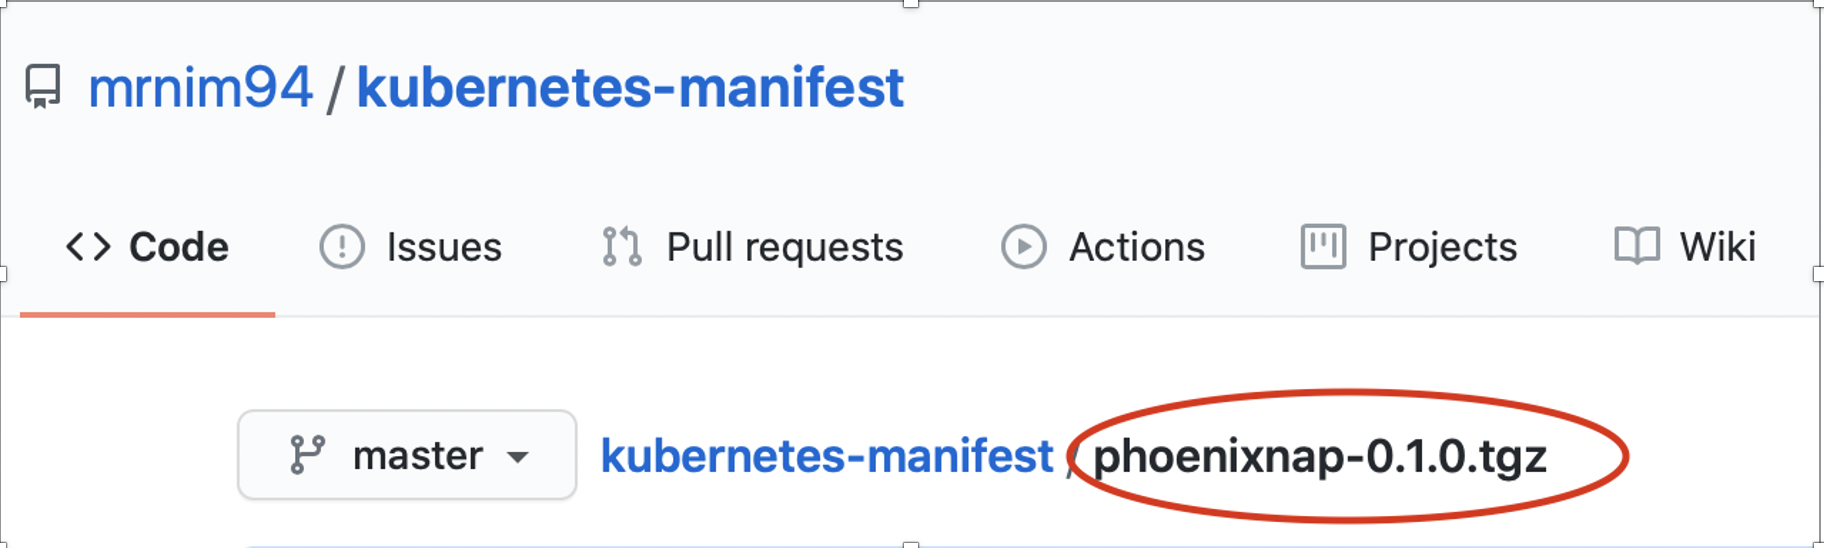
Trên ulr sẽ ta copy được như thế này:
https://github.com/mrnim94/kubernetes-manifest/blob/master/phoenixnap-0.1.0.tgz
Được link chúng ta cần lấy để vào spinnaker là:
https://api.github.com/repos/mrnim94/kubernetes-manifest/contents/phoenixnap-0.1.0.tgz
Tự loại compare và tạo nhé!
Thực hiên Overrides các thông số của helm chart theo các ta muốn.
Thông qua file value:
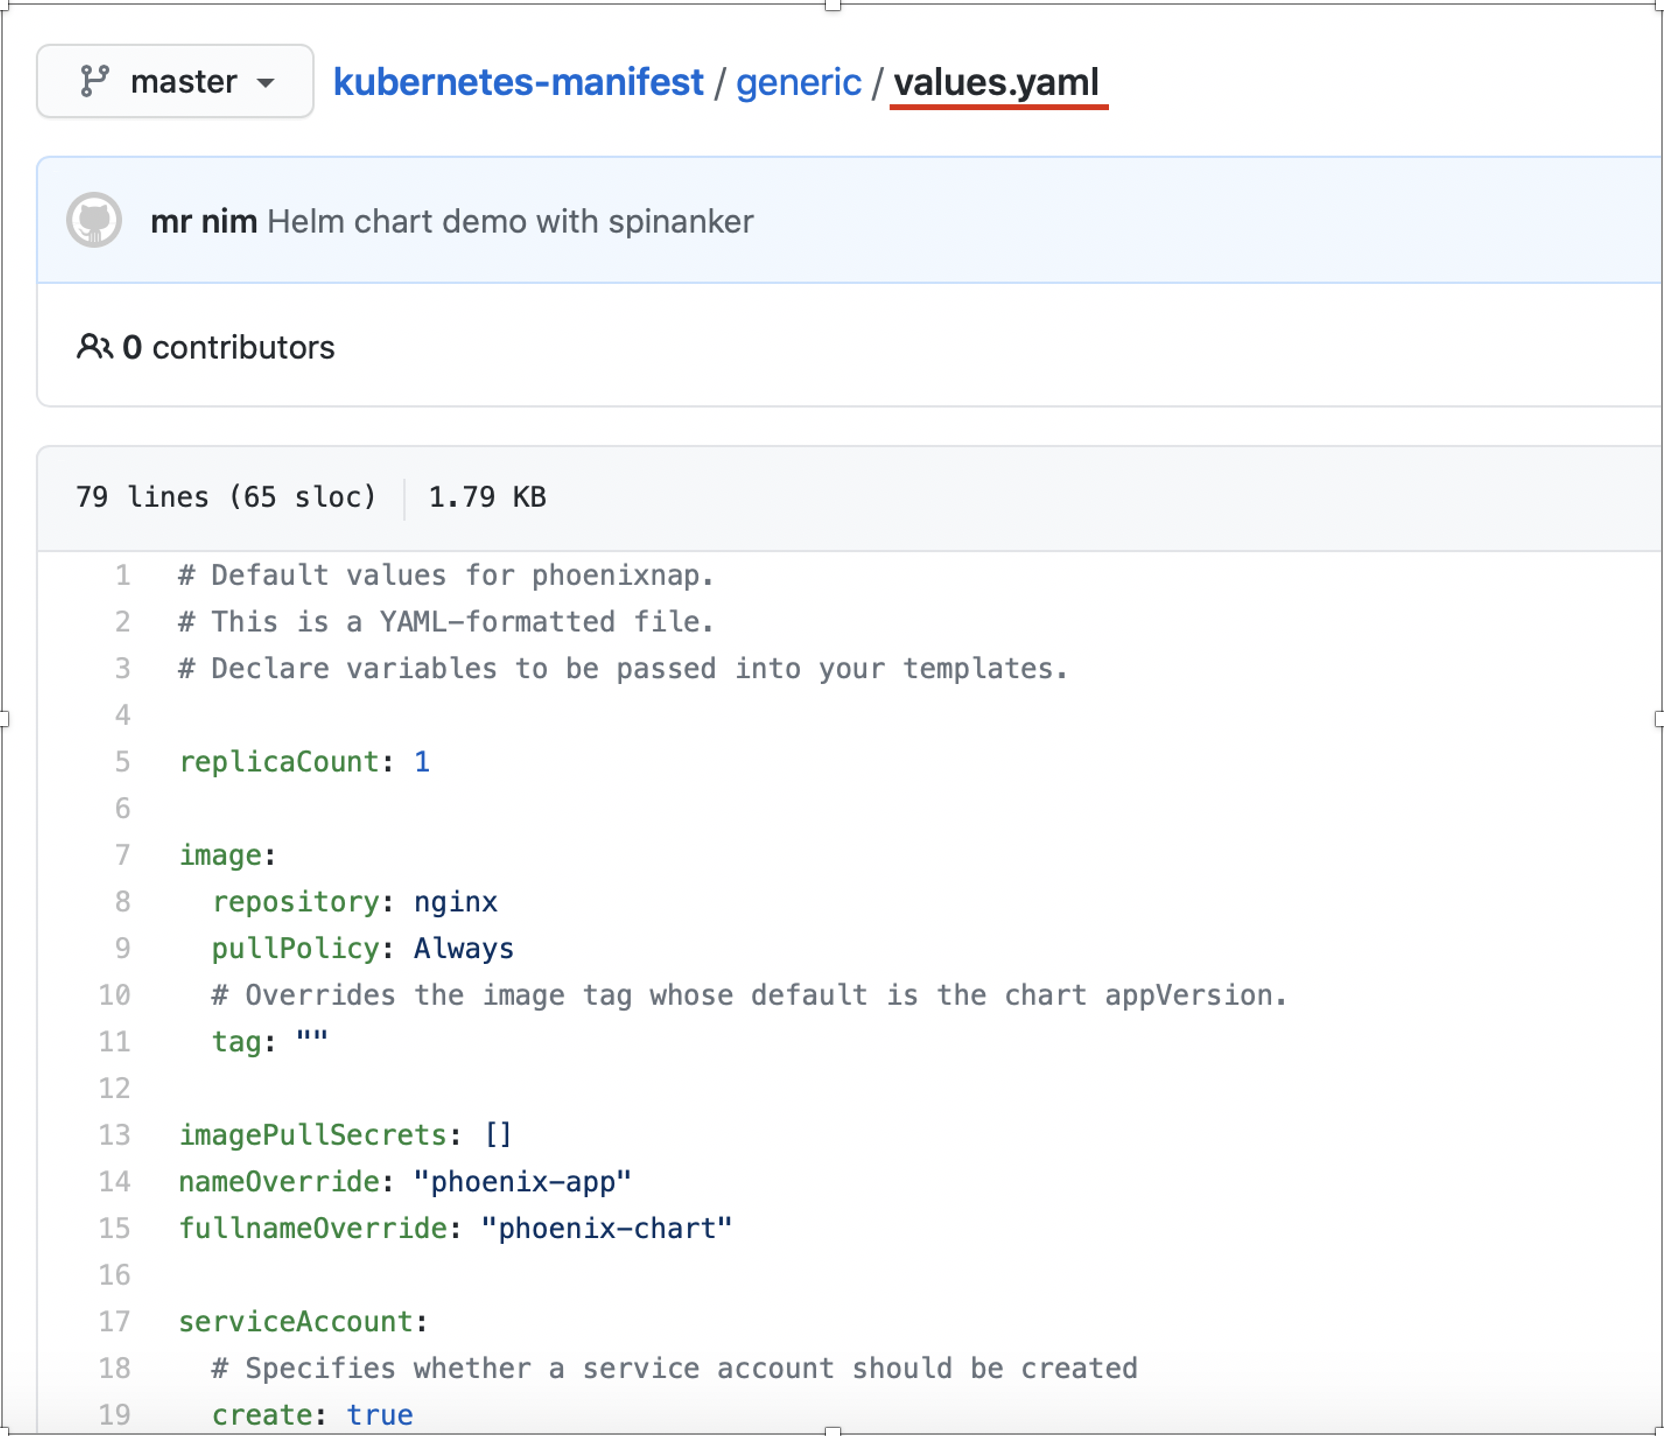
Thực hiện như trên:

Nội dung trong url
https://api.github.com/repos/mrnim94/kubernetes-manifest/contents/generic/values.yaml
File này có thể lưu trư trên s3 của aws hay google luôn nhé.
Hoặc overrides theo dạng key value
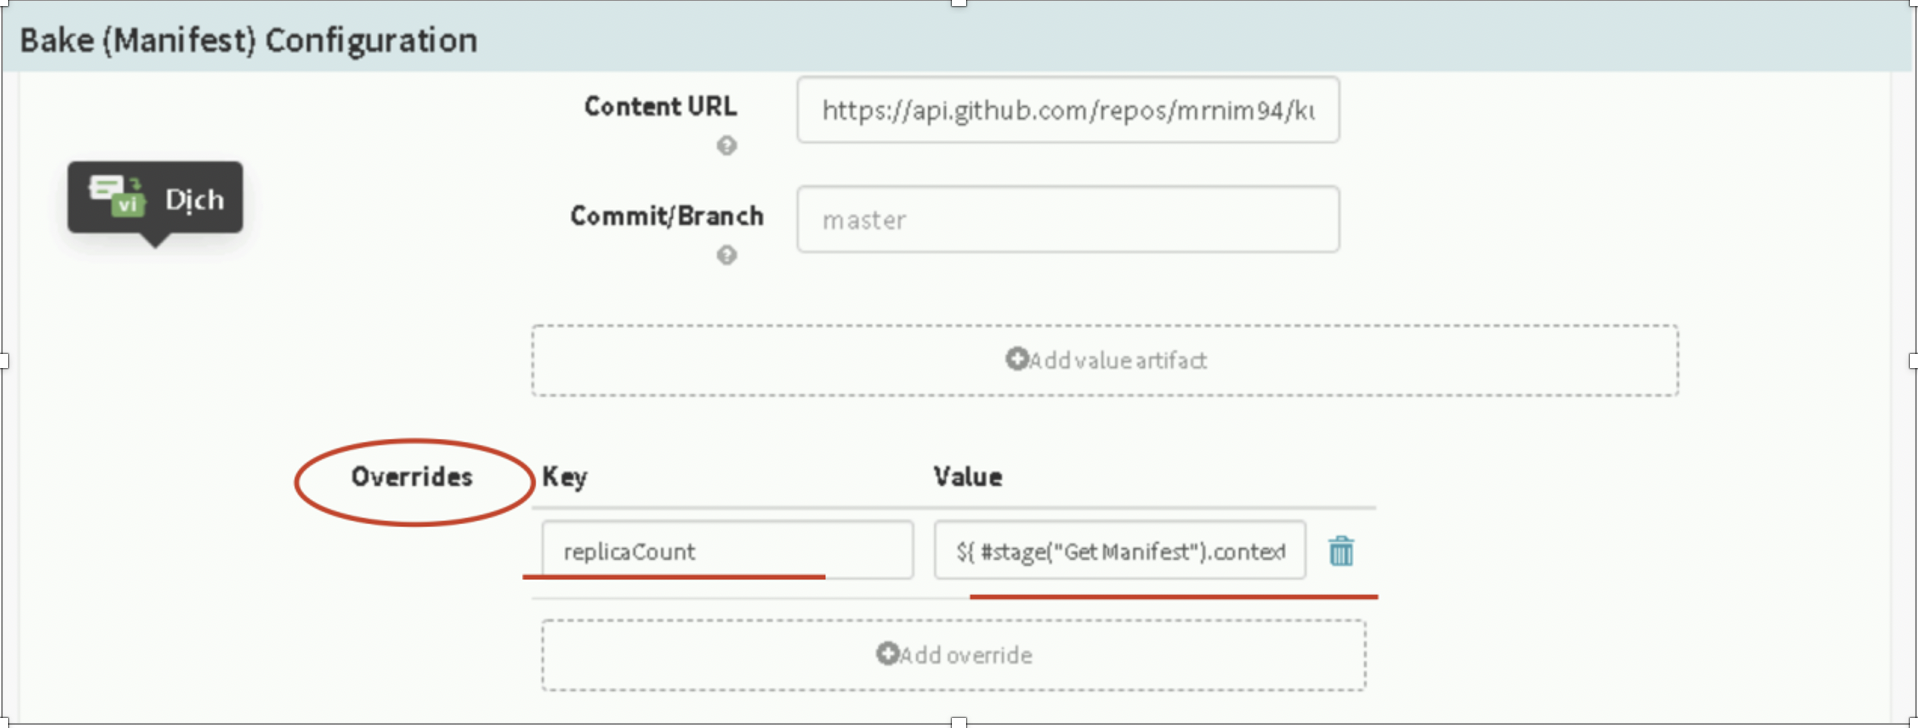
Ở đây chúng muốn giữ replicaCount như deployment trước đó:
replicaCount
${ #stage(“Get Manifest”).context[“manifest”][“spec”][“replicas”] }
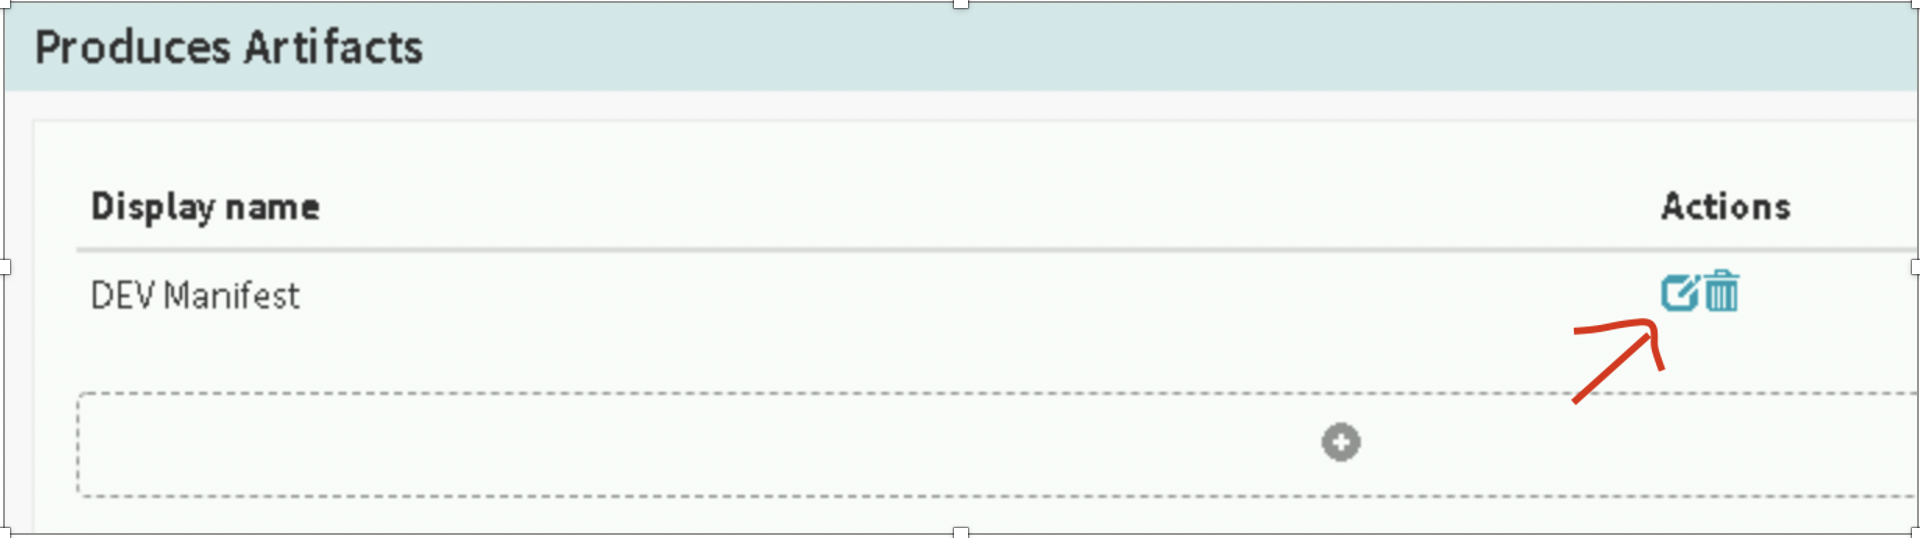
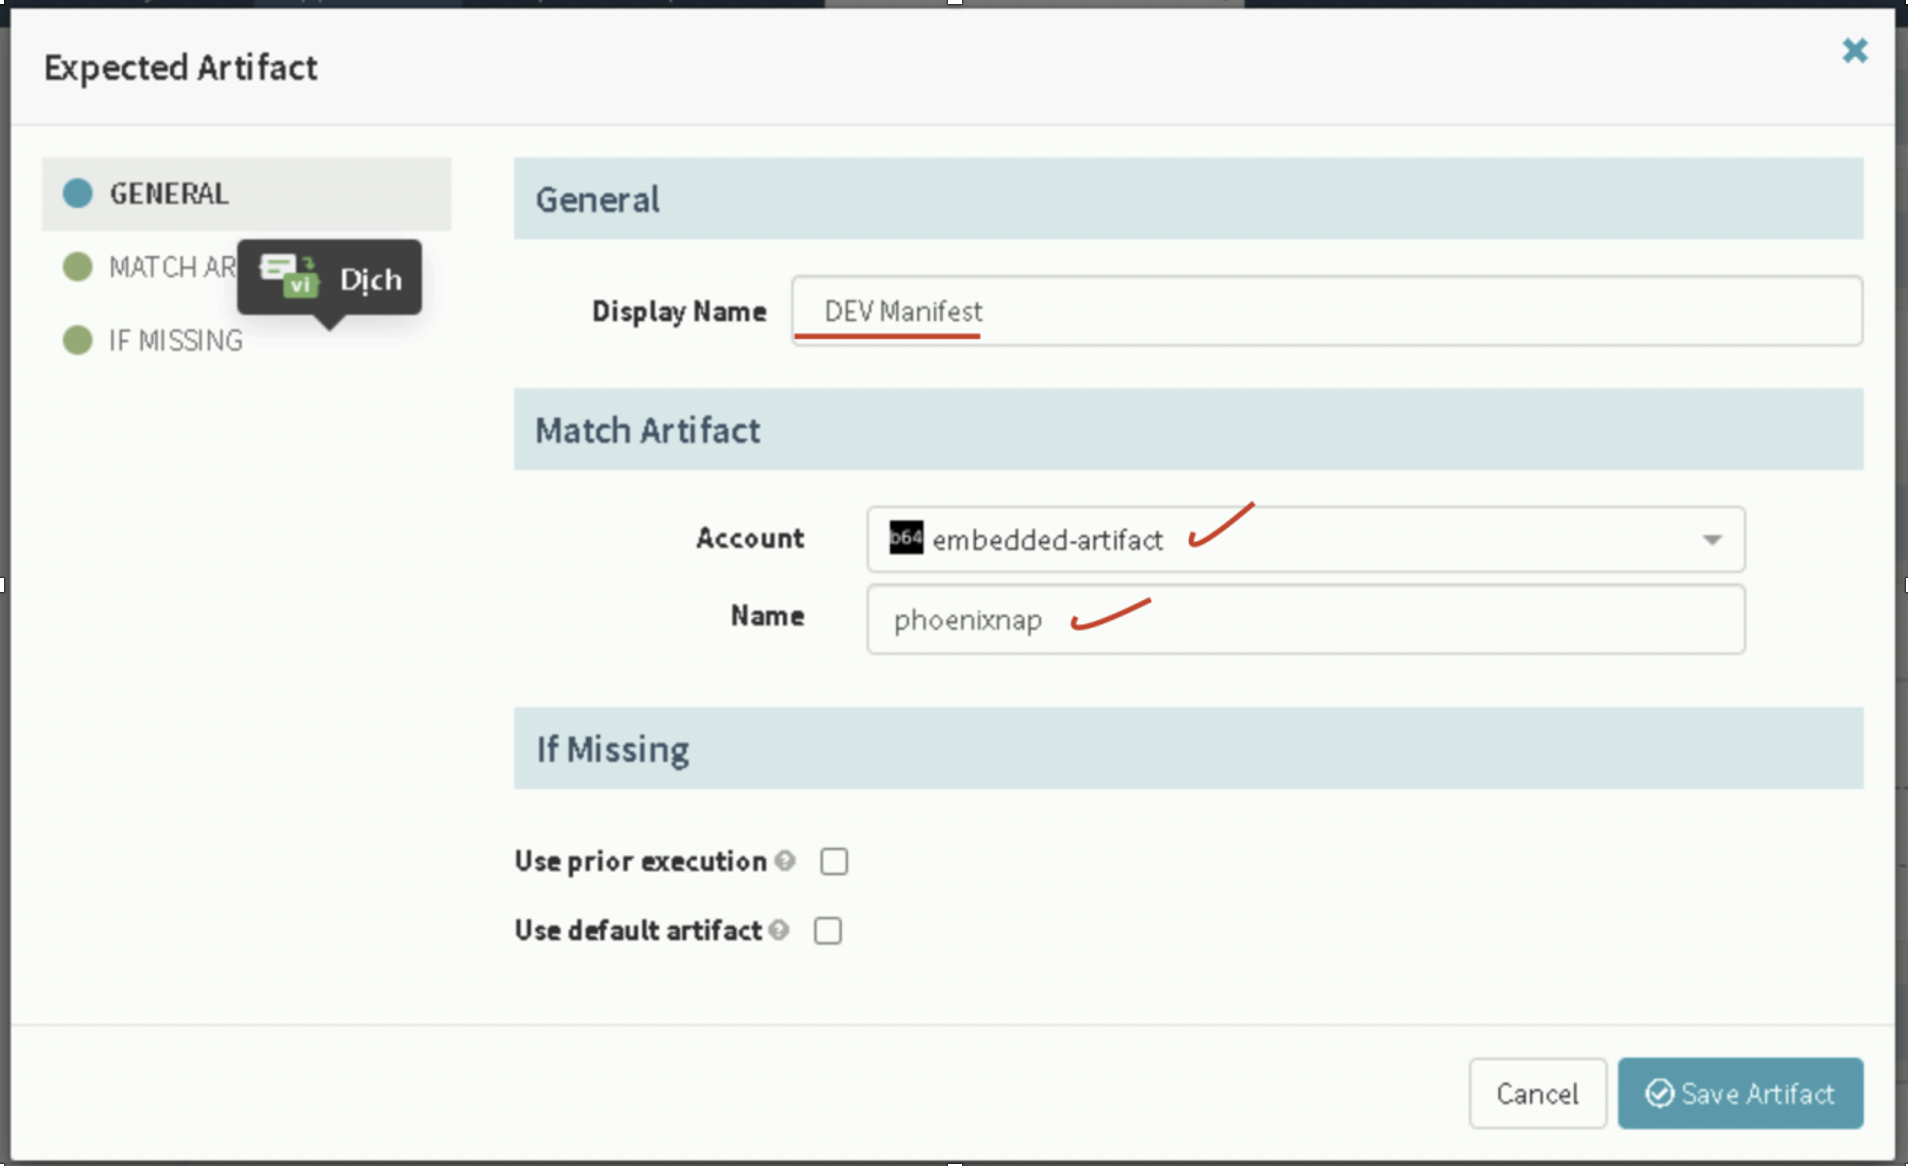
Lăn xuống dưới chúng ta sẽ tạo file manifest cho bước sau để deploy thực hiện đặt tên lại cho đẹp:
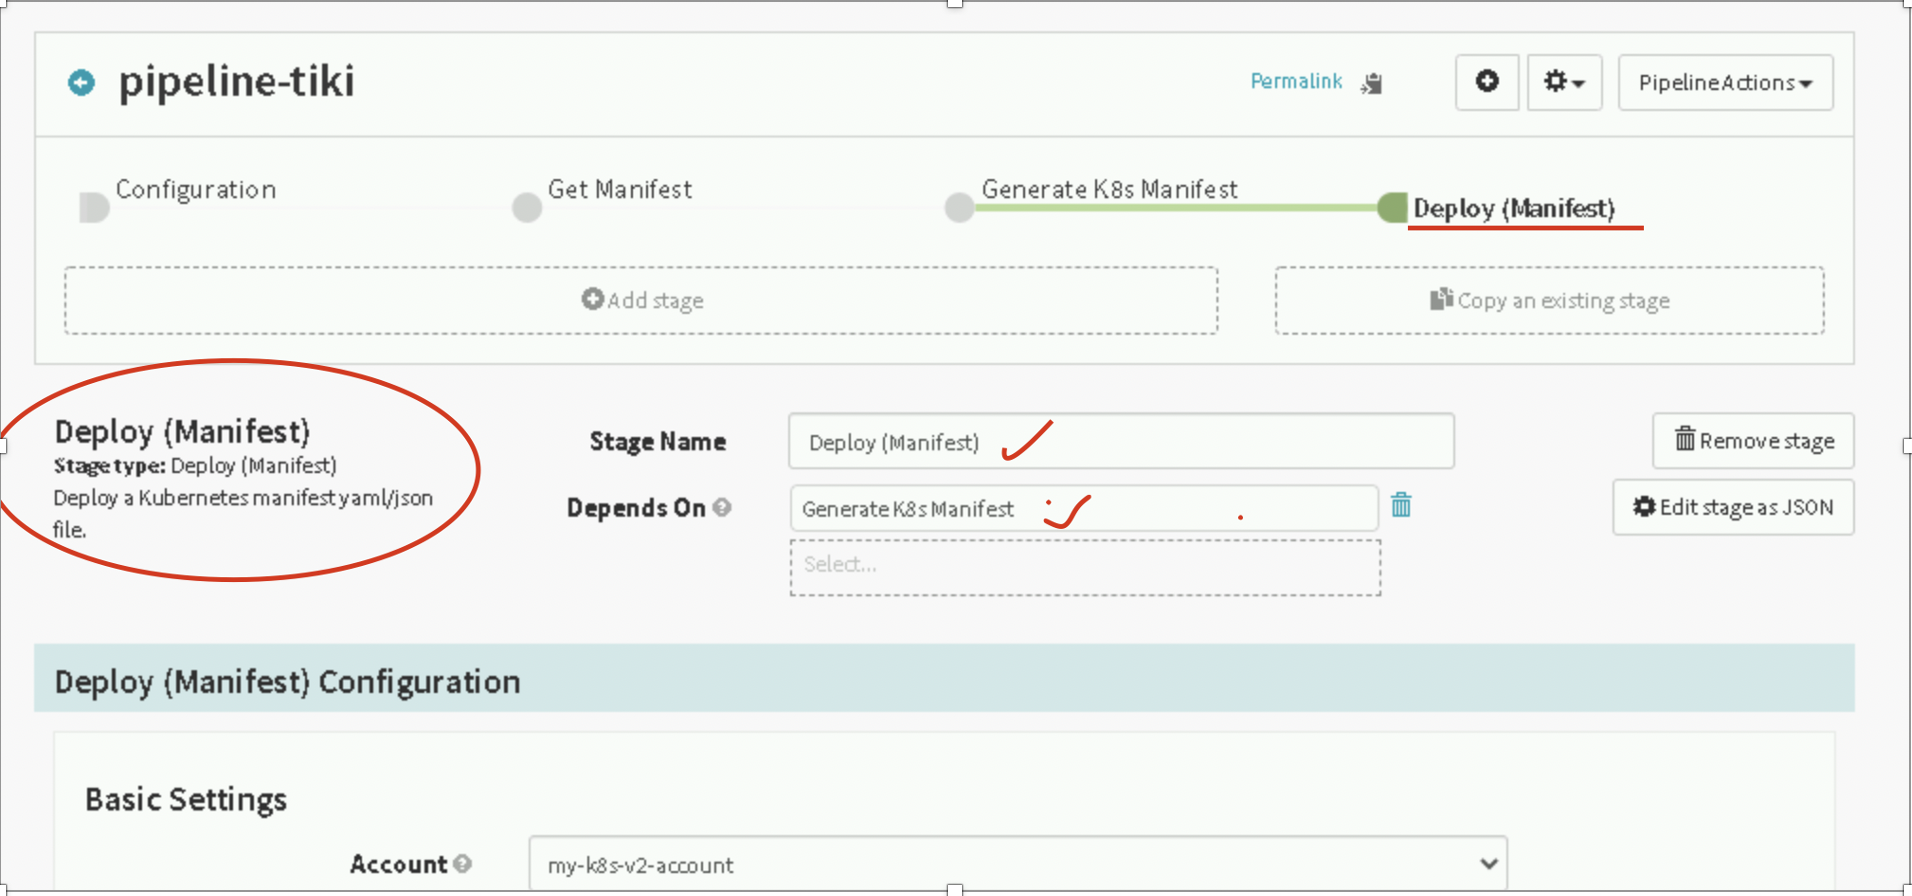
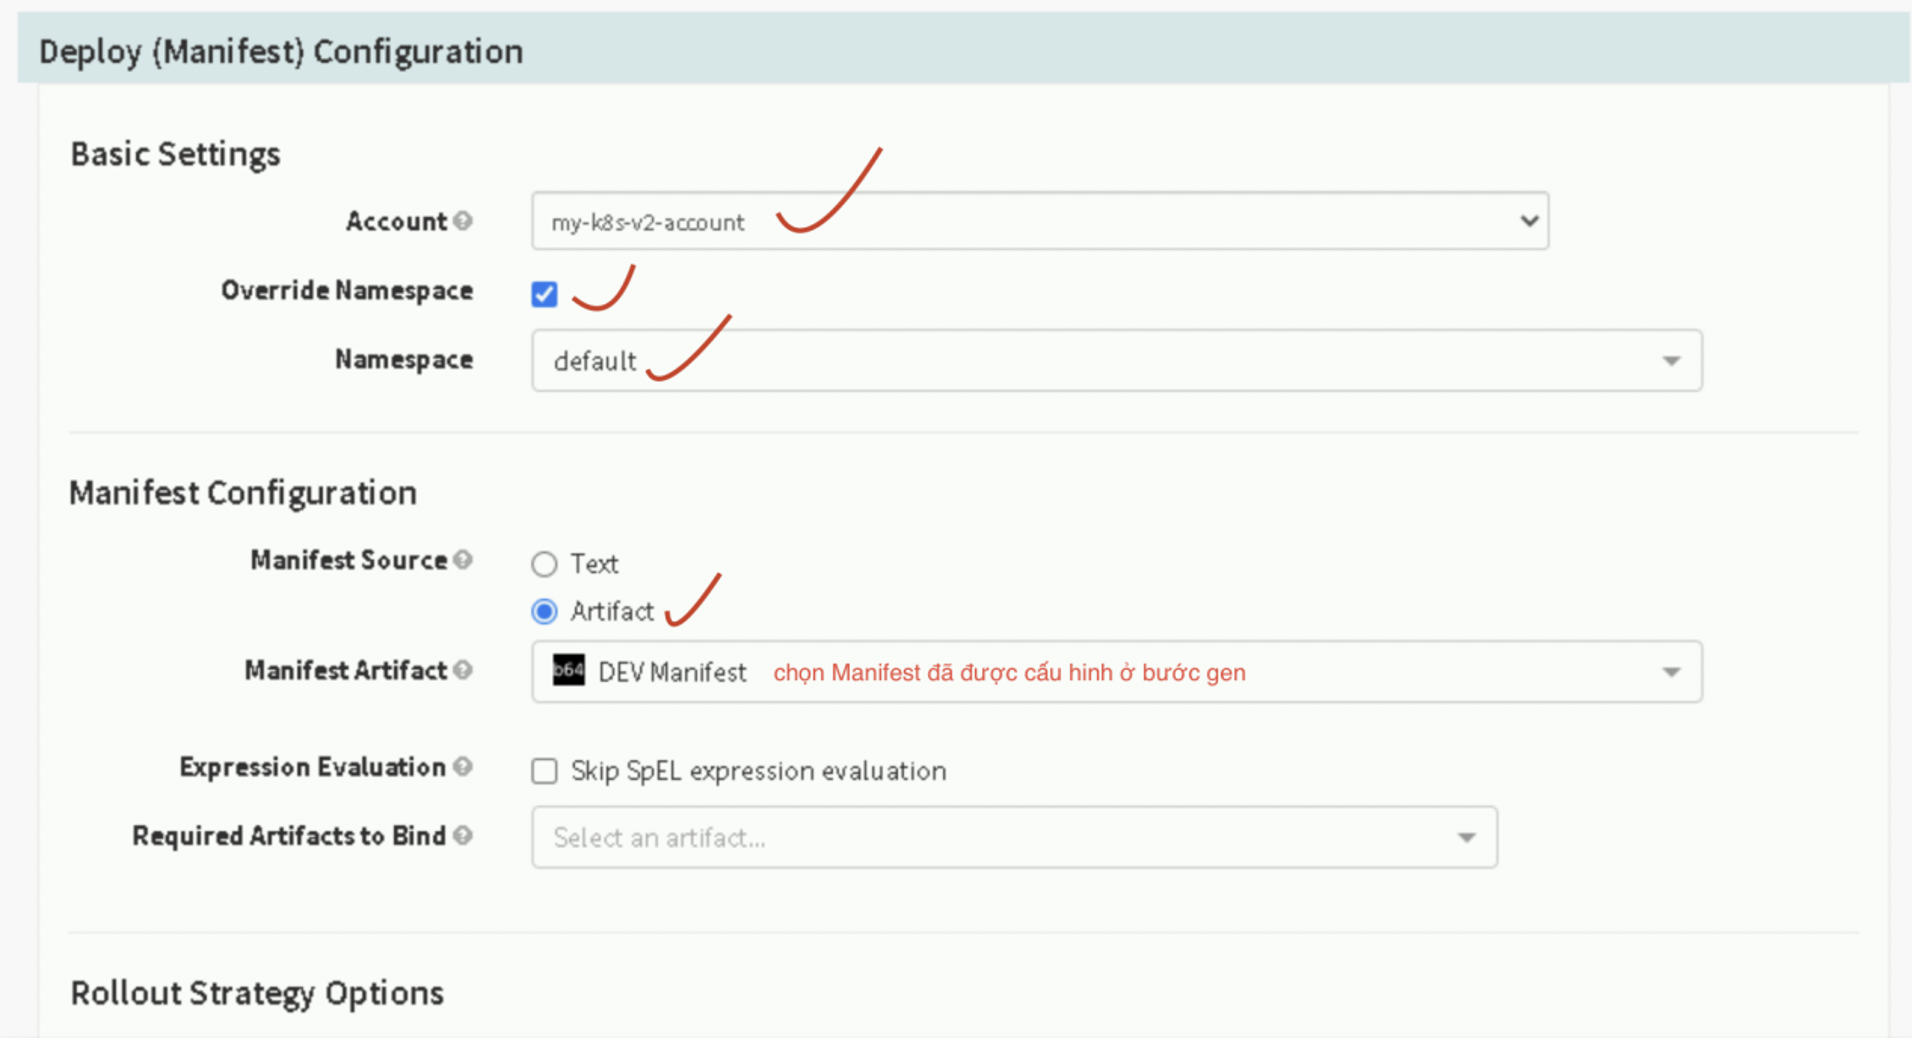
Thực hiện bược deployment
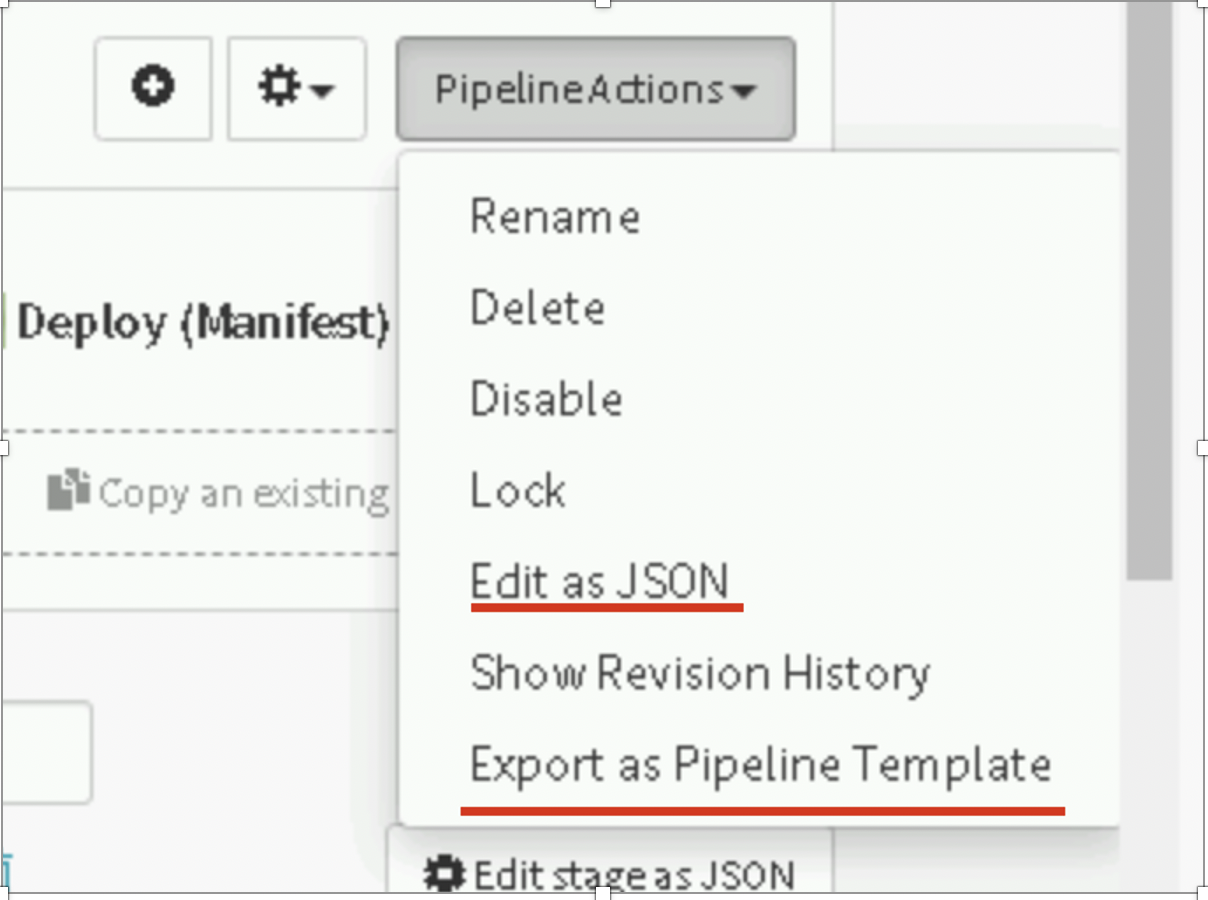
Xong òi click export thành template hay copy json
Giờ ấn run và kiểm tra thôi
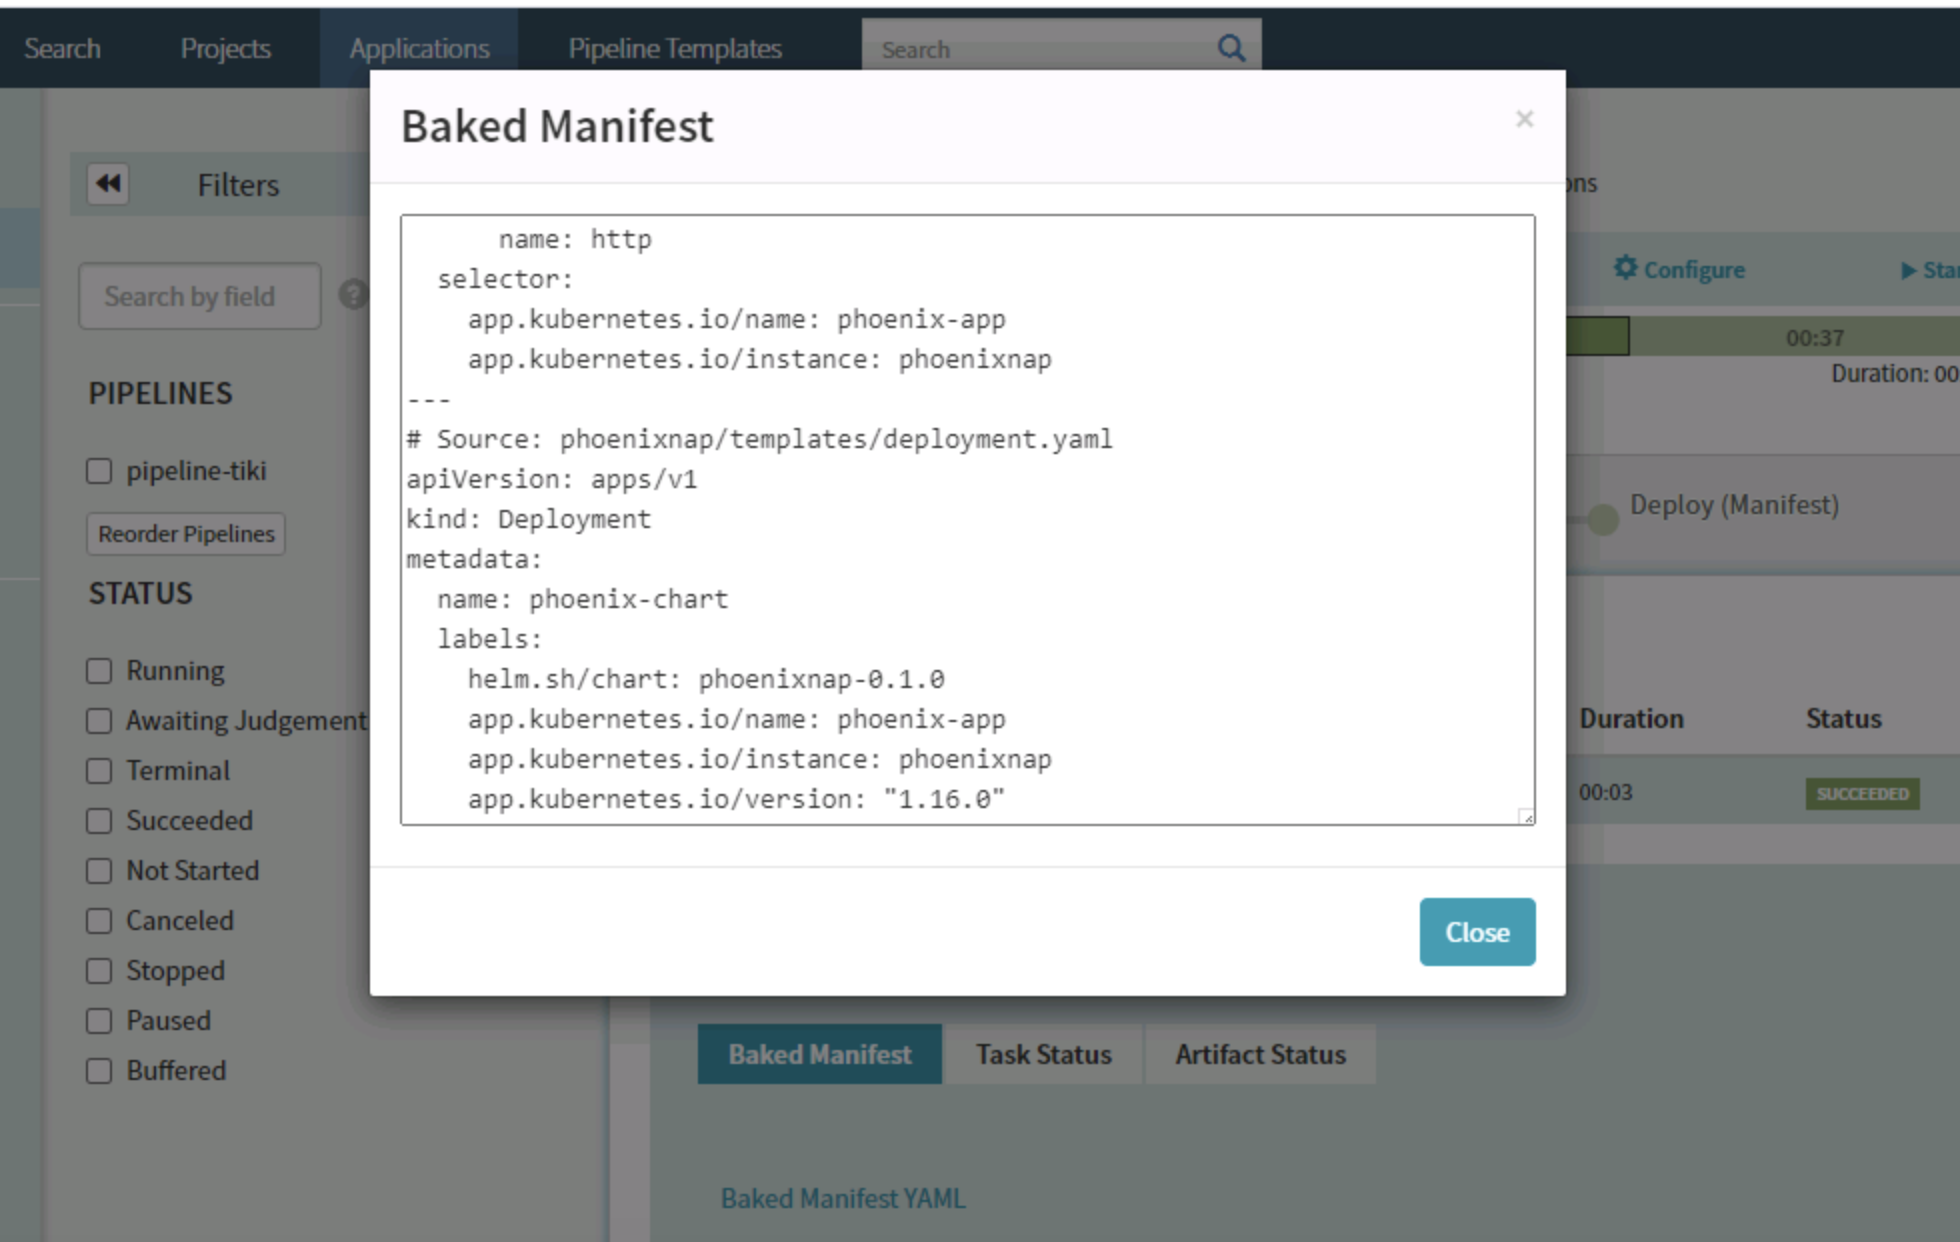
Giờ bạn muốn sem lại file manifest của spinnaker gen ra dựa vào helm ntn