chúng ta có rất nhiều tool để CI: jenkin, github action, bitbucket, pipelie
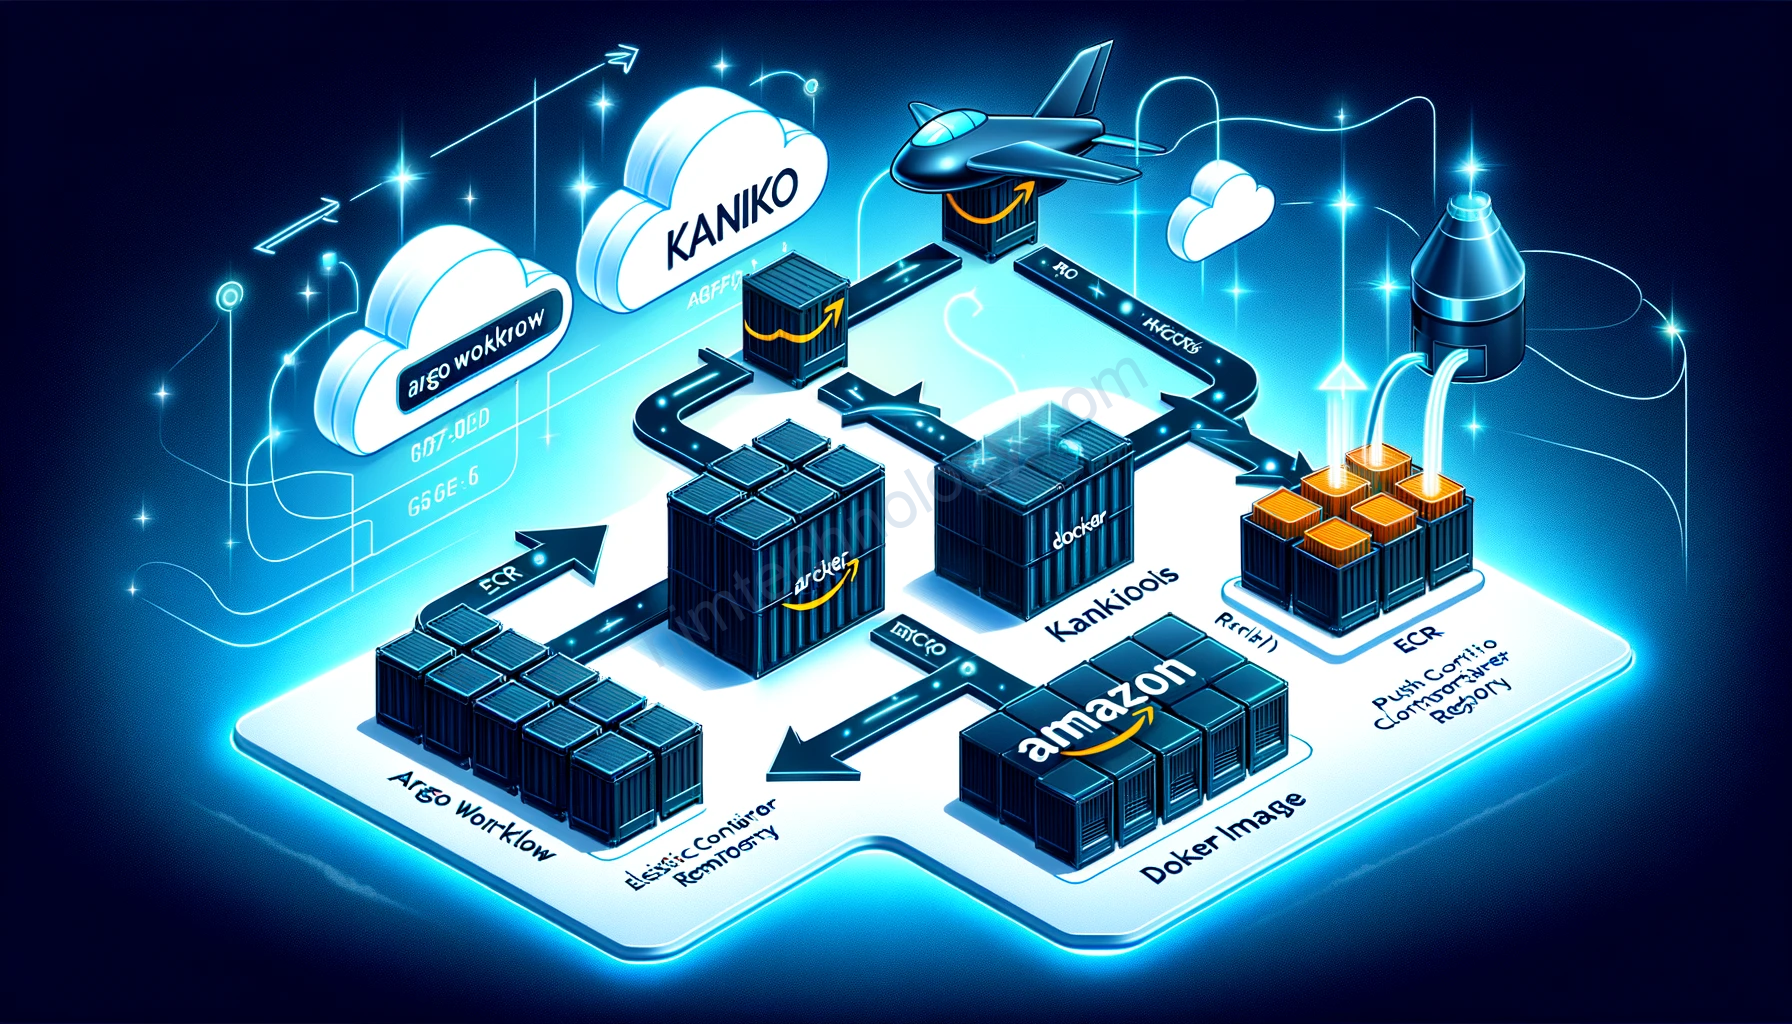
Hôm này chúng ta sẽ chọn Argo Workflow để build 1 solution để CI cho team.
Nó sẽ chạy trong internal K8s cluster.
trước khi làm được bài này thì mình có tham khảo các links:
https://medium.com/@mrsirsh/a-simple-argo-workflow-to-build-and-push-ecr-docker-images-in-parallel-a4fa67d4cd60
https://mikenabhan.com/posts/build-docker-image-argo-workflows/
Sau đây sẽ là Full configuration và sau đó chúng ta sẽ mổ sẻ từng phần.
apiVersion: argoproj.io/v1alpha1
kind: WorkflowTemplate
metadata:
  name: integration-template
spec:
  entrypoint: integration
  volumeClaimTemplates:
    - metadata:
        name: workdir
      spec:
        accessModes:
          - ReadWriteOnce
        resources:
          requests:
            storage: 500Mi
        storageClassName: ebs-gp3-workflow-sc
  arguments:
    parameters:
      - name: git-branch
        value: "feature/XXXX1-475"
      - name: integration-command
        value: "node index.js -e staging -a integration"
  templates:
    - name: integration
      inputs:
        parameters:
          - name: git-branch
          - name: integration-command
      dag:
        tasks:
          - name: git-clone
            template: git-clone
            arguments:
              parameters:
                - name: git_branch
                  value: '{{inputs.parameters.git-branch}}'
          - name: ls
            template: ls
            dependencies:
              - git-clone
          - name: build
            template: build
            dependencies:
              - git-clone
              - ls
          - name: run-integration
            template: run-integration
            arguments:
              parameters:
                - name: integration_command
                  value: '{{inputs.parameters.integration-command}}'
            dependencies:
              - build
          - name: trivy-image-scan
            template: trivy-image-scan
            dependencies:
              - build
          - name: trivy-filesystem-scan
            template: trivy-filesystem-scan
            dependencies:
              - git-clone

    - name: git-clone
      nodeSelector:
        kubernetes.io/os: linux
      inputs:
        parameters:
        - name: git_branch
        artifacts:
        - name: argo-source
          path: /src
          git:
            repo: https://bitbucket.org/XXXX/et-XXXX-engines.git
            singleBranch: true
            branch: "{{inputs.parameters.git_branch}}"
            usernameSecret:
              name: git-creds
              key: username
            passwordSecret:
              name: git-creds
              key: password
      container:
        image: alpine:3.17
        command:
          - sh
          - -c
        args:
          - |
            apk add --no-cache rsync
            rsync -av /src/ .
        workingDir: /workdir
        volumeMounts:
          - name: workdir
            mountPath: /workdir
    - name: ls
      container:
        image: alpine:3.17
        command:
          - sh
          - -c
        args:
          - ls -la /workdir
        workingDir: /workdir
        volumeMounts:
          - name: workdir
            mountPath: /workdir
    - name: build
      container:
        image: gcr.io/kaniko-project/executor:latest
        args:
          - --context=/workdir/tools
          - --dockerfile=integration_test/docker/Dockerfile
          - --destination=XXXXXXXXXXXX.dkr.ecr.us-west-2.amazonaws.com/integration_testing:{{workflow.name}}
          - --tar-path=/workdir/.tar
        workingDir: /workdir
        volumeMounts:
          - name: workdir
            mountPath: /workdir
    - name: run-integration
      inputs:
        parameters:
        - name: integration_command
      container:
        image: XXXXXXXXXXXX.dkr.ecr.us-west-2.amazonaws.com/integration_testing:{{workflow.name}}
        command:
          - sh
          - -c
        args:
          - |
            {{inputs.parameters.integration_command}}
        workingDir: /app
        envFrom:
          - secretRef:
              name: integration-env
    - name: trivy-image-scan
      container:
        image: aquasec/trivy
        args:
          - image
          - XXXXXXXXXXXX.dkr.ecr.us-west-2.amazonaws.com/integration_testing:{{workflow.name}}
    - name: trivy-filesystem-scan
      container:
        image: aquasec/trivy
        args:
          - filesystem
          - /workdir
          - --ignorefile=/workdir/.tar
        workingDir: /workdir
        volumeMounts:
          - name: workdir
            mountPath: /workdir
1) Create a Persistent Volume for running Pipeline
1.1) Overview.

Bạn có thể thấy là đôi khi trong pipeline của bạn cần save file hay code xuống 1 volume và bạn muốn duy trì volume đó trong suốt quá trình run pipeline cho đến khi kết thúc.
Như hình sau khi mình pull code về thì mình muốn save nó xuống disk và sử dụng cho build step tiếp theo như: build and test.

Bạn sẽ hỏi là ủa! trên 1 pipeline: chạy step này tới step kia mắc gì lưu disk rồi tạo volume?
Nó là chạy các step trên cùng 1 con mà?
No! No!
Nếu nhìn kĩ config thì bạn sẽ thấy ở mỗi step chúng ta đang run docker image khác nhau => mỗi step là 1
pod và chúng ta cần mount pv vào các pod đó.
OK!

1.2) Look into configurations
volumeClaimTemplates:
  - metadata:
      name: workdir
    spec:
      accessModes:
        - ReadWriteOnce
      resources:
        requests:
          storage: 500Mi
      storageClassName: ebs-gp3-sc
Understanding volumeClaimTemplates
Purpose: This template is used to create a PVC for each instance of the workflow. It allows workflows to have a dedicated, temporary storage that is created when the workflow starts and can be disposed of when the workflow completes.
metadata.name: The name of the PVC that will be created. In your case, it’sworkdir.spec.accessModes: Defines how the PVC can be accessed.ReadWriteOncemeans the volume can be mounted as read-write by a single node.spec.resources.requests.storage: The amount of storage requested. Here, it’s 500 MiB.spec.storageClassName: The StorageClass to be used for provisioning the volume.ebs-gp3-scindicates an AWS EBS volume with gp3 type will be provisioned.
1.3) Workflow Integration
In your WorkflowTemplate, the volumeClaimTemplates section defines a PVC named workdir that will be created for each workflow run. This PVC is then used by various steps in your workflow, such as git-clone, ls, build, and run-integration. Each of these steps mounts the workdir volume, allowing them to share data and files between them.
For instance, in the git-clone step:
volumeMounts:
  - name: workdir
    mountPath: /workdir
This snippet mounts the workdir PVC at the /workdir path in the container. This pattern is repeated in other steps, ensuring that they all operate on the same set of data.
1.4) Considerations
- Storage Limits: Be mindful of the storage size and class you specify, as they should meet the requirements of your workflow.
- Clean Up: Depending on your cluster configuration, you might need to clean up the PVCs after workflow completion to avoid leftover volumes consuming resources.
Đi sâu vào vấn đề clean up thi bạn nên tạo 1 storage class với config như sau:
allowVolumeExpansion: true
apiVersion: storage.k8s.io/v1
kind: StorageClass
metadata:
  name: ebs-gp3-workflow-sc
parameters:
  encrypted: 'true'
  iops: '3000'
  throughput: '125'
  type: gp3
provisioner: ebs.csi.aws.com
reclaimPolicy: Delete
volumeBindingMode: WaitForFirstConsumer
In this case, reclaimPolicy: Delete means that any PVs dynamically provisioned using this StorageClass will have their persistentVolumeReclaimPolicy set to Delete.
2) Use the Dag template to control the pipeline process in the argo workflow.
Phần này thì bạn sẽ thấy câu trả lời Dag template là gì:
https://nimtechnology.com/2022/01/04/argoworkflows-lesson2-demo-steps-template-and-dag-template-on-argoworkflows/#DAG_Template
apiVersion: argoproj.io/v1alpha1
kind: WorkflowTemplate
metadata:
  name: integration-template
spec:
  entrypoint: integration
### hide code #####
  templates:
    - name: integration
      dag:
        tasks:
          - name: git-clone
            template: git-clone
          - name: ls
            template: ls
            dependencies:
              - git-clone
          - name: build
            template: build
            dependencies:
              - git-clone
              - ls
          - name: run-integration
            template: run-integration
            dependencies:
              - build
In the context of an Argo Workflow, the entrypoint field specifies the first template that is executed when a workflow starts. It acts as the starting point of your workflow. In your provided configuration, the entrypoint is set to integration
How entrypoint Works in Your Workflow:
- Template
integration: In your workflow, theintegrationtemplate is the starting point. This template defines a DAG (Directed Acyclic Graph) which orchestrates the execution order of different tasks. - DAG in
integrationTemplate:- The
integrationtemplate contains a series of tasks (git-clone,ls,build,run-integration), each of which refers to another template in thetemplatessection. - These tasks are executed according to the dependencies defined. For example,
lsandbuilddepend ongit-clone. This meansgit-clonemust complete beforelsandbuildstart. Similarly,run-integrationdepends onbuild.
- The
- Flow of Execution:
- When the workflow is initiated, Argo starts with the
integrationtemplate because it’s specified as theentrypoint. - Within
integration, the tasks are executed following the DAG’s logic, ensuring the right order and dependencies are maintained.
- When the workflow is initiated, Argo starts with the
3) Child Tasks in a series
3.1) Git Clone in Argo Workflow.
    - name: git-clone
      nodeSelector:
        kubernetes.io/os: linux
      inputs:
        artifacts:
        - name: argo-source
          path: /src
          git:
            repo: https://bitbucket.org/<Secret-XXX>/et-<Secret-XXX>-engines.git
            singleBranch: true
            branch: "feature/<Secret-XXX>1-475"
            usernameSecret:
              name: git-creds
              key: username
            passwordSecret:
              name: git-creds
              key: password
      container:
        image: alpine:3.17
        command:
          - sh
          - -c
        args:
          - cp -r /src/* .
        workingDir: /workdir
        volumeMounts:
          - name: workdir
            mountPath: /workdir
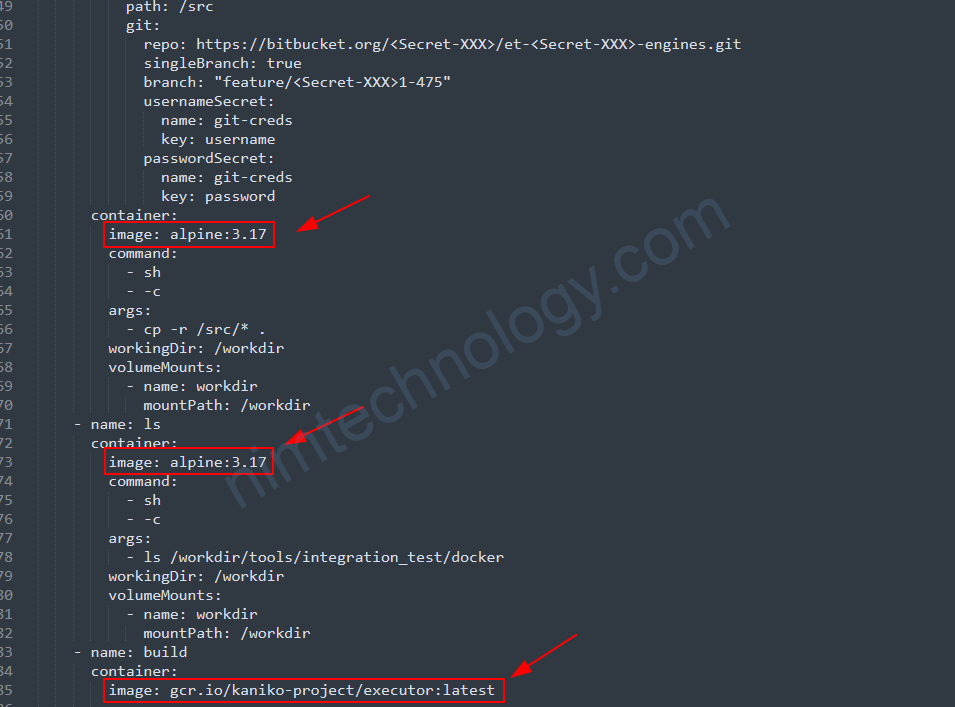
Đầu tiên mình thích git clone code về với branch “feature/1-475”
để làm được điều này thì bạn phải config singleBranch: true
vì đây là private git: cần có credentials để login:
            usernameSecret:
              name: git-creds
              key: username
            passwordSecret:
              name: git-creds
              key: password
Sau khi git clone code xong thì mình sử dụng container: alpine:3.17
để copy code vào folder:
Các error trong argo workflow: /workdir
3.2) Build image docker and push it to ECR by Kaniko.
ECR mà mình sử dụng nó là 1 private hub.
nên bạn sẽ cần config Kaniko authen with ECR
https://github.com/GoogleContainerTools/kaniko?tab=readme-ov-file#pushing-to-amazon-ecr
Kaniko họ sử dụng cái The Amazon ECR credential helper để authen với ECR AWS.
với K8s thì có 2 cách.
3.2.1) use file credentials.
Nghĩa là bạn cần tạo 1 secret:
kubectl create secret generic aws-secret --from-file=<path to .aws/credentials> File credentials có format như sau:
[default]
aws_access_key_id = YOUR_ACCESS_KEY_ID
aws_secret_access_key = YOUR_SECRET_ACCESS_KEY
Tiếp đến là bạn mount chúng step kaniko
apiVersion: v1
kind: Pod
metadata:
  name: kaniko
spec:
  containers:
    - name: kaniko
      image: gcr.io/kaniko-project/executor:latest
      args:
        - "--dockerfile=<path to Dockerfile within the build context>"
        - "--context=s3://<bucket name>/<path to .tar.gz>"
        - "--destination=<aws_account_id.dkr.ecr.region.amazonaws.com/my-repository:my-tag>"
      volumeMounts:
        # when not using instance role
        - name: aws-secret
          mountPath: /root/.aws/
  restartPolicy: Never
  volumes:
    # when not using instance role
    - name: aws-secret
      secret:
        secretName: aws-secret
3.2.2) use IRSA.
Vì mình đã setup argo workflow authen AWS vi IRSA:
https://nimtechnology.com/2023/04/17/argo-workflows-lesson23-setup-logging-and-artifact-repository/#21_AWS_S3_IRSA
nên mình chỉ cần update Policy IAM là xong:
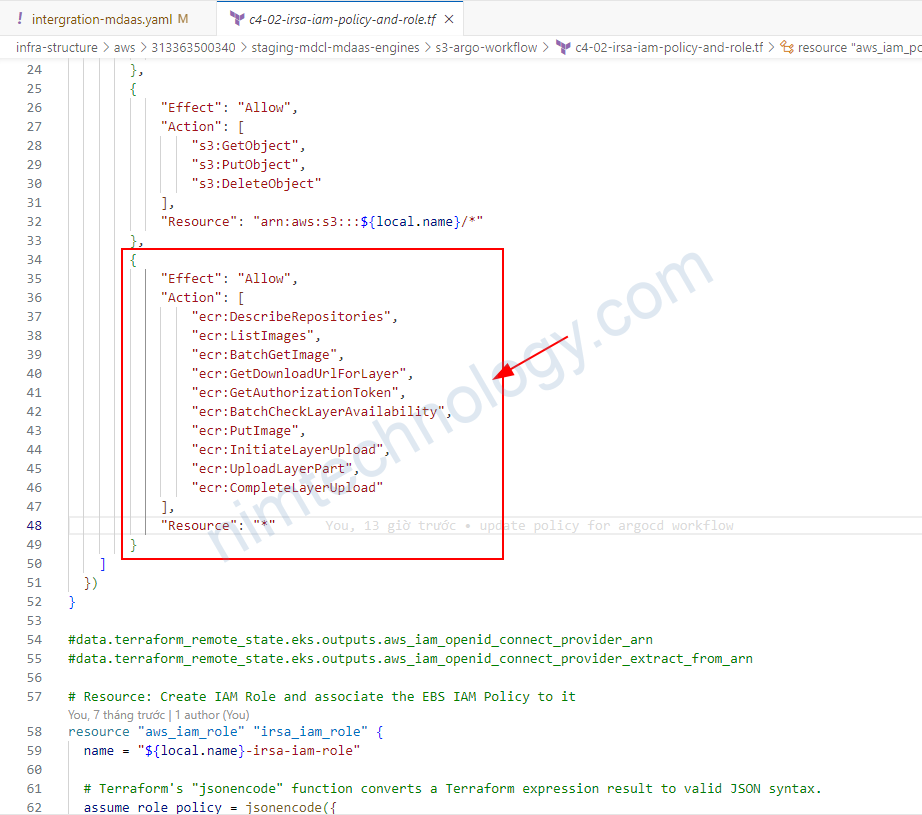
# output "aws_iam_openid_connect_provider_arn" {
#   description = "aws_iam_openid_connect_provider_arn"
#   value = "arn:aws:iam::${element(split(":", "${data.aws_eks_cluster.k8s.arn}"), 4)}:oidc-provider/${element(split("//", "${data.aws_eks_cluster.k8s.identity[0].oidc[0].issuer}"), 1)}"
# }

# Resource: IAM Policy for Cluster Autoscaler
resource "aws_iam_policy" "irsa_iam_policy" {
  name        = "${local.name}-ArgoWorkflowPolicy"
  path        = "/"
  description = "Argo Workflow Policy"

  # Terraform's "jsonencode" function converts a
  # Terraform expression result to valid JSON syntax.
  policy = jsonencode({
    "Version": "2012-10-17",
    "Statement": [
        {
            "Effect": "Allow",
            "Action": [
                "s3:ListBucket",
                "s3:GetBucketLocation"
            ],
            "Resource": "arn:aws:s3:::${local.name}"
        },
        {
            "Effect": "Allow",
            "Action": [
                "s3:GetObject",
                "s3:PutObject",
                "s3:DeleteObject"
            ],
            "Resource": "arn:aws:s3:::${local.name}/*"
        },
        {
            "Effect": "Allow",
            "Action": [
                "ecr:DescribeRepositories",
                "ecr:ListImages",
                "ecr:BatchGetImage",
                "ecr:GetDownloadUrlForLayer",
                "ecr:GetAuthorizationToken",
                "ecr:BatchCheckLayerAvailability",
                "ecr:PutImage",
                "ecr:InitiateLayerUpload",
                "ecr:UploadLayerPart",
                "ecr:CompleteLayerUpload"
            ],
            "Resource": "*"
        }
    ]
  })
}

#data.terraform_remote_state.eks.outputs.aws_iam_openid_connect_provider_arn
#data.terraform_remote_state.eks.outputs.aws_iam_openid_connect_provider_extract_from_arn

# Resource: Create IAM Role and associate the EBS IAM Policy to it
resource "aws_iam_role" "irsa_iam_role" {
  name = "${local.name}-irsa-iam-role"

  # Terraform's "jsonencode" function converts a Terraform expression result to valid JSON syntax.
  assume_role_policy = jsonencode({
    Version = "2012-10-17"
    Statement = [
      {
        Action = "sts:AssumeRoleWithWebIdentity"
        Effect = "Allow"
        Sid    = ""
        Principal = {
          Federated = "arn:aws:iam::${element(split(":", "${data.aws_eks_cluster.k8s.arn}"), 4)}:oidc-provider/${element(split("//", "${data.aws_eks_cluster.k8s.identity[0].oidc[0].issuer}"), 1)}"
        }
        Condition = {
          StringLike = {
            "${element(split("oidc-provider/", "arn:aws:iam::${element(split(":", "${data.aws_eks_cluster.k8s.arn}"), 4)}:oidc-provider/${element(split("//", "${data.aws_eks_cluster.k8s.identity[0].oidc[0].issuer}"), 1)}"), 1)}:sub": "system:serviceaccount:argo-workflow:argoworkflow-<Secret-XXX>-staging-argo-workflows-*"
          }
        }

      },
    ]
  })

  tags = {
    tag-key = "${local.name}-irsa-iam-role"
  }
}

# Associate IAM Role and Policy
resource "aws_iam_role_policy_attachment" "irsa_iam_role_policy_attach" {
  policy_arn = aws_iam_policy.irsa_iam_policy.arn
  role       = aws_iam_role.irsa_iam_role.name
}

output "irsa_iam_role_arn" {
  description = "IRSA Demo IAM Role ARN"
  value = aws_iam_role.irsa_iam_role.arn
}
3.2.3) Configuration task.
    - name: build
      container:
        image: gcr.io/kaniko-project/executor:latest
        args:
          - --context=/workdir/tools
          - --dockerfile=integration_test/docker/Dockerfile
          - --destination=<Secret-XXX>.dkr.ecr.us-west-2.amazonaws.com/integration_testing:{{workflow.name}}
        workingDir: /workdir
        volumeMounts:
          - name: workdir
            mountPath: /workdir
Bạn có thể link bên dưới để hiều về: “–context” và “–dockerfile”
https://nimtechnology.com/2021/06/06/huong-dan-build-image-docker-chay-trong-container/#Build_image_docker_with_Kaniko_and_Argo_Workflow
level=warning msg="failed to patch task set, falling back to legacy/insecure pod patch, see https://argoproj.github.io/argo-workflows/workflow-rbac/" error="workflowtaskresults.argoproj.io is forbidden: User \"system:serviceaccount:argo-workflow:argoworkflow-nimtechnology-staging-argo-workflows-workflow-controller\" cannot create resource \"workflowtaskresults\" in API group \"argoproj.io\" in the namespace \"argo-workflow\""Vì dev đứng ở folder: tools
và run docker build và trỏ đến file integration_test/docker/Dockerfile
3.3) Using Trivy Scan on Argo Workflow.
3.3.1) Trivy scan image docker.
    - name: trivy-image-scan
      container:
        image: aquasec/trivy
        args:
          - image
          - 313363500340.dkr.ecr.us-west-2.amazonaws.com/integration_testing:{{workflow.name}}
3.3.2) Trivy scan the file system
    - name: trivy-filesystem-scan
      container:
        image: aquasec/trivy
        args:
          - filesystem
          - /workdir
          - --ignorefile=/workdir/.tar
        workingDir: /workdir
        volumeMounts:
          - name: workdir
            mountPath: /workdir
4) Input the parameters.
khi bạn thực hiện chạy bằng tay hay automactic thì bạn sẽ truyền vào branch hoặc truyền vào command nào đó
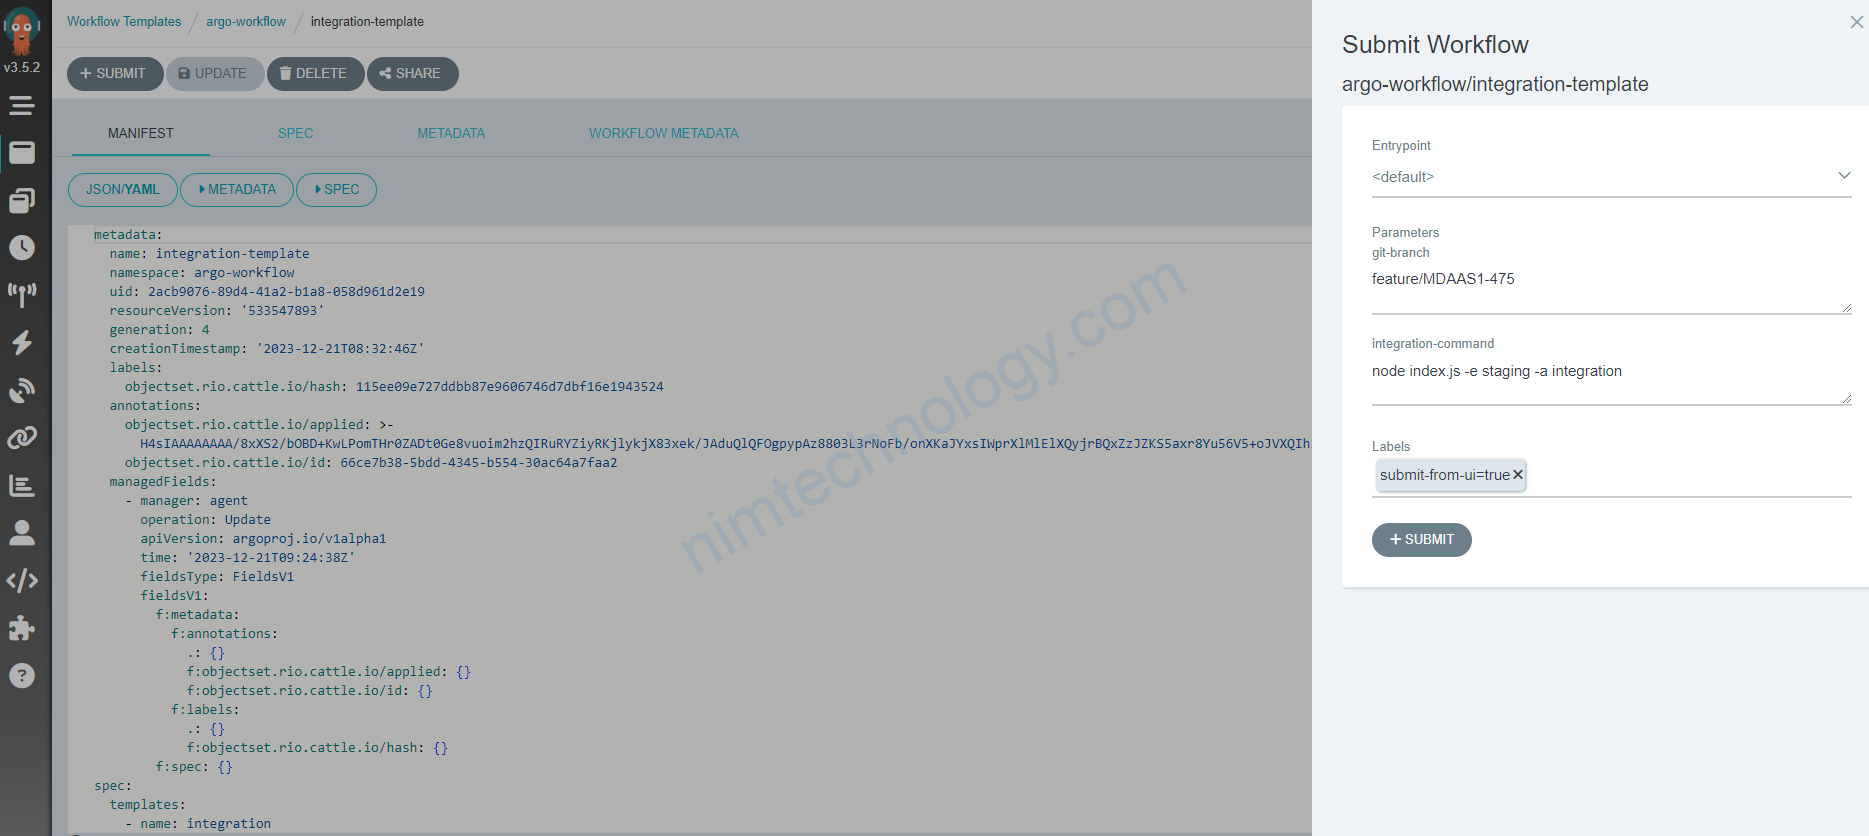
Để hiểu được vấn đề này chúng ta cần xem bài.
https://nimtechnology.com/2022/01/06/argo-workflows-lesson3-argo-cli-and-input-parameters/#Input_Parameters
Issues
You need to find the rool or clusterRole then update:
apiVersion: rbac.authorization.k8s.io/v1
kind: Role
metadata:
  namespace: argo-workflow
  name: workflow-task-results-role
rules:
- apiGroups: ["argoproj.io"]
  resources: ["workflowtaskresults"]
  verbs: ["create"]
