Bài này chúng ta sẽ tìm hiểu thử Kafka connect là cái quái j?
Và có 1 vài demo để dễ hiểu hơn.
Đầu tiên:
Nếu bạn muốn có người cầm tay chỉ việc vip hơn mình thì down khoá này nhé:
https://www.udemy.com/course/kafka-connect/
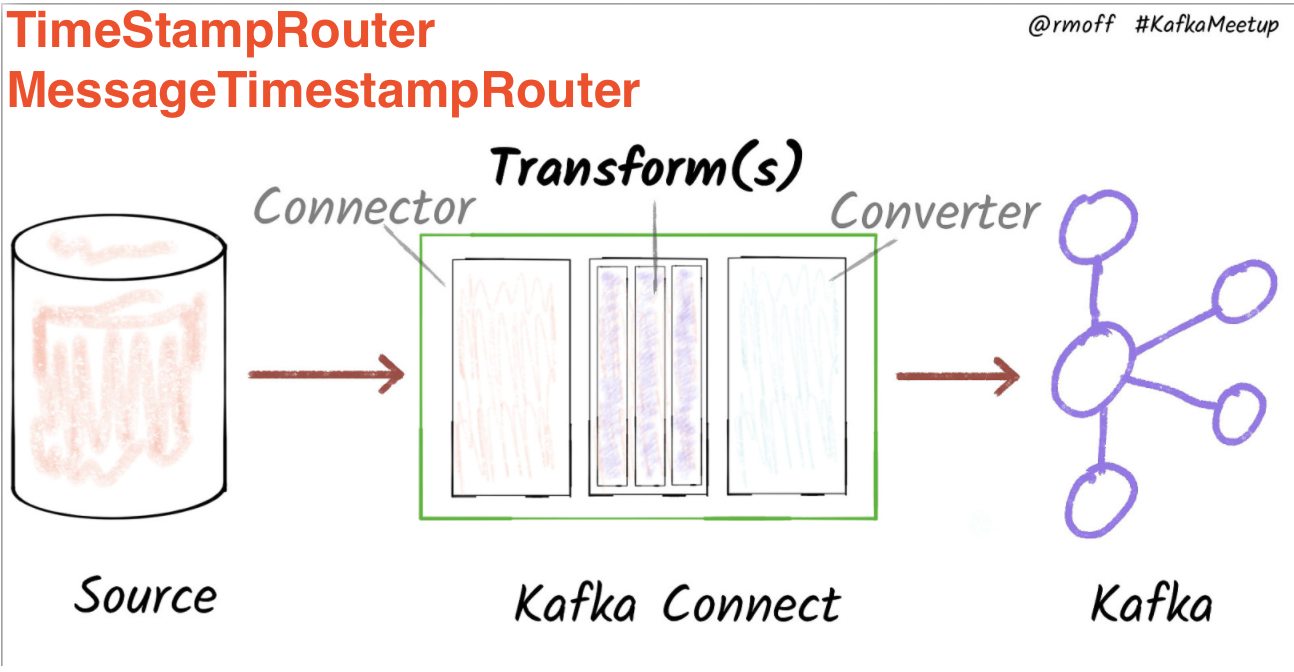
1) Kafka Connect Source
Hiệu đơn giản thì chúng ta sẽ lấy data từ 1 source nào đó (file, database, …) rồi write vào 1 topic trên kafka.
1.1) STANDALONE MODE
1.1.1) overview
Example: FileStreamSourceConnector STANDALONE MODE
- Goal:
- Read a file and load the content directly into Kafka
- Run in a connector in standalone mode (useful for development)
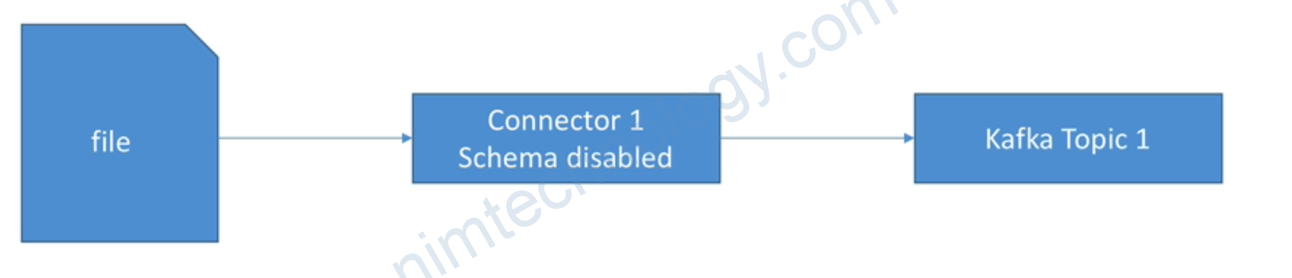
- Learning:
- Understand how to configure a connector in standalone mode
- Get a first feel for Kafka Connect Standalone
OK vậy phần này chúng ta chỉ dựng các components của Kafka hay Kafka connect để học các tính năng của nó. Về phần dựng production ntn đó thì sau khi tìm hiểu kha khá mình sẽ chỉ he.
1.1.2) Practice.
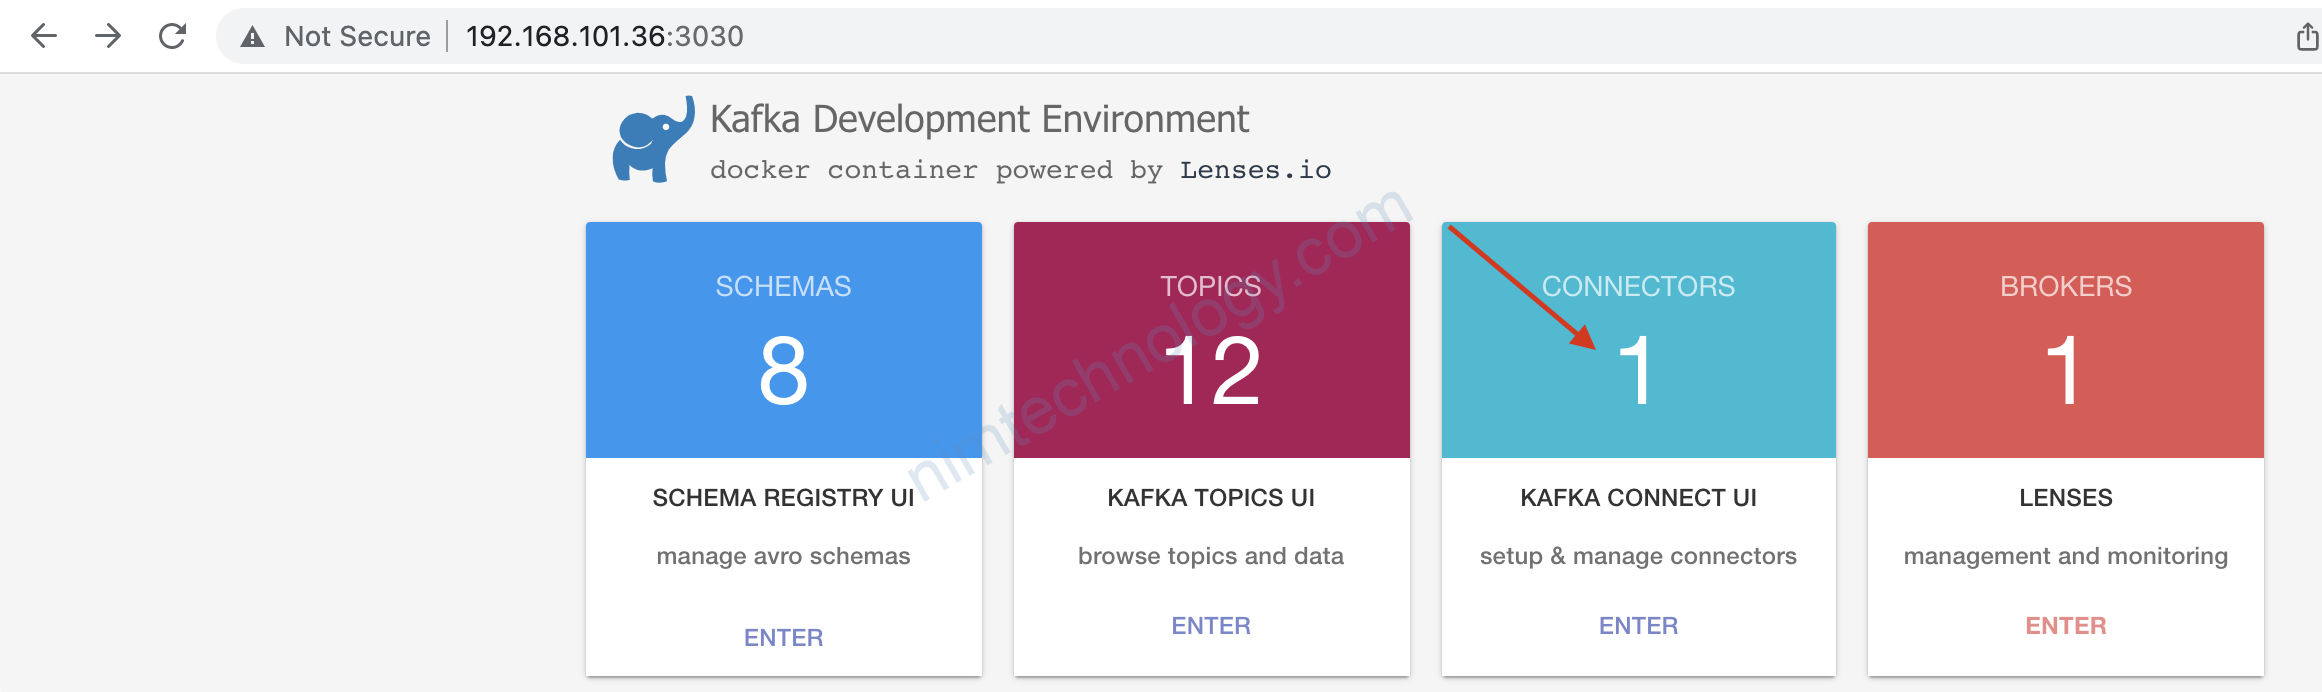
1.1.2.1) Run Kafka-connect on docker to learn.
version: '2'

services:
  # this is our kafka cluster.
  kafka-cluster:
    network_mode: "host"
    image: landoop/fast-data-dev
    environment:
      ADV_HOST: "192.168.101.36"         # Change to 192.168.99.100 if using Docker Toolbox
      RUNTESTS: 0                 # Disable Running tests so the cluster starts faster
    # ports:
    #   - 2181:2181                 # Zookeeper
    #   - 3030:3030                 # Landoop UI
    #   - 8081-8083:8081-8083       # REST Proxy, Schema Registry, Kafka Connect ports
    #   - 9581-9585:9581-9585       # JMX Ports
    #   - 9092:9092                 # Kafka Broker

  # we will use elasticsearch as one of our sinks.
  # This configuration allows you to start elasticsearch
  elasticsearch:
    image: itzg/elasticsearch:2.4.3
    environment:
      PLUGINS: appbaseio/dejavu
      OPTS: -Dindex.number_of_shards=1 -Dindex.number_of_replicas=0
    ports:
      - "9200:9200"

  # we will use postgres as one of our sinks.
  # This configuration allows you to start postgres
  postgres:
    image: postgres:9.5-alpine
    environment:
      POSTGRES_USER: postgres     # define credentials
      POSTGRES_PASSWORD: postgres # define credentials
      POSTGRES_DB: postgres       # define database
    ports:
      - 5432:5432                 # Postgres port
Chúng ta sẽ chạy kafka-cluster ở mode network host luôn nhé.

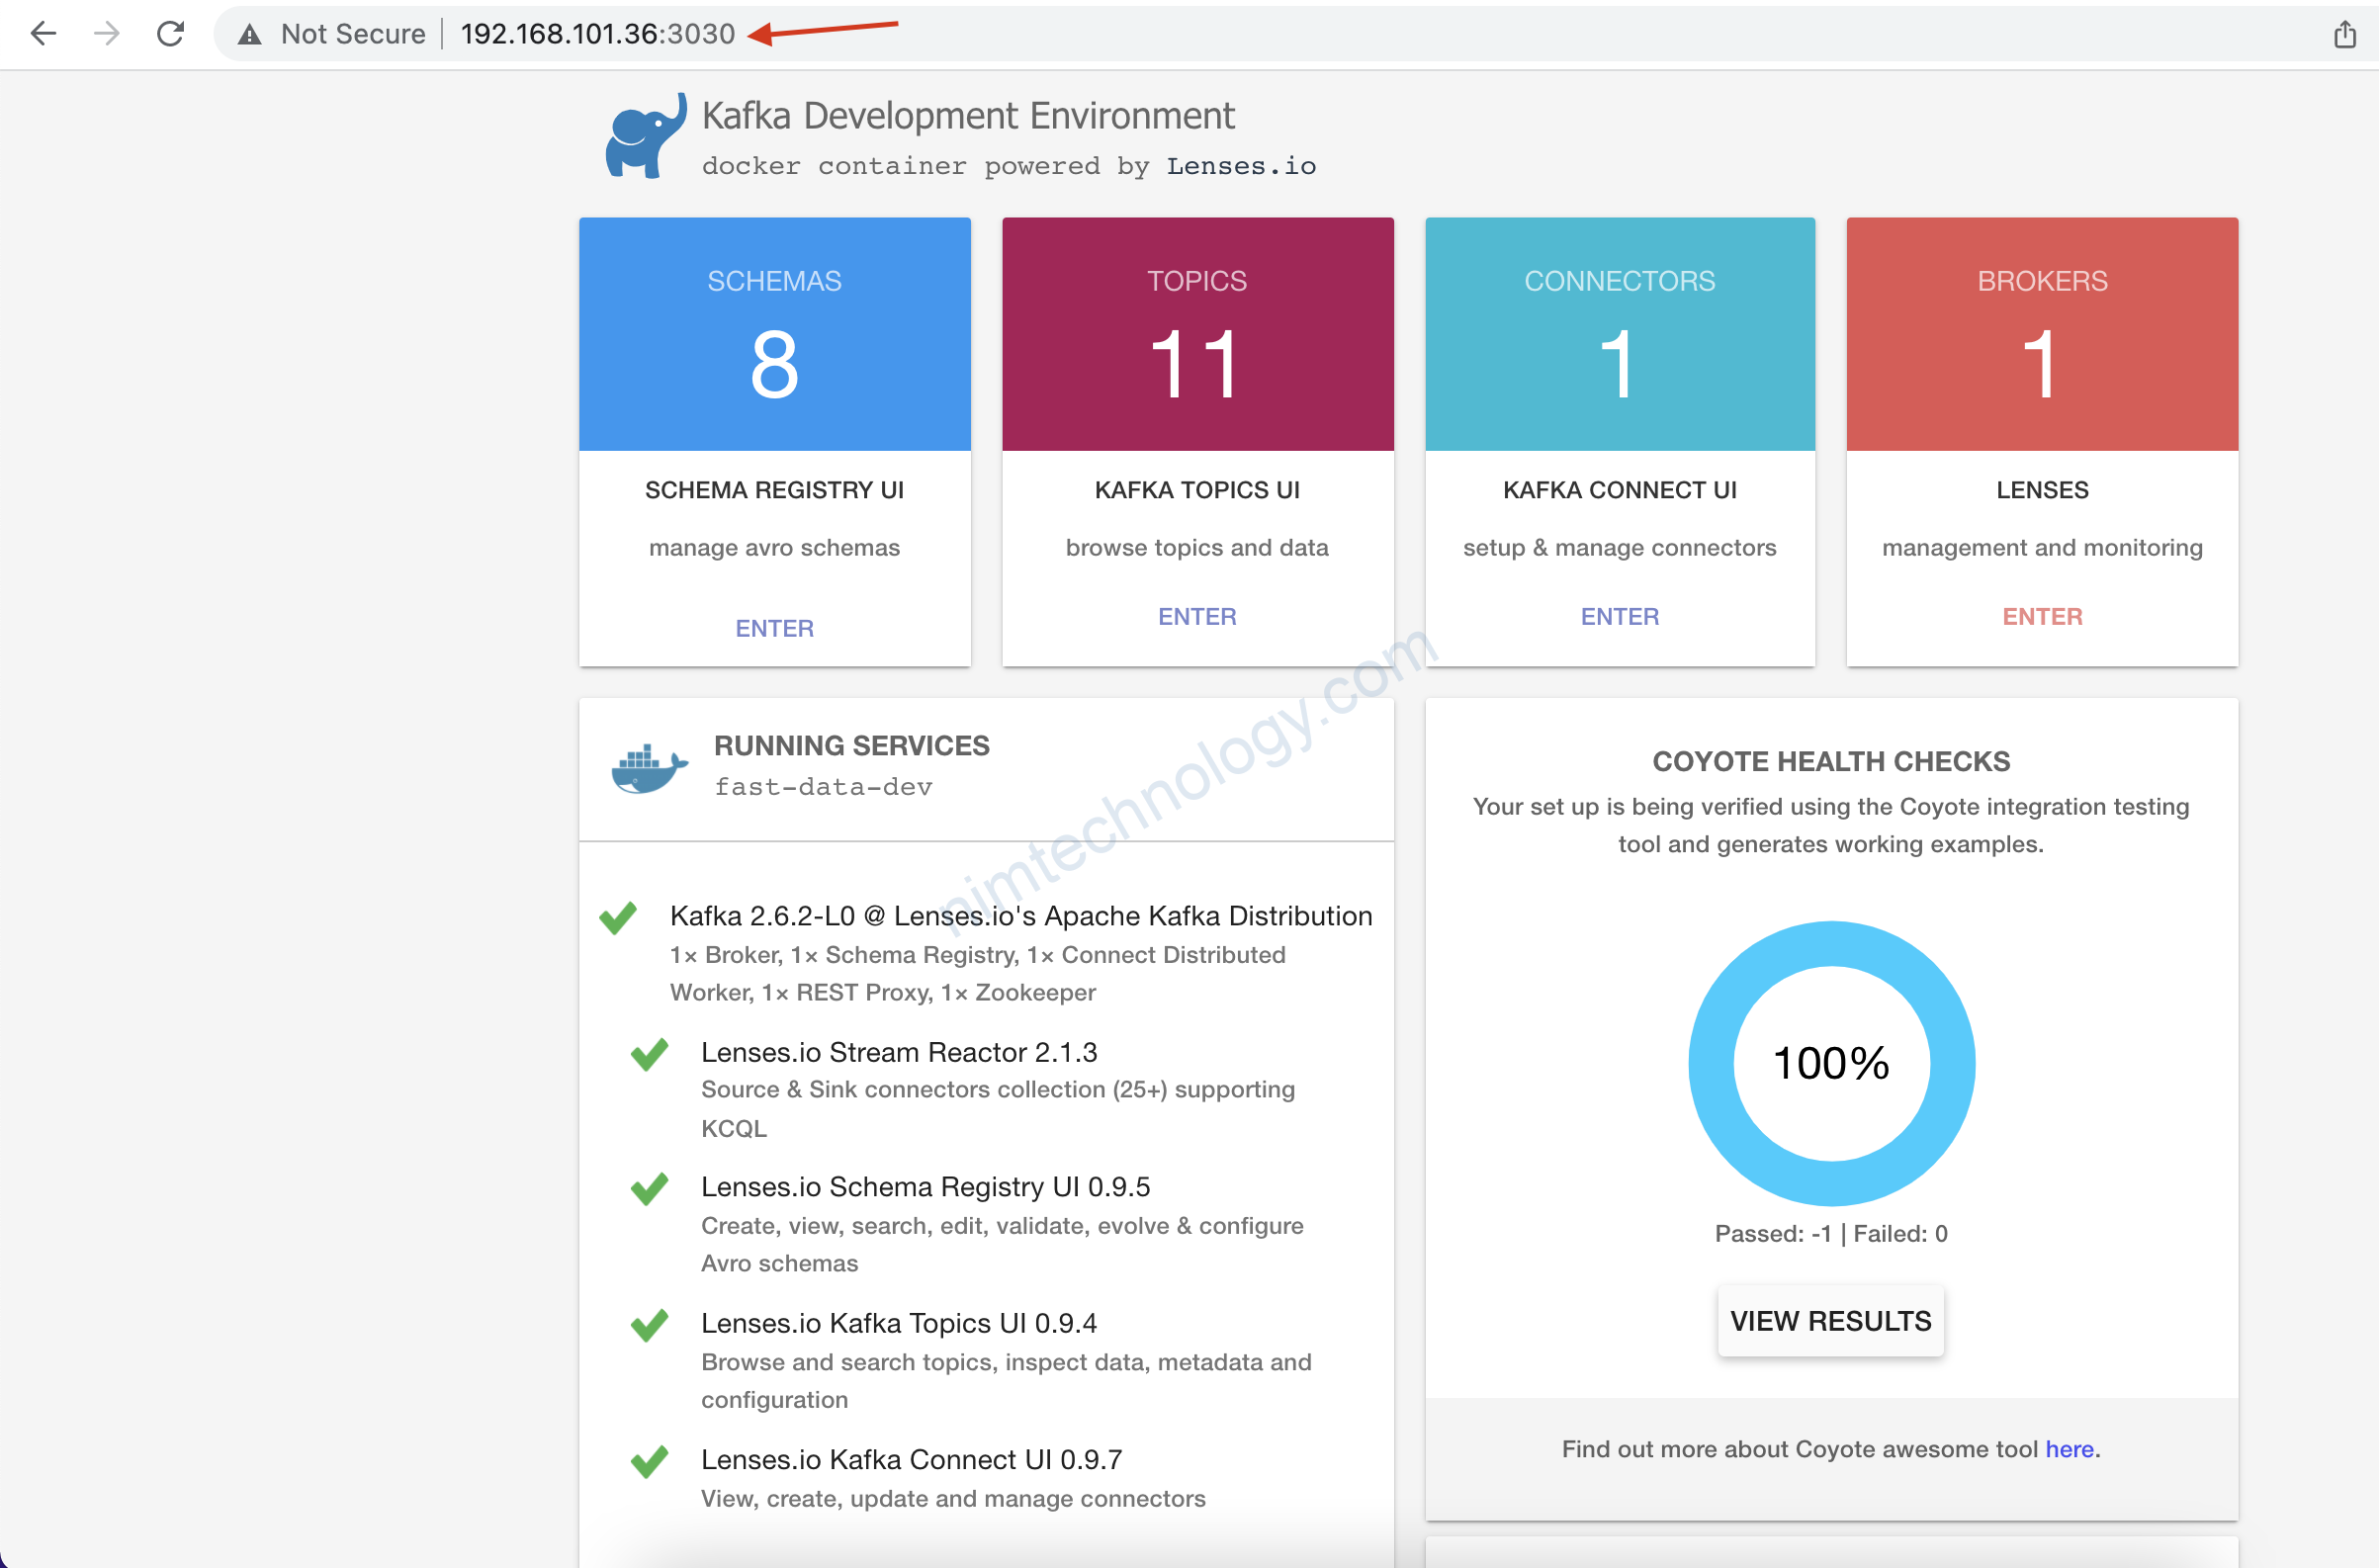
nếu hiện như mình là ok
1.1.2.2) Create topic and kafka connect.
Thực hiện exec vào container kafka.
docker exec -it kafka-connect_kafka-cluster_1 bash
Chúng ra cần tạo 1 folder và tạo 3 file
mkdir -p /tutorial/source/demo-1
cd /tutorial/source/demo-1
tạo file vi worker.properties
# from more information, visit: http://docs.confluent.io/3.2.0/connect/userguide.html#common-worker-configs
bootstrap.servers=127.0.0.1:9092
key.converter=org.apache.kafka.connect.json.JsonConverter
key.converter.schemas.enable=false
value.converter=org.apache.kafka.connect.json.JsonConverter
value.converter.schemas.enable=false
# we always leave the internal key to JsonConverter
internal.key.converter=org.apache.kafka.connect.json.JsonConverter
internal.key.converter.schemas.enable=false
internal.value.converter=org.apache.kafka.connect.json.JsonConverter
internal.value.converter.schemas.enable=false
# Rest API
rest.port=8086
rest.host.name=127.0.0.1
# this config is only for standalone workers
offset.storage.file.filename=standalone.offsets
offset.flush.interval.ms=10000
bootstrap.servers: gọi vào IP kafka cluster
offset.storage.file.filename: nó lưu data ra 1 file
offset.flush.interval.ms: cái thời gian(s) nó sẽ watch file và nếu file có sự thay đổi nó sẽ write data vào topic
Tiếp tục tạo 1 file:vi file-stream-demo-standalone.properties
# These are standard kafka connect parameters, need for ALL connectors
name=file-stream-demo-standalone
connector.class=org.apache.kafka.connect.file.FileStreamSourceConnector
tasks.max=1
# Parameters can be found here: https://github.com/apache/kafka/blob/trunk/connect/file/src/main/java/org/apache/kafka/connect/file/FileStreamSourceConnector.java
file=/tutorial/source/demo-1/demo-file.txt
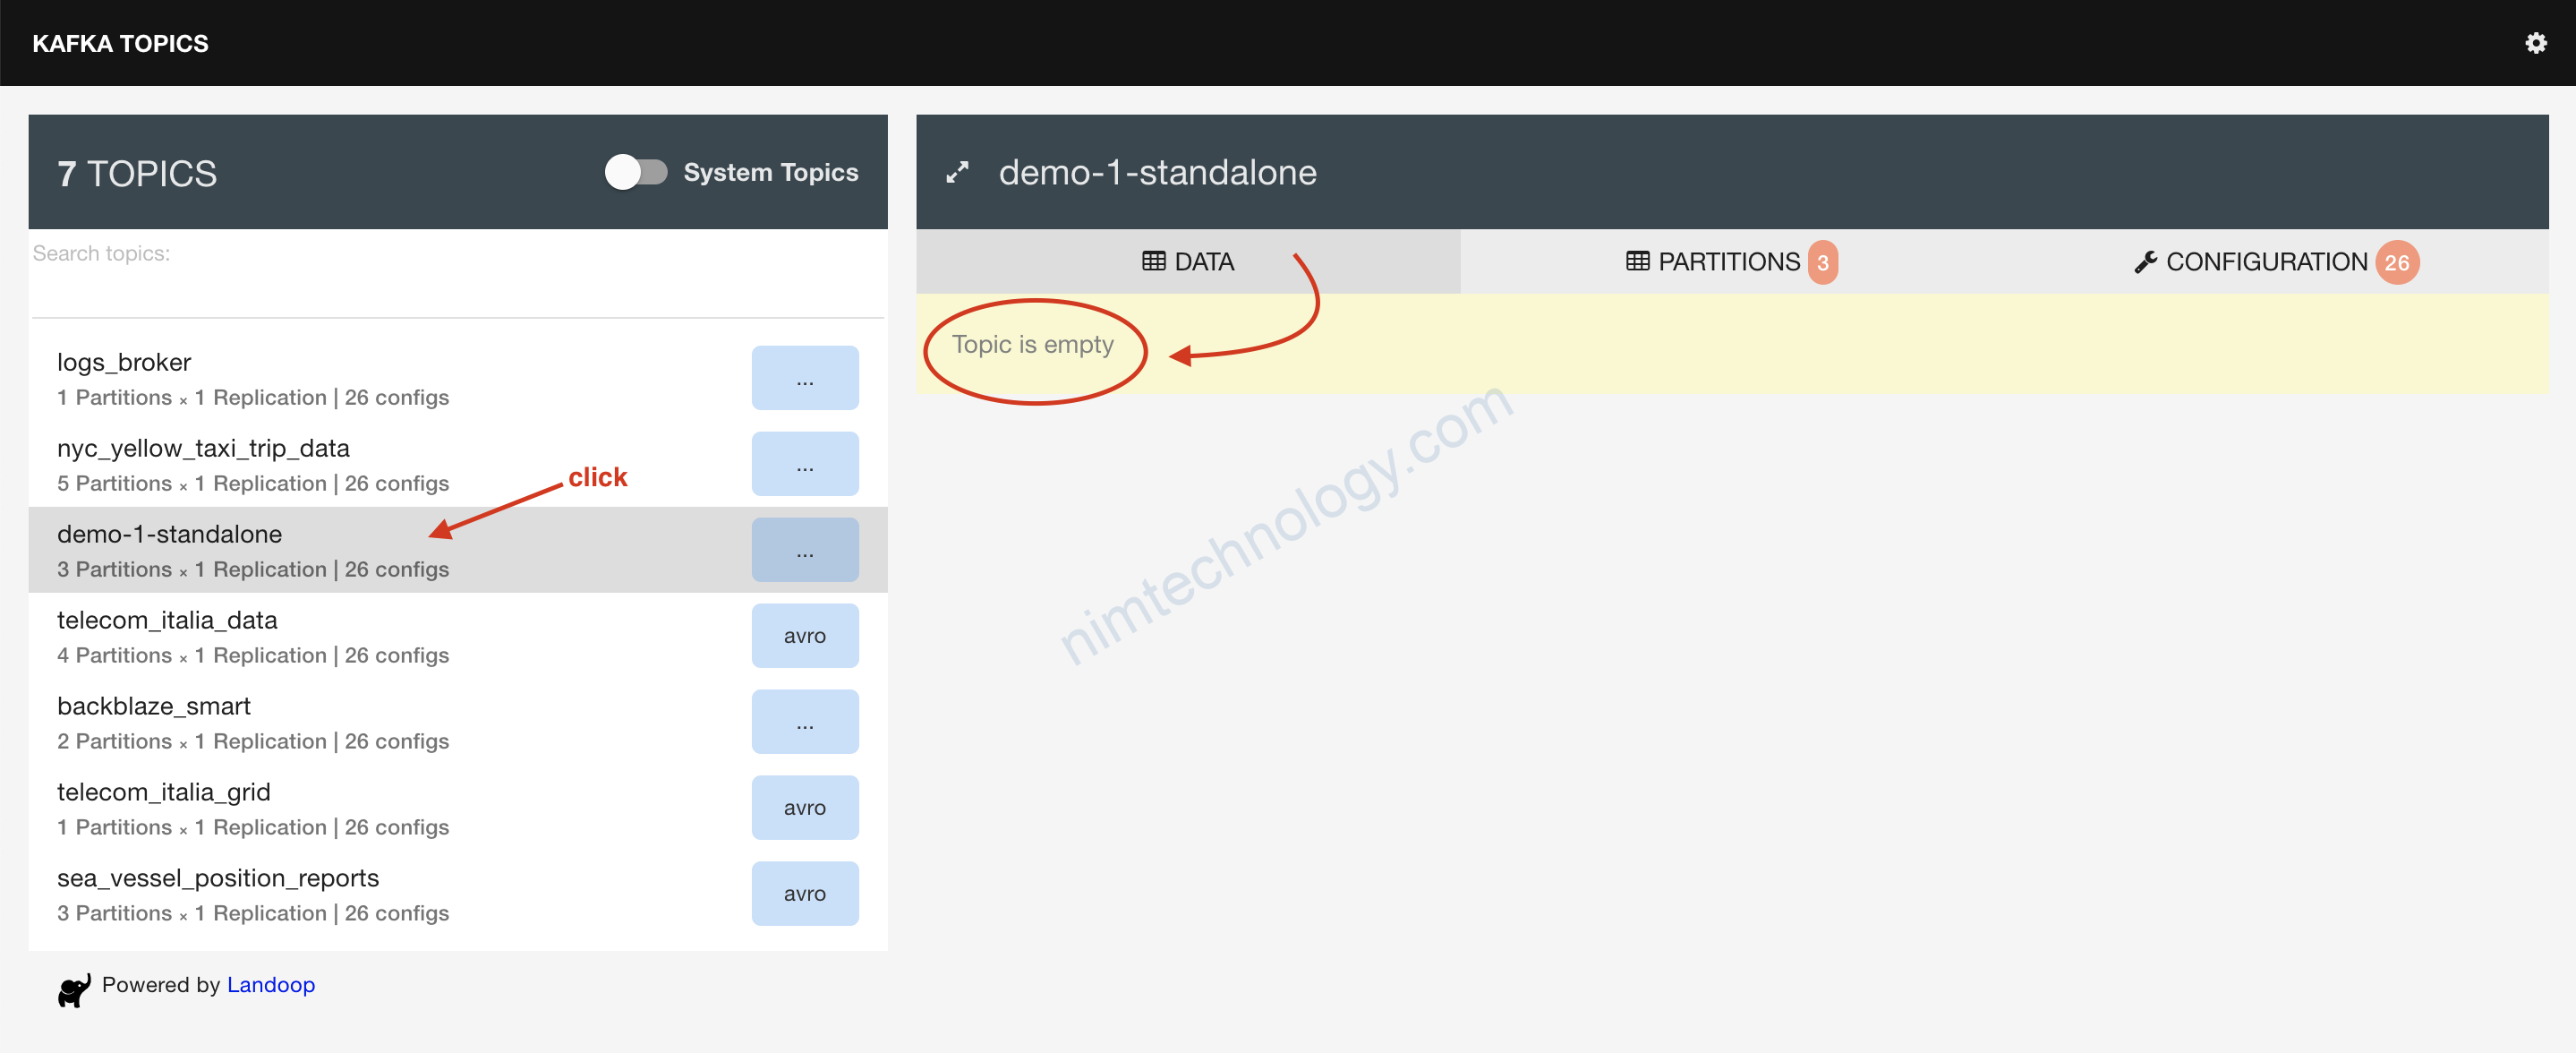
topic=demo-1-standalone
file: chúng ta chỉ cho kafka connect watchs file bào và ở đâu?
topic: write data vào topic nào?
tạo 1 filetouch demo-file.txt
giờ dùng command để tạo 1 topic:
# create the topic we write to with 3 partitions
kafka-topics --create --topic demo-1-standalone --partitions 3 --replication-factor 1 --zookeeper 127.0.0.1:2181
Tạo kafka-connect:
# Usage is connect-standalone worker.properties connector1.properties [connector2.properties connector3.properties]
connect-standalone worker.properties file-stream-demo-standalone.properties
Vậy là ngon
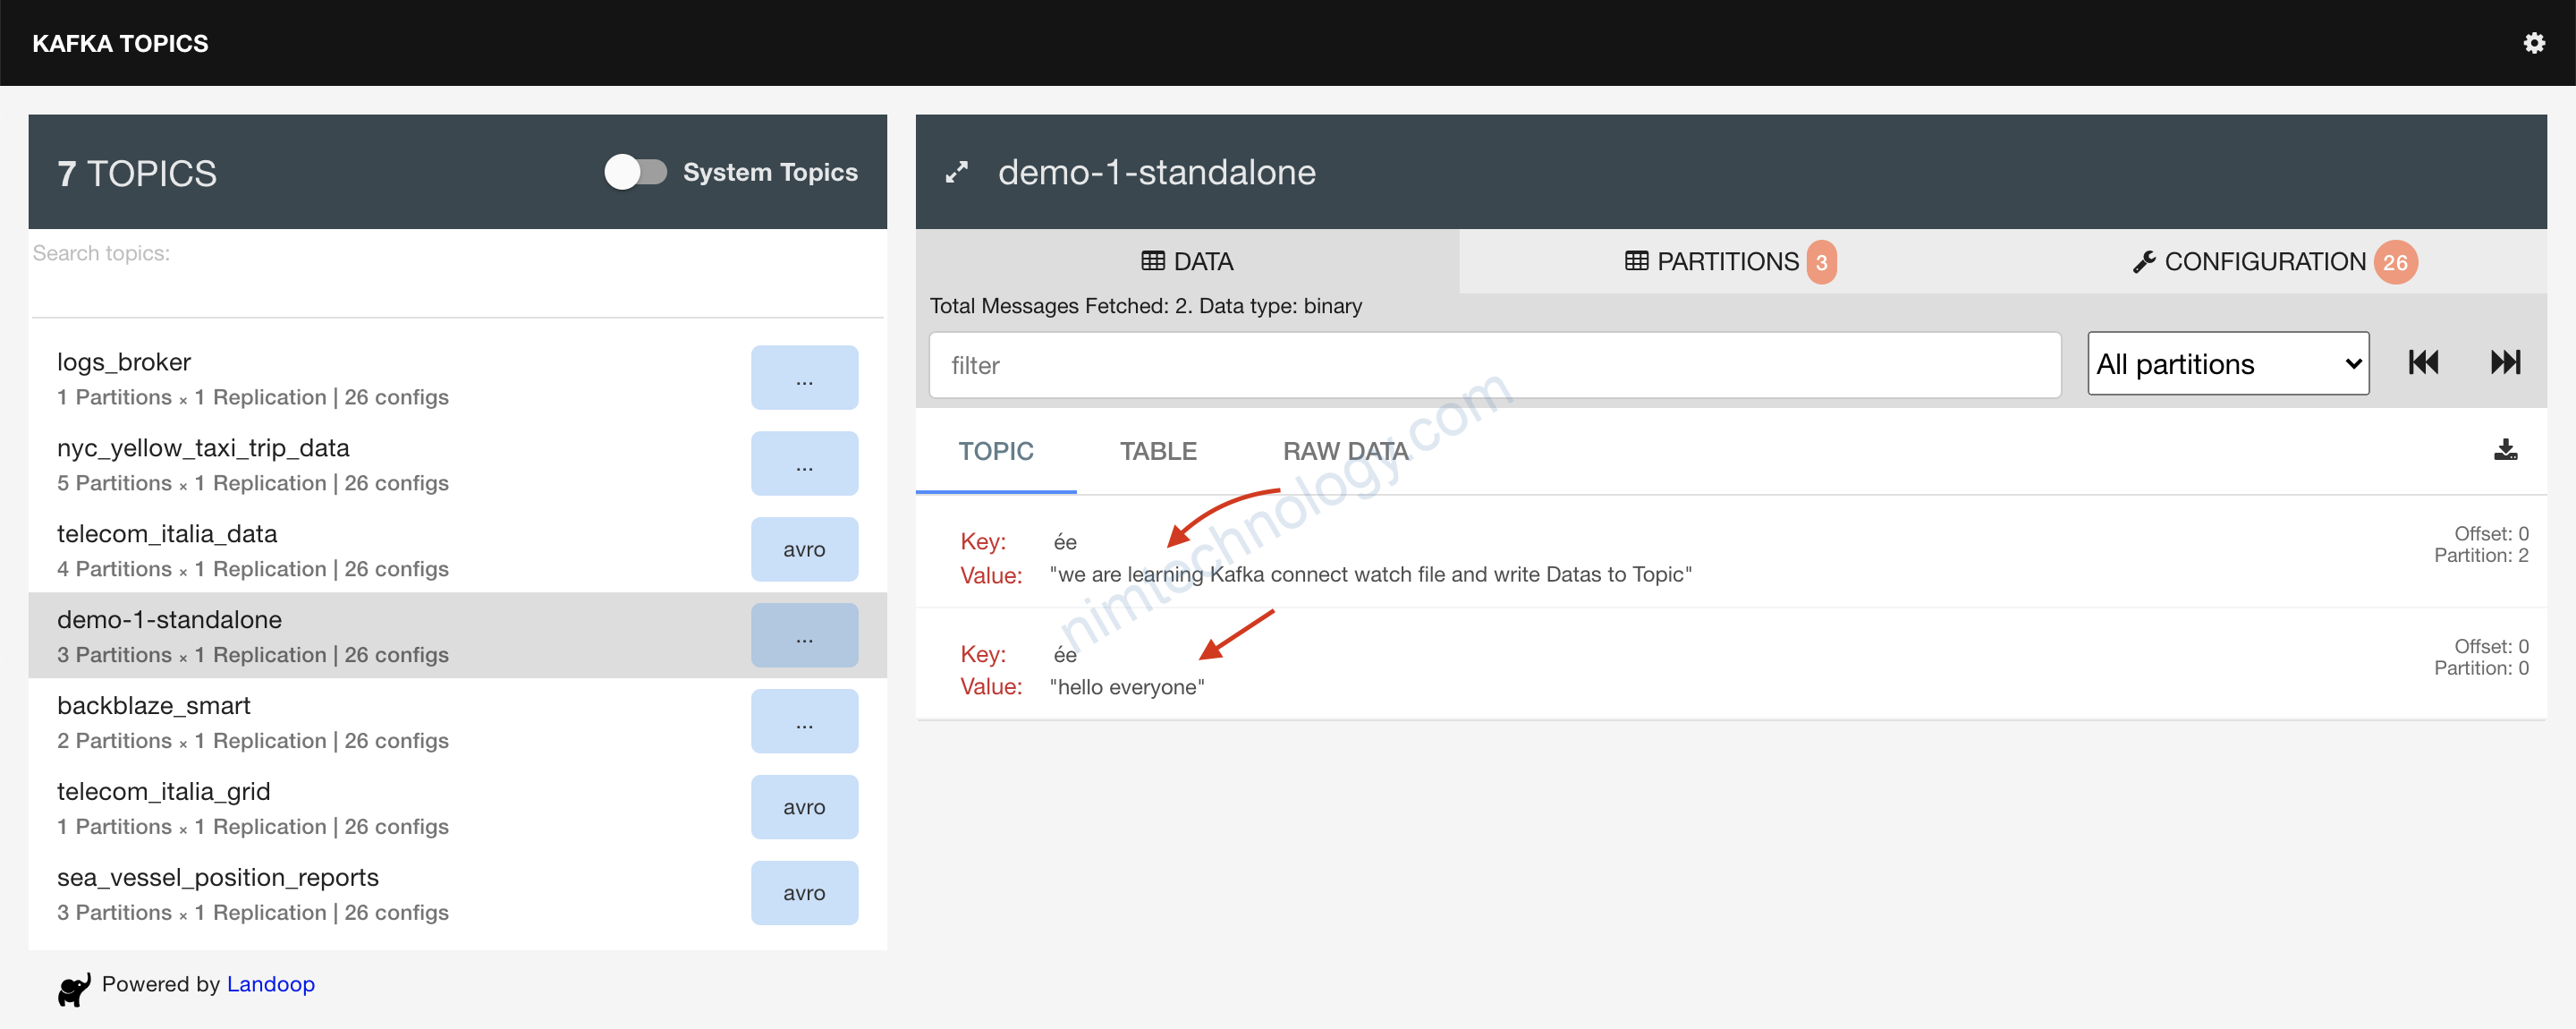
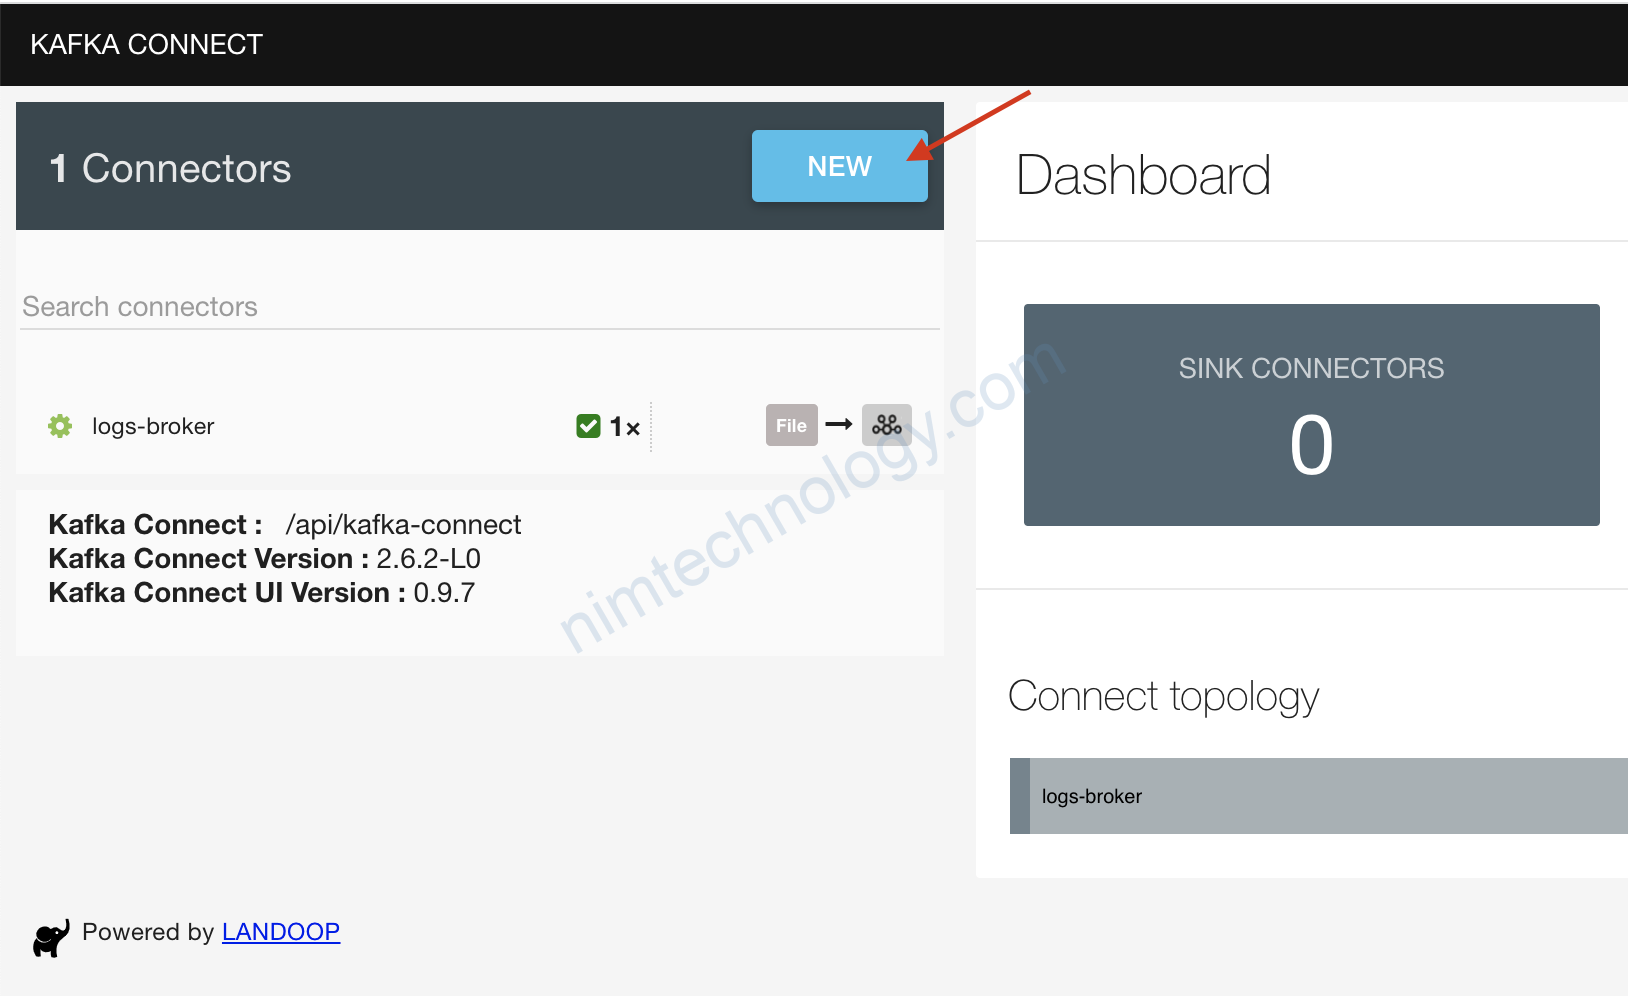
Giờ trở về lại trang web:
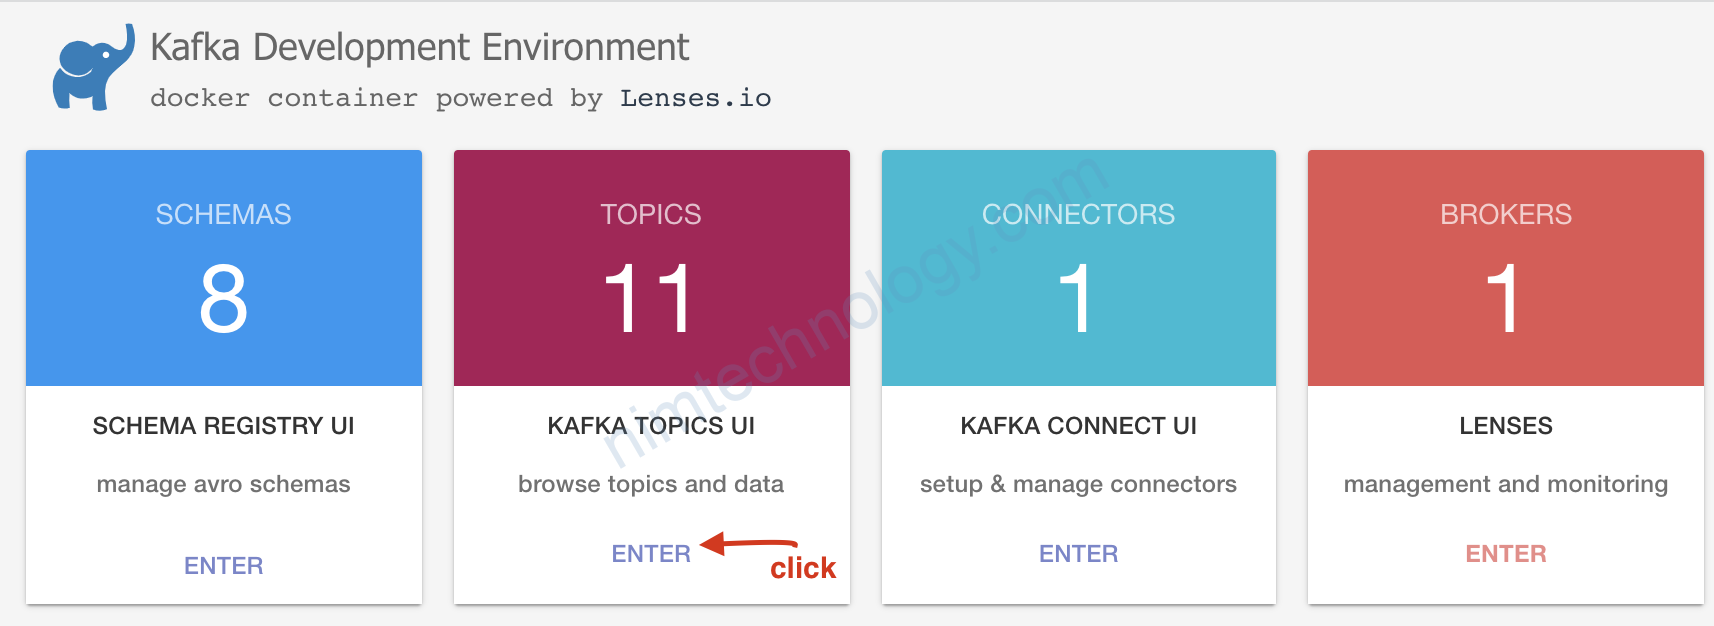
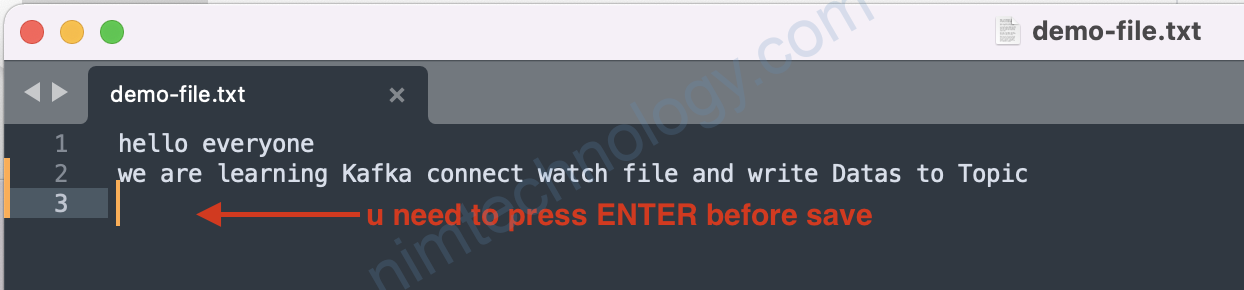

Quay trợ lại brower và F5:
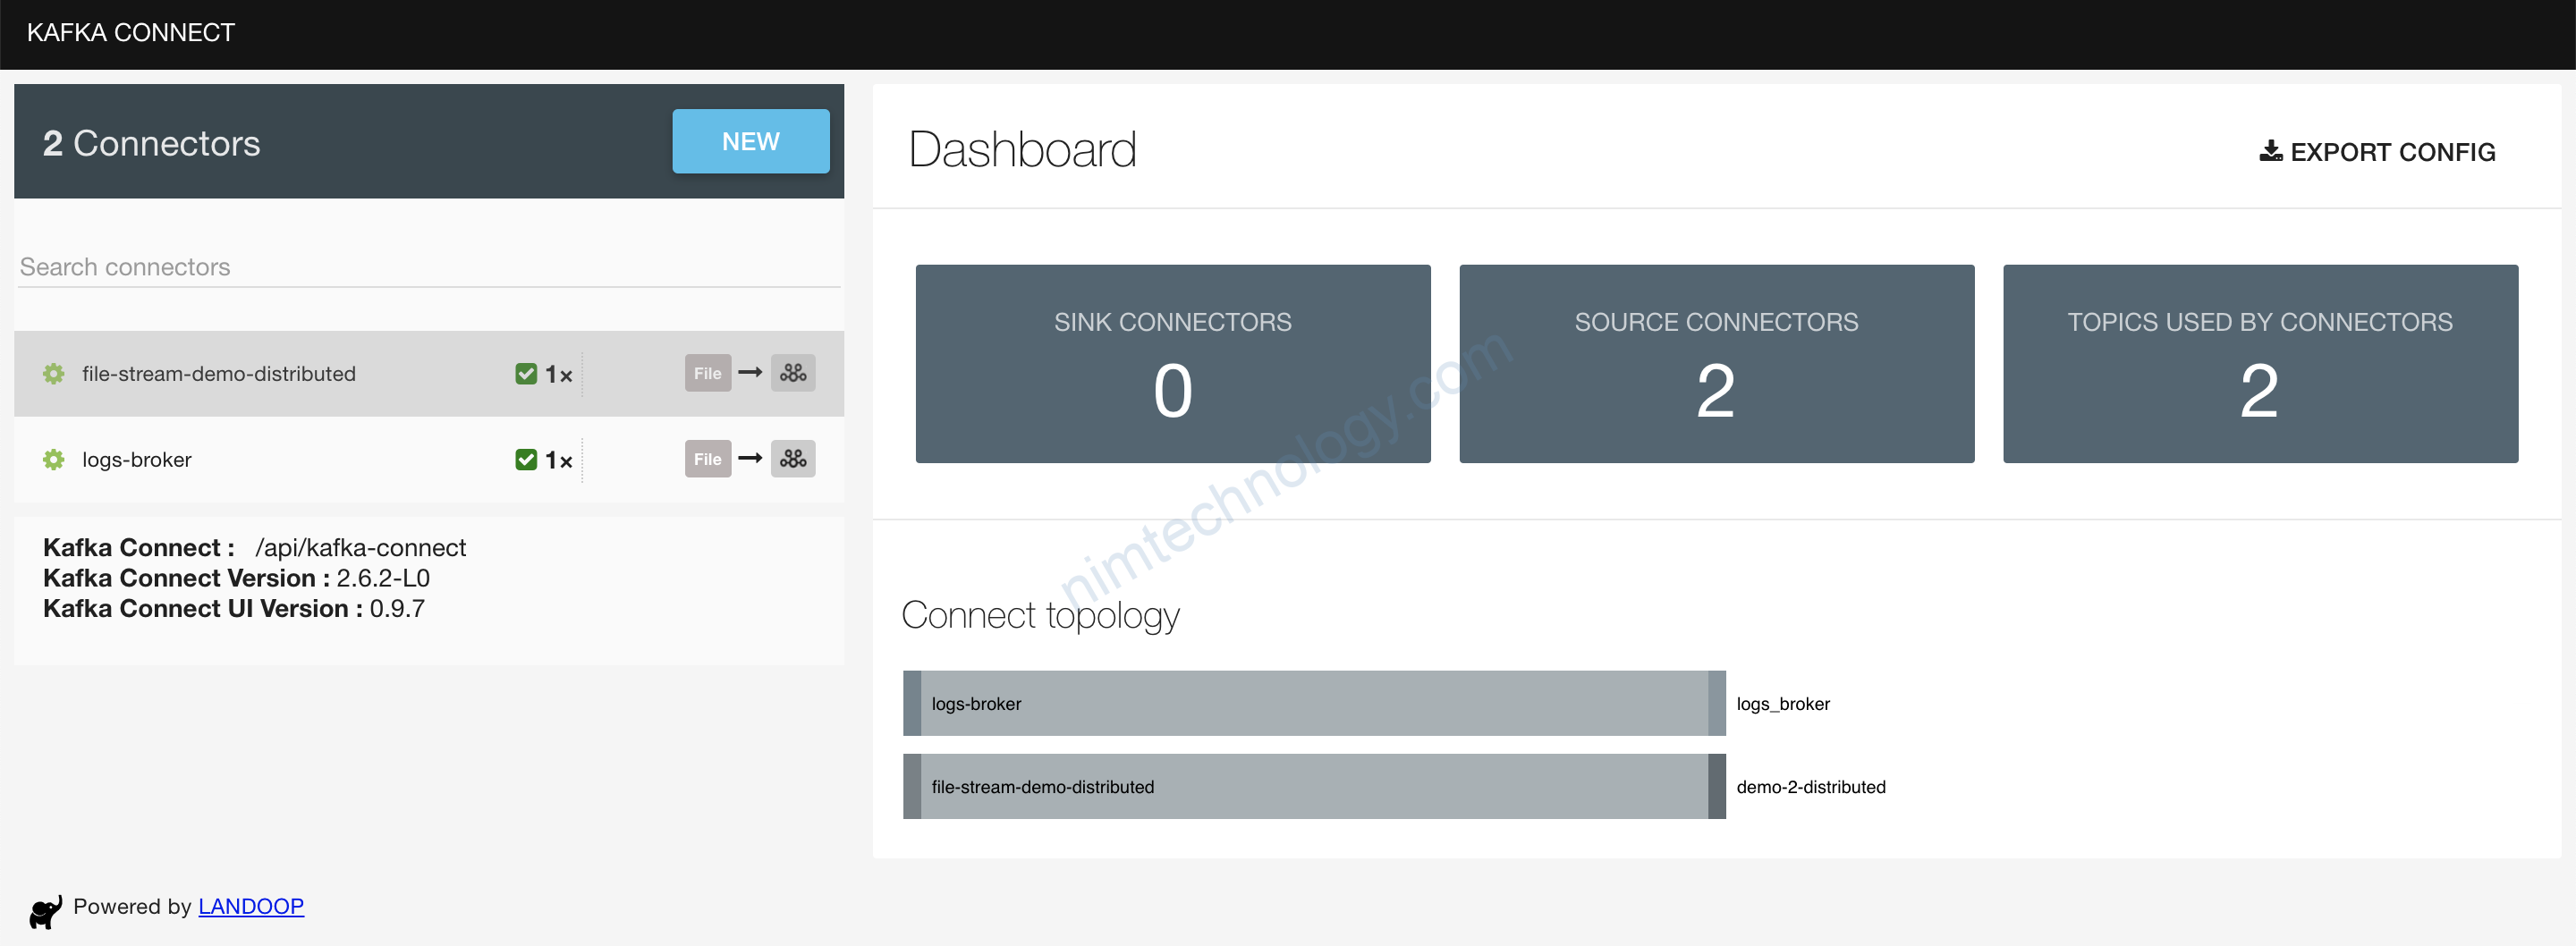
1.2) DISTRIBUTED MODE.
1.2.1) overview
Example: FileStreamSourceConnector DISTRIBUTED MODE
- Goal:
- Read a file and load the content directly into Kafka
- Run in distributed mode on our already set-up Kafka Connect Cluster
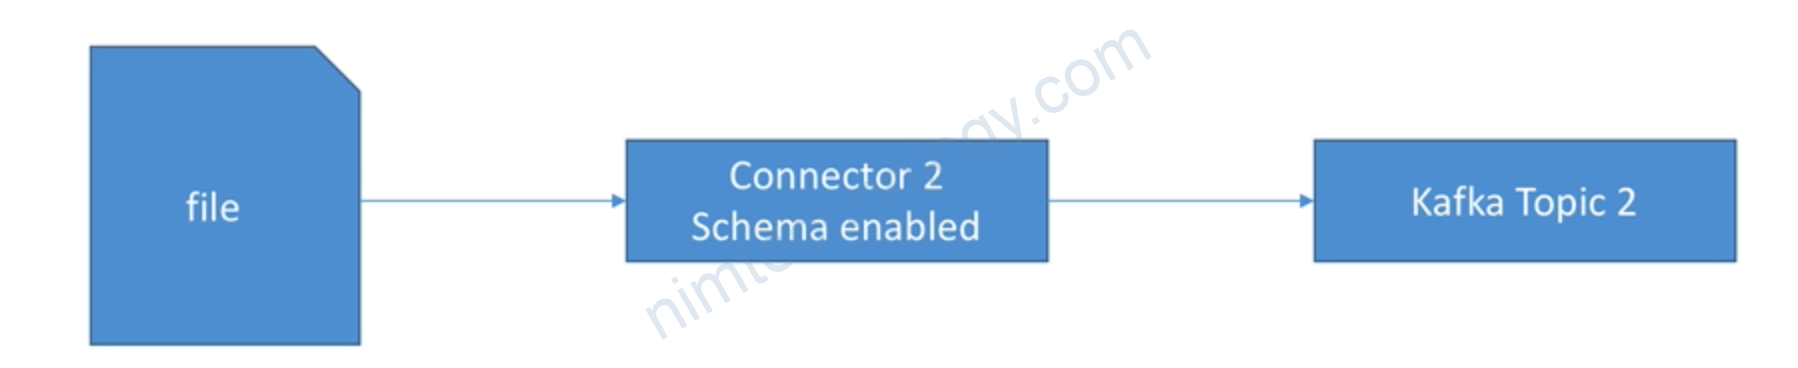
- Learning:
- Understand how to configure a connector in distributed mode
- Get a first feel for Kafka Connect Cluster
- Understand the schema configuration option
1.2.2) Practice
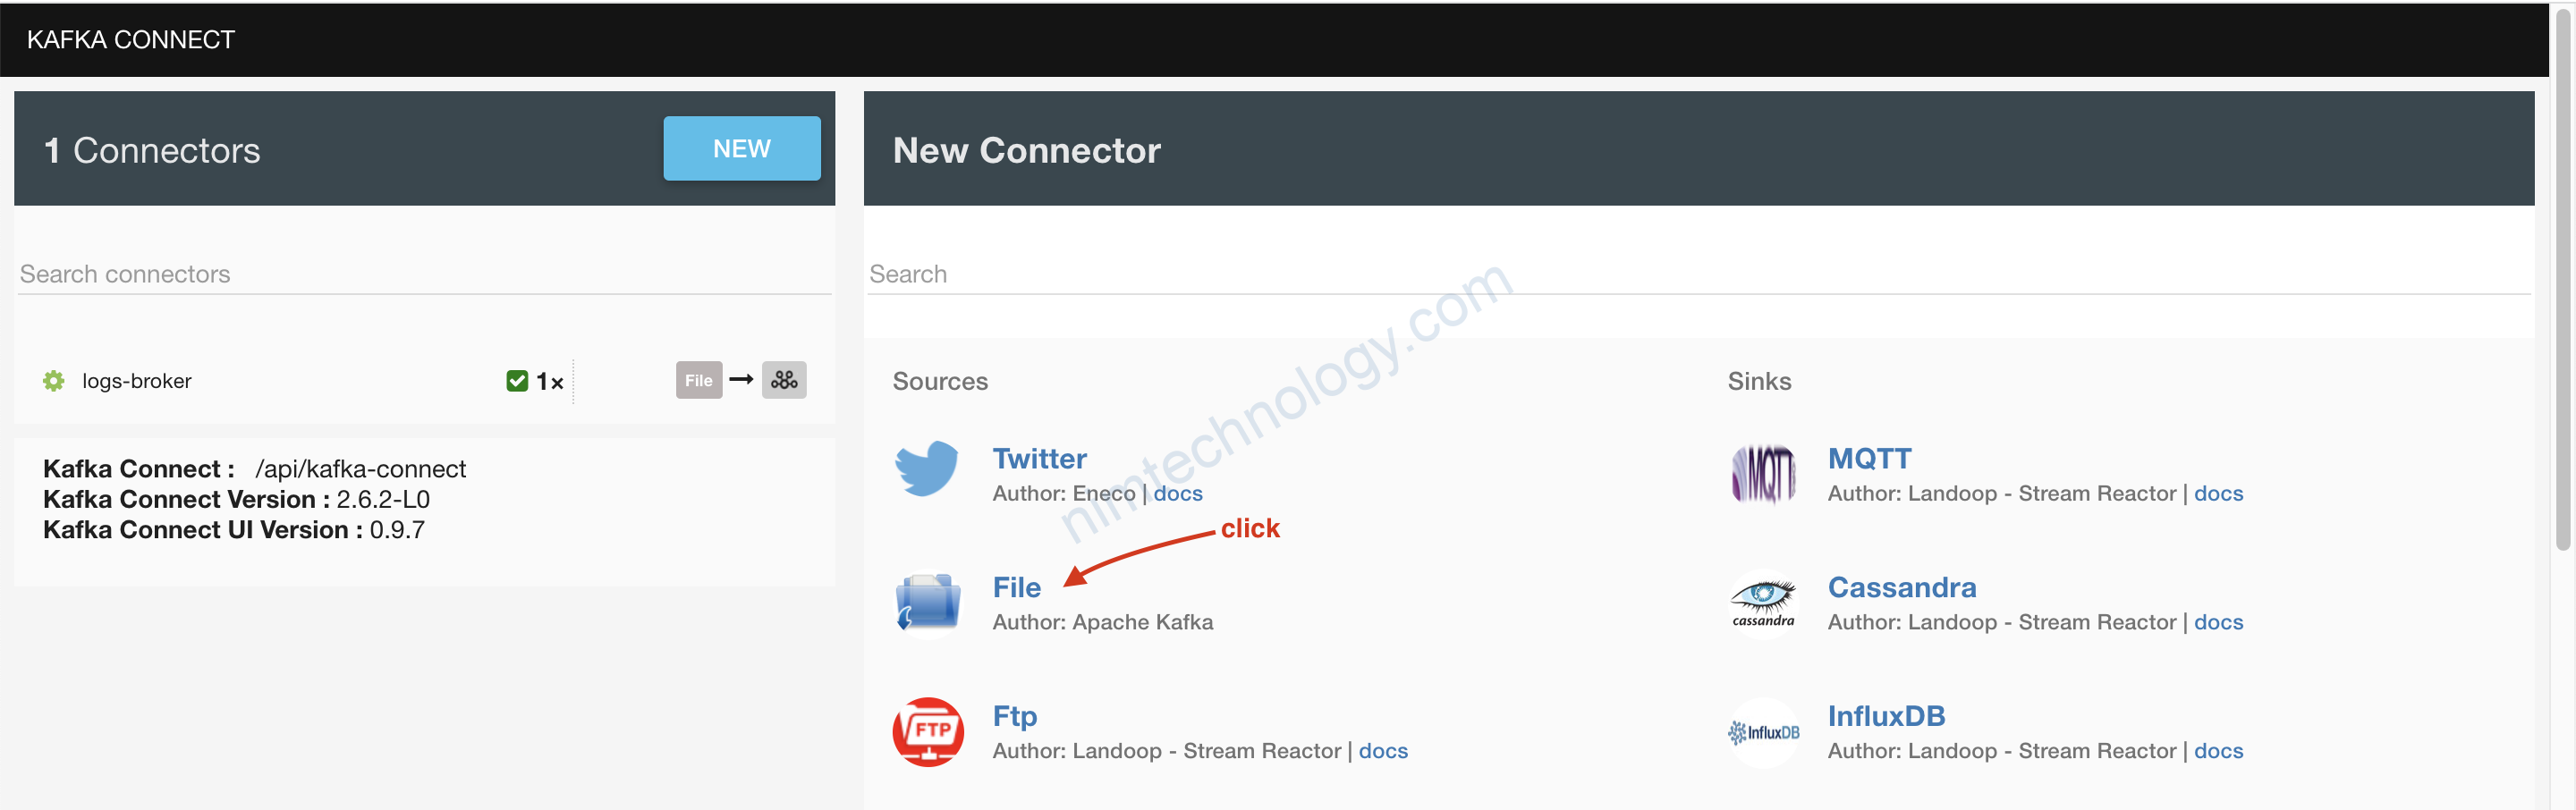
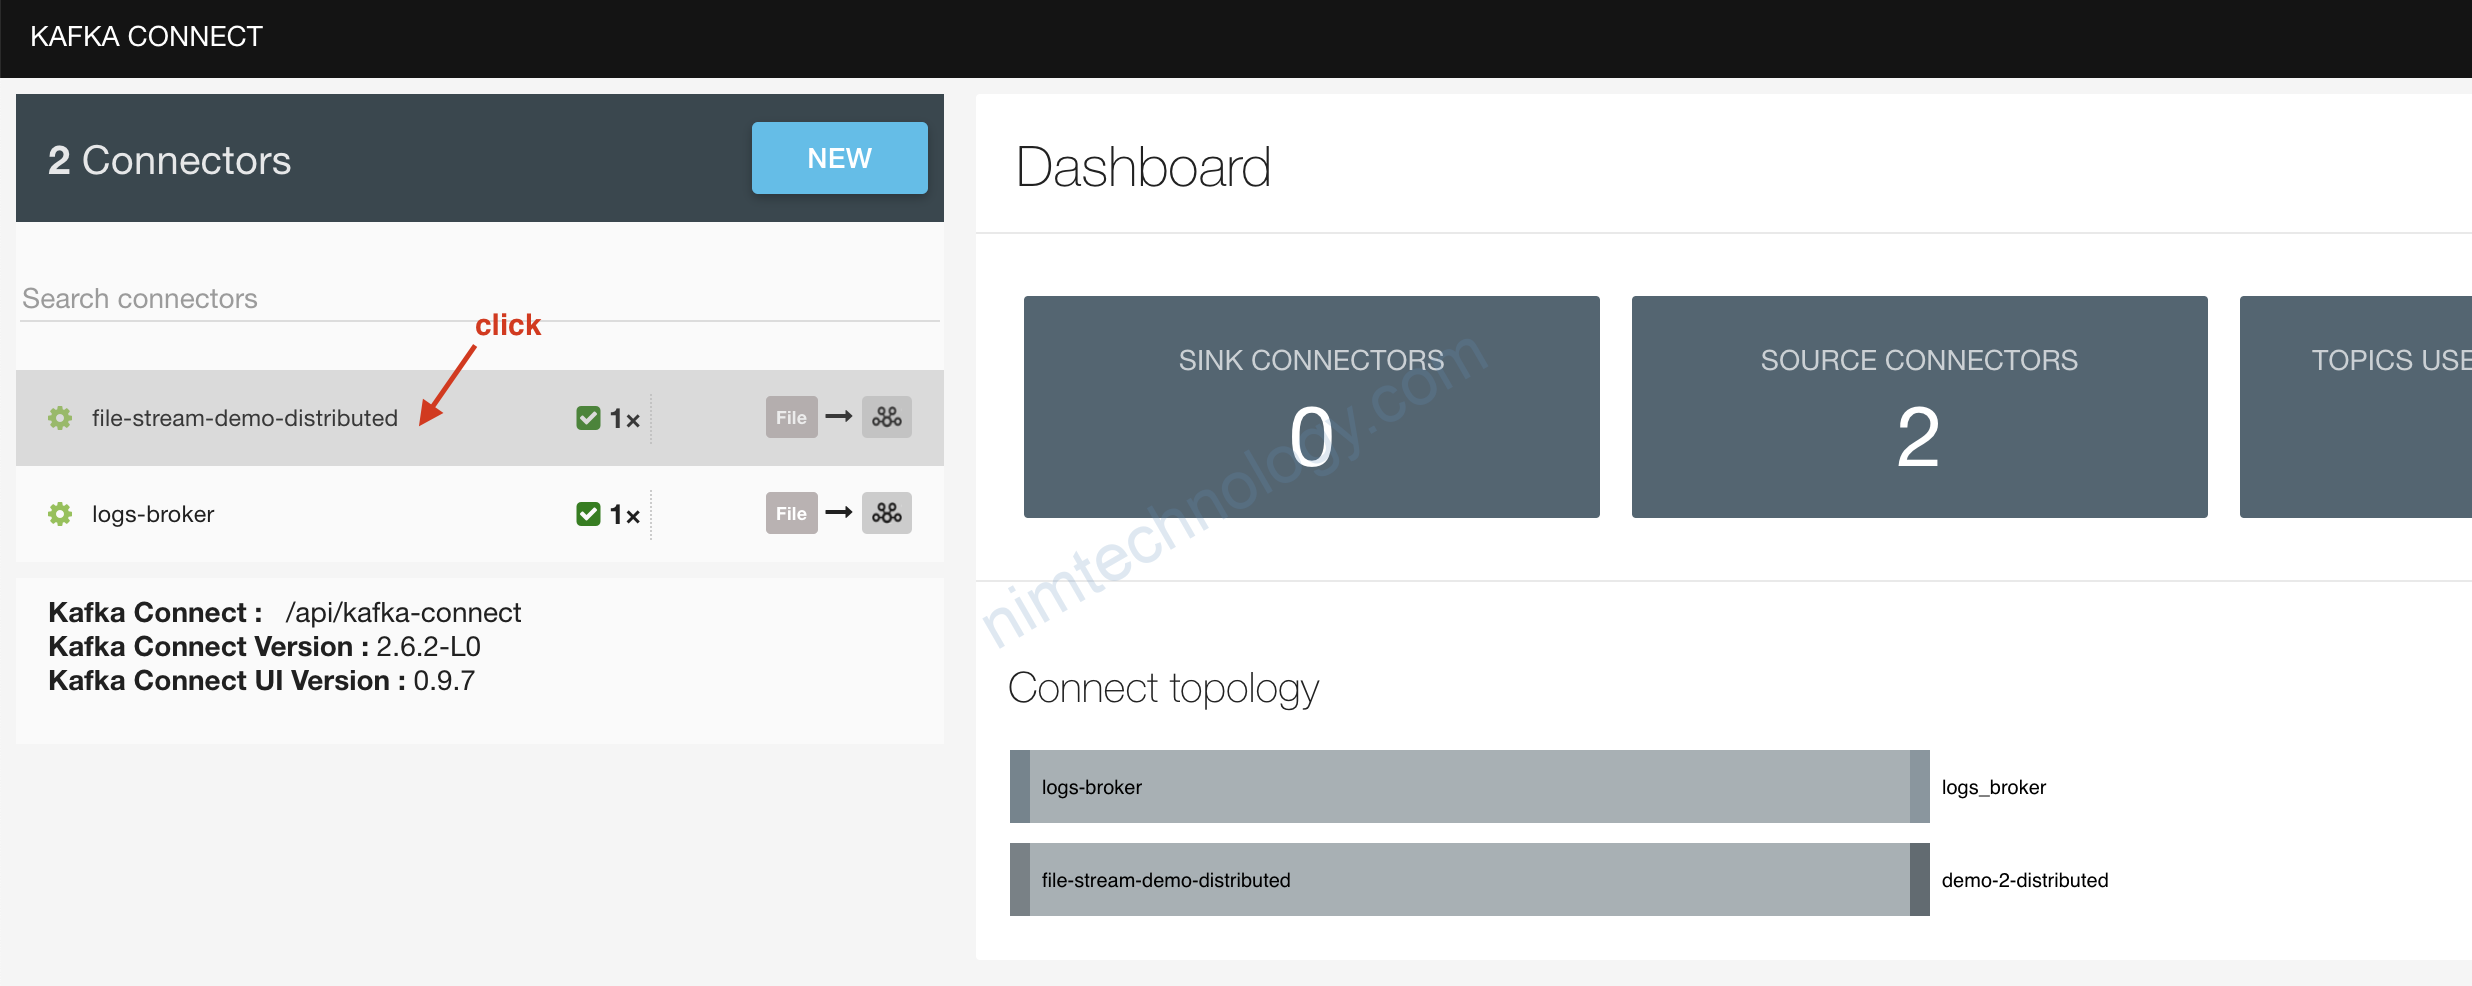
1.2.2.1) create Connectors on UI
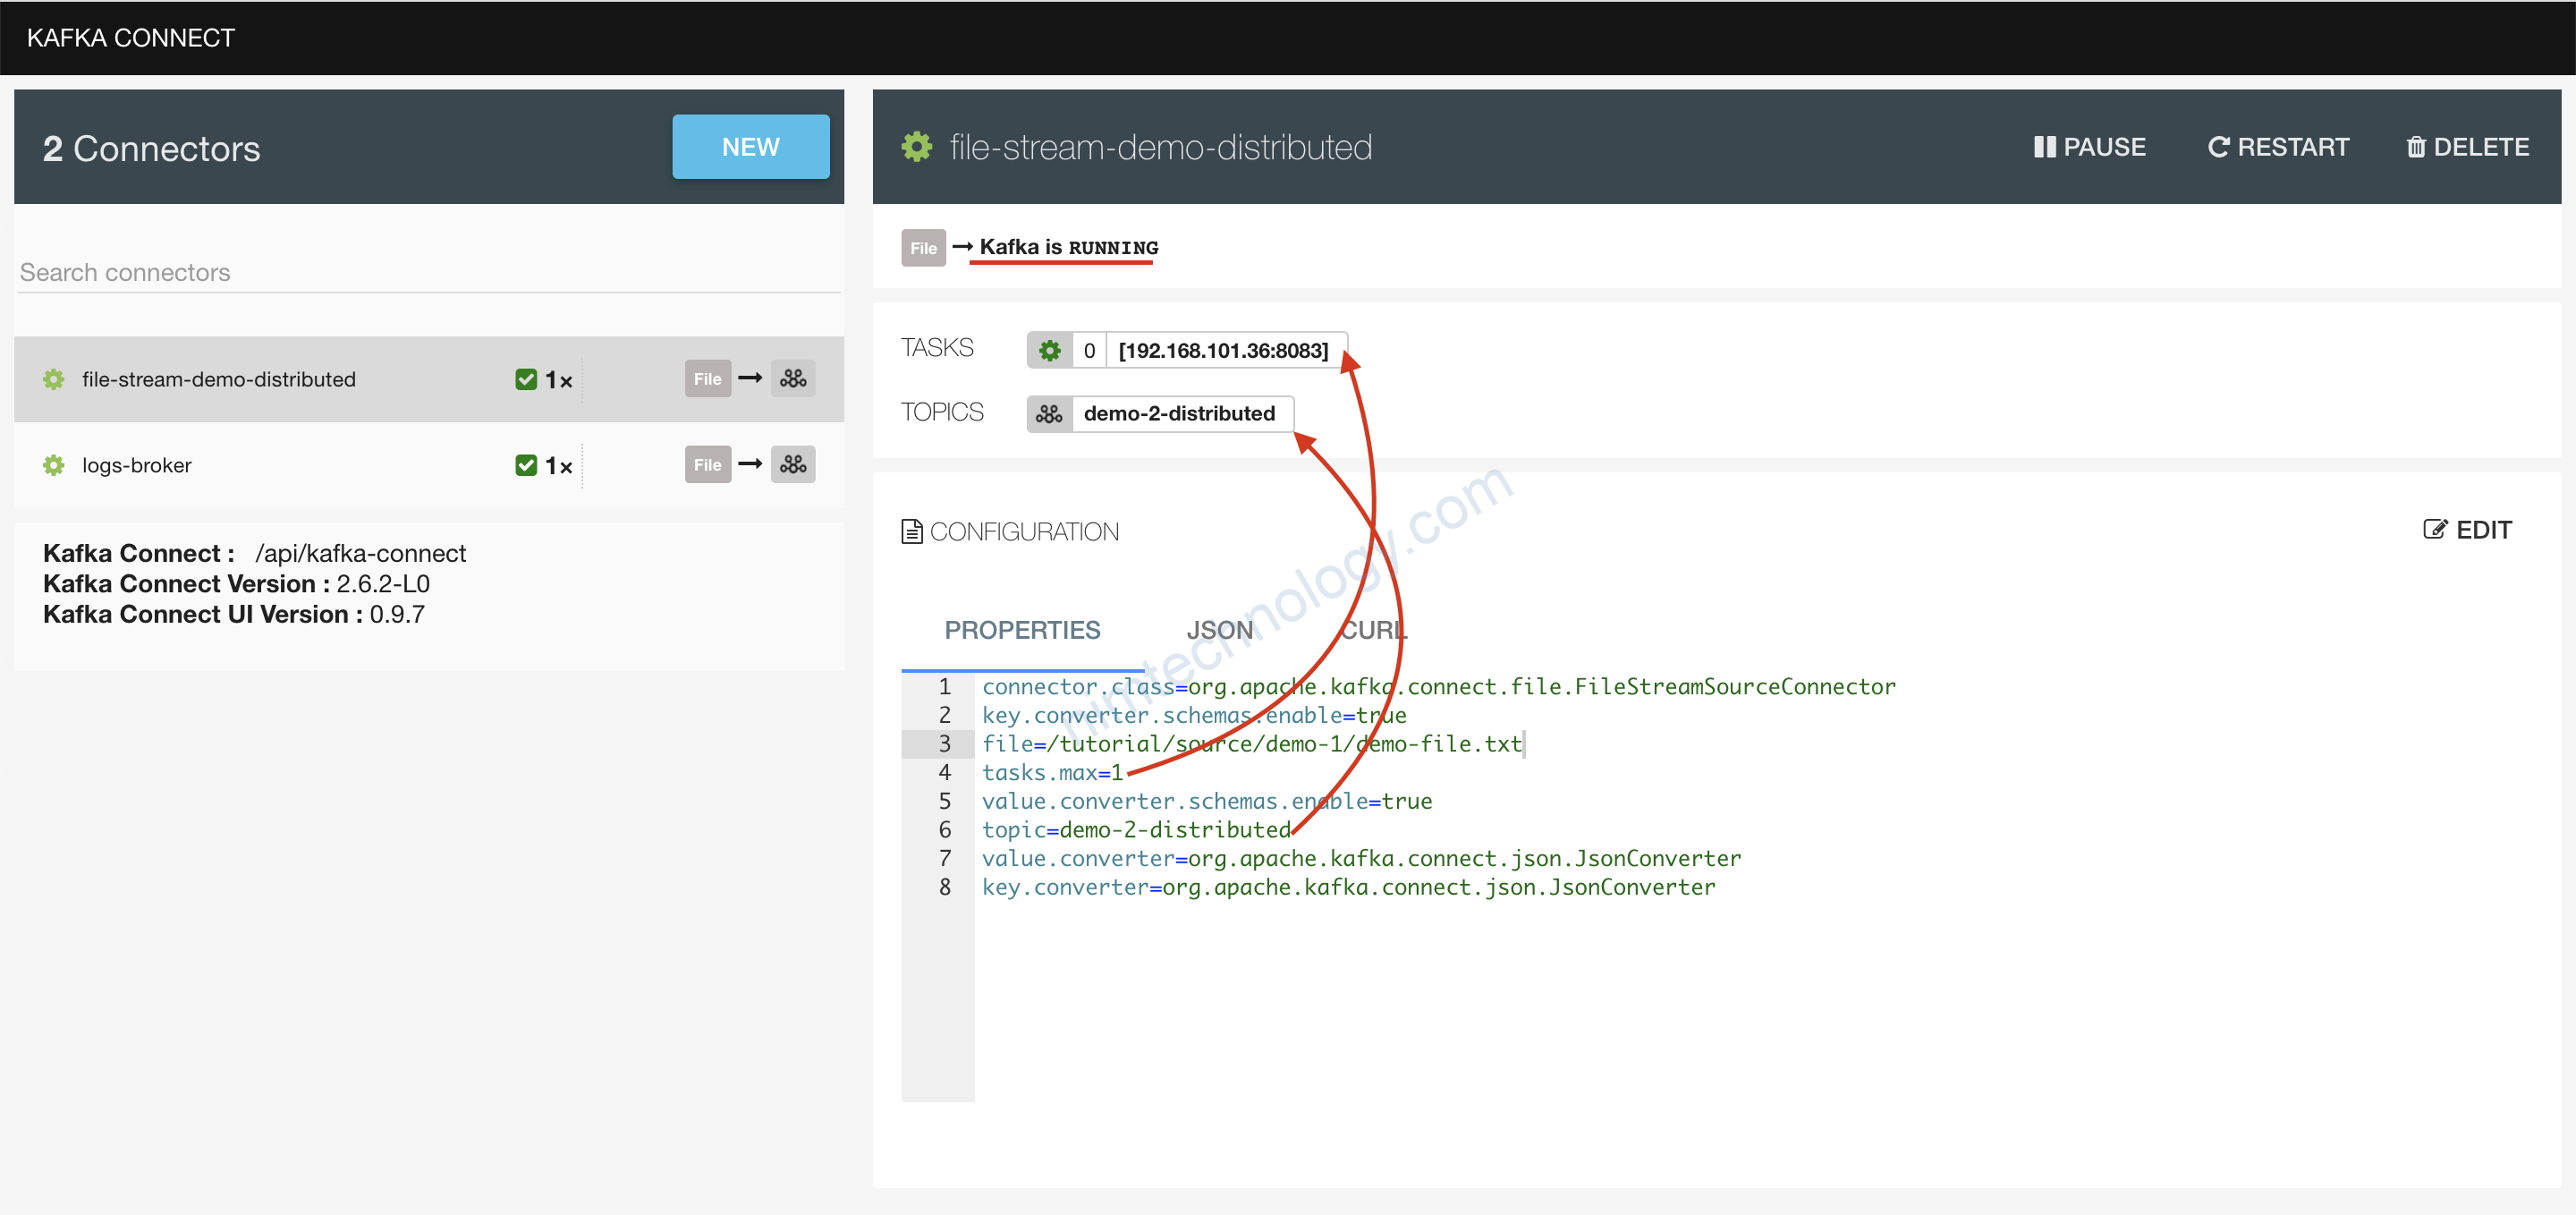
kafka-topics --create --topic demo-2-distributed --partitions 3 --replication-factor 1 --zookeeper 127.0.0.1:2181
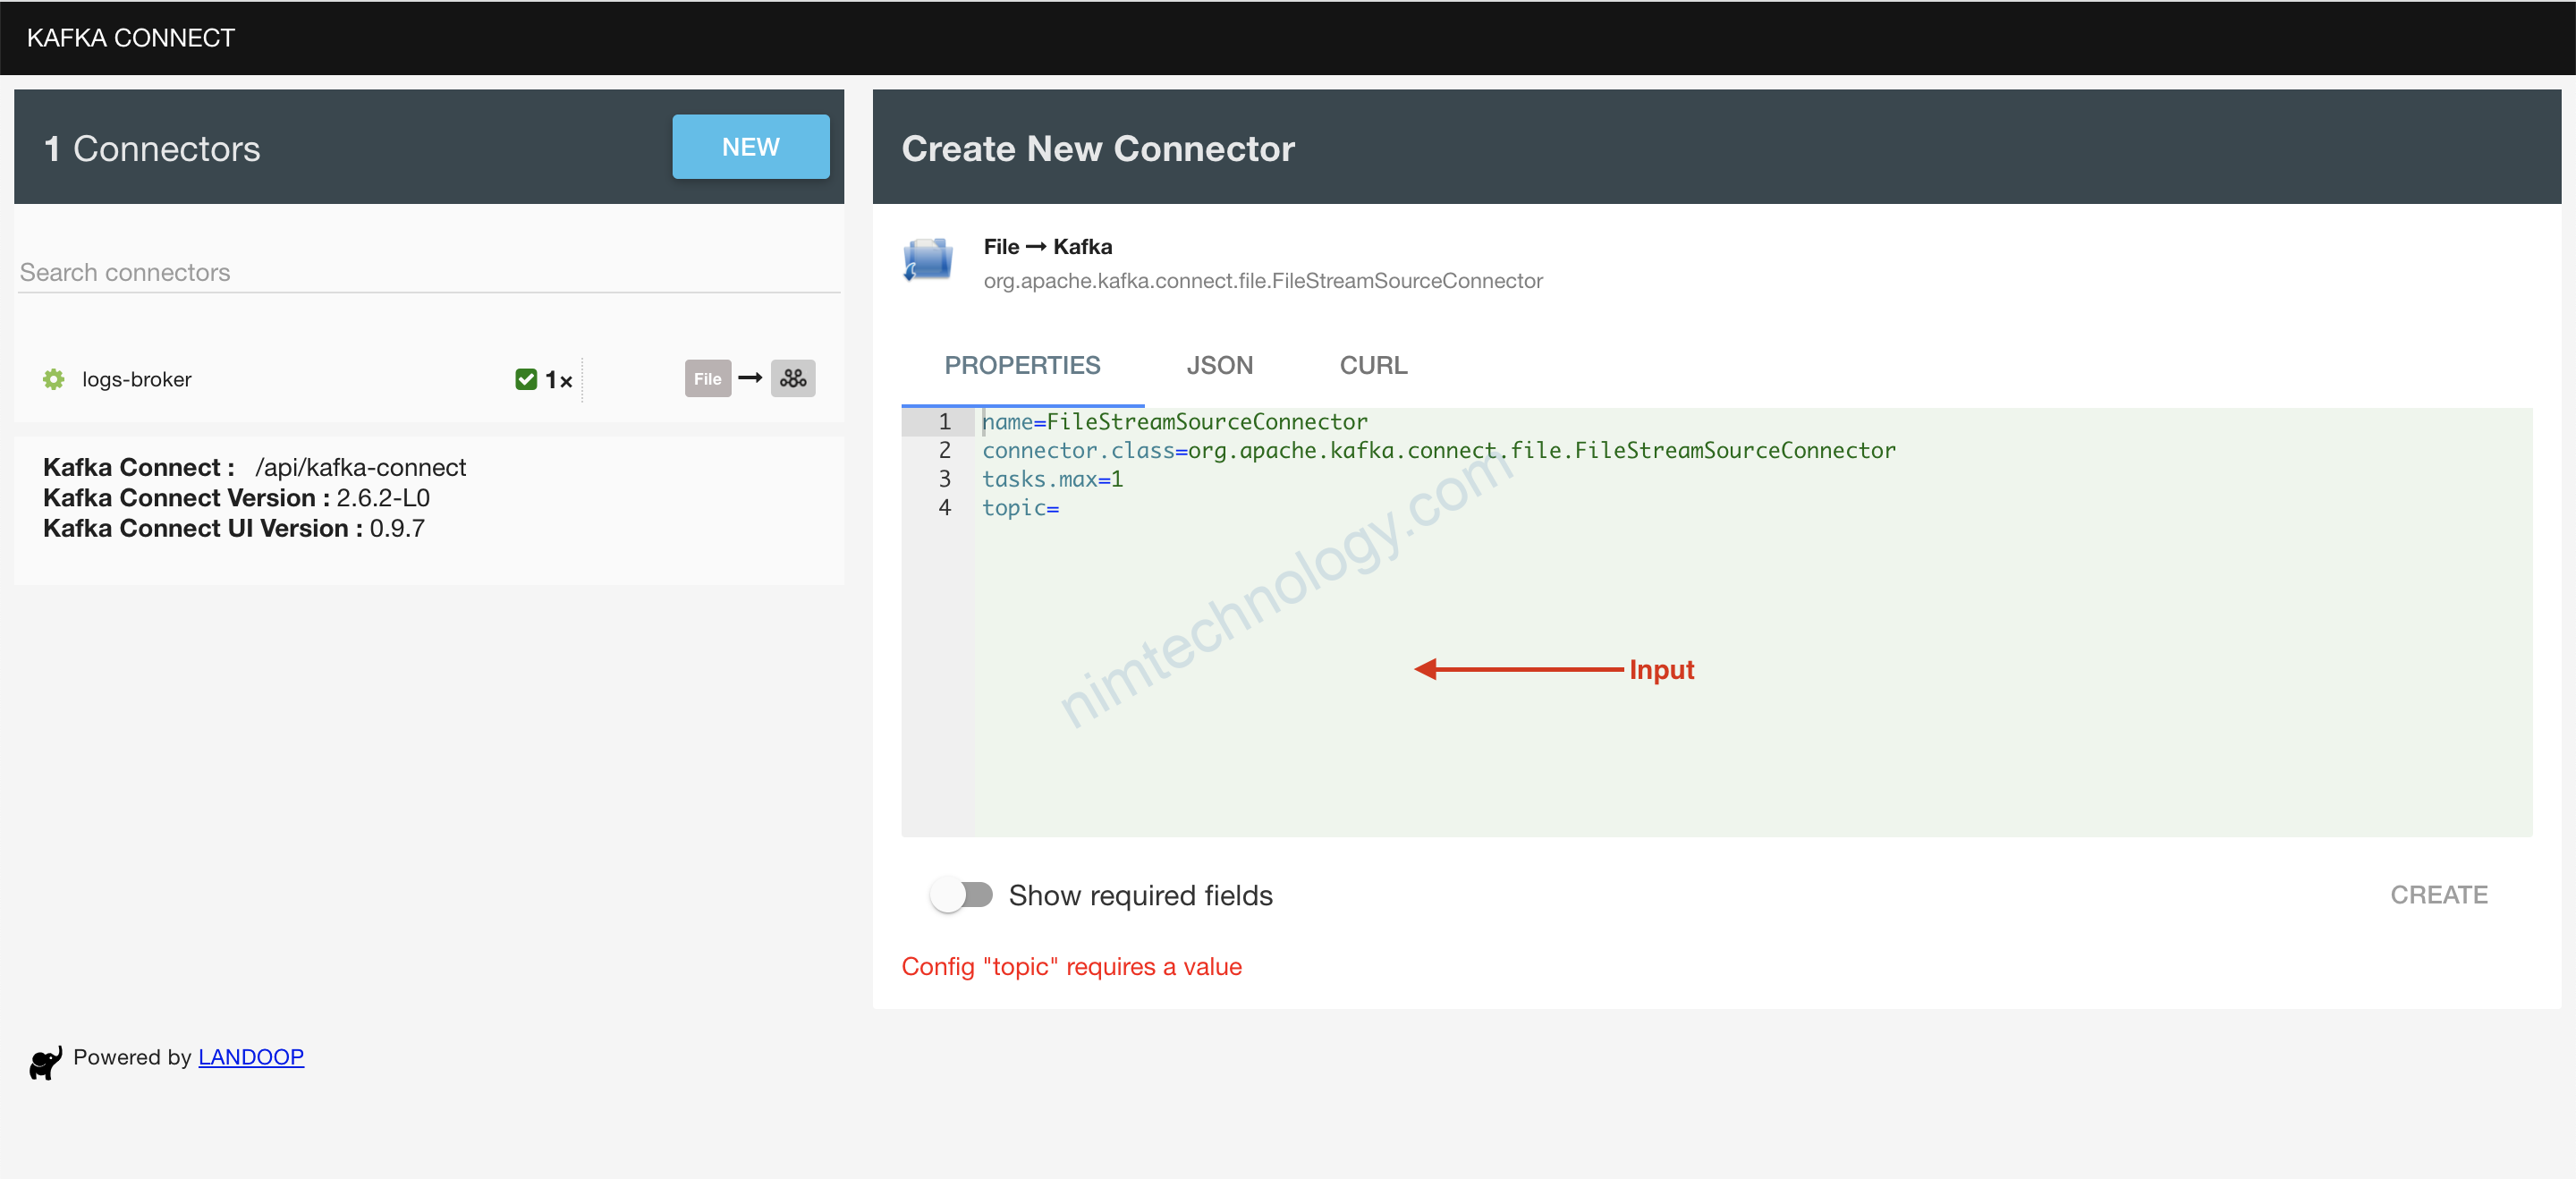
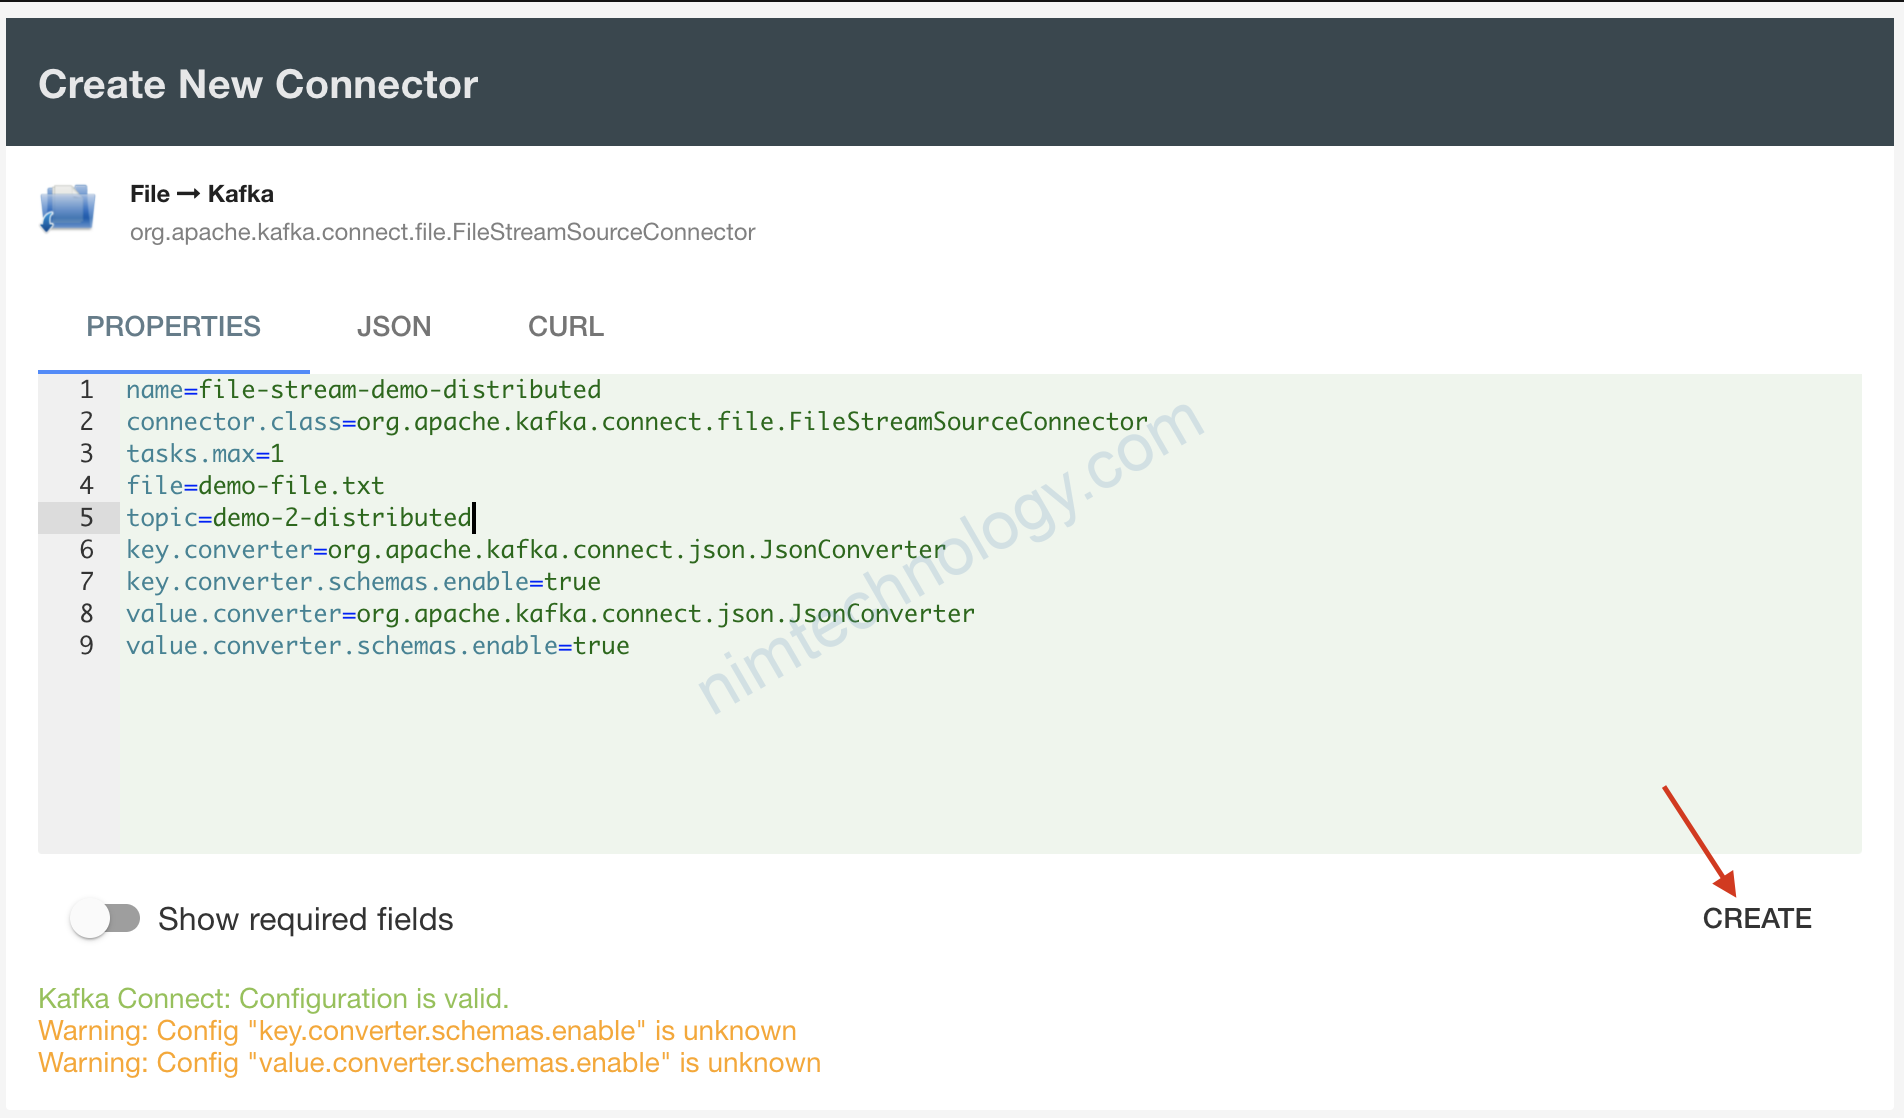
Bạn copy nội dụng bên dưới và paste vào ô trên
# These are standard kafka connect parameters, need for ALL connectors
name=file-stream-demo-distributed
connector.class=org.apache.kafka.connect.file.FileStreamSourceConnector
tasks.max=1
# Parameters can be found here: https://github.com/apache/kafka/blob/trunk/connect/file/src/main/java/org/apache/kafka/connect/file/FileStreamSourceConnector.java
file=/tutorial/source/demo-1/demo-file.txt
topic=demo-2-distributed
# Added configuration for the distributed mode:
key.converter=org.apache.kafka.connect.json.JsonConverter
key.converter.schemas.enable=true
value.converter=org.apache.kafka.connect.json.JsonConverter
value.converter.schemas.enable=true
Giờ chúng ta trở lại với topic trên browser:

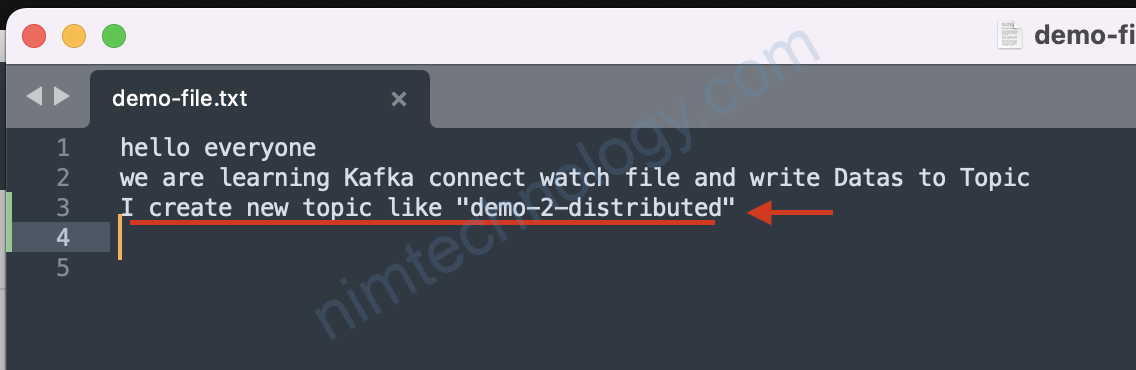
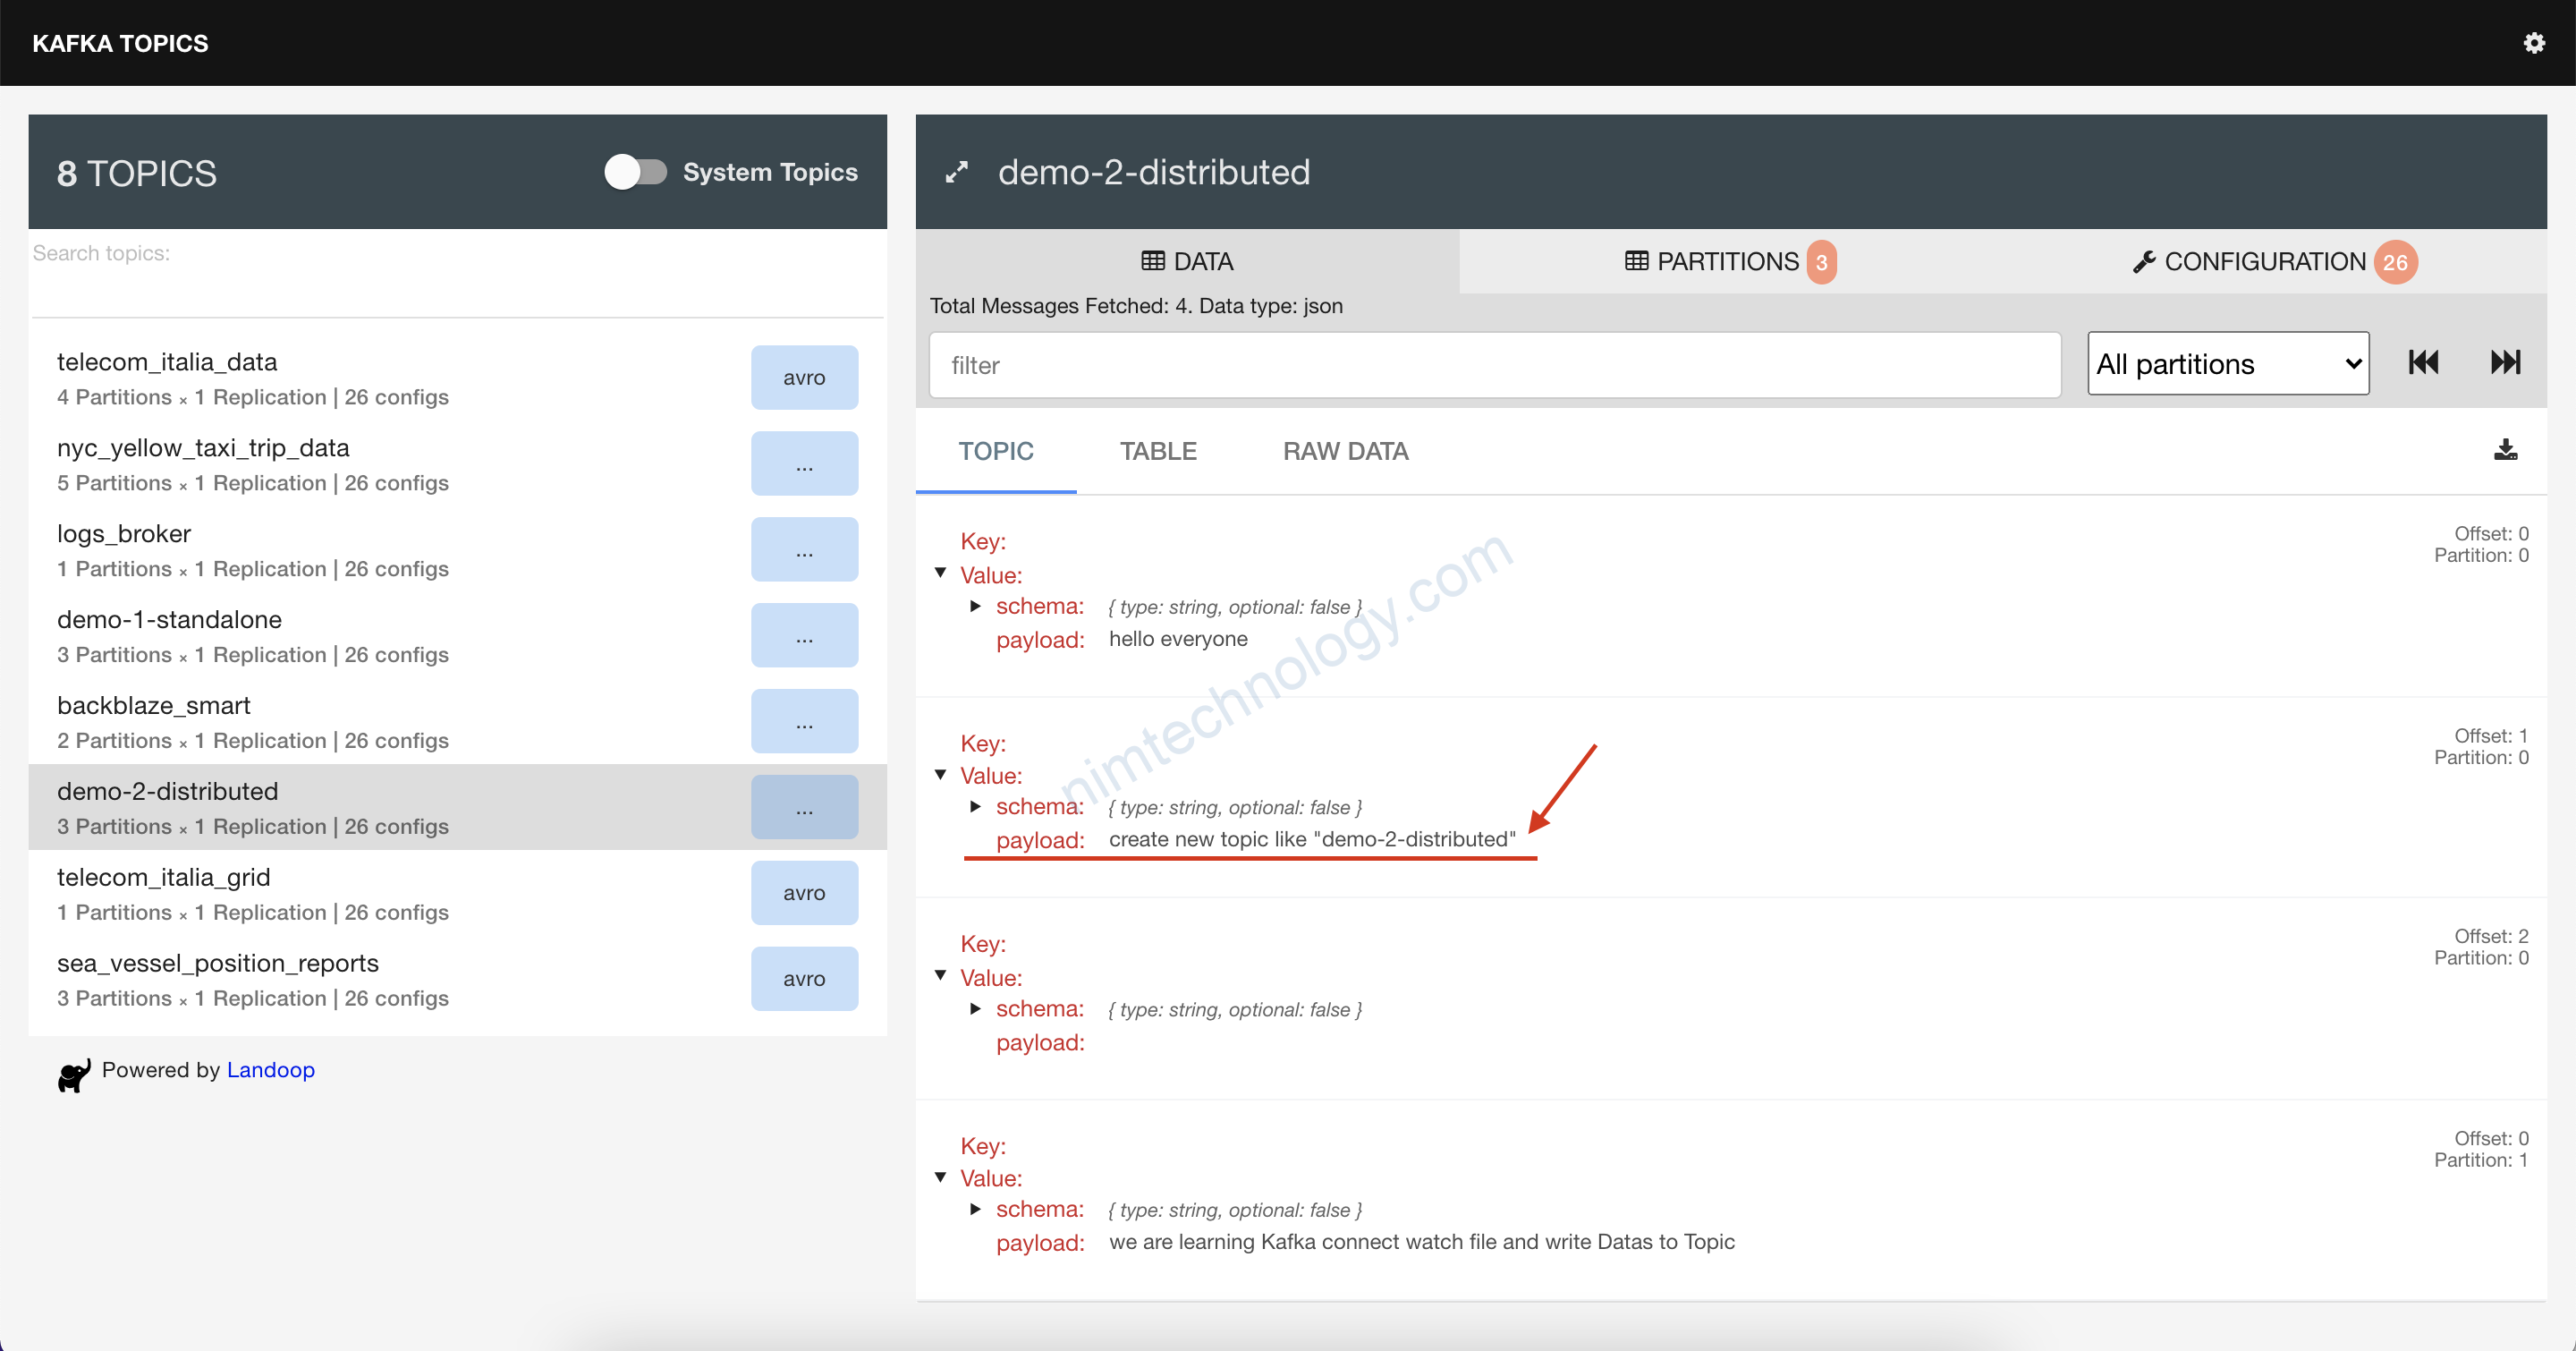
Bạn thấy data đã được convert sang JSON nhờ vào Option này:value.converter.schemas.enable=true
Bạn có thể chạy command sau để dễ tưởng tưởng hơn:
kafka-console-consumer --bootstrap-server localhost:9092 --topic demo-2-distributed --from-beginning