GitLab Community Edition (CE) is a powerful, open-source DevOps platform that enables DevOps teams to collaborate, manage code, and streamline their software development lifecycle. It is a really popular CI/CD with developers, and it is often considered one of the best. Best of all you can install it for free.
This comprehensive guide walks you through installing GitLab CE on Ubuntu 22.04, ensuring a seamless and secure setup.
Why Choose GitLab CE?
GitLab CE isn’t just a code repository; it’s a complete DevOps toolkit. It offers:
- Version Control: Robust Git-based source code management.
- Issue Tracking: Organize and prioritize tasks.
- Continuous Integration/Continuous Deployment (CI/CD): Automate building, testing, and deployment.
- Security Features: Code scanning, vulnerability management, and more.
- And Much More: Explore the full range of GitLab’s capabilities.
Prerequisites
- A fresh installation of Ubuntu 22.04 server.
- A domain name (e.g.,
yourdomain.com) or a valid hostname. - Sudo privileges or root access.
Step 1 – Update Ubuntu
It’s best practice to update the Ubuntu OS.
apt update -y
apt upgrade -y #optional
If you choose to Upgrade your OS, there is a good chance you will need to reboot.
Step 2 – Install GitLab Dependencies
You need to install ca-certs and postfix to get GitLab CE working.
apt install ca-certificates postfix -y
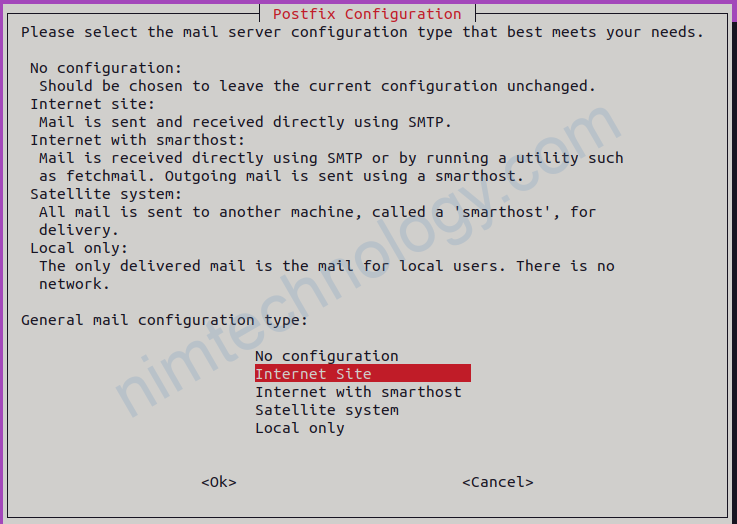
During postfix installation, choose “Internet Site” and enter your server’s domain name

Step 3 – Add the GitLab Repository
Next, you need to configure the GitLab repo. It is not available by default.
curl -sS https://packages.gitlab.com/install/repositories/gitlab/gitlab-ce/script.deb.sh | sudo bash

#Example Output:
Detected operating system as Ubuntu/jammy.
Checking for curl...
Detected curl...
Checking for gpg...
Detected gpg...
Running apt-get update... done.
Installing apt-transport-https... done.
Installing /etc/apt/sources.list.d/gitlab_gitlab-ce.list...done.
Importing packagecloud gpg key... done.
Running apt-get update... done.
The repository is setup! You can now install packages.
Step 4 – Install GitLab CE
You can now install GitLab CE.
apt install gitlab-ce -y

#Example Output:
Reading package lists... Done
Building dependency tree... Done
Reading state information... Done
The following packages were automatically installed and are no longer required:
  libflashrom1 libftdi1-2
Use 'apt autoremove' to remove them.
The following NEW packages will be installed:
  gitlab-ce
0 upgraded, 1 newly installed, 0 to remove and 2 not upgraded.
Need to get 989 MB of archives.
After this operation, 3084 MB of additional disk space will be used.
Get:1 https://packages.gitlab.com/gitlab/gitlab-ce/ubuntu jammy/main amd64 gitlab-ce amd64 17.1.1-ce.0 [989 MB]
Fetched 989 MB in 15s (65.5 MB/s)
Selecting previously unselected package gitlab-ce.
(Reading database ... 110340 files and directories currently installed.)
Preparing to unpack .../gitlab-ce_17.1.1-ce.0_amd64.deb ...
Unpacking gitlab-ce (17.1.1-ce.0) ...
Setting up gitlab-ce (17.1.1-ce.0) ...
It looks like GitLab has not been configured yet; skipping the upgrade script.

       *.                  *.
      ***                 ***
     *****               *****
    .******             *******
    ********            ********
   ,,,,,,,,,***********,,,,,,,,,
  ,,,,,,,,,,,*********,,,,,,,,,,,
  .,,,,,,,,,,,*******,,,,,,,,,,,,
      ,,,,,,,,,*****,,,,,,,,,.
         ,,,,,,,****,,,,,,
            .,,,***,,,,
                ,*,.


     _______ __  __          __
    / ____(_) /_/ /   ____ _/ /_
   / / __/ / __/ /   / __ `/ __ \
  / /_/ / / /_/ /___/ /_/ / /_/ /
  \____/_/\__/_____/\__,_/_.___/


Thank you for installing GitLab!
GitLab was unable to detect a valid hostname for your instance.
Please configure a URL for your GitLab instance by setting `external_url`
configuration in /etc/gitlab/gitlab.rb file.
Then, you can start your GitLab instance by running the following command:
  sudo gitlab-ctl reconfigure

For a comprehensive list of configuration options please see the Omnibus GitLab readme
https://gitlab.com/gitlab-org/omnibus-gitlab/blob/master/README.md

Help us improve the installation experience, let us know how we did with a 1 minute survey:
https://gitlab.fra1.qualtrics.com/jfe/form/SV_6kVqZANThUQ1bZb?installation=omnibus&release=17-1

Scanning processes...
Scanning linux images...

Running kernel seems to be up-to-date.

No services need to be restarted.

No containers need to be restarted.

No user sessions are running outdated binaries.

No VM guests are running outdated hypervisor (qemu) binaries on this host.
Step 5 – Configure GitLab CE
Configure External URL:
Edit the main configuration file:
nano /etc/gitlab/gitlab.rb
Locate the external_url line and replace it with your domain or hostname:
external_url 'http://gitlab.turbonet.uk'
Save and Close
Apply Configuration:
gitlab-ctl reconfigure
Note: the reconfigure can take a few minutes to complete.
Configure Initial Root Password:
Note: GitLab generates a temporary root password; you’ll be prompted to change it upon your first login.
cat /etc/gitlab/initial_root_password

#Example Output:
# WARNING: This value is valid only in the following conditions
#          1. If provided manually (either via `GITLAB_ROOT_PASSWORD` environment variable or via `gitlab_rails['initial_root_password']` setting in `gitlab.rb`, it was provided before database was seeded for the first time (usually, the first reconfigure run).
#          2. Password hasn't been changed manually, either via UI or via command line.
#
#          If the password shown here doesn't work, you must reset the admin password following https://docs.gitlab.com/ee/security/reset_user_password.html#reset-your-root-password.

Password: mysuperstrongpassword=

# NOTE: This file will be automatically deleted in the first reconfigure run after 24 hours.
Save the output; this is your initial root password.
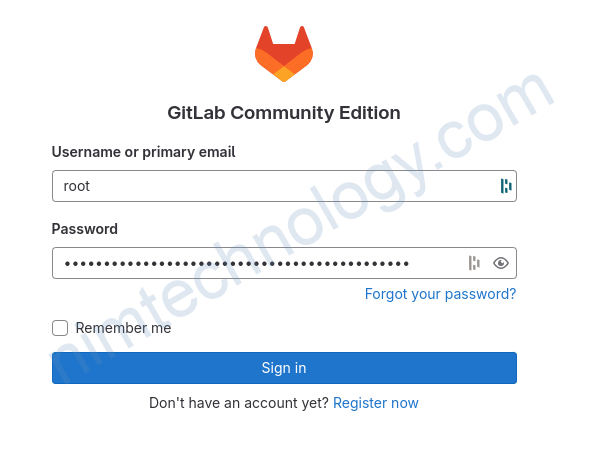
Step 6 – Log Into Your GitLab Server
Make sure you have set your DNS forwarding at your domain name provider. I use Cloudflare and I had to create an A record to my service IP.
Make sure you use the External URL provided earlier.
Deactivate Public Logins
My server is hosted on a public cloud, so in the interest of security, I need to deactivate remote signups.

Now configure your server to only allow signups from your domain

Step 7 – Configure SSL on GitLab
Let’s give the Gitlab Server an SSL certificate.
Edit the main configuration file:
nano /etc/gitlab/gitlab.rb


external_url 'https://gitlab.turbonet.uk'

#Add these Lines:
letsencrypt['enable'] = true
letsencrypt['contact_emails'] = ['myemailaddress@gmail.com']
letsencrypt['auto_renew'] = true
letsencrypt['auto_renew_hour'] = 3
letsencrypt['auto_renew_day_of_month'] = "*/7"
Save and close the file, then reconfigure the GitLab to reload the changes.
Important Note: Remember to update your URL to https!
gitlab-ctl reconfigure
Next, verify the GitLab status using the following command.
gitlab-ctl status
Thats it. I will be back later with details on how to setup pipelines and build your code.