1) traditional FOR in terraform
Trong Terraform, for không được sử dụng như vòng lặp thông thường trong các ngôn ngữ lập trình như Python, Java, hoặc JavaScript. Thay vào đó, for trong Terraform được sử dụng chủ yếu để tạo ra các cấu trúc dữ liệu như danh sách hoặc từ điển từ các cấu trúc dữ liệu khác.
Dưới đây là một số ví dụ về cách sử dụng for trong Terraform:
For để tạo ra danh sách: Ví dụ bạn có một danh sách tên và muốn thêm tiền tố “mr-” vào mỗi tên:
variable "names" {
  default = ["john", "doe", "smith"]
}

locals {
  prefixed_names = [for name in var.names : "mr-${name}"]
}
Kết quả của local.prefixed_names sẽ là ["mr-john", "mr-doe", "mr-smith"].
For để tạo ra từ điển: Ví dụ bạn có một danh sách tên và muốn tạo một từ điển với tên làm khóa và giá trị là tên có tiền tố:
variable "names" {
  default = ["john", "doe", "smith"]
}

locals {
  name_map = {for name in var.names : name => "mr-${name}"}
}
Kết quả của local.name_map sẽ là:
{
  "john" = "mr-john"
  "doe" = "mr-doe"
  "smith" = "mr-smith"
}
For với điều kiện: Bạn cũng có thể sử dụng if kết hợp với for để lọc dữ liệu:
variable "numbers" {
  default = [1, 2, 3, 4, 5, 6]
}

locals {
  even_numbers = [for n in var.numbers : n if n % 2 == 0]
}
Kết quả của local.even_numbers sẽ là [2, 4, 6].
Đây là một biểu thức for được sử dụng trong Terraform để tạo ra một danh sách mới từ một danh sách đã tồn tại (var.numbers).
- [for n in var.numbers : … ]: Điều này nghĩa là “đối với mỗi phần tử
ntrong danh sáchvar.numbers, thực hiện một số hành động”. - … n …: Đây chỉ đơn giản là giá trị mà chúng ta muốn thêm vào danh sách mới. Trong trường hợp này, chúng ta chỉ muốn thêm giá trị hiện tại của
nvào danh sách mới (chúng ta không muốn biến đổi nó bằng cách nào). - … if n % 2 == 0: Đây là phần điều kiện. Nó chỉ thêm giá trị của
nvào danh sách mới nếu giá trị đó thỏa mãn điều kiện là số chẵn (chúng ta kiểm tra điều này bằng cách sử dụng phép toán modulo:n % 2). Nếun % 2trả về 0, điều này có nghĩa lànlà một số chẵn, vì vậy nó sẽ được thêm vào danh sách mới.
Do đó, kết quả của biểu thức này là một danh sách chỉ chứa các số chẵn từ var.numbers.
Ví dụ: Nếu var.numbers là [1, 2, 3, 4, 5, 6], thì even_numbers sẽ trở thành [2, 4, 6].
2) For each in terraform.
The following shows outputting all CIDR blocks for every subnet ID in a VPC.
data "aws_subnets" "example" {
  filter {
    name   = "vpc-id"
    values = [var.vpc_id]
  }
}

data "aws_subnet" "example" {
  for_each = toset(data.aws_subnets.example.ids)
  id       = each.value
}

output "subnet_cidr_blocks" {
  value = [for s in data.aws_subnet.example : s.cidr_block]
}
- First, you use data “aws_subnets” to get all subnet ids on the VPC
- Next, the aws_subnet data source in Terraform is designed to return information about a single subnet. However, Terraform’s for_each construct allows you to use this data source to fetch information for multiple subnets, one at a time, by iterating over a collection of subnet IDs.
When you use the for_each statement with a data source like aws_subnet, Terraform doesn’t change the fundamental behavior of the data source—it still fetches information for one subnet at a time. What for_each does is automate the process of querying each subnet sequentially based on the collection you provide. This approach effectively turns a data source that normally returns a single subnet’s information into a tool for gathering data on multiple subnets in a loop-like manner.
Here’s a simplified explanation of the process:- Define a Collection of Subnet IDs: You start with a collection of subnet IDs, which can be a list or a set. In the example,
toset(locals.all_subnet_ids)converts a list of subnet IDs into a set (to ensure each ID is unique and to eliminate duplicates). - Iterate with
for_each: Thefor_eachstatement takes this set of subnet IDs and iterates over it. For each iteration, it temporarily treats the current subnet ID aseach.value. - Fetch Data for Each Subnet: For every iteration of
for_each, theaws_subnetdata source is configured to fetch data for the subnet ID corresponding toeach.value. Even thoughaws_subnetis designed to fetch data for a single subnet,for_eachmakes it repeat this process for each subnet ID in your collection. - Access Data for Multiple Subnets: After Terraform has iterated over all the subnet IDs, you end up with a collection of
aws_subnetdata source instances, one per subnet ID in your original collection. You can access these individually using their keys (the subnet IDs) or iterate over them to extract specific information, like CIDR blocks.- Here’s an example of how you might access the CIDR block for each subnet afterward:
- Define a Collection of Subnet IDs: You start with a collection of subnet IDs, which can be a list or a set. In the example,
output "subnet_cidrs" { value = { for id, subnet in data.aws_subnet.subnets : id => subnet.cidr_block } }This outputs a map where each key is a subnet ID and each value is the corresponding CIDR block.
3) Dynamic Node Group Configuration for EKS in Terraform
let’s modify the specific part of your Terraform configuration to implement a loop for creating multiple node groups based on a new variable that allows customers to declare the details for any number of node groups. I’ll keep the rest of your configuration as is and focus on updating the section for dynamic node group creation.
First, define a new variable in your Terraform configuration to replace var.extra_node_group. This new variable will be a list of objects, where each object represents a node group configuration:
variable "custom_node_groups" {
  description = "List of custom node group configurations"
  type = list(object({
    name            = string
    platform        = string
    instance_type   = string
    key_name        = string
    desired_size    = number
    max_size        = number
    min_size        = number
    node_labels     = string
    node_taints     = string
    volume_size     = number
    volume_type     = string
    iops            = number
    throughput      = number
  }))
  default = []
}
Now, modify the self_managed_node_groups section within your EKS module configuration to dynamically create node groups based on the new custom_node_groups variable:
self_managed_node_groups = merge(
  {
    # Preserved node groups (linux and windows)
    linux = {
      platform = "linux"
      name = "linux"
      public_ip = false
      instance_type = var.lin_instance_type
      key_name = var.node_host_key_name
      desired_size = var.lin_desired_size
      max_size = var.lin_max_size
      min_size = var.lin_min_size
      ami_id = data.aws_ami.lin_ami.id
      bootstrap_extra_args = chomp(
        <<-EOT
        --kubelet-extra-args '--node-labels=apps=true'
        EOT
      )
      ebs_optimized = true
      block_device_mappings = {
        xvda = {
          device_name = "/dev/xvda"
          ebs = {
            volume_size = 100
            volume_type = "gp3"
            iops = 3000
            throughput = 125
            encrypted = true
            delete_on_termination = true
          }
        }
      }
    },
    windows = {
      platform = "windows"
      name = "windows"
      public_ip = false
      instance_type = var.win_instance_type
      key_name = var.node_host_key_name
      desired_size = var.win_desired_size
      max_size = var.win_max_size
      min_size = var.win_min_size
      ami_id = data.aws_ami.win_ami.id
      enable_bootstrap_user_data = true
      bootstrap_extra_args = chomp(
        <<-EOT
        -KubeletExtraArgs '--node-labels=apps=true'
        EOT
      )
      post_bootstrap_user_data = var.disable_windows_defender ? chomp(
        <<-EOT
        # Add Windows Defender exclusion
        Set-MpPreference -DisableRealtimeMonitoring $true
        EOT
      ) : ""
      ebs_optimized = true
      block_device_mappings = {
        xvda = {
          device_name = "/dev/sda1"
          ebs = {
            volume_size = 100
            volume_type = "gp3"
            iops = 3000
            throughput = 125
            encrypted = true
            delete_on_termination = true
          }
        }
      }
    }
  },
  { for ng in var.custom_node_groups : ng.name => {
      platform = ng.platform
      name = ng.name
      public_ip = false
      instance_type = ng.instance_type
      key_name = ng.key_name
      desired_size = ng.desired_size
      max_size = ng.max_size
      min_size = ng.min_size
      ami_id = ng.platform == "linux" ? data.aws_ami.lin_ami.id : data.aws_ami.win_ami.id
      subnet_ids = local.effective_win_subnet_ids
      bootstrap_extra_args = chomp(
        <<-EOT
        --kubelet-extra-args '--node-labels=${ng.node_labels} --register-with-taints=${ng.node_taints}'
        EOT
      )
      ebs_optimized = true
      block_device_mappings = {
        xvda = {
          device_name = ng.platform == "linux" ? "/dev/xvda" : "/dev/sda1"
          ebs = {
            volume_size = ng.volume_size
            volume_type = ng.volume_type
            iops = ng.iops
            throughput = ng.throughput
            encrypted = true
            delete_on_termination = true
          }
        }
      }
    }
  }
)
With these changes, your Terraform configuration will now support dynamic
creation of multiple node groups based on the custom_node_groups variable. Users can define any number of node groups by specifying their configurations in this variable, and your Terraform code will automatically create the corresponding resources.
Here’s an example value for the custom_node_groups variable that simulates two different node groups, one intended for general application workloads and another optimized for compute-intensive tasks. You would place this example configuration in your Terraform terraform.tfvars file, or pass it directly when running Terraform commands:
custom_node_groups = [
  {
    name          = "app-nodes"
    platform      = "linux"
    instance_type = "t3.large"
    key_name      = "my-key-pair"
    desired_size  = 3
    max_size      = 5
    min_size      = 2
    node_labels   = "type=application,team=dev"
    node_taints   = "specialty=app:NoSchedule"
    volume_size   = 50
    volume_type   = "gp3"
    iops          = 3000
    throughput    = 125
  },
  {
    name          = "compute-nodes"
    platform      = "linux"
    instance_type = "c5.2xlarge"
    key_name      = "my-key-pair"
    desired_size  = 2
    max_size      = 4
    min_size      = 1
    node_labels   = "type=compute,team=data"
    node_taints   = "specialty=compute:NoSchedule"
    volume_size   = 100
    volume_type   = "gp3"
    iops          = 3000
    throughput    = 125
  }
]
In this example:
custom_node_groupsis a list containing two maps, each representing a node group configuration.- The first node group,
app-nodes, is set up witht3.largeinstances, intended for general application workloads. It starts with three nodes (scaling between two and five), uses GP3 volumes with 50 GB size, and has specific labels and taints for scheduling. - The second node group,
compute-nodes, usesc5.2xlargeinstances for compute-intensive tasks. This group starts with two nodes (scaling between one and four), uses larger GP3 volumes with 100 GB size, and also has distinct labels and taints for workload segregation.
This configuration can be adjusted based on your workload requirements, instance preferences, volume needs, and Kubernetes scheduling configurations.
4) Using For Function to create a new list.
variable "eks_private_subnets" {
  description = "List of private subnets for EKS"
  type        = list(string)
}
Đầu tiên cái variable này người dùng sẽ cung cấp cho 1 list Subnets:
Nhiệm vụ của mình trong mỗi Availability Zone ID chỉ lấy ra 1 subnet
Đầu tiên mình dùng data “aws_subnet” kết hợp với for_each = toset(). Nó sẽ lấy từng subet trong list mà bạn cung cấp và thực hiện query để get ra thông tin của từng subnet.
Thay data “aws_subnet” chỉ return thông tin của một subnet. Nhưng sau khi kết hợp với for_each = toset() thì nó merge thông tin của nhiều subnets lại.
data "aws_subnet" "subnets" {
  for_each = toset(var.eks_private_subnets)
  id       = each.value
}
Tiếp đến mình local value kết hợp với for funtion để get ra các thông tin cần thiết từ Mutil Infomation Subnets ở trên:
# Extract the AZ ID for each subnet and group by AZ ID
locals {
  # Map subnet ids to their AZ ids
  subnet_az_ids = { for s in data.aws_subnet.subnets : s.id => s.availability_zone_id }
}
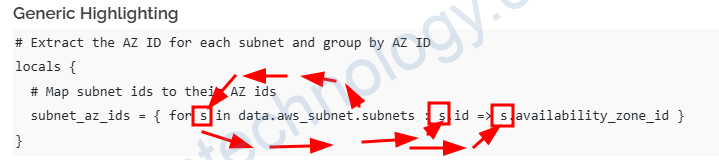
Bạn có thể tưởng tượng là nó sẽ đi qua từng phần từ của Mutil Infomation Subnets và để nó vào s.
Bạn để ý sau dấu 2 chấm ‘:’ chúng ta sẽ tạo ra 1 list mới có key s.id và value s.availability_zone_id
và kết quả của subnet_az_ids sẽ là:
{
  "subnet-1234" = "usw2-az1"
  "subnet-5678" = "usw2-az1"
  "subnet-9101" = "usw2-az2"
  "subnet-1121" = "usw2-az2"
}
Tiếp theo chúng ta cần mổ sẻ code terraform ảo ma sau:
subnets_by_az = {
  for az in distinct(values(local.subnet_az_ids)) : az => [
    for s_id, az_id in local.subnet_az_ids : s_id if az_id == az
  ]
}
Phân tích distinct(values(local.subnet_az_ids))
local.subnet_az_ids
đây chính là cài map mà đang lưu giữ subnet IDs như là keys and Availability Zone IDs như là values
{
  "subnet-1234" = "usw2-az1"
  "subnet-5678" = "usw2-az1"
  "subnet-9101" = "usw2-az2"
  "subnet-1121" = "usw2-az2"
}
values(local.subnet_az_ids) function này extracts (trích xuất) only the values (Availability Zone IDs) từ map trên.
["usw2-az1", "usw2-az1", "usw2-az2", "usw2-az2"]
distinct(…) sẽ remove các duplicates từ list trên và chỉ giữ lại các Availability Zone IDs duy nhất.
Vậy distinct(values(local.subnet_az_ids)) sẽ trả về
["usw2-az1", "usw2-az2"]
for az in distinct(values(local.subnet_az_ids)) : ...:
đây là 1 for loop mà lặp lại qua từng AZ ID. Cho mội AZ nó sẽ quan sát tất các các subet trong AZ đó và Group chúng lại với nhau:
Ví dụ nó sẽ loop:"usw2-az1""usw2-az2"
az => [...]:
đây là phần sau đấu ‘:’ nó định nghĩa giá trị mỗi mục trong kết quả của map. Nó sẽ chỉ định ràng mỗi AZ, chúng ta sẽ tạo 1 list subnets mà thuộc về 1 AZ
Phía bên phải của đấy suy ra (=>) là 1 for loop khách mà đi qua từng subnet trong local.subnet_az_ids và nó lọc ra thông tin mà khớp với AZ ID
Inner for loop:
for s_id, az_id in local.subnet_az_ids : s_id if az_id == az
Cái Loop sẽ đi qua tất các mục trong local.subnet_az_ids map mà nó đang chứa subnet IDs như là keys và AZ IDs như là values
Mỗi subnet (s_id) và nó cũng đang tương ứng với AZ ID (az_id), nếu if az_id == az lọc để đảm bảo rằng chỉ có các subnets trong az hiện tại được in vào list.
For example, khi az == "usw2-az1", the loop sẽ chọn the subnet IDs subnet-1234 and subnet-5678 (which have usw2-az1 as their AZ ID).
kết quả của chúng ta sẽ là:
subnets_by_az = {
  "usw2-az1" = ["subnet-1234", "subnet-5678"]
  "usw2-az2" = ["subnet-9101", "subnet-1121"]
}
Tiếp đến chúng ta có:
unique_az_subnets = flatten([for az, subnets in local.subnets_by_az : [subnets[0]]]) # pick the first subnet from each AZ
local.subnets_by_az:
- Đây là một map nơi key là
AZ IDvà value là một danh sách cácsubnet IDnằm trong AZ đó. - Ví dụ:
local.subnets_by_az = {
  "az-1" = ["subnet-1a", "subnet-1b"],
  "az-2" = ["subnet-2a", "subnet-2b"]
}
for az, subnets in local.subnets_by_az : [subnets[0]]:
- Đây là một vòng lặp
fortrong Terraform. az: đại diện cho AZ ID (ví dụ:az-1,az-2).subnets: danh sách các subnet nằm trong AZ tương ứng.subnets[0]: là subnet đầu tiên trong danh sách của mỗi AZ.[subnets[0]]: subnet đầu tiên này được bao trong một list.- Kết quả trung gian sẽ giống như:
[
  ["subnet-1a"],  # subnet đầu tiên của AZ-1
  ["subnet-2a"]   # subnet đầu tiên của AZ-2
]
flatten(...):
- Hàm
flattentrong Terraform “làm phẳng” danh sách lồng nhau thành một danh sách đơn giản. - Từ:
[["subnet-1a"], ["subnet-2a"]]
Sau khi flatten, kết quả sẽ thành:
["subnet-1a", "subnet-2a"]
Chỗ này thật ra bạn cũng có thể không cần dùng flatten
unique_az_subnets = [for az, subnets in local.subnets_by_az : subnets[0]]
Có, bạn hoàn toàn có thể sử dụng cách viết đơn giản hơn như sau:
unique_az_subnets = [for az, subnets in local.subnets_by_az : subnets[0]]
Tại sao cách này hoạt động?
for az, subnets in local.subnets_by_az : subnets[0]:- Vẫn lặp qua từng phần tử trong
local.subnets_by_az. subnets[0]: Chọn phần tử đầu tiên của danh sách subnet trong AZ.- Kết quả trả về sẽ là một danh sách các subnet đầu tiên từ mỗi AZ.
- Vẫn lặp qua từng phần tử trong
Kết quả giống nhau
Cả hai cách viết đều sẽ cho kết quả tương tự nhau. Ví dụ:
Nếu local.subnets_by_az như sau:
local.subnets_by_az = {
  "az-1" = ["subnet-1a", "subnet-1b"],
  "az-2" = ["subnet-2a", "subnet-2b"]
}
- Cách dùng
flatten:unique_az_subnets = flatten([for az, subnets in local.subnets_by_az : [subnets[0]]])Kết quả:["subnet-1a", "subnet-2a"] - Cách viết đơn giản không cần
flatten:unique_az_subnets = [for az, subnets in local.subnets_by_az : subnets[0]]Kết quả cũng là:["subnet-1a", "subnet-2a"]
Kết luận
Cách viết không cần flatten sẽ ngắn gọn hơn và dễ đọc hơn, đồng thời không ảnh hưởng gì đến kết quả. Vì vậy, nếu danh sách kết quả không bị lồng nhau, bạn nên sử dụng:
unique_az_subnets = [for az, subnets in local.subnets_by_az : subnets[0]]