1) Create VPC from Console
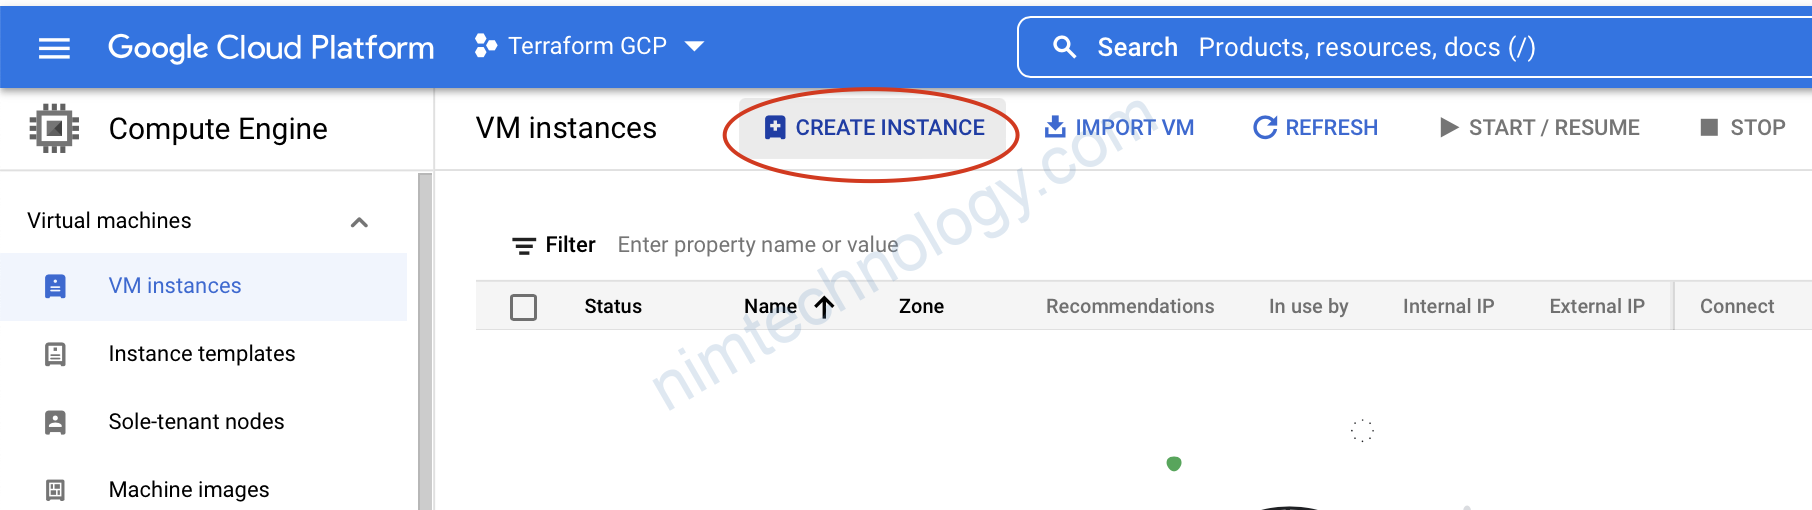
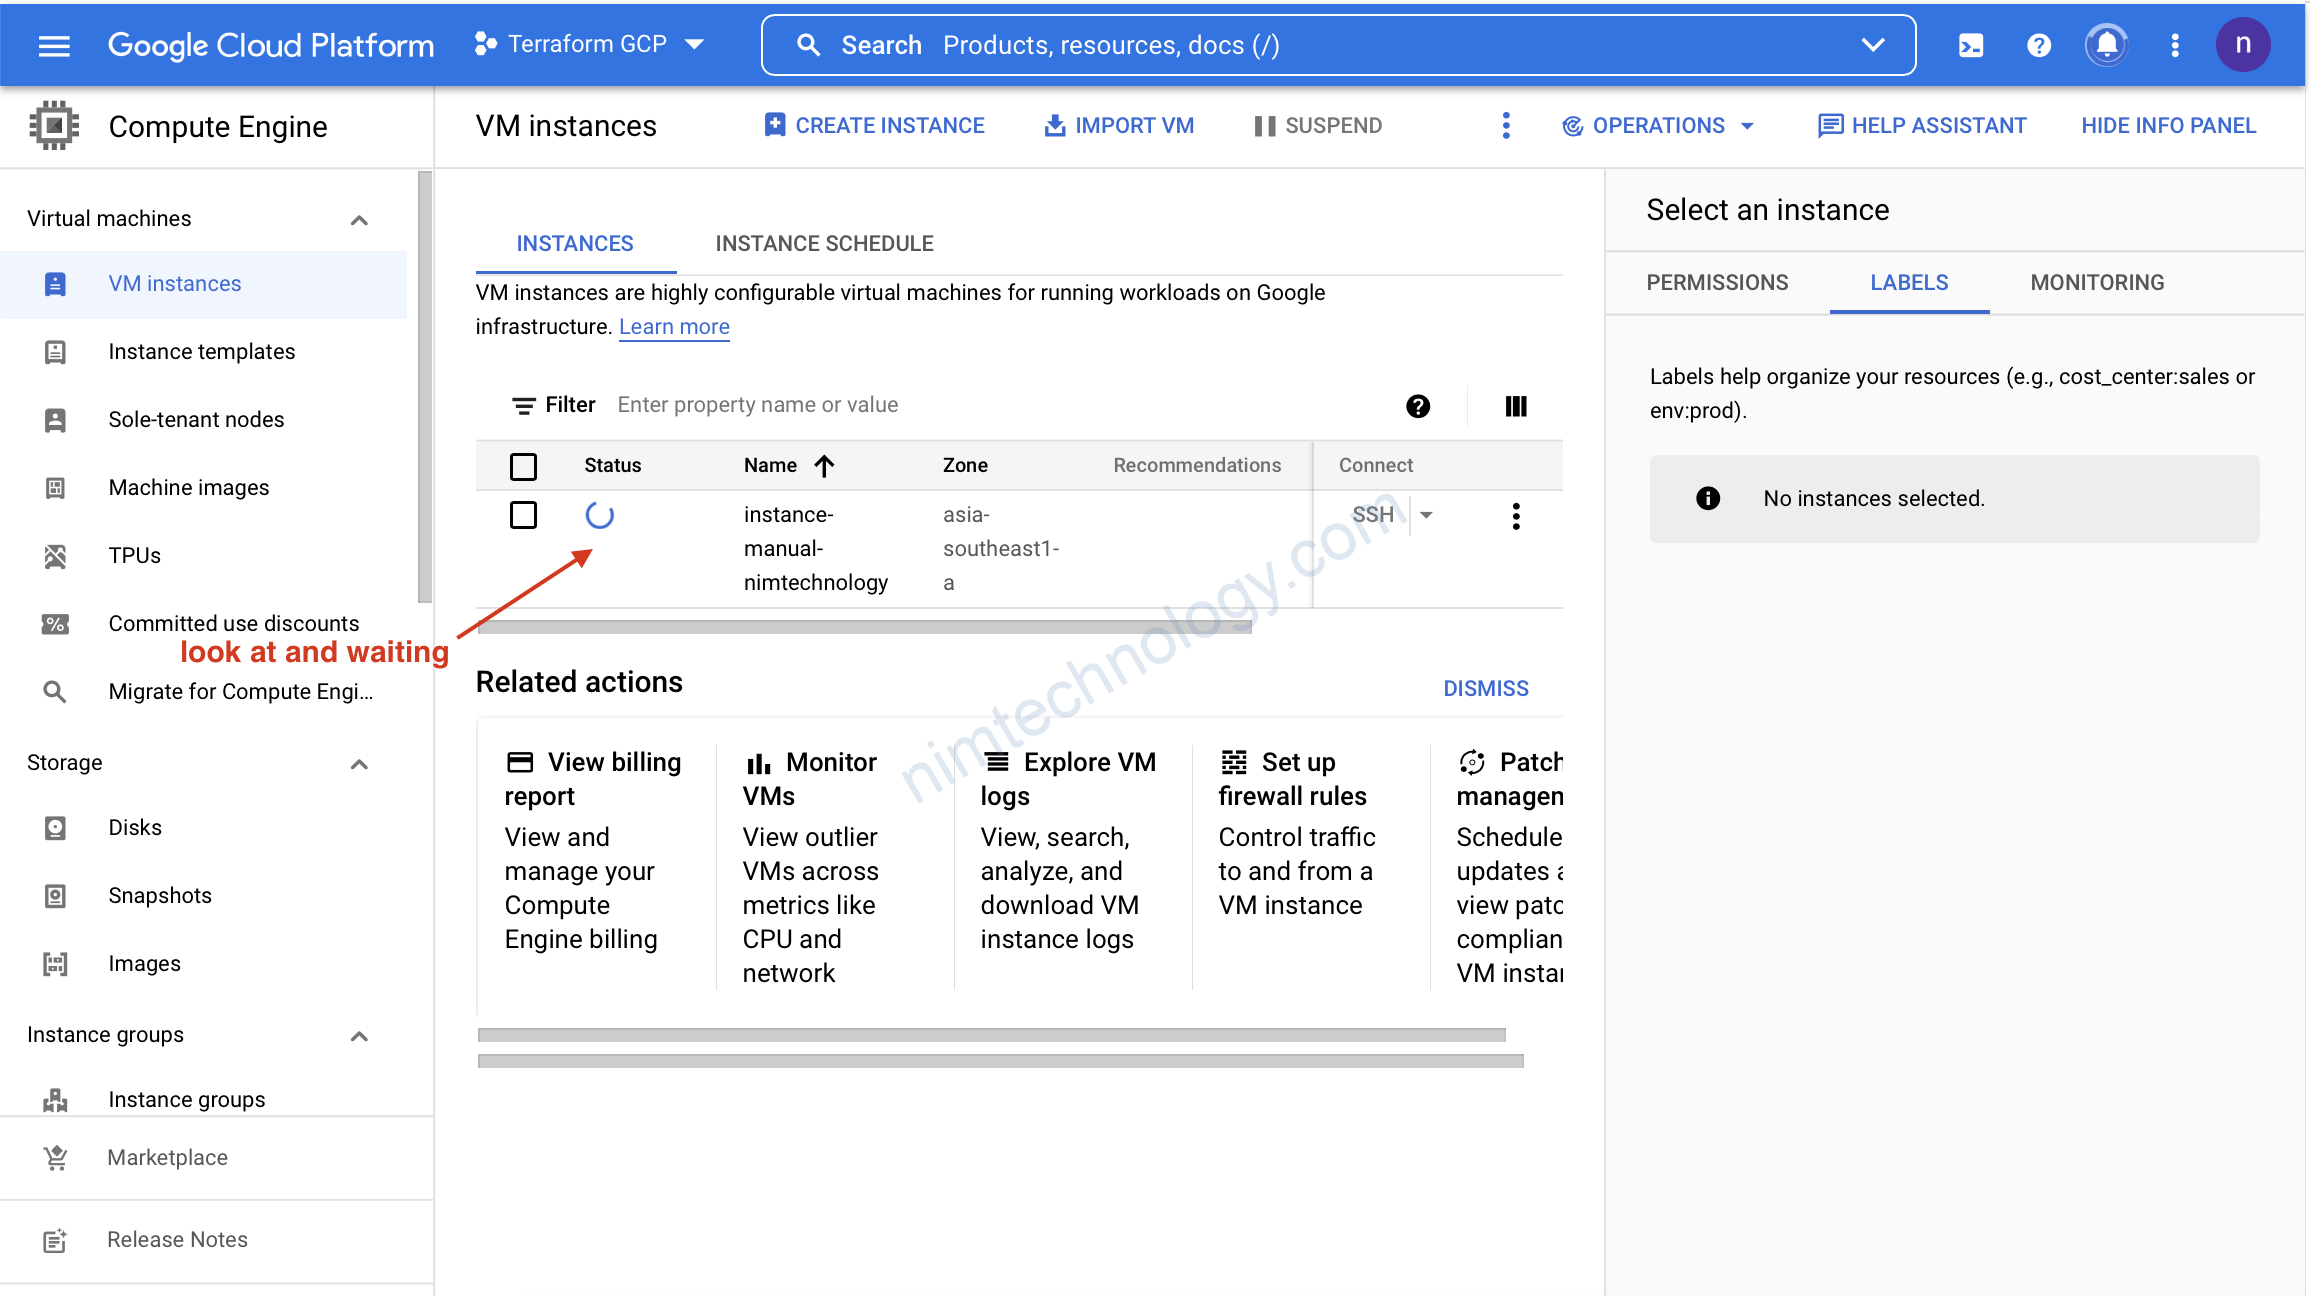
Giờ chúng ta tạo VM trên cloud.
ghê hem!!!!

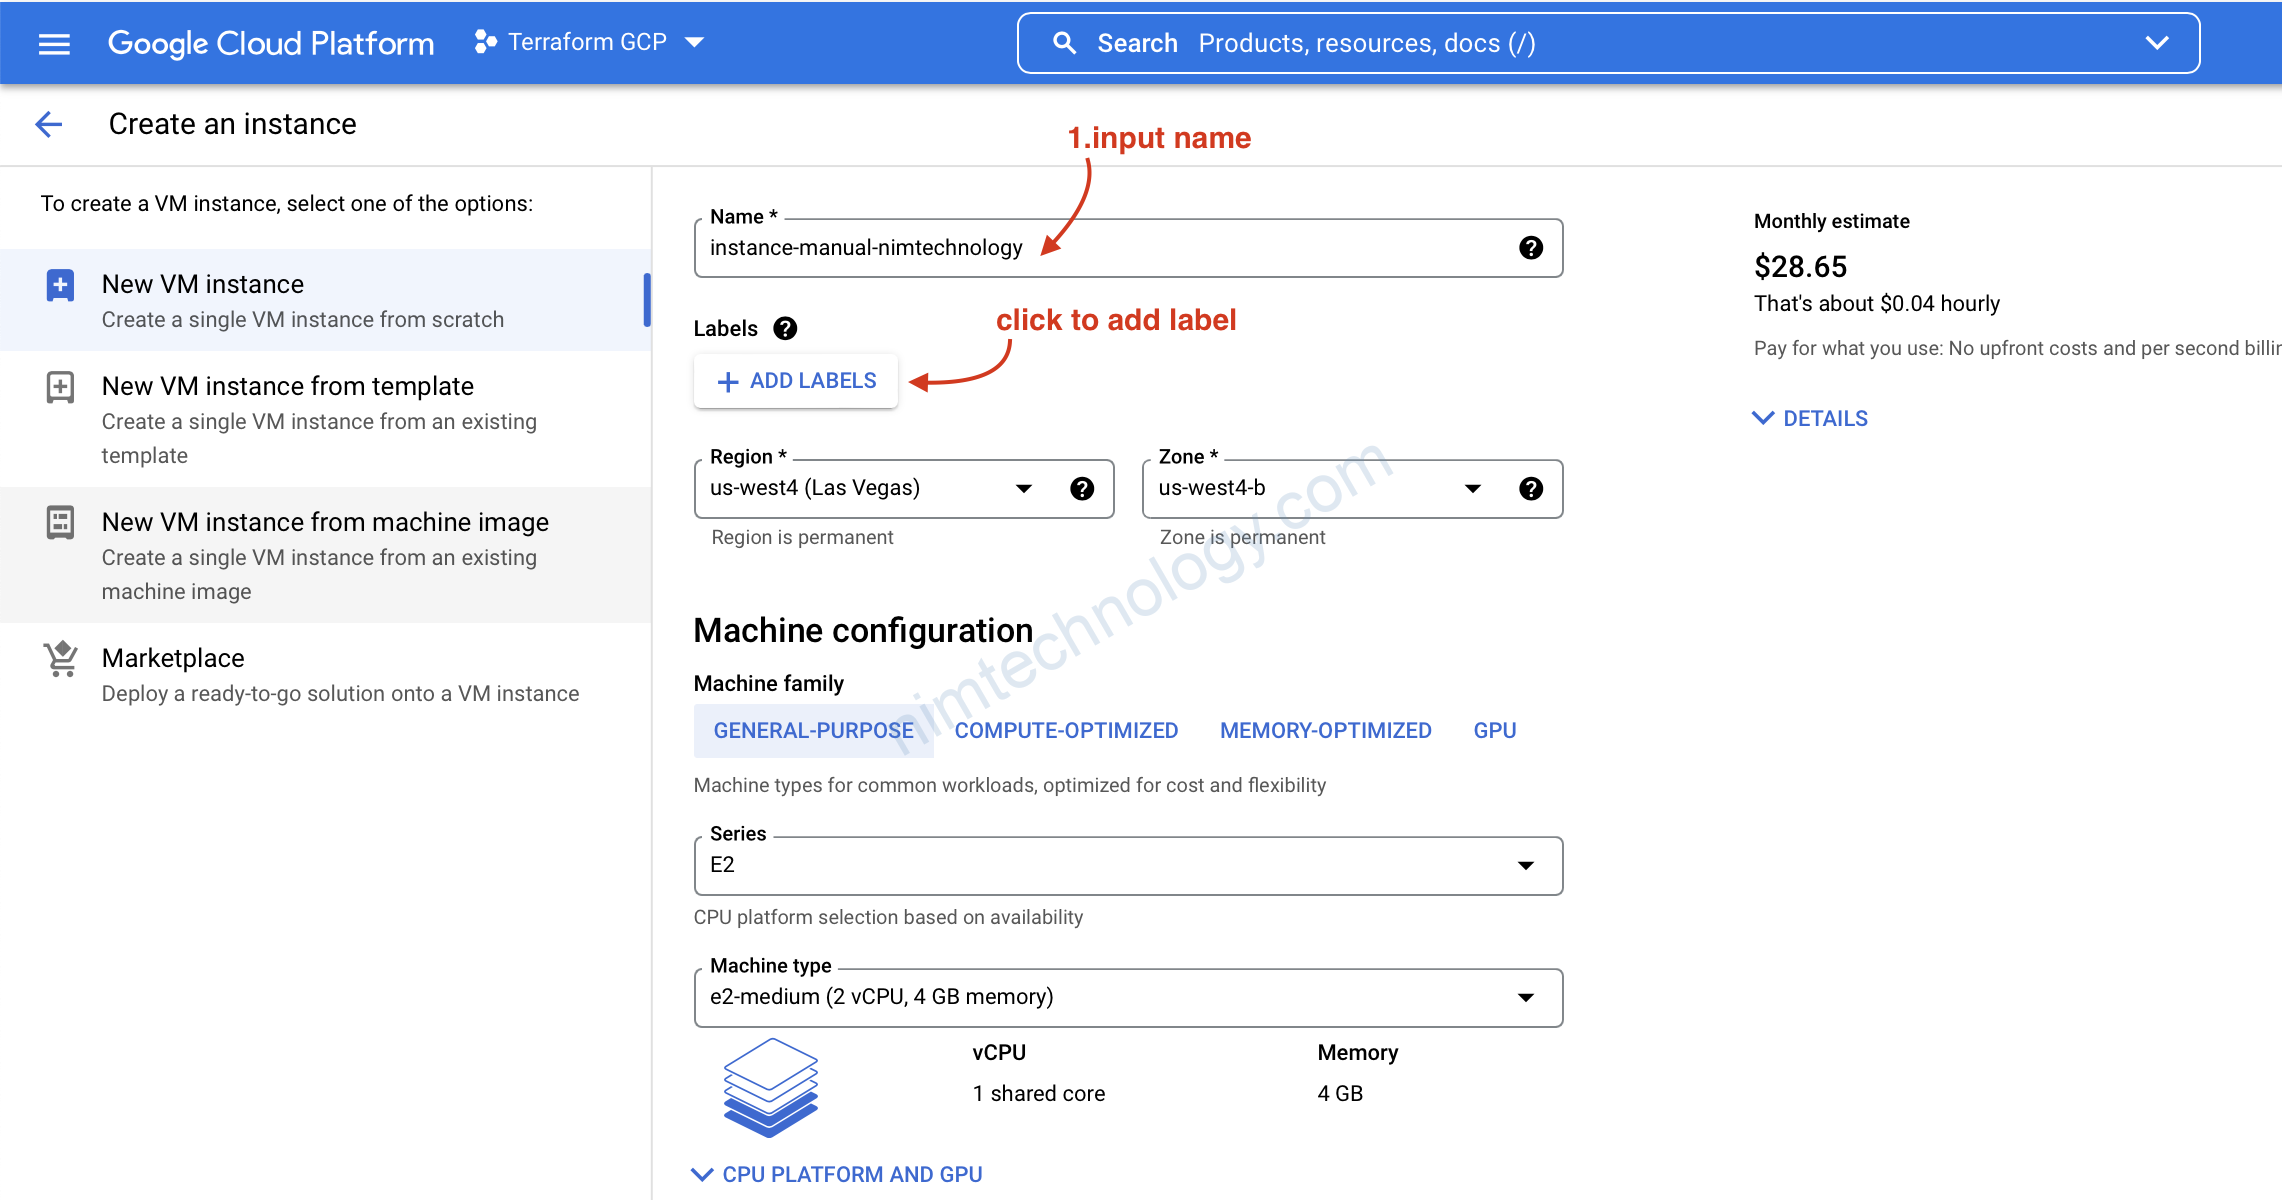
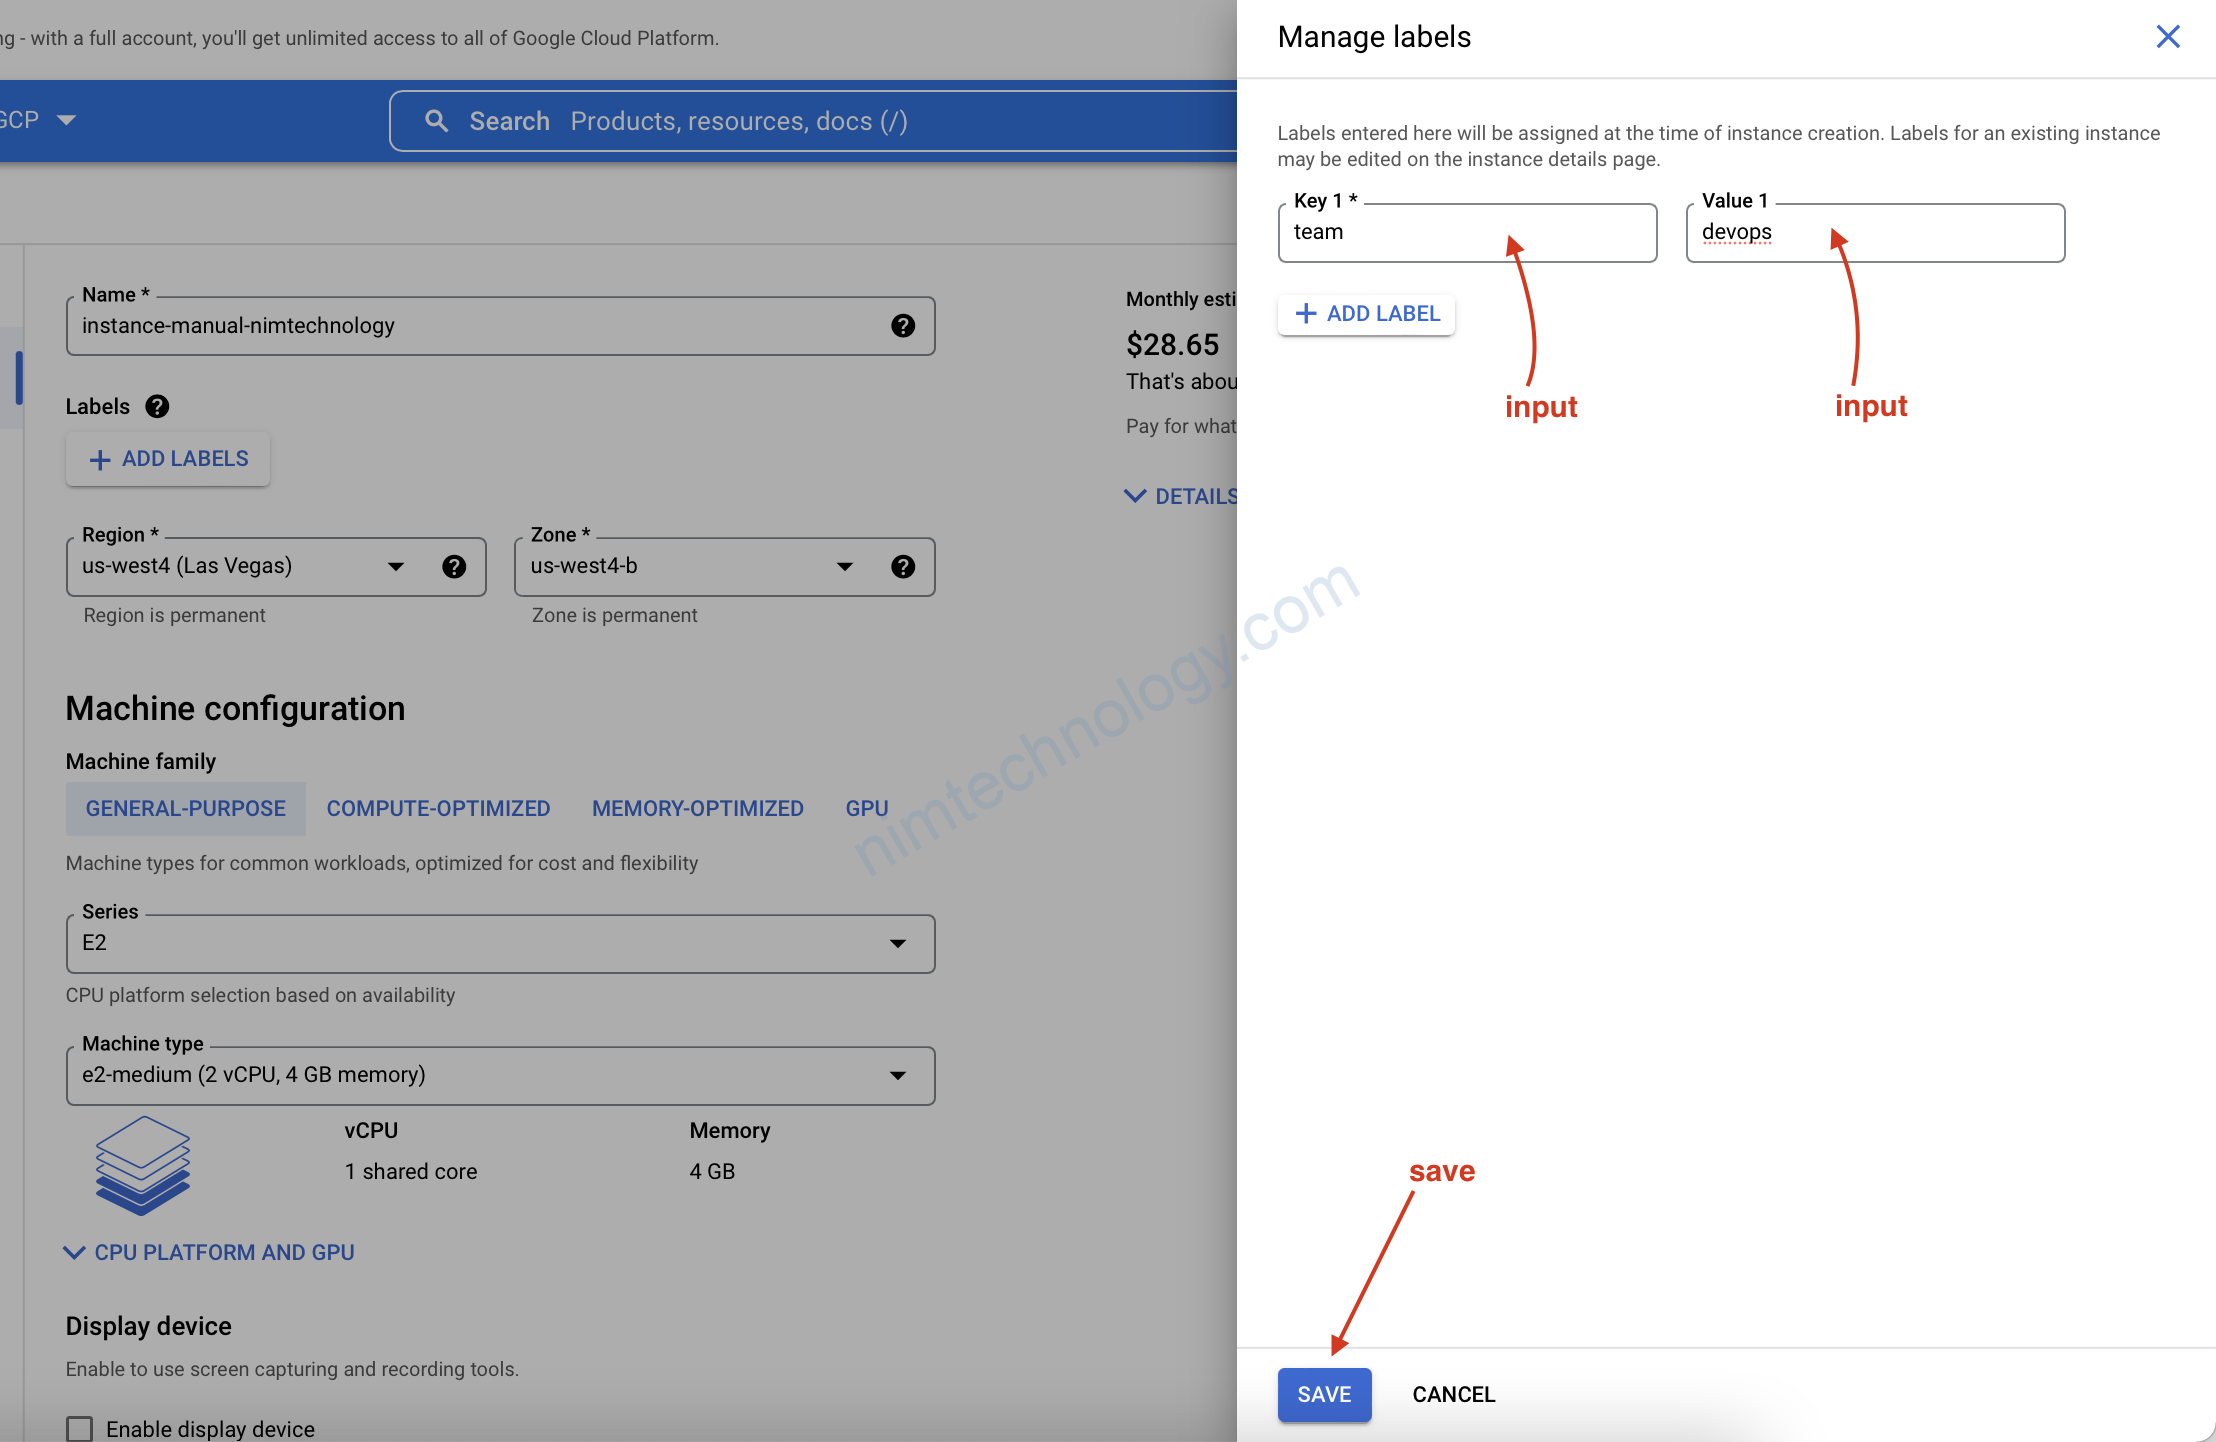
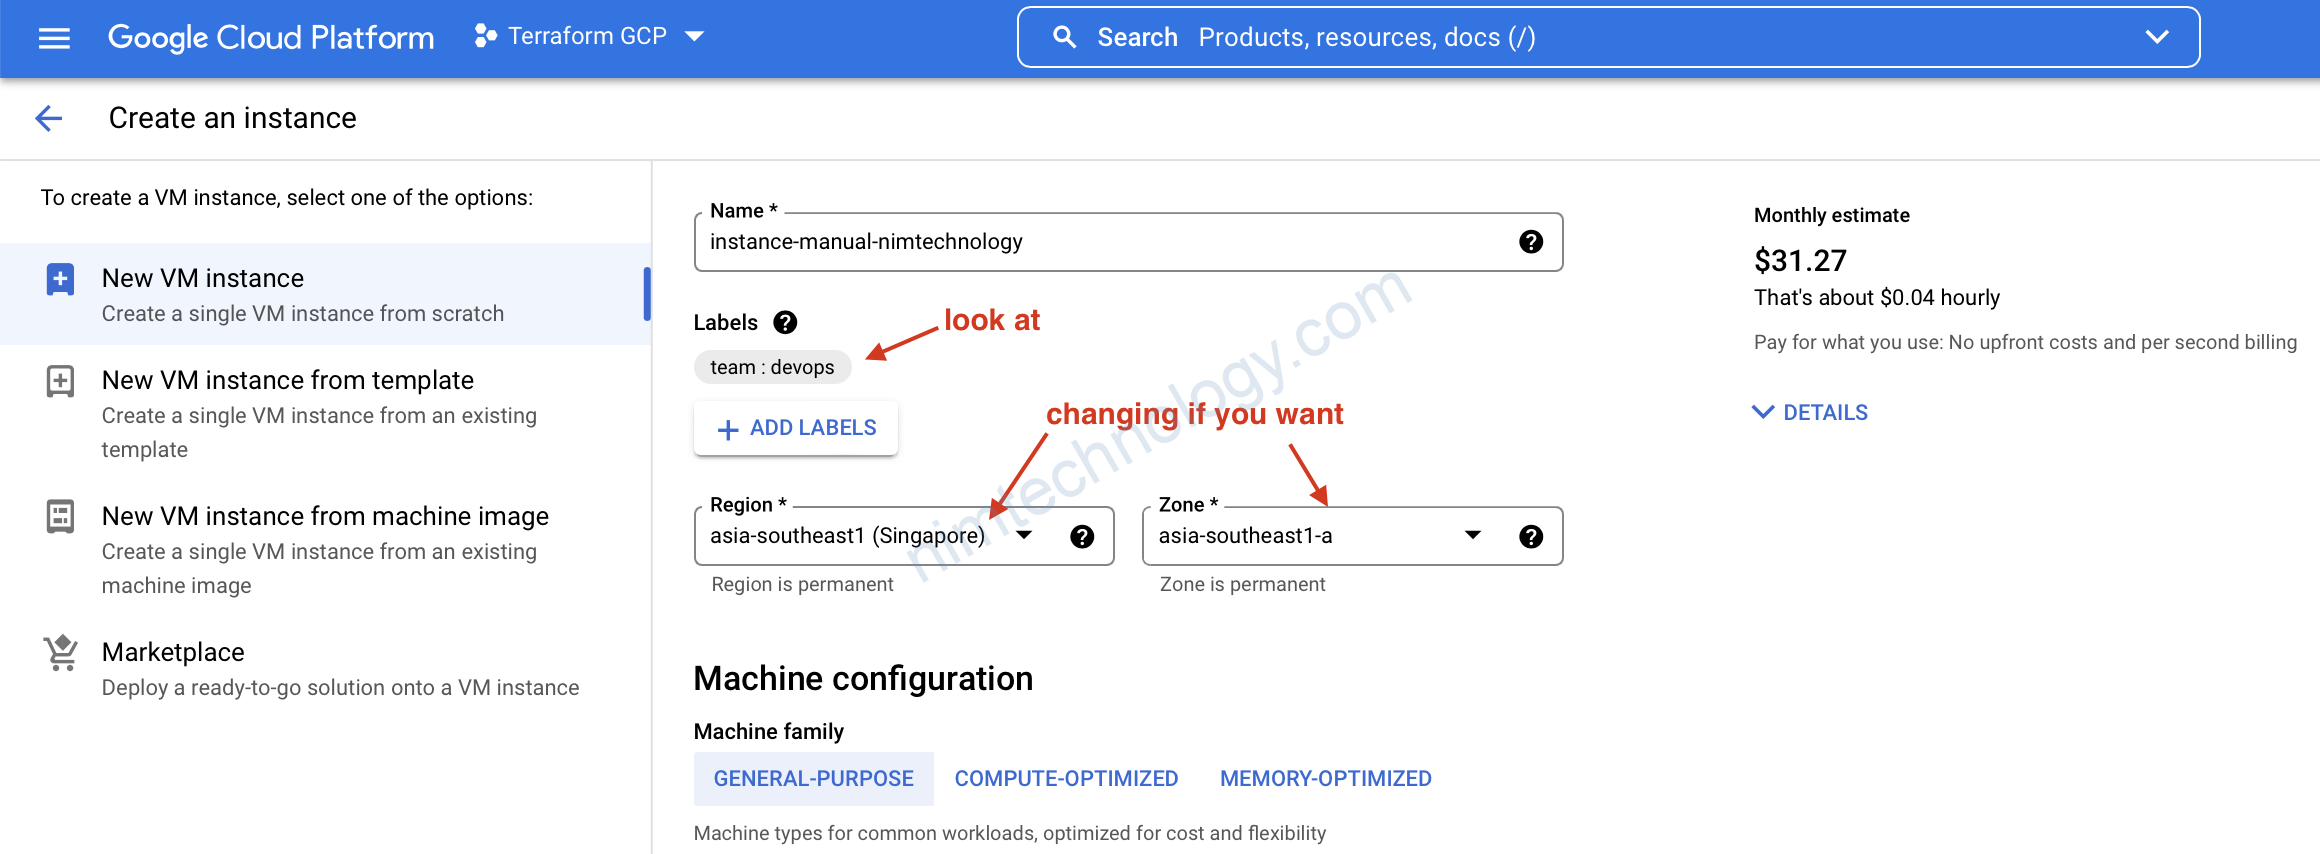
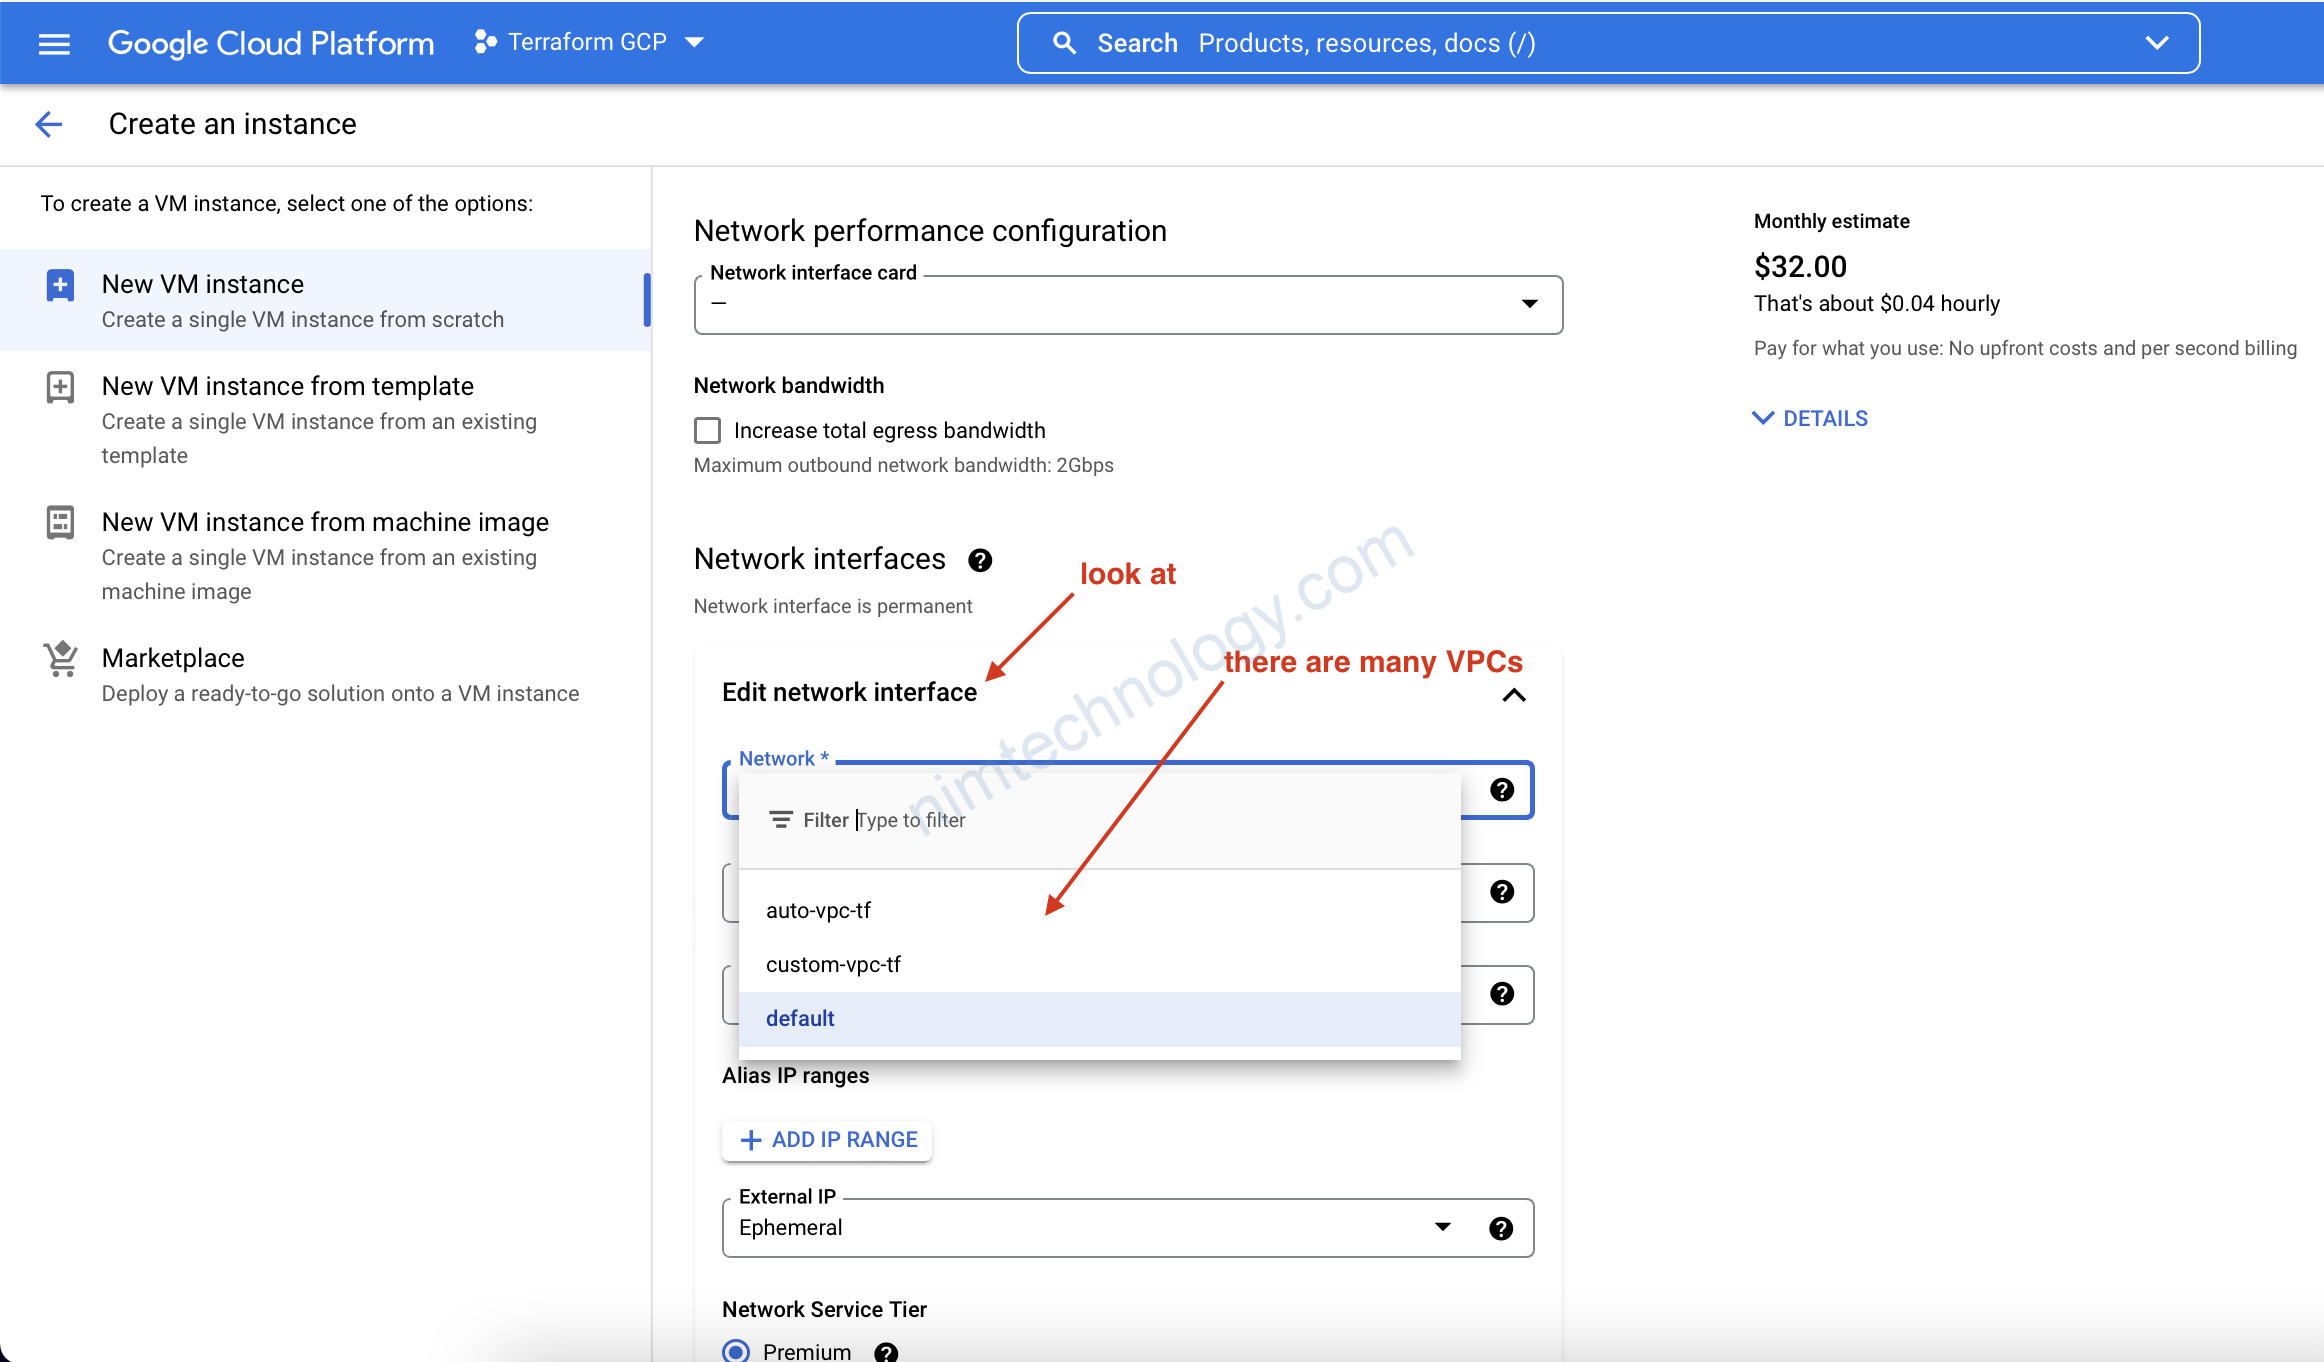
VM của bạn sẽ năm ở đâu?
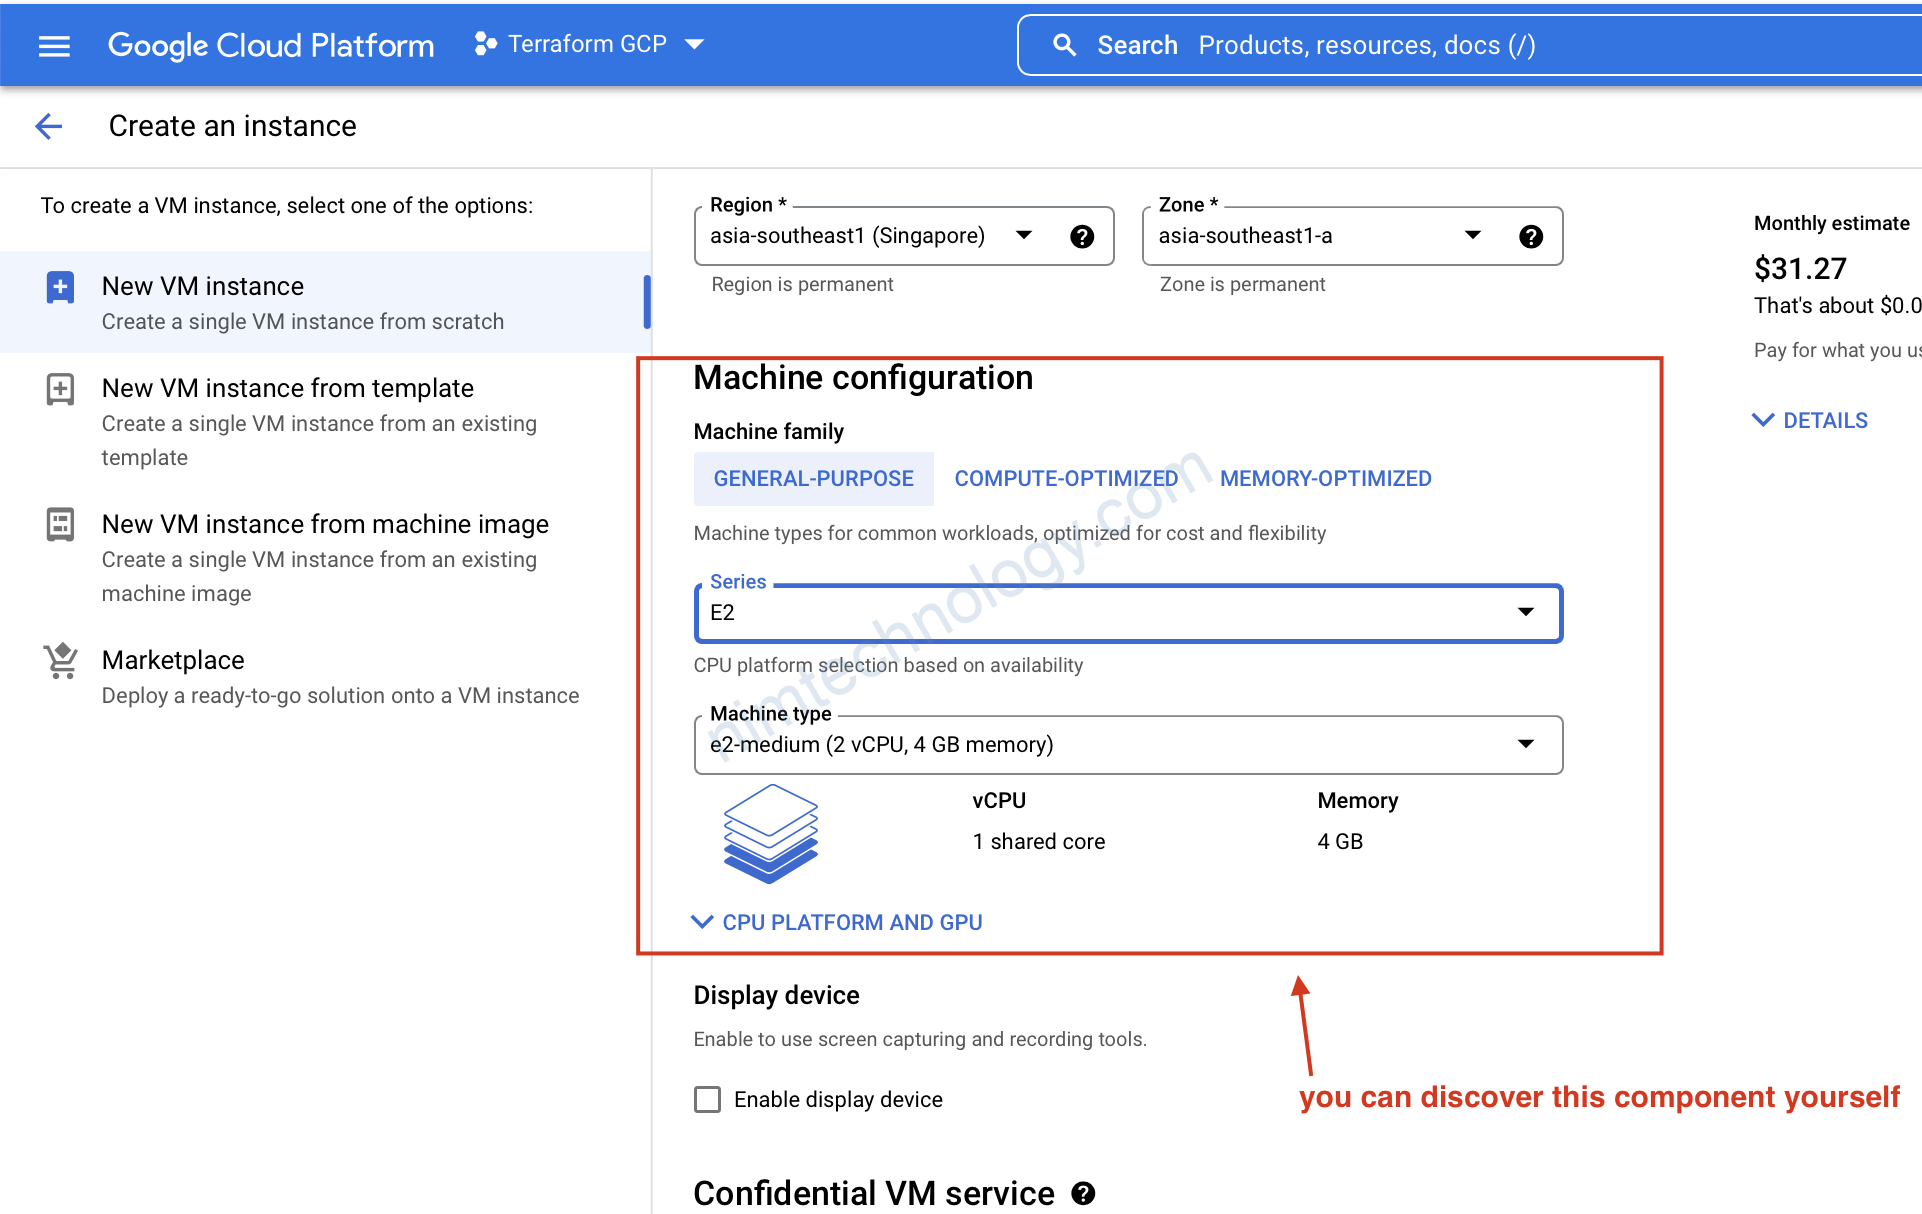
ngoài ra bạn chọn lại là VM của bạn chạy bao nhiều CPU or bao nhiều GB RAM
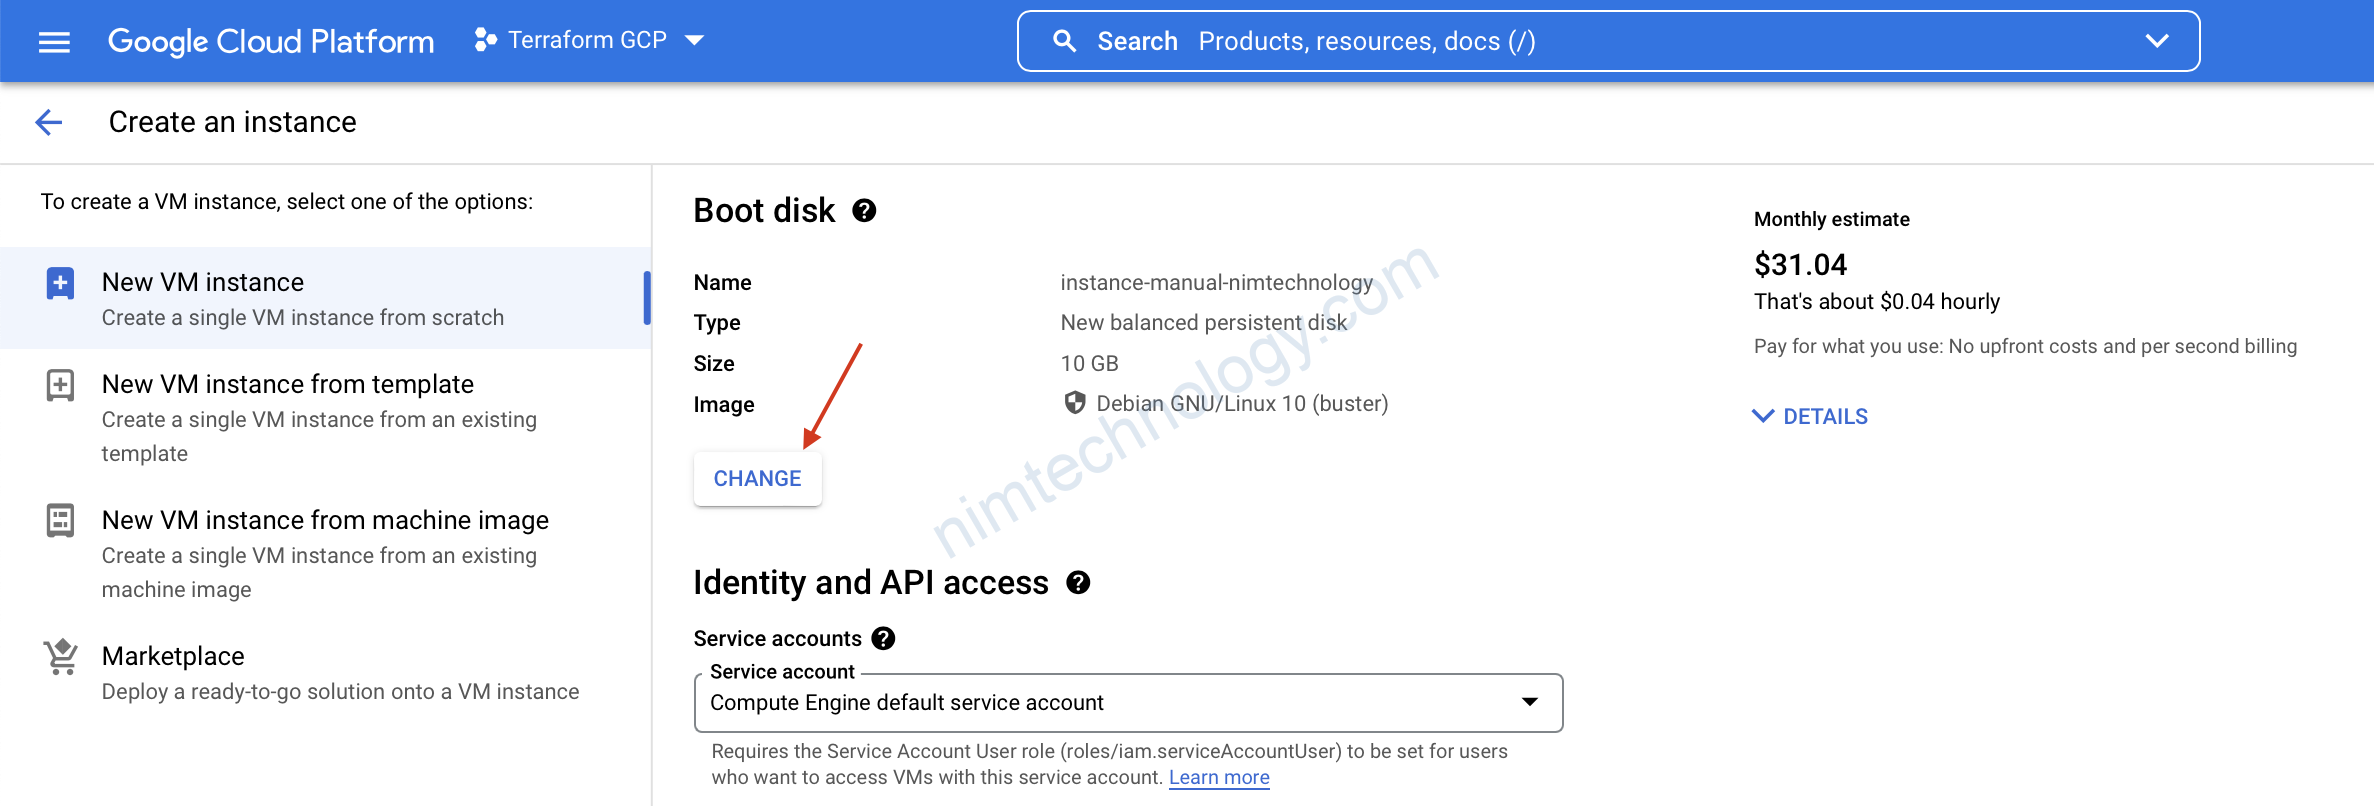
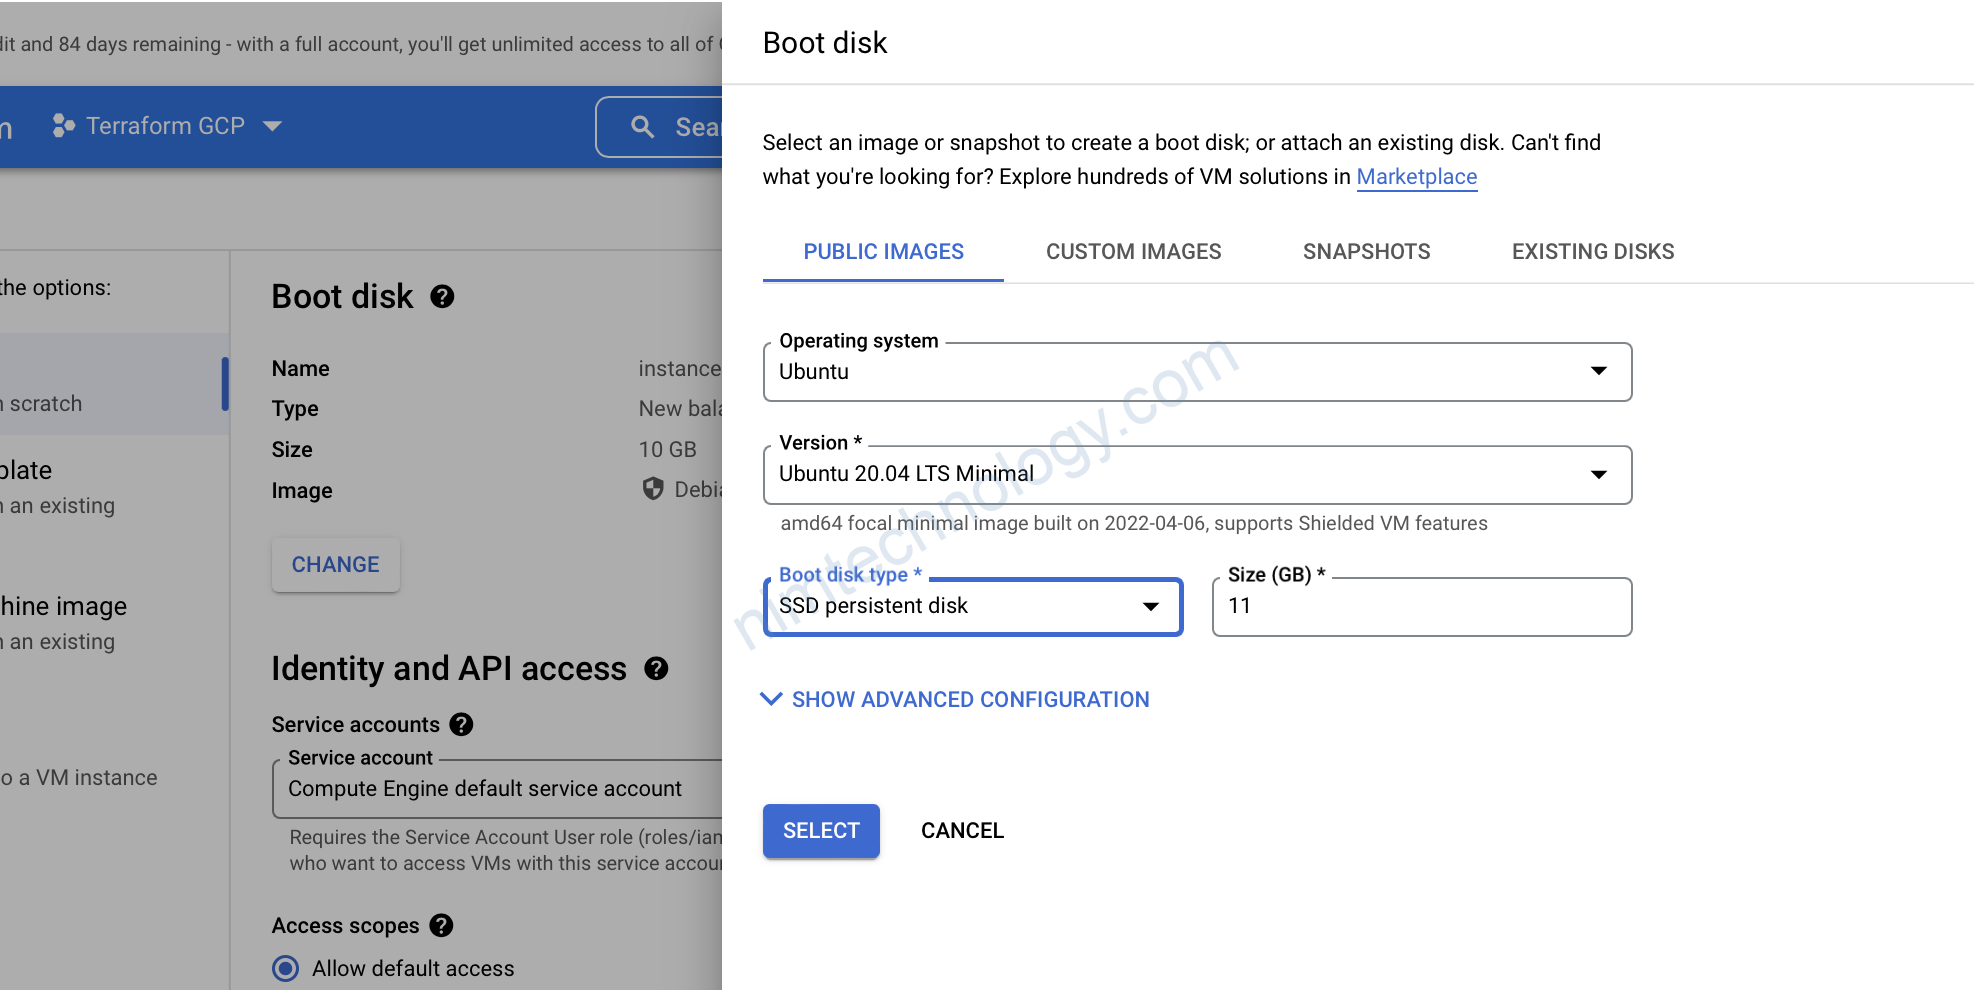
chạy disk SSD luôn!
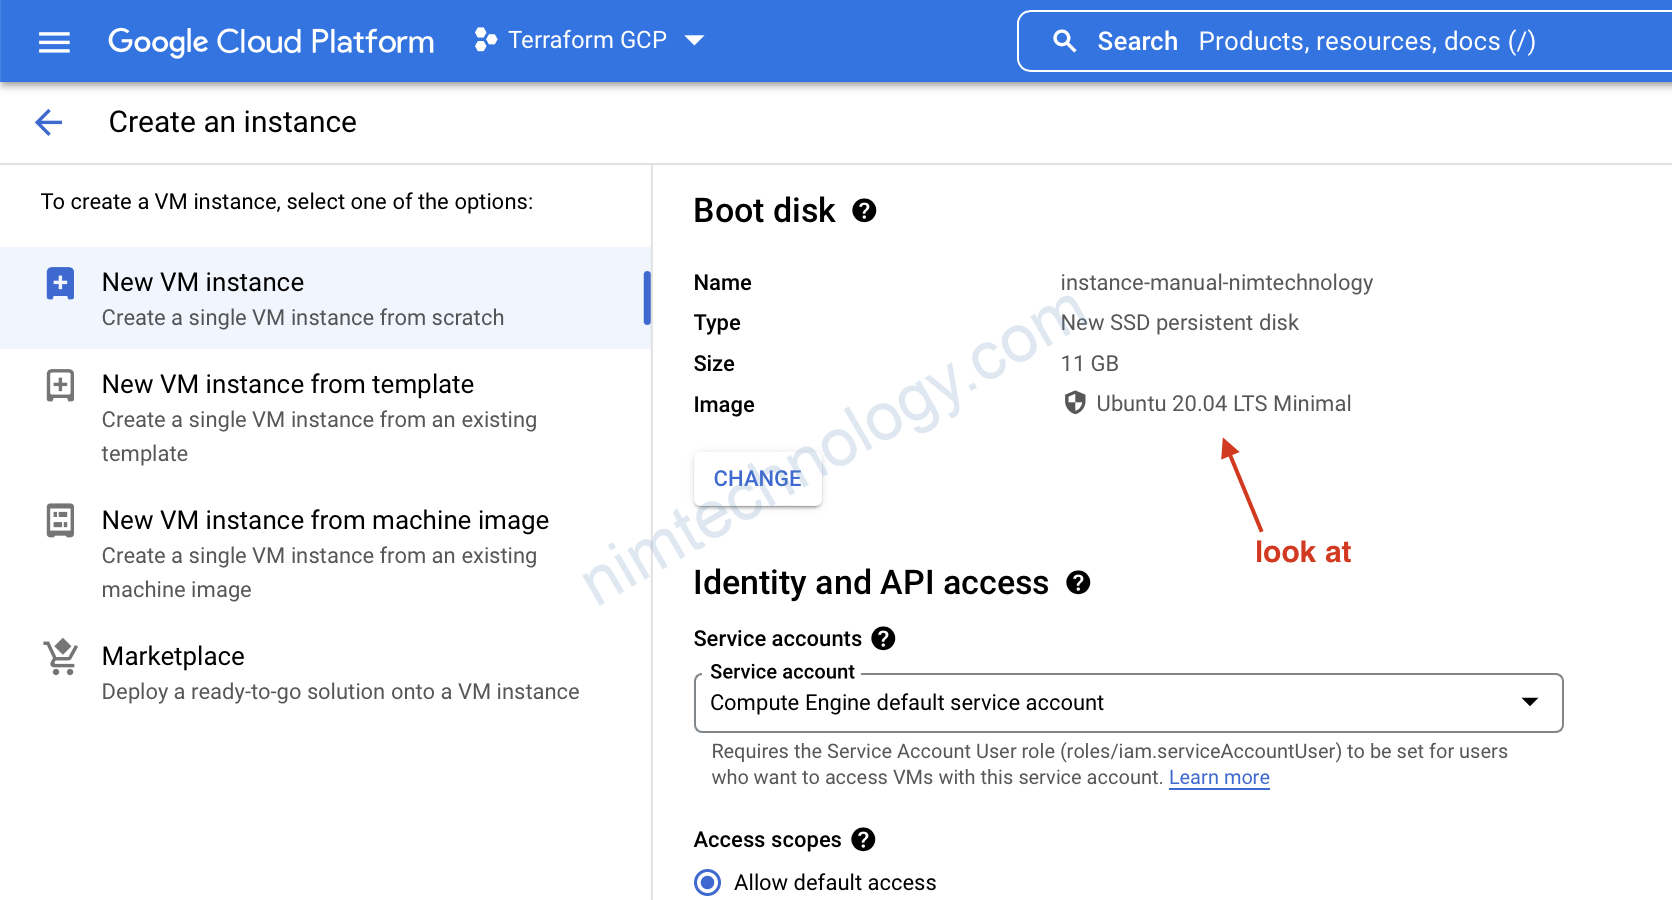
mà mình đã tạo ở bài trước!
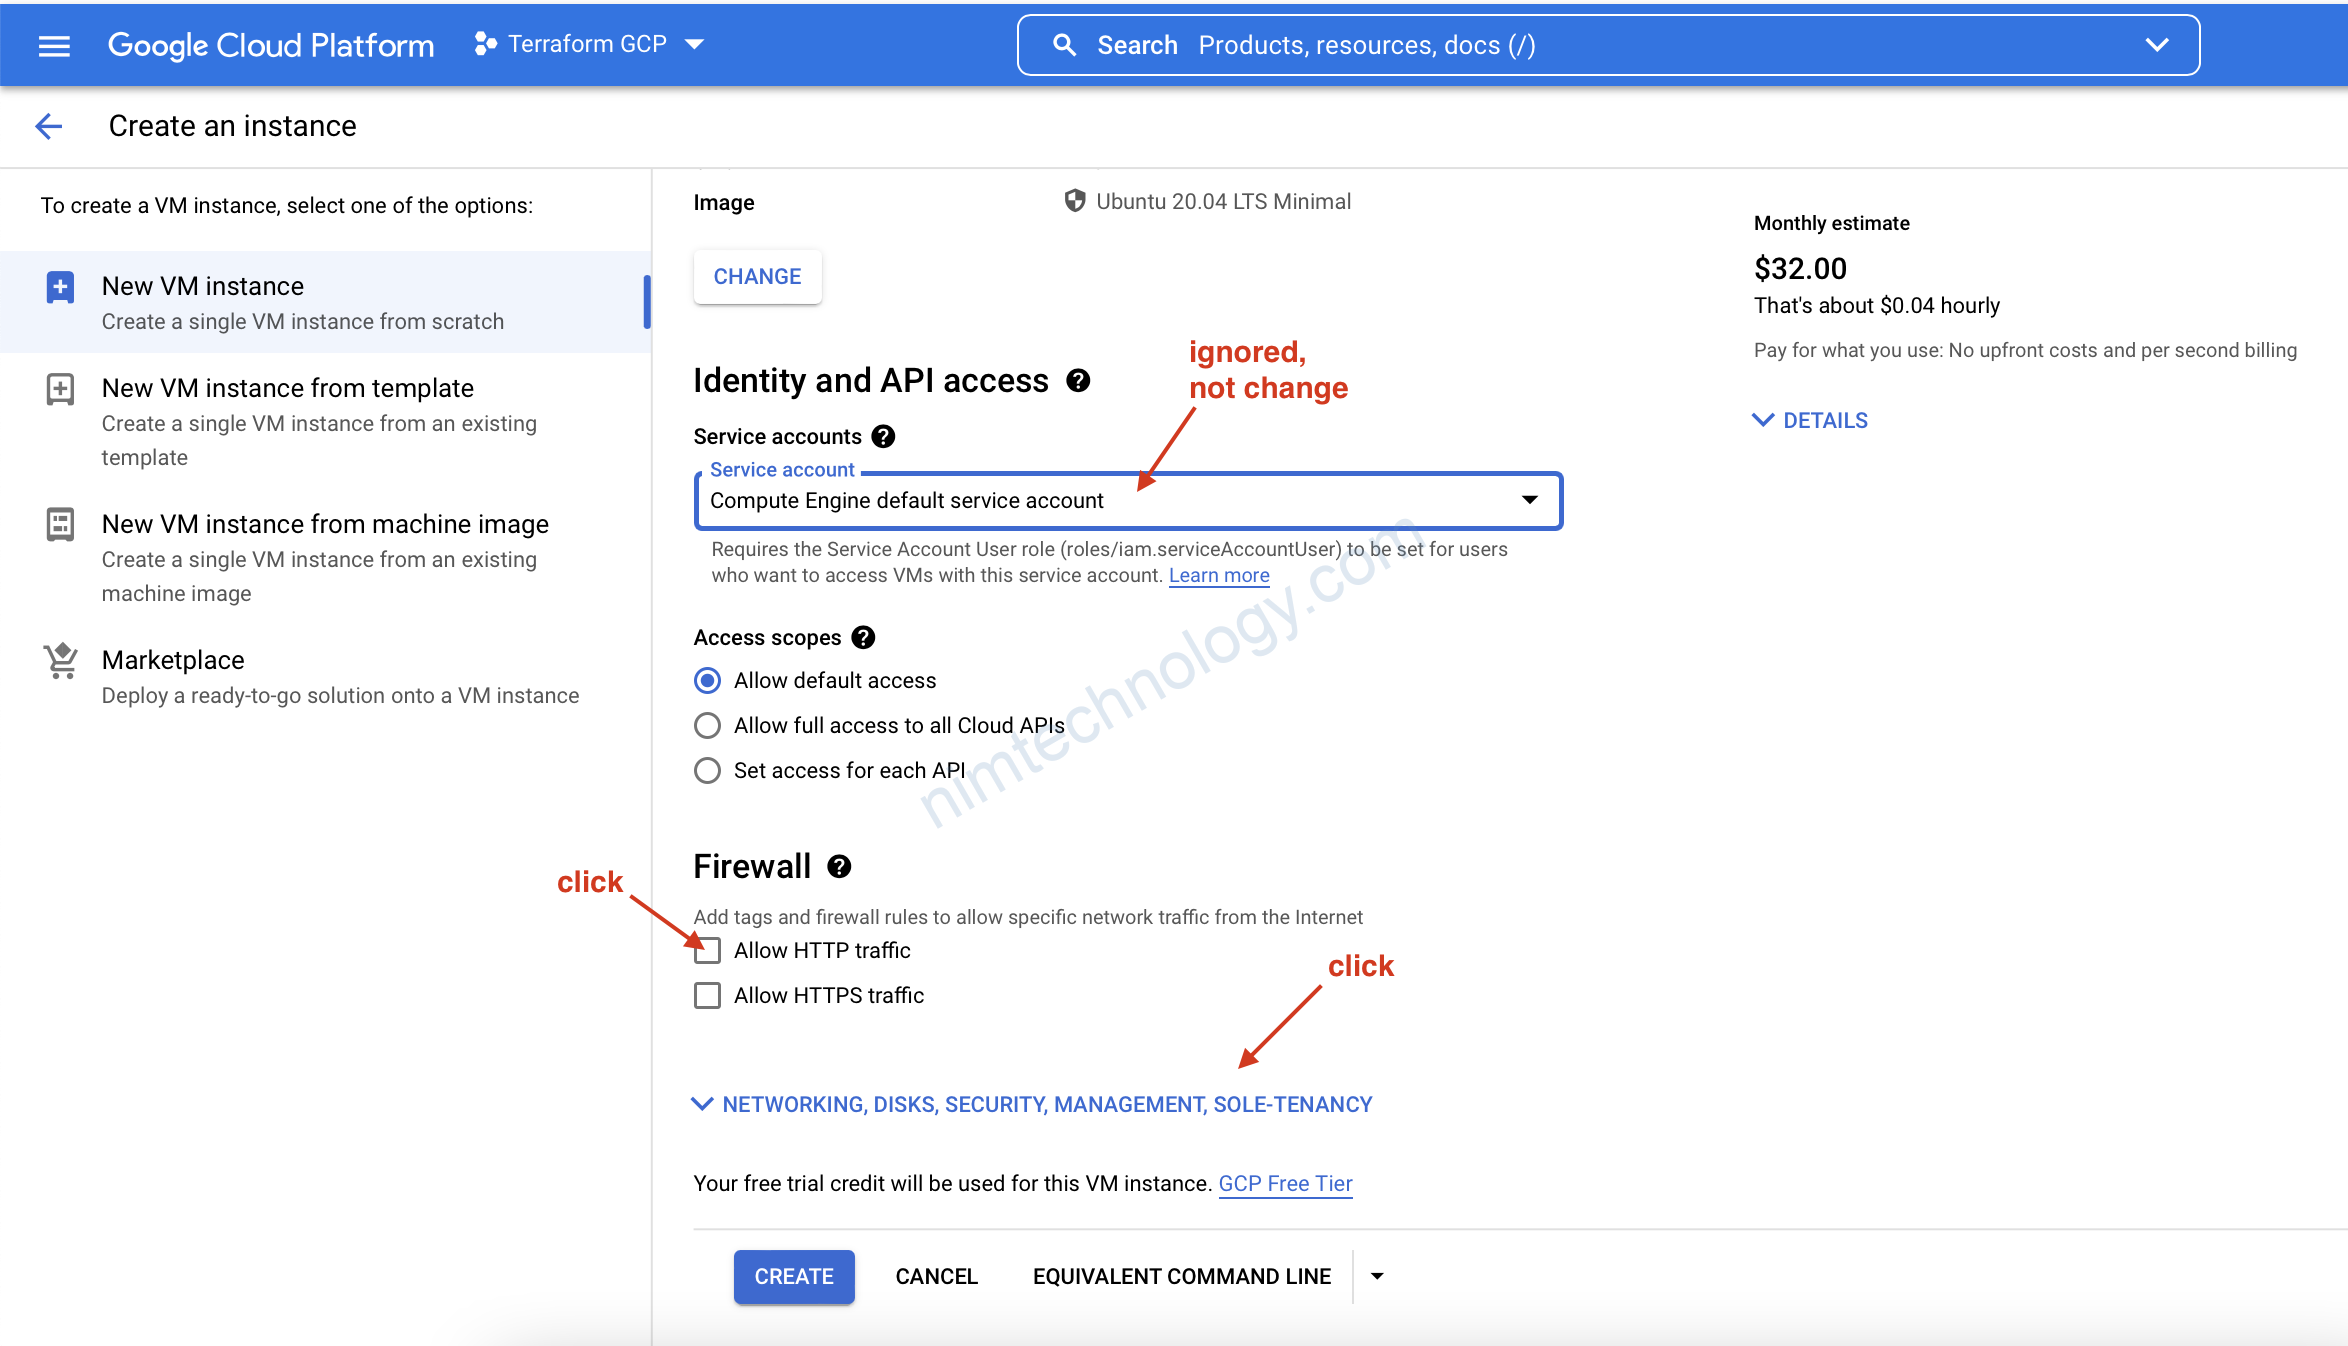
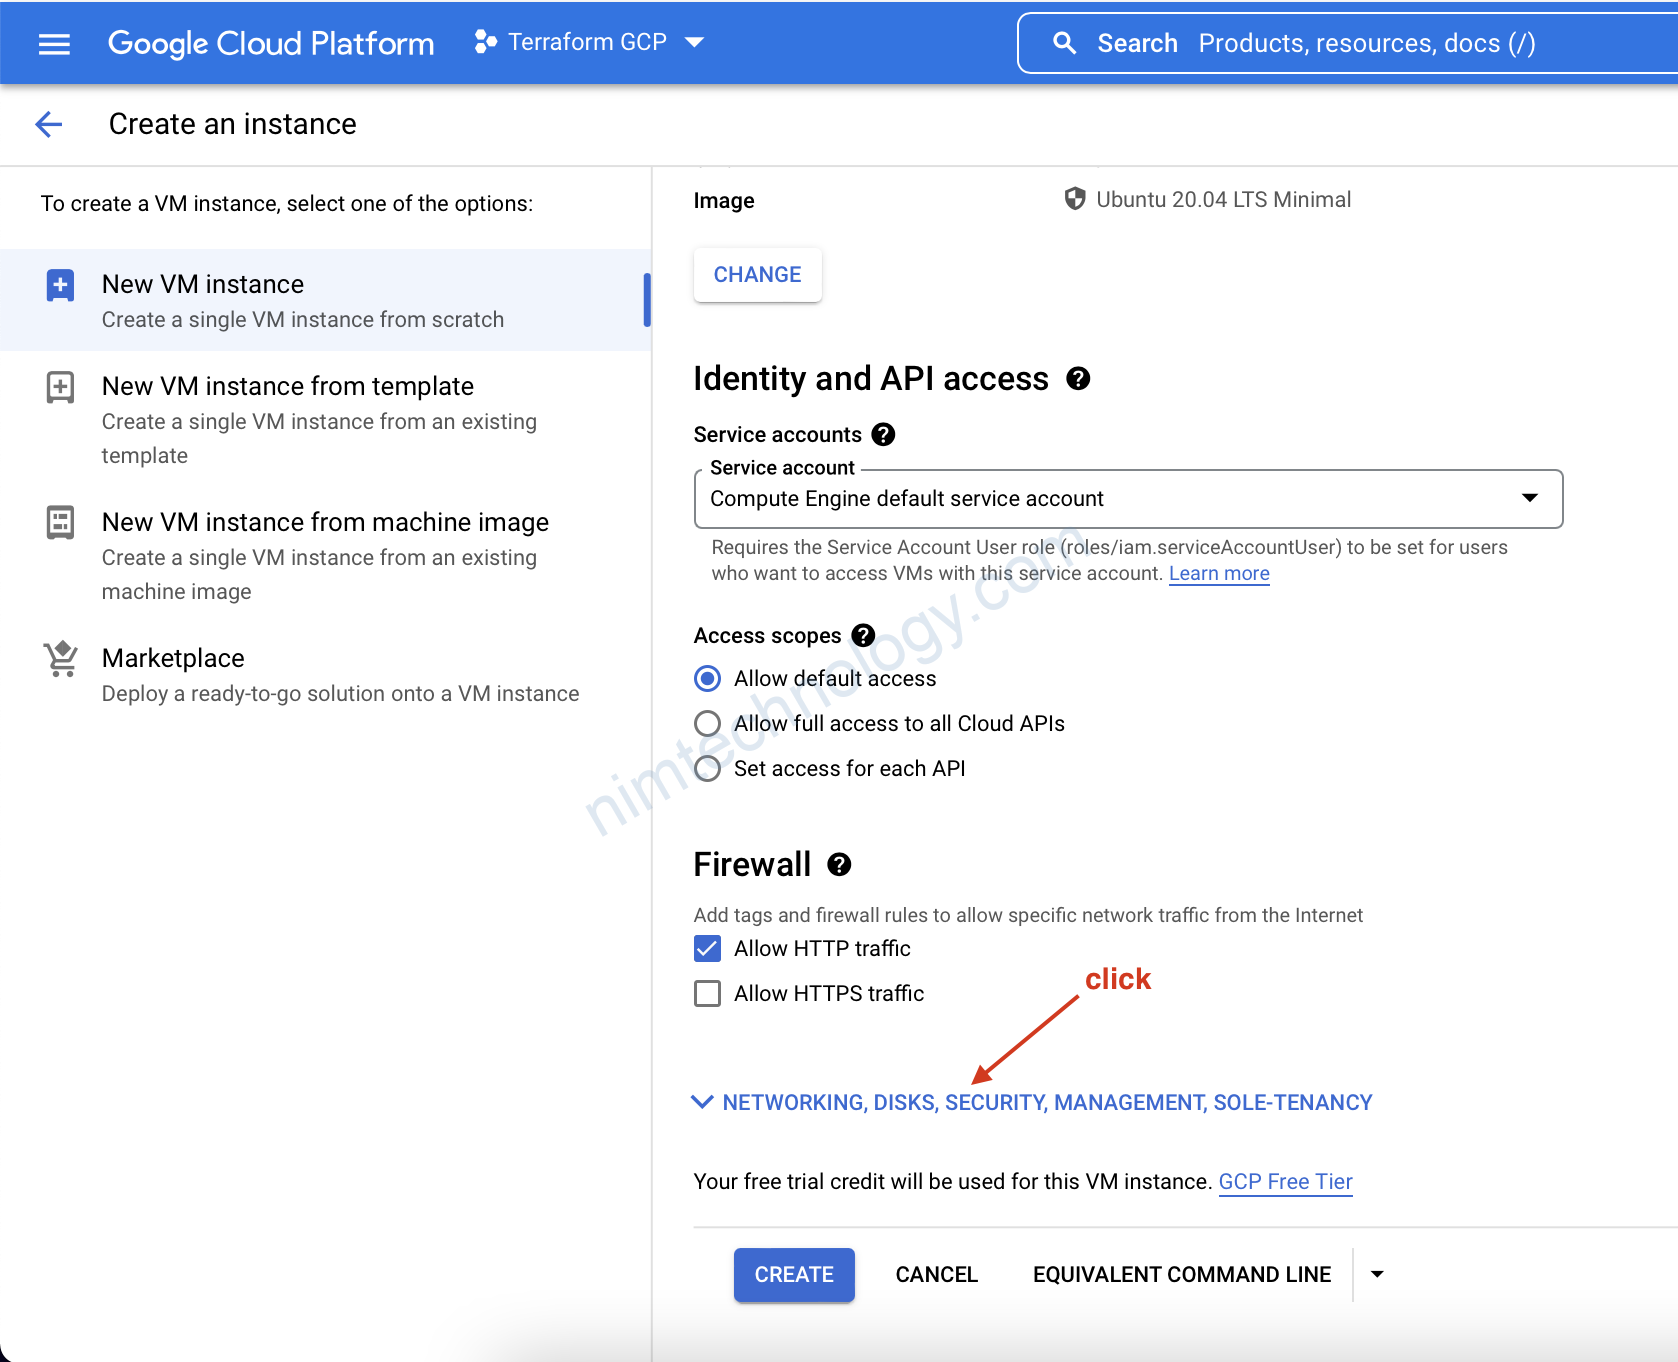
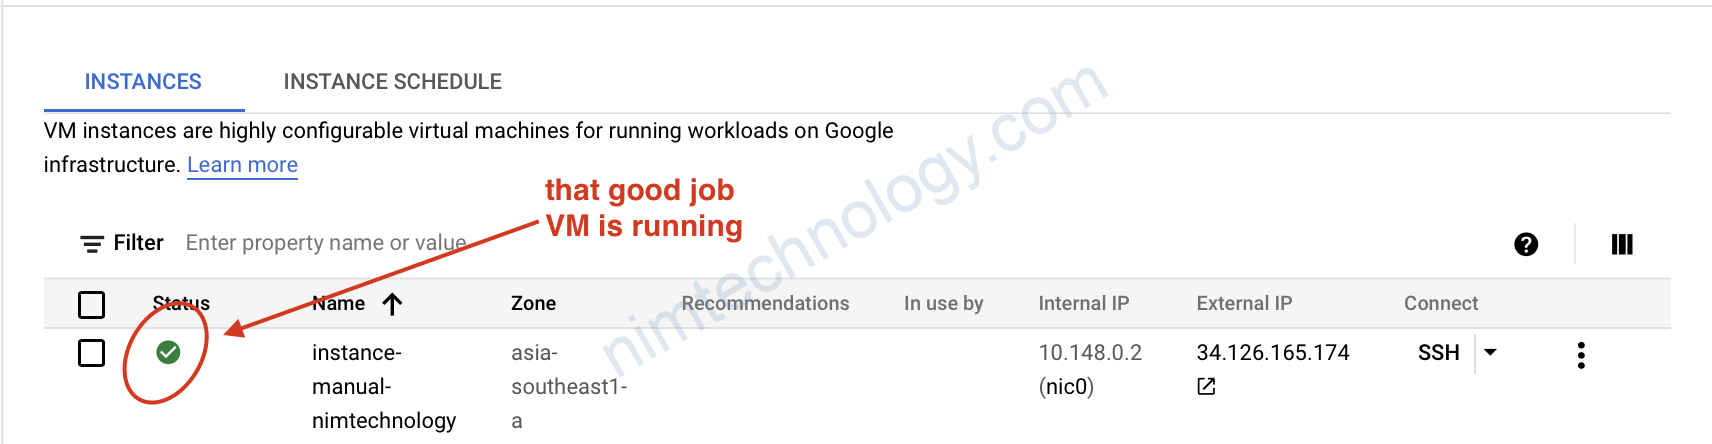
Giờ các bạn có thể click create rồi
mình nhớ câu pay at you go
2) Hands-on Compute Engine with Terraform
Giờ mình sẽ cung cấp file terraform full:
resource "google_compute_instance" "vm-from-tf" {
  name = "vm-from-tf"
  zone = "asia-southeast1-a"
  machine_type = "n1-standard-2"

  allow_stopping_for_update = true

  network_interface {
    network = "custom-vpc-tf"
    subnetwork = "sub-sg"
  }

  boot_disk {
    initialize_params {
      image = "debian-9-stretch-v20210916"
      size = 35

    }
    auto_delete = false
  }

  labels = {
    "env" = "tfleaning"
  }


  scheduling {
    preemptible = false
    automatic_restart = false
  }

  service_account {
    email = "terraform-gcp@terraform-gcp-326702.iam.gserviceaccount.com"
    scopes = [ "cloud-platform" ]
  }

  lifecycle {
    ignore_changes = [
      attached_disk
    ]
  }

}

resource "google_compute_disk" "disk-1" {
  name = "disk-1"
  size = 15
  zone = "asia-southeast1-a"
  type = "pd-ssd"
}

resource "google_compute_attached_disk" "adisk" {
  disk = google_compute_disk.disk-1.id
  instance = google_compute_instance.vm-from-tf.id
}
2.1) Compute Engine + Update Compute Engine parameter + Service Account – Terraform
resource "google_compute_instance" "vm-from-tf" {
  name = "vm-from-tf"
  zone = "asia-southeast1-a"
  machine_type = "n1-standard-2"

  allow_stopping_for_update = true

  network_interface {
    network = "custom-vpc-tf"
    subnetwork = "sub-sg"
  }

  boot_disk {
    initialize_params {
      image = "debian-9-stretch-v20210916"
      size = 35

    }
    auto_delete = false
  }

  labels = {
    "env" = "tfleaning"
  }


  scheduling {
    preemptible = false
    automatic_restart = false
  }

  lifecycle {
    ignore_changes = [
      attached_disk
    ]
  }

}
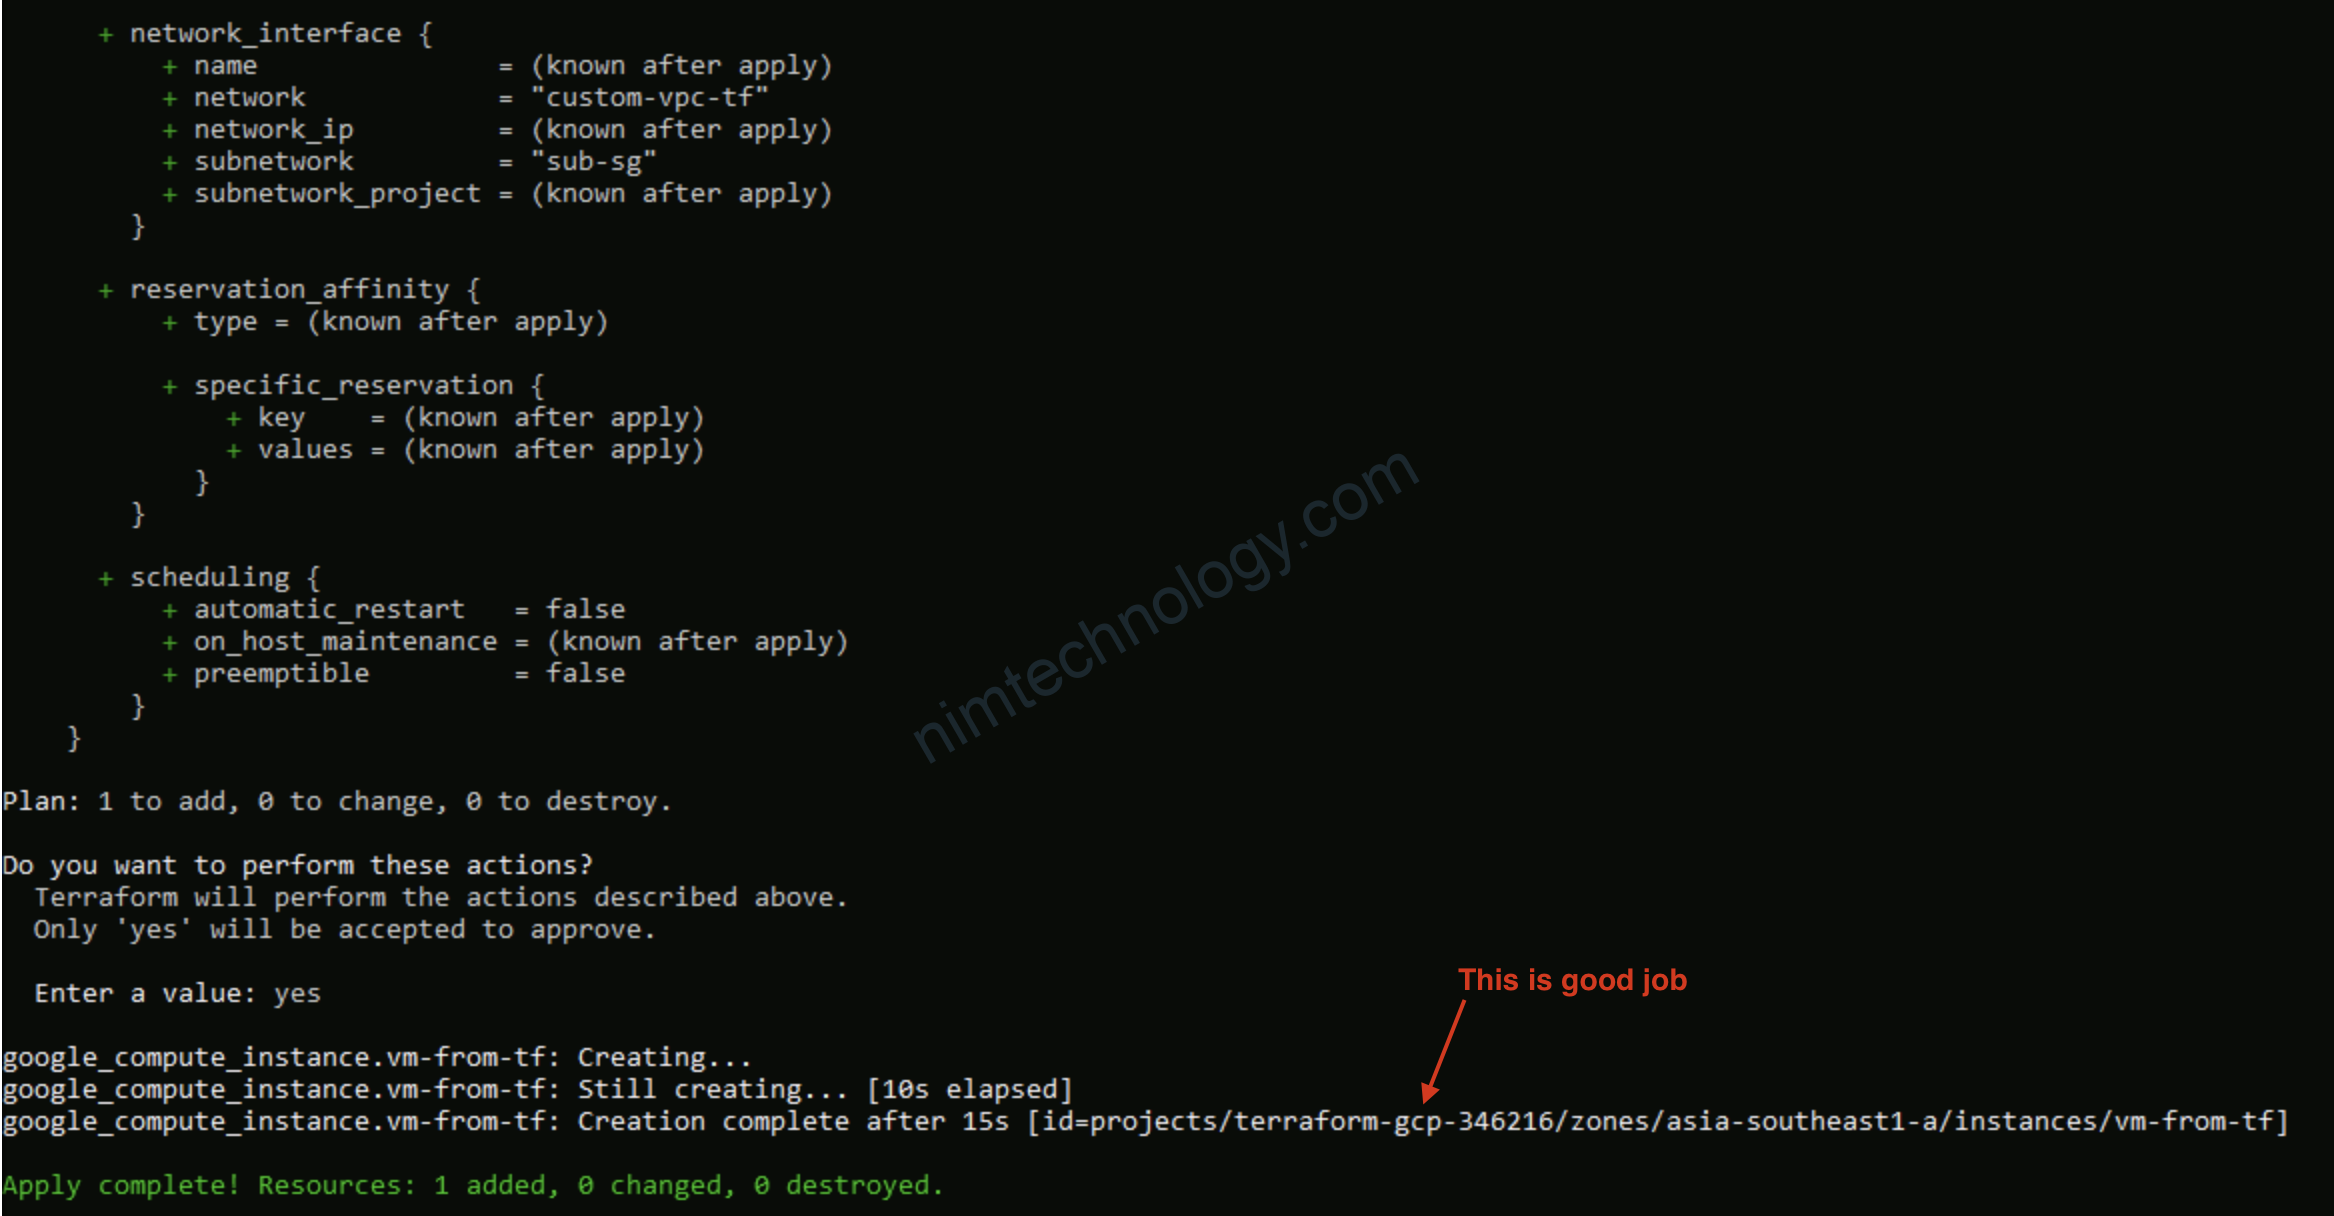
Giờ thực hiện: terraform init và terraform apply
2.1.1) Finding out a suitable machine_type!
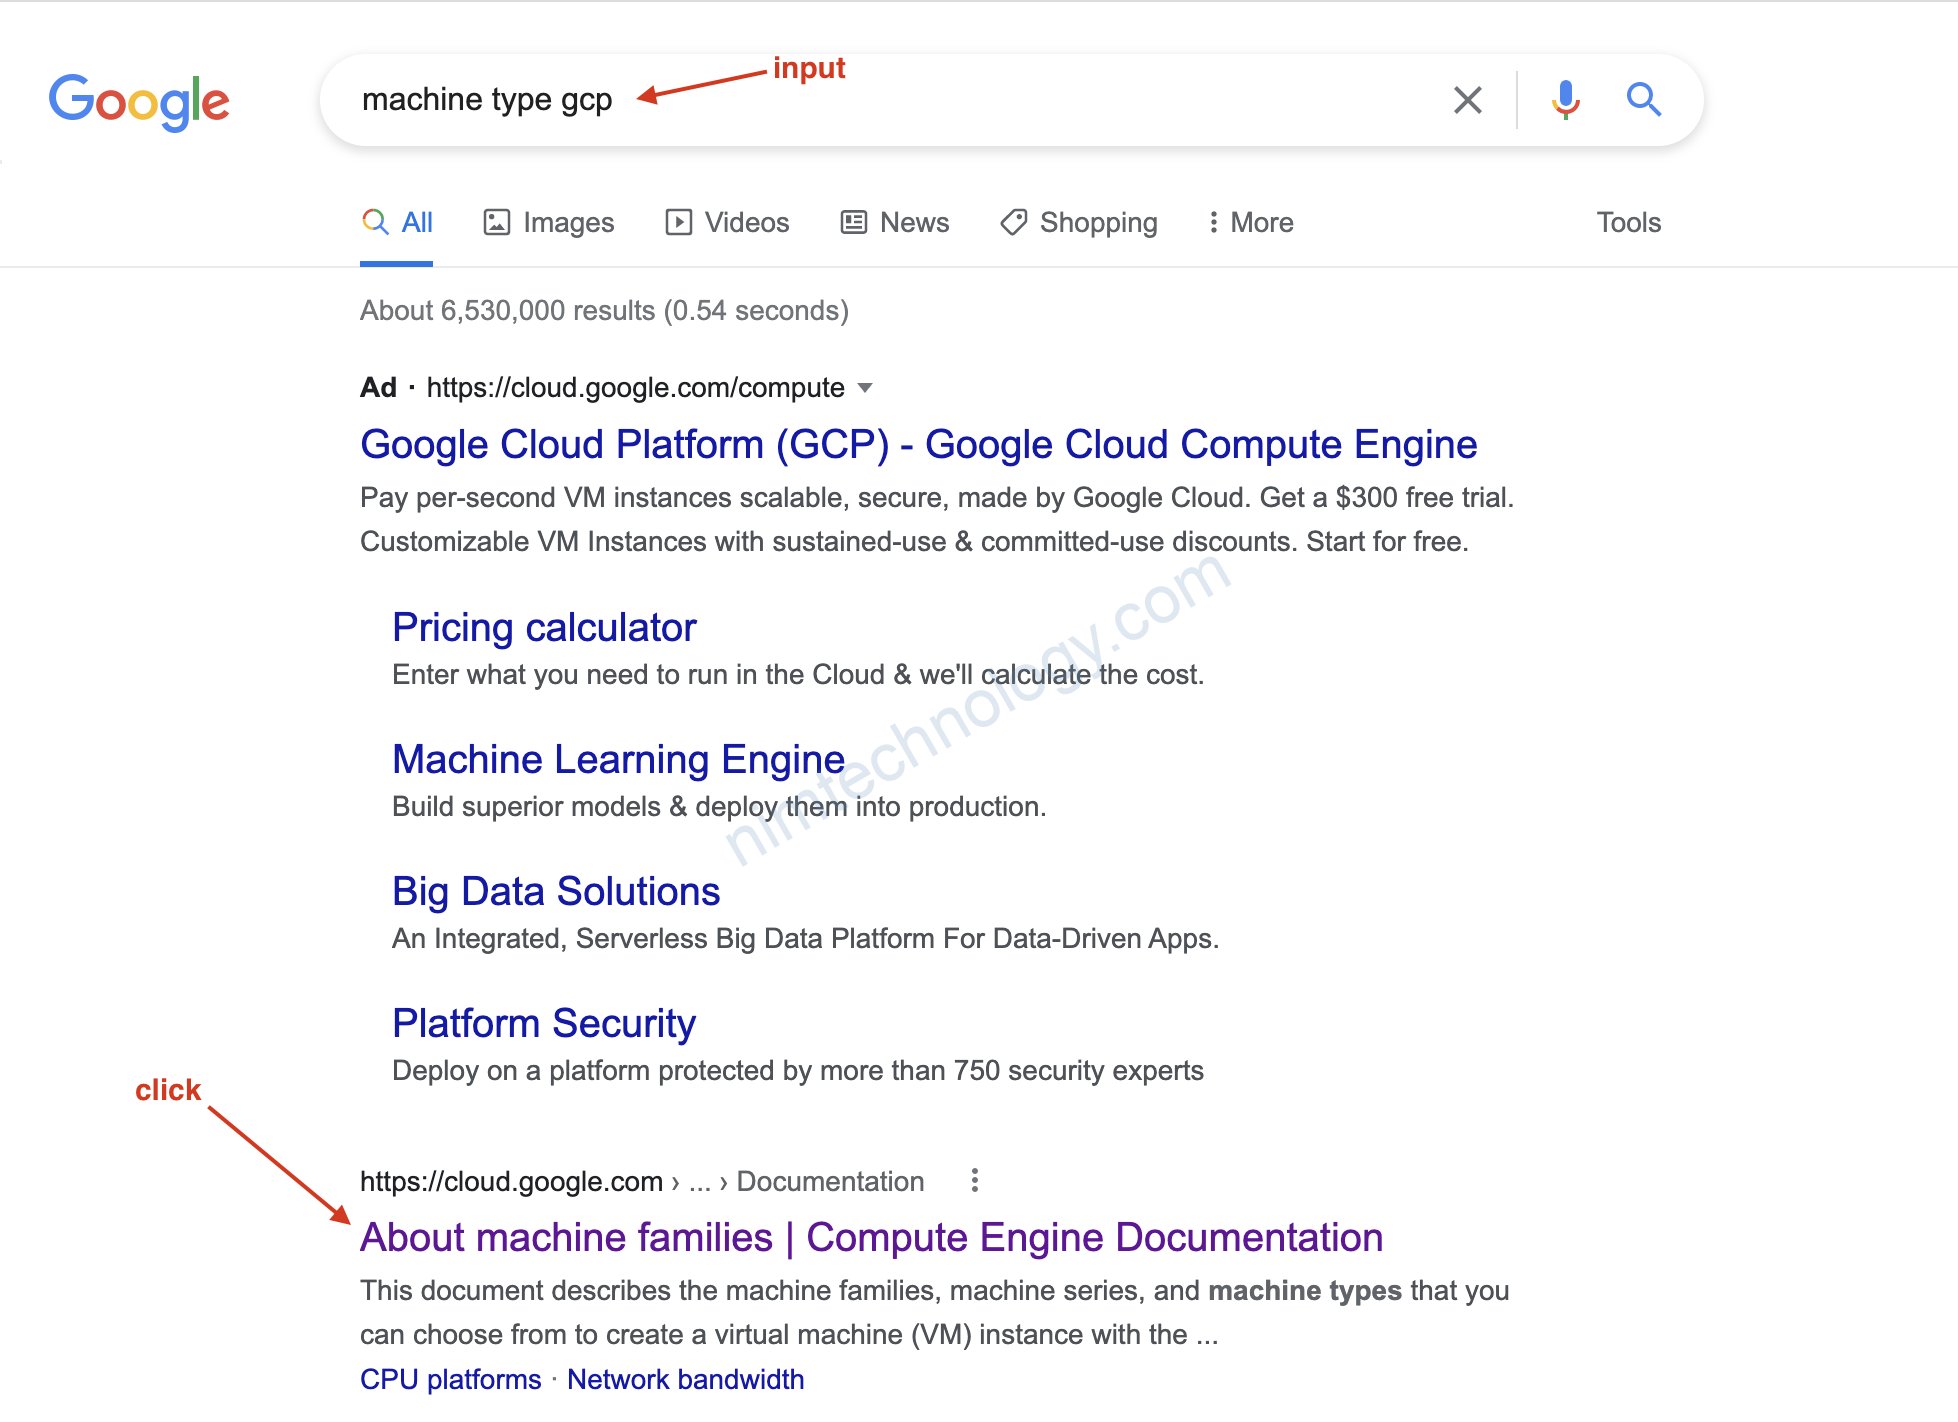
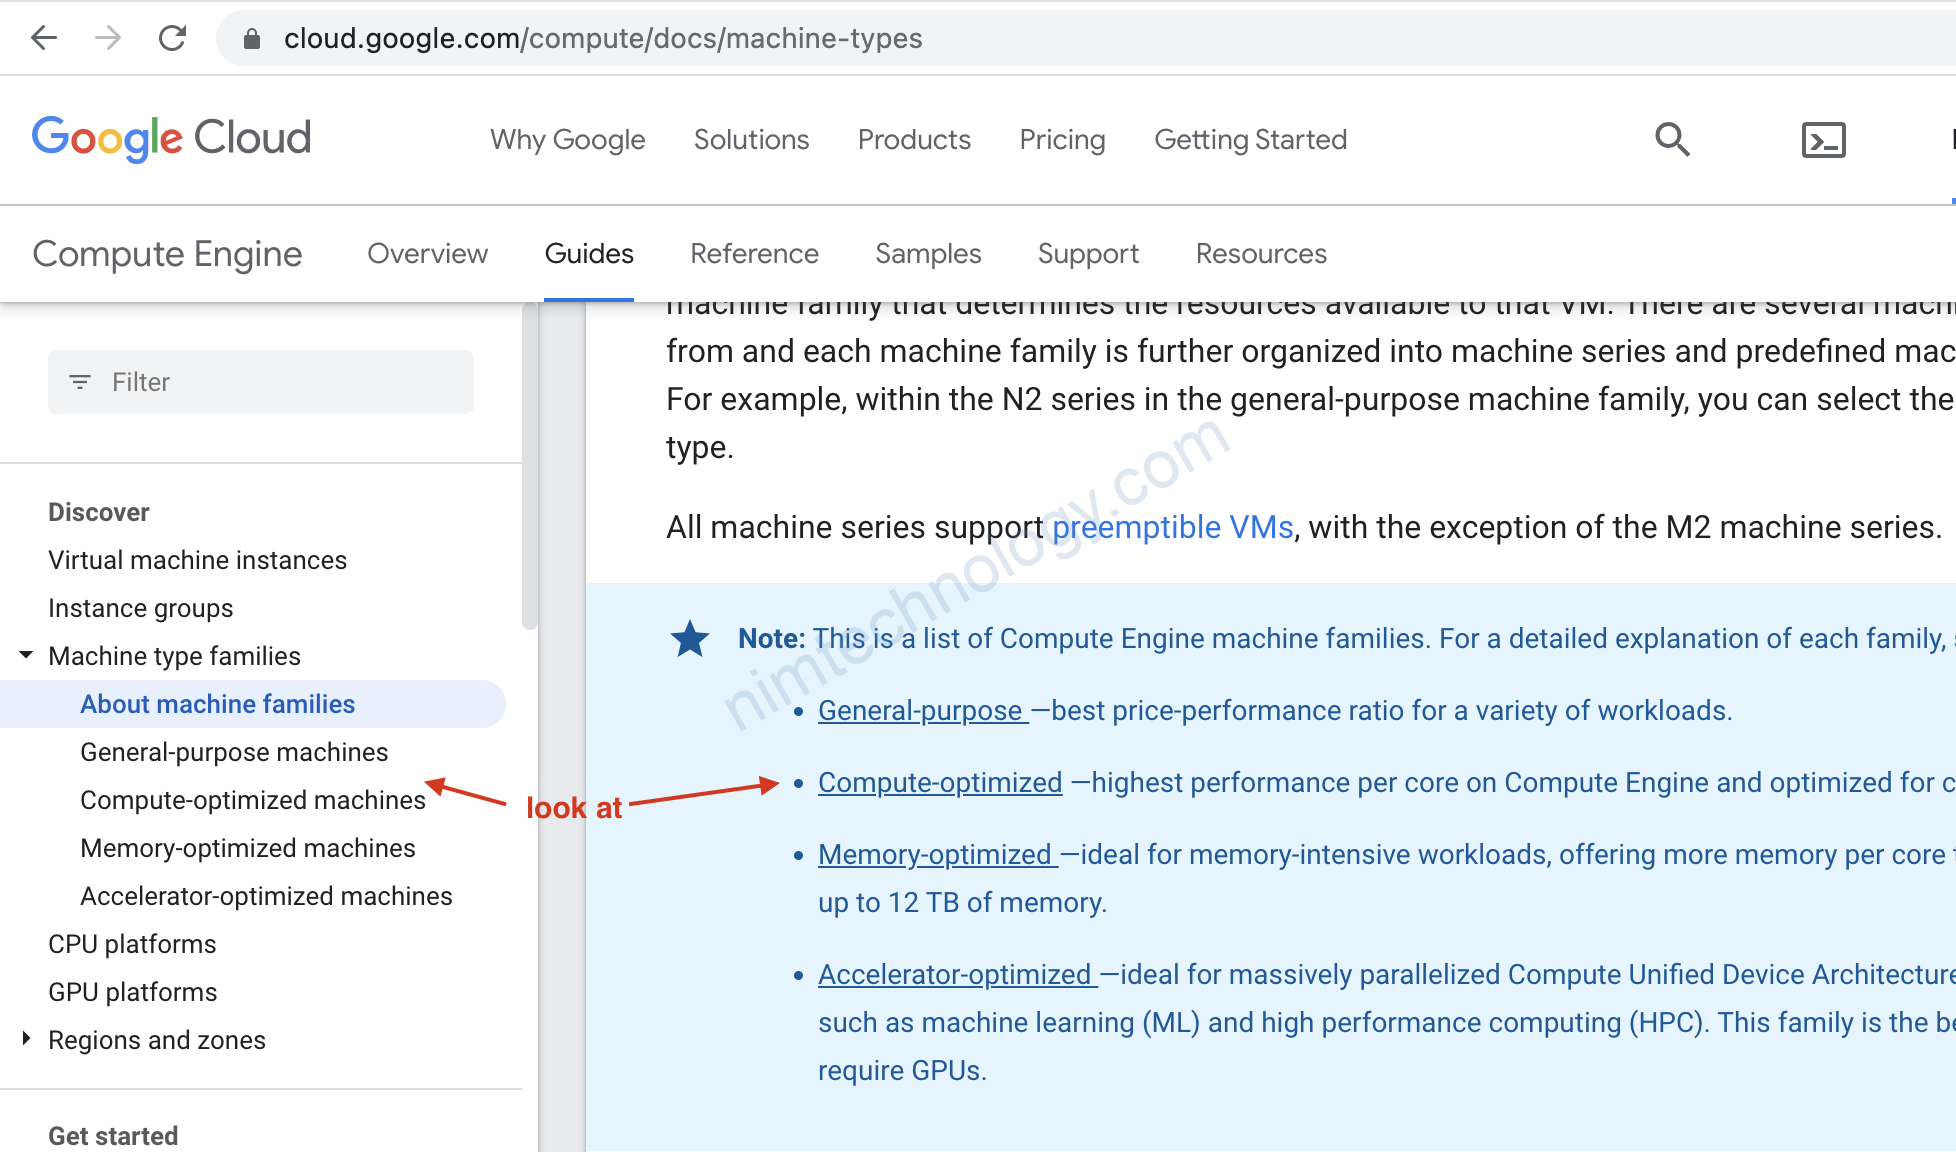
Links:
https://cloud.google.com/compute/docs/machine-types
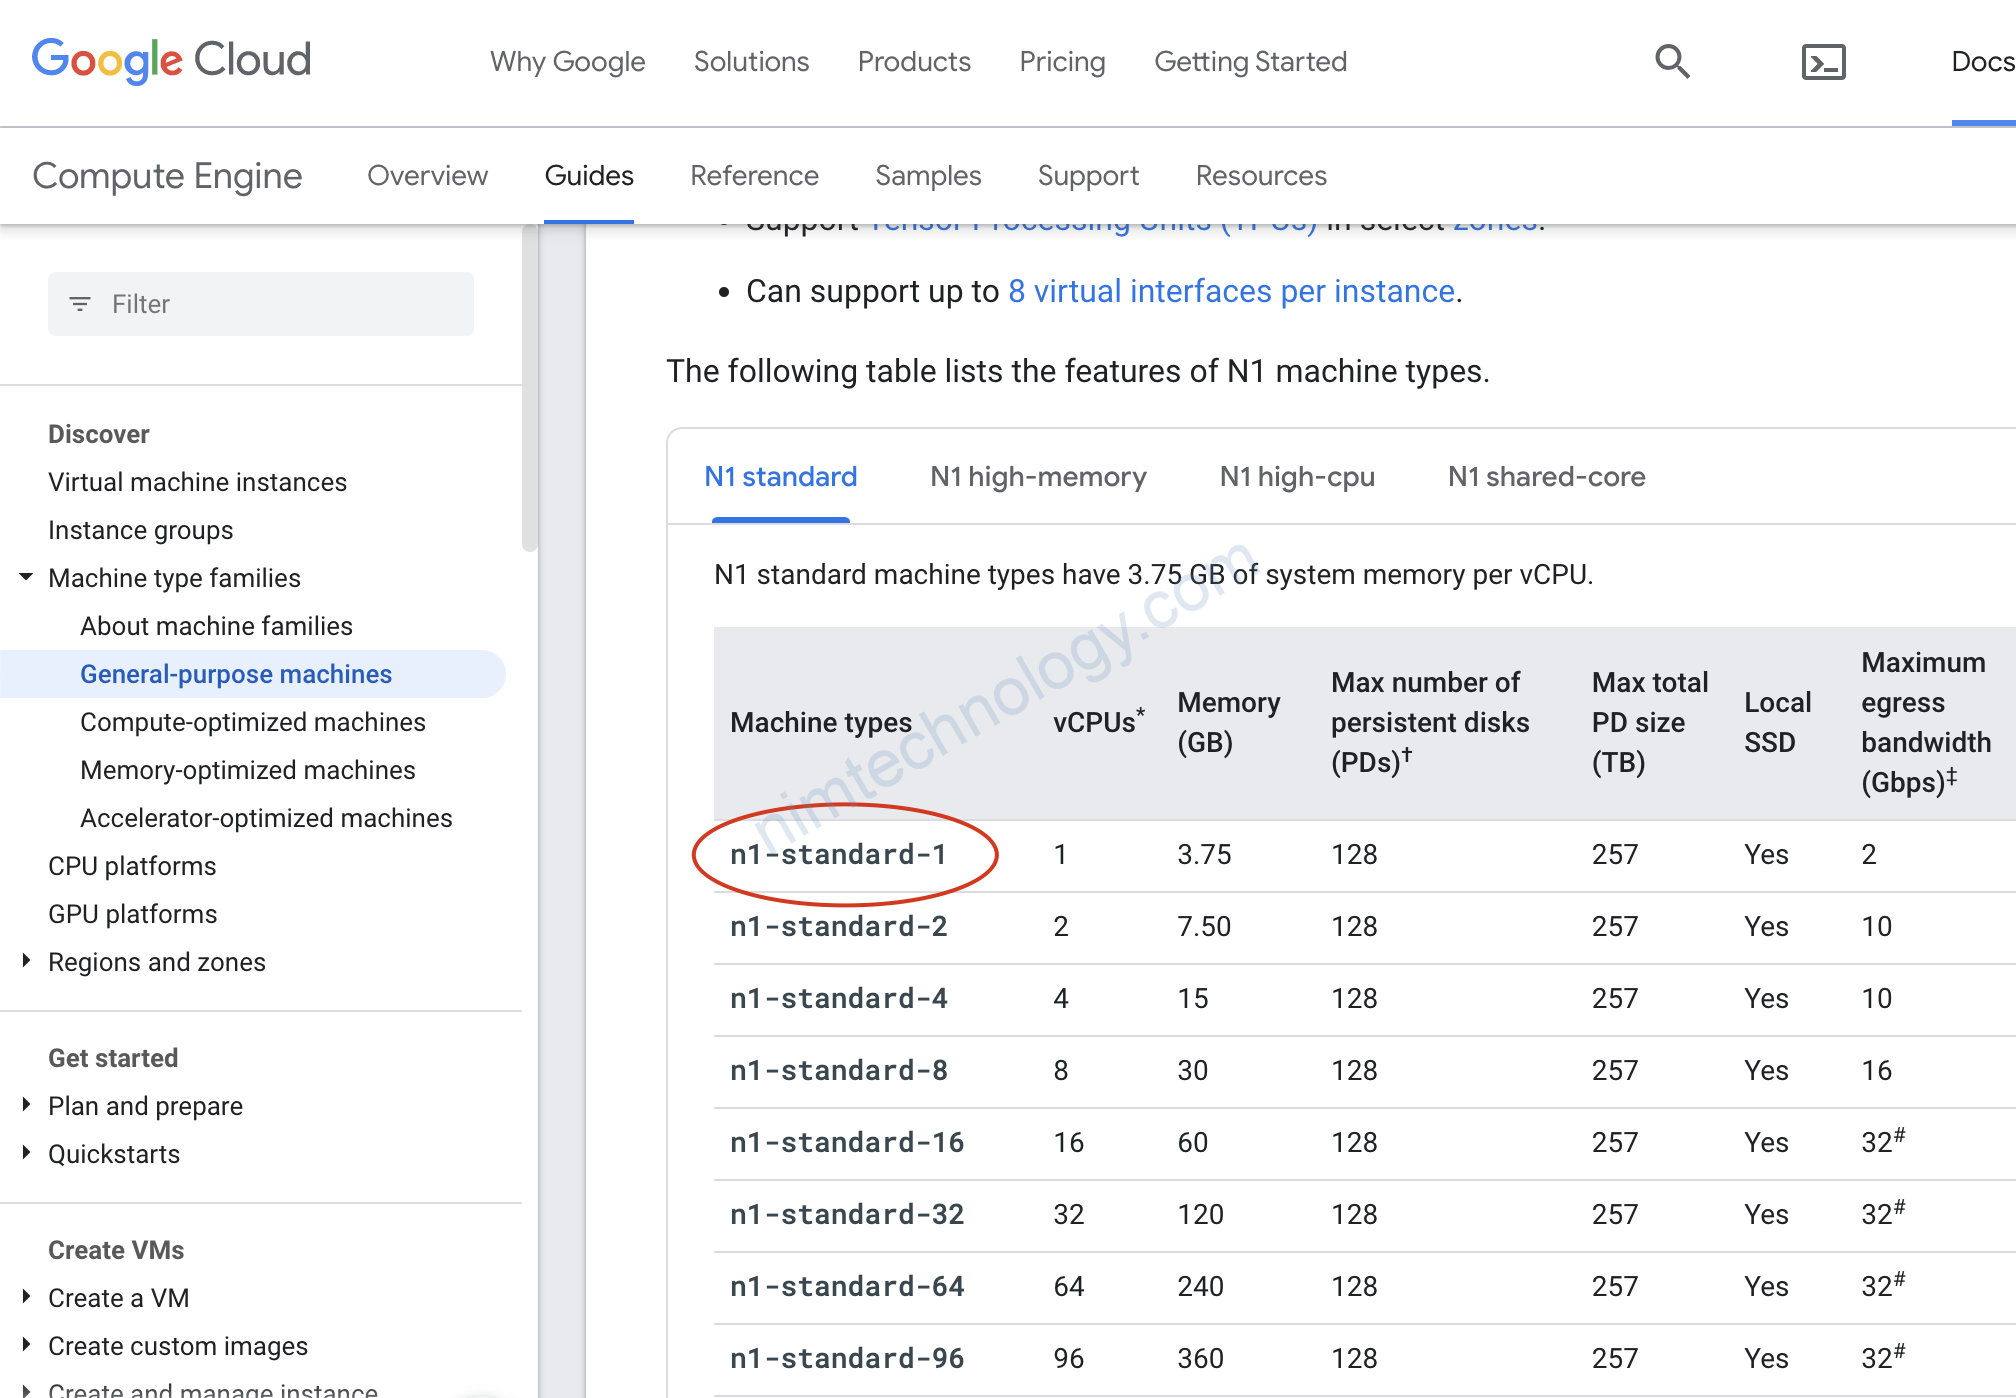

machine_type – (Required) The machine type to create.
Note: If you want to update this value (resize the VM) after initial creation, you must set allow_stopping_for_update to true.
Khi bạn change machine type thì bạn nên set allow_stopping_for_update = trueallow_stopping_for_update – (Optional) If true, allows Terraform to stop the instance to update its properties. If you try to update a property that requires stopping the instance without setting this field, the update will fail.
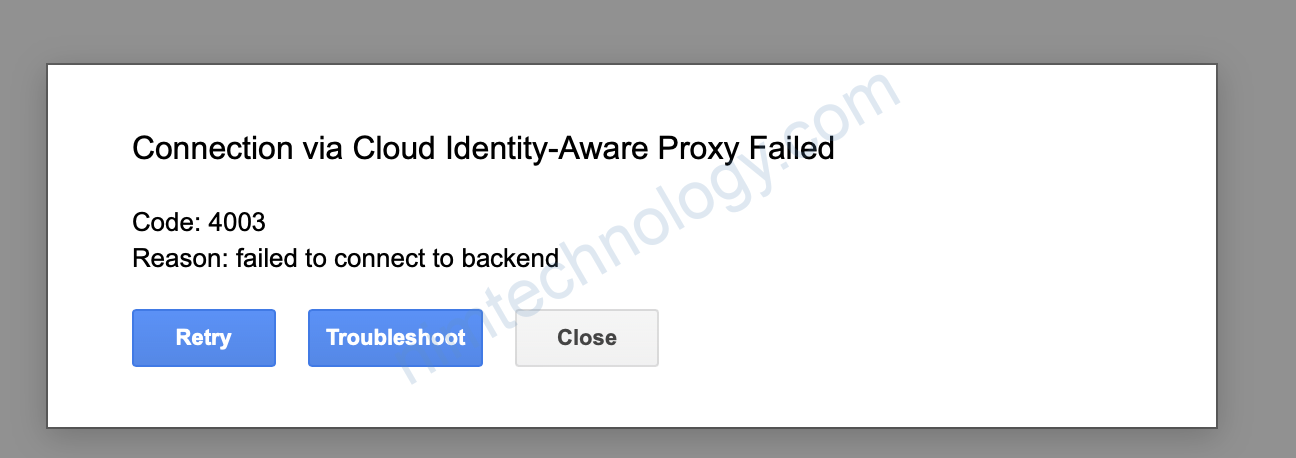
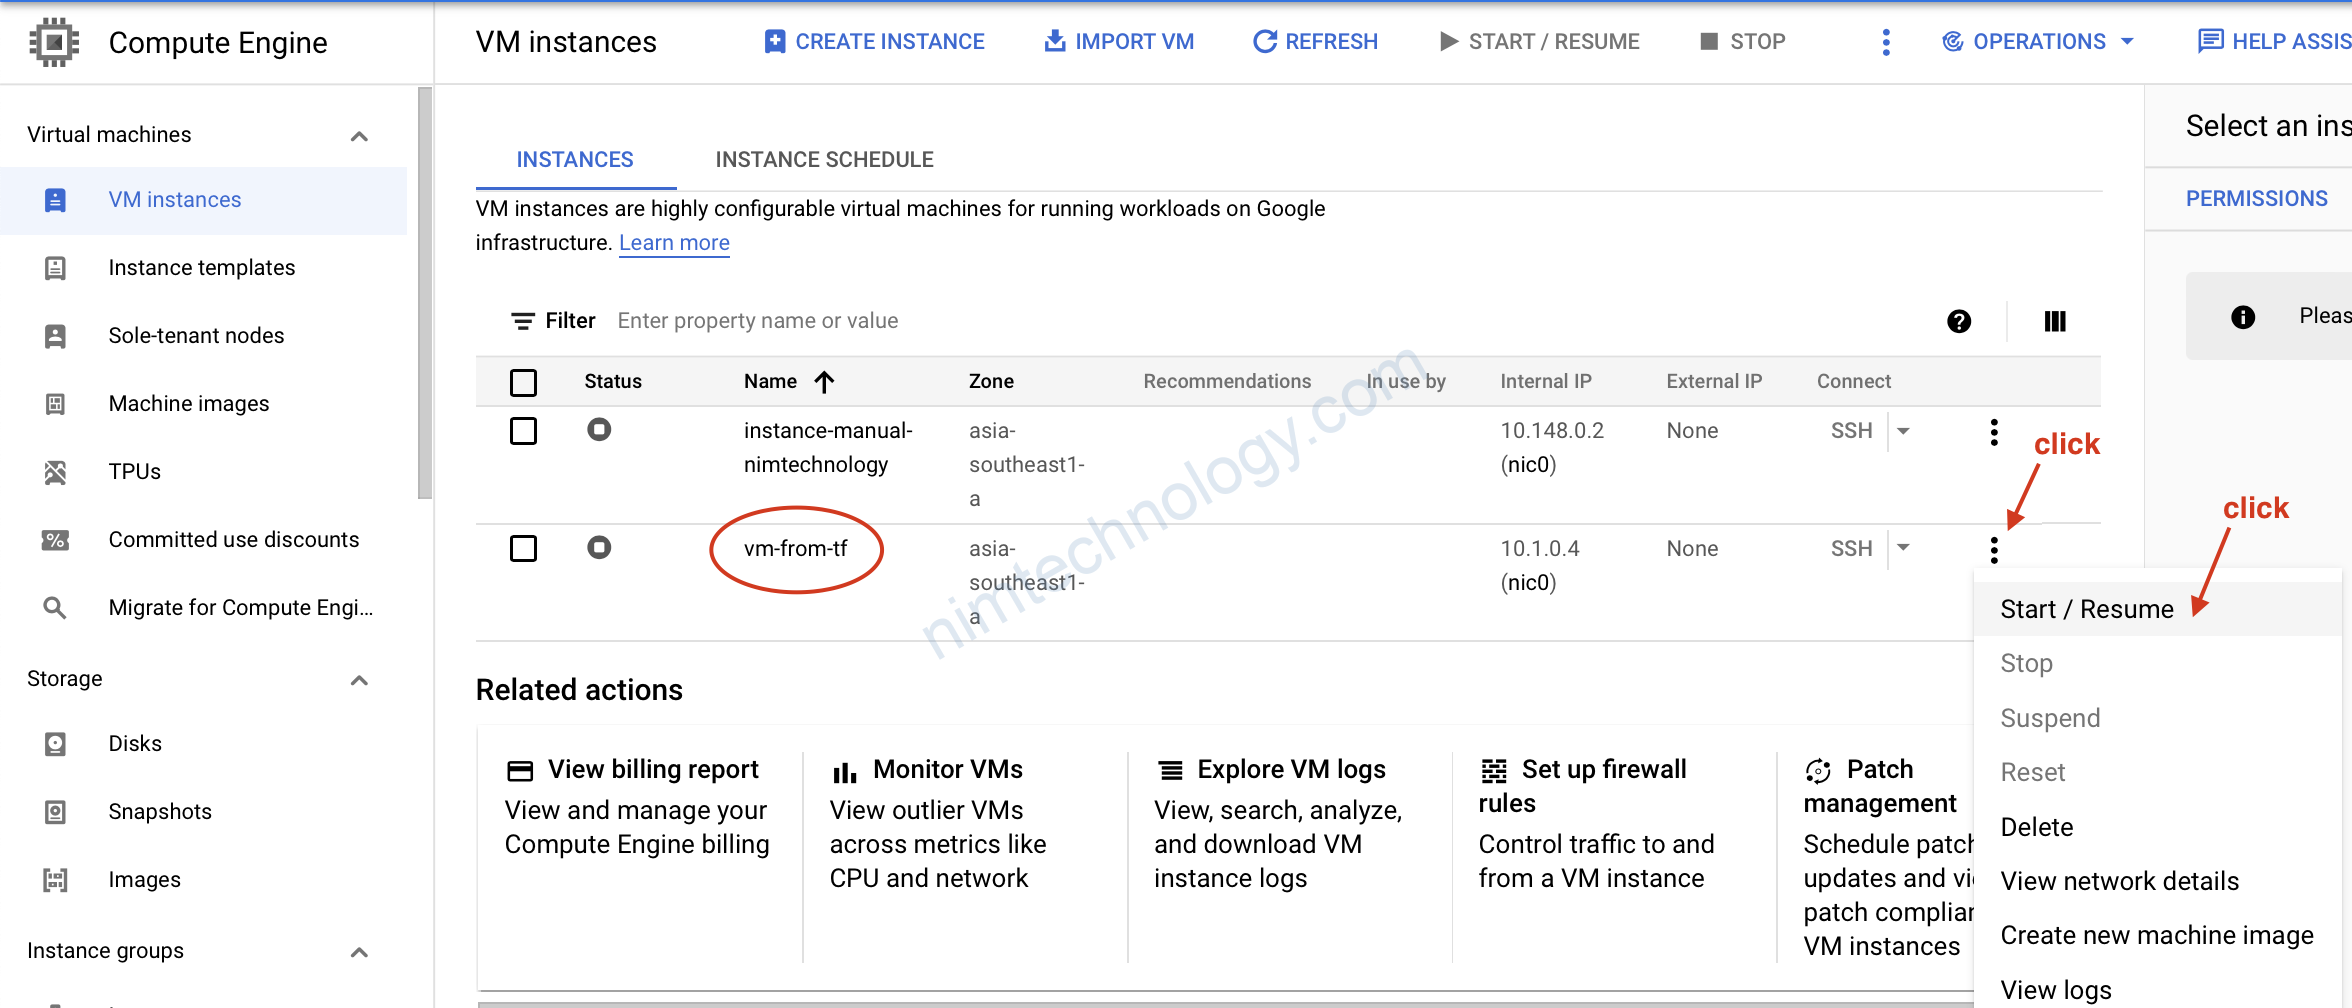
Lỗi này thì do VM của chúng ta chưa mở SSH

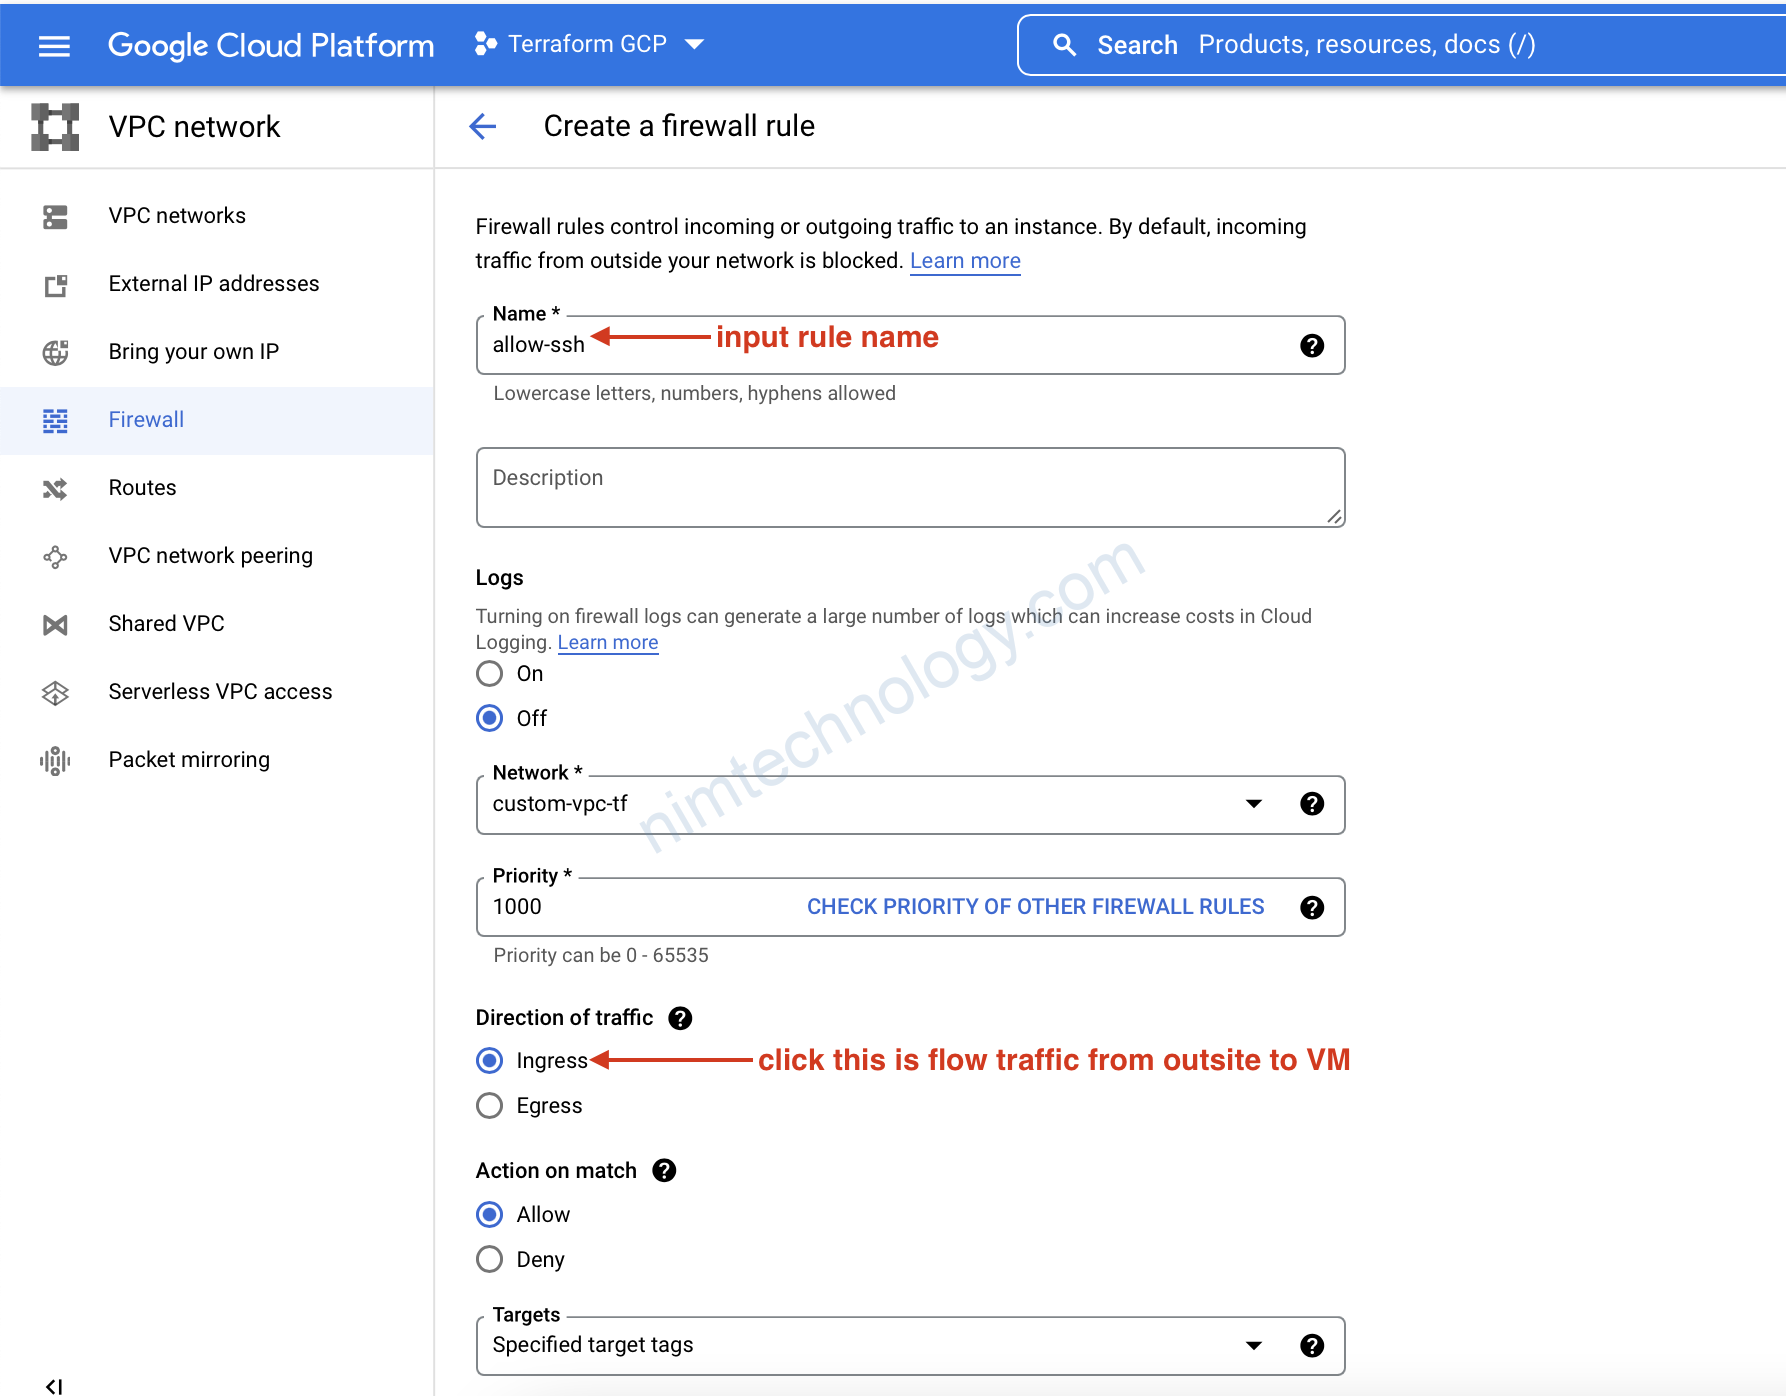
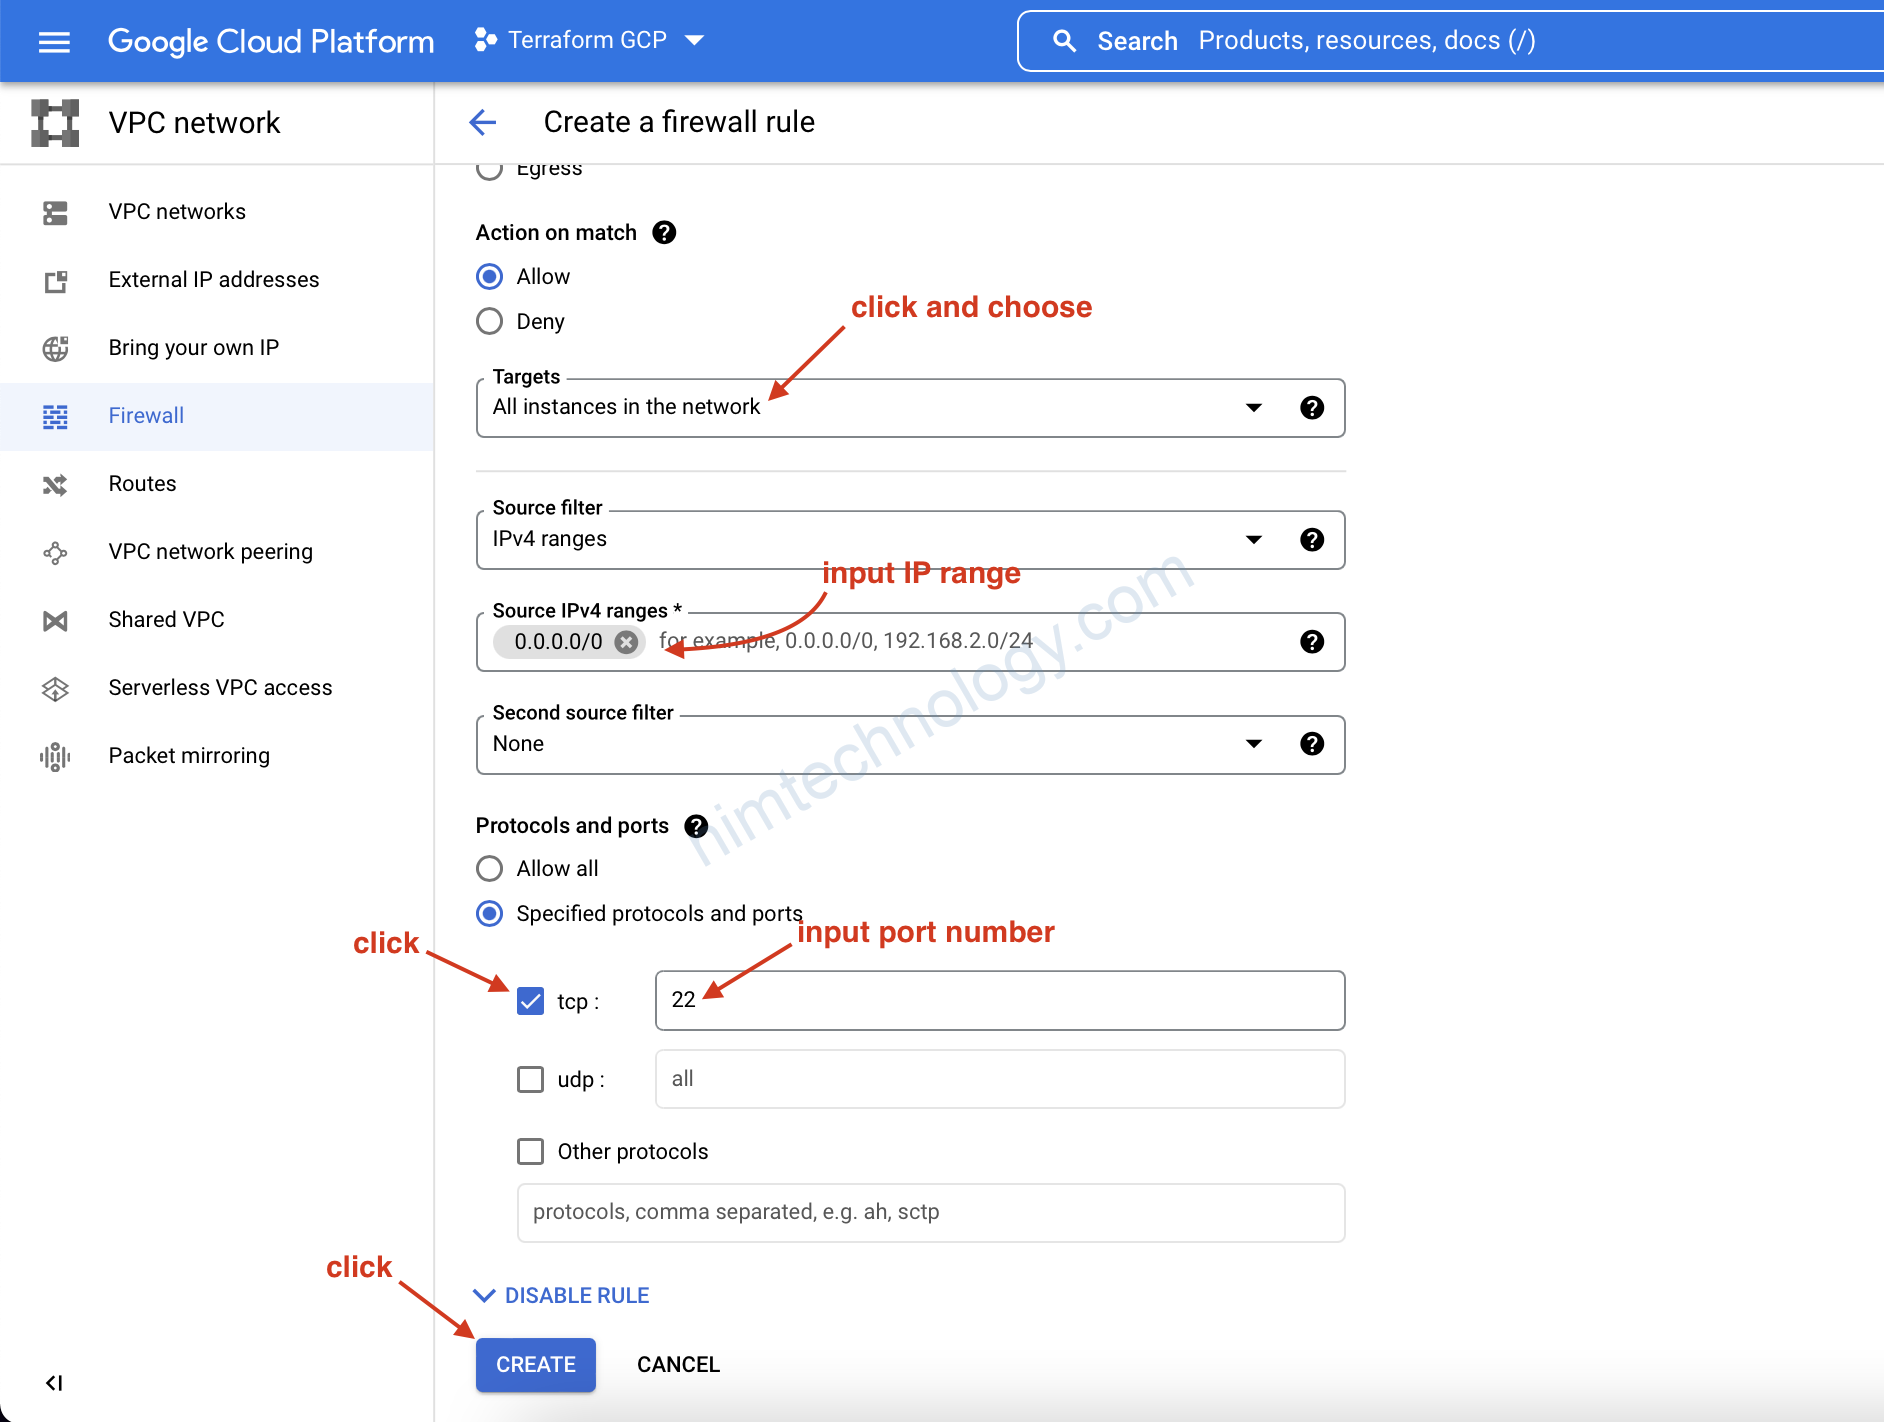
còn nếu đúng chúng nên quay lại terraform VPC để update firewall rule bên đó
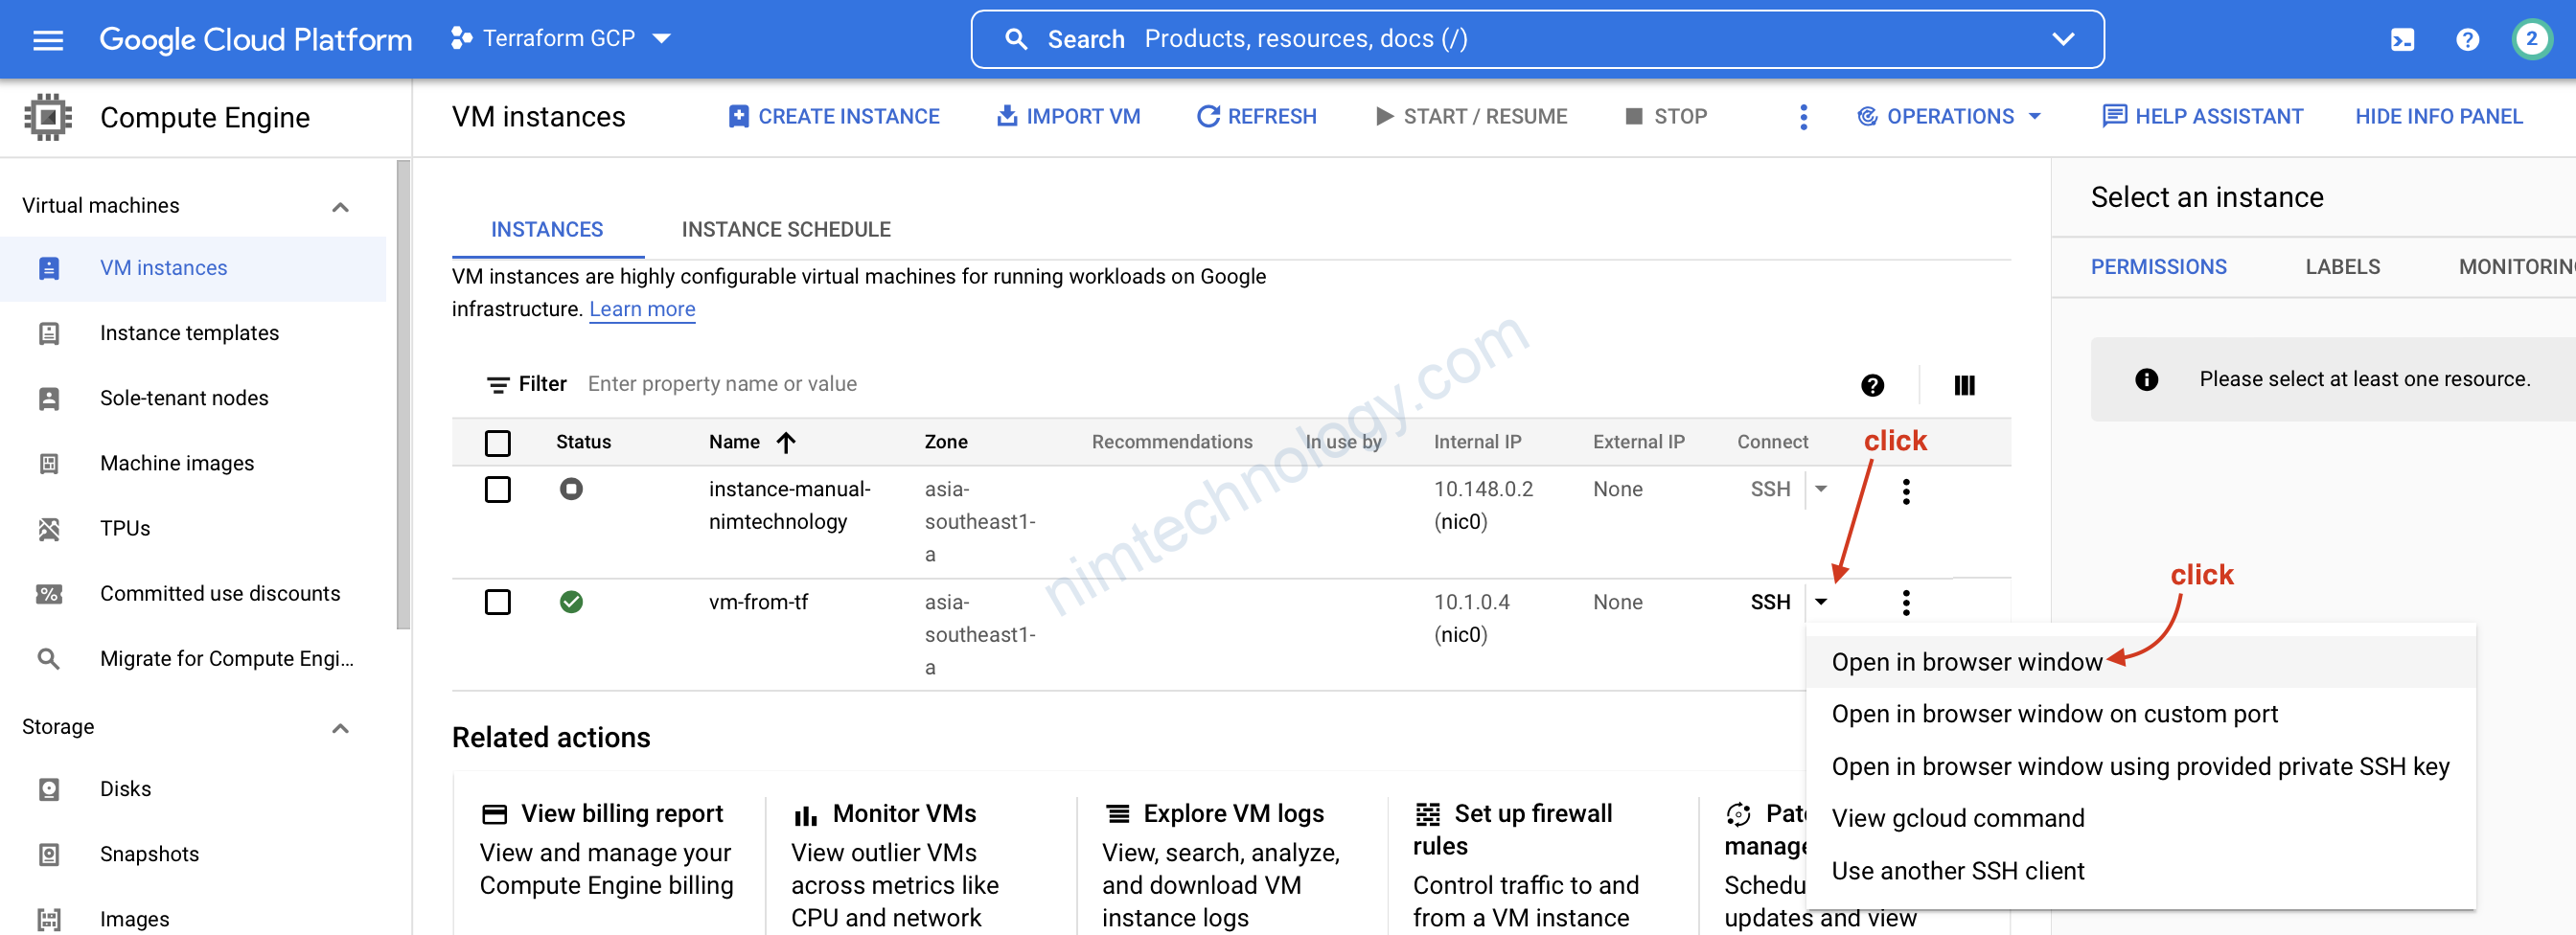
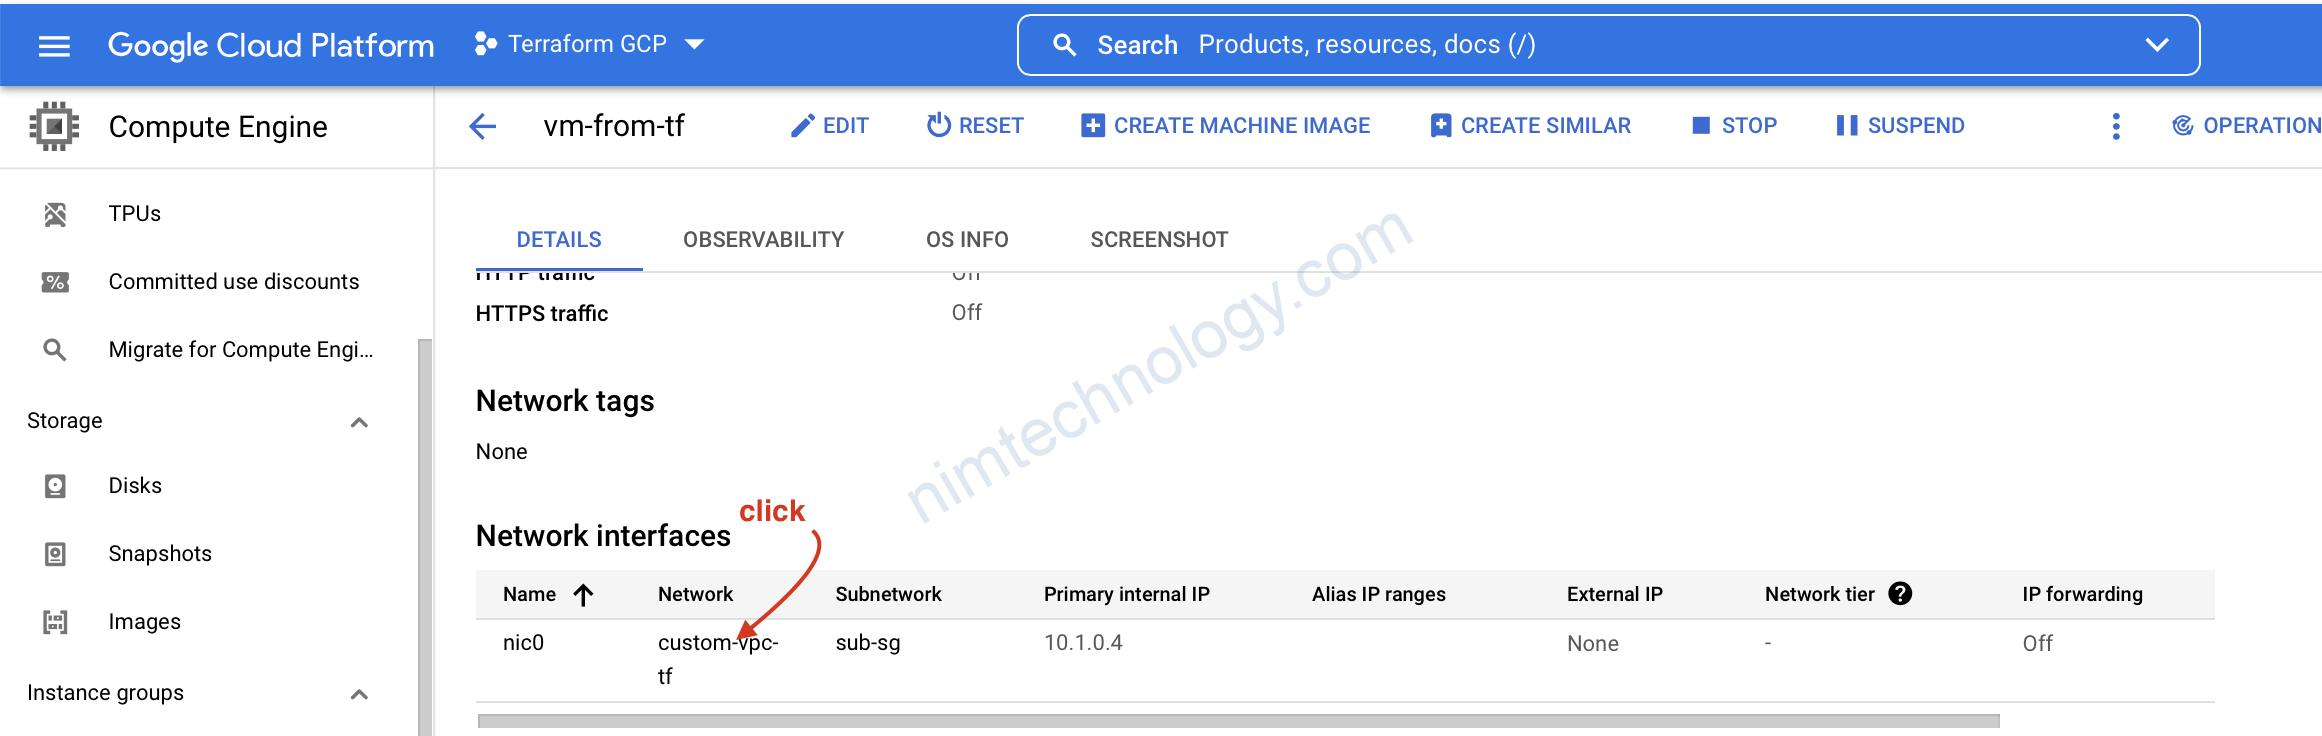
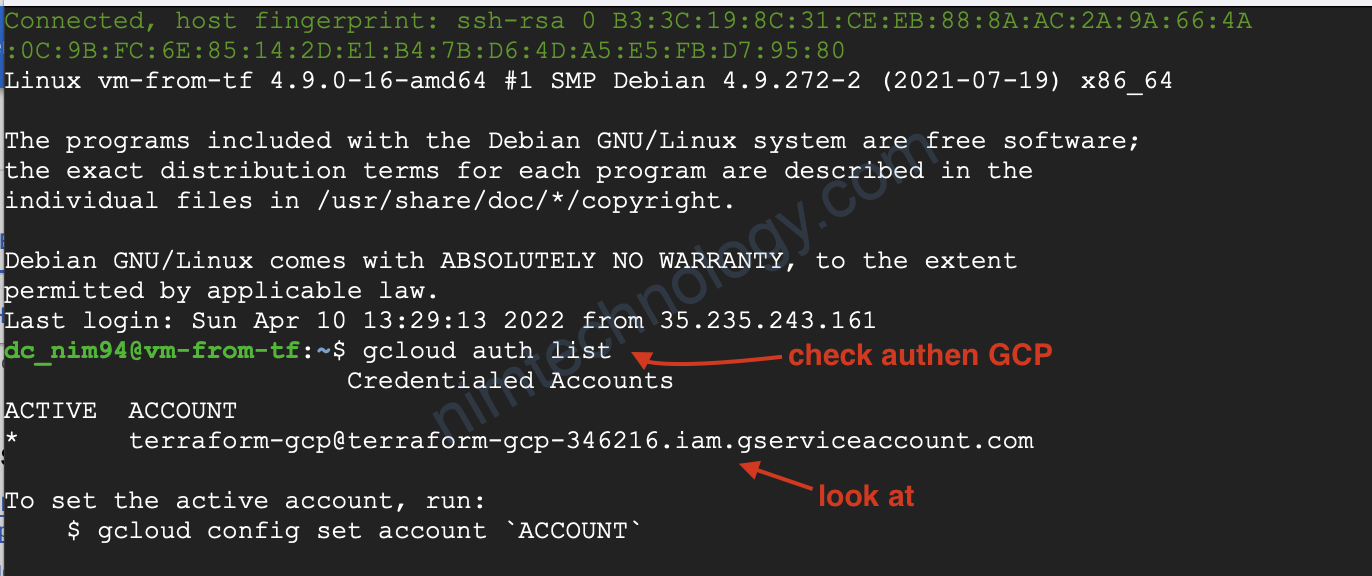
Giờ quay trở lại VM và mở console ssh
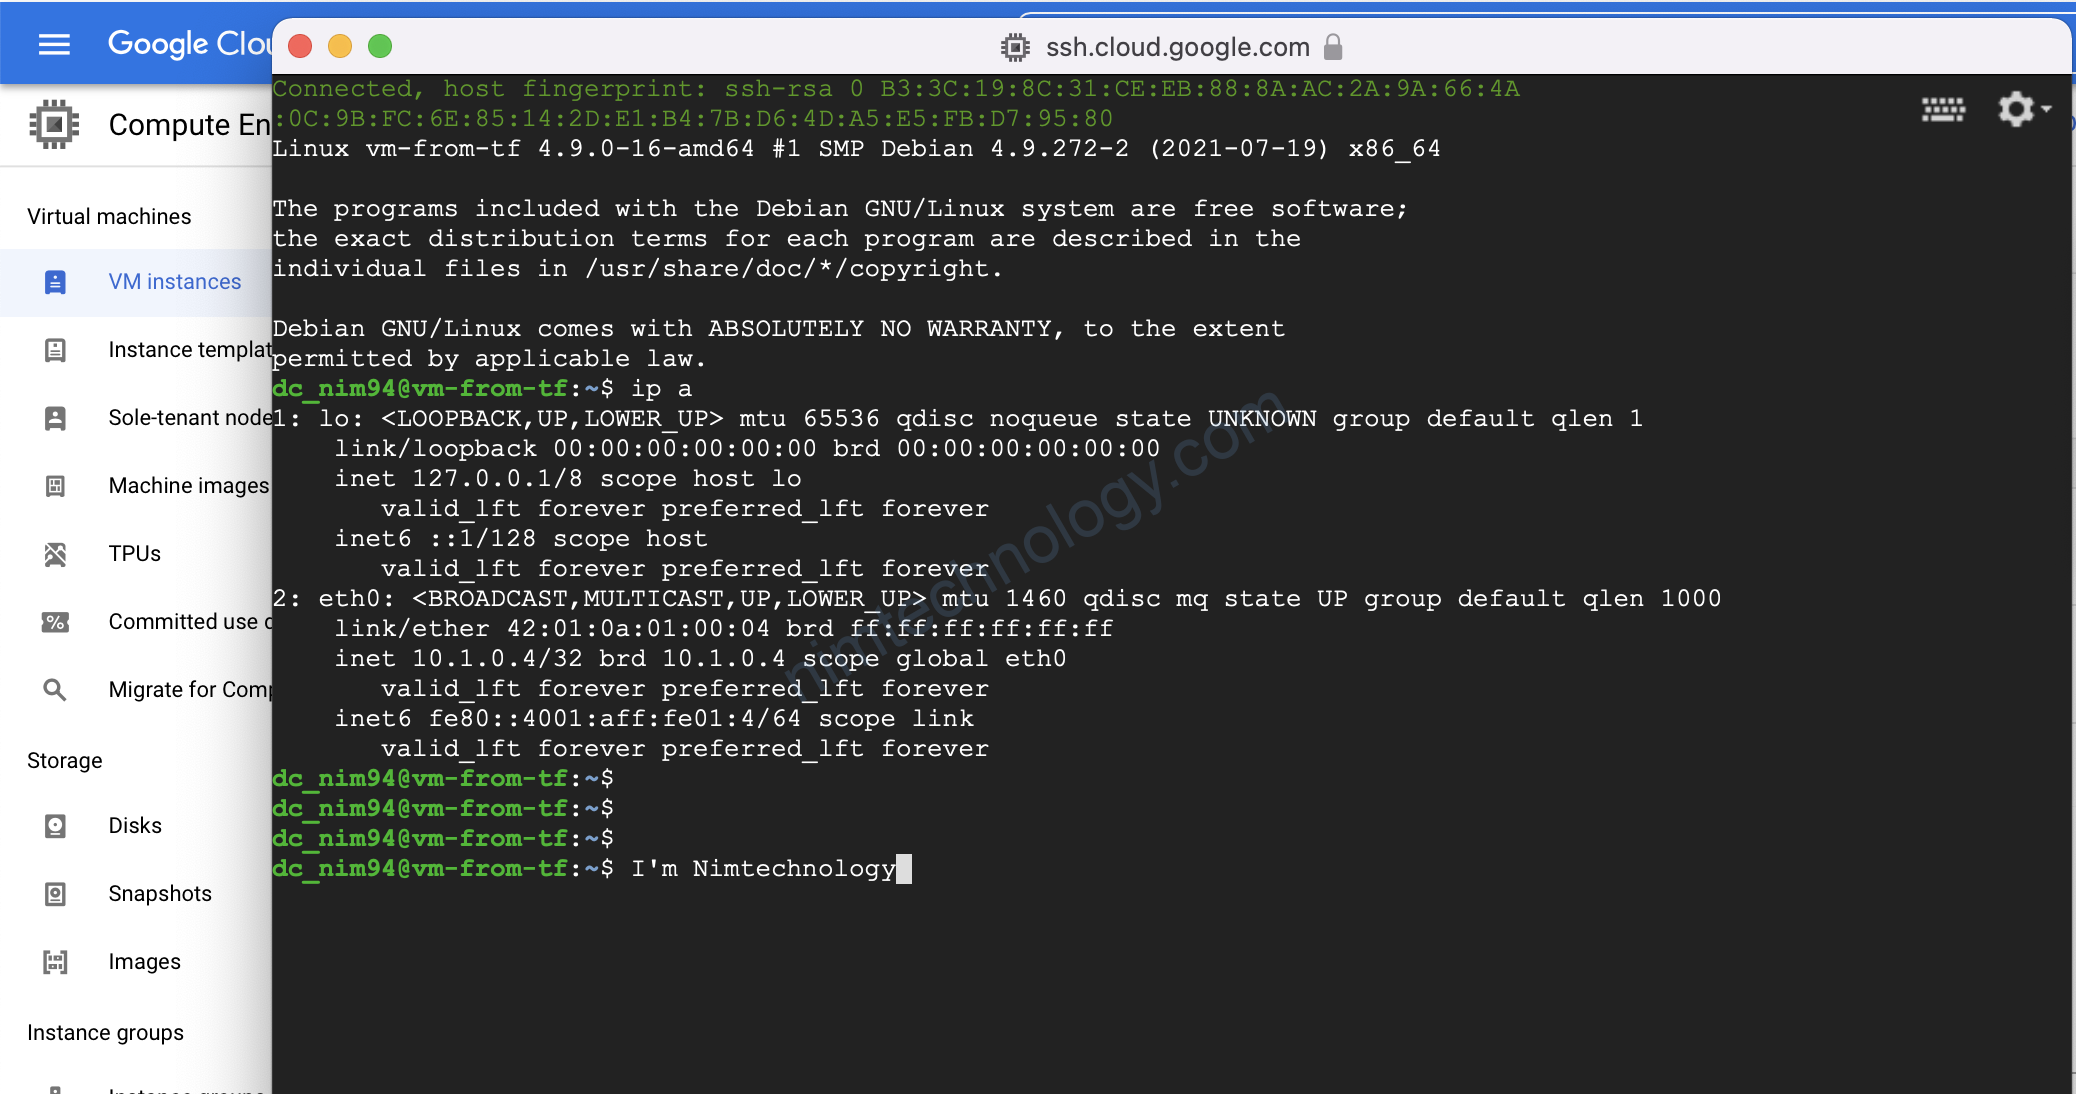
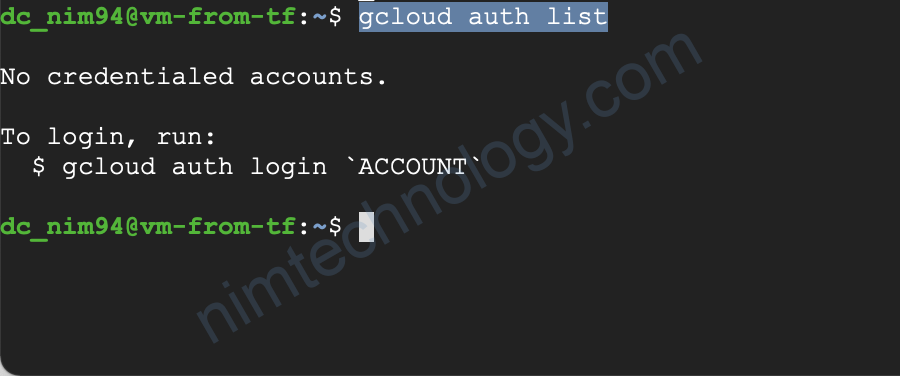
gcloud auth list
Giờ gõ thử command bên trên:
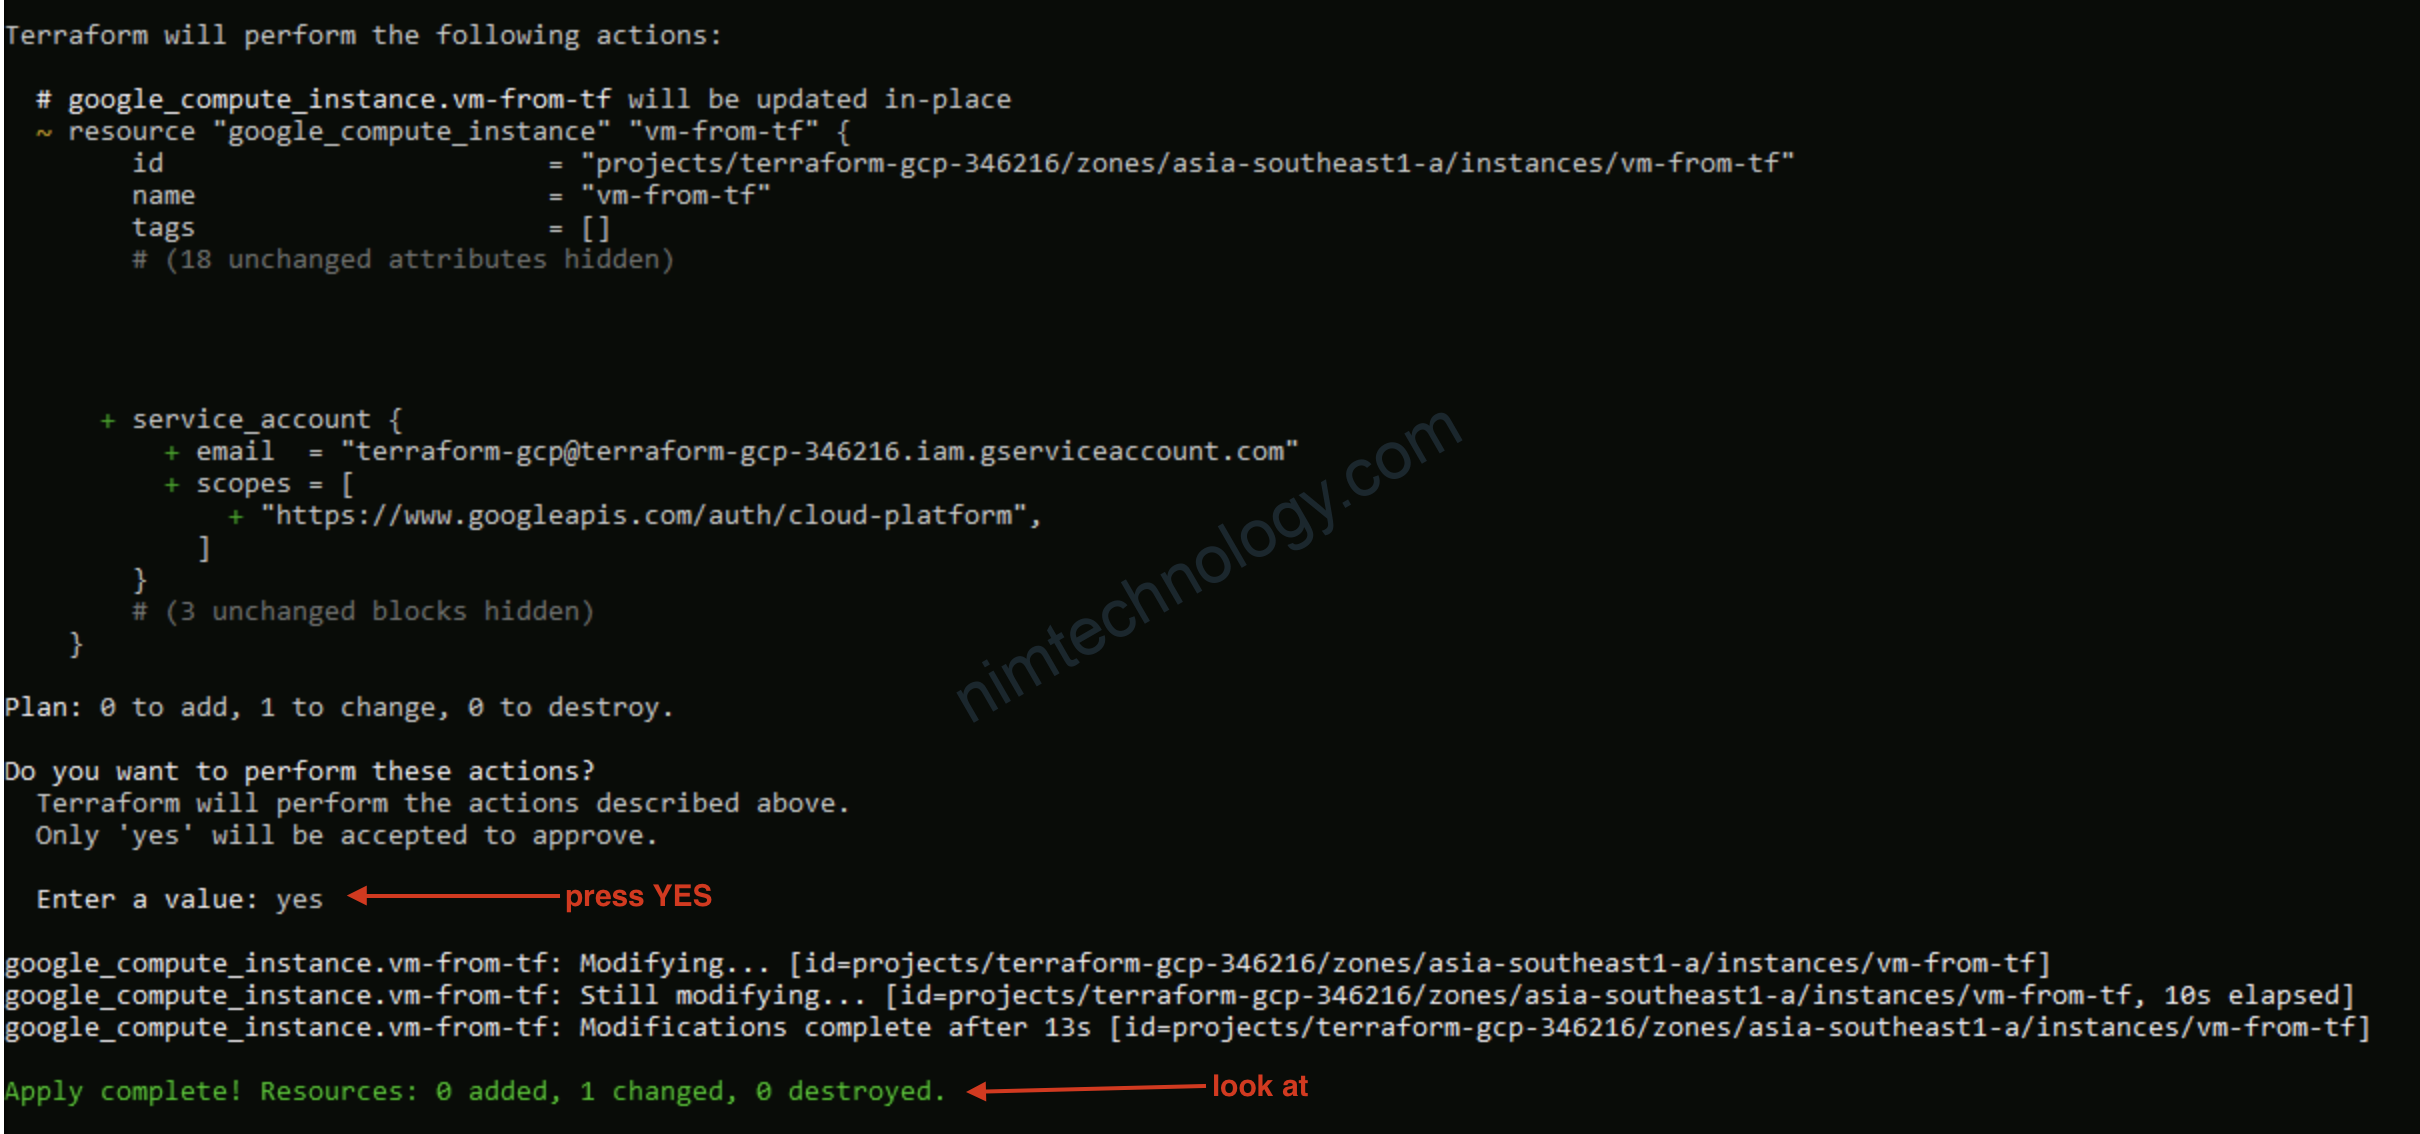
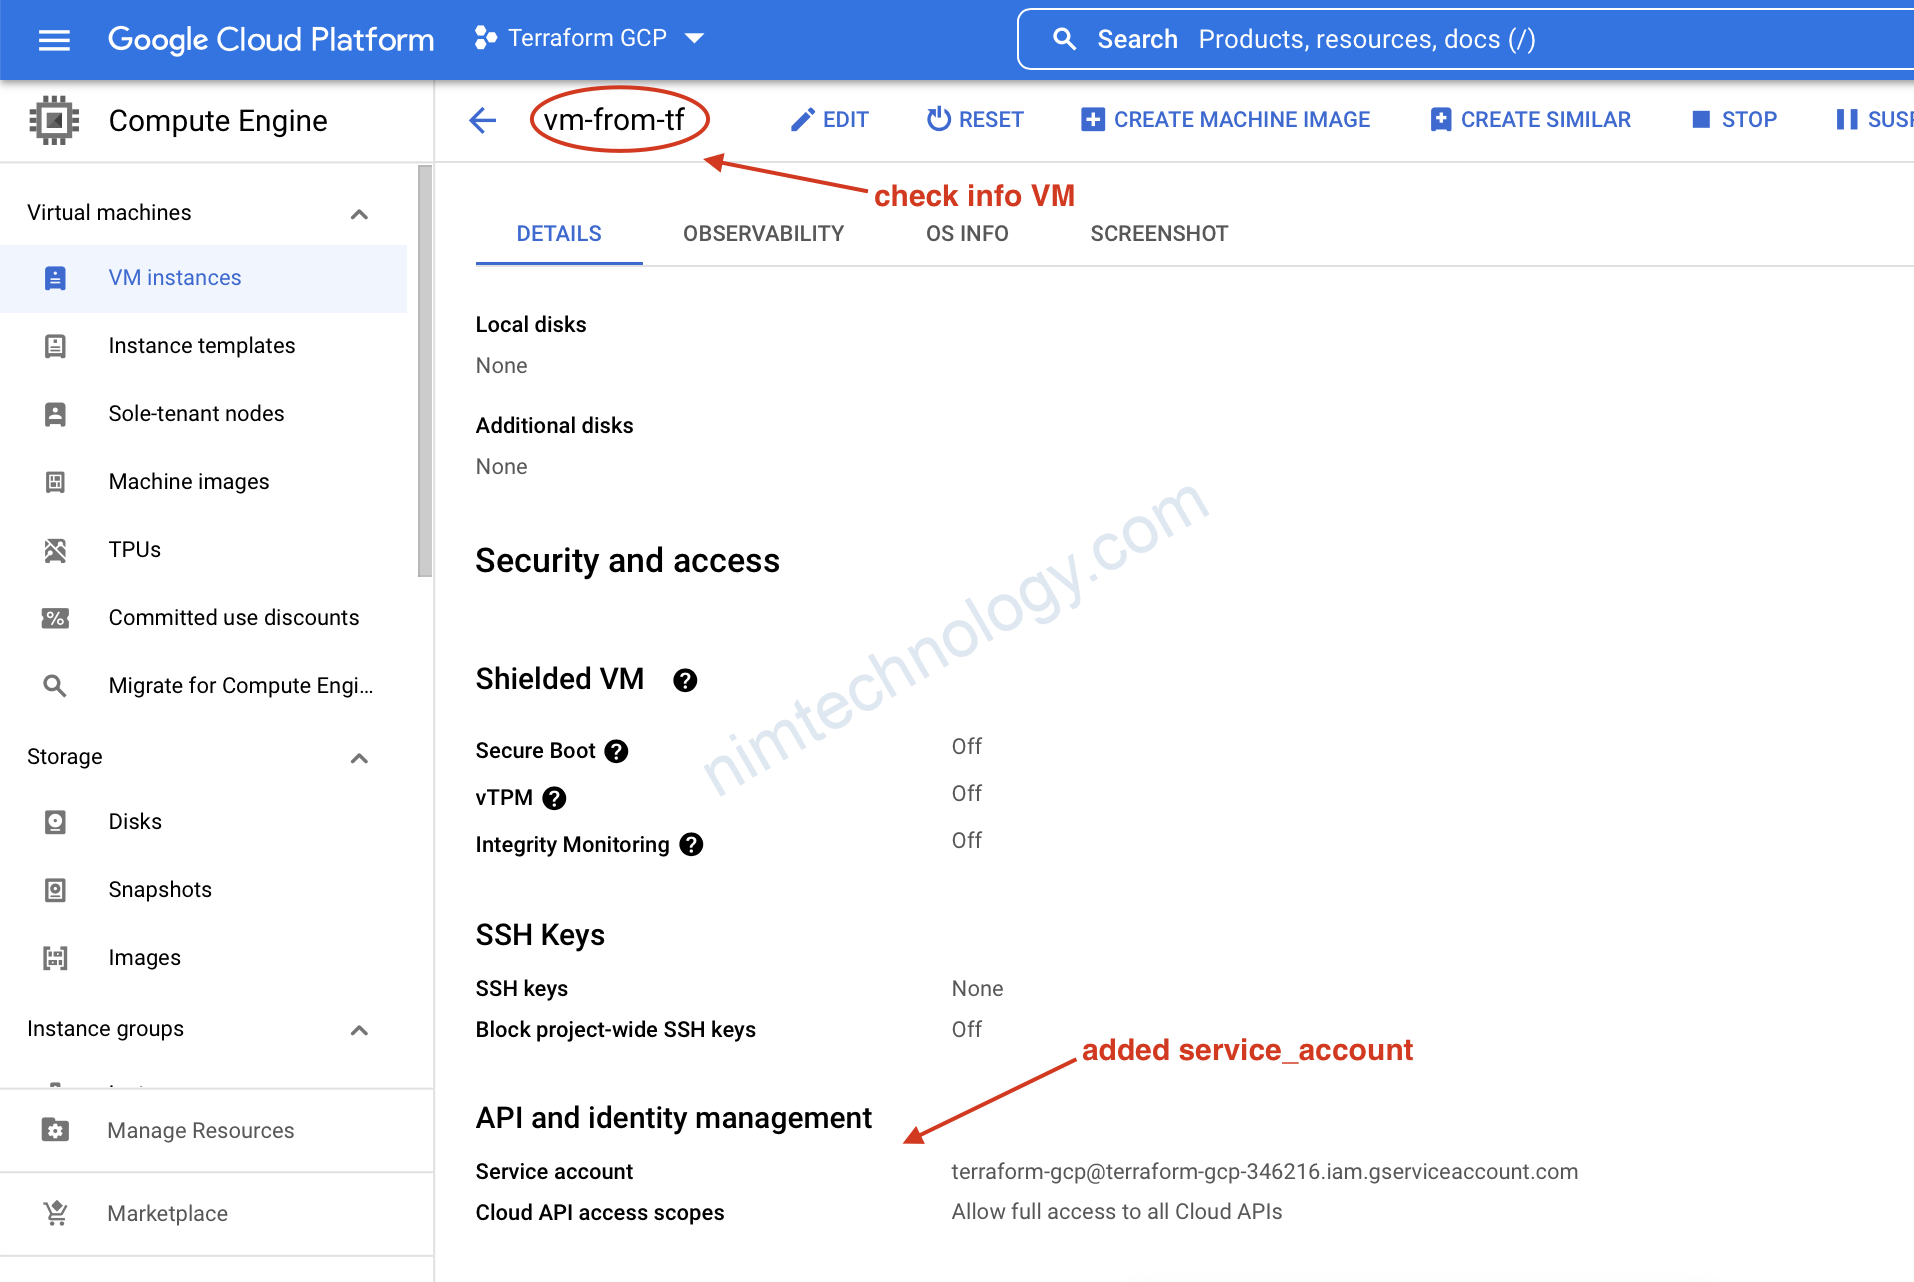
2.1.2) service_account in google_compute_instance
service_account – (Optional) Service account to attach to the instance. Structure is documented below. Note: allow_stopping_for_update must be set to true or your instance must have a desired_status of TERMINATED in order to update this field.
The service_account block supports:
email– (Optional) The service account e-mail address. If not given, the default Google Compute Engine service account is used. Note:allow_stopping_for_updatemust be set to true or your instance must have adesired_statusofTERMINATEDin order to update this field.scopes– (Required) A list of service scopes. Both OAuth2 URLs and gcloud short names are supported. To allow full access to all Cloud APIs, use thecloud-platformscope. See a complete list of scopes here. Note:allow_stopping_for_updatemust be set to true or your instance must have adesired_statusofTERMINATEDin order to update this field.
resource "google_compute_instance" "vm-from-tf" {
  name = "vm-from-tf"
  zone = "asia-southeast1-a"
  machine_type = "n1-standard-2"

  allow_stopping_for_update = true

  network_interface {
    network = "custom-vpc-tf"
    subnetwork = "sub-sg"
  }

  boot_disk {
    initialize_params {
      image = "debian-9-stretch-v20210916"
      size = 35

    }
    auto_delete = false
  }

  labels = {
    "env" = "tfleaning"
  }


  scheduling {
    preemptible = false
    automatic_restart = false
  }

  service_account {
    email = "terraform-gcp@terraform-gcp-346216.iam.gserviceaccount.com"
    scopes = [ "cloud-platform" ]
  }

  lifecycle {
    ignore_changes = [
      attached_disk
    ]
  }

}
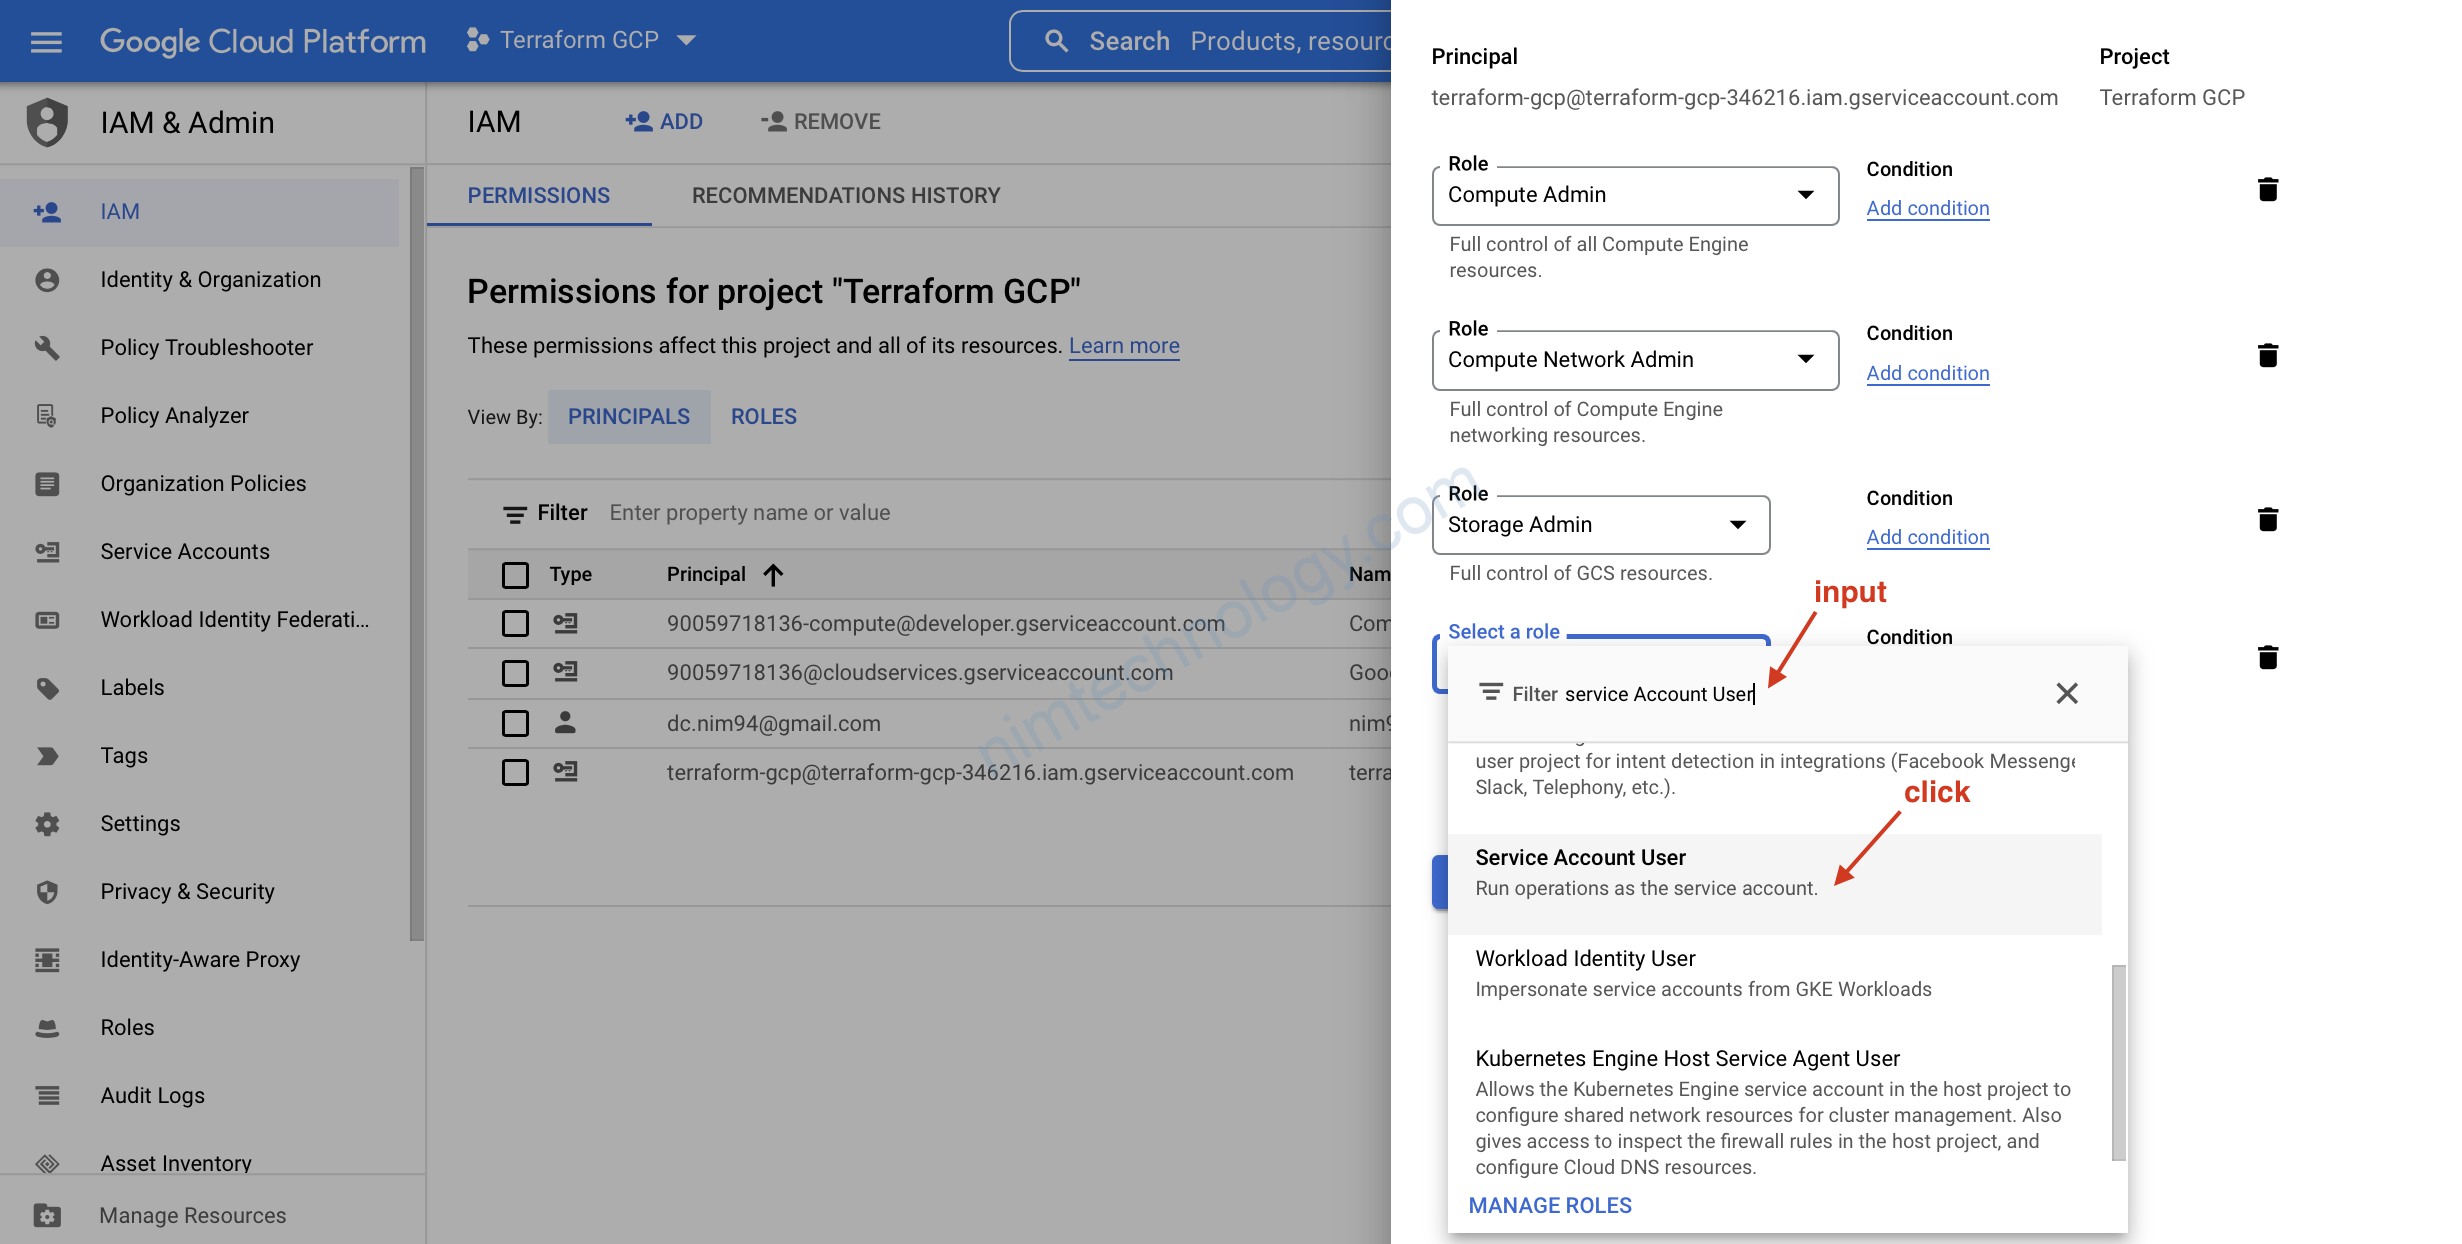
Khi mà gõ terraform apply nếu bạn gặp lỗi bên dưới
Error: Error waiting for updating service account: The user does not have access to service account ‘terraform-gcp@terraform-gcp-346216.iam.gserviceaccount.com’. User: ‘terraform-gcp@terraform-gcp-346216.iam.gserviceaccount.com’. Ask a project owner to grant you the iam.serviceAccountUser role on the service account
Bạn để ý phần mà tô đỏ
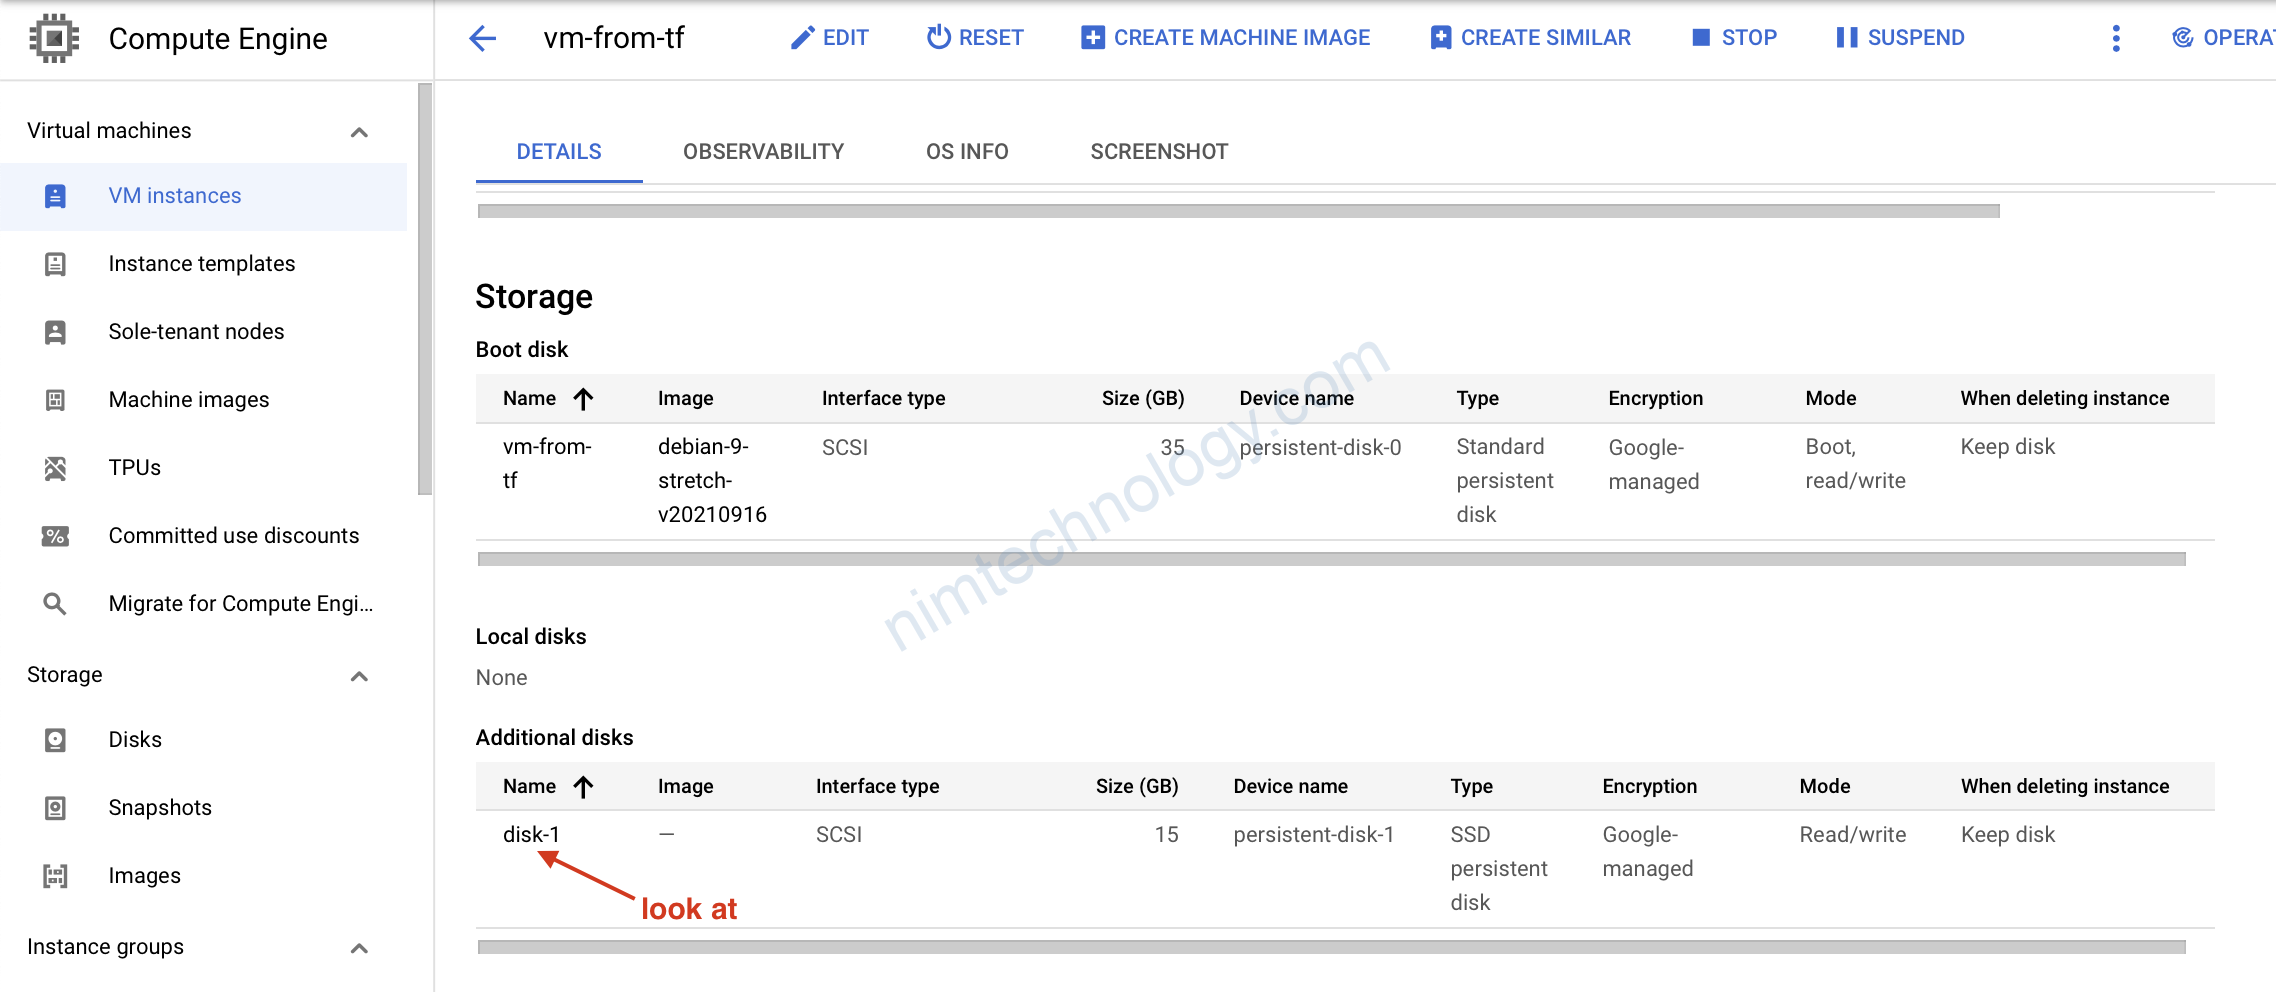
2.2) Attach Disk – Terraform
Khác với việc cài VM trên esxi của vmware trên on-premise.
Thì khi bạn tạo VM trên cloud phần disk sẽ có phần boot và phần data riêng.
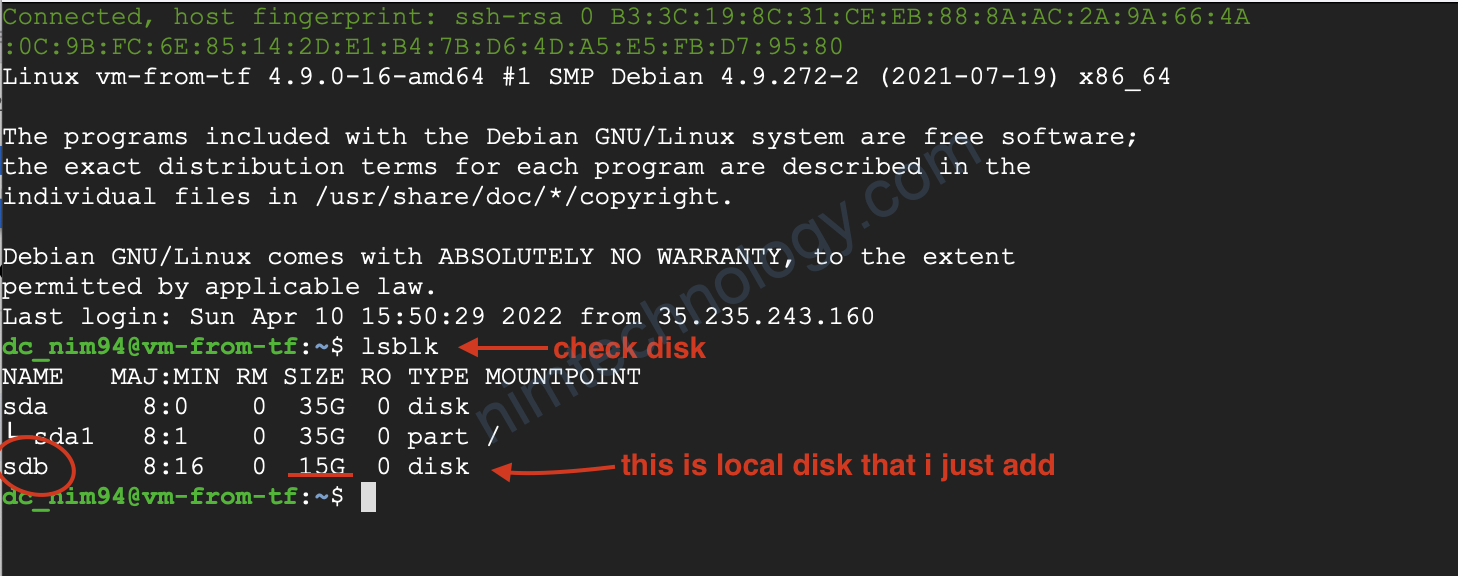
Giờ chúng ta cần add thêm data disk.
resource "google_compute_instance" "vm-from-tf" {
name = "vm-from-tf"
zone = "asia-southeast1-a"
machine_type = "n1-standard-2"
allow_stopping_for_update = true
network_interface {
network = "custom-vpc-tf"
subnetwork = "sub-sg"
}
boot_disk {
initialize_params {
image = "debian-9-stretch-v20210916"
size = 35
}
auto_delete = false
}
labels = {
"env" = "tfleaning"
}
scheduling {
preemptible = false
automatic_restart = false
}
service_account {
email = "terraform-gcp@terraform-gcp-346216.iam.gserviceaccount.com"
scopes = [ "cloud-platform" ]
}
lifecycle {
ignore_changes = [
attached_disk
]
}
}
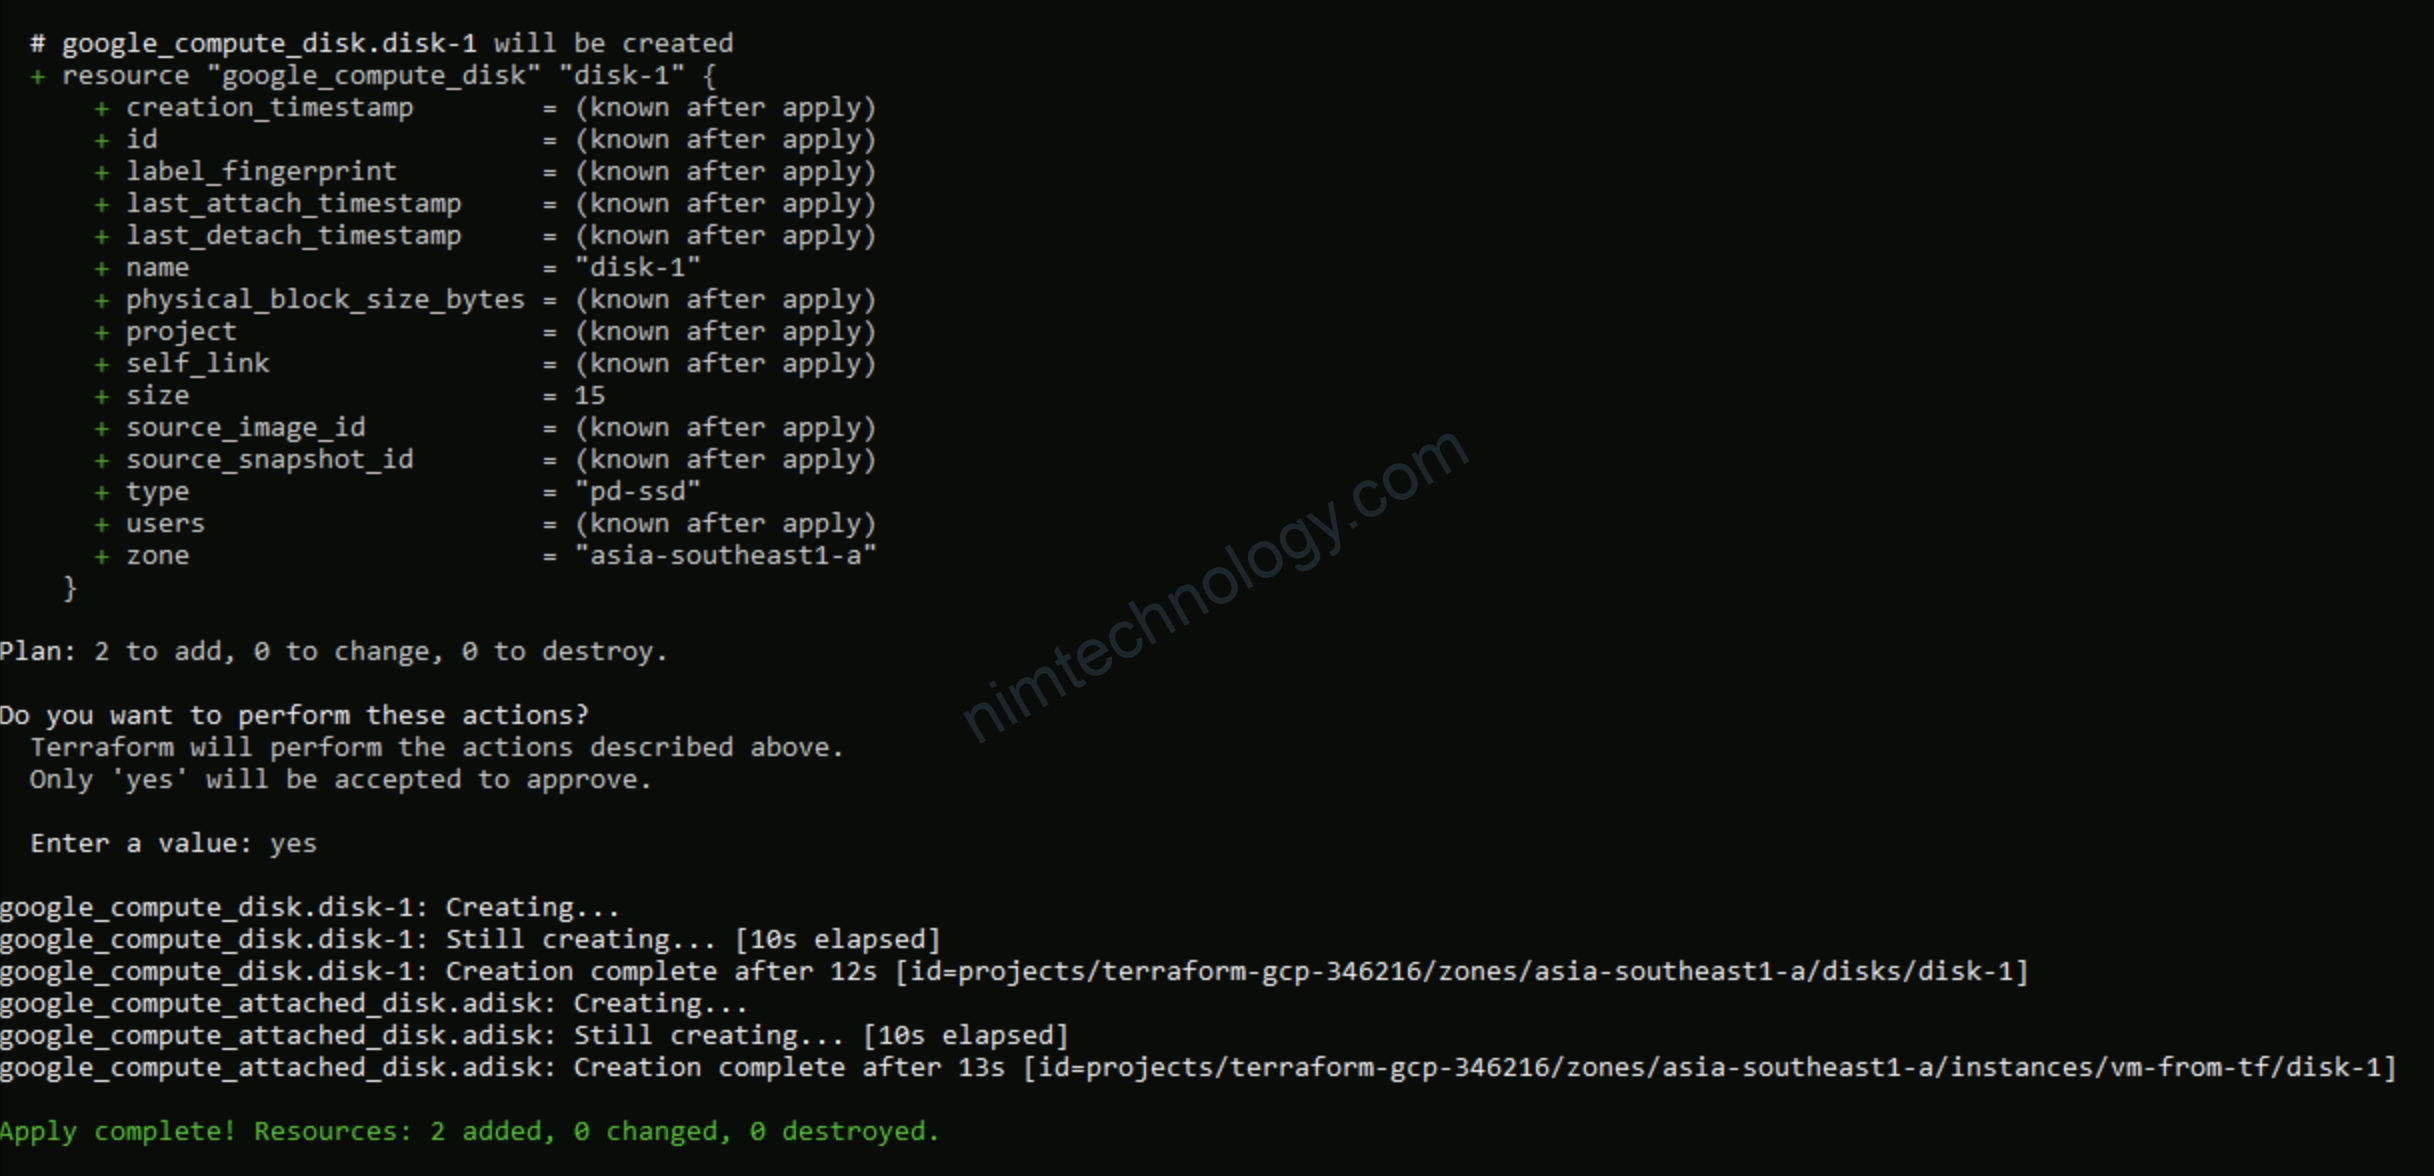
resource "google_compute_disk" "disk-1" {
name = "disk-1"
size = 15
zone = "asia-southeast1-a"
type = "pd-ssd"
}
resource "google_compute_attached_disk" "adisk" {
disk = google_compute_disk.disk-1.id
instance = google_compute_instance.vm-from-tf.id
}
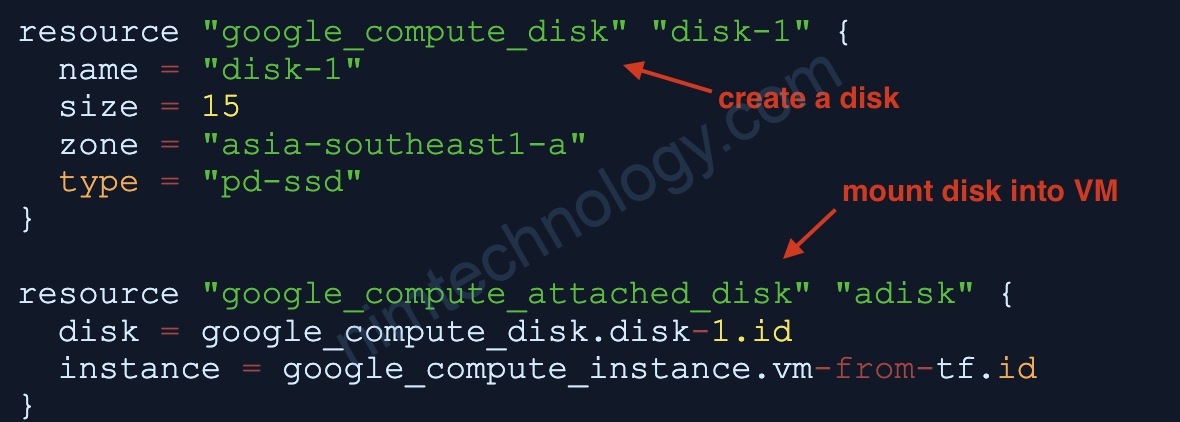
Bạn tham khảo google_compute_disk và google_compute_attached_disk để khiểu được cái khai báo
Giờ lại terraform apply tiếp
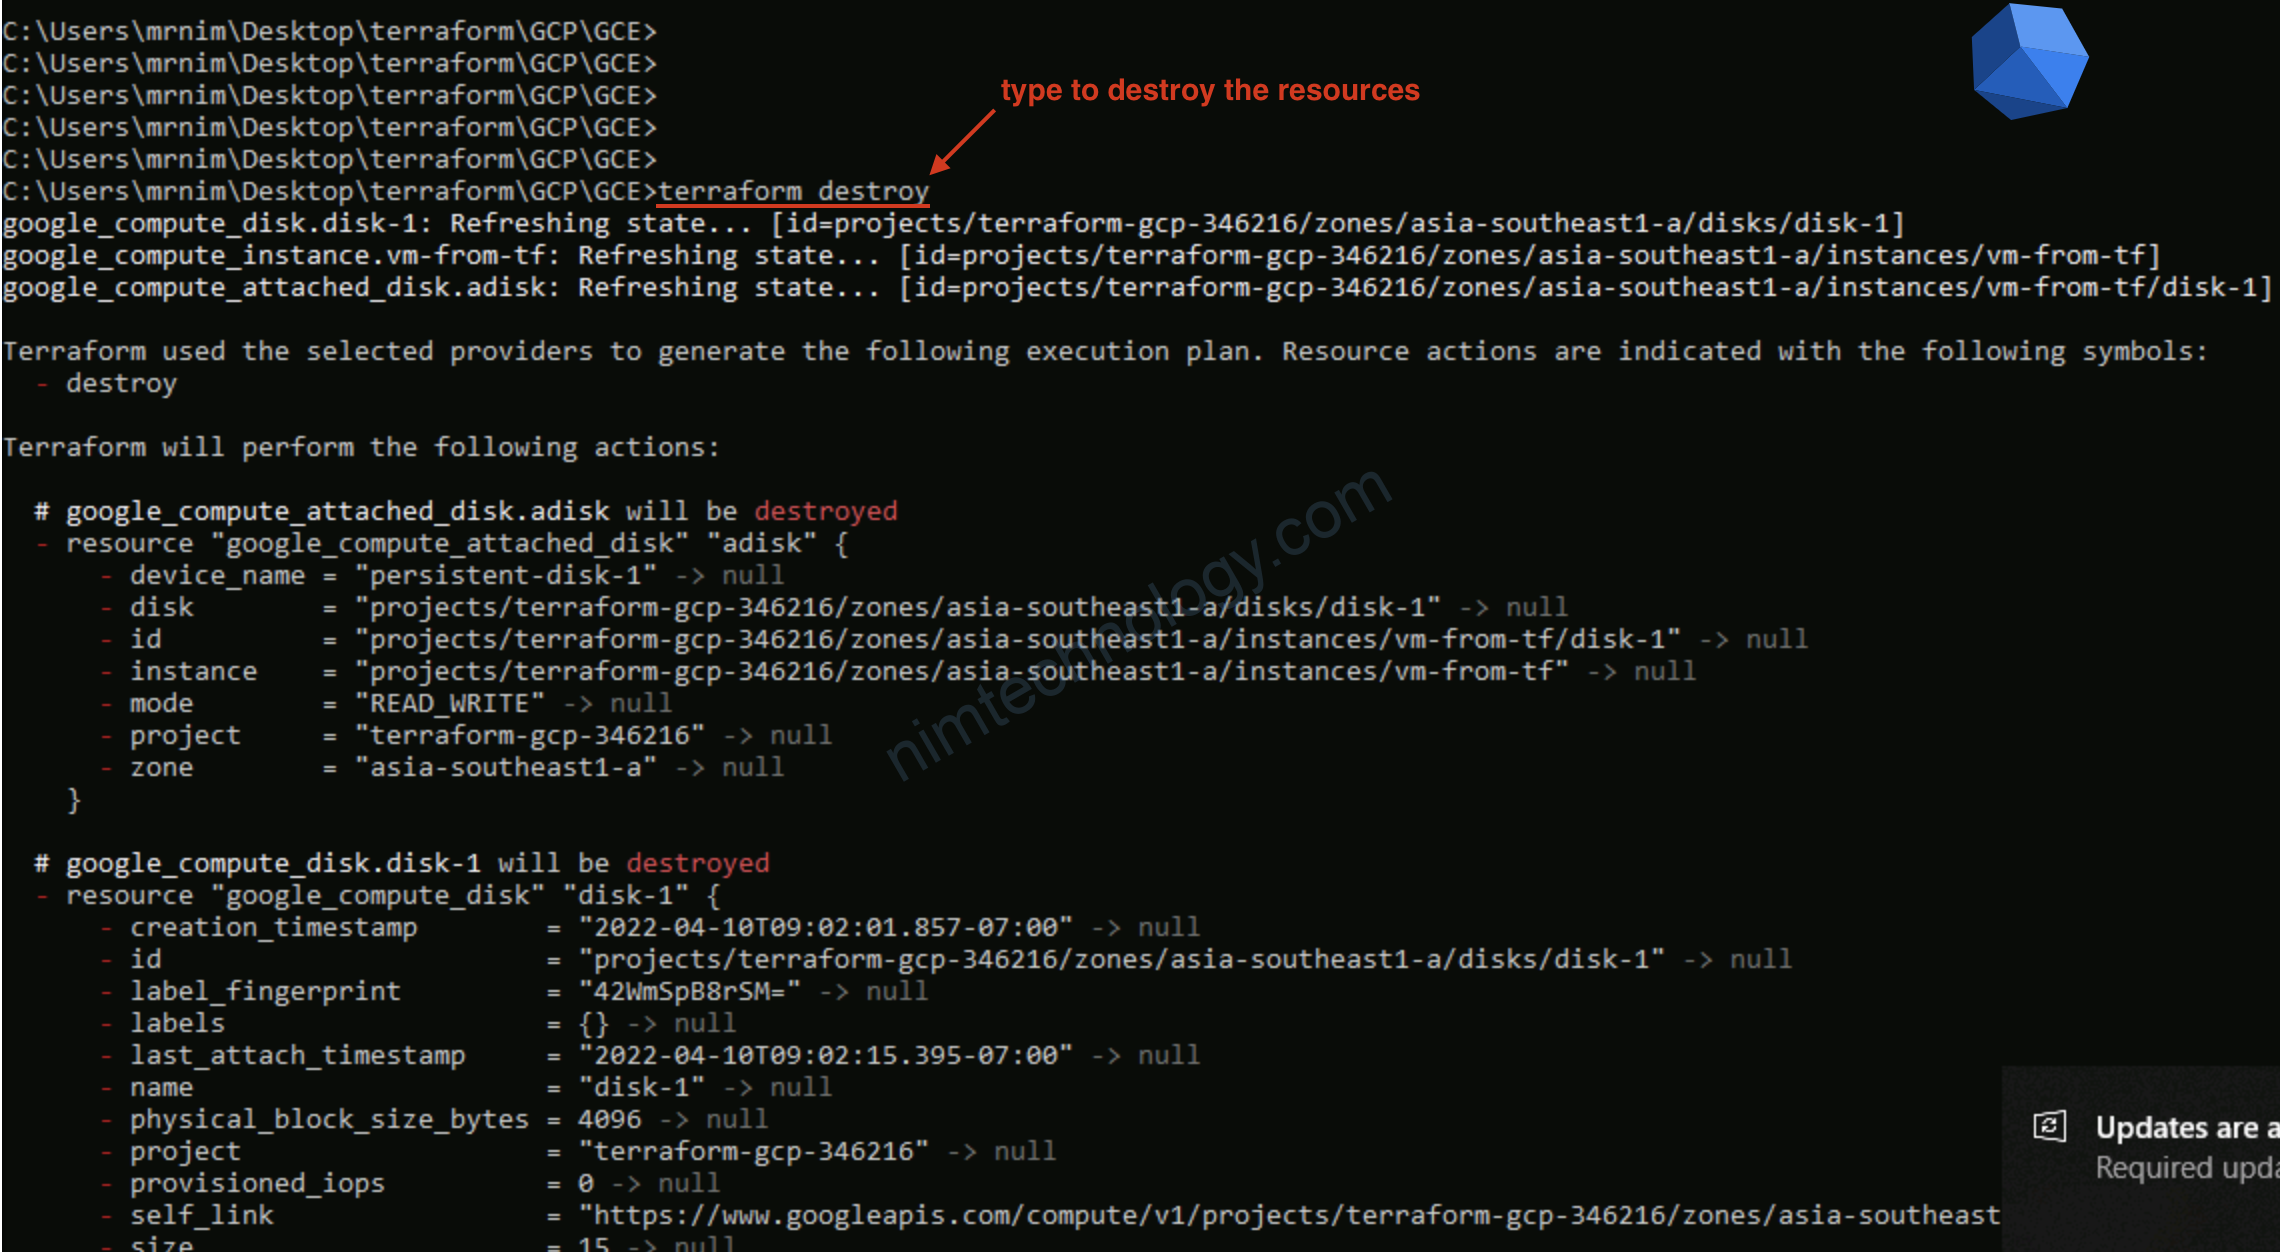
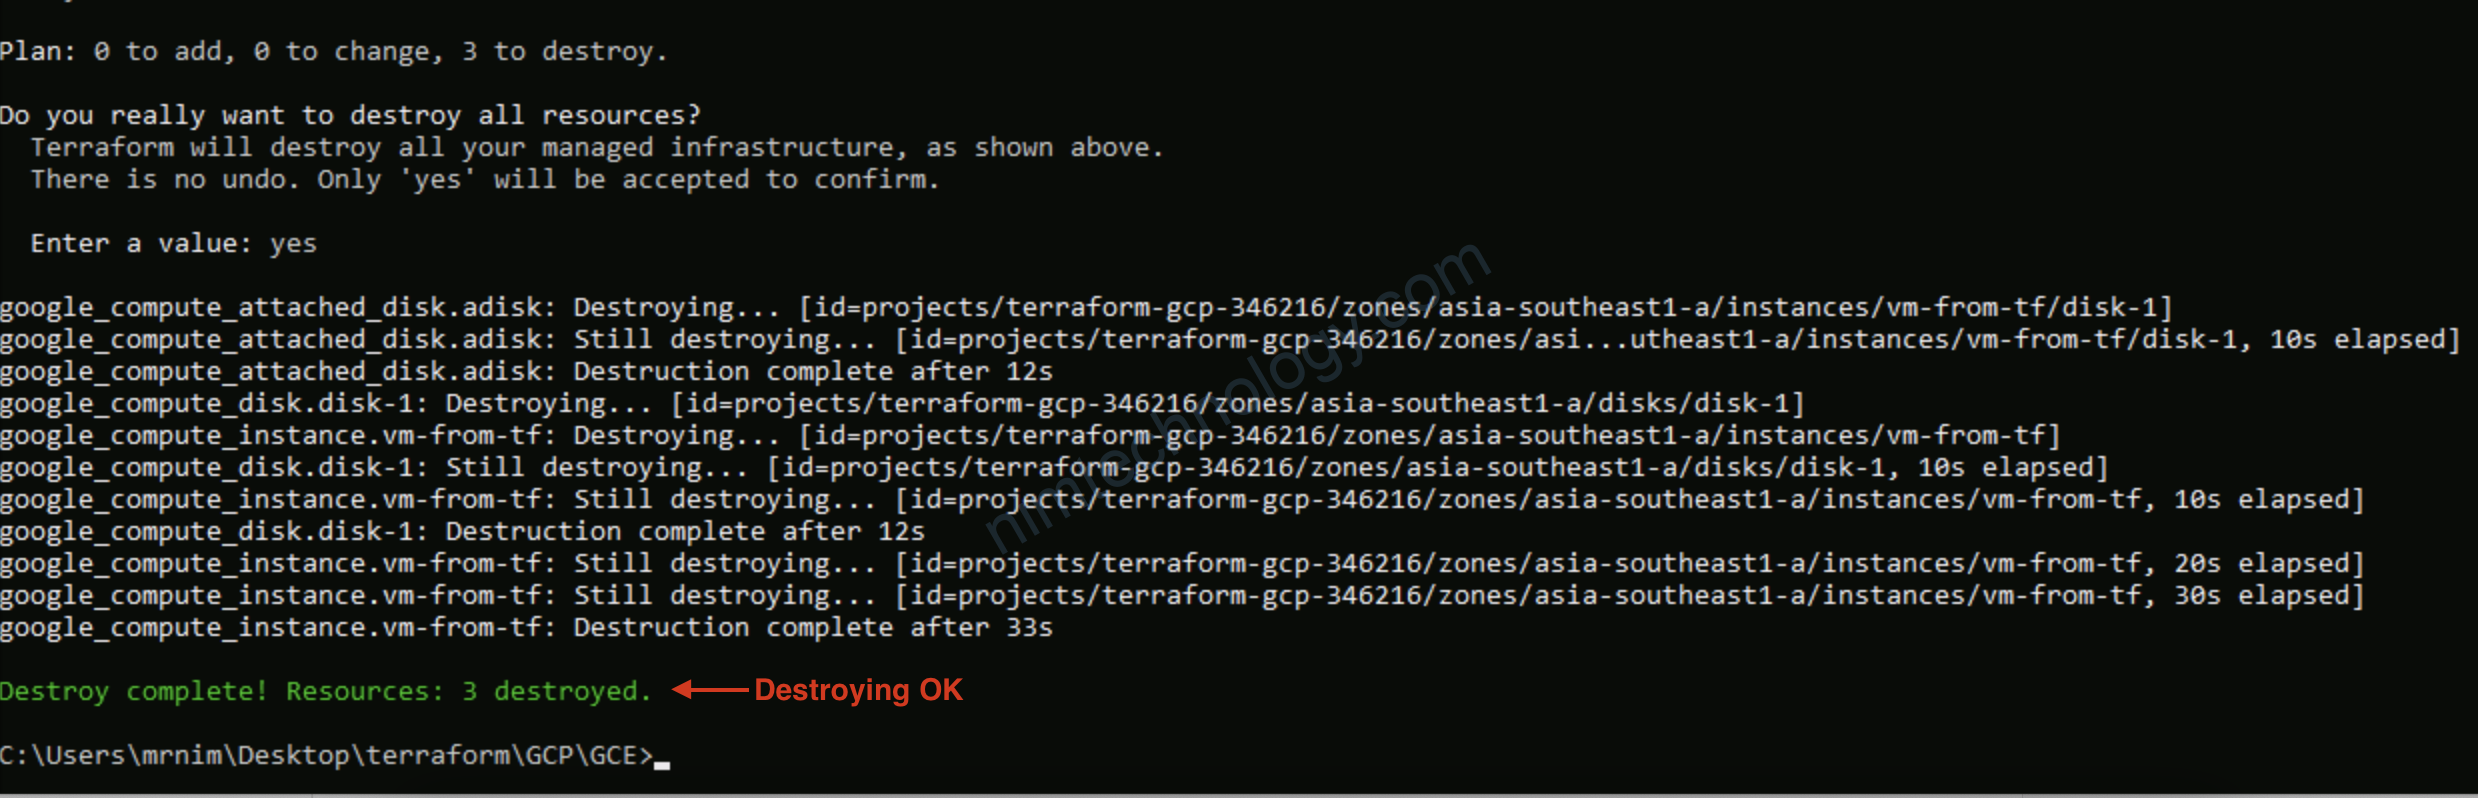
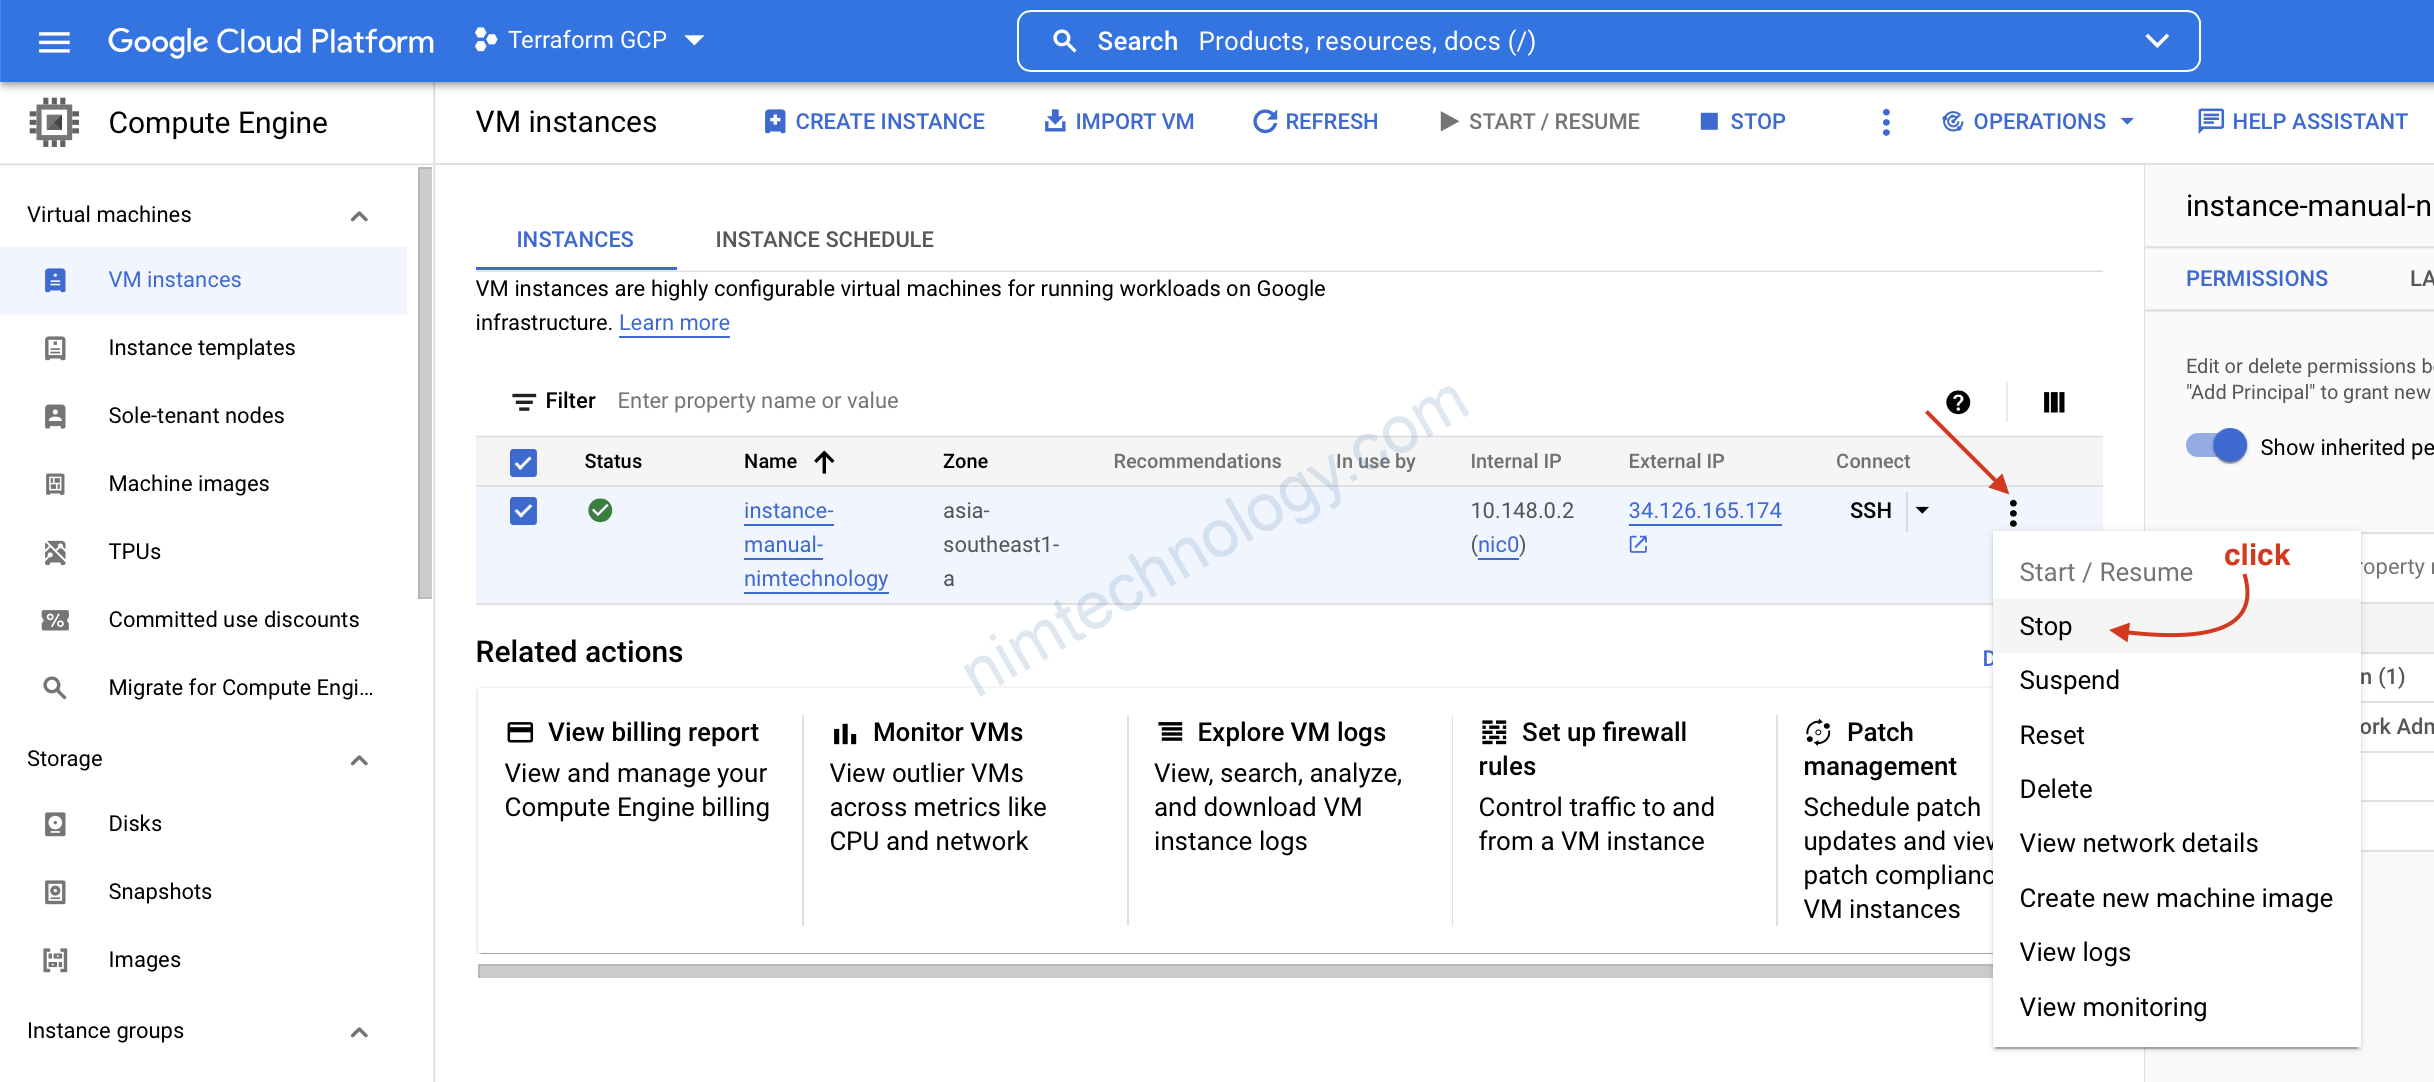
2.3) Destroy resources
Để delete các resources do terraform tạo ra chúng ta cần gõ:
terraform destroy