Ở bài về beginer terraform mình đã hướng dẫn cách tạo tài khoản AWS free 1 năm
1) Create account and login console
Lúc này user của bạn sẽ là user root
Đa số ta sẽ được khuyên là sửa sử dụng user root càng ít càng tốt.
Vậy giờ chúng ta vào mục tiếp theo là:
2) Setup AWS Account
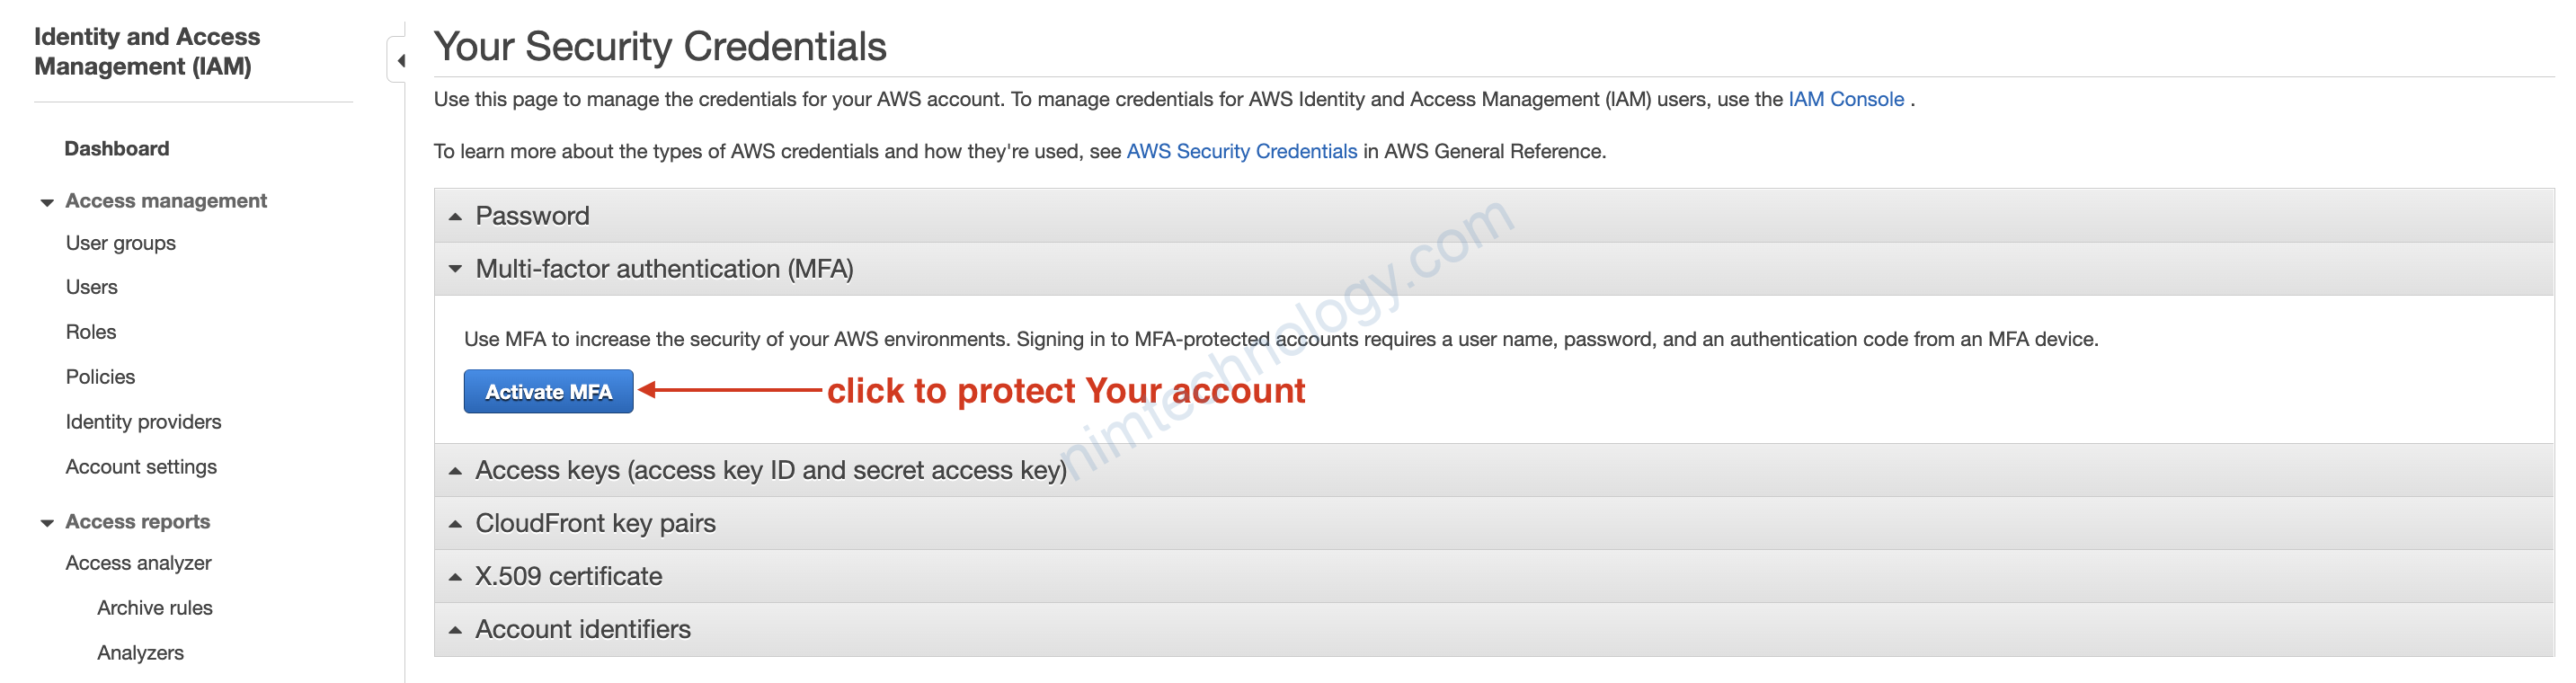
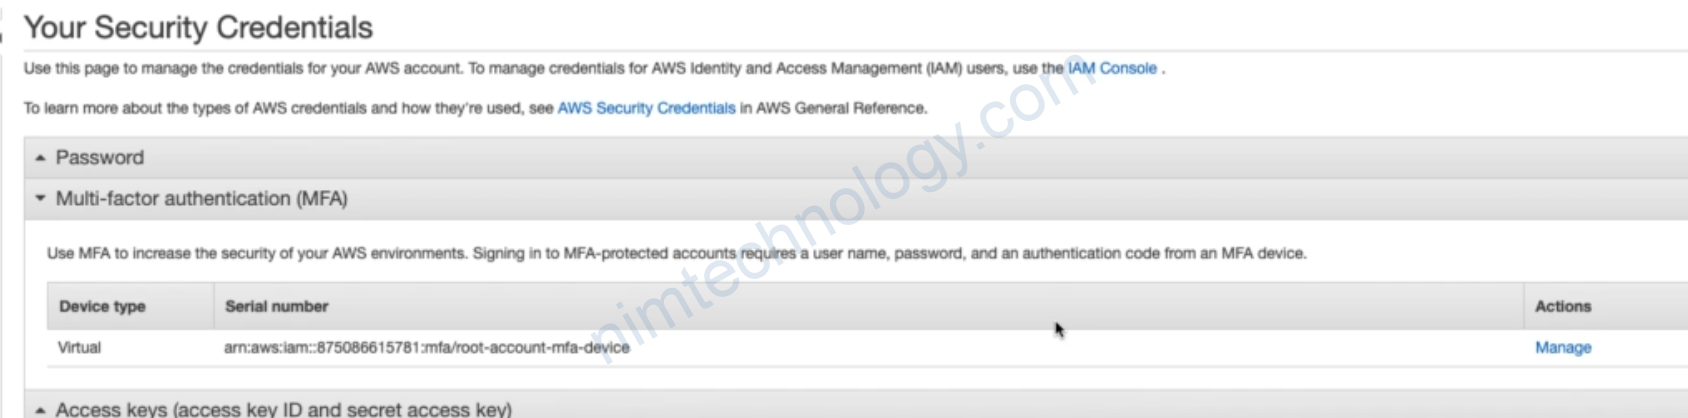
Hiện tại mình đang lab nên cũng không cần active MFA
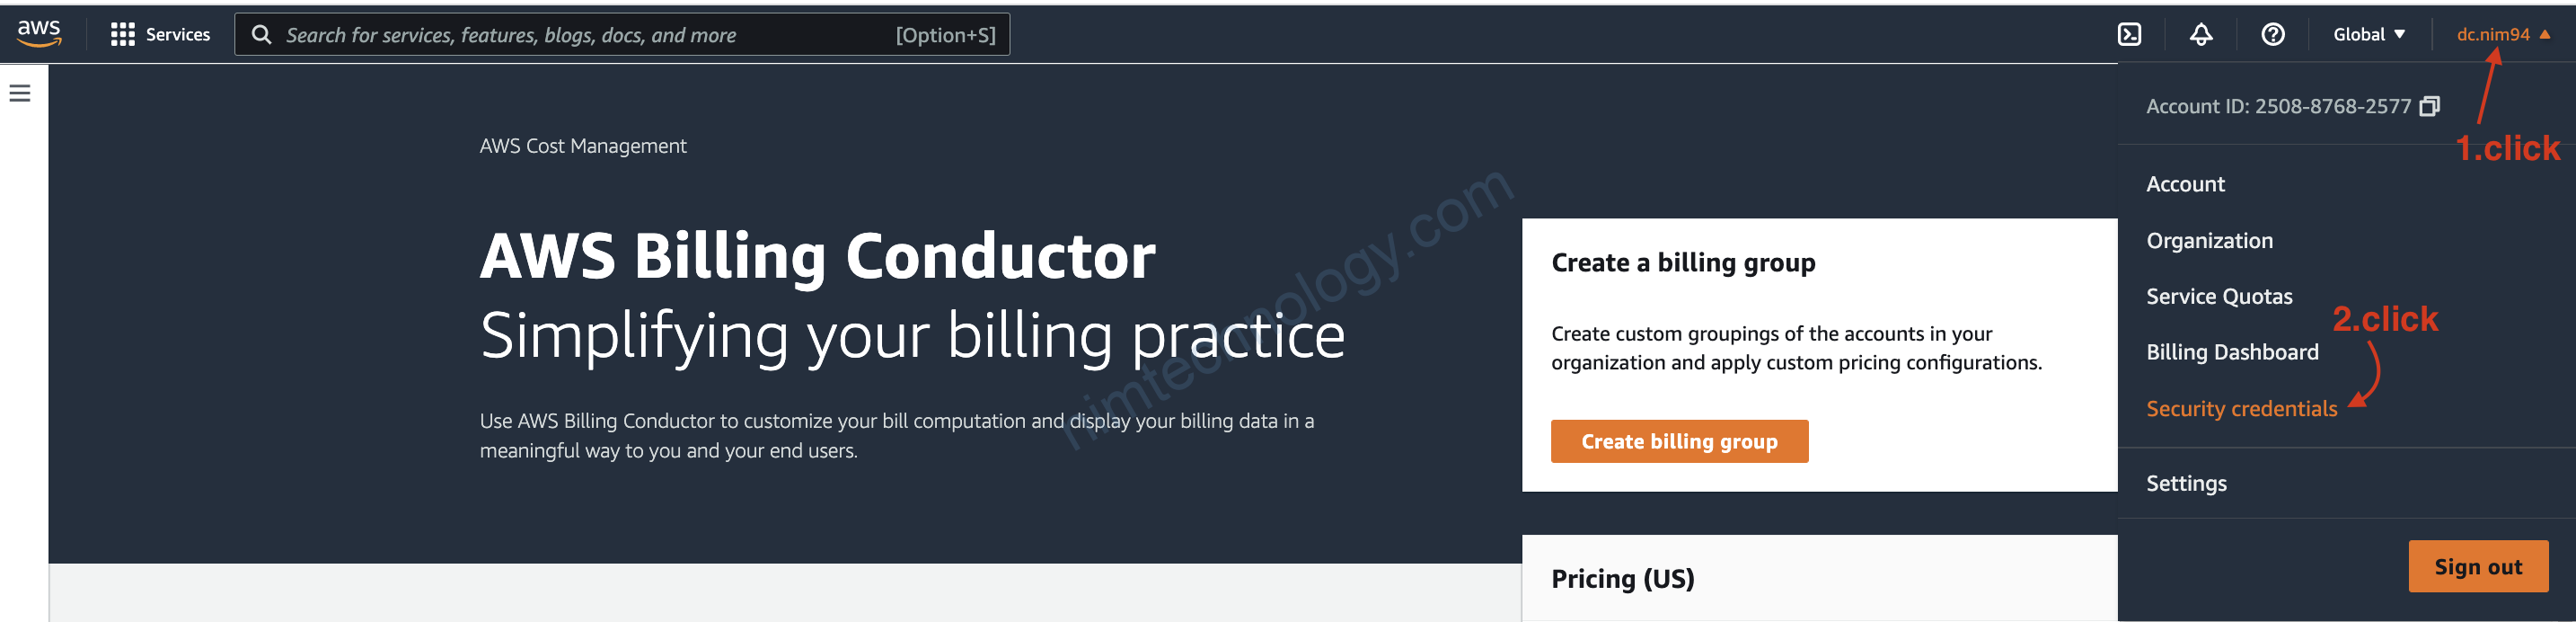
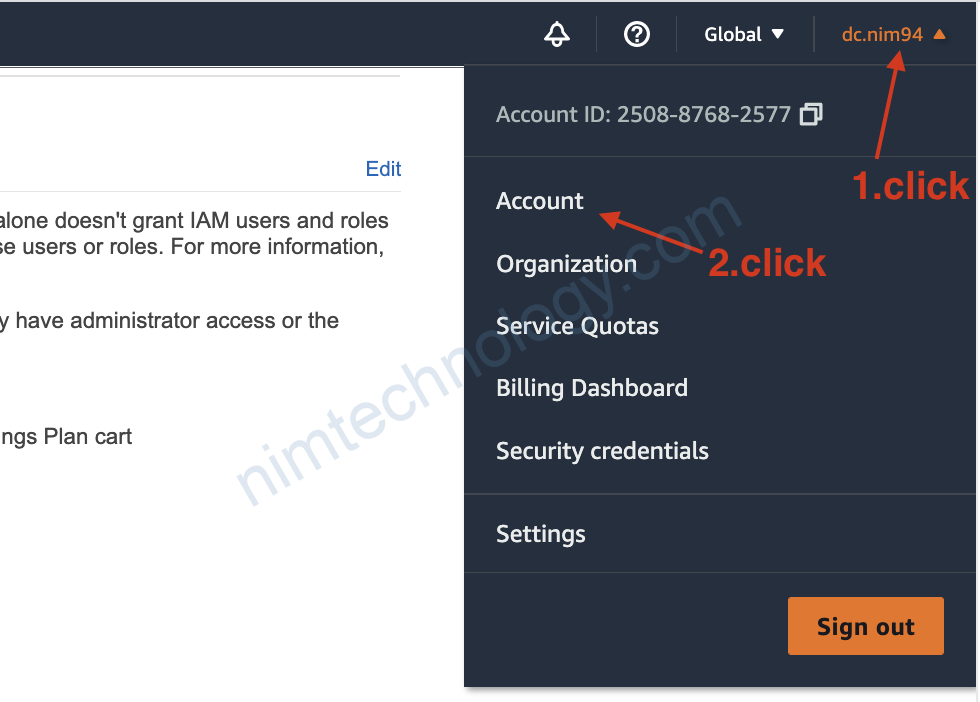
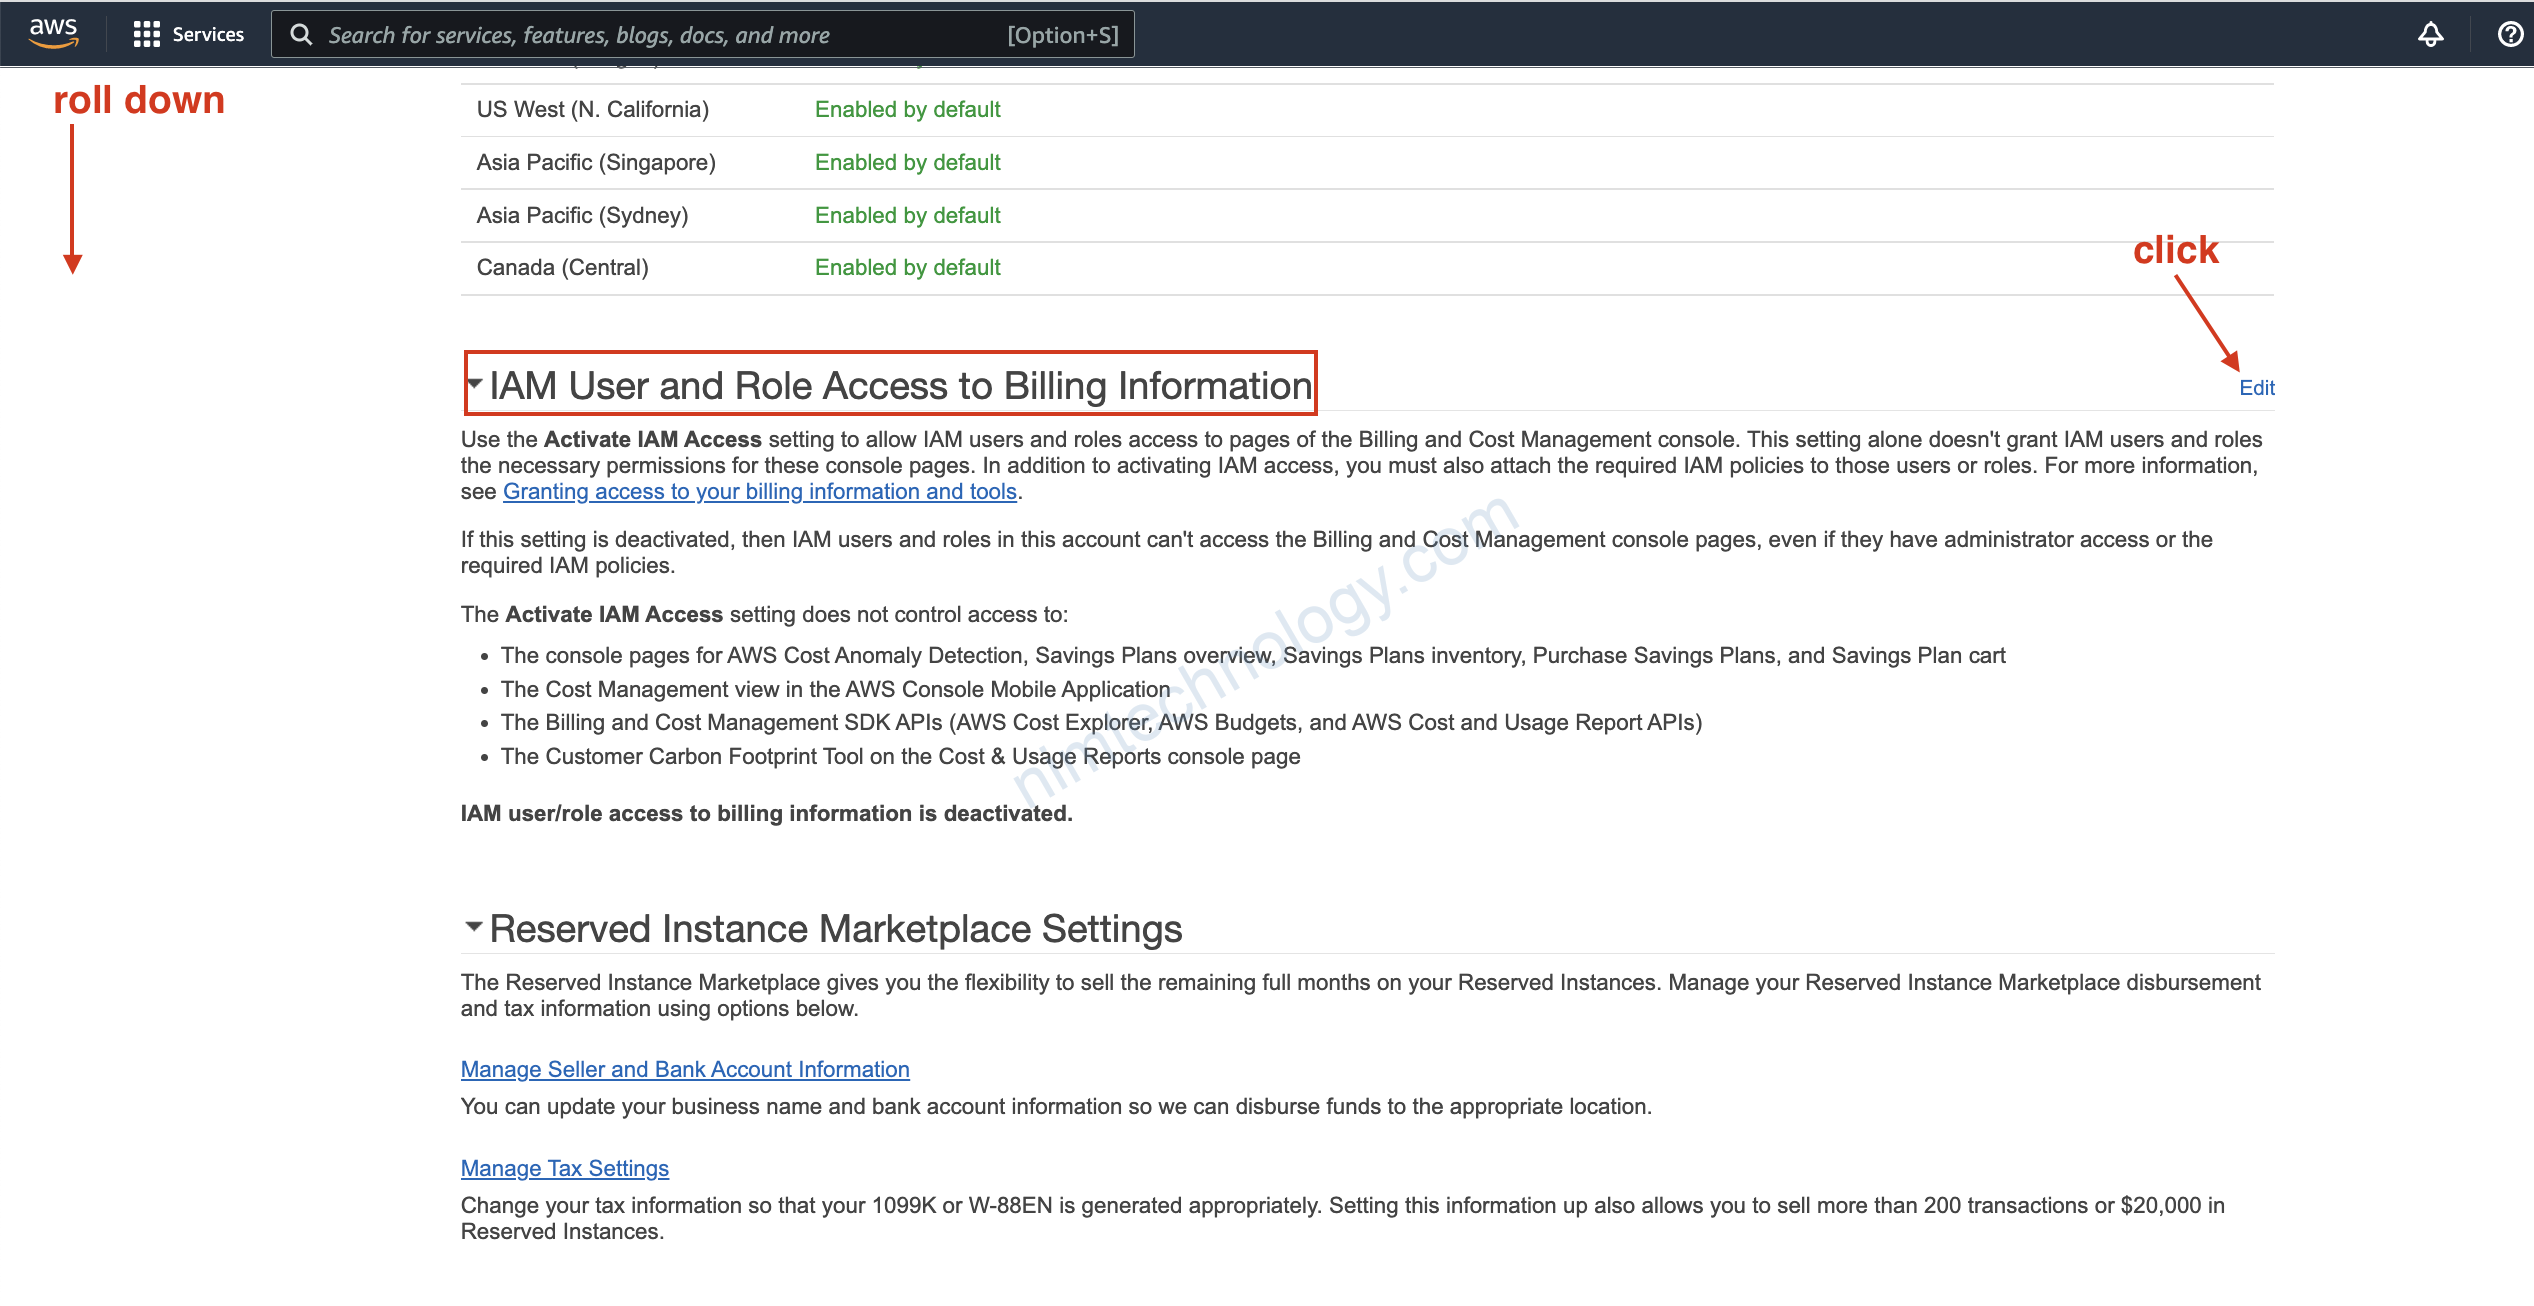
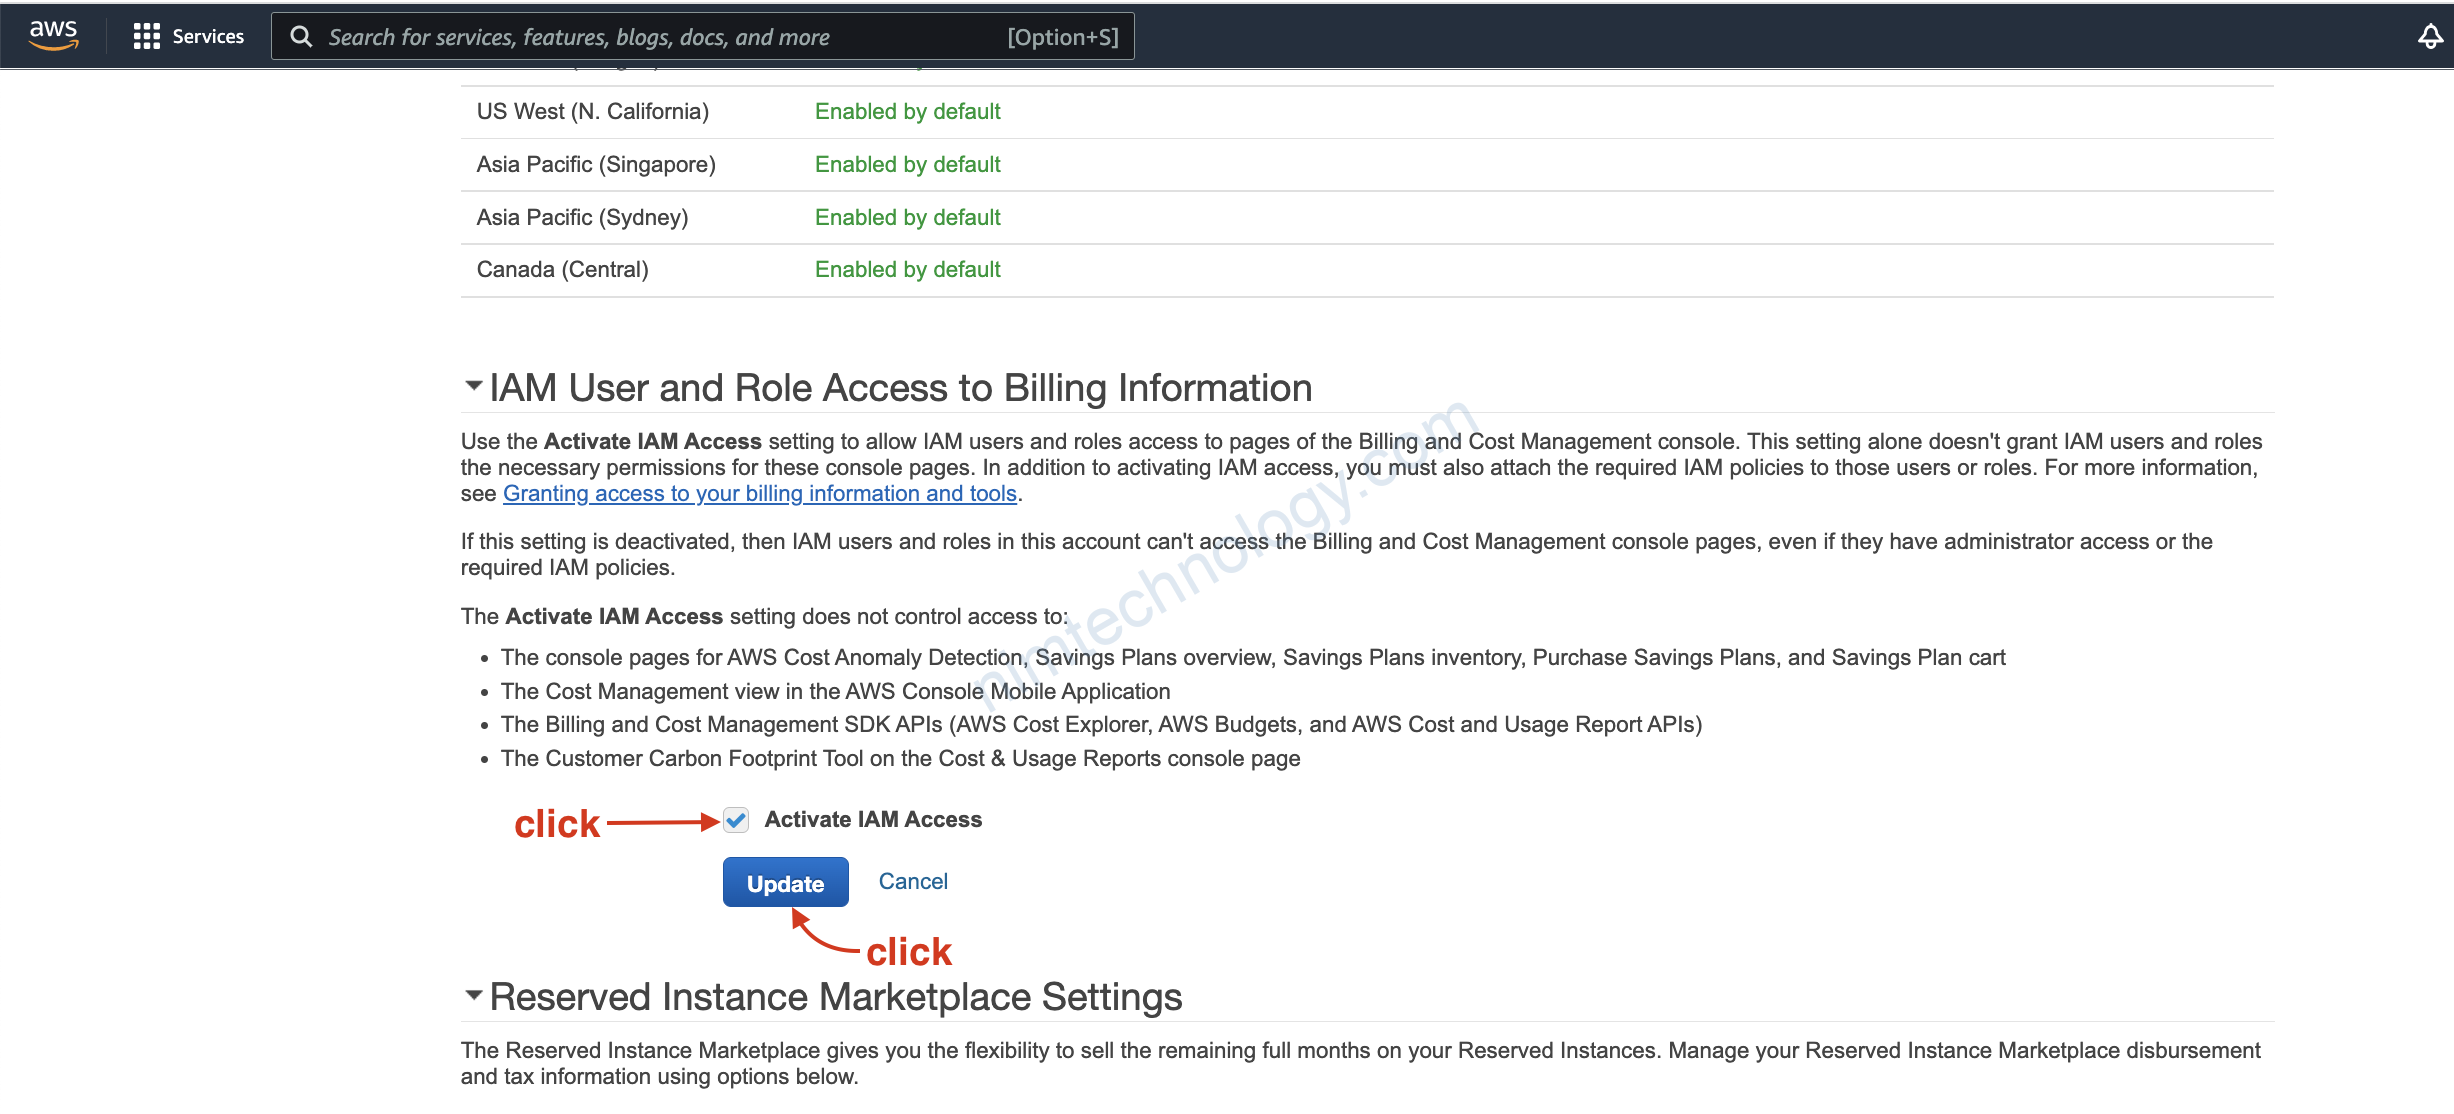
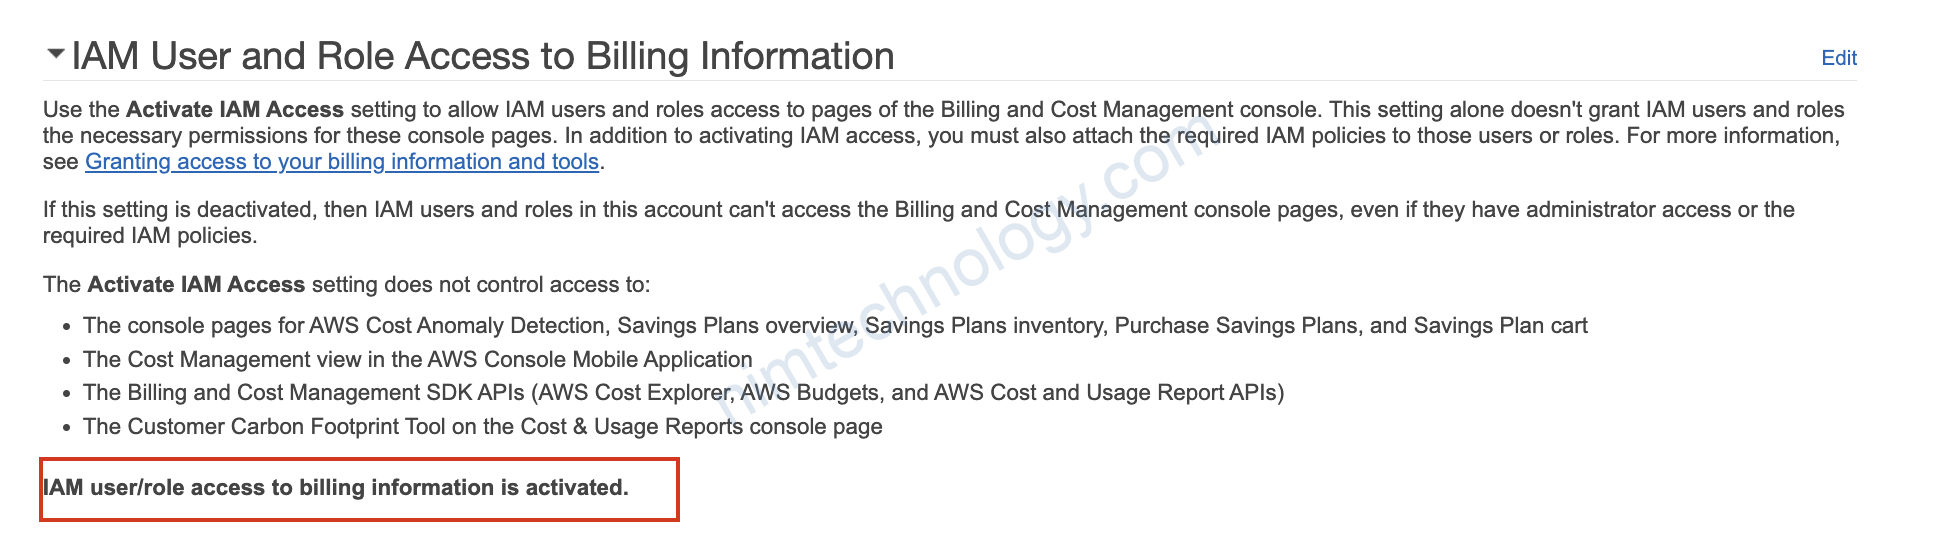
3) Give IAM users access to billing information
Để hạn chế tối đa việc sử dựng tài khoản root thì chúng ta cần config cho IAM user có quyền access vào Billing.
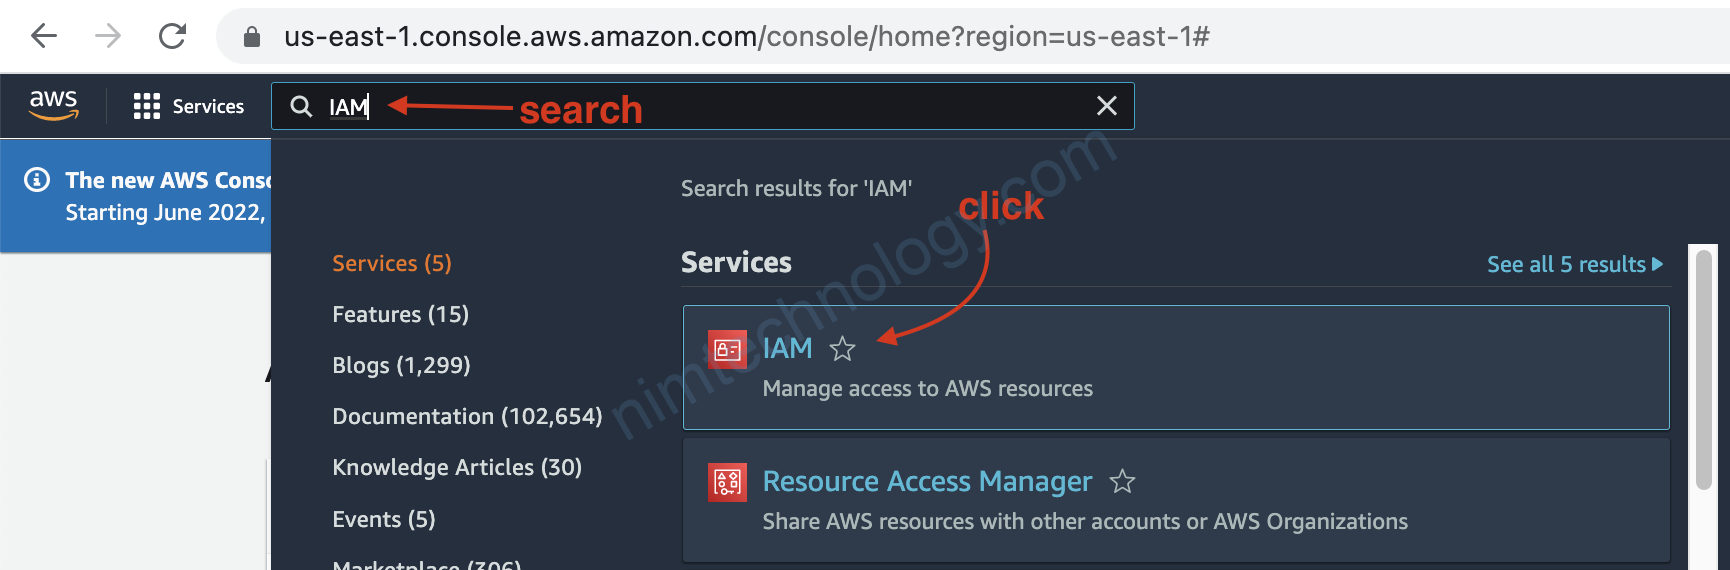
4) Setup AWS IAM account
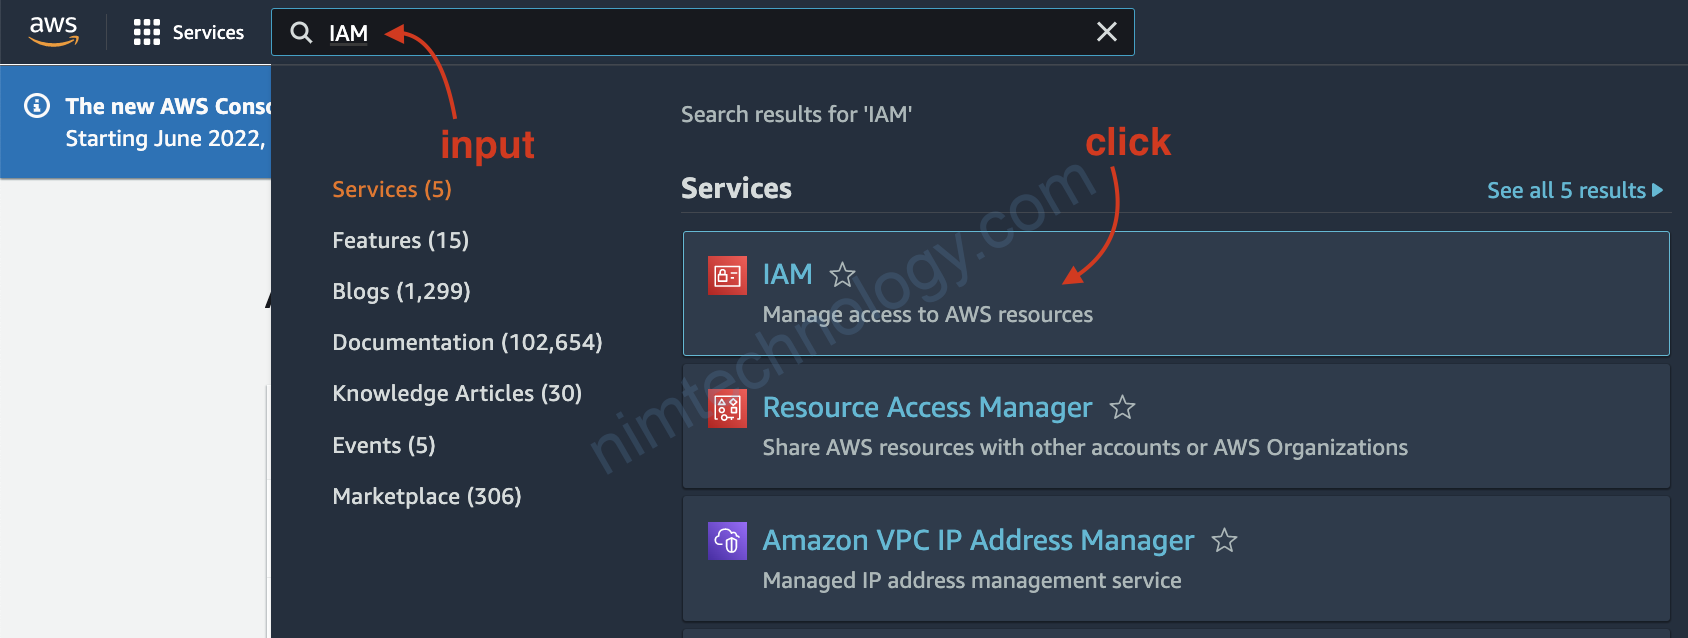
4.1) Create Custom Policy.
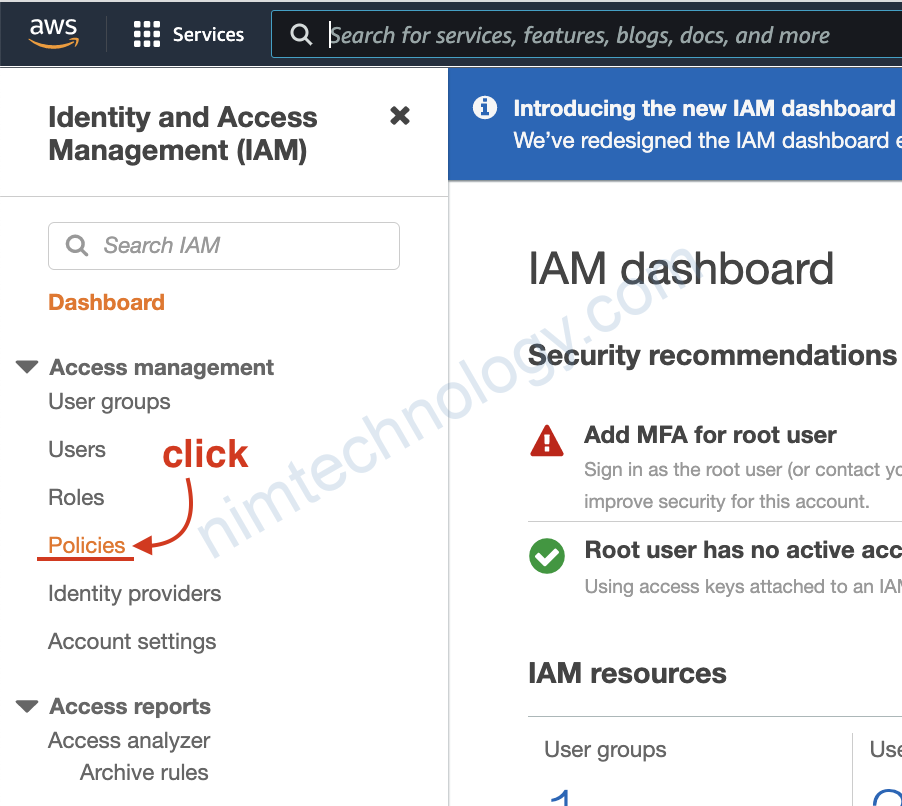
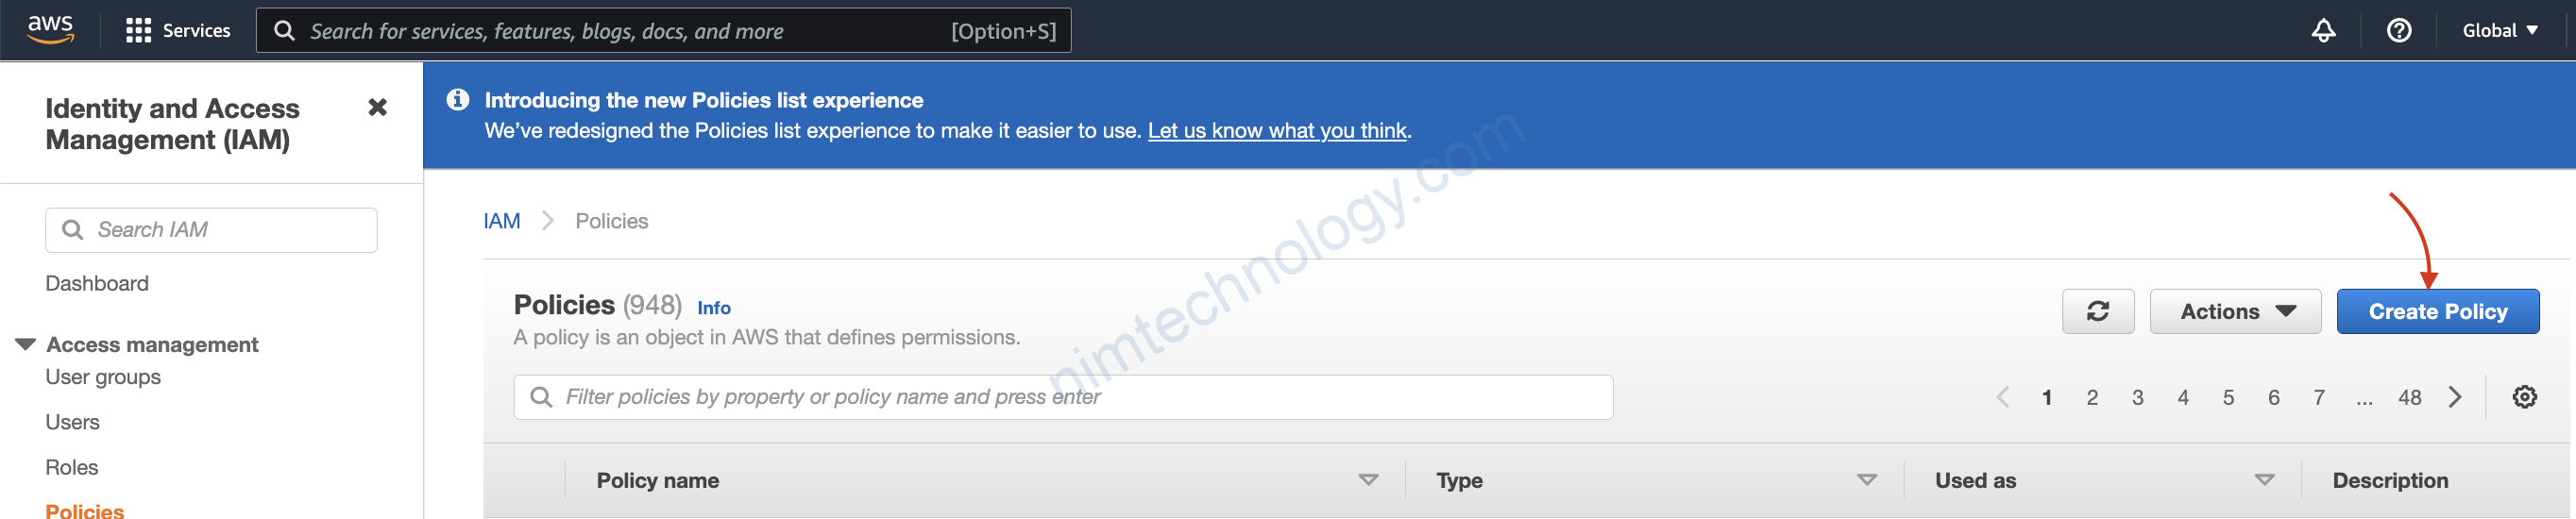
Bạn có thể tham khảo links:
https://docs.aws.amazon.com/IAM/latest/UserGuide/reference_policies_examples_aws_my-sec-creds-self-manage.html
Và config bên dưới này:
{
    "Version": "2012-10-17",
    "Statement": [
        {
            "Sid": "AllowViewAccountInfo",
            "Effect": "Allow",
            "Action": [
                "iam:GetAccountPasswordPolicy",
                "iam:GetAccountSummary",
                "iam:ListVirtualMFADevices",
                "iam:ListUsers"
            ],
            "Resource": "*"
        },
        {
            "Sid": "AllowManageOwnPasswords",
            "Effect": "Allow",
            "Action": [
                "iam:ChangePassword",
                "iam:GetUser"
            ],
            "Resource": "arn:aws:iam::*:user/${aws:username}"
        },
        {
            "Sid": "AllowManageOwnAccessKeys",
            "Effect": "Allow",
            "Action": [
                "iam:CreateAccessKey",
                "iam:DeleteAccessKey",
                "iam:ListAccessKeys",
                "iam:UpdateAccessKey"
            ],
            "Resource": "arn:aws:iam::*:user/${aws:username}"
        },
        {
            "Sid": "AllowManageOwnSigningCertificates",
            "Effect": "Allow",
            "Action": [
                "iam:DeleteSigningCertificate",
                "iam:ListSigningCertificates",
                "iam:UpdateSigningCertificate",
                "iam:UploadSigningCertificate"
            ],
            "Resource": "arn:aws:iam::*:user/${aws:username}"
        },
        {
            "Sid": "AllowManageOwnSSHPublicKeys",
            "Effect": "Allow",
            "Action": [
                "iam:DeleteSSHPublicKey",
                "iam:GetSSHPublicKey",
                "iam:ListSSHPublicKeys",
                "iam:UpdateSSHPublicKey",
                "iam:UploadSSHPublicKey"
            ],
            "Resource": "arn:aws:iam::*:user/${aws:username}"
        },
        {
            "Sid": "AllowManageOwnGitCredentials",
            "Effect": "Allow",
            "Action": [
                "iam:CreateServiceSpecificCredential",
                "iam:DeleteServiceSpecificCredential",
                "iam:ListServiceSpecificCredentials",
                "iam:ResetServiceSpecificCredential",
                "iam:UpdateServiceSpecificCredential"
            ],
            "Resource": "arn:aws:iam::*:user/${aws:username}"
        },
        {
            "Sid": "AllowManageOwnVirtualMFADevice",
            "Effect": "Allow",
            "Action": [
                "iam:CreateVirtualMFADevice",
                "iam:DeleteVirtualMFADevice"
            ],
            "Resource": "arn:aws:iam::*:mfa/${aws:username}"
        },
        {
            "Sid": "AllowManageOwnUserMFA",
            "Effect": "Allow",
            "Action": [
                "iam:DeactivateMFADevice",
                "iam:EnableMFADevice",
                "iam:ListMFADevices",
                "iam:ResyncMFADevice"
            ],
            "Resource": "arn:aws:iam::*:user/${aws:username}"
        },
        {
            "Sid": "DenyAllExceptListedIfNoMFA",
            "Effect": "Deny",
            "NotAction": [
                "iam:CreateVirtualMFADevice",
                "iam:EnableMFADevice",
                "iam:GetUser",
                "iam:ListMFADevices",
                "iam:ListVirtualMFADevices",
                "iam:ResyncMFADevice",
                "sts:GetSessionToken",
                "iam:ListUsers"
            ],
            "Resource": "*",
            "Condition": {
                "BoolIfExists": {
                    "aws:MultiFactorAuthPresent": "false"
                }
            }
        }
    ]
}
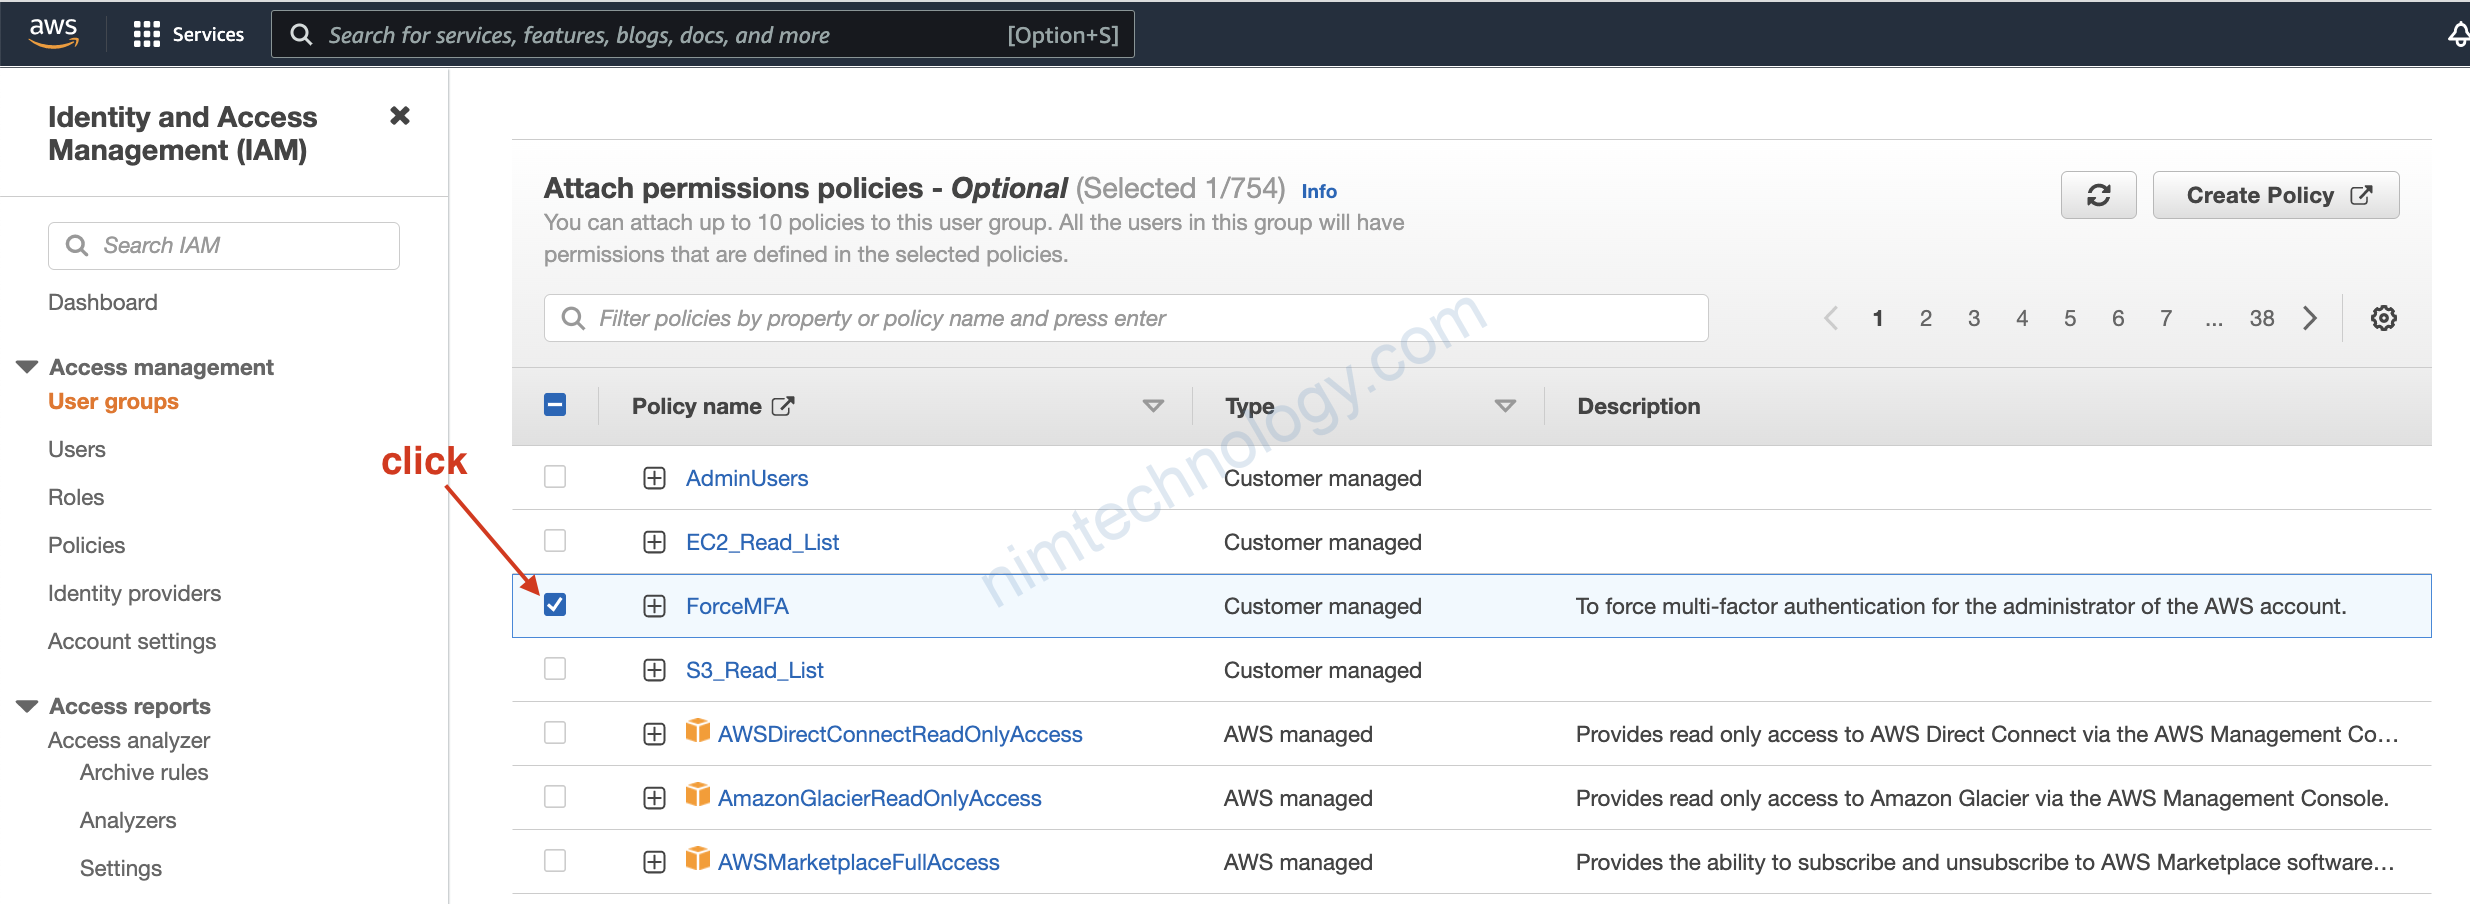
Bạn copy config bên trên và paste như hình bên dưới.
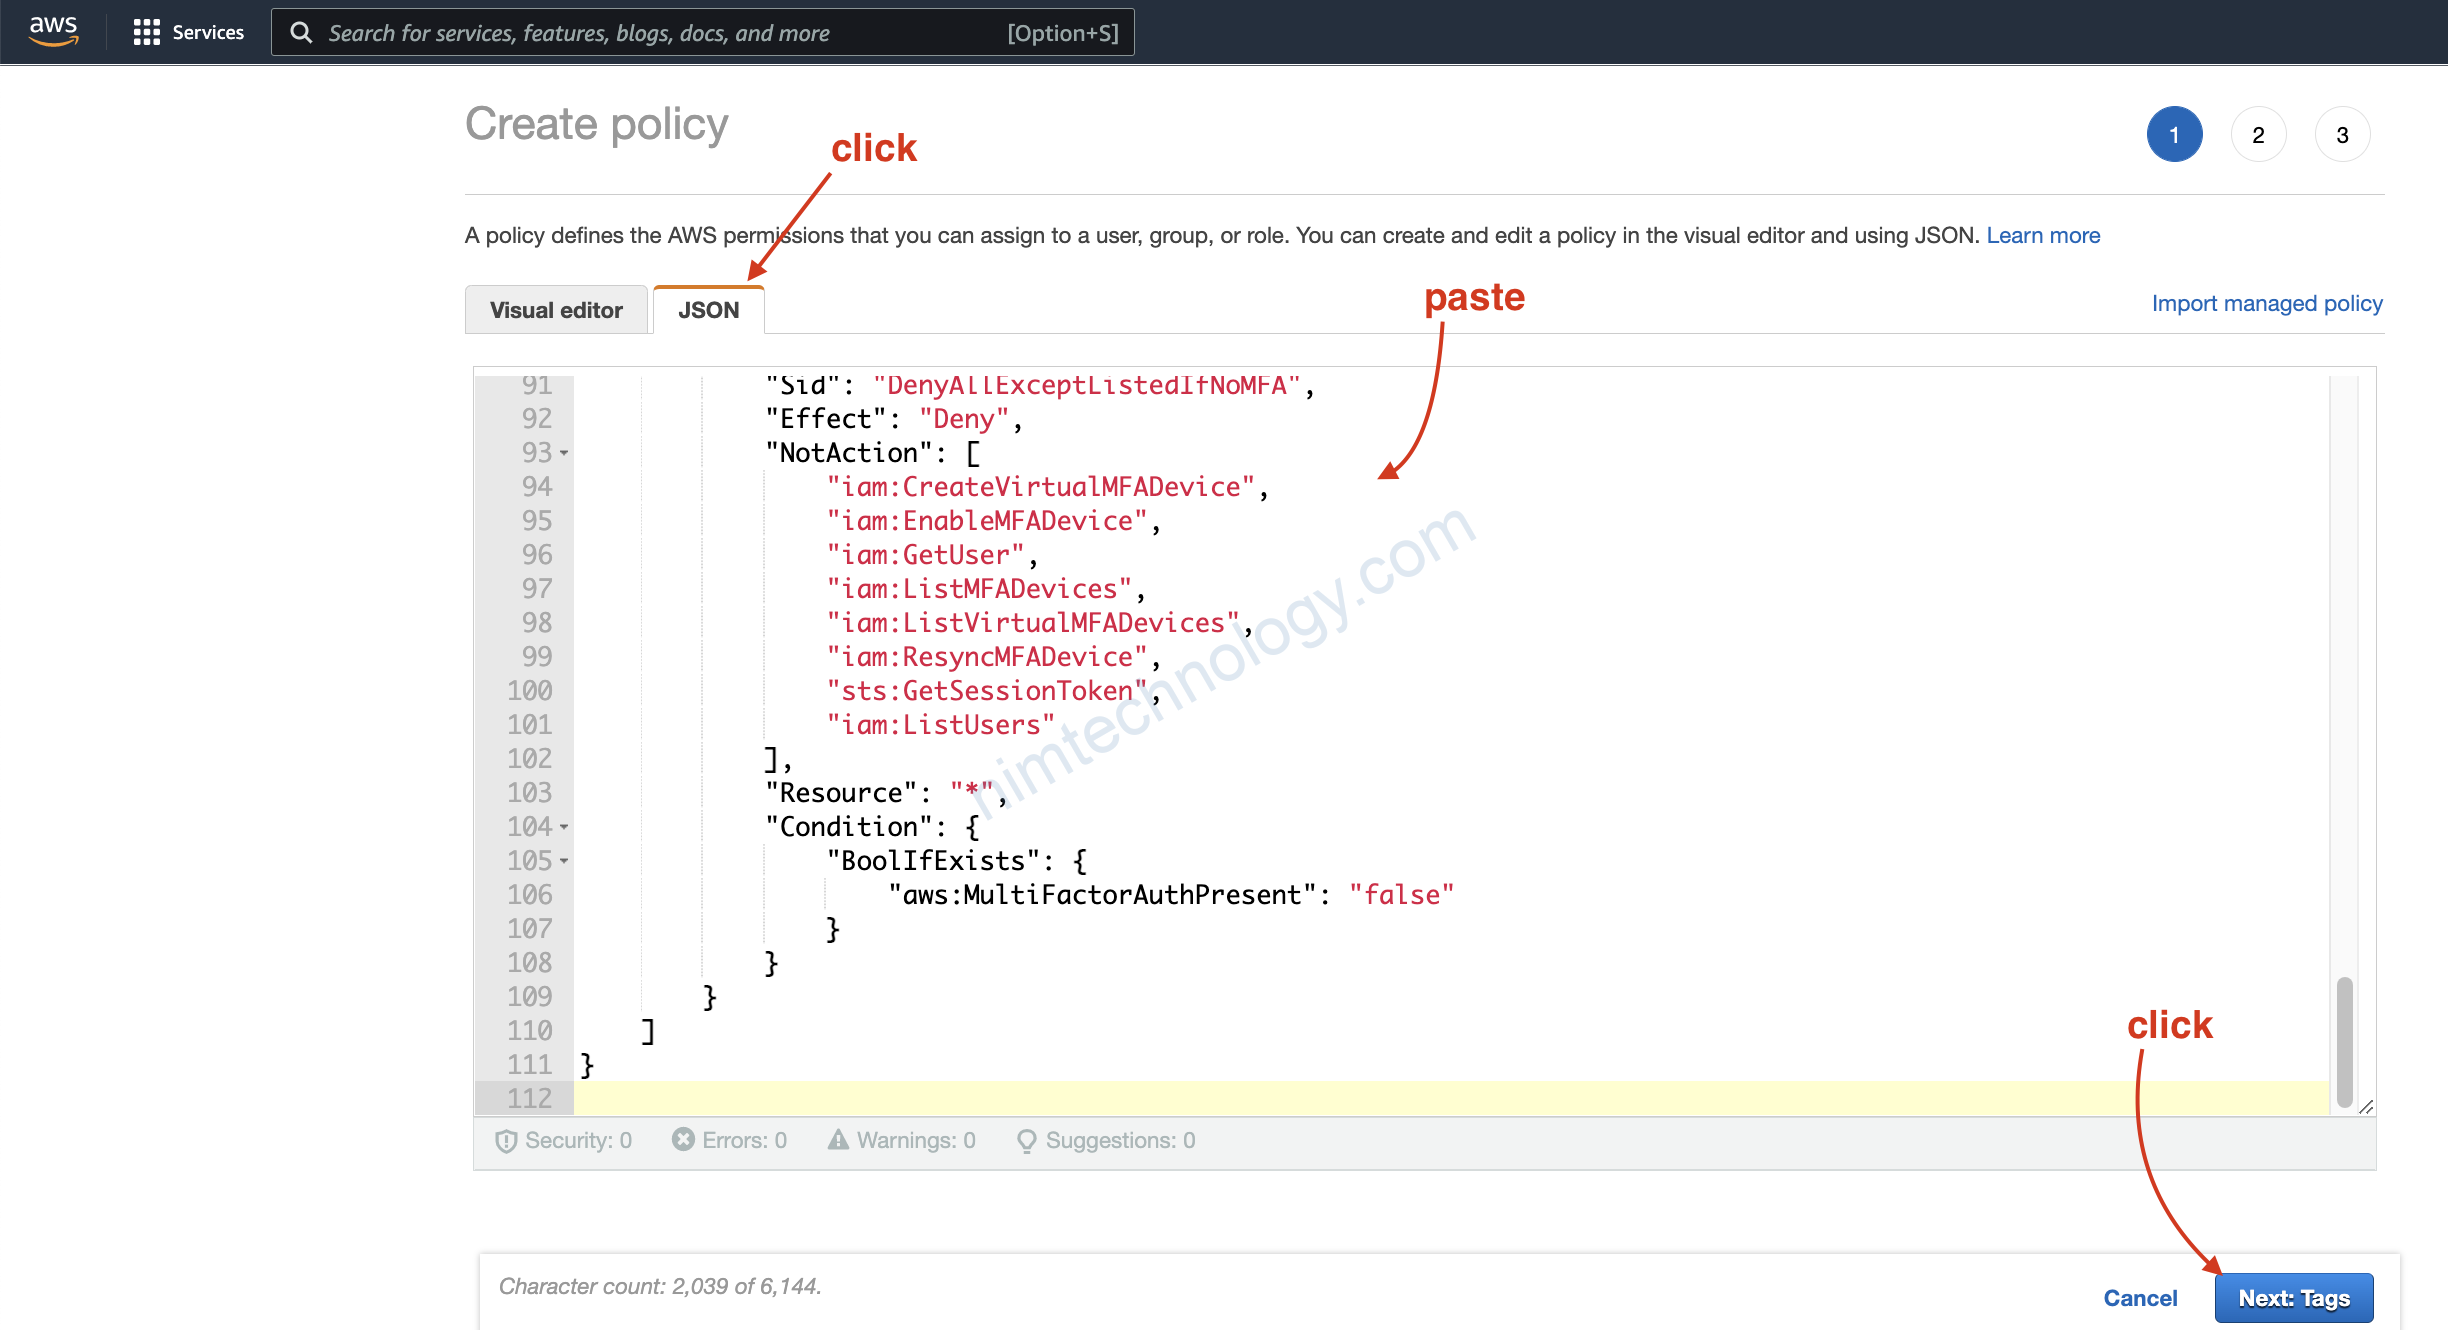
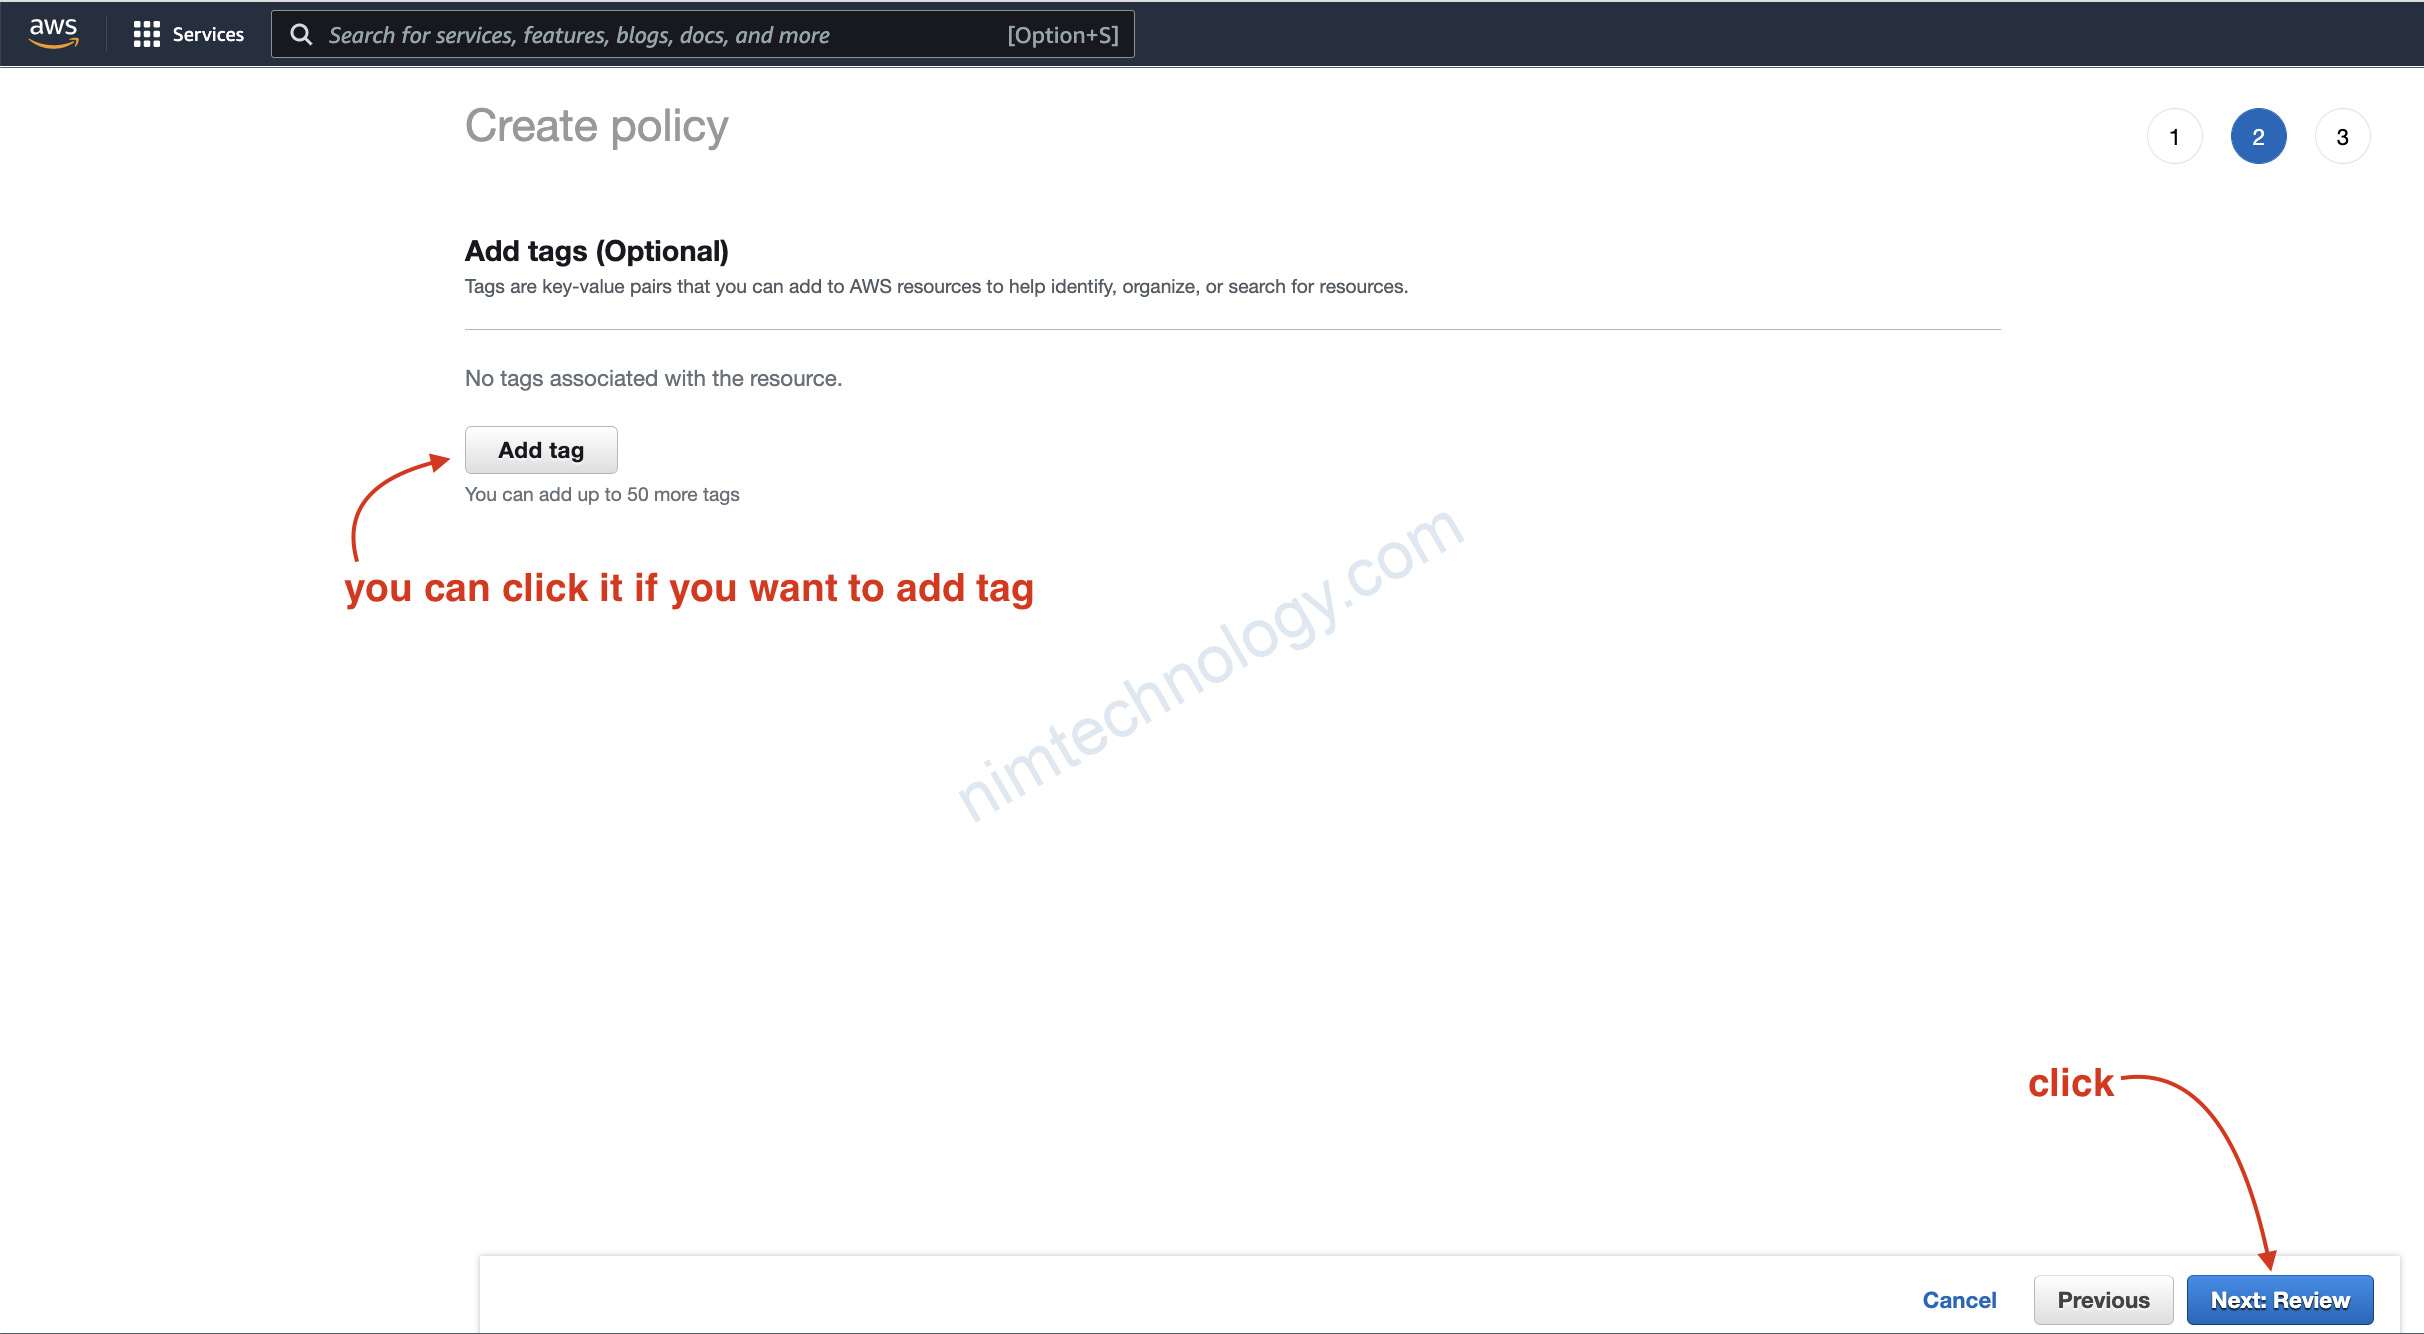
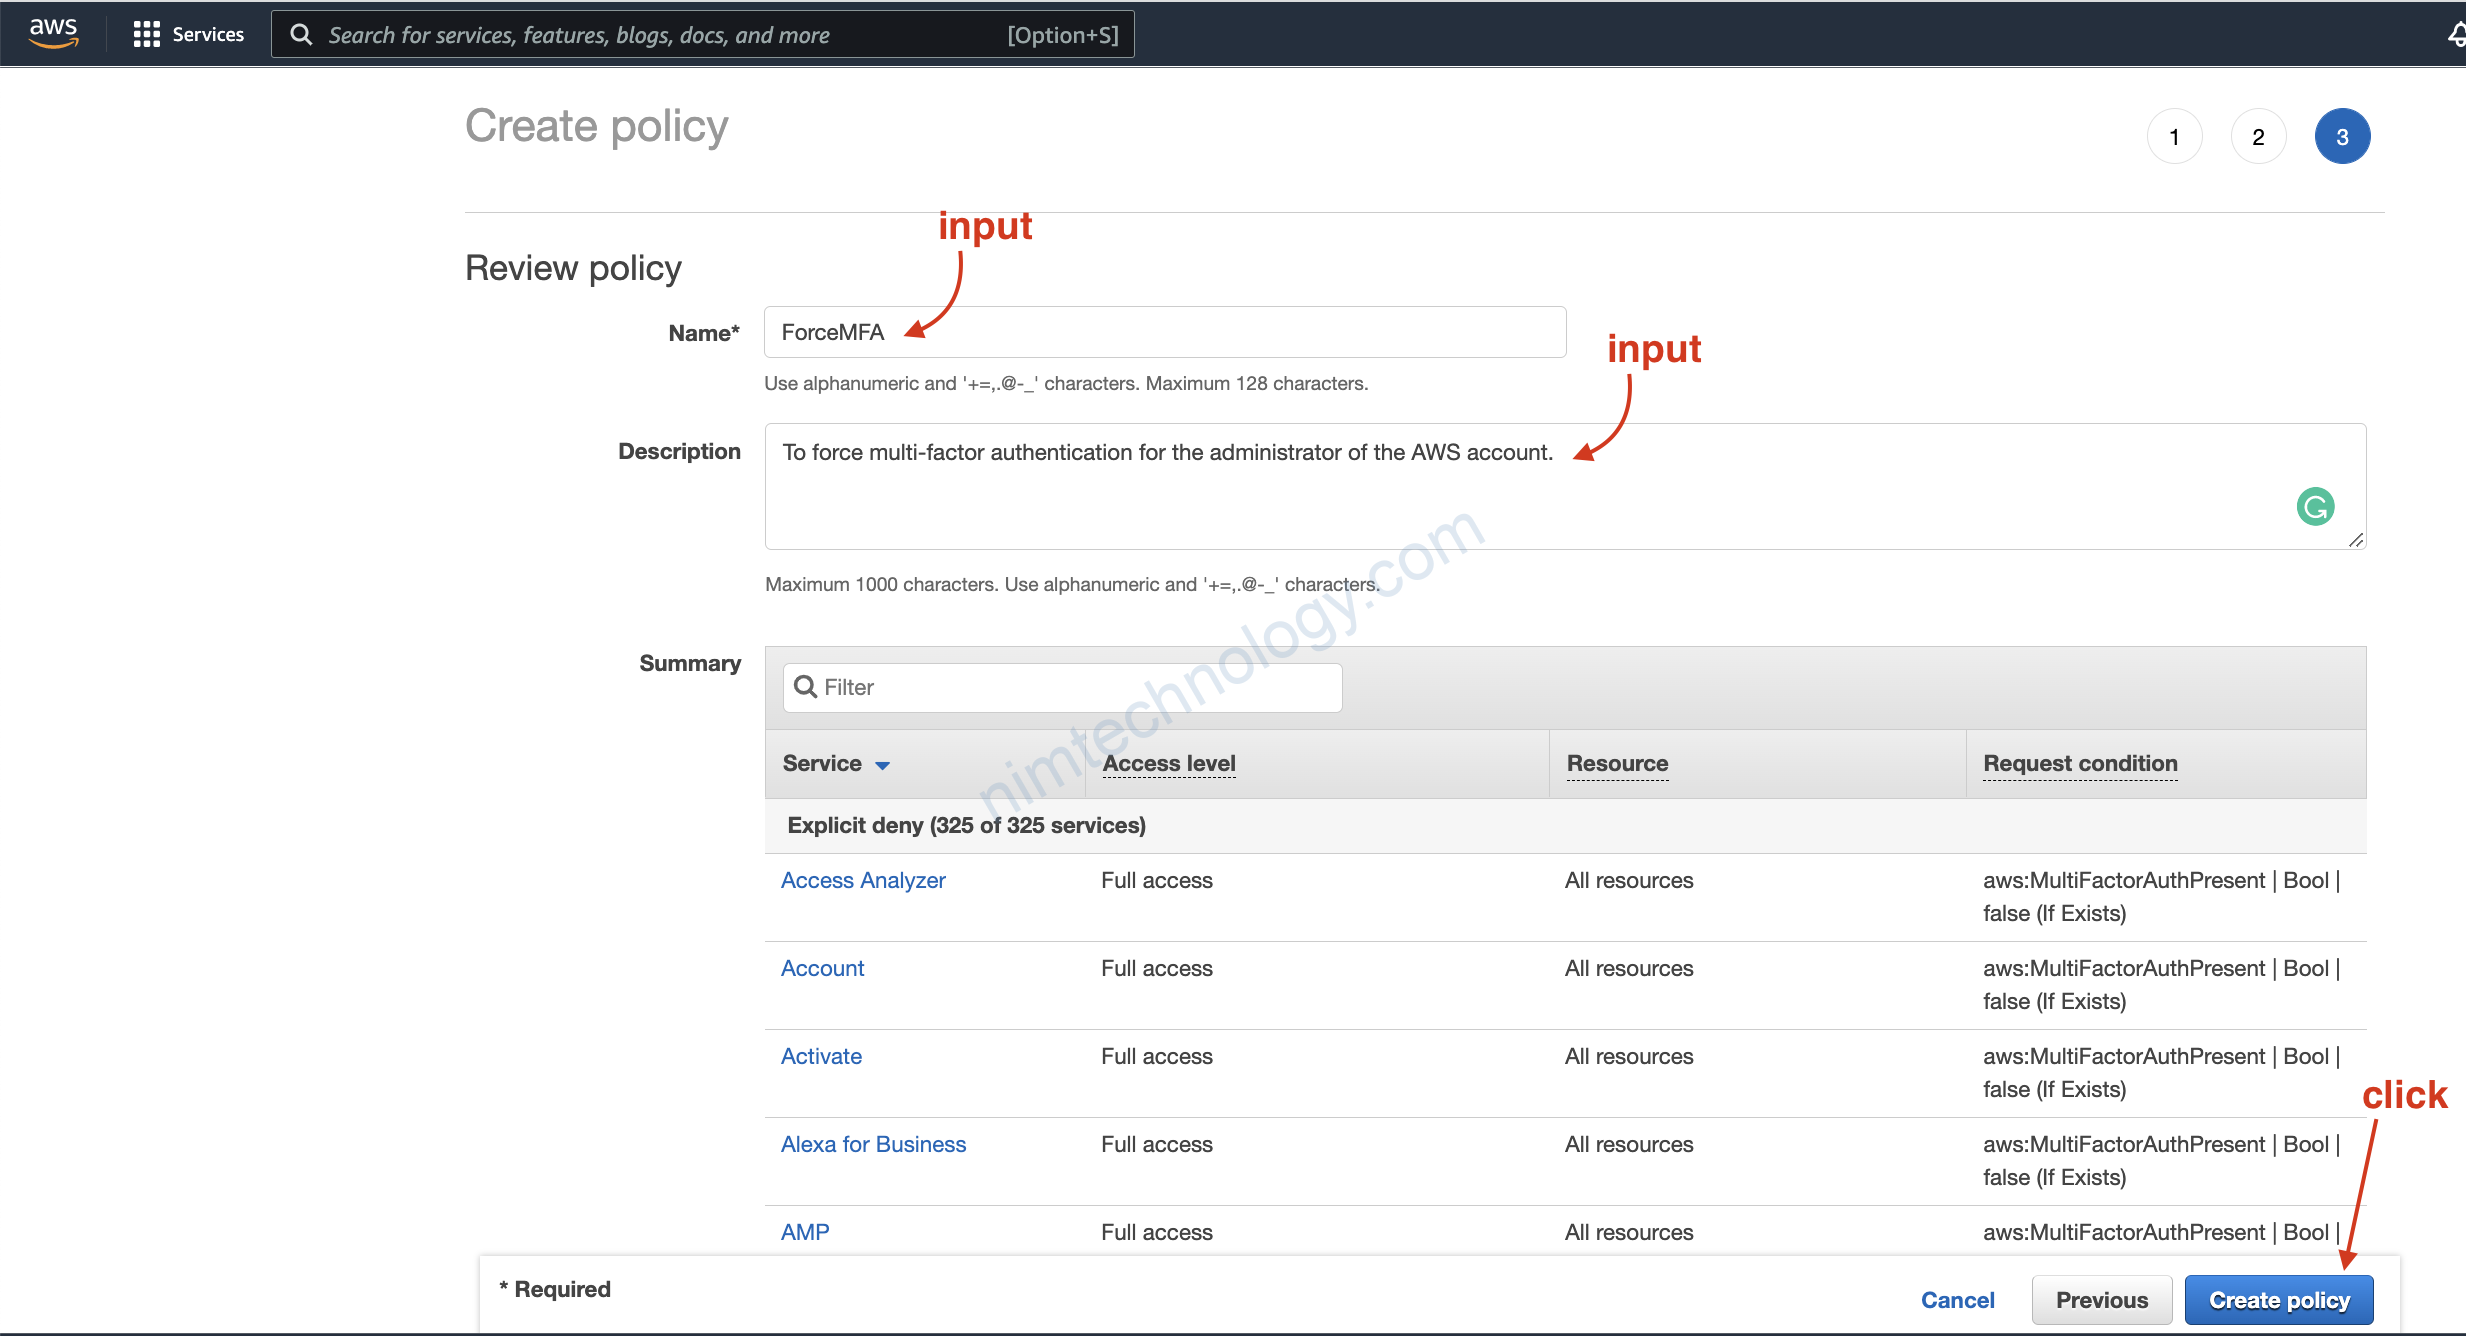
Mình thì bỏ qua add tag và click next để review.

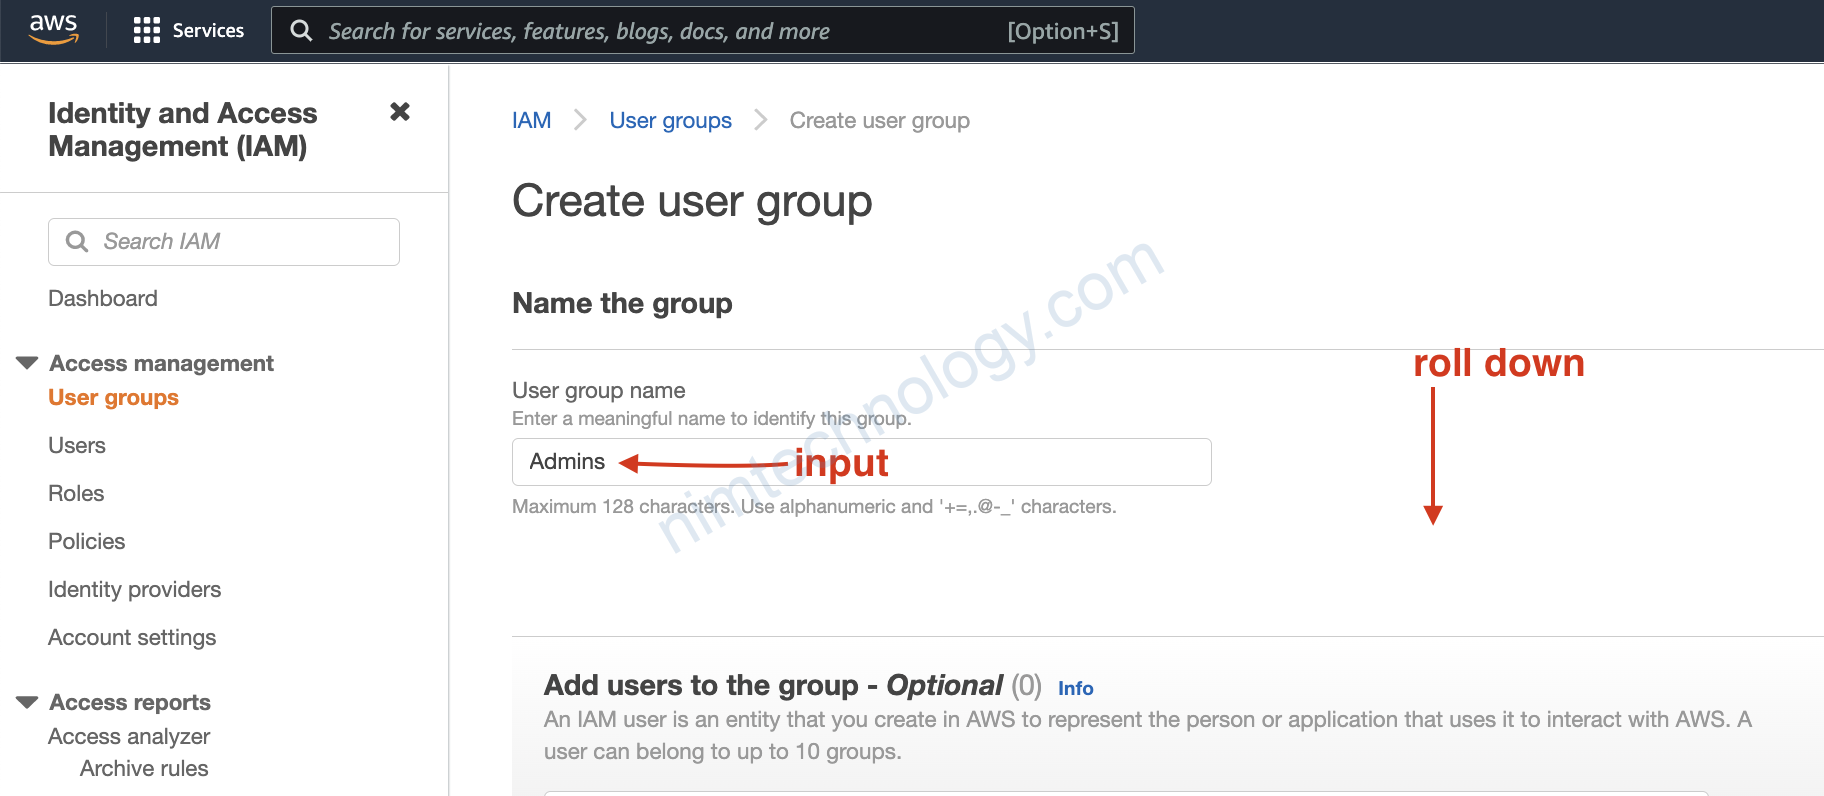
4.2) Create Group

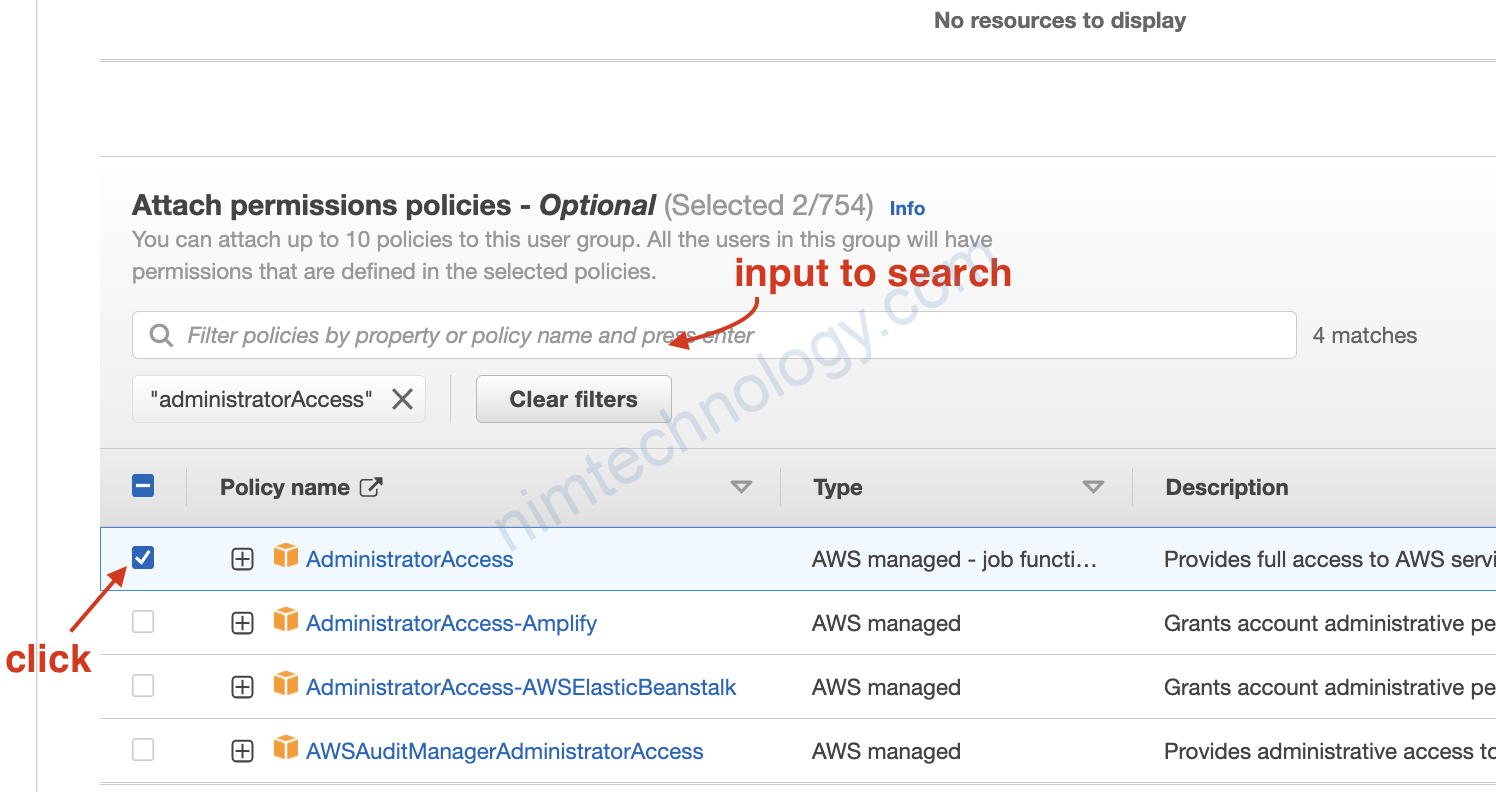
và add thêm policy này. AdministratorAccess
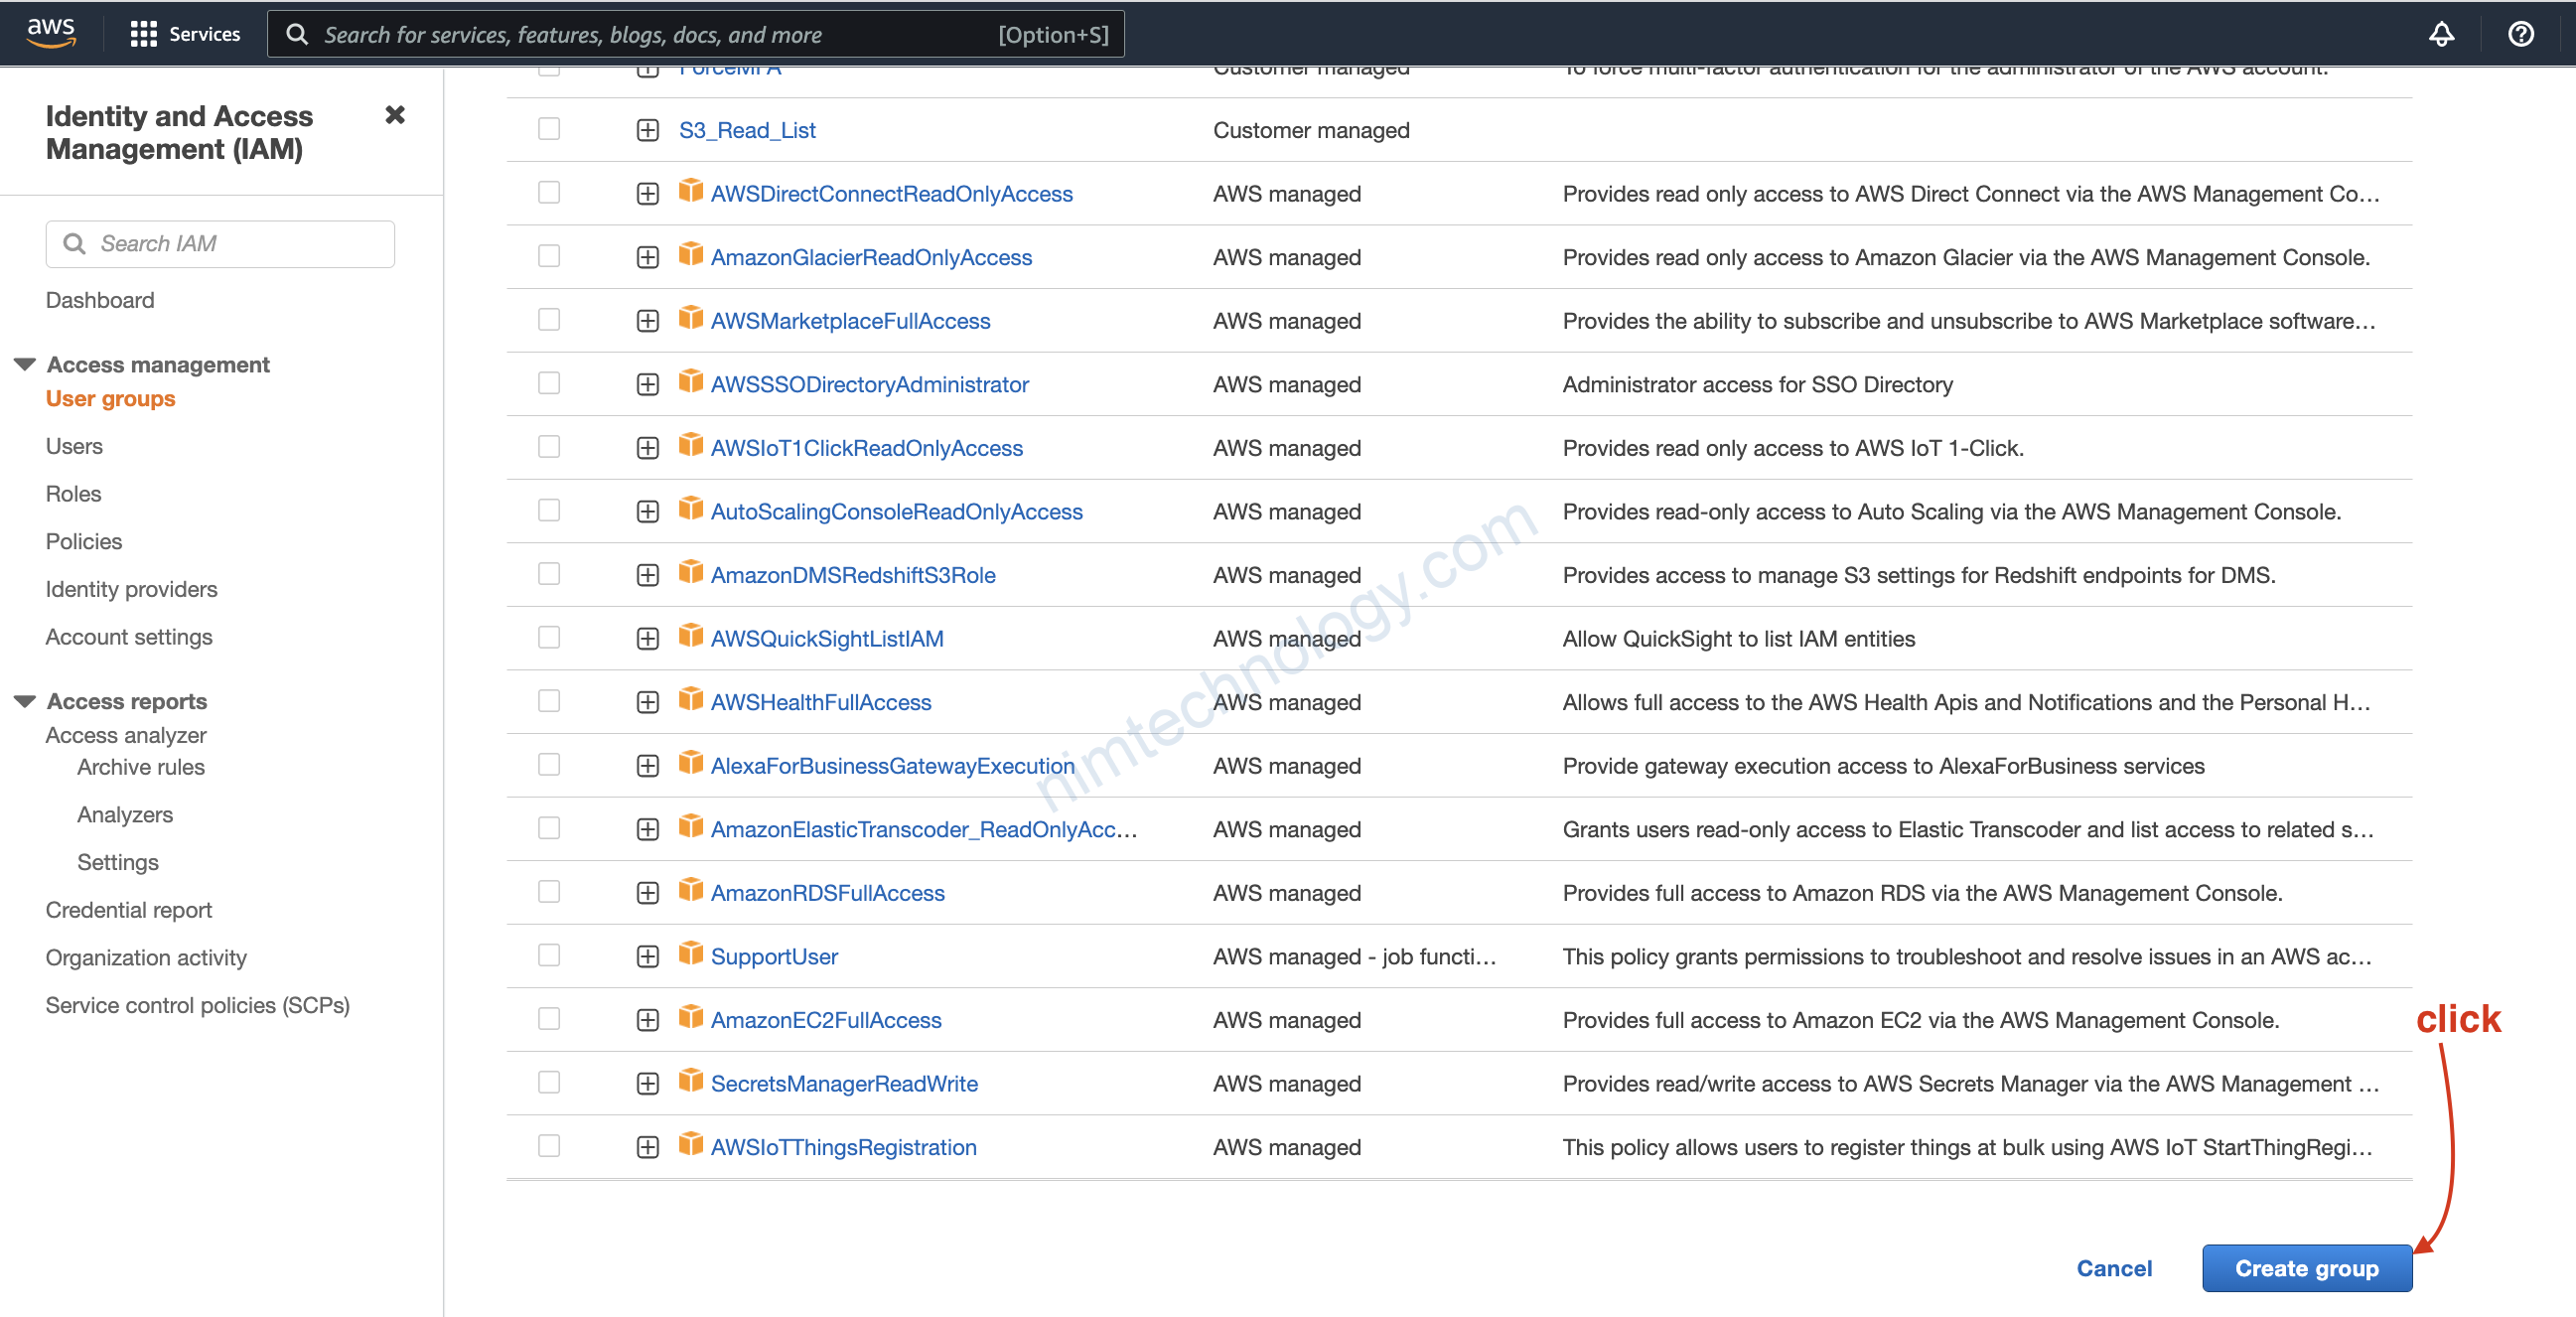
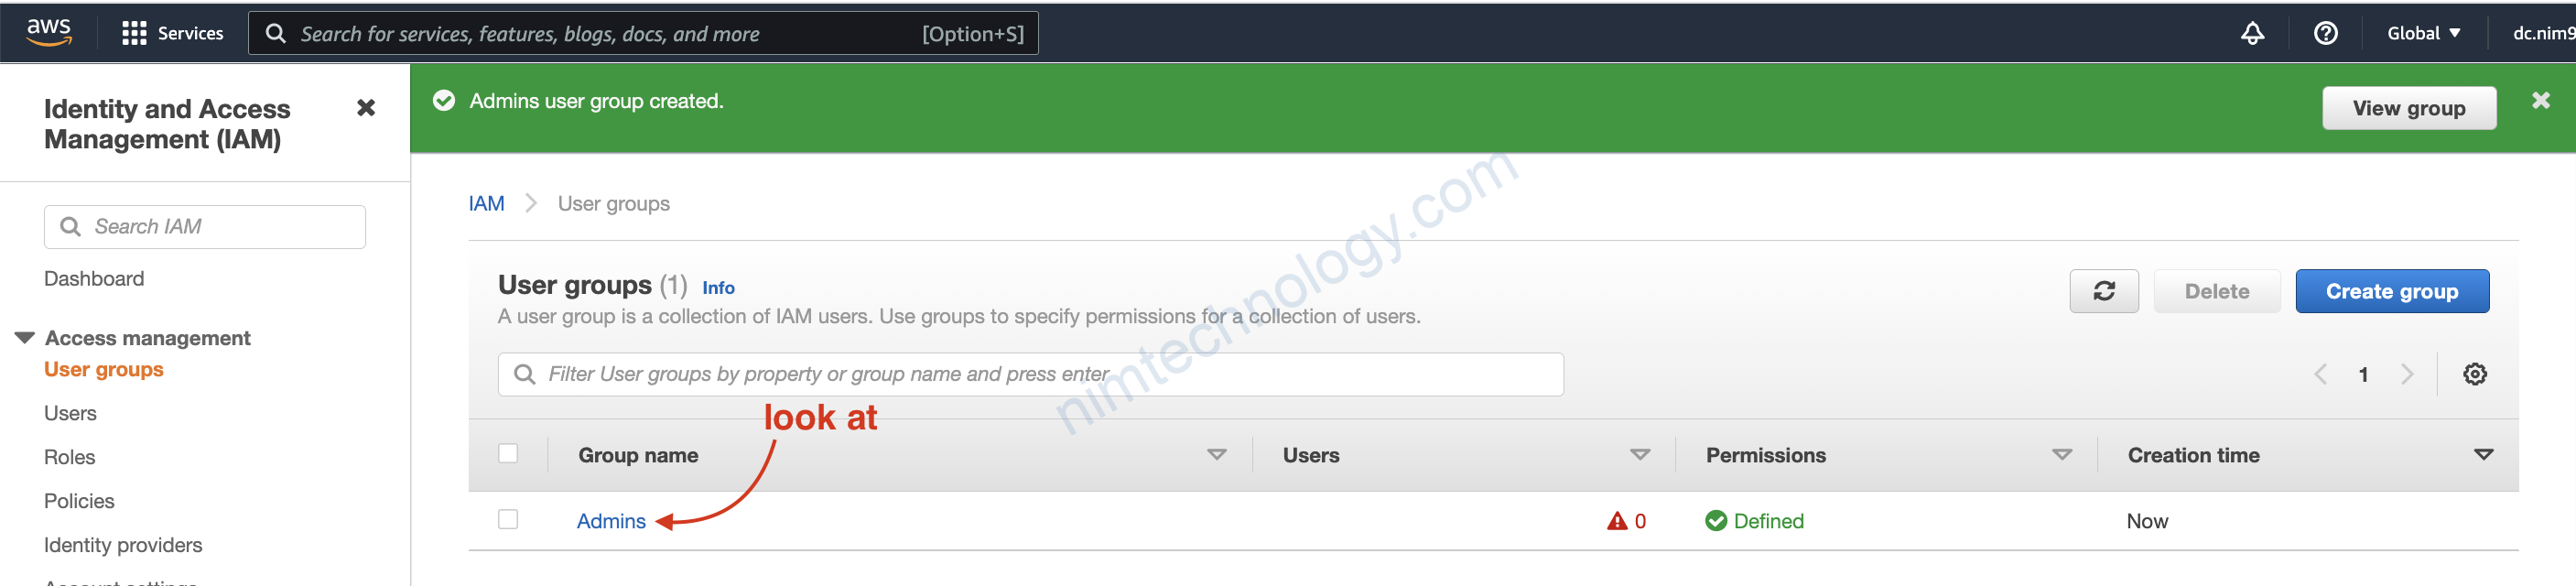
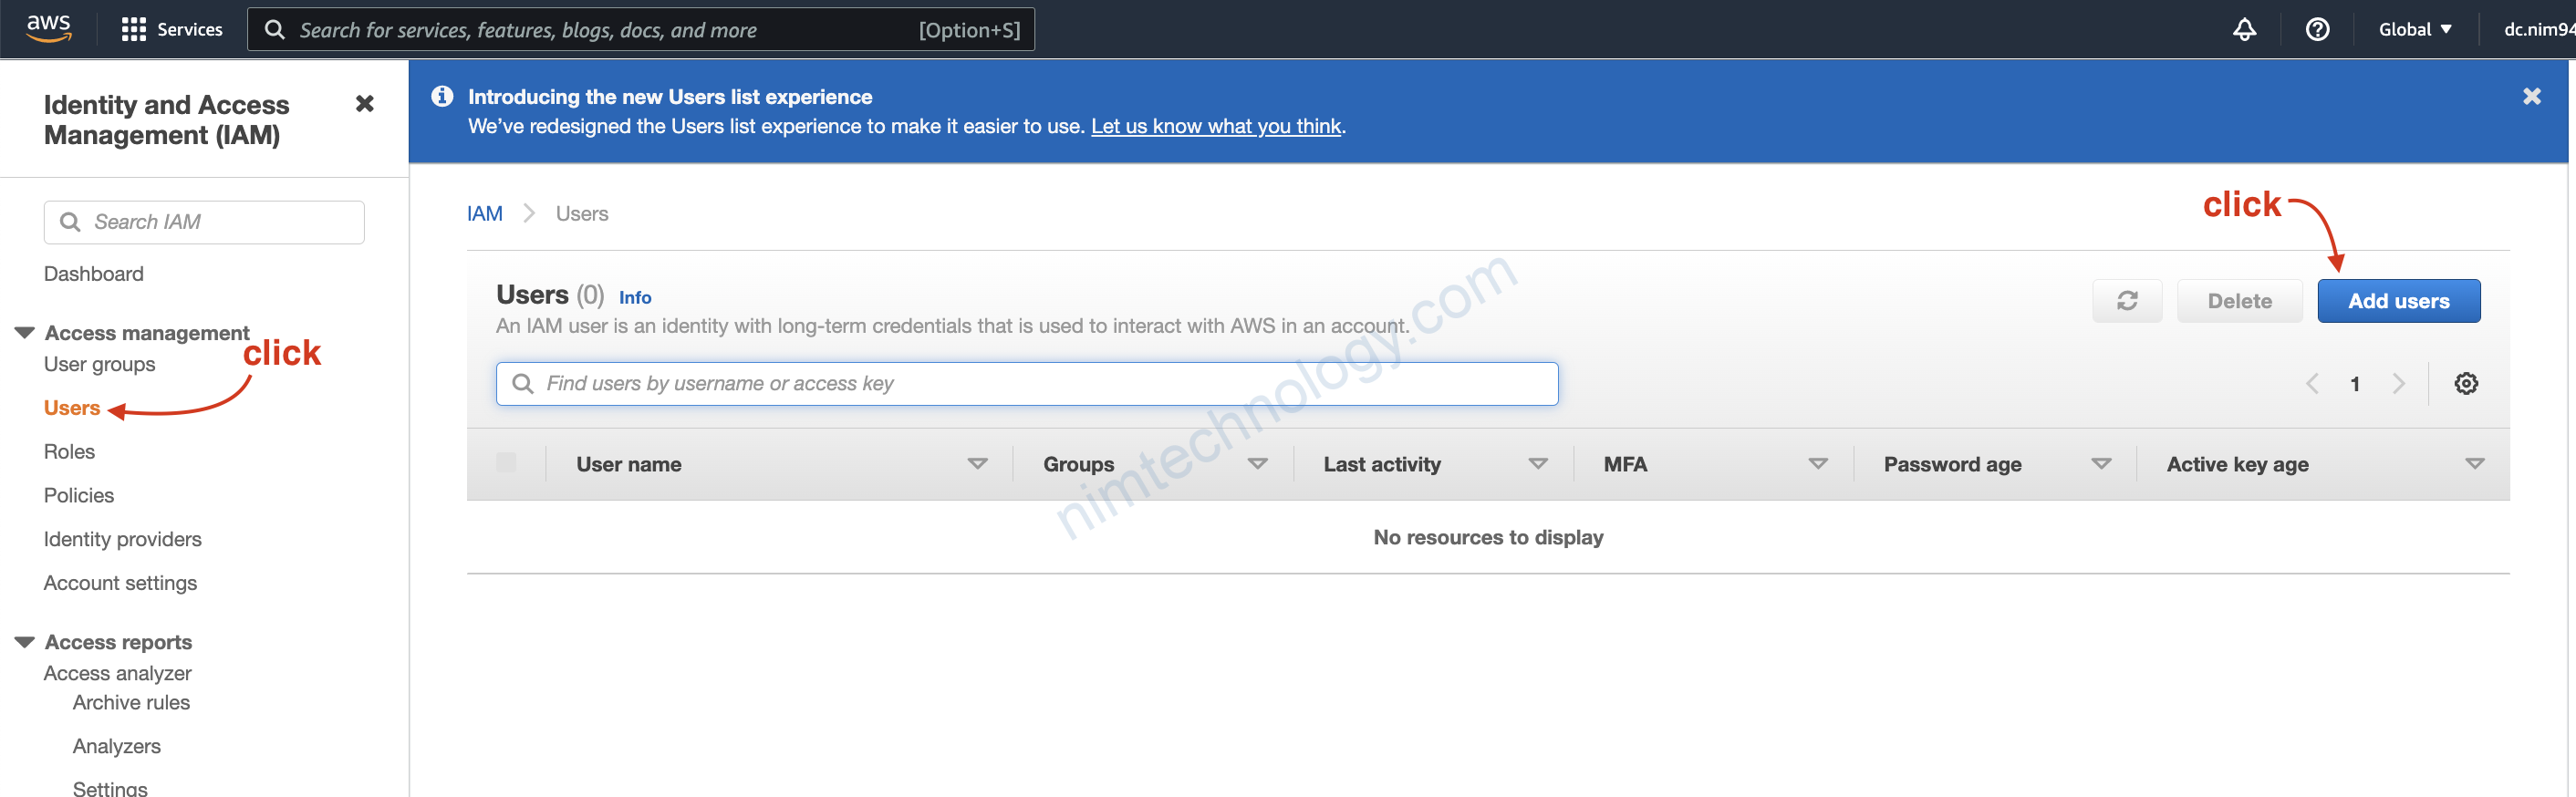
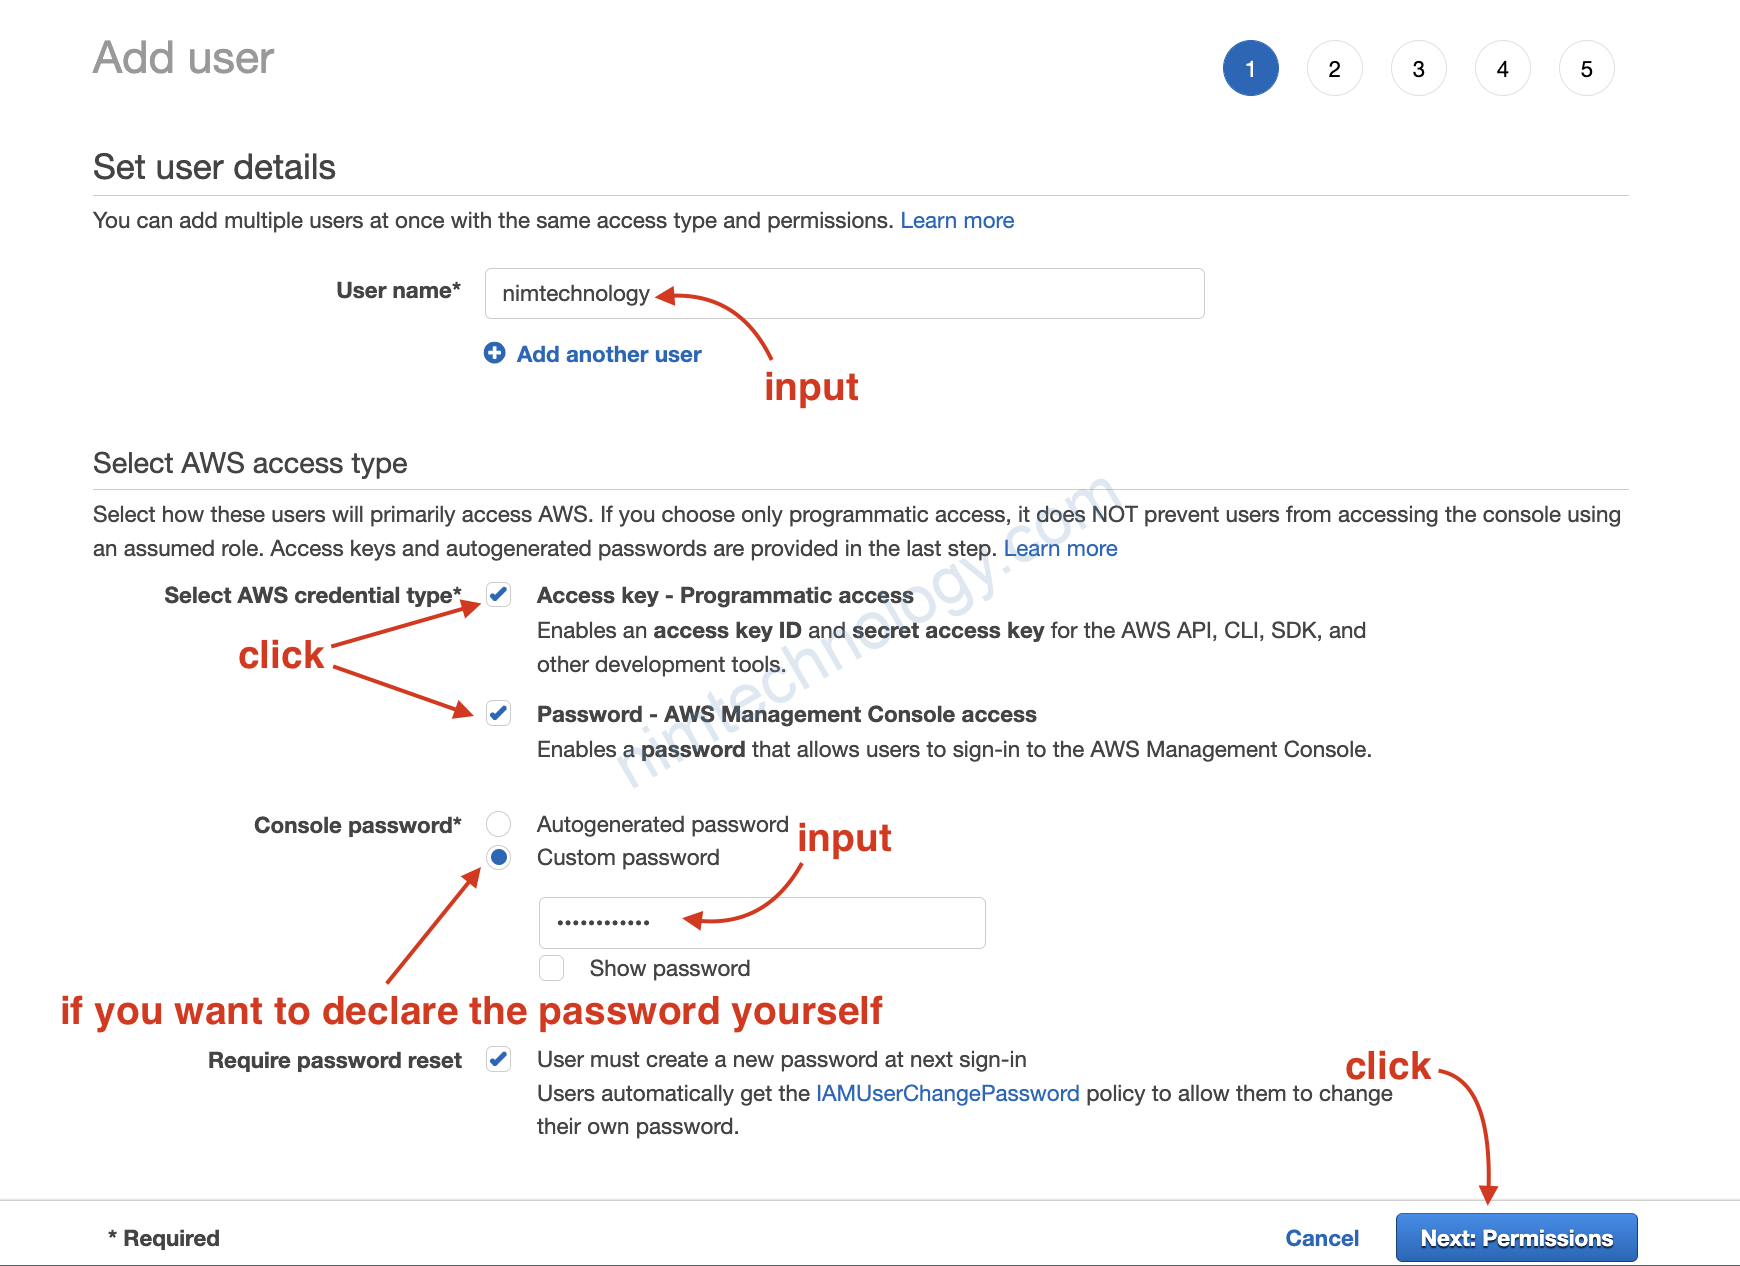
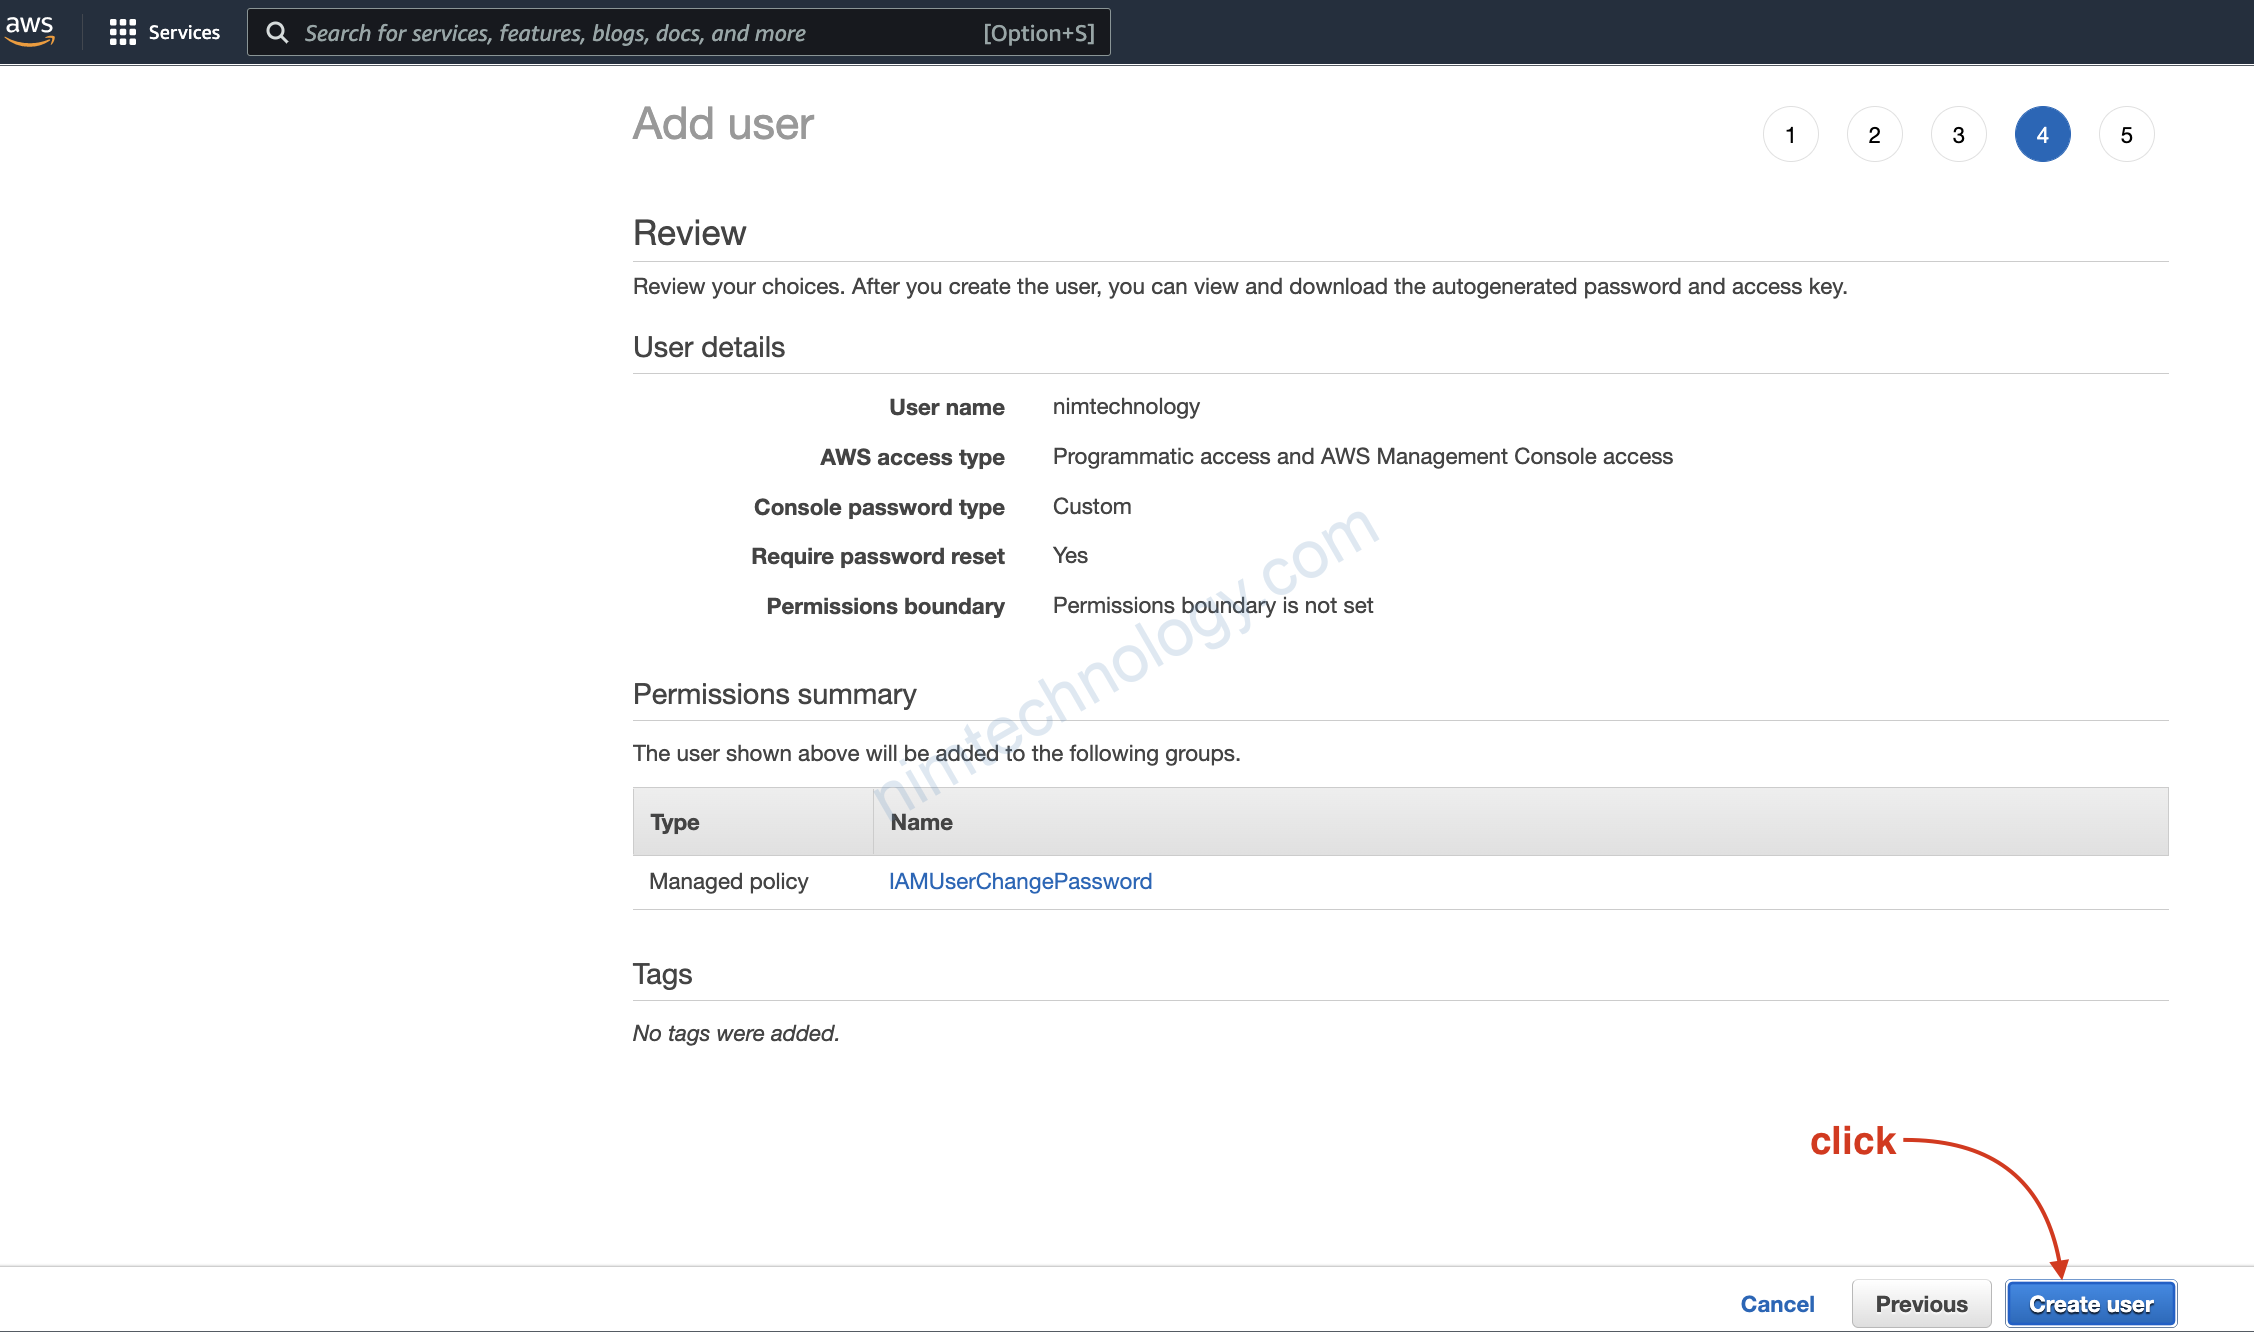
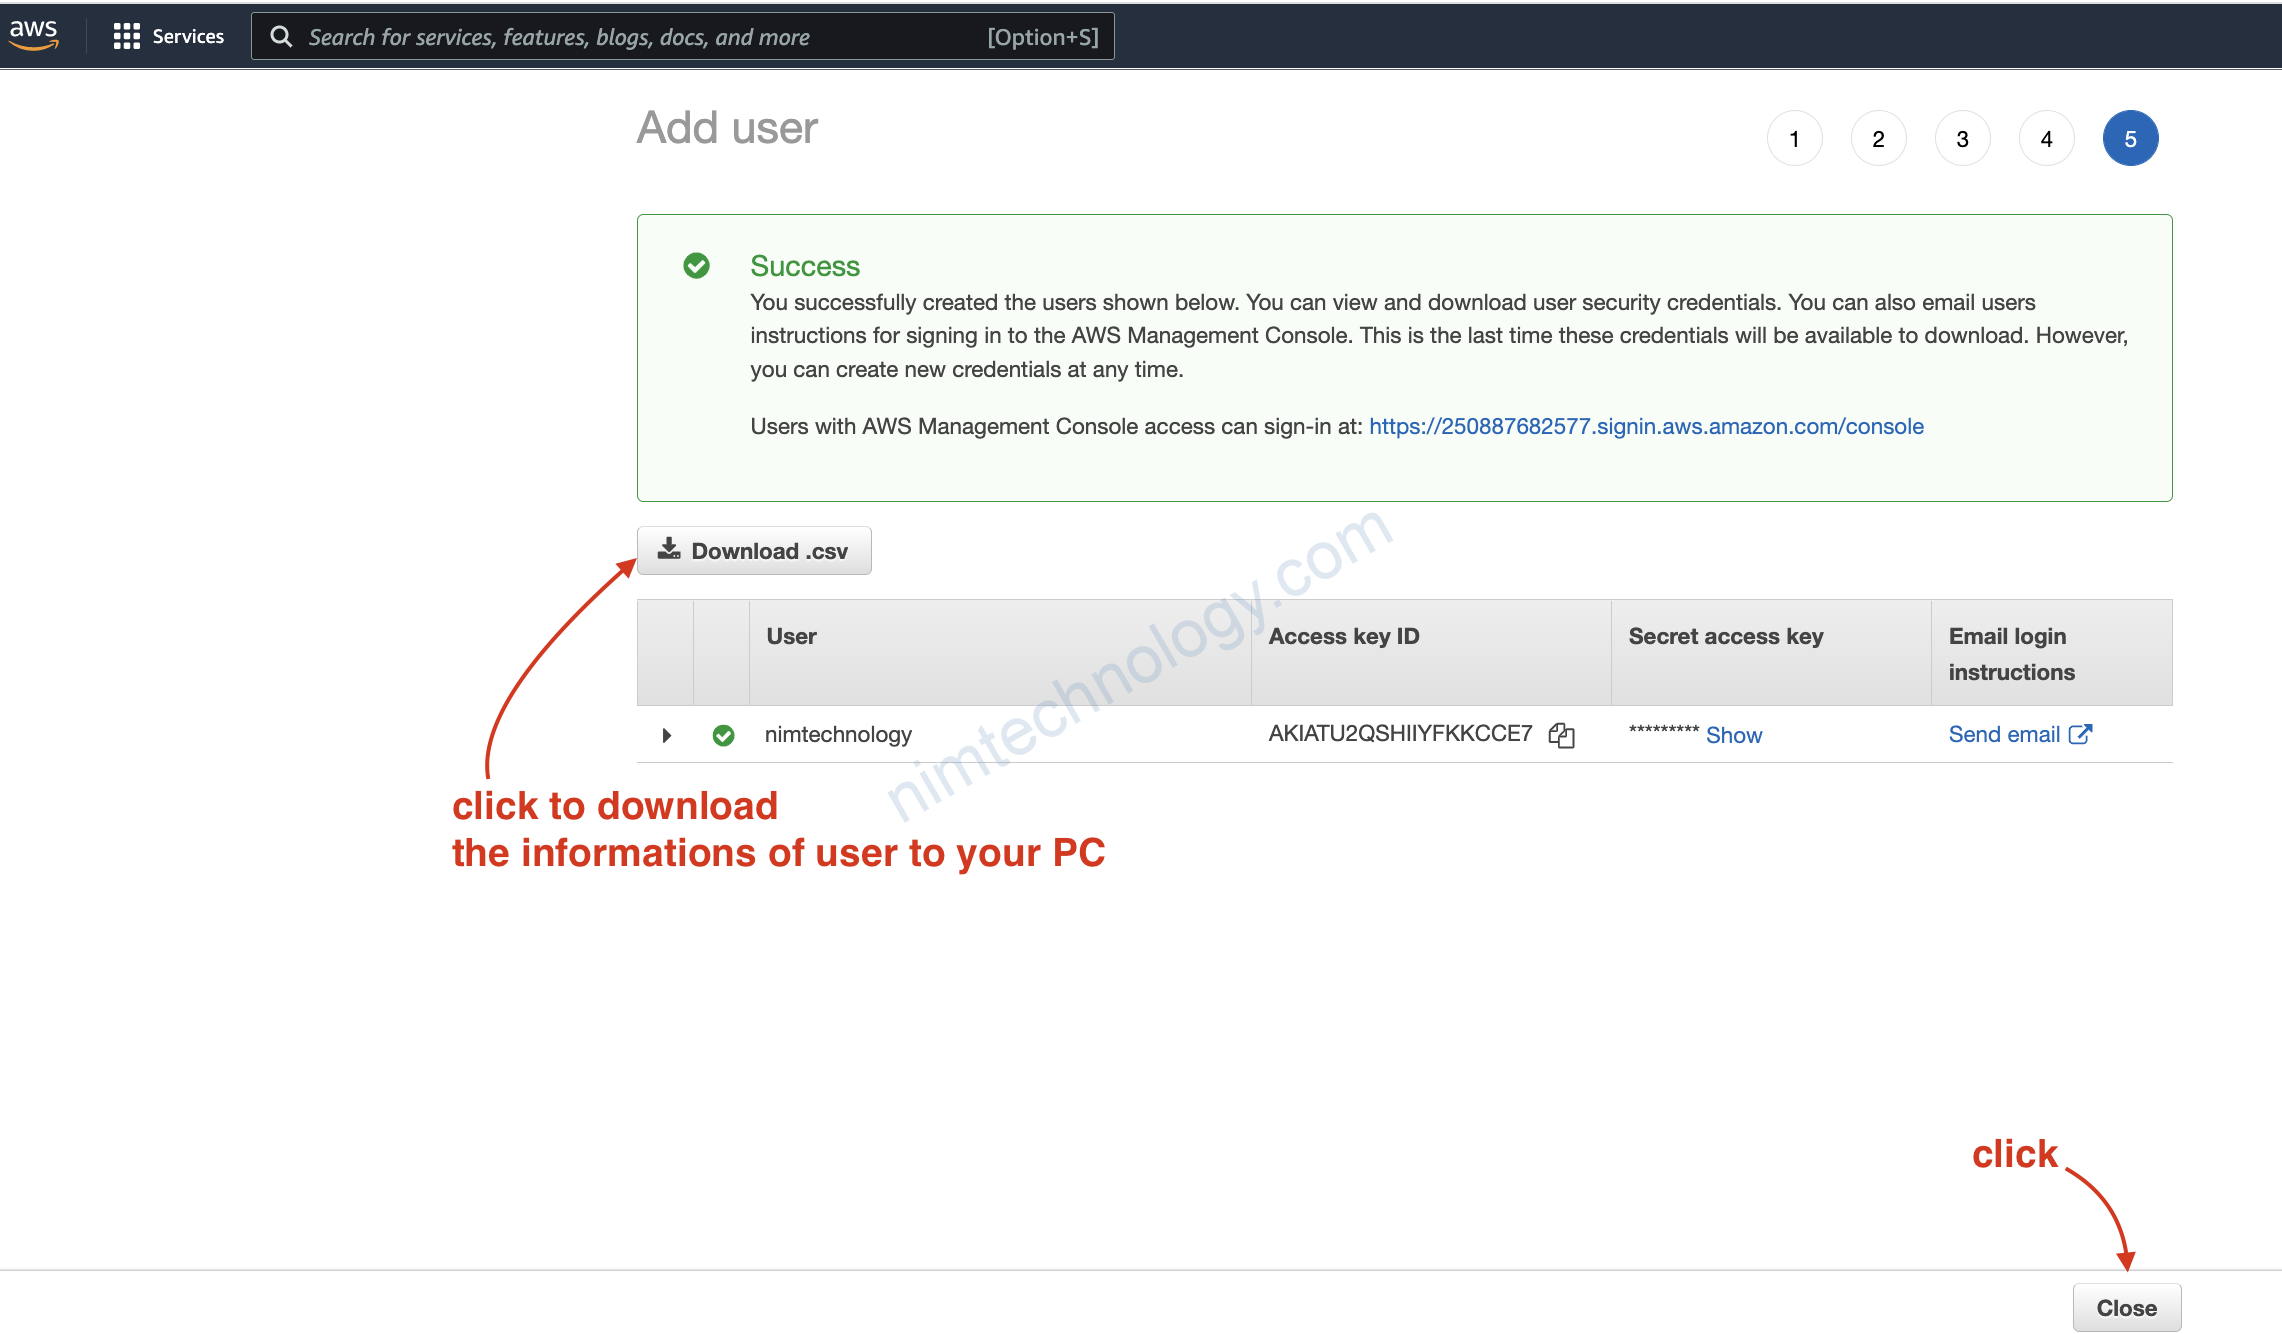
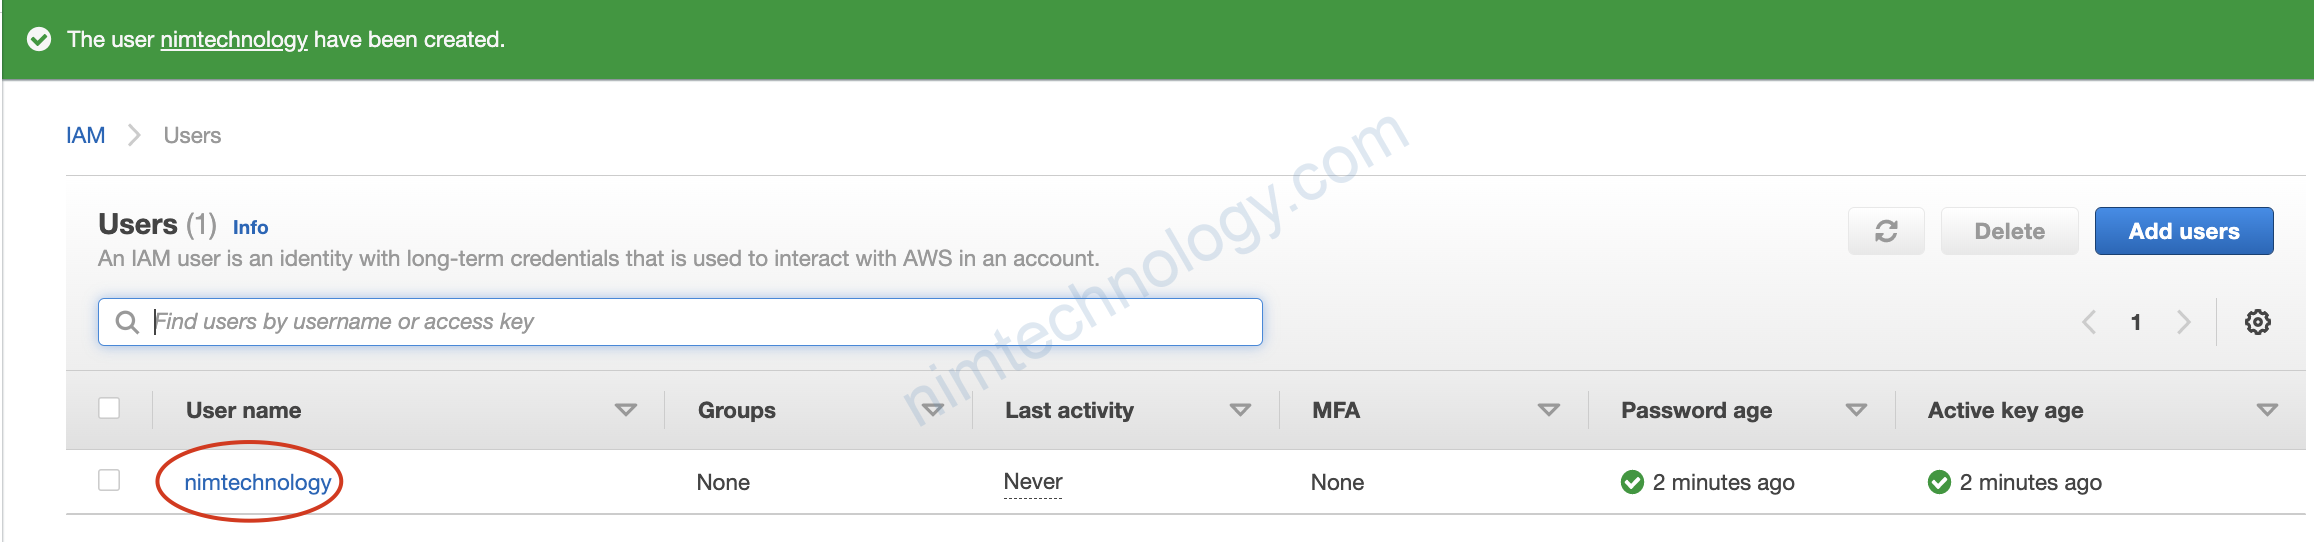
4.3) Create User
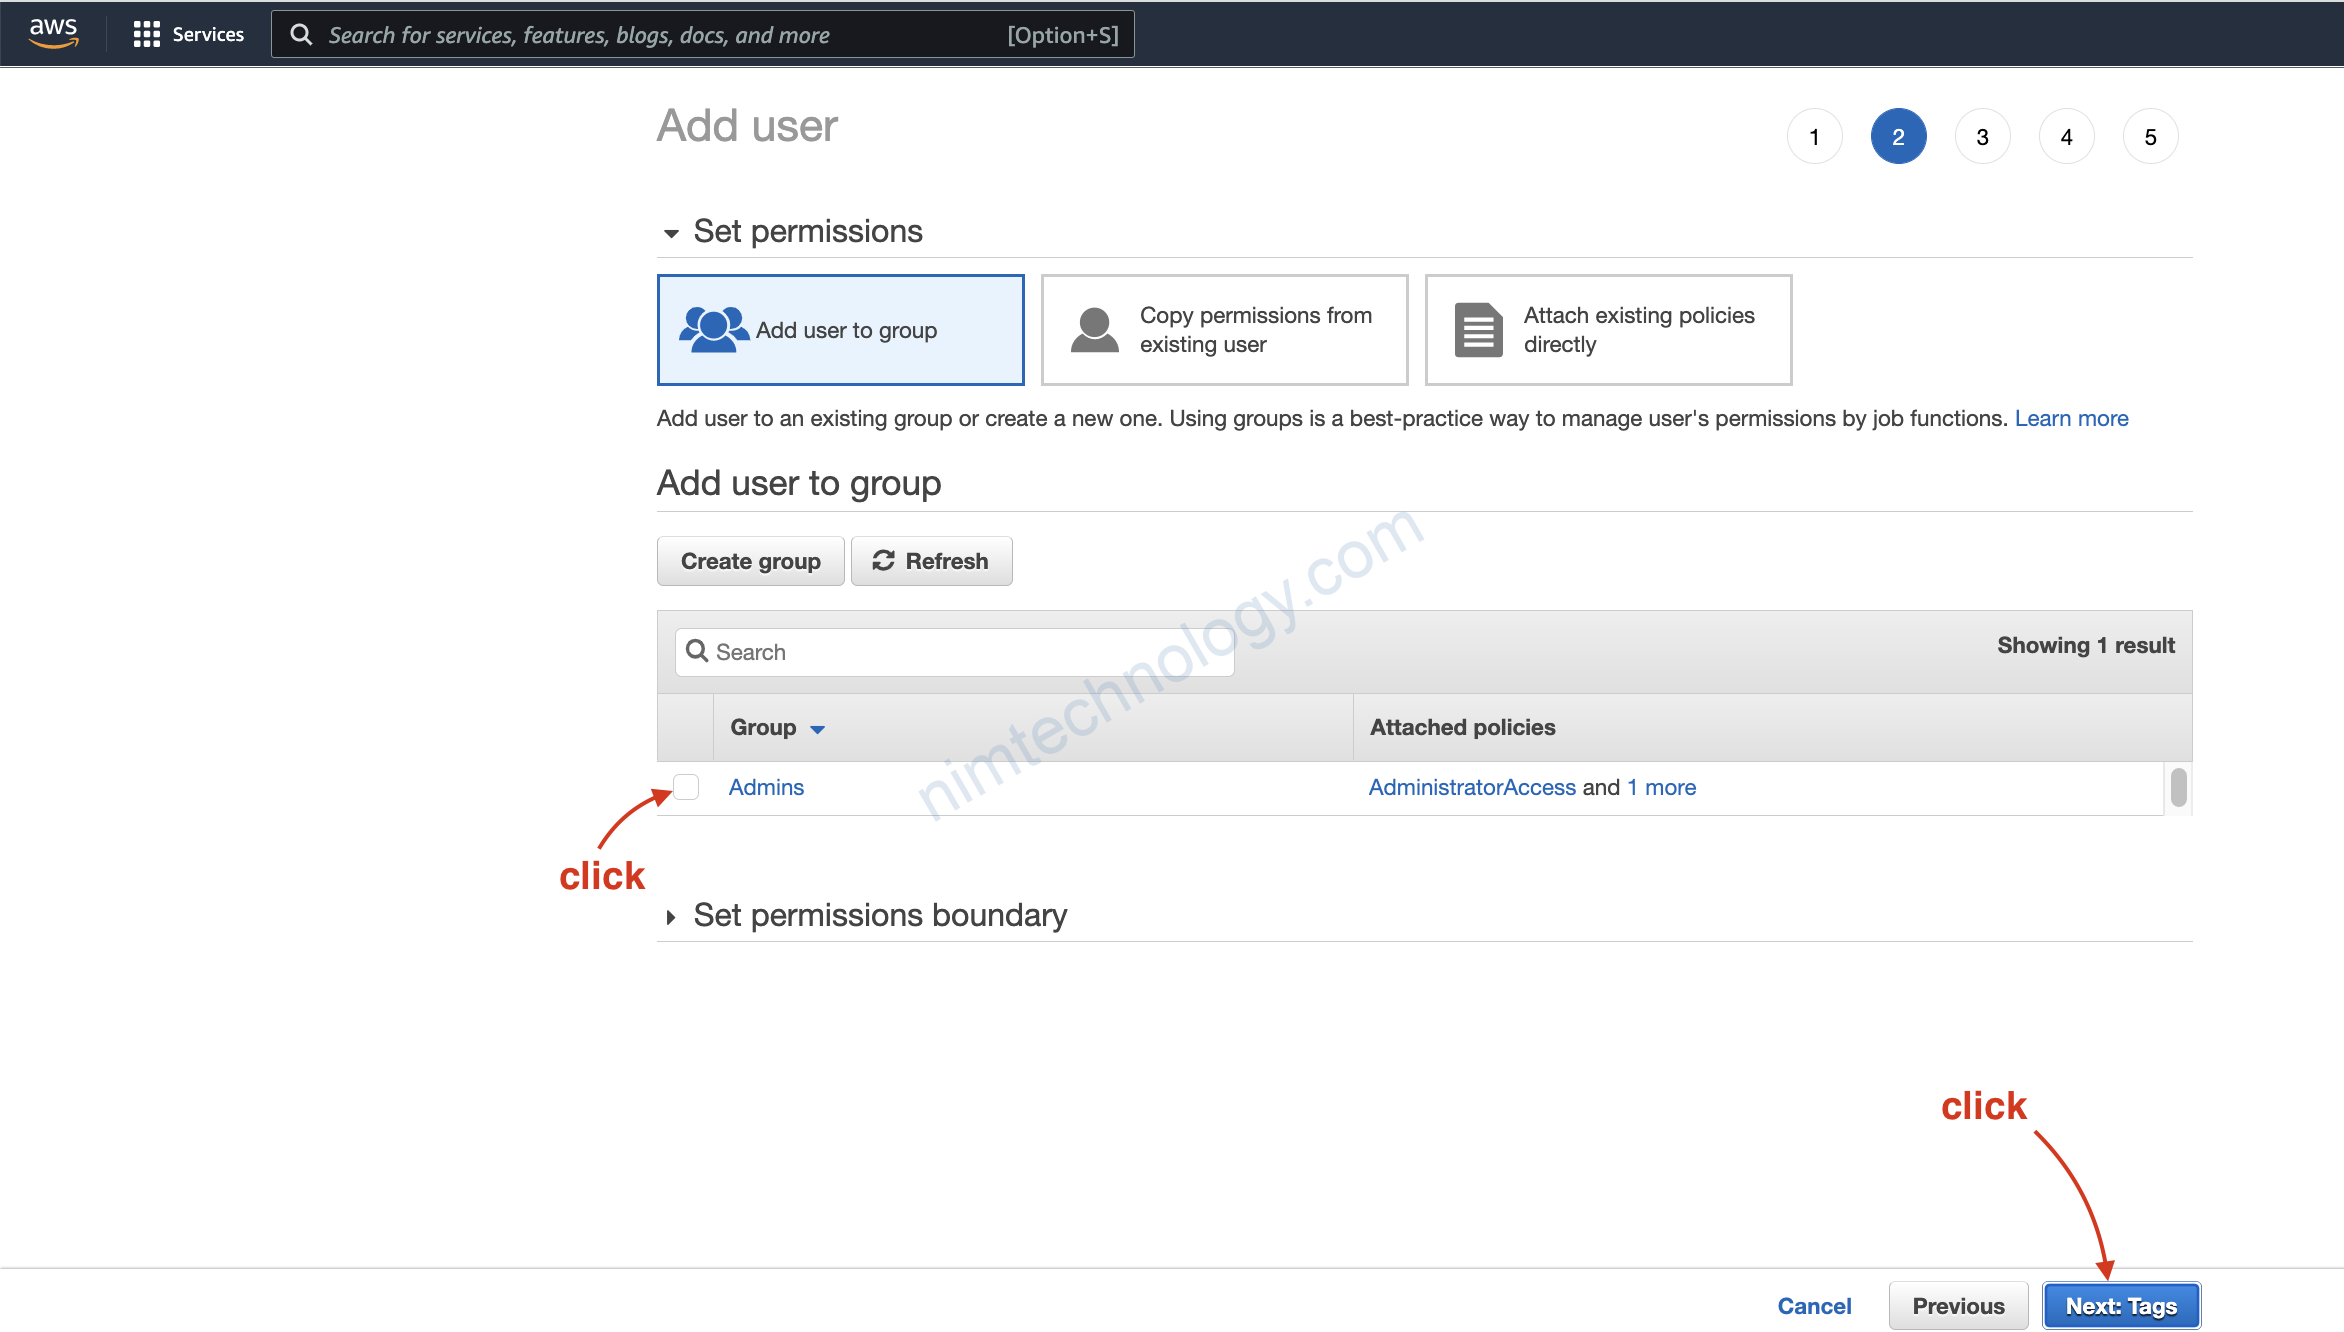
Điều này user sẽ được add vào group Admins và kế thừa các quền của group này.

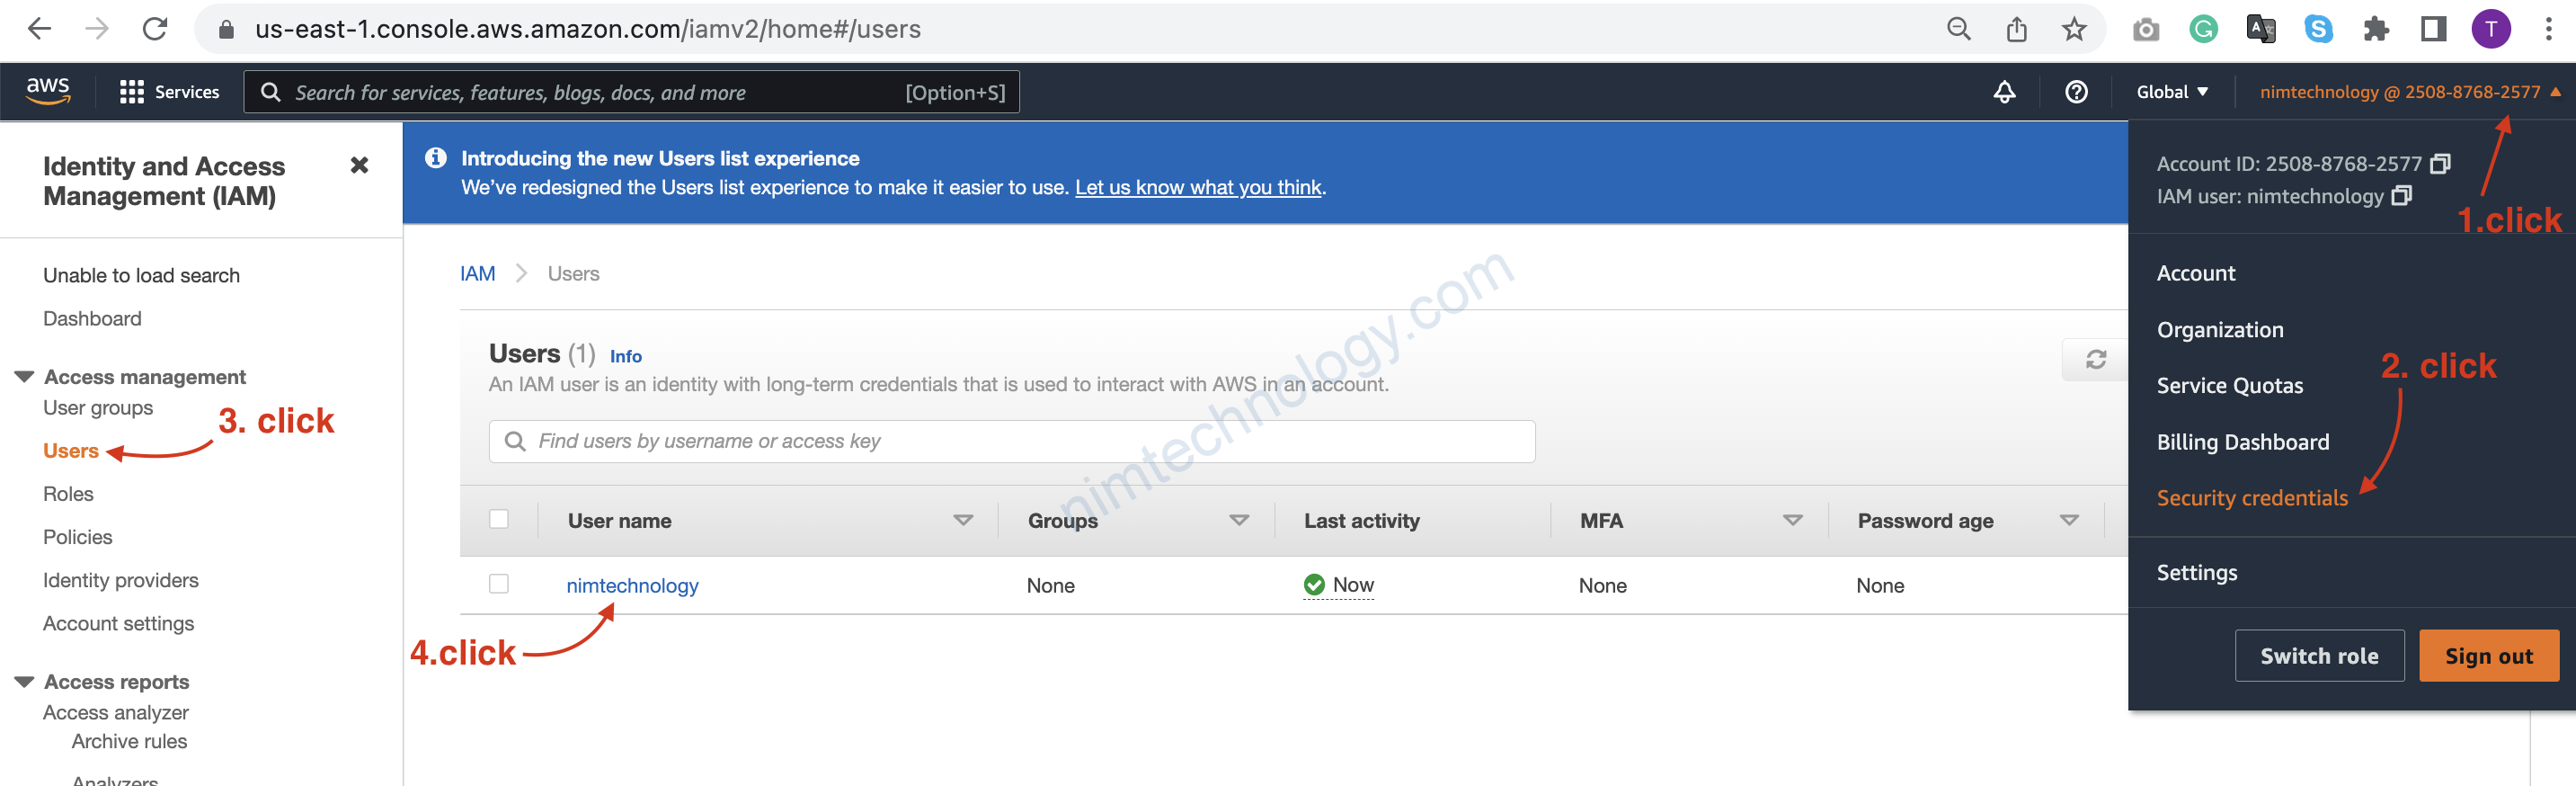
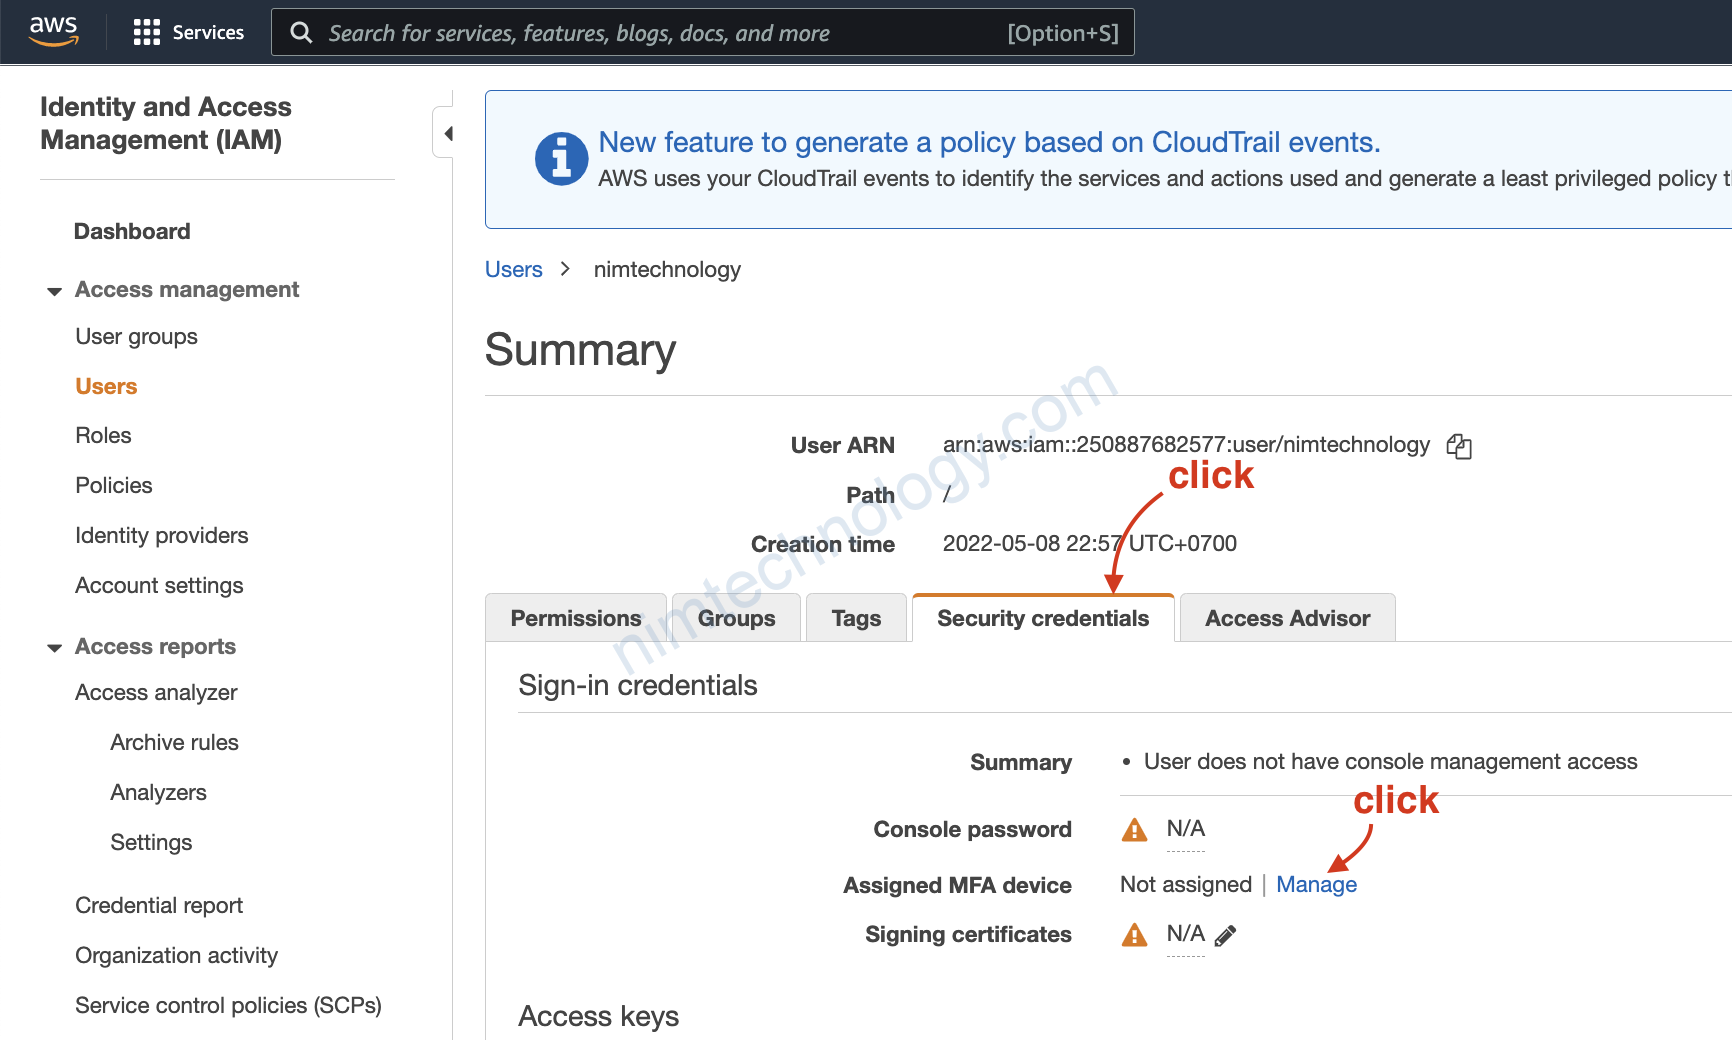
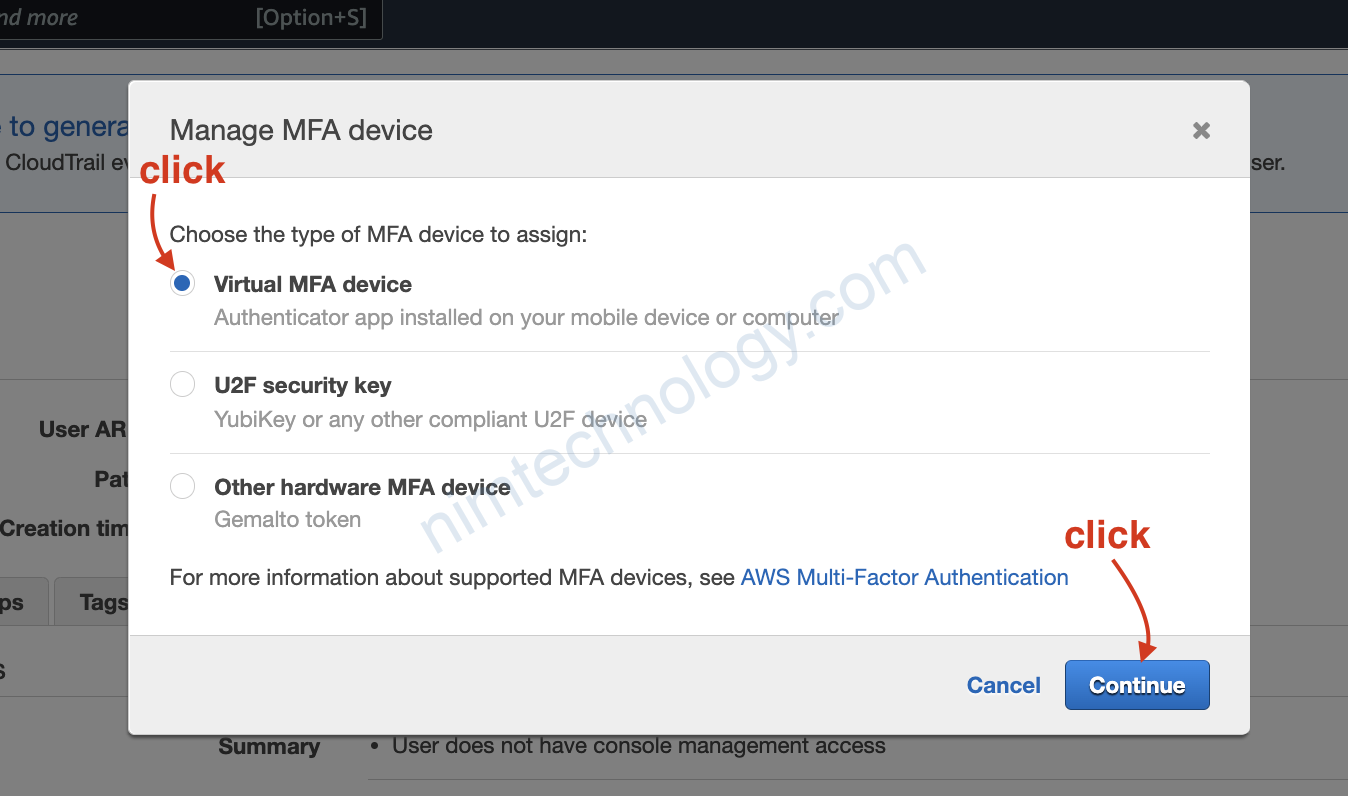
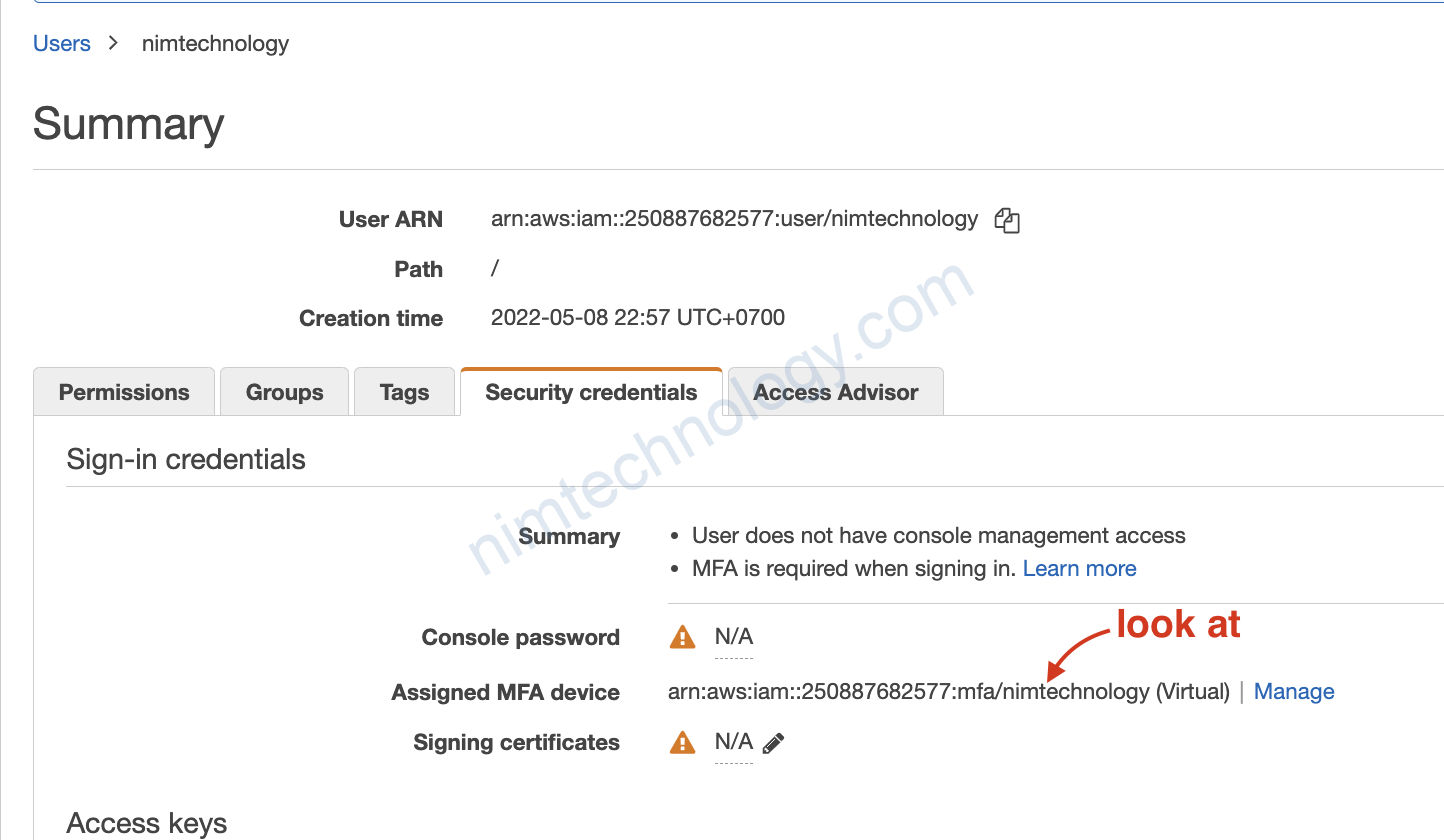
5) Set MFA on IAM account
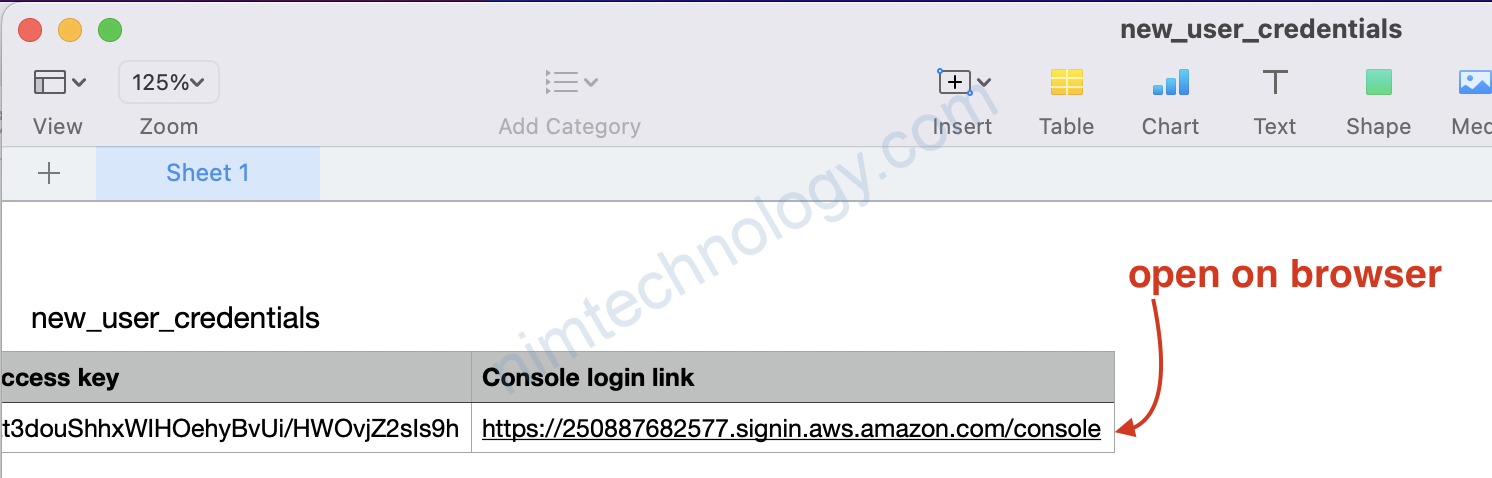
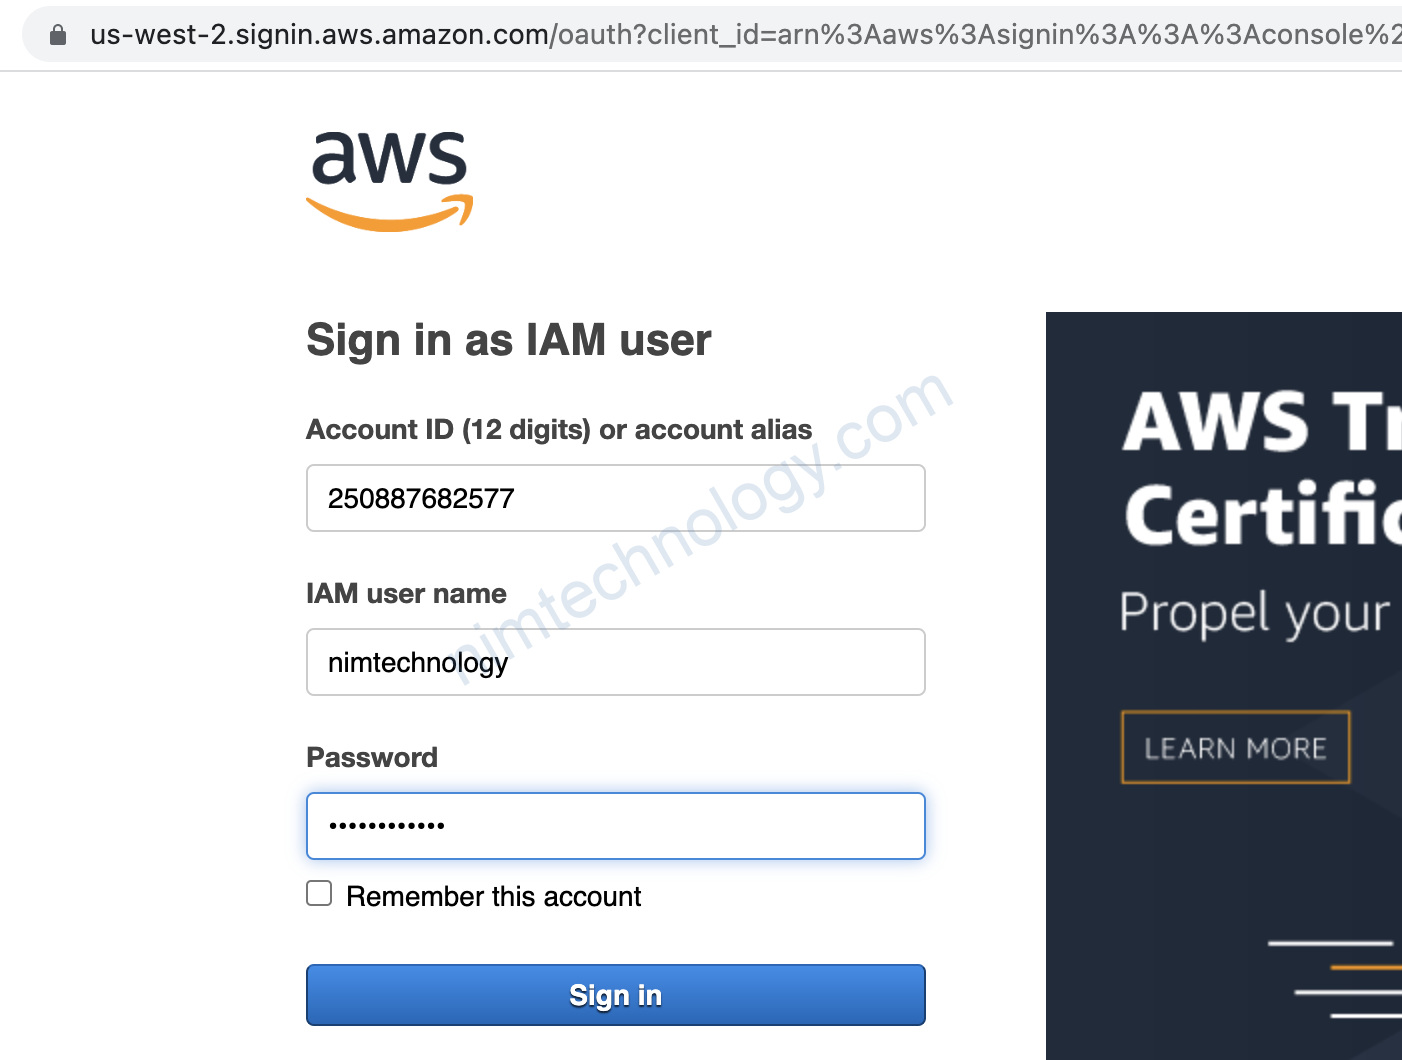
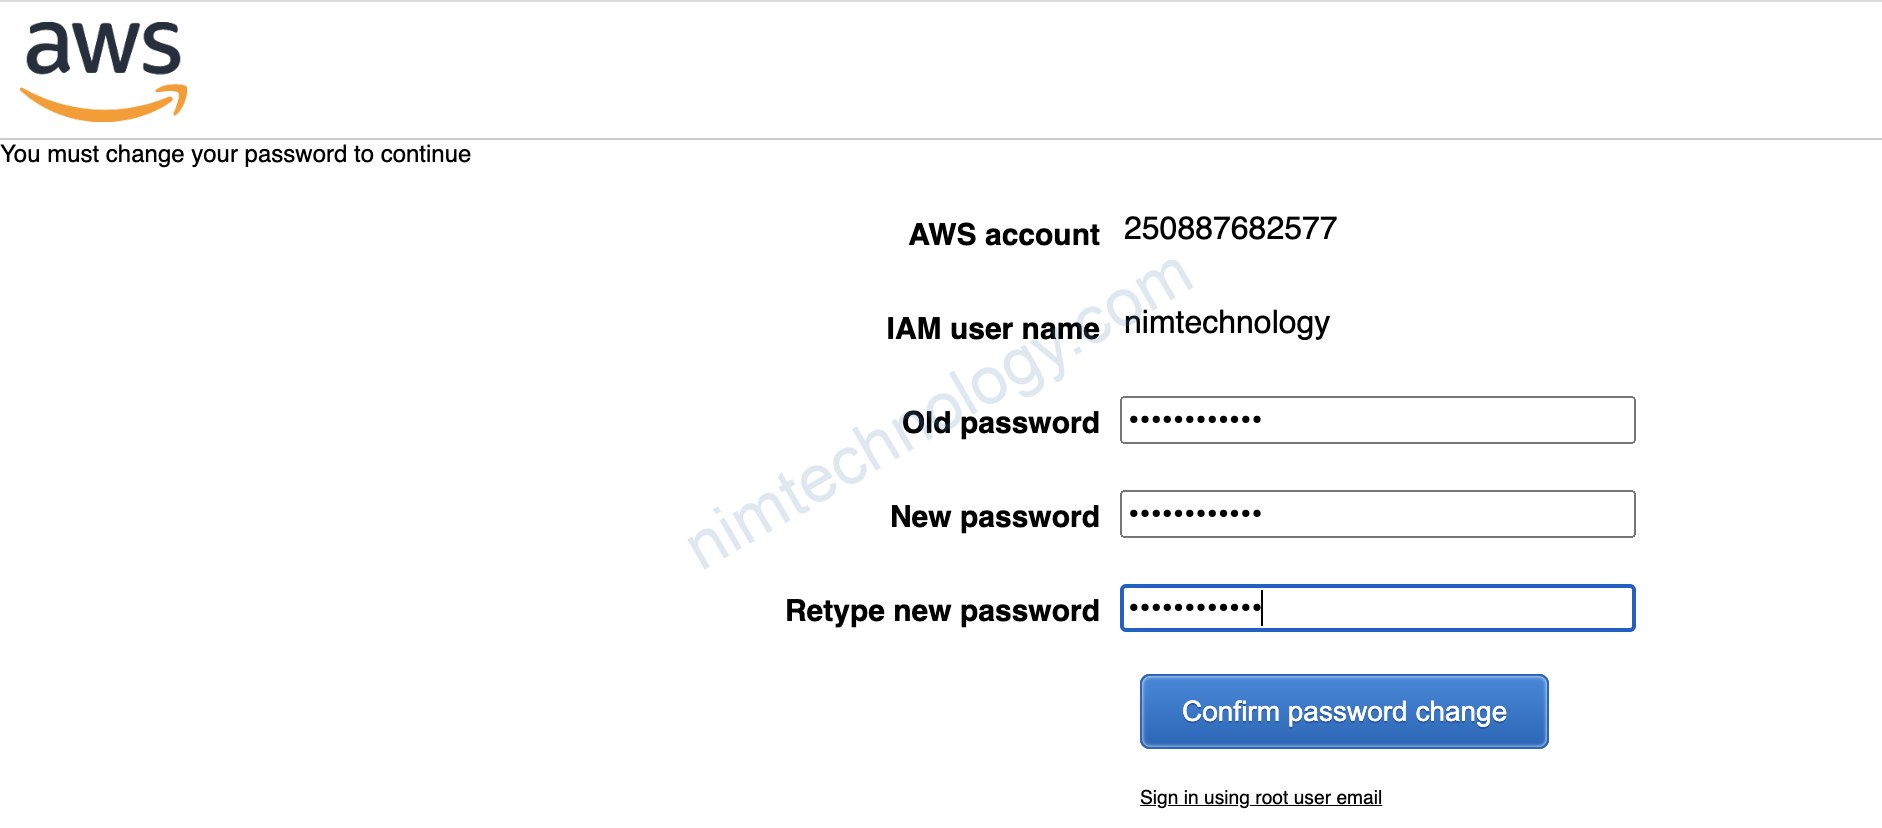
Giờ bạn login vào web aws bằng user IAM
Bạn sẽ mở lại file csv mà bạn download ở bước tạo user.
Truy cập vào console login link.
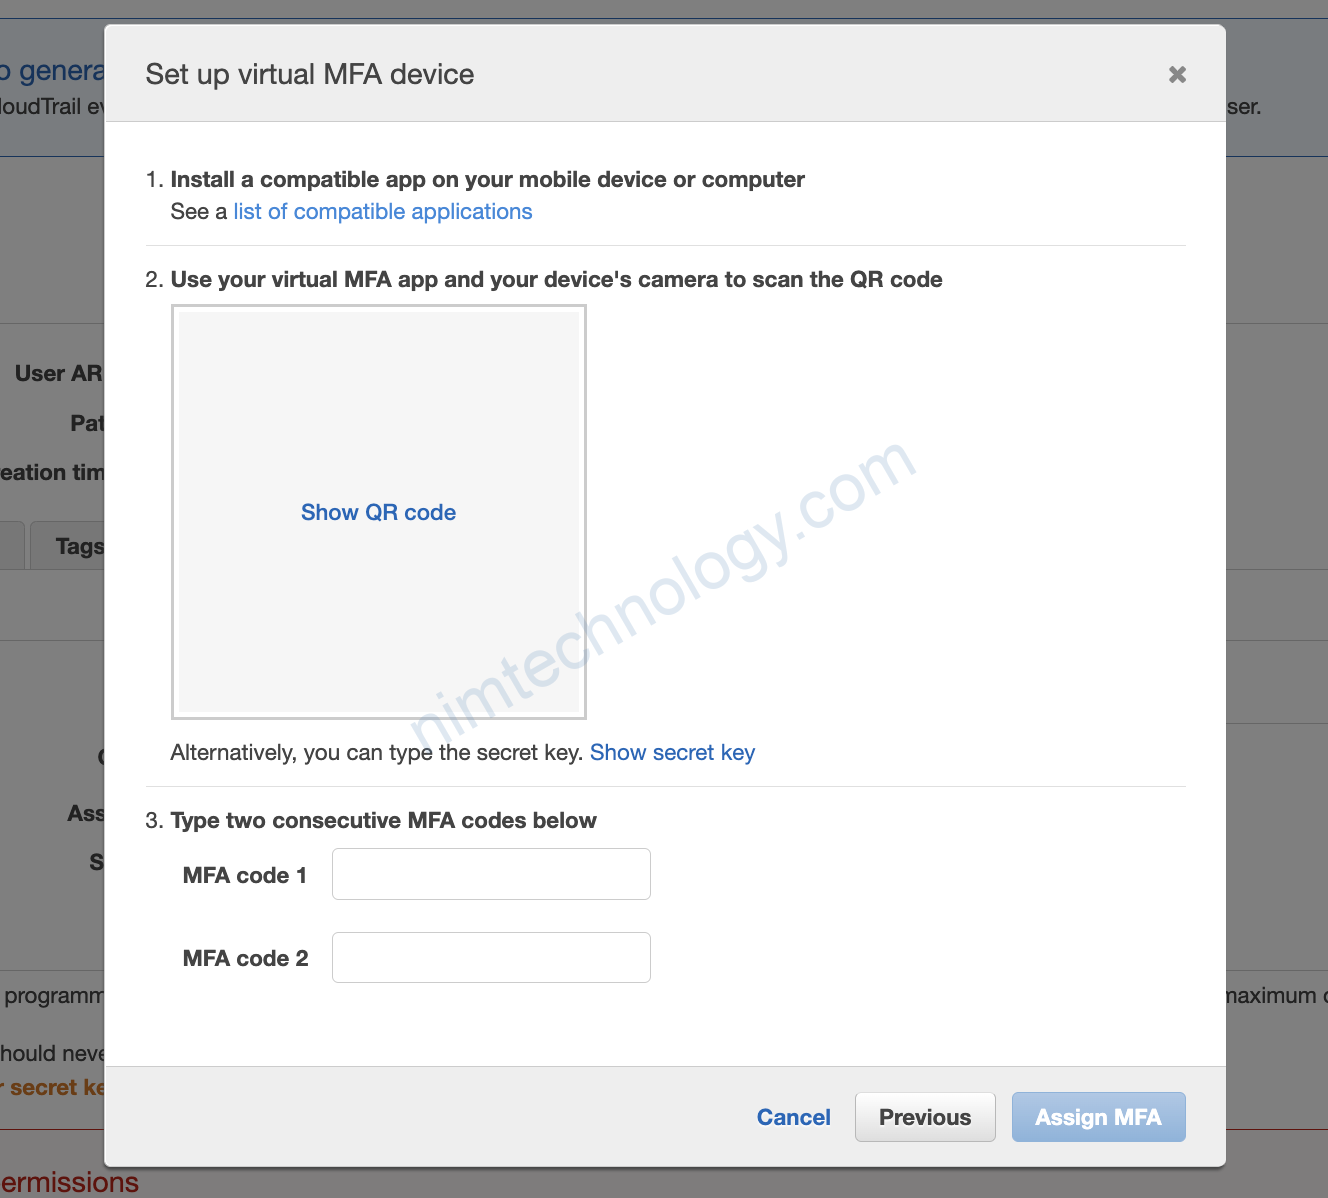
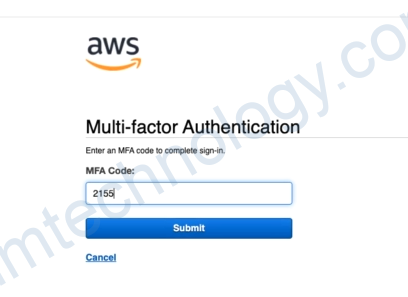
Bạn quest mã QR code -> Lần thử nhất điền mã code đầu tiên –> chờ đổi mã code -> diền mã code tiếp thứ 2 vào
Giờ bạn logout và login lại thì thấy aws sẽ bắt nhập thêm MFA nhé
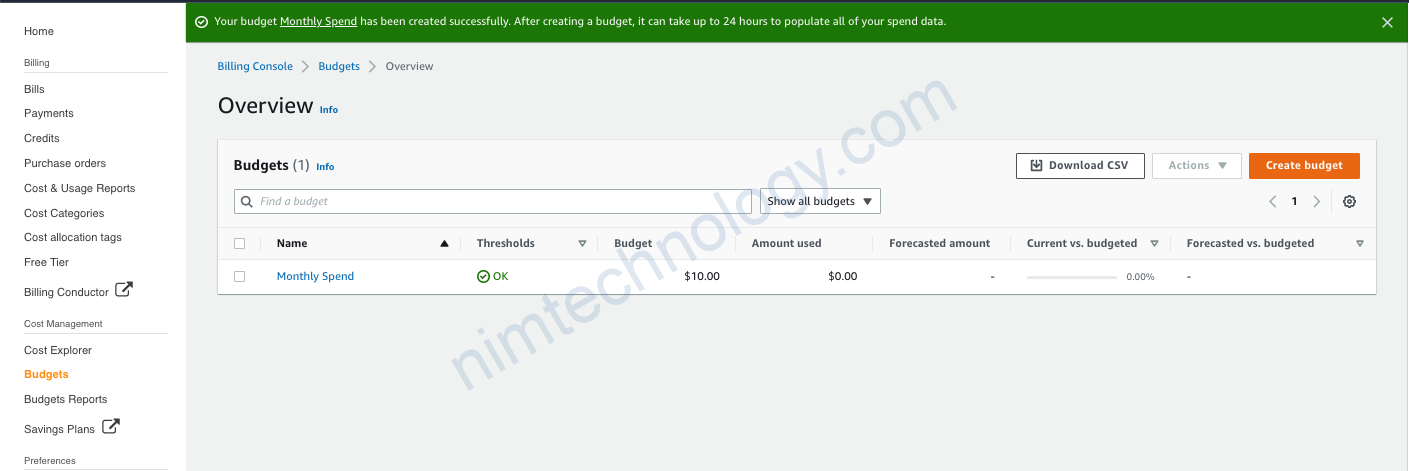
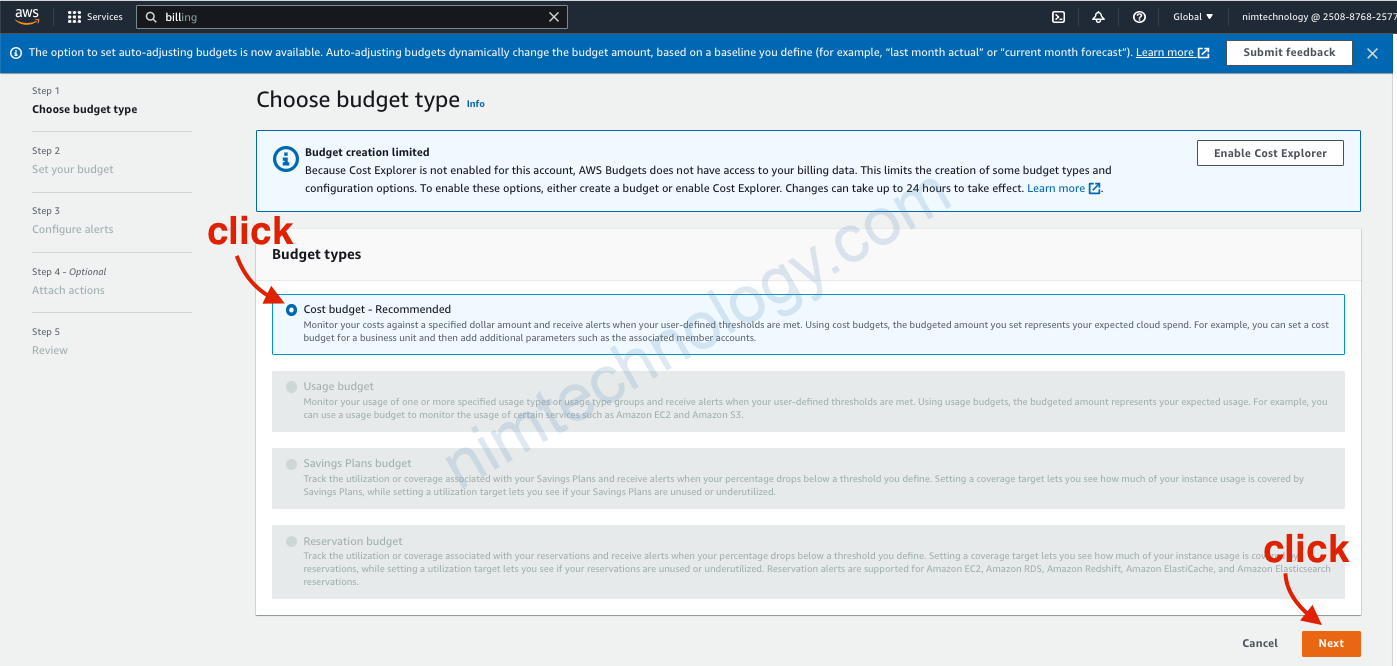
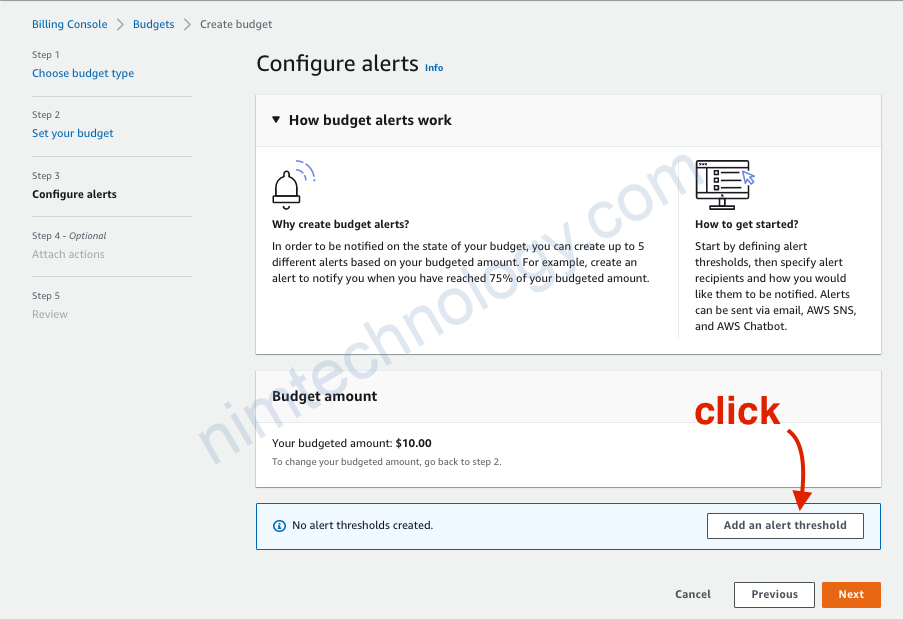
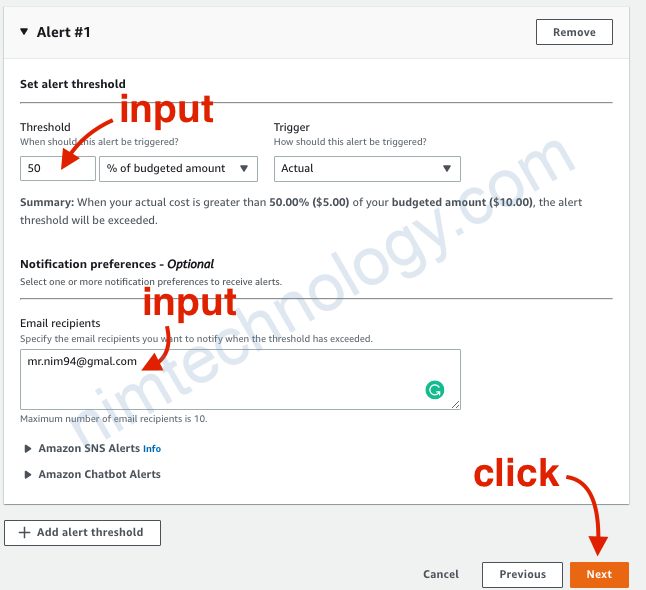
6) Create budget in AWS

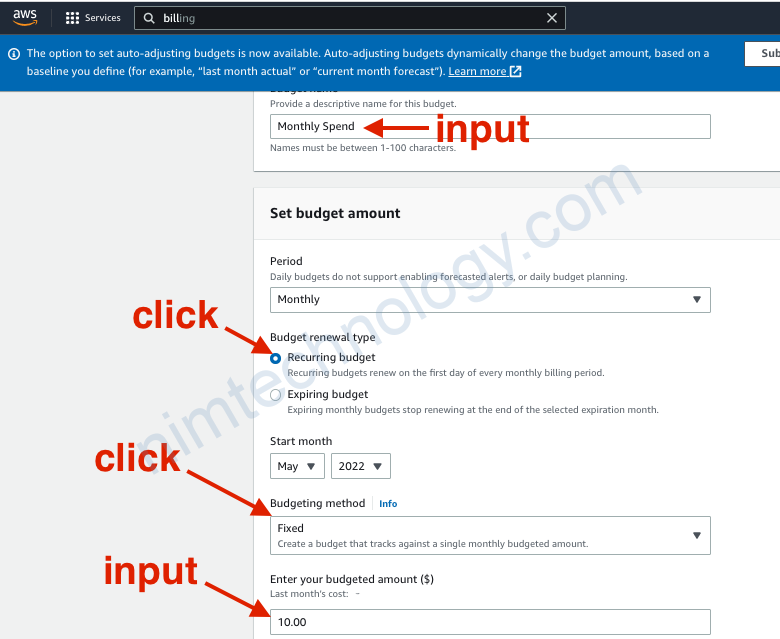
Enter your budgeted amount ($): Số này tính bằng đơn vị Dollar. Mình ví dụ trong 1 tháng mình chỉ được tiêu 10$ thì mình set là 10.
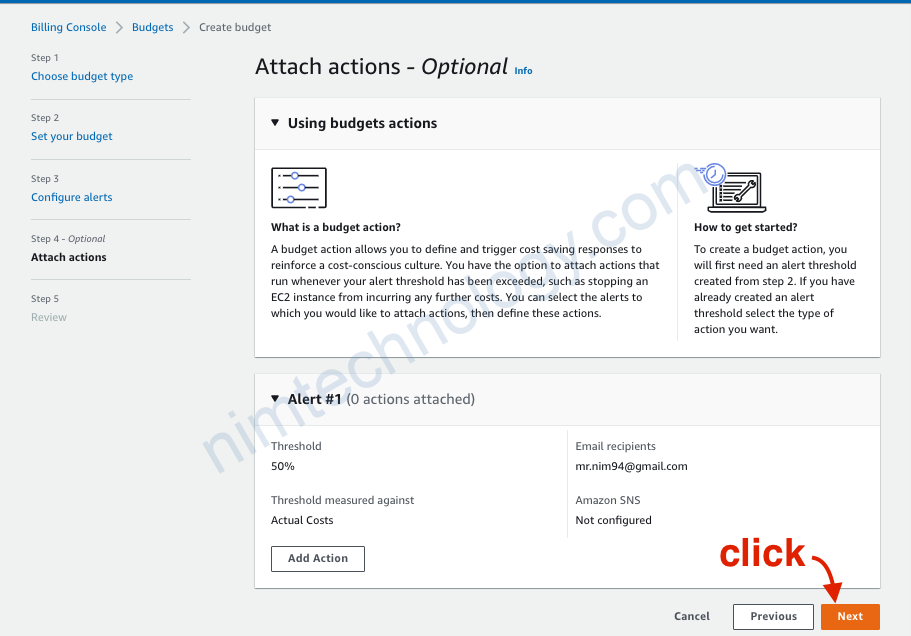
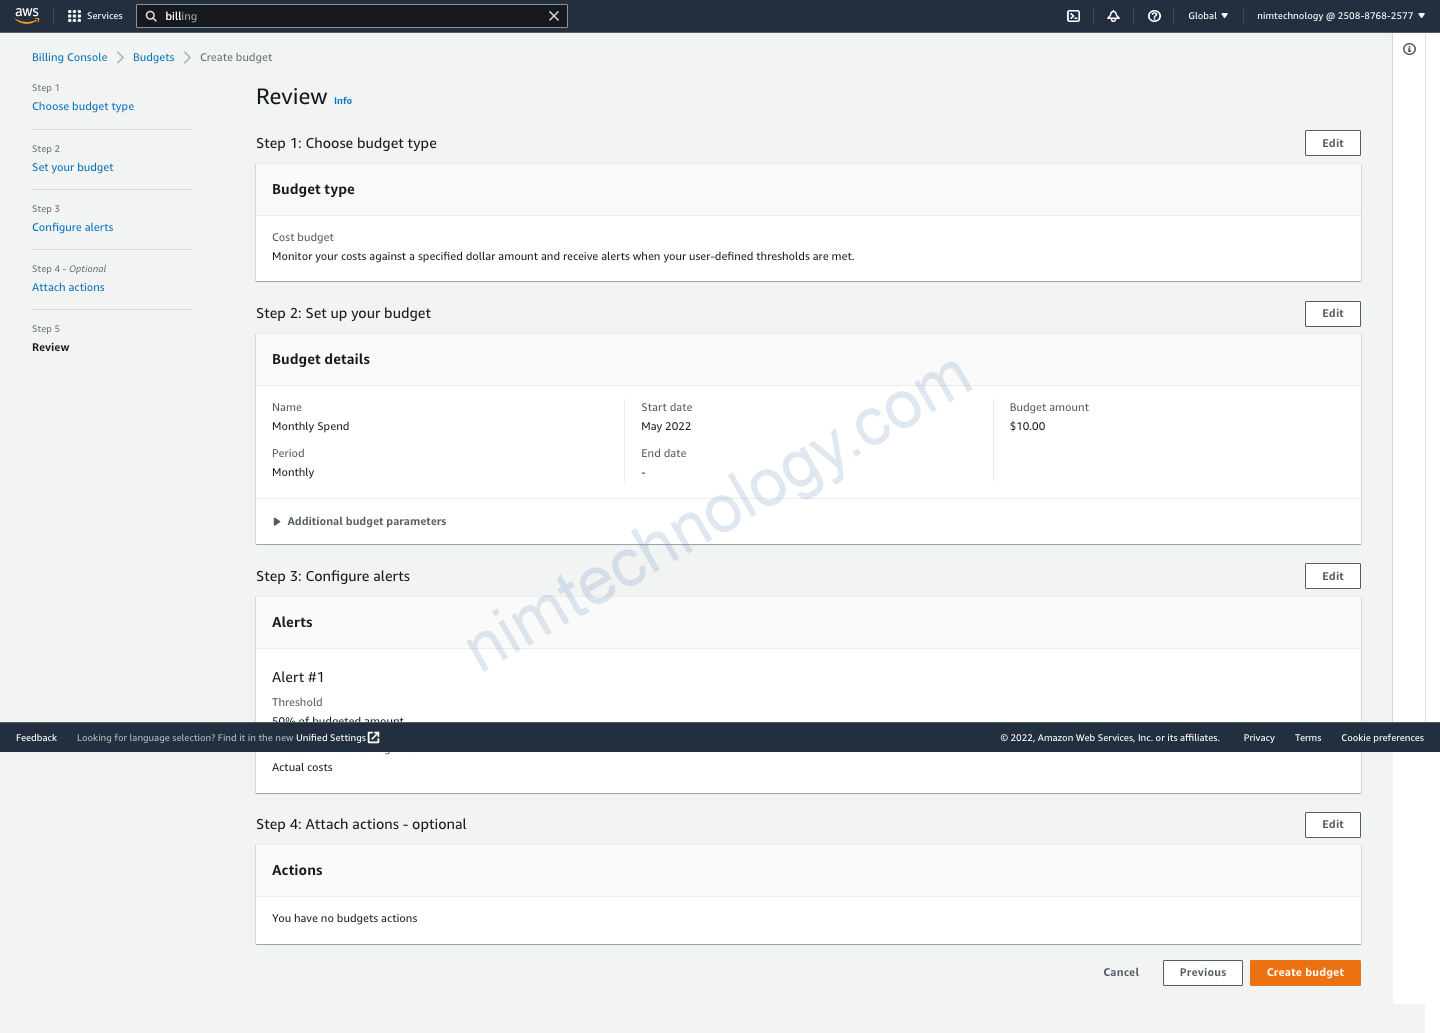
Click Create budget thôi.