Giờ chúng ta tìm hiểu về Bitbucket Pipeline.
Bạn có thể xem video ở trên trước
Mình đã có 1 bài hướng dẫn chạy terragrunt
https://nimtechnology.com/2022/08/26/terraform-using-terragrunt-to-provision-aws-base-on-terraform-module/
Giờ mình sẽ kết hợp với Bitbucket Pipeline và terragrunt để deploy 1 con EC2
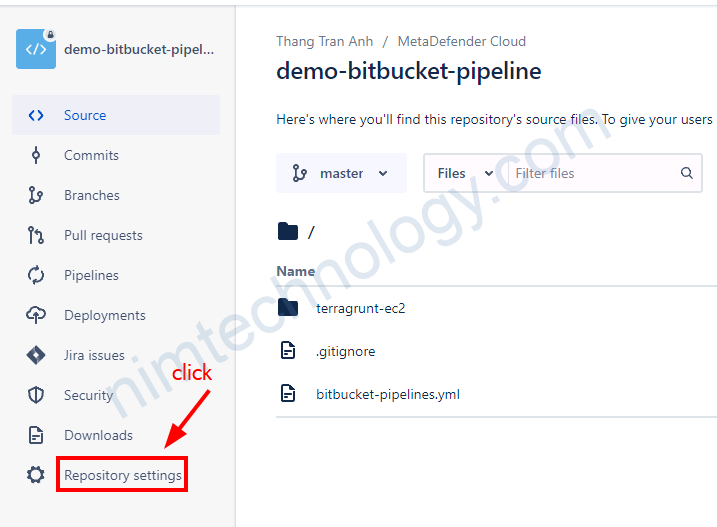
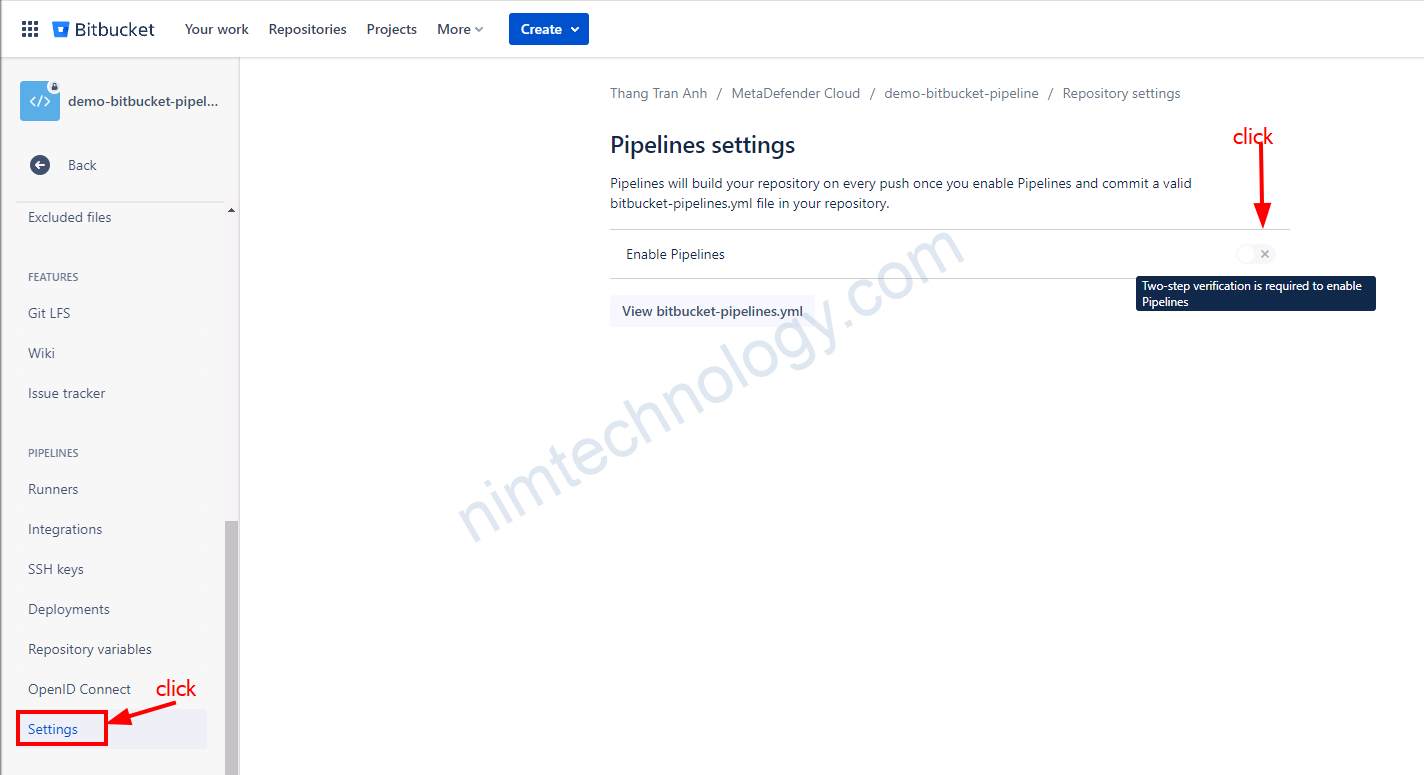
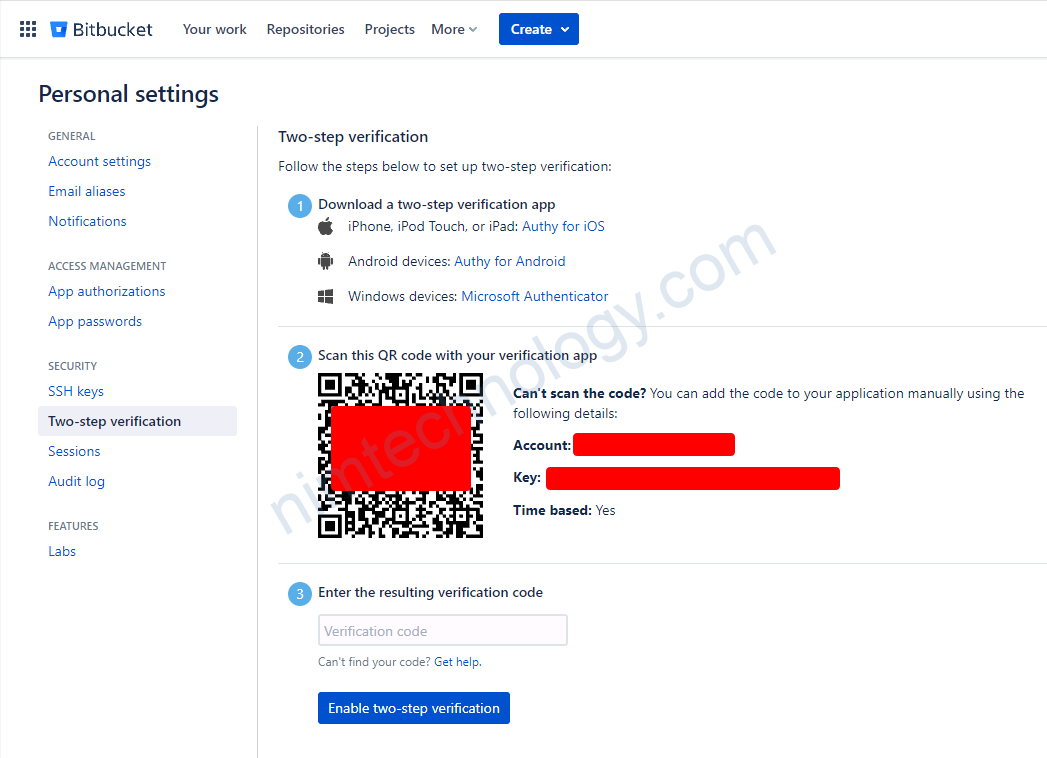
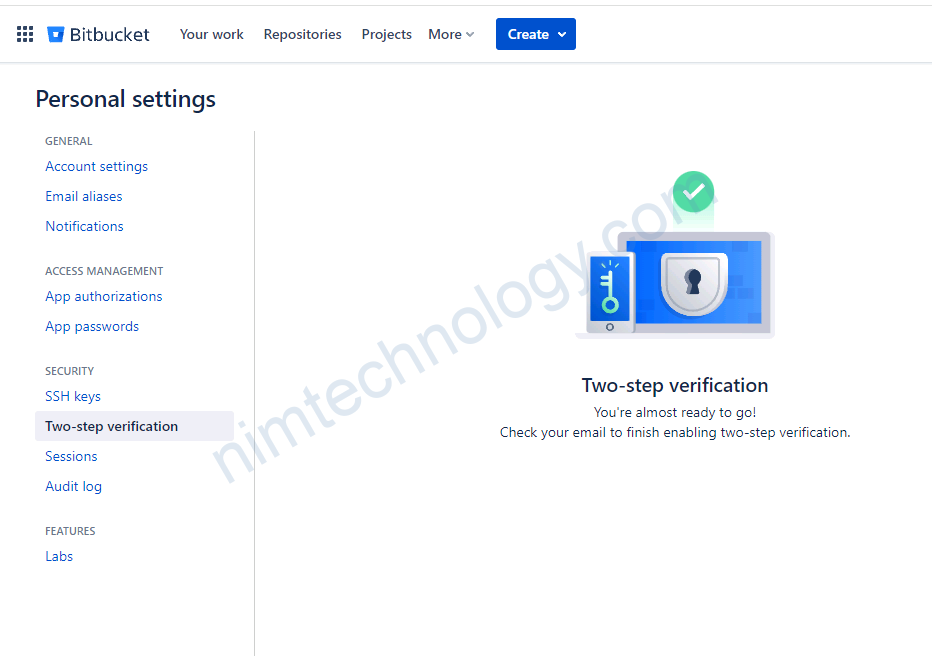
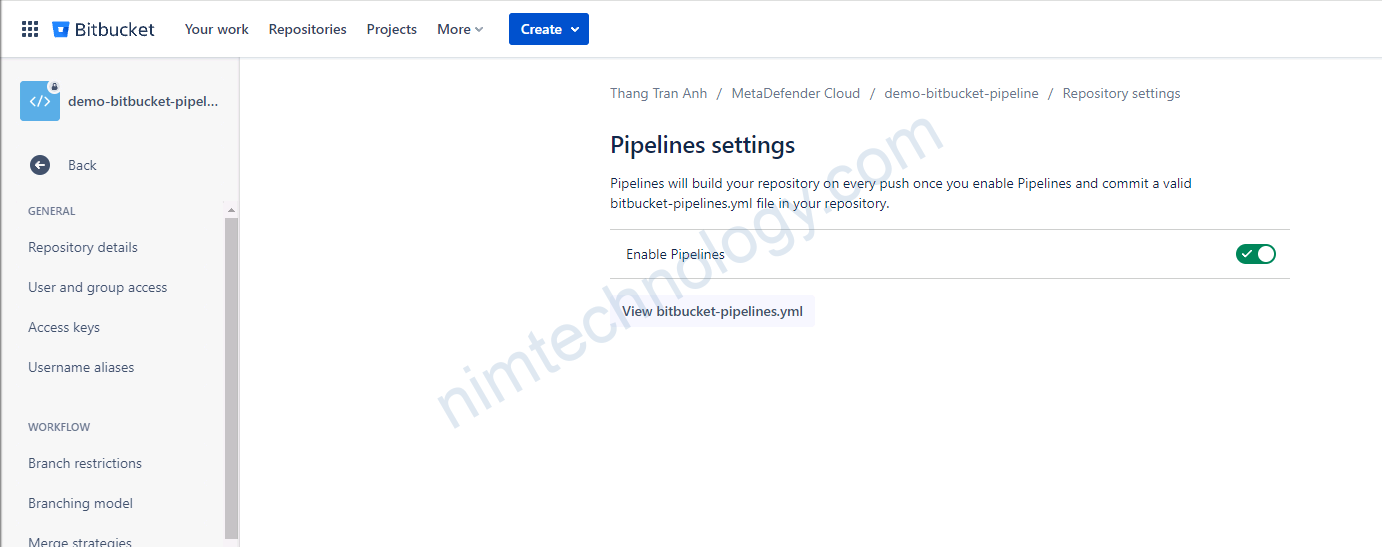
alpine/terragrunt:1.2.8-eks1) Set up and enable bitbucket-pipeline


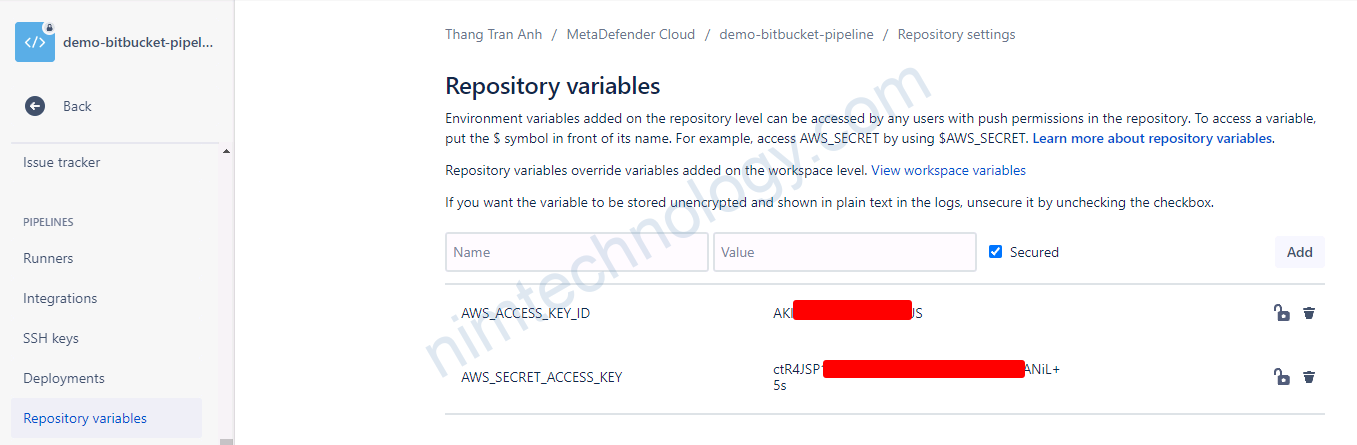
2) Declare the global environment for bitbucket-pipeline
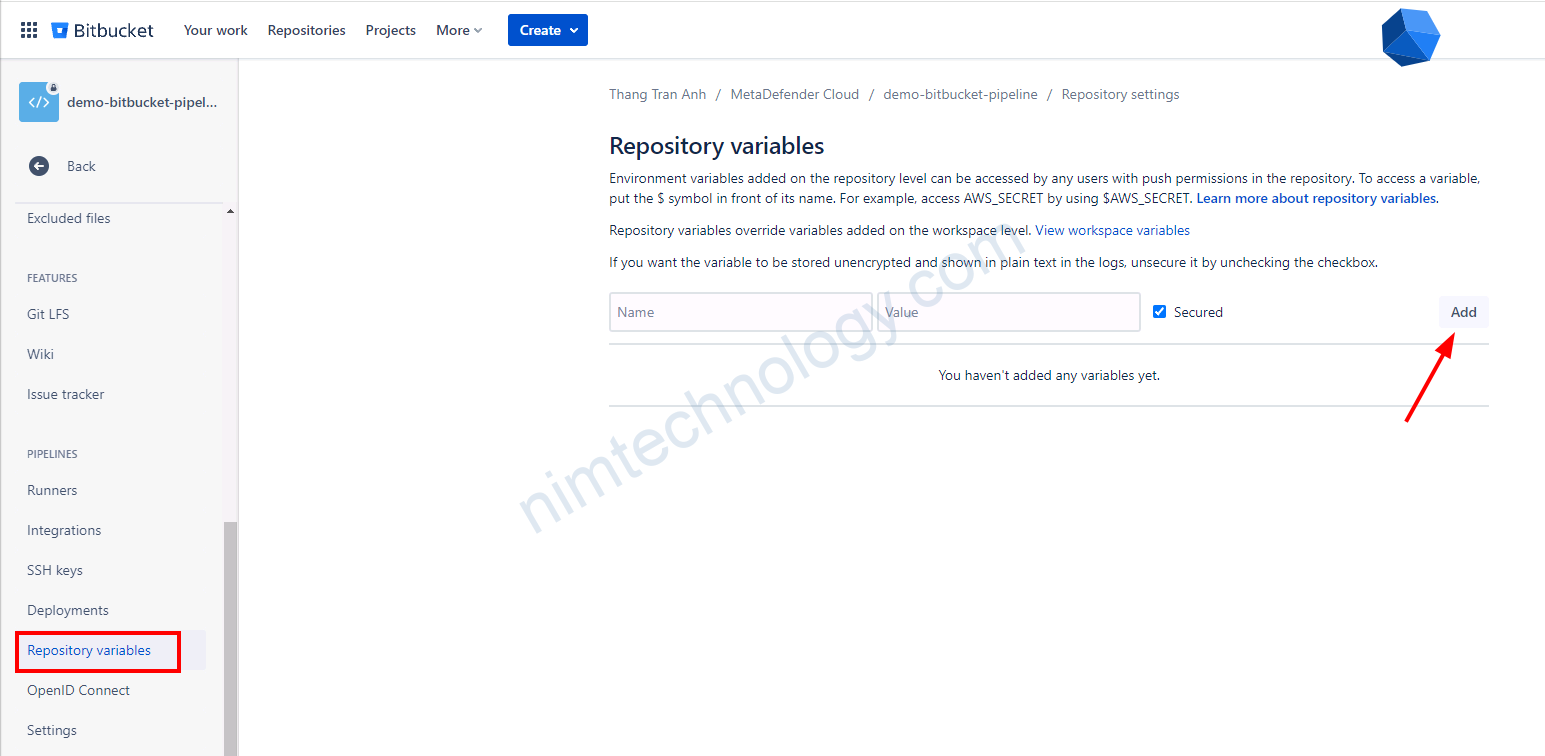
Vì là mình chạy terragunt nên mình sẽ add env như hình dưới!

bitbucket-pipelines.yml
image:
name: alpine/terragrunt:1.2.8-eks
# aws:
# access-key: $AWS_ACCESS_KEY_ID_dev
# secret-key: $AWS_SECRET_ACCESS_KEY_dev
pipelines:
custom:
Remote-state:
- step:
name: Terraform apply S3
script:
- cd terragrunt_s3
- terragrunt init
- terragrunt plan
- terragrunt apply -auto-approve
- step:
name: Terraform apply dynamodb
script:
- cd terragrunt_dynamodb
- terragrunt init
- terragrunt plan
- terragrunt apply -auto-approve
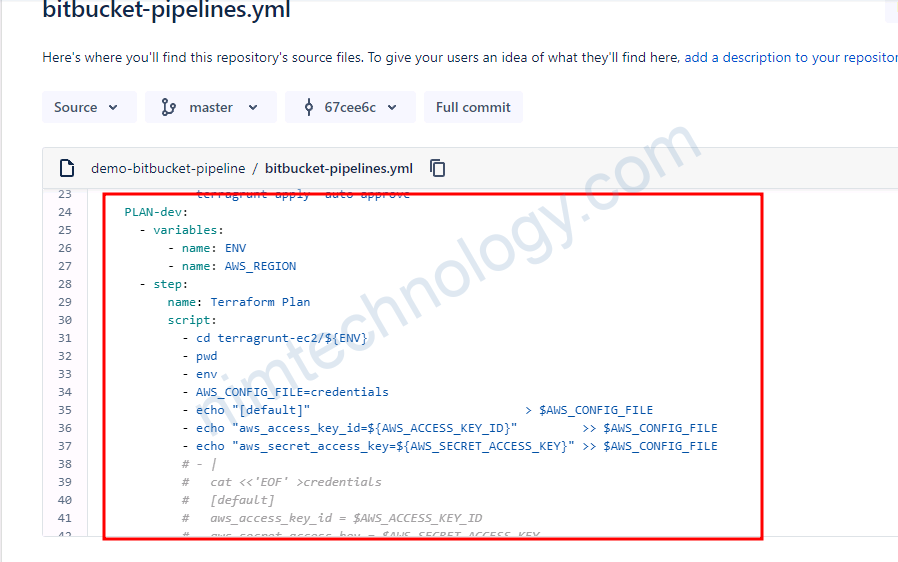
PLAN-dev:
- variables:
- name: ENV
- name: AWS_REGION
- step:
name: Terraform Plan
script:
- cd terragrunt-ec2/${ENV}
- pwd
- env
- AWS_CONFIG_FILE=credentials
- echo "[default]" > $AWS_CONFIG_FILE
- echo "aws_access_key_id=${AWS_ACCESS_KEY_ID}" >> $AWS_CONFIG_FILE
- echo "aws_secret_access_key=${AWS_SECRET_ACCESS_KEY}" >> $AWS_CONFIG_FILE
# - |
# cat <<'EOF' >credentials
# [default]
# aws_access_key_id = $AWS_ACCESS_KEY_ID
# aws_secret_access_key = $AWS_SECRET_ACCESS_KEY
# EOF
- cat credentials
- terragrunt init
- terragrunt plan
- terragrunt apply -auto-approve
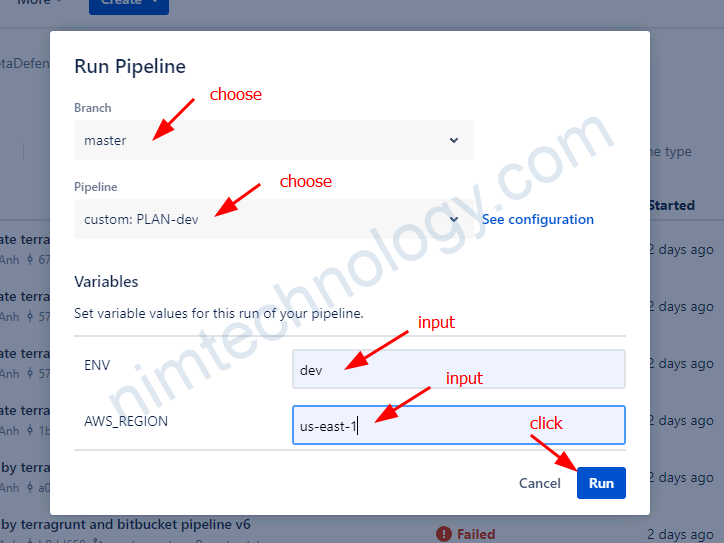
Đơn gian là anh em ấn run và input vào 1 số variable nếu cần
bitbucket nó chạy các command mà anh em khai báo
Nếu anh em chưa biêt terragrunt thì thao khảo bài này nhé
Đương nhiên là anh em có chạy với container terraform nhé!
3) Demo
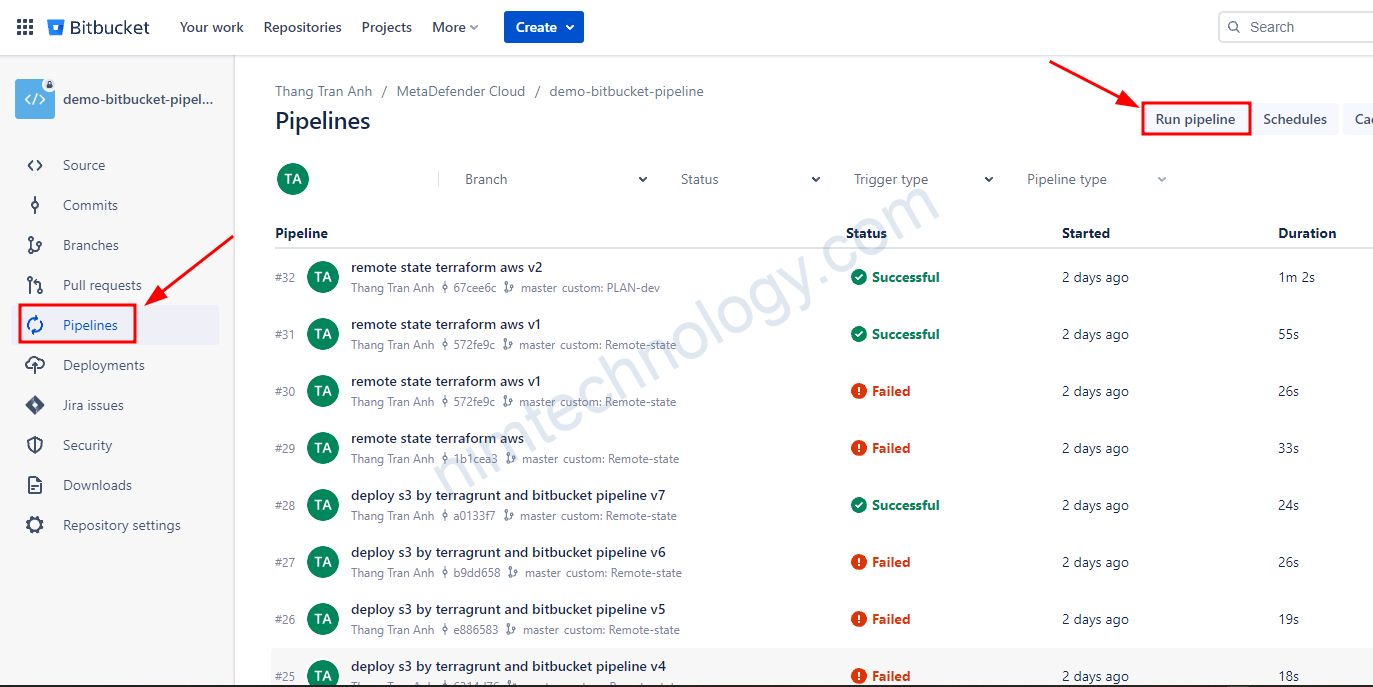
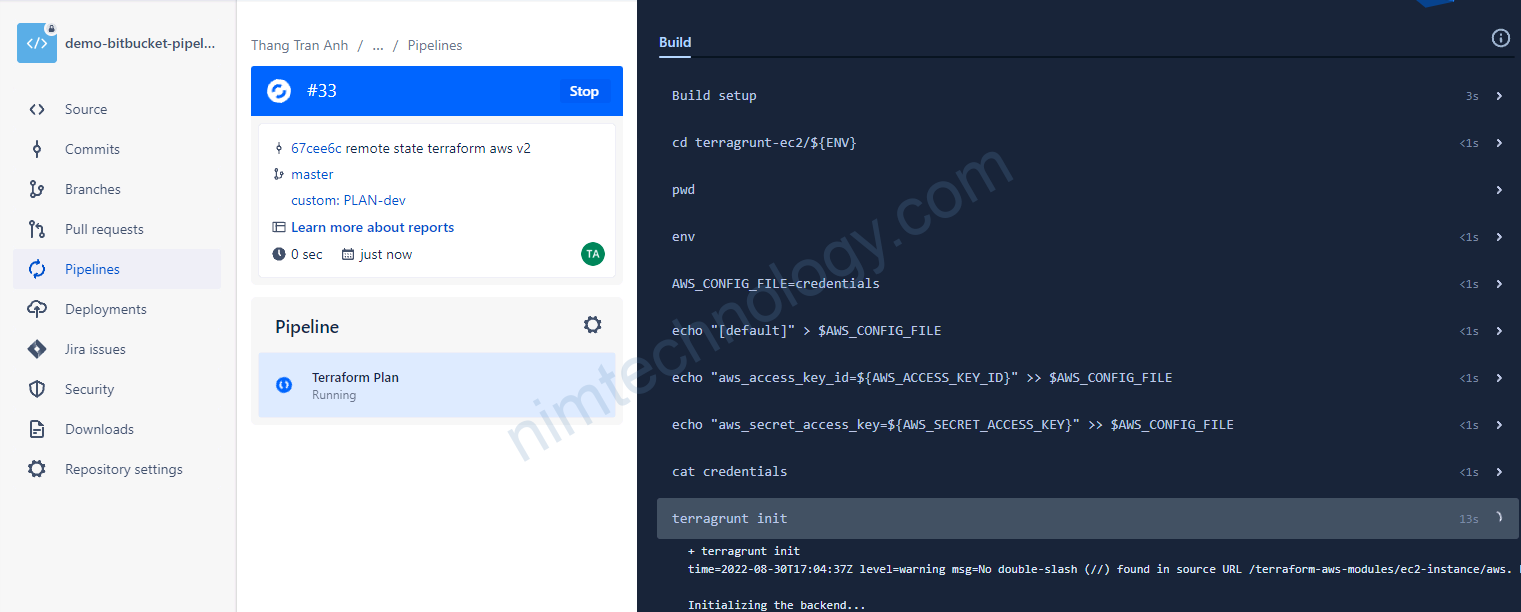
nó sẽ watch đoạn code dưới và run
4) Creating many environment variables/system for many cases on Bitbucket Agent
Cây này minh nghĩ là sẽ phổ biến.
bạn đang control nhiều AWS account và bạn tạo nhiều loại resource trong đó.
Đương nhiên là bạn muốn mới mỗi case thì chúng ta sẽ sử dụng một credential thích hợp.

trong file bitbucket pipeline thì sử dụng line này.

pipelines:
  custom:
    Remote-state:
      - step:
          deployment: aws-nimtechnology
occurs multiple times in the pipeline
The deployment environment ‘xxx-nimtechnology’ in your bitbucket-pipelines.yml file occurs multiple times in the pipeline. Please refer to our documentation for valid environments and their ordering.
Lỗi này sau ra khi mà bạn reuse “deployment: xxx-nimtechnology” trong nhiều step cũng thuộc 1 pipeline
5) Create dropdown menu or selected options in bitbucket-pipeline
Link tham khảo:
https://bitbucket.org/blog/predefine-values-of-custom-pipeline-variables
Mình thấy cái khá tiện và cũng đơn giản nếu người mới cũng chả biết nên input cái j?
Bạn làm sẵn cho họ mấy chọn để họ đỡ sai.
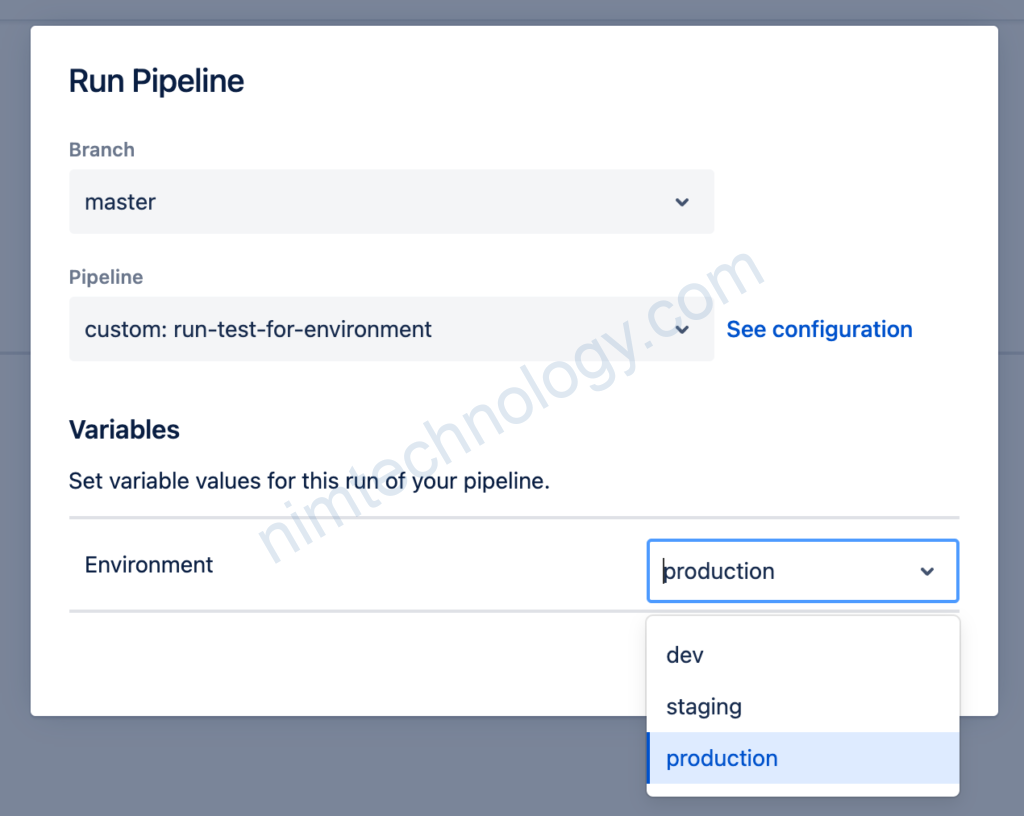
pipelines:
  custom:
    run-test-for-environment:
      - variables:
          - name: Environment
            default: production
            allowed-values:         # optionally restrict variable values
             - dev
             - staging
             - production
      - step:
          script:
            - echo "environment is $Environment"
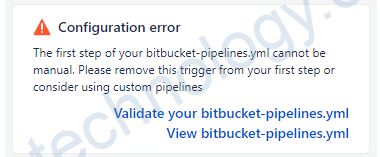
6) Manually submit step in bitbucket pipeline
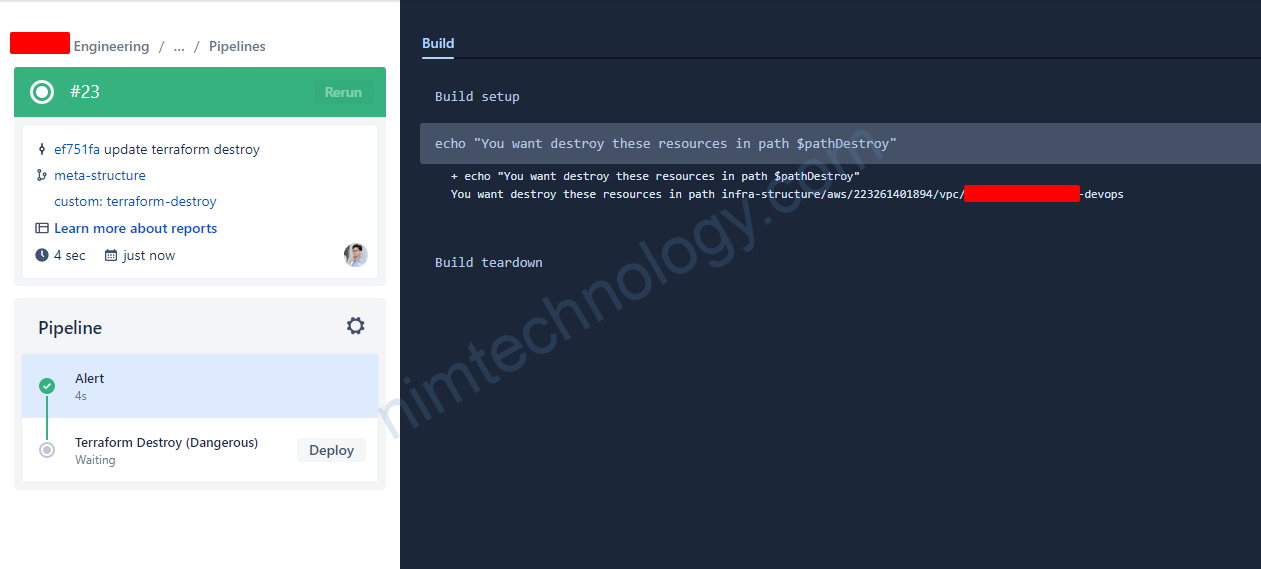

image: python:3.6.3

pipelines:
  default:
    - step:
        name: Build and push to S3
        script:
          - apt-get update
          - apt-get install -y python-dev
          - curl -O https://bootstrap.pypa.io/get-pip.py
          - python get-pip.py
          - pip install awscli
          - aws deploy push --application-name $APPLICATION_NAME --s3-location s3://$S3_BUCKET/test_app_$BITBUCKET_BUILD_NUMBER --ignore-hidden-files
    - step:
        name: Deploy to test
        script:
          - python deploy_to_test.py
    - step:
        name: Deploy to staging
        trigger: manual
        script:
          - python deploy_to_staging.py
    - step:
        name: Deploy to production
        trigger: manual
        script:
          - python deploy_to_production.py
Bạn cần nhớ trigger manual này sẽ không được configure ở step đầu tiên
Links
https://bitbucket.org/blog/pipelines-manual-steps-confidence-deployment-pipeline
7) Save files/folders inside any step and reuse them again at other steps with the bitbucket pipeline
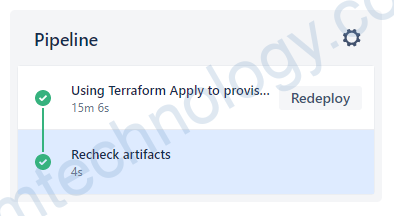
Nếu step 1 bạn make ra 1 file gì đó và bạn muốn sử dụng file đó step thứ 2 thì bạn phải sử dụng tính năng artifacts
Bạn có thểm tham khảo bài biết bên dưới.
https://support.atlassian.com/bitbucket-cloud/docs/use-artifacts-in-steps/
8) Using an individual image for each step in bitbucket pipeline
You can specify a picture for each step. Like that:
pipelines:
  default:
    - step:
        name: Build and test
        image: node:8.6
        script:
          - npm install
          - npm test
          - npm run build
        artifacts:
          - dist/**
    - step:
        name: Deploy
        image: python:3.5.1
        trigger: manual
        script:
          - python deploy.py
nhưng có điểm là mình phải sử dụng public image
Mình chưa tìm thử sử dụng private image thì như thế nào
9) Multi lines in a comand of script
Đôi khi bạn cần tạo 1 command mà có xuống dòng và enter.
https://tantingli.medium.com/quick-pro-tips-for-bitbucket-pipeline-b4dda132ee3f
image: node:10.15.0
test: &test
    name: Install and Test
    script:
      - cd my-tools
      - npm install
      - npm test
      - npm pack
    artifacts: # defining the artifacts to be passed to each future step.
      # - dist/**
      # - folder/files*.txt
      - my-tools/my-tools-*.tgz
upload: &upload
    name: Upload to S3
    image: your-own-aws-deployment-image:latest
    script:
      - cd my-tools
      - echo "$BITBUCKET_BRANCH"
      - |
        if [ -z "$AWS_ACCESS_KEY_ID" ]; then
          echo "AWS credentials not found; skipping deployment...";
        elif [ -z "$BITBUCKET_BRANCH" ]; then
          echo "Current branch not found; skipping deployment...";
        elif [[ "$BITBUCKET_BRANCH" != dev ]] && [[ "$BITBUCKET_BRANCH" != master ]]; then
          echo "Current branch does not appear to be a valid environment; skipping deployment...";
        else
          echo "all good, ready to upload to s3";
          for f in `ls my-tools-*.tgz`; do
            aws s3 cp "$f" "s3://${MY_TOOLS_BUCKET}/"
          done
        fi
pipelines:
  default:
    - step:
        <<: *test
  branches:
    master:
      - step:
          <<: *test
      - step:
          <<: *upload
          deployment: production
    dev:
      - step:
          <<: *test
      - step:
          <<: *upload
          deployment: dev
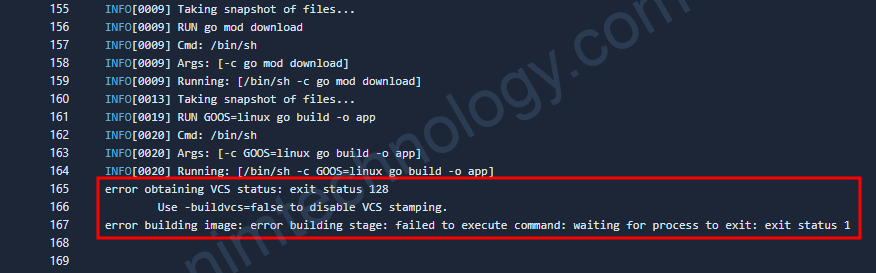
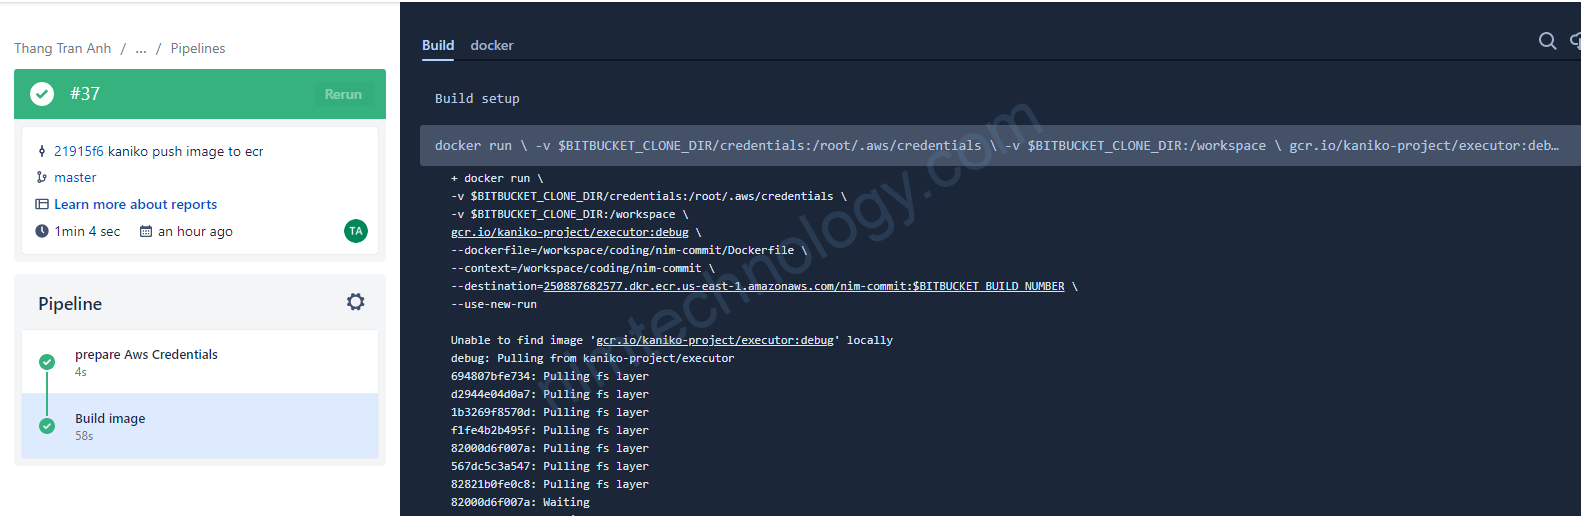
10) Run the command: “docker run …” on bitbucket-pipeline
Để run command “docker run ….” trên bitbucket pipeline thì các bạn cần thêm cái sau:

pipelines:
  branches:
    master:
      - step:
          name: prepare Aws Credentials
          script:
            - AWS_CREDENTIAL_FILE=credentials
            - echo "[default]"                              > $AWS_CREDENTIAL_FILE
            - echo "aws_access_key_id=${AWS_ACCESS_KEY_ID}"         >> $AWS_CREDENTIAL_FILE
            - echo "aws_secret_access_key=${AWS_SECRET_ACCESS_KEY}" >> $AWS_CREDENTIAL_FILE
          artifacts:
            - credentials
      - step:
          name: Build image
          script:
            - |
              docker run \
              -v $BITBUCKET_CLONE_DIR/credentials:/root/.aws/credentials \
              -v $BITBUCKET_CLONE_DIR:/workspace \
              gcr.io/kaniko-project/executor:debug \
              --dockerfile=/workspace/coding/nim-commit/Dockerfile \
              --context=/workspace/coding/nim-commit \
              --destination=250887682577.dkr.ecr.us-east-1.amazonaws.com/nim-commit:$BITBUCKET_BUILD_NUMBER \
              --use-new-run
          services:
              - docker
11) Reuse code in bitbucket-pipeline.
11.1) Reuse scripts
definitions:
  scripts:
    - script: &script-build-and-test |-
        yarn
        yarn test

pipelines:
  branches:
    develop:
      - step:
          name: Build and test and deploy
          script:
            - export NODE_ENV=develop
            - *script-build-and-test
11.2) Reuse scripts
https://blog.duyet.net/2021/08/bitbucket-pipelines-notes.html
12) Increase memory for the bitbucket pipeline
To increase the memory available for the analysis step, you can follow the procedure described in that similar thread 240
- Set the size of the step executing the
sonarcloud-scanto2x(the only supported values at the moment are1x, the default, and2x, according to the documentation 204). It will increase the step memory to 8096MB. - Keep the
services.docker.memorysetting to4048is you did, or increase it a bit if it still fails. According to that documentation 153, you can’t allocate more than 7128 MB to Docker on a 2x step.
https://community.sonarsource.com/t/service-memory-size-when-using-a-pipeline-runner-in-bitbucket/47810
https://support.atlassian.com/bitbucket-cloud/docs/databases-and-service-containers/#UseservicesanddatabasesinBitbucketPipelines-Servicememorylimits
Ngoài ra bạn cũng cần kiểm tra app nhận bao nhiêu GB ram nữa
End) summarize many formulas in bitbucket pipeline
MÌnh thấy có page này tổng hợp khá nhiều kiểu khai báo trong bitbucket pipeline
https://balajisblog.com/cheatsheet-for-bitbucket-pipelines/
https://github.com/miso-belica/playground/blob/main/cheatsheets/bitbucket-pipelines.yml