Bài này mình sẽ tìm hiểu các create agent của teamcity trên các aws, vmware hoặc k8s.
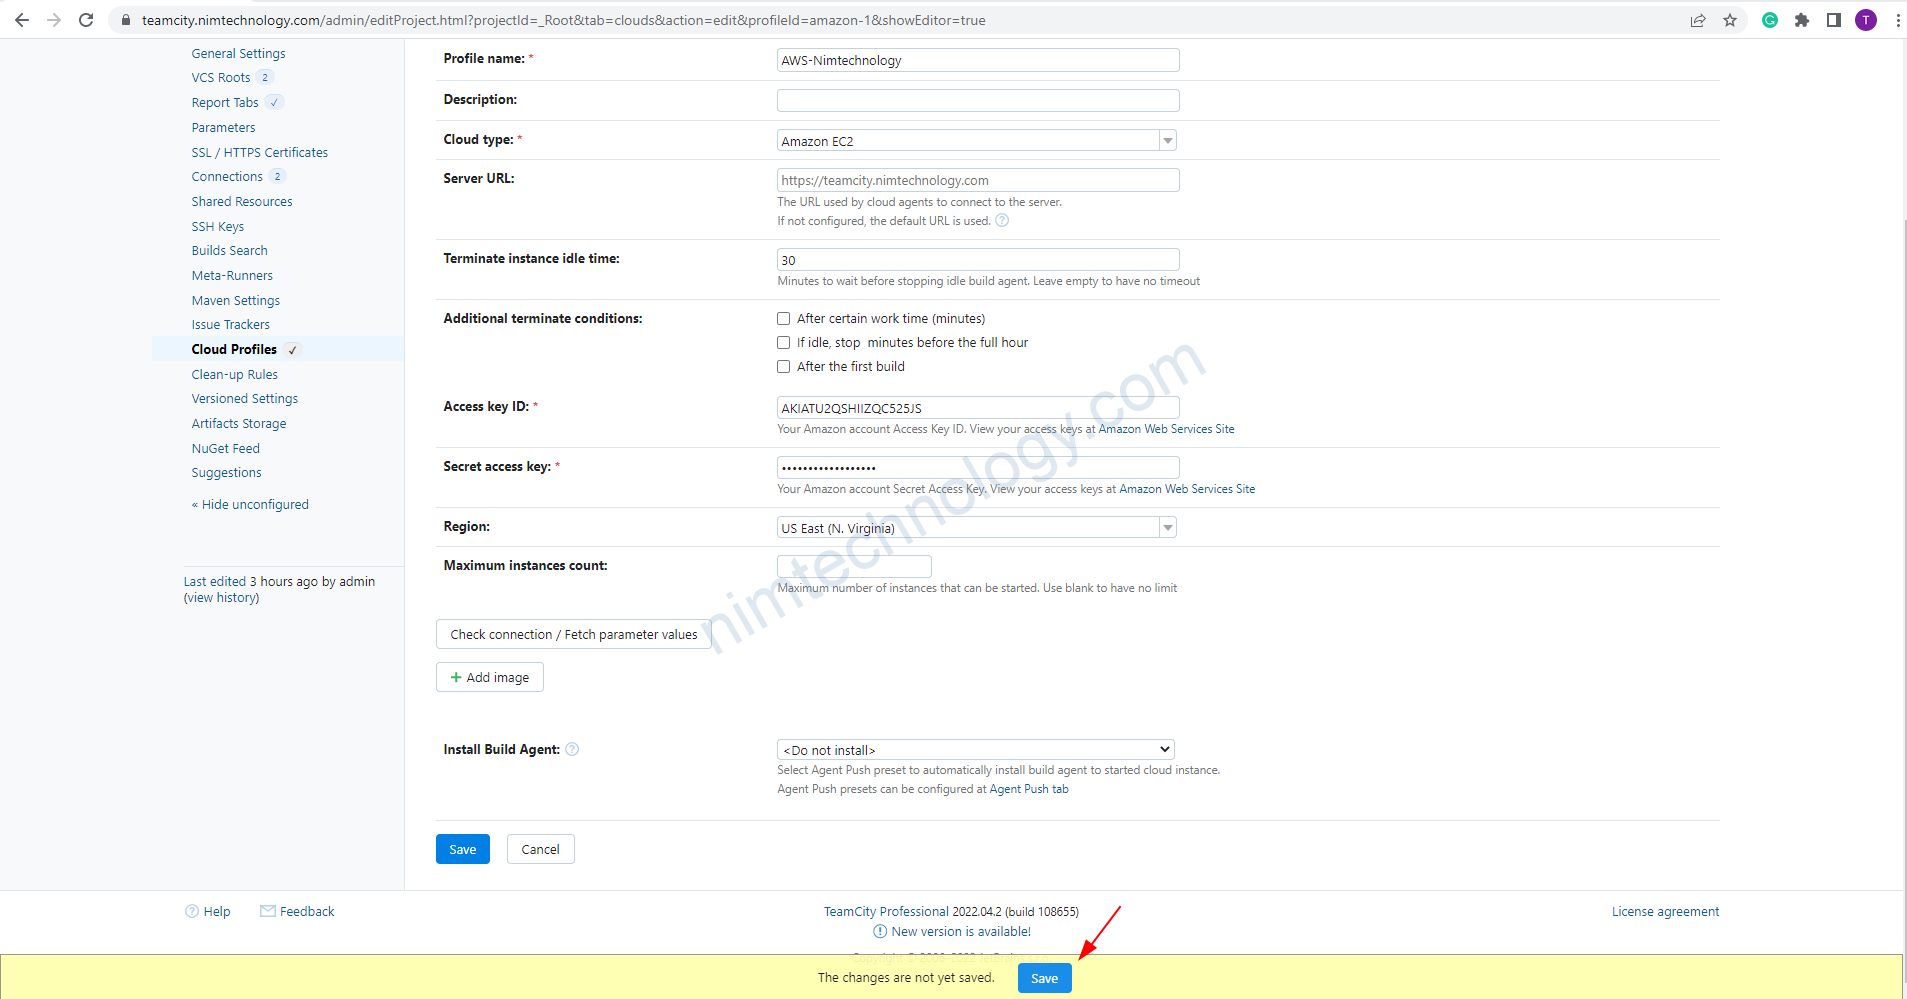
1) Configure TeamCity server to connect to AWS.
1.1) Setup Teamcity Server.

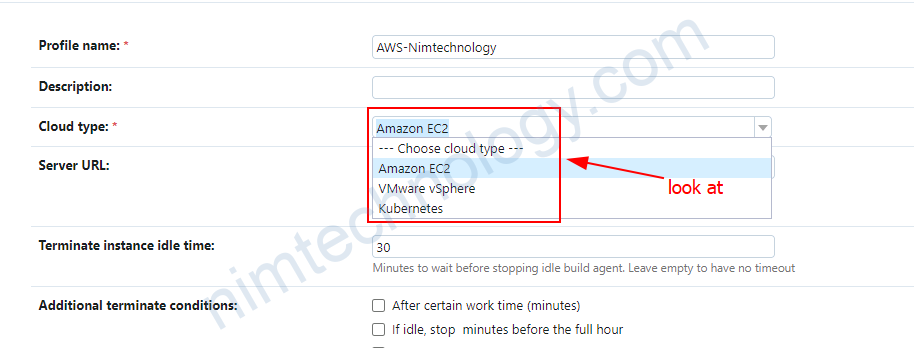
– EC2
– VMware
K8s
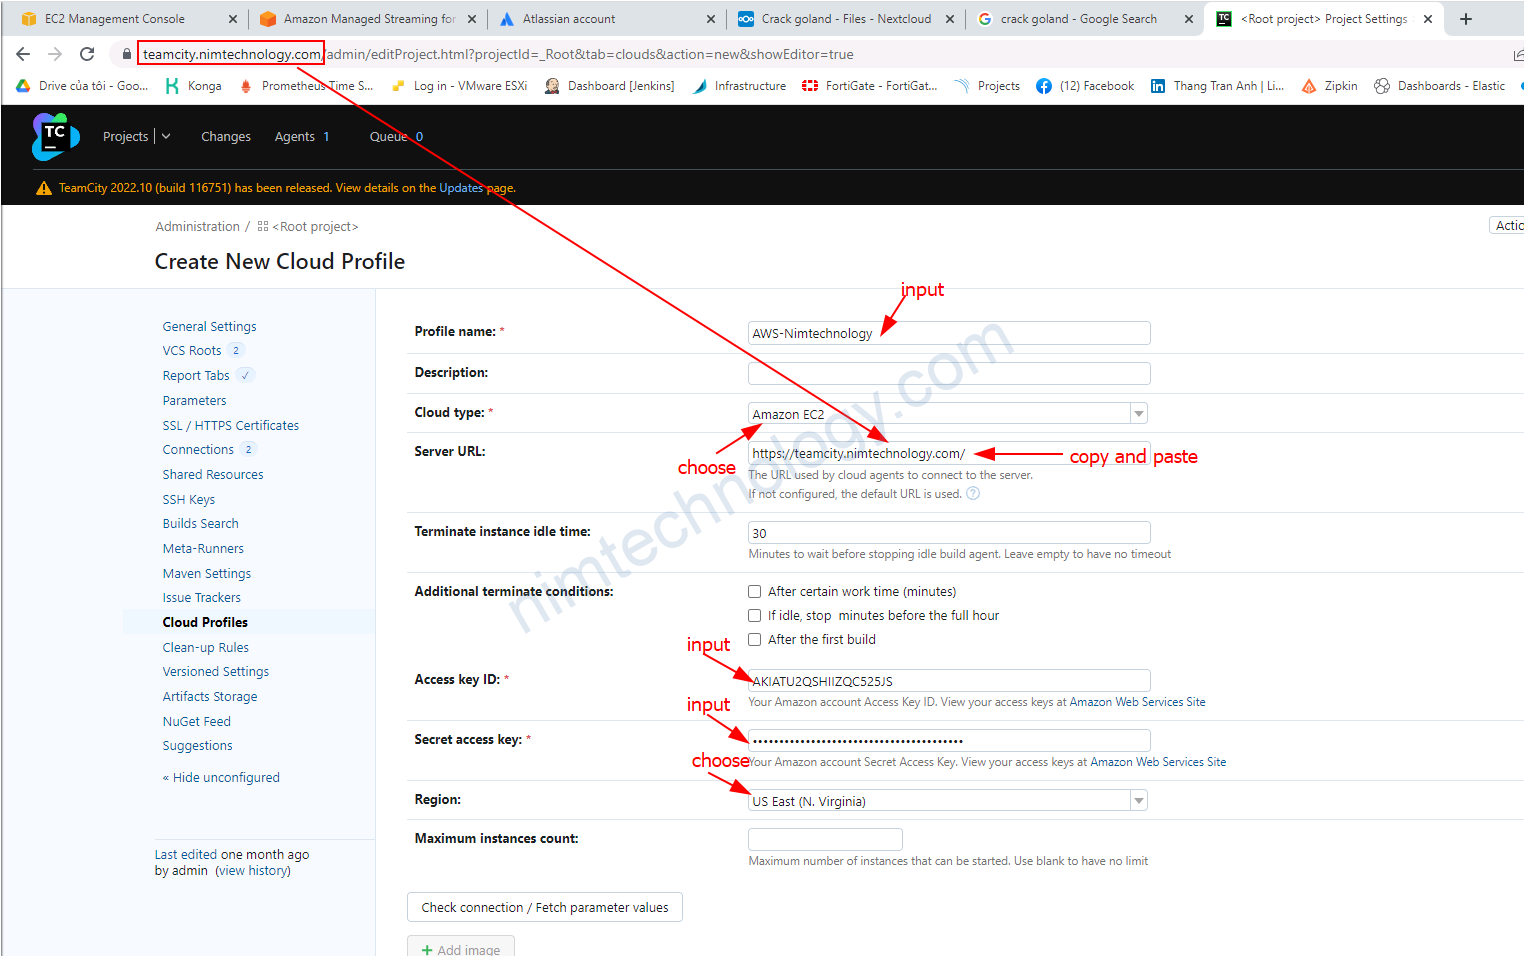
Bạn copy cái domain của teamcity xuống.
rồi bạn điền access key và secret key vào.
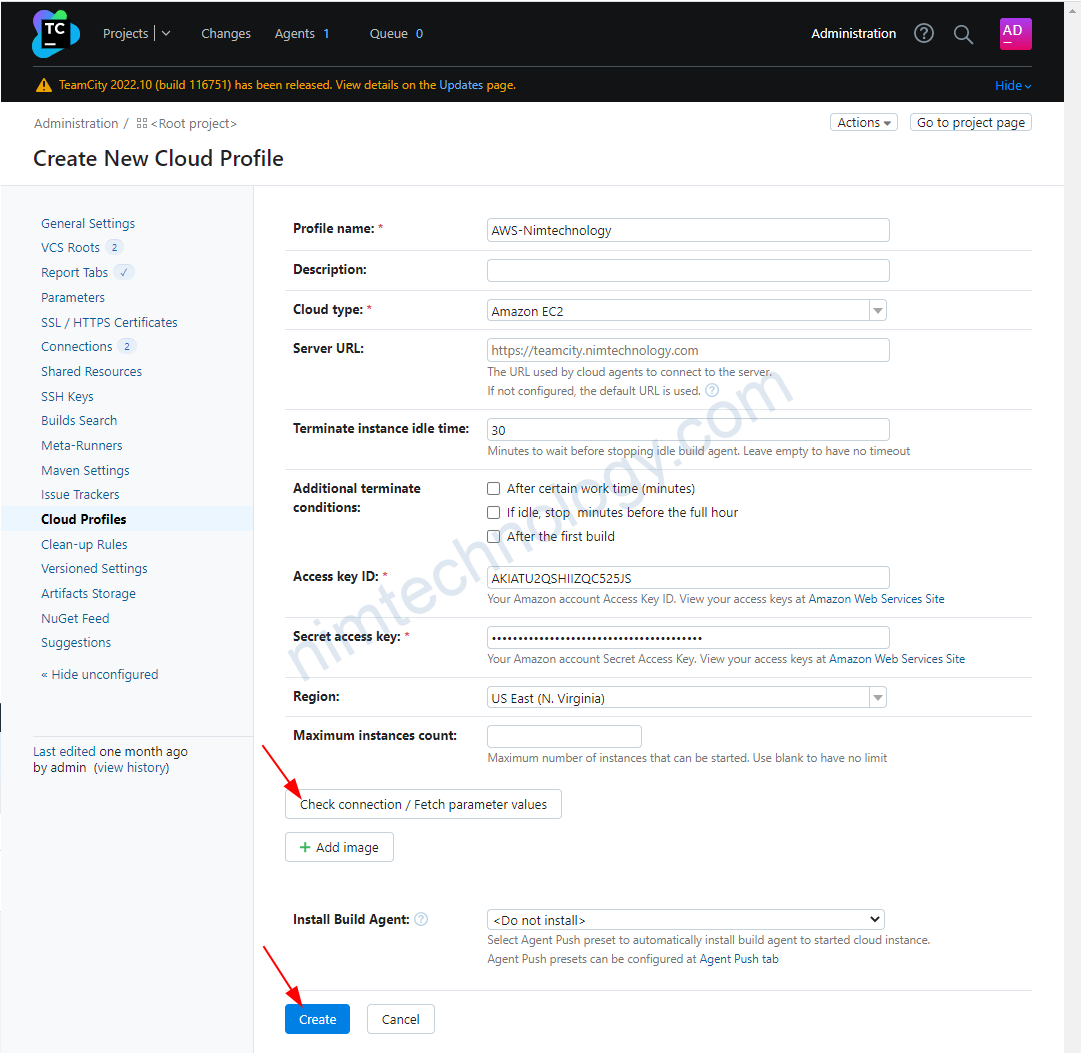
Ấn chạy mà ko thấy có dấu hiệu gì bất thường là ok.
1.2) Configure agent windows for Teamcity
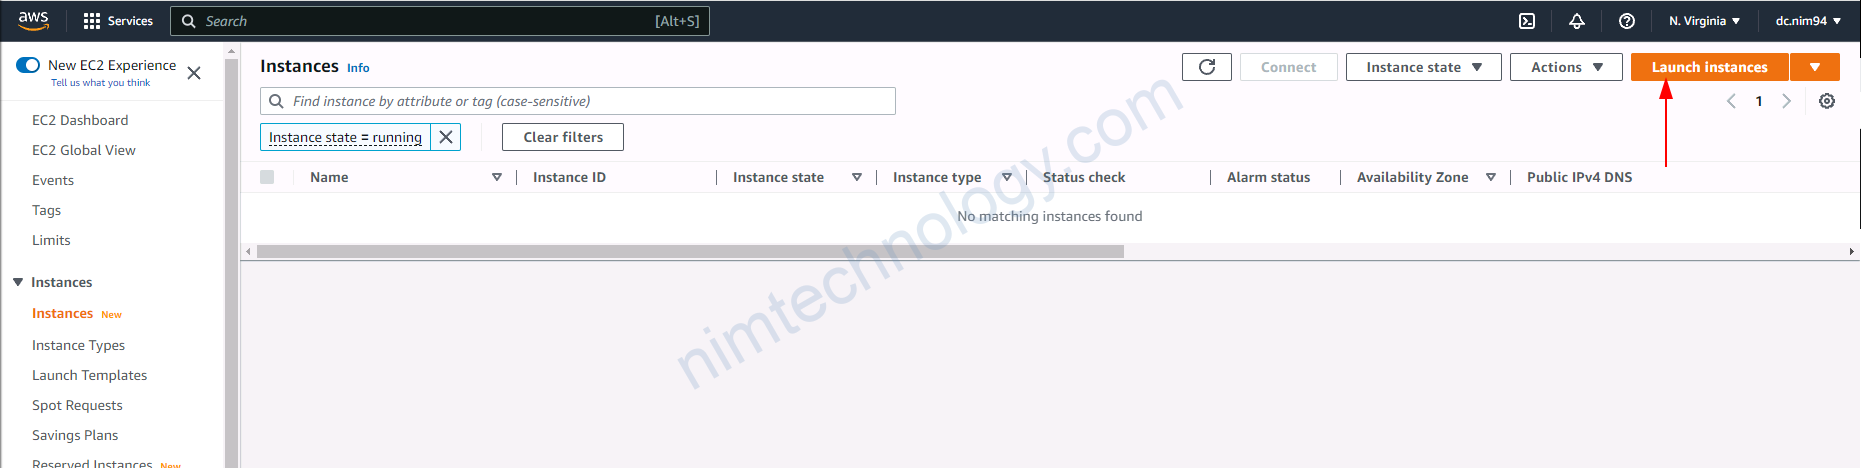
1.2.1) Create VM windows on AWS
Bạn có thể tham khảo video bên dưới để create vm windows trên AWS.
https://github.com/ravsau/aws-labs/blob/master/terraform-aws/lesson2-windows-and-linux-login.MD
1.2.1.1) Create Key-pairs
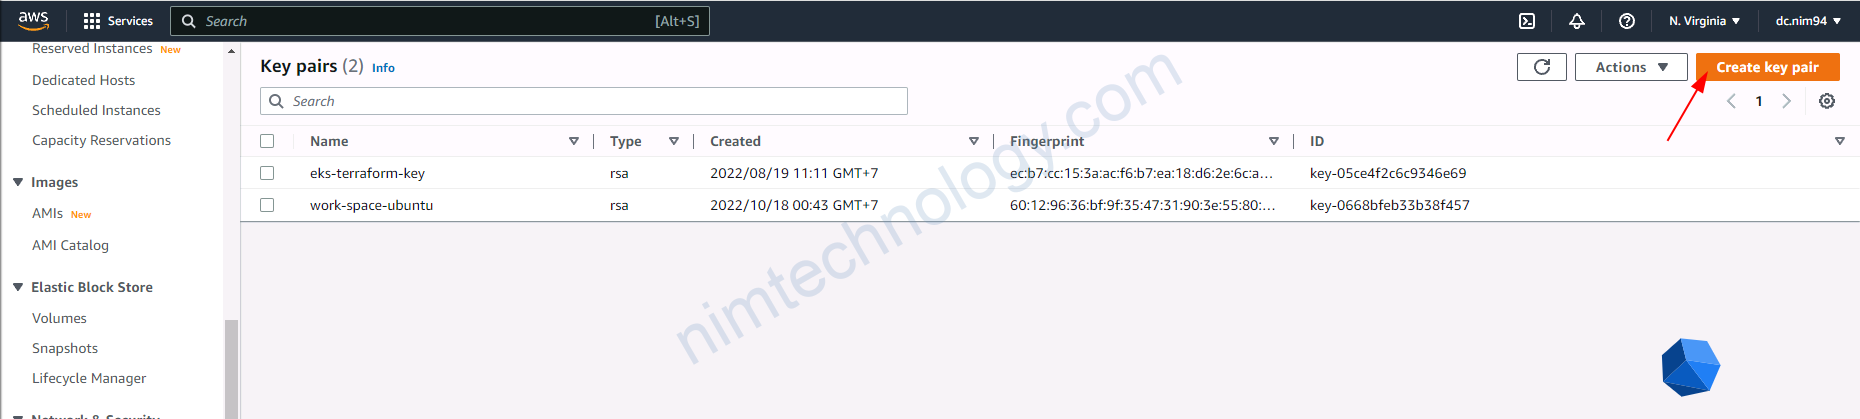
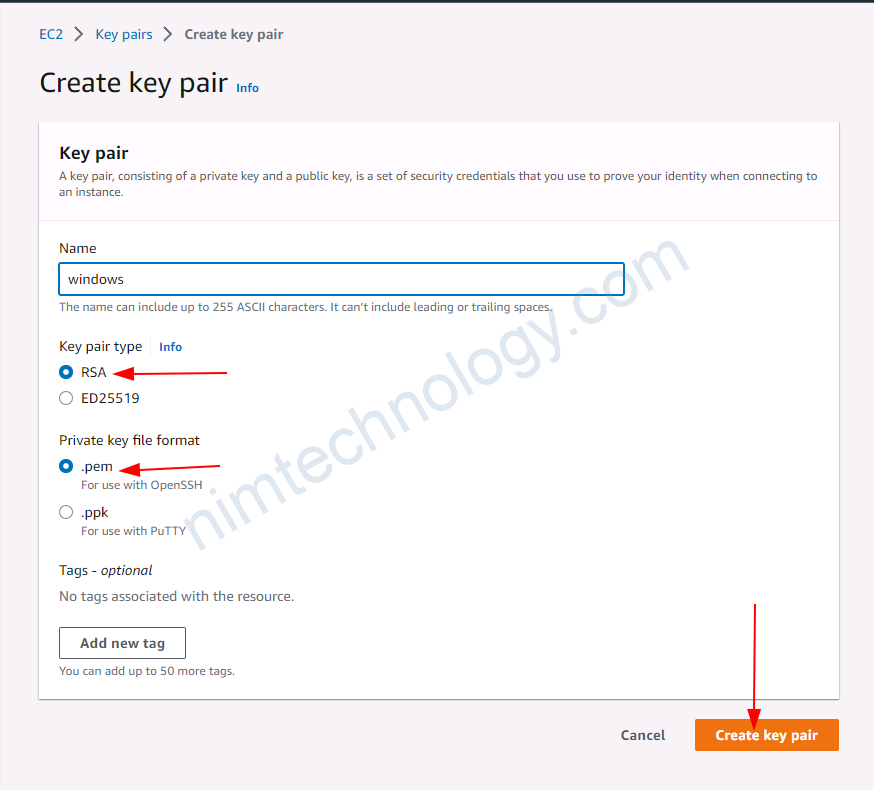
để tý chúng ta còn login vào vm windows thông qua remote desktop.
1.2.1.2) Create EC2 windows by terraform.
Bạn vào dường link bên dưới để tham khảo terraform.
https://github.com/mrnim94/terraform-aws/tree/master/ec2-windows
Thông qua terraform mình sẽ tạo 1 vm window.
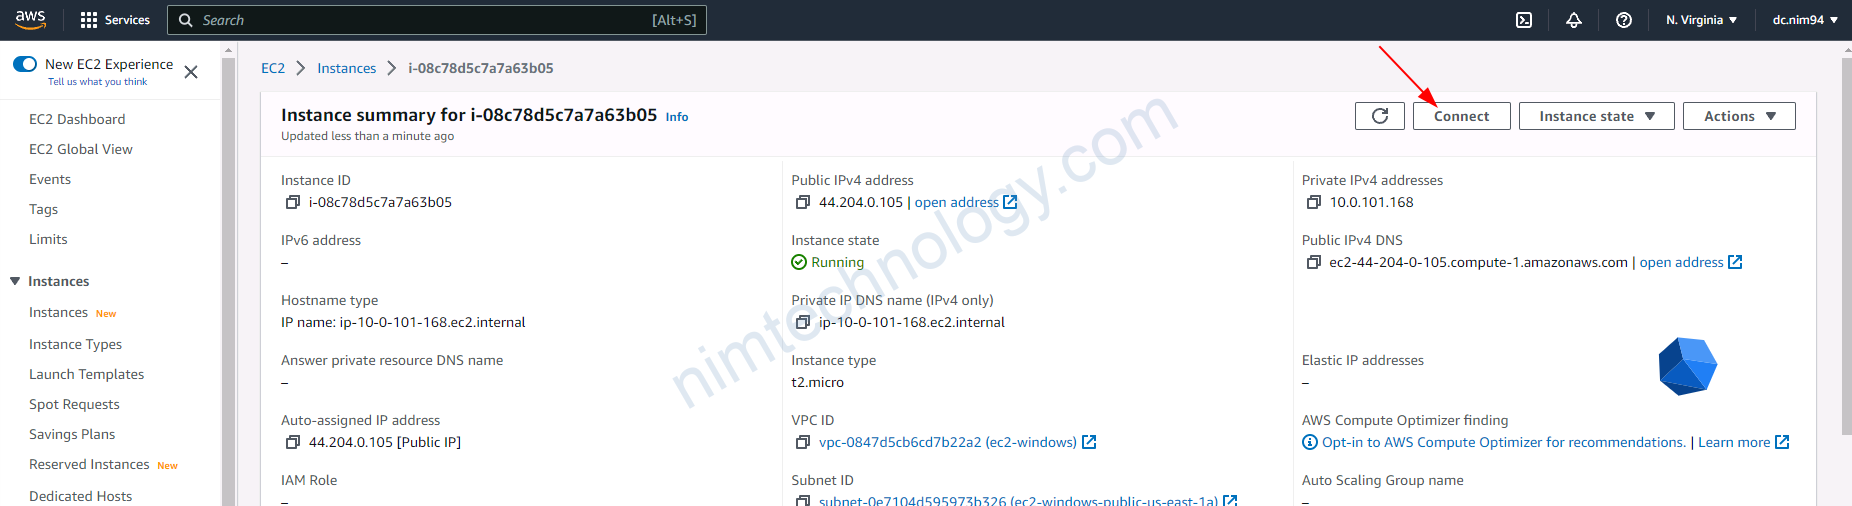
1.2.2) Access to VM windows by remote desktop
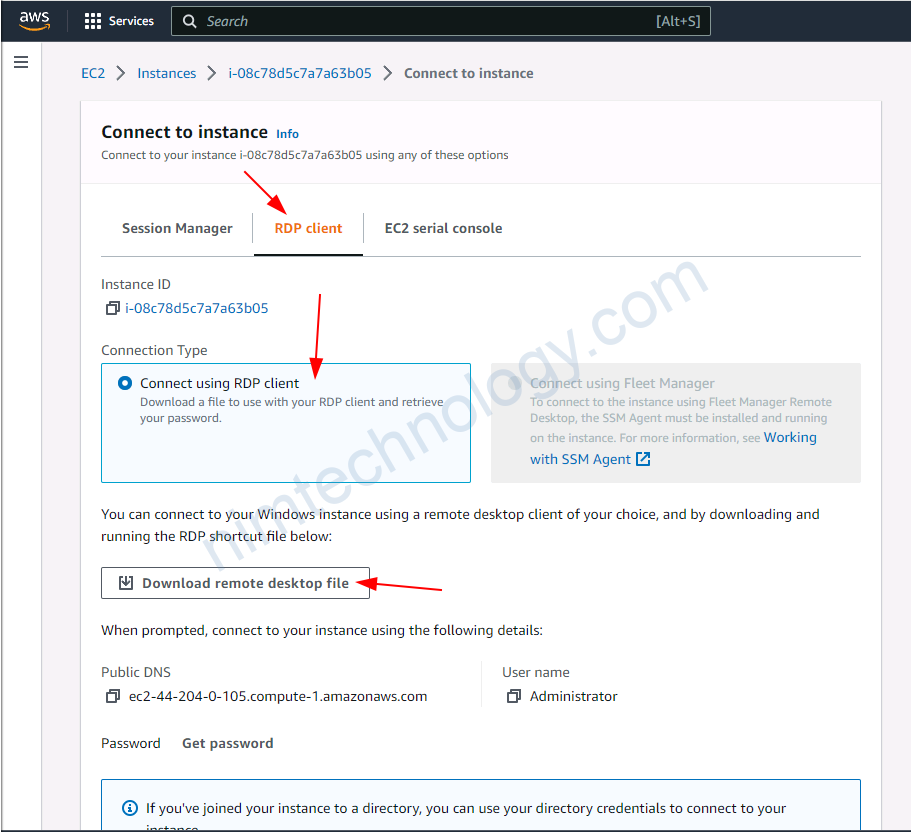
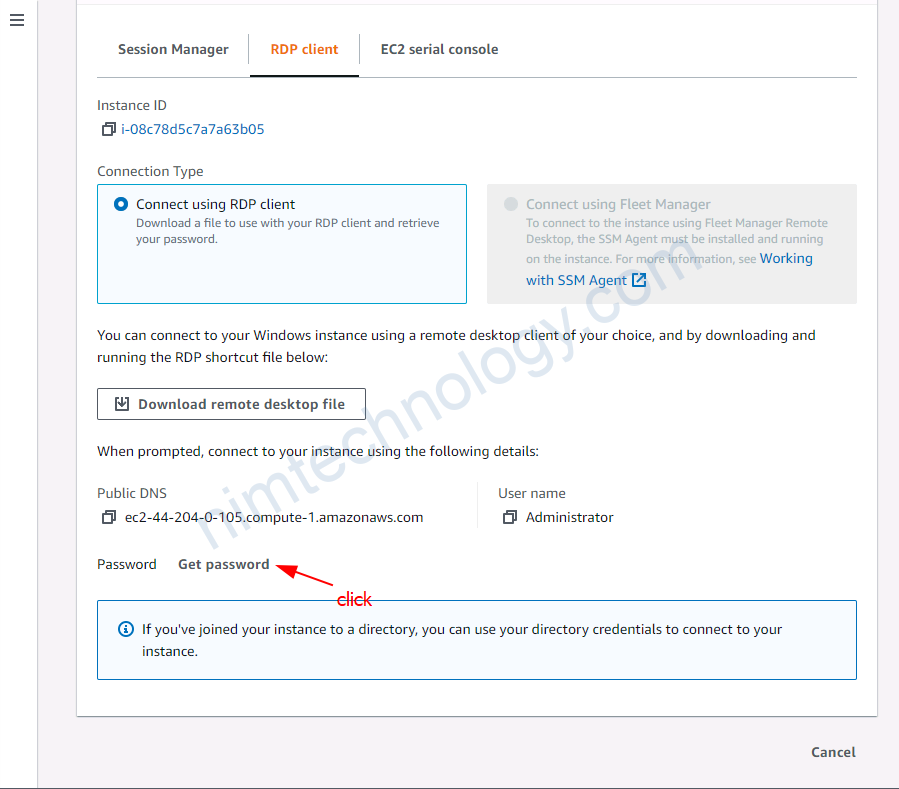

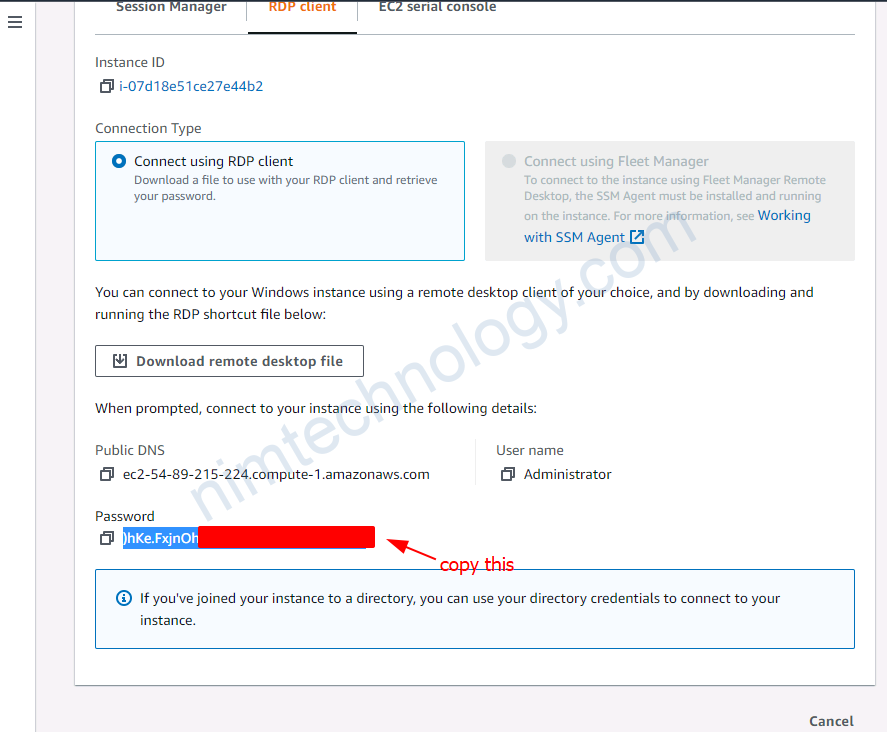
Bạn sử dụng file remote và password để remote vào con agent ec2 windows.
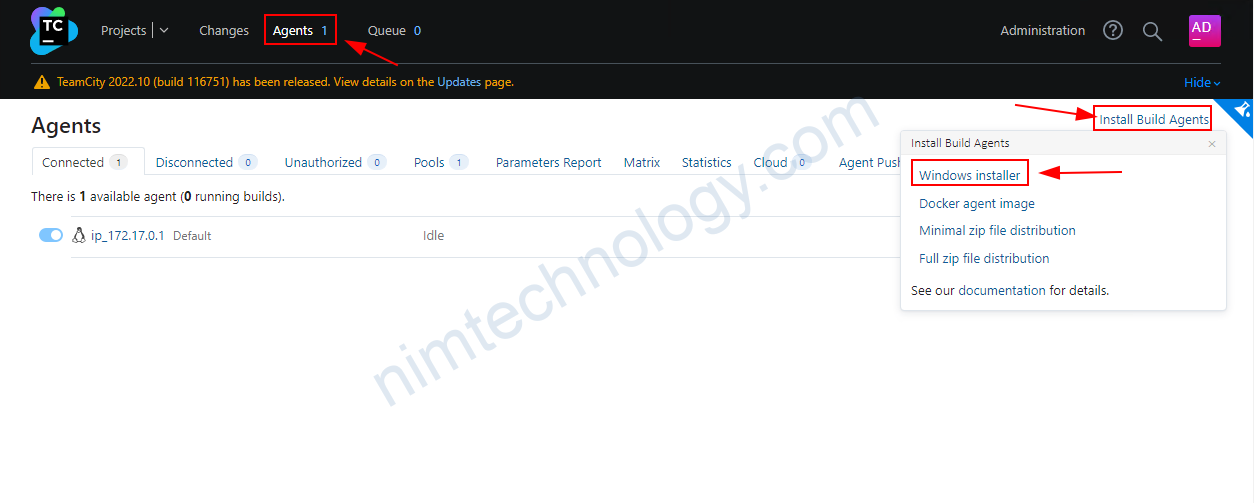
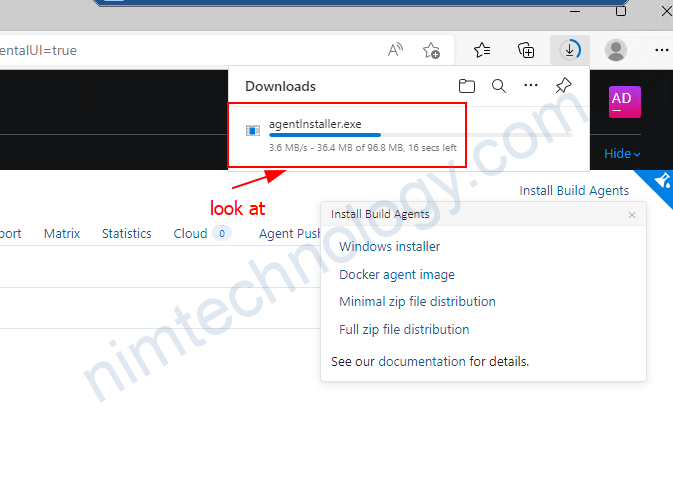
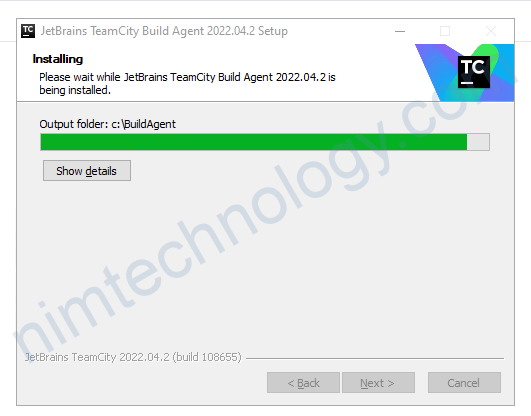
1.2.3) Install Teamcity Agent on windows
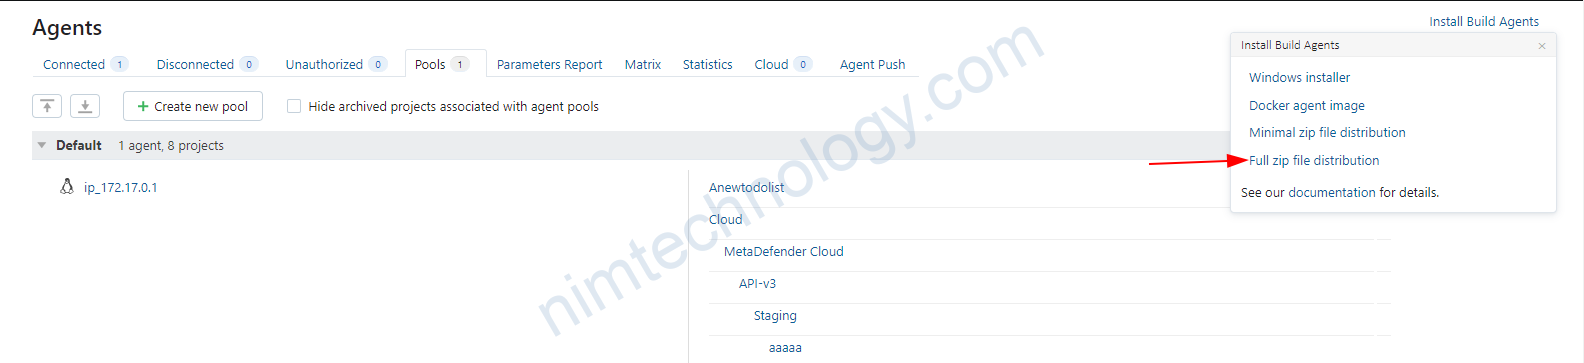
sau khi access được vào bên trong teamcity agent thì bạn truy cập vào web teamcity server
vào agent và tải agent window về.
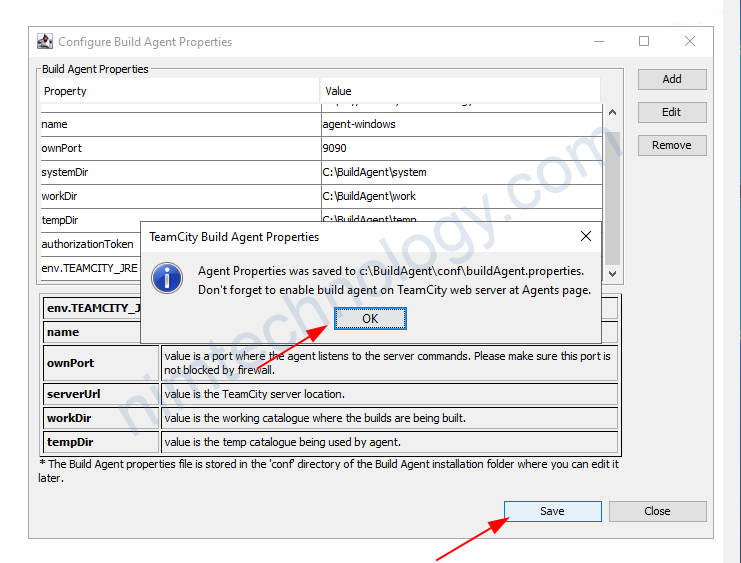
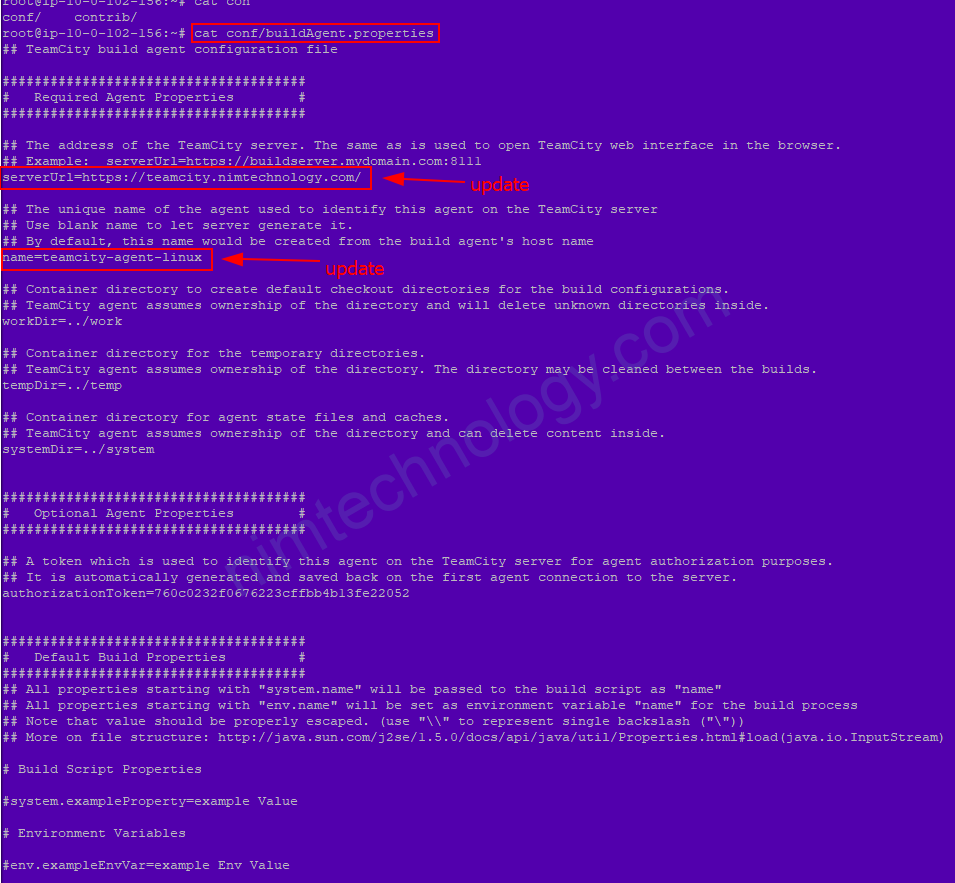
Xong bước này bạn chỉ cần điền url của teamcity server và đặt tên cho agent là ok
ownPort thì để nguyên nhé, không change để nguyên (9090)
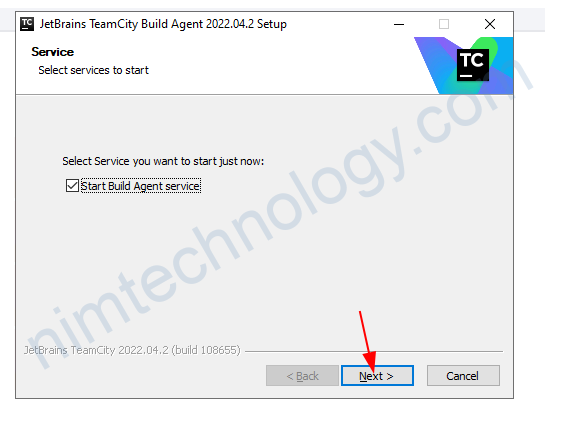
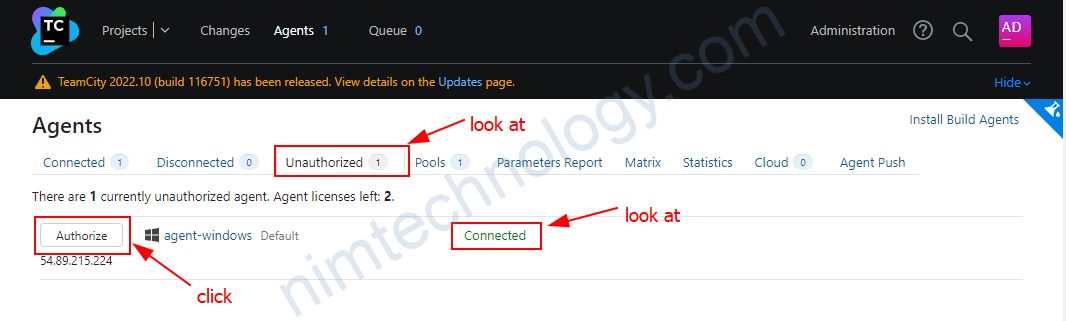
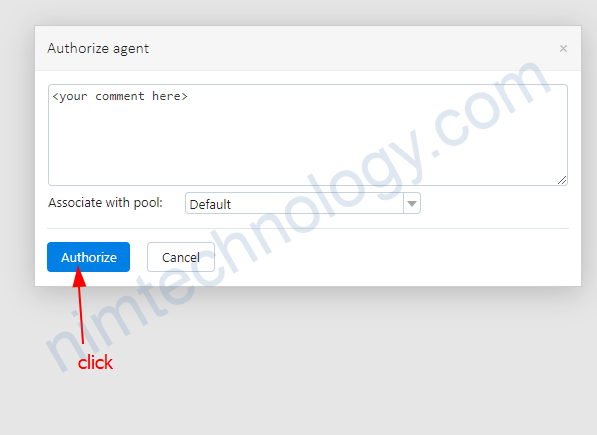
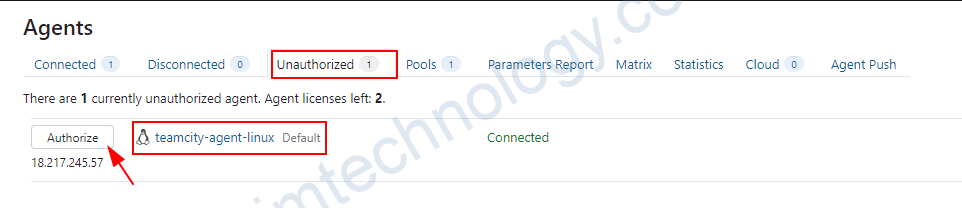
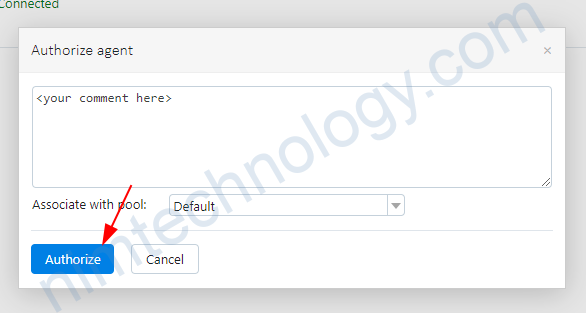
1.2.4) Accept connection of teamcity agent.
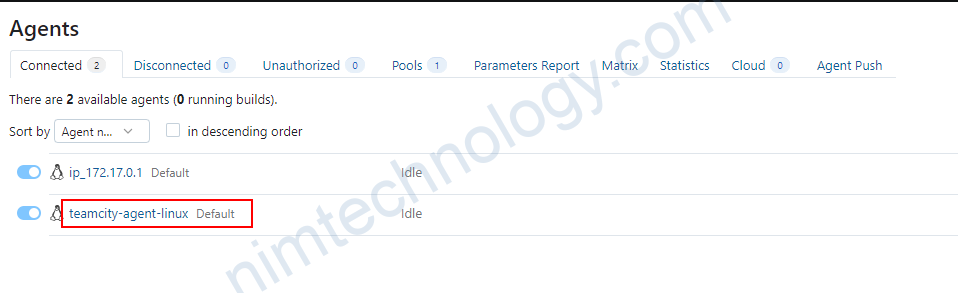
xong khi run xong hết thì bạn sẽ trở lại Teamcity server
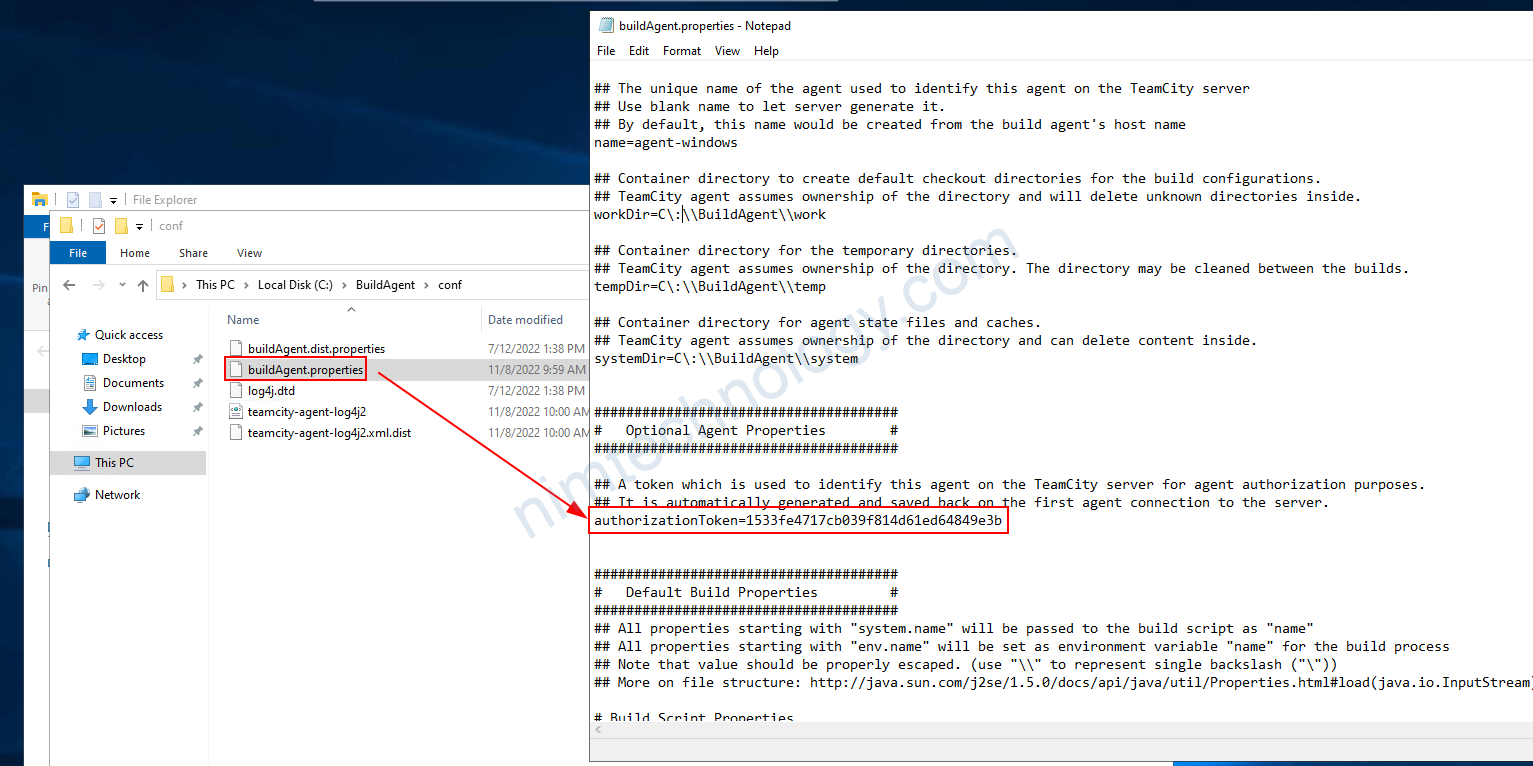
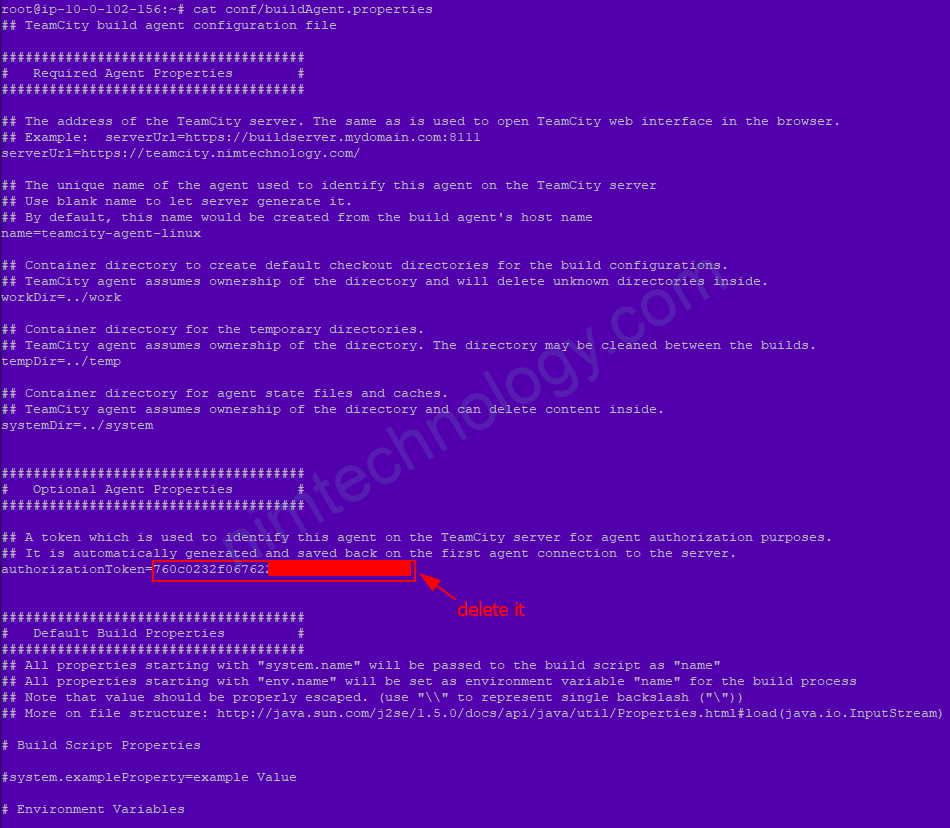
sau khi authen thành công bạn sẽ thấy file config sẽ có 1 token.

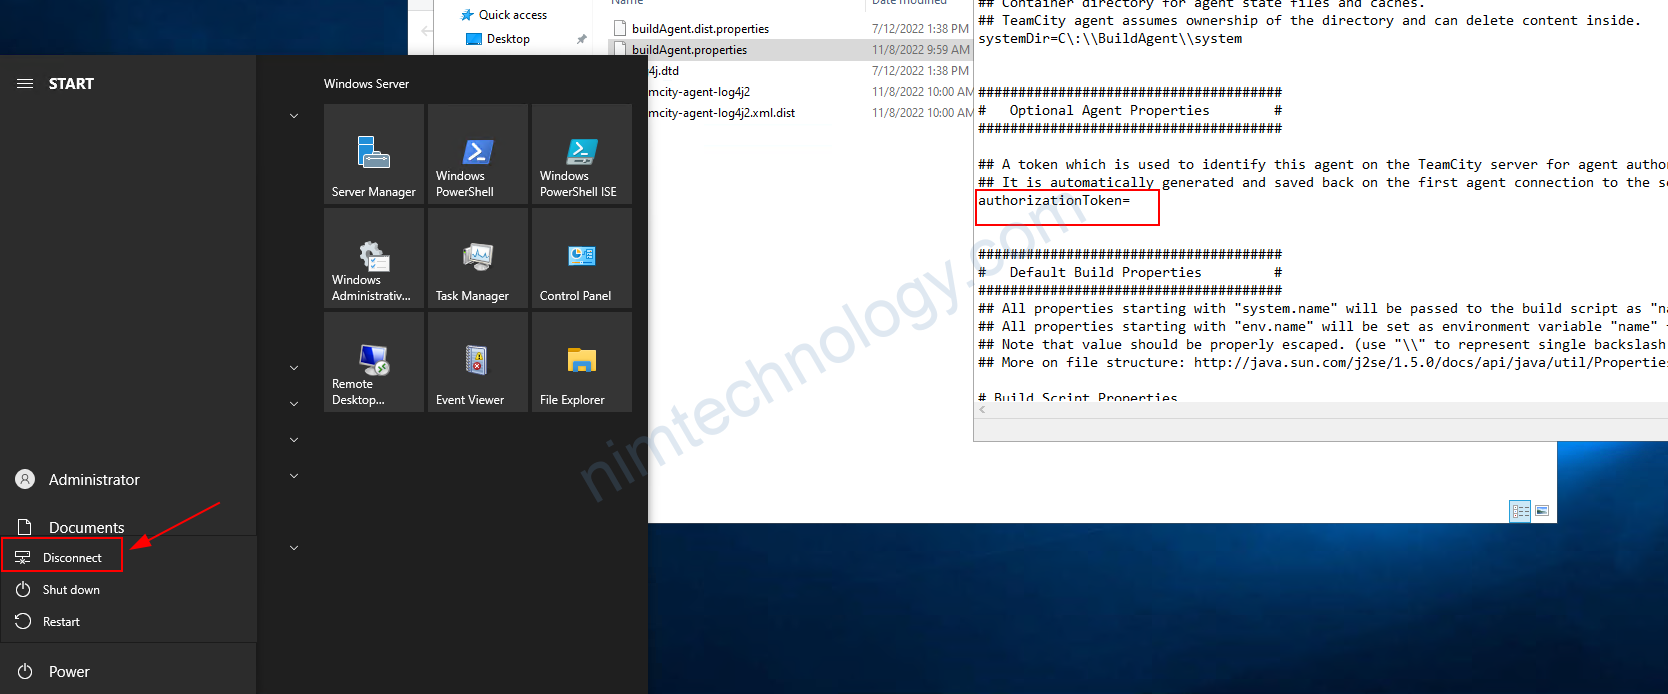
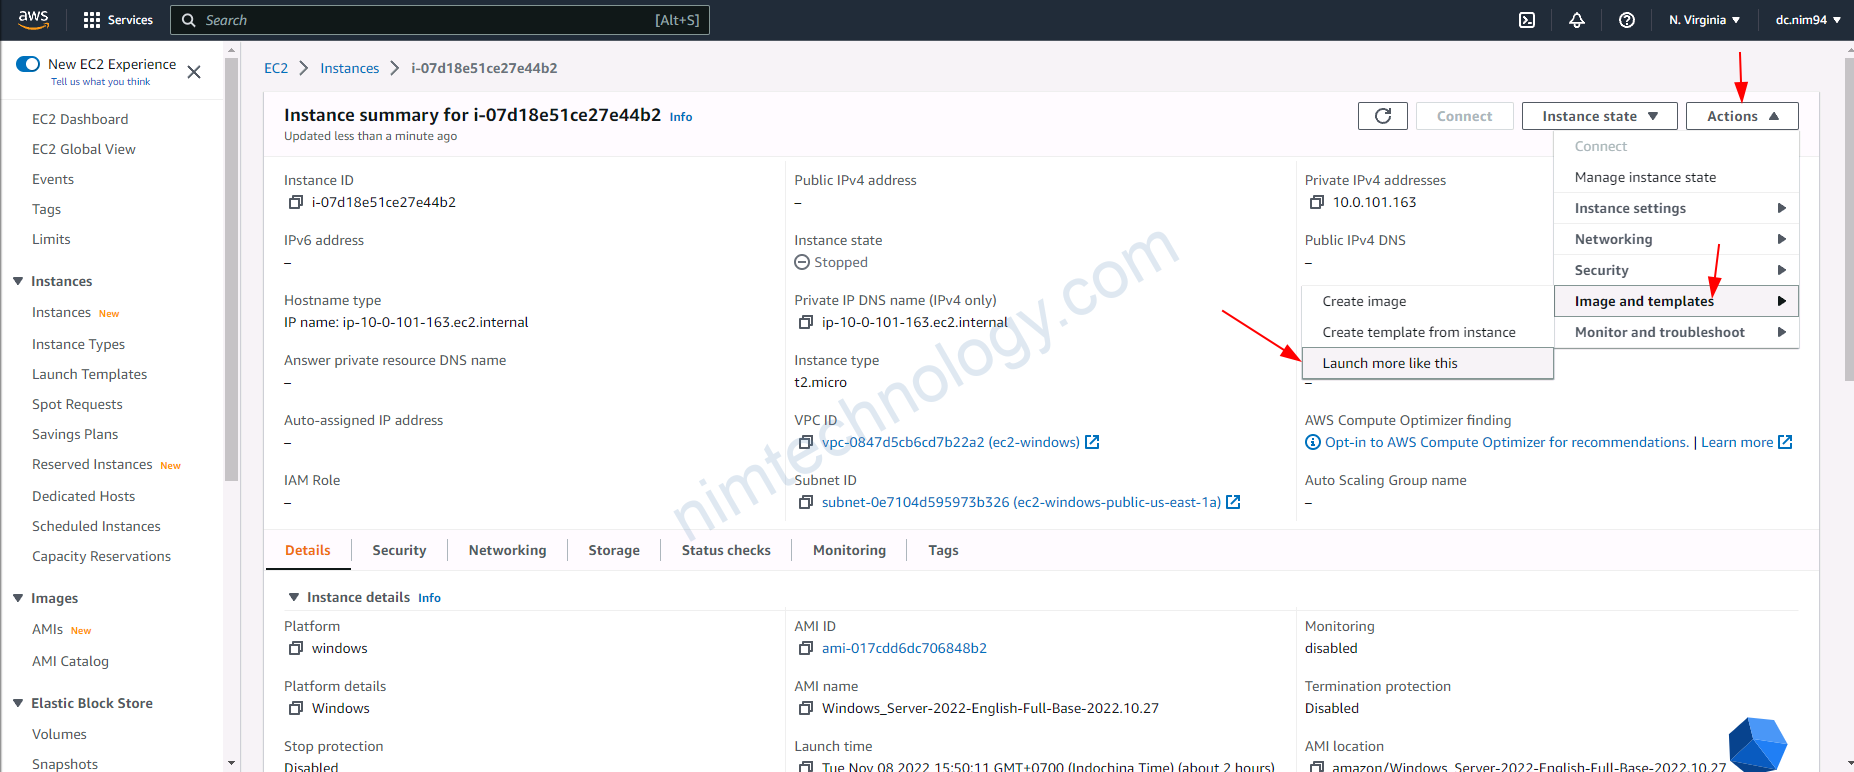
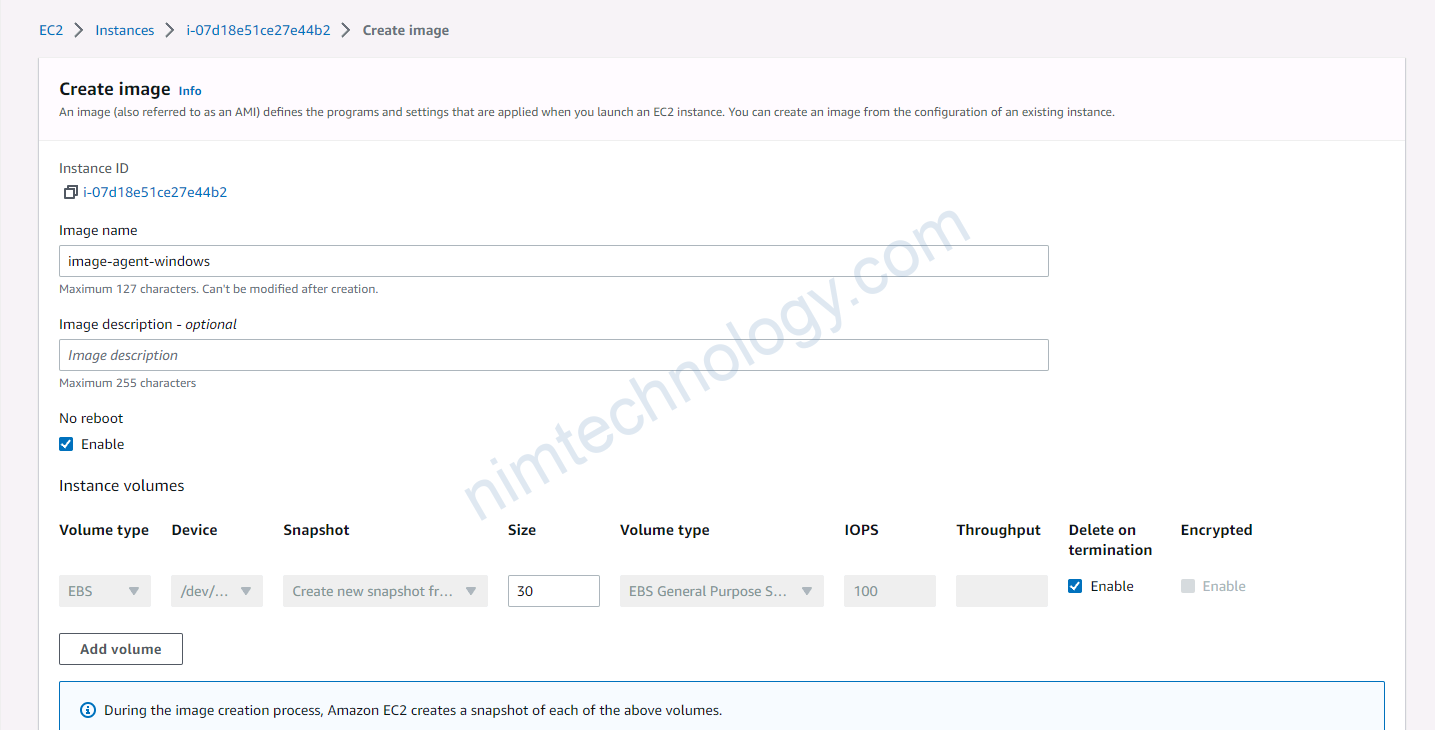
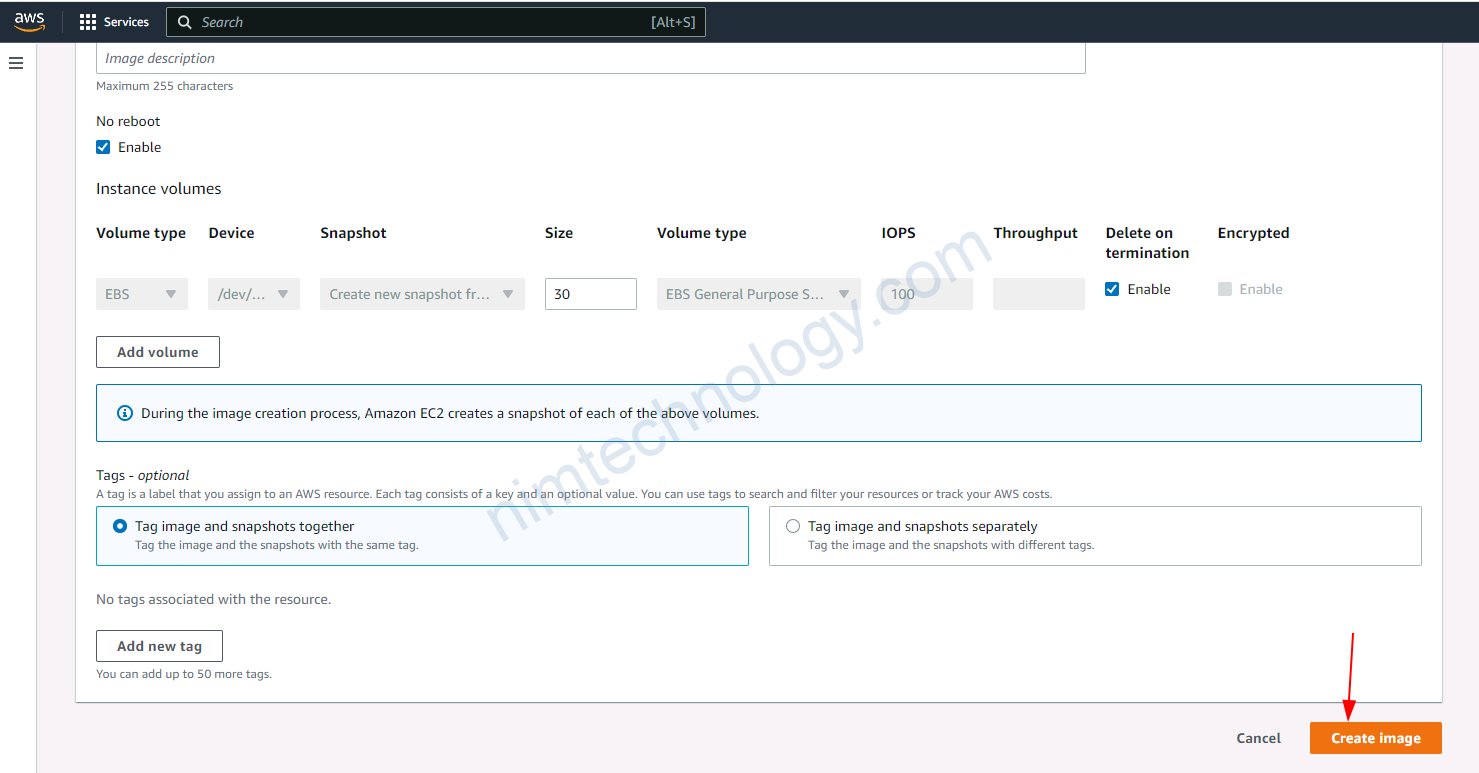
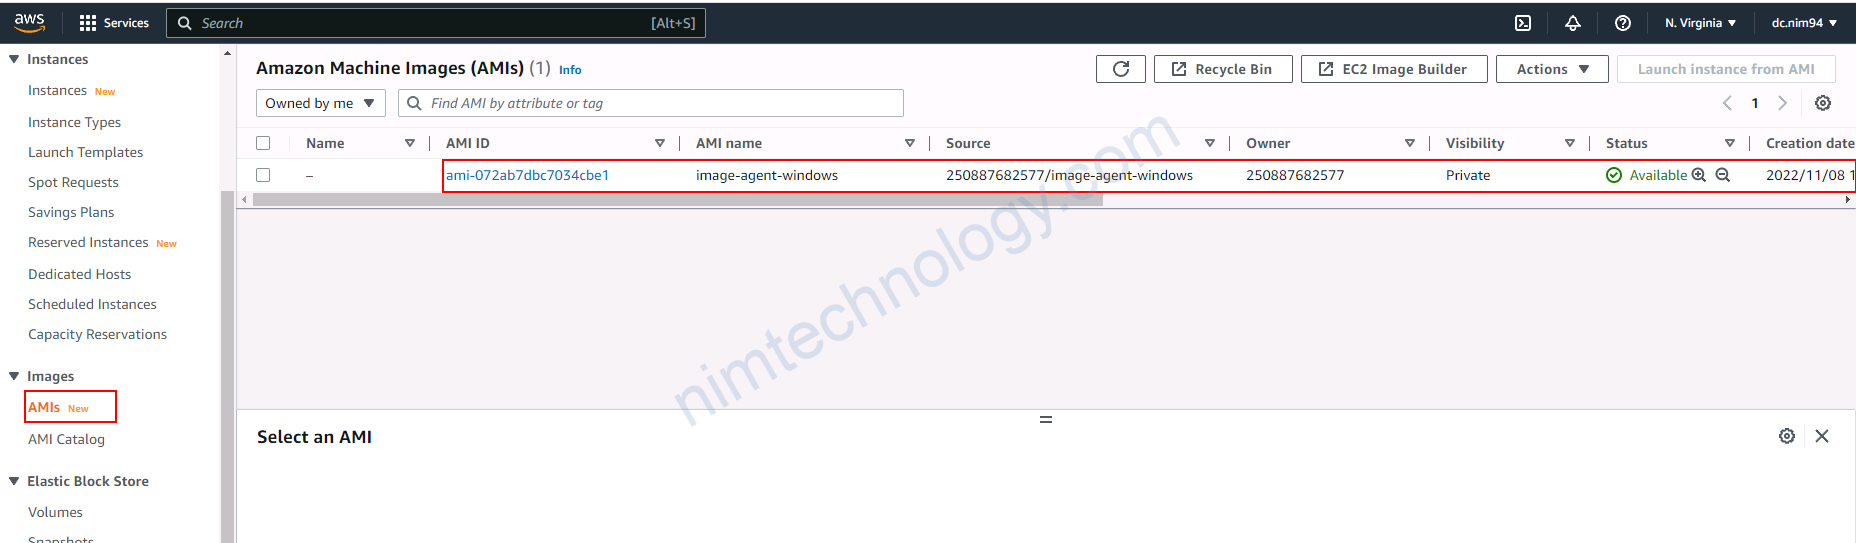
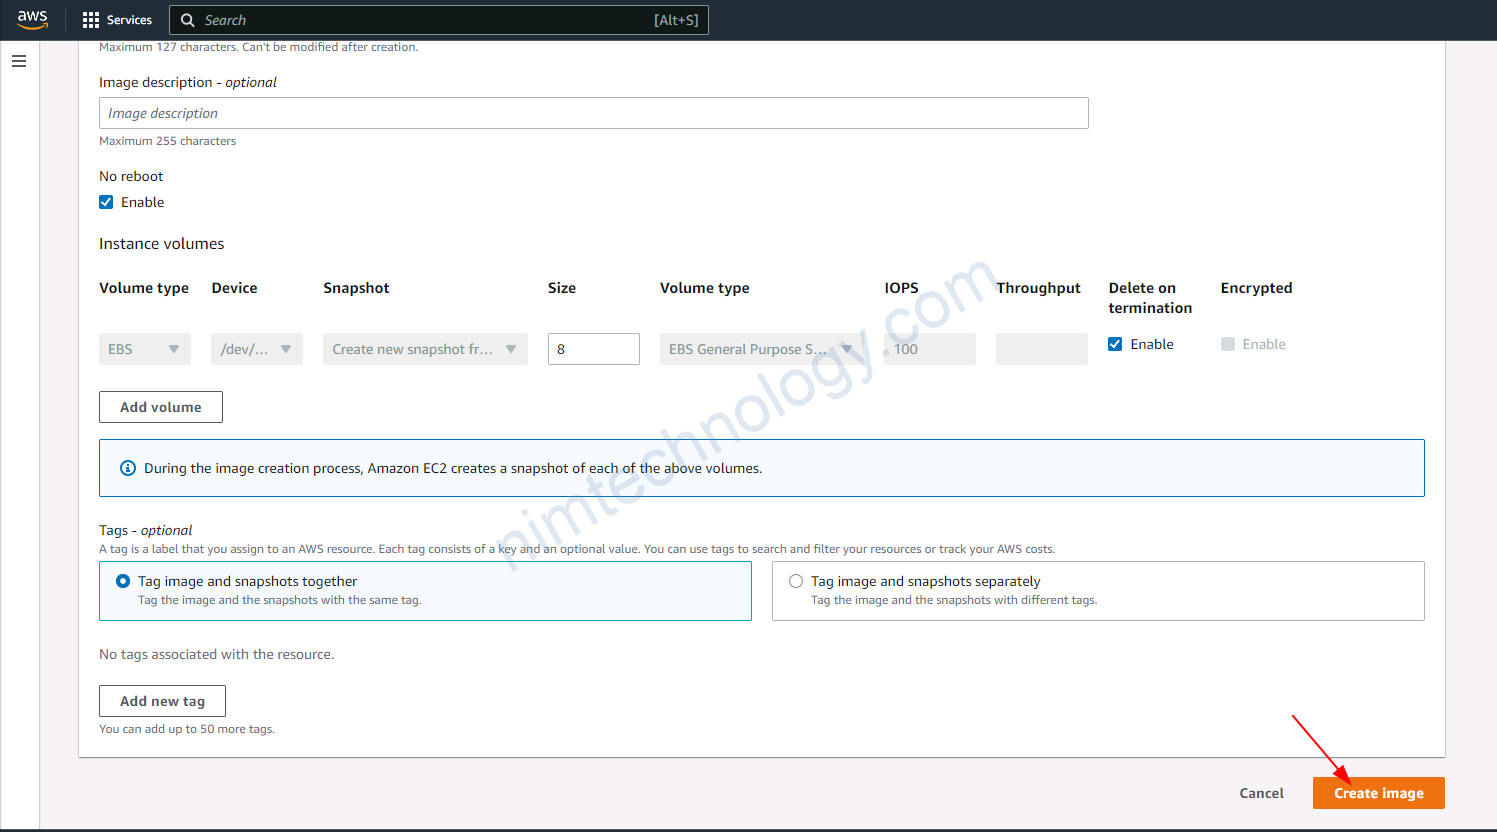
1.2.5) Create image (AMI) based on the agent windows be installed temcity agent
Bước tiếp theo bạn cần xóa token đó đi. vì bước tiếp theo chúng ta tạo image(AMI) base on trên con VM này.
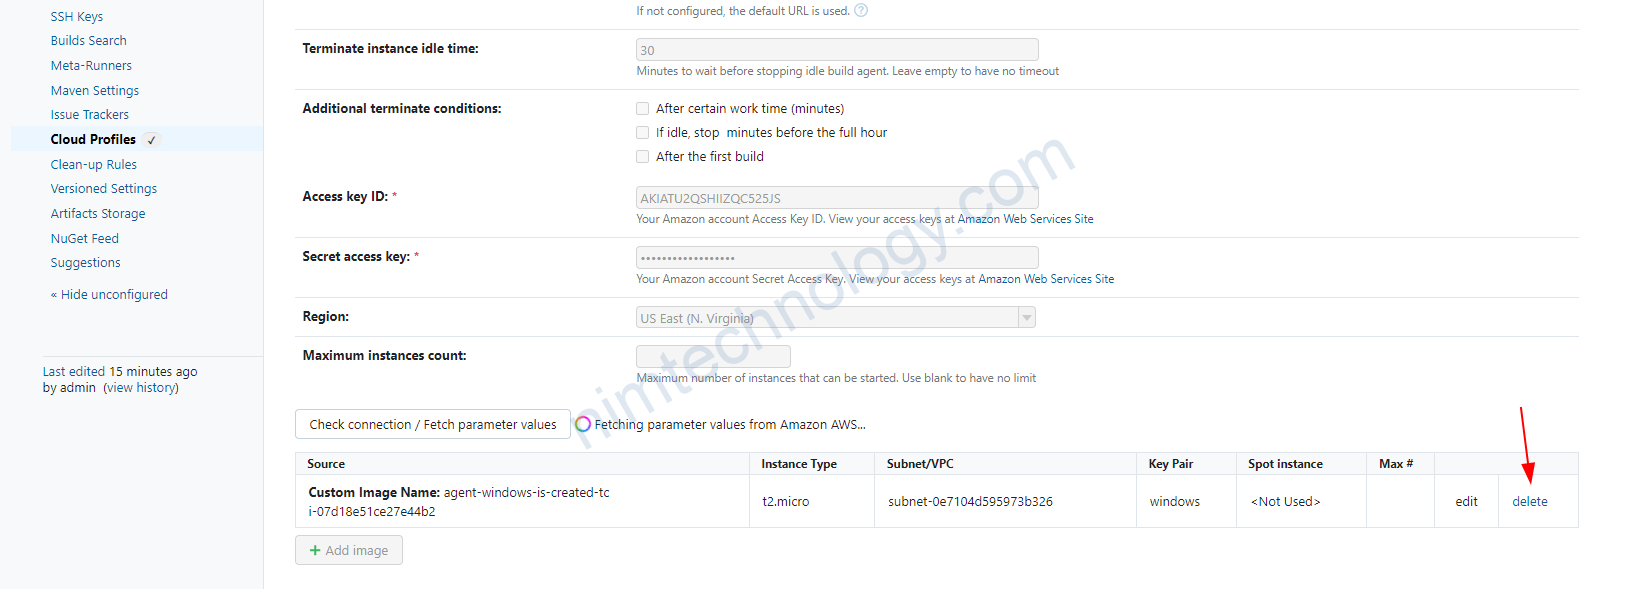
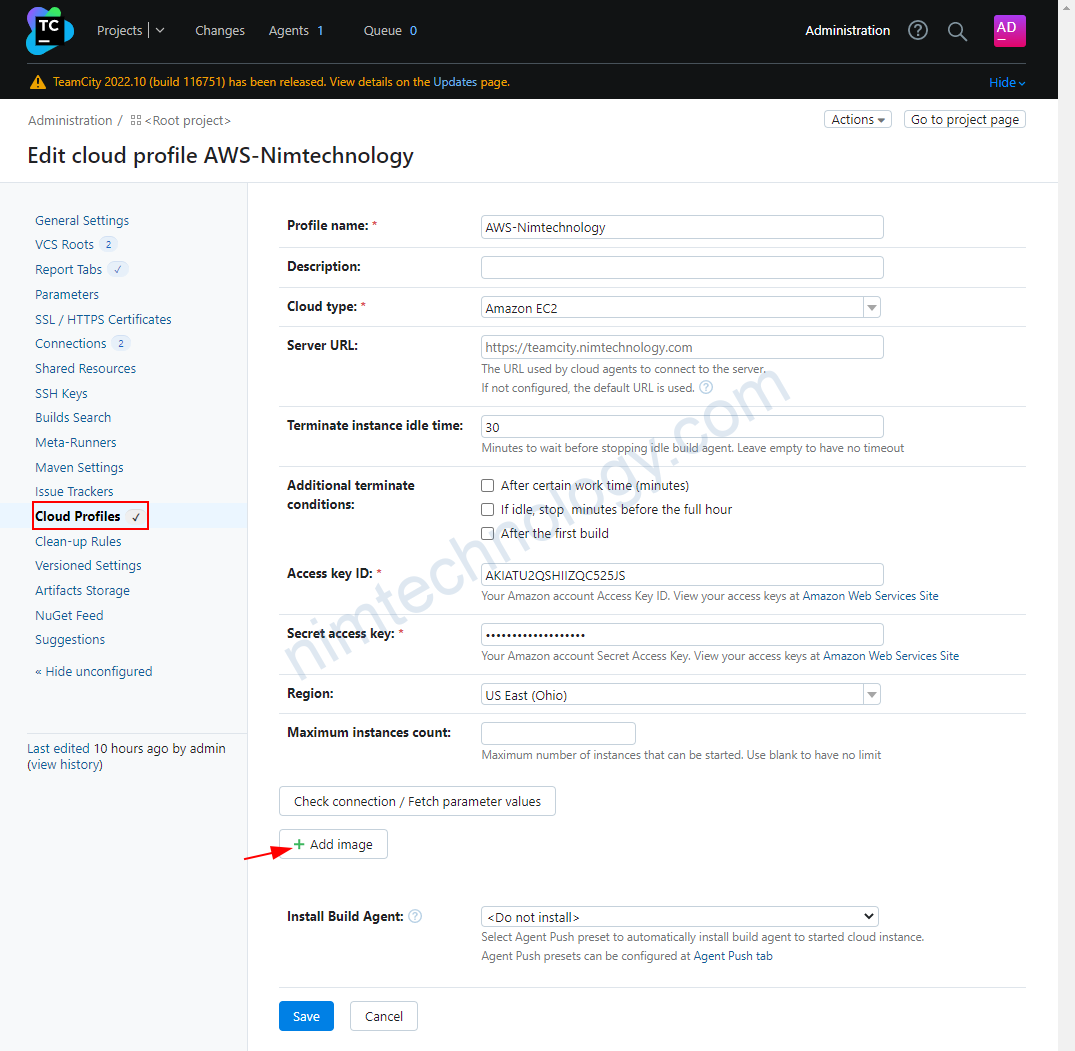
1.2.6) Teamcity server will create agent windows based on AMI.
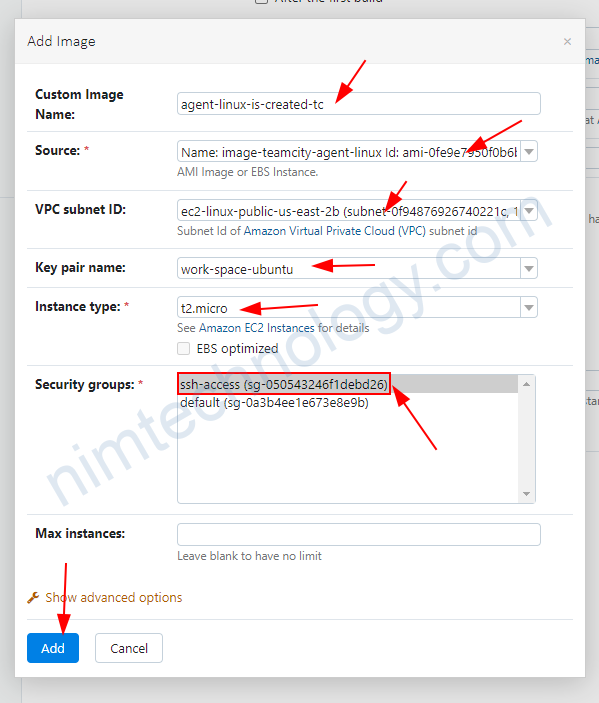
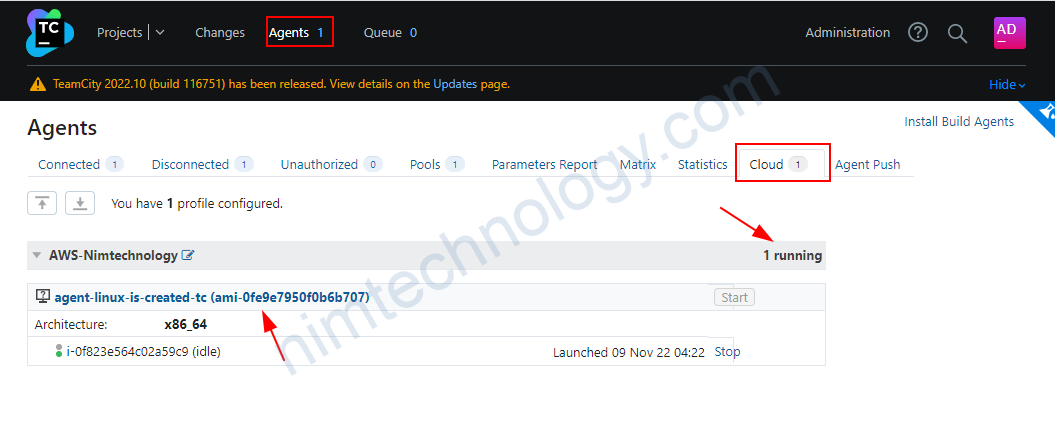
Giớ chúng ta trở lại Teamcity và create agent trên EC2 thông qua AMI.
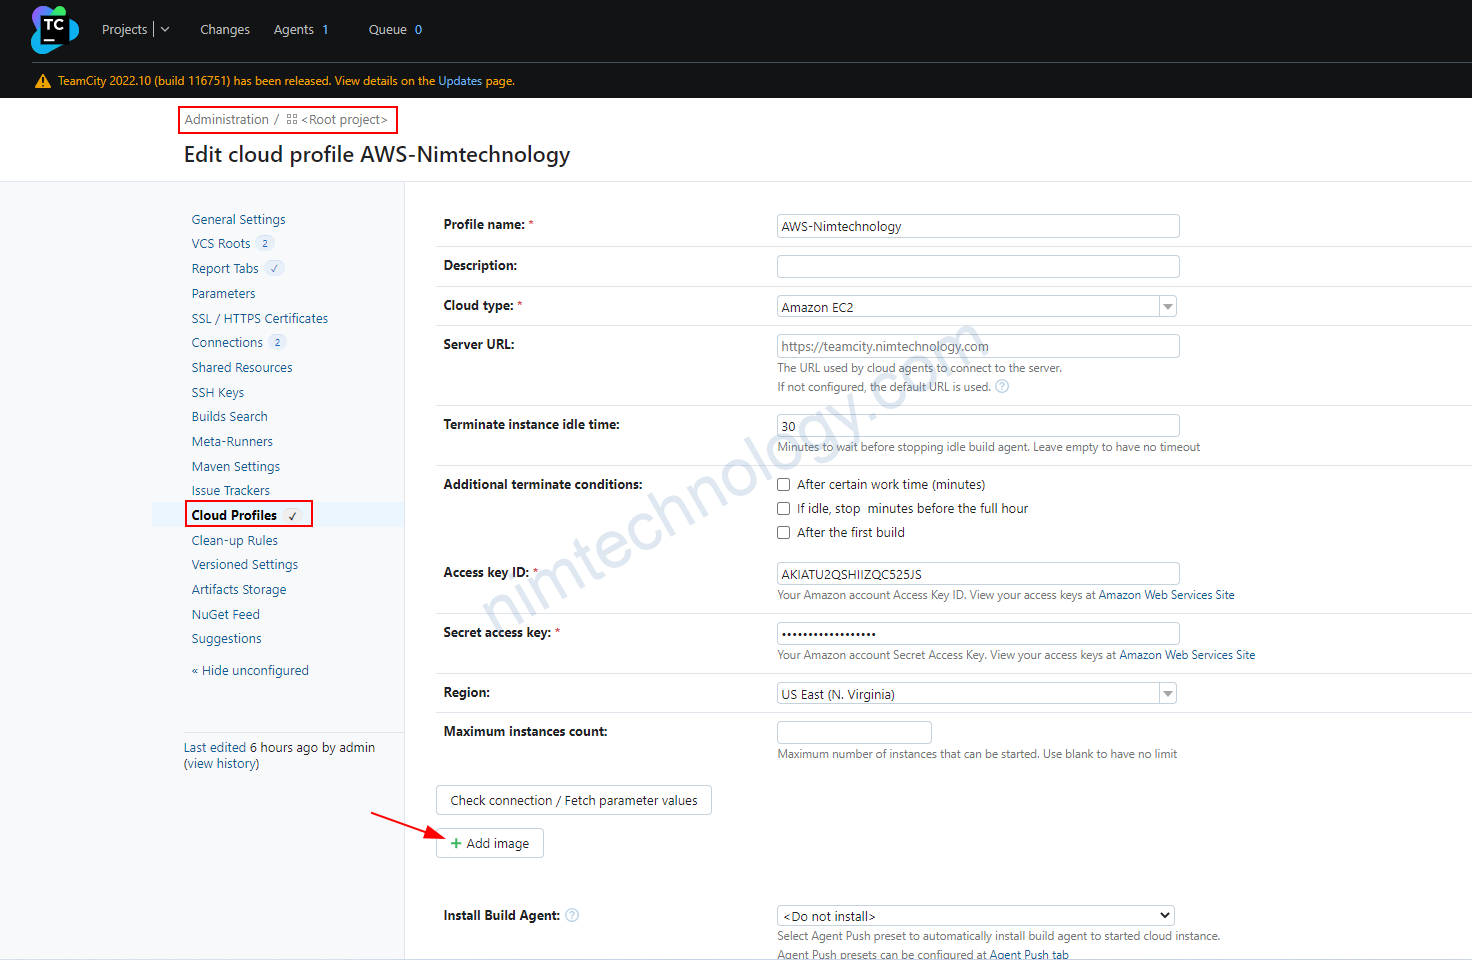
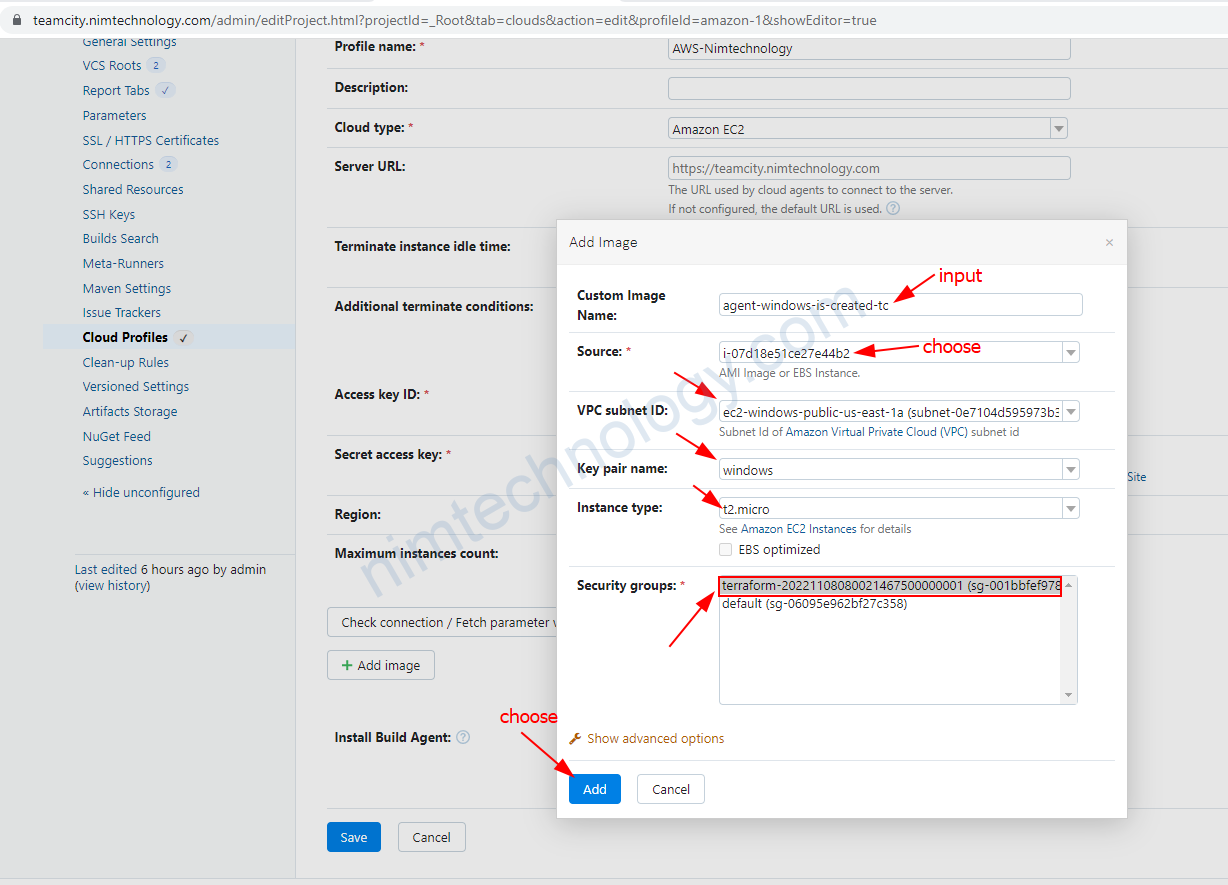
chọn subnet, key-pair, Sec Group,…
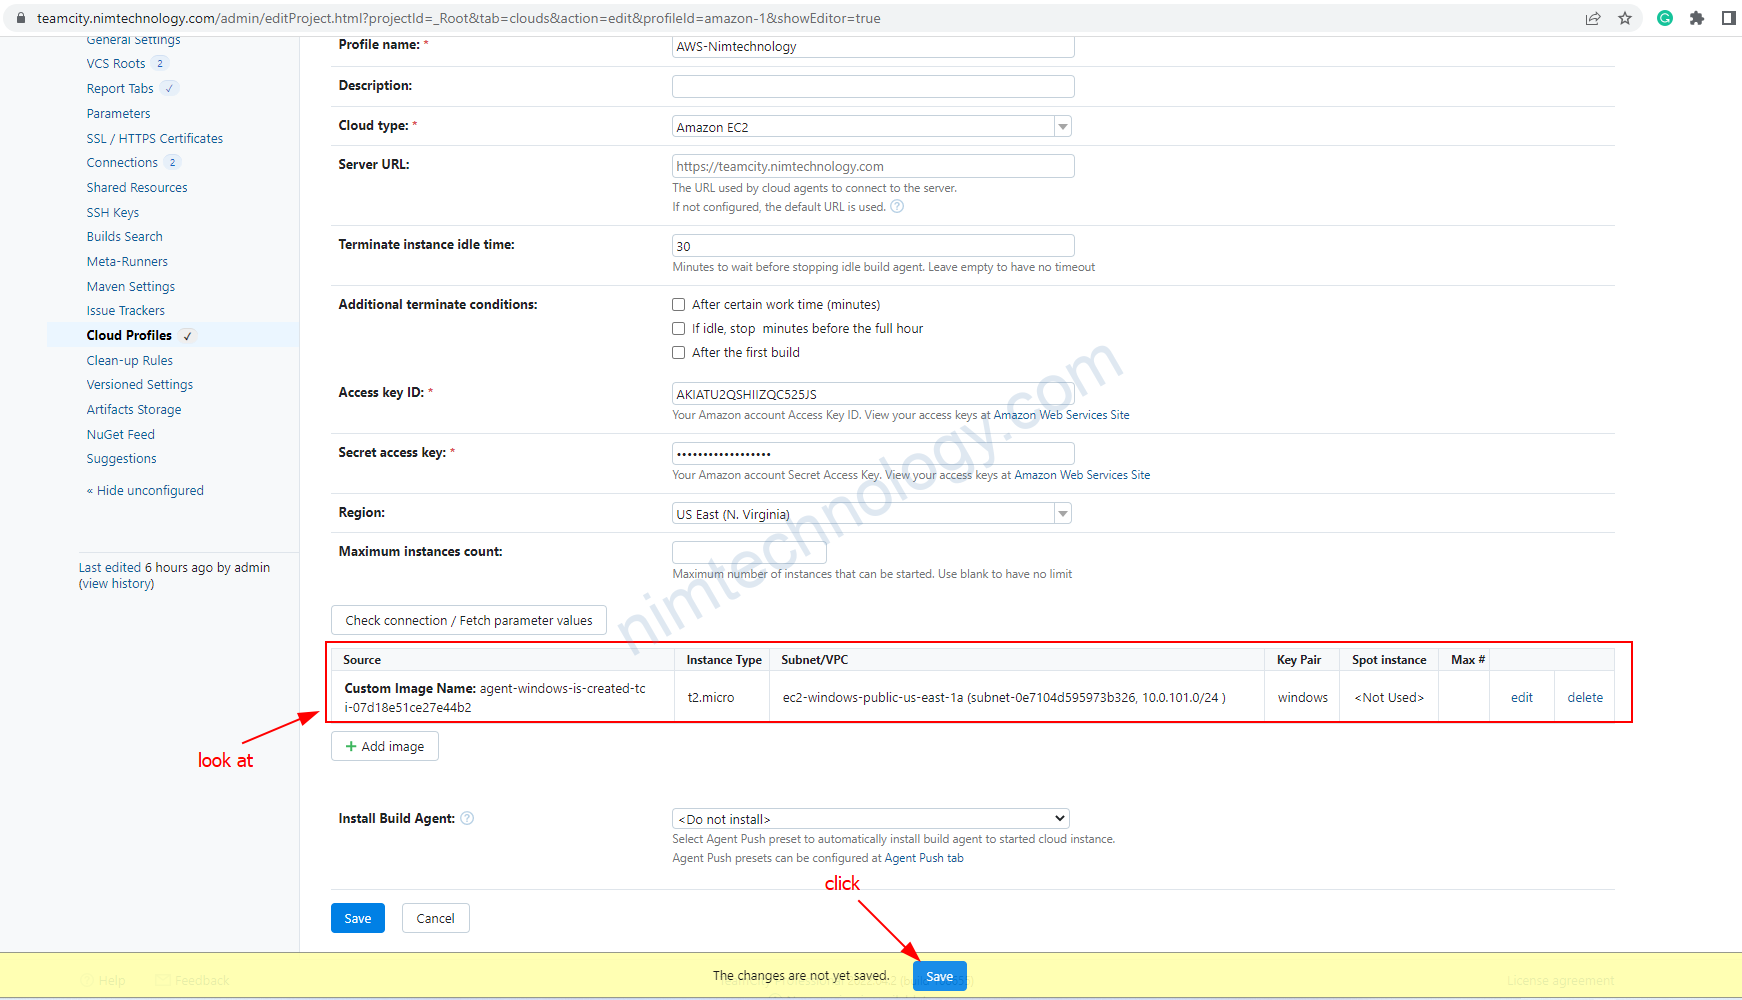

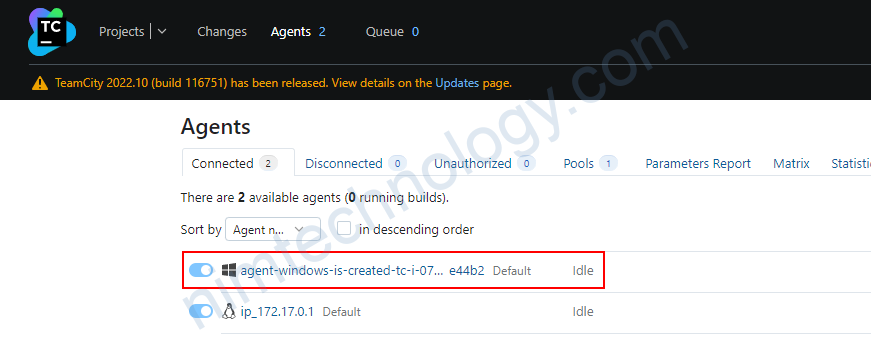
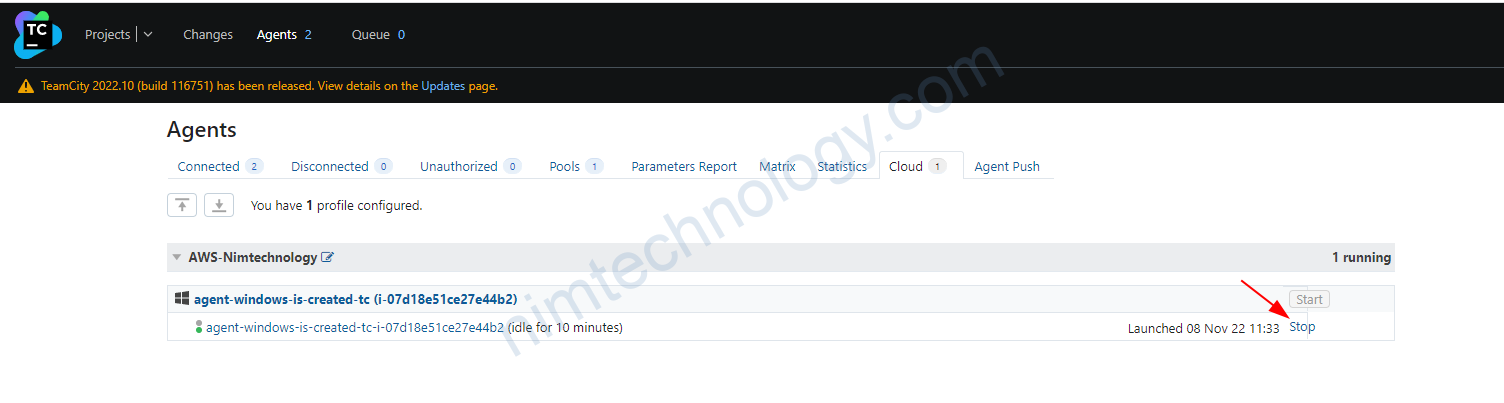
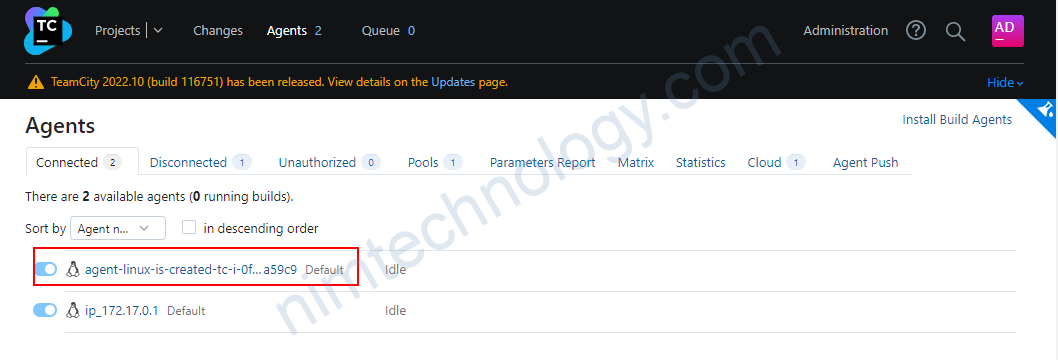
Đợi 1 lúc thì agent là đã lên cả trên EC2 và teamcity

Dưới đây là hình ảnh trên teamcity

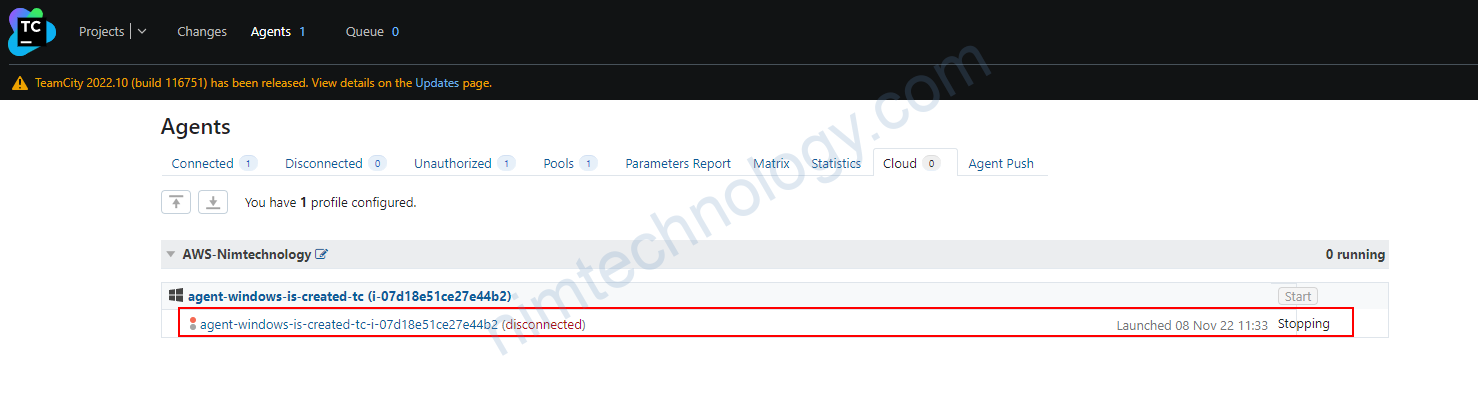

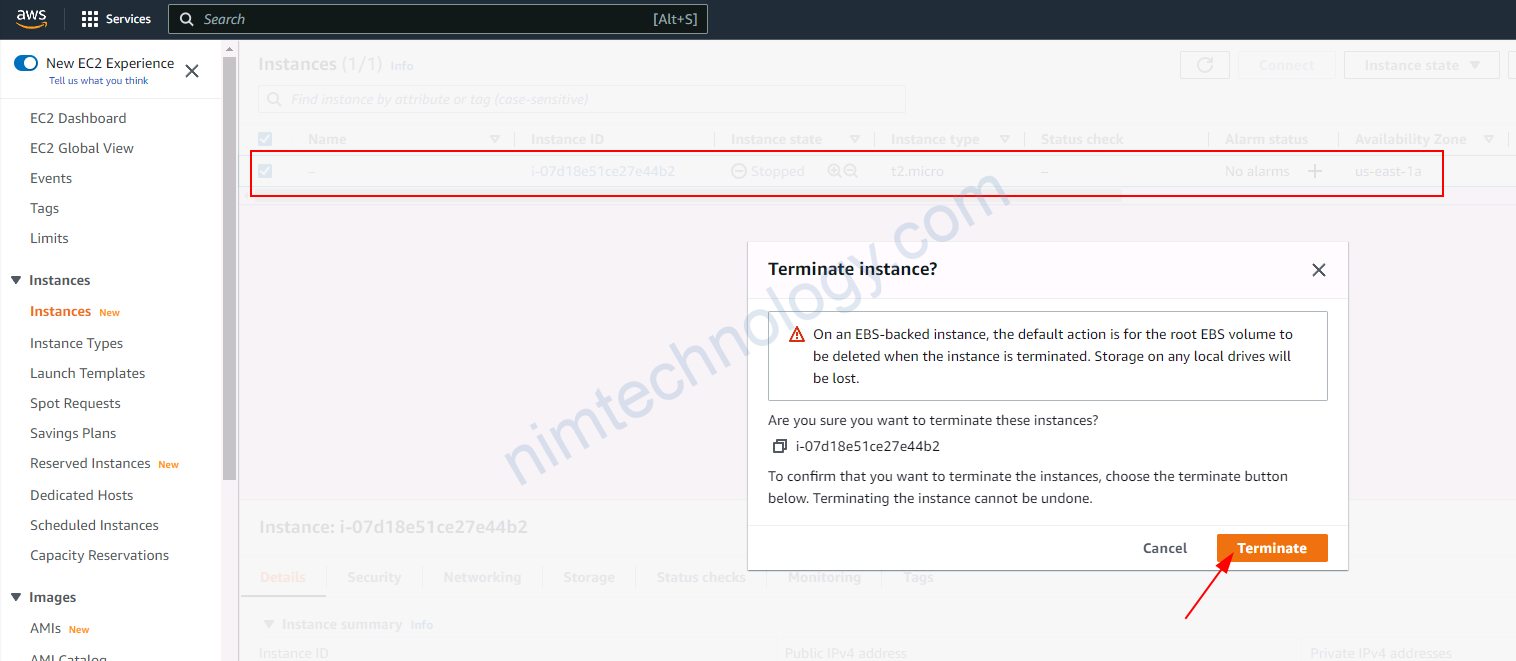
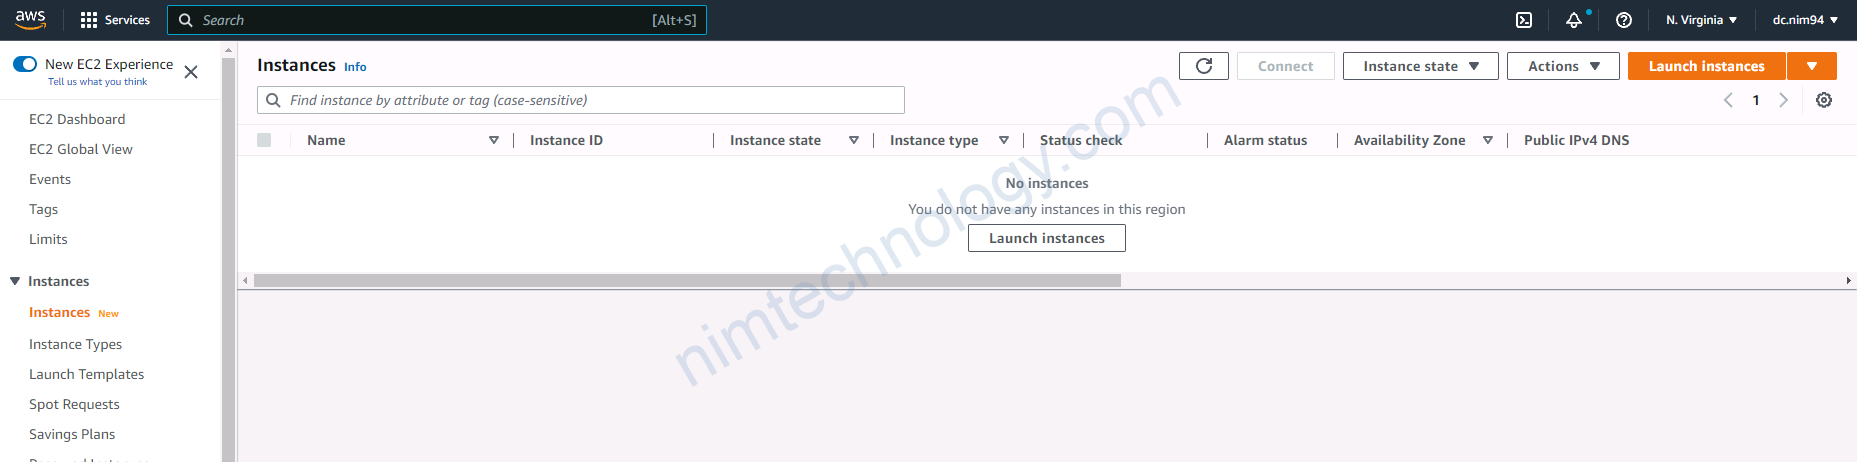
Bạn sẽ chờ hẳn khi vm windows đã được xóa trên aws
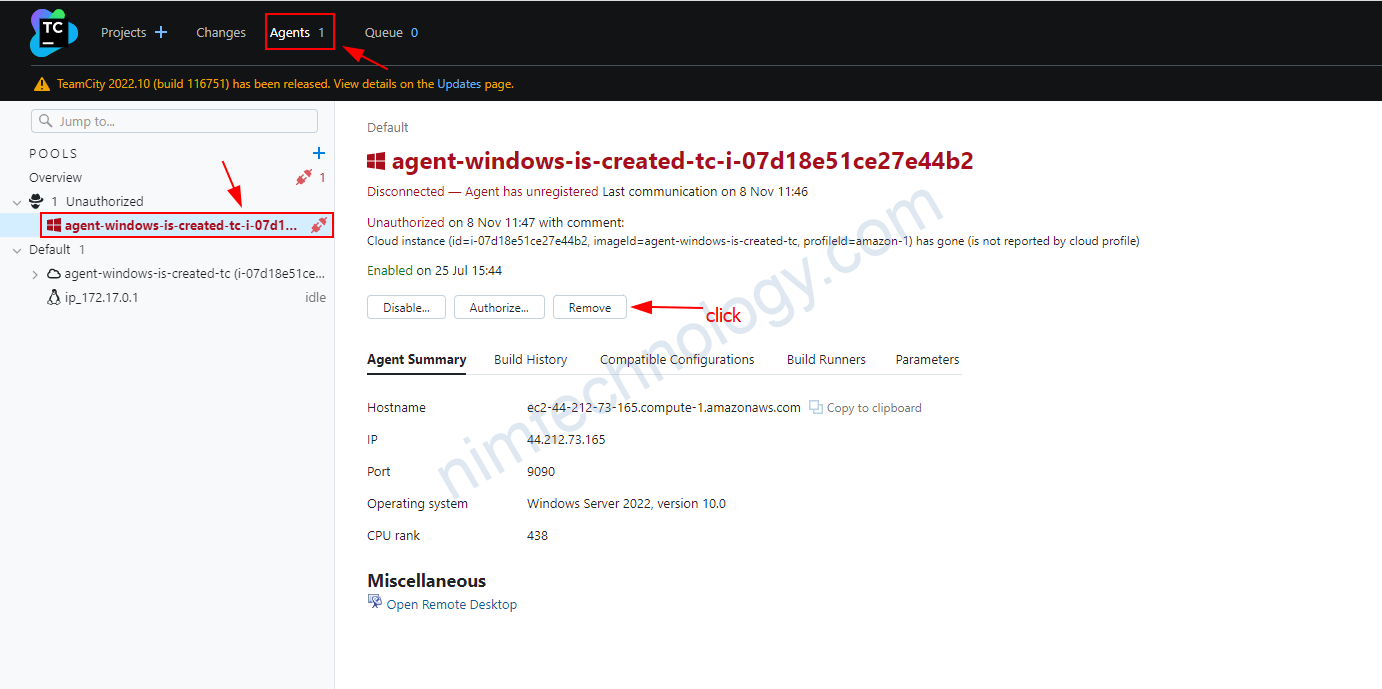
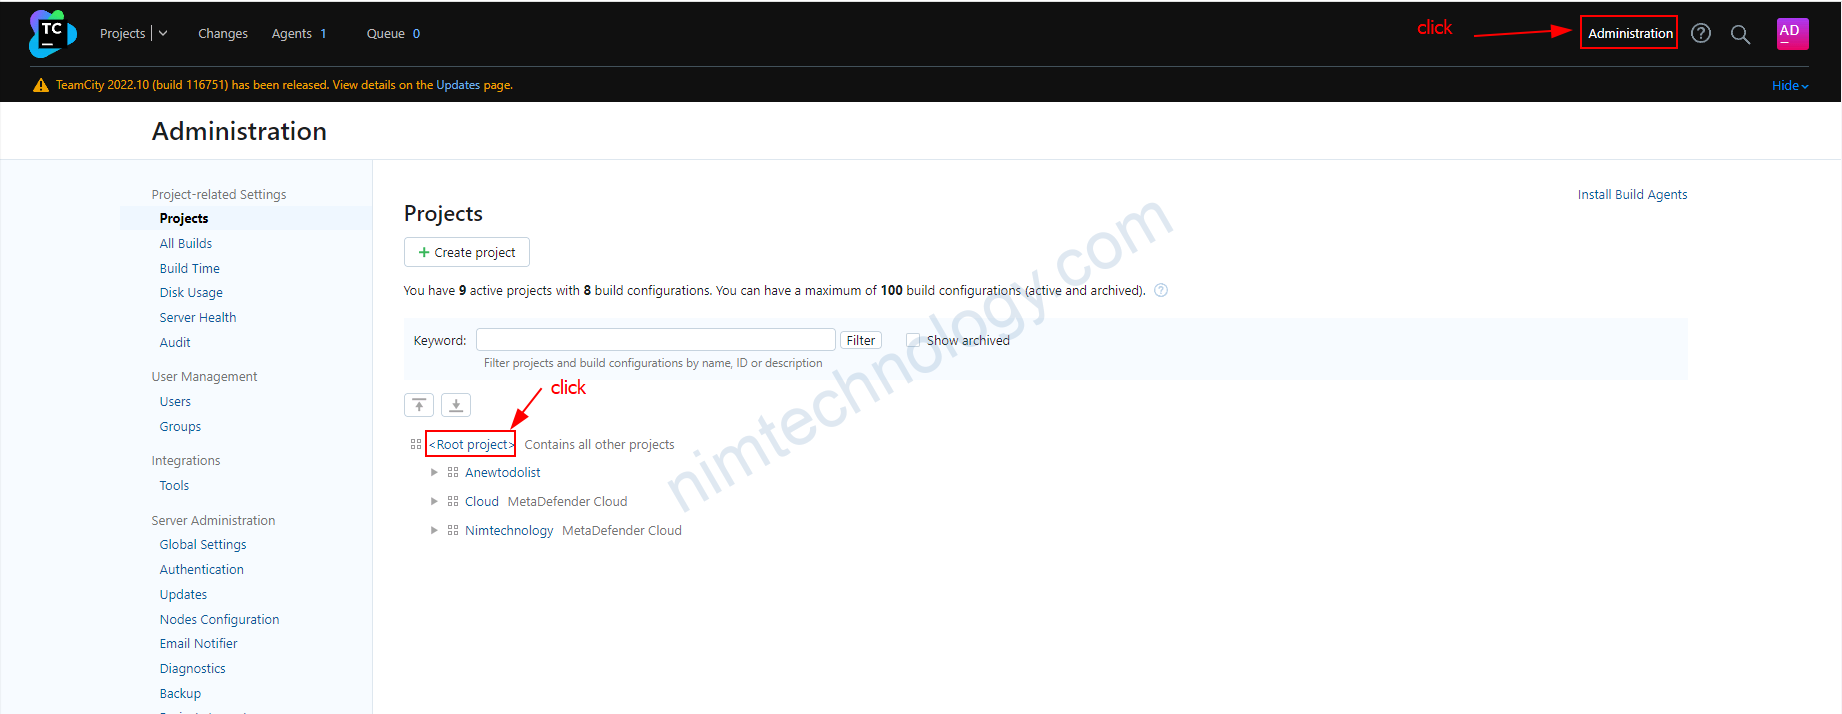
xong bạn vào trong project root để xóa agent.
1.3) Configure agent ubuntu for Teamcity
1.3.1) install teamcity agent on linux
Tham khảo link này:
https://unixcop.com/install-and-configure-teamcity-agent-on-linux/
Bạn ssh vào server linux
wget https://teamcity.nimtechnology.com/update/buildAgentFull.zip
apt install unzip
unzip buildAgentFull.zip
apt install java-1.8.0-openjdk
sudo apt-get update
apt-get install openjdk-8-jdk
java -version

export JAVA_HOME=/usr/lib/jvm/java-1.8.0-openjdk-amd64/jre/bin/java
echo $JAVA_HOME
cp conf/buildAgent.dist.properties conf/buildAgent.properties vi buildAgent.properties
chmod +x bin/agent.sh
./bin/agent.sh start
Làm sao để auto restart teamcity agent nếu linux bị restart.
Refence Links:
https://www.jetbrains.com/help/teamcity/start-teamcity-agent.html#Automatic+Agent+Start+Under+Linux
đầu tiên bạn cần kiểm tra lại bash agent.sh của bạn đang ở đây.
root@ip-10-0-102-156:~# ls bin/agent.sh
bin/agent.sh
root@ip-10-0-102-156:~# pwd
/root
vi /etc/systemd/system/teamcityagent.service [Unit] Description=TeamCity Build Agent After=network.target [Service] Type=oneshot #User=teamcityagent #Group=teamcityagent ExecStart=/home/teamcityagent/agent/bin/agent.sh start ExecStop=-/home/teamcityagent/agent/bin/agent.sh stop # Support agent upgrade as the main process starts a child and exits then RemainAfterExit=yes # Support agent upgrade as the main process gets SIGTERM during upgrade and that maps to exit code 143 SuccessExitStatus=0 143 [Install] WantedBy=default.target
sau đó bạn chạy các lệnh sau:
systemctl daemon-reload
systemctl start teamcityagent
systemctl enable teamcityagent
giờ nếu bạn có reboot thì agent cùng tự connect với teamcity server.
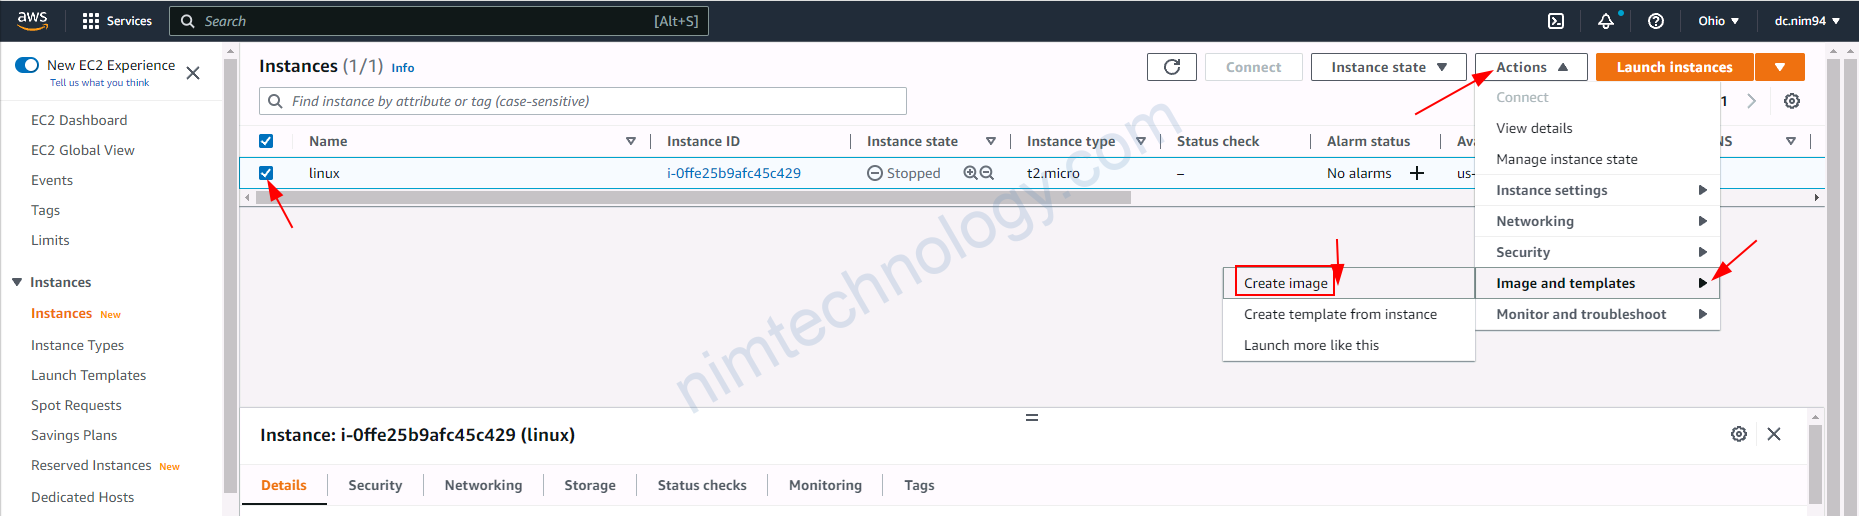
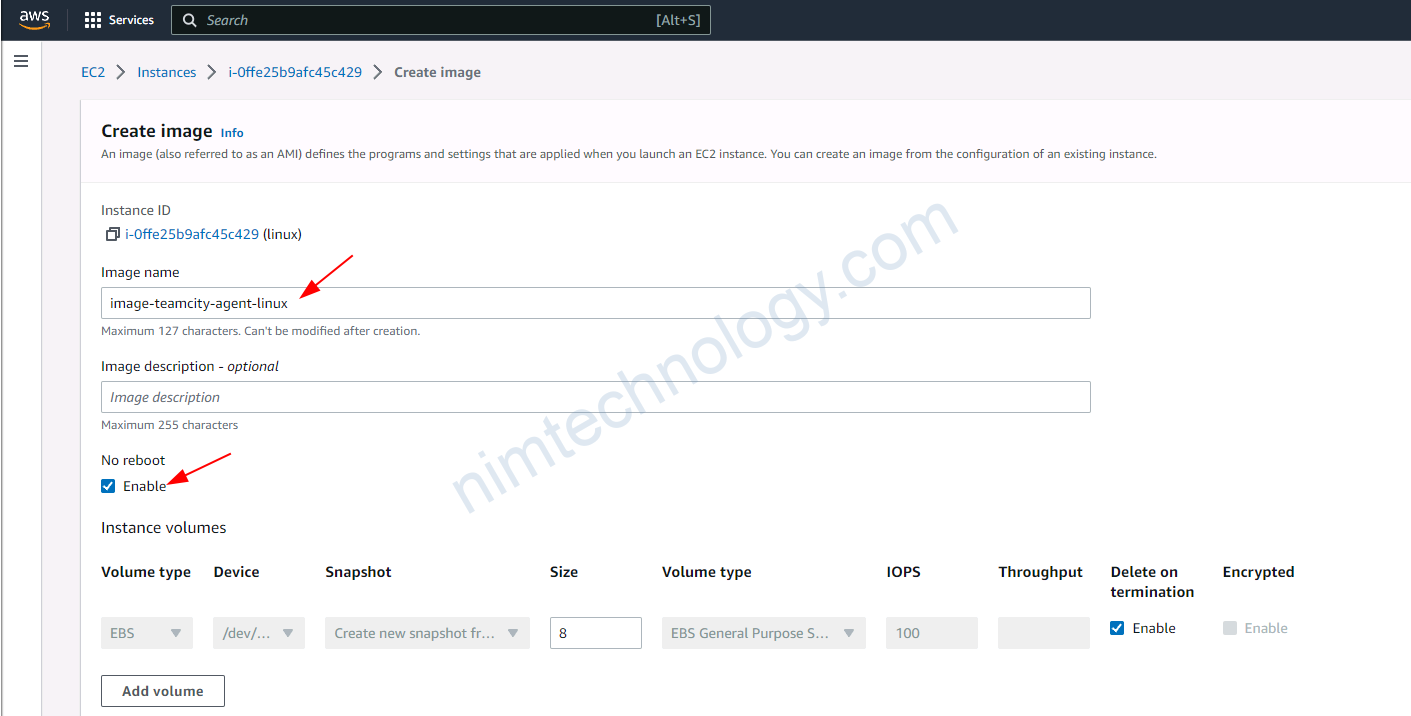
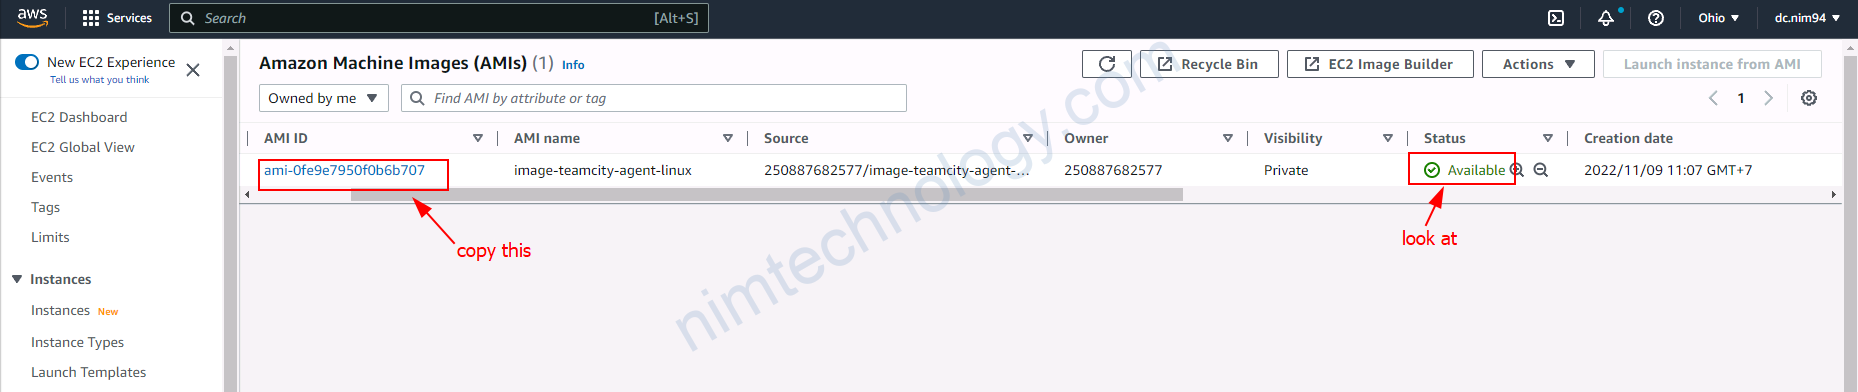
1.3.2) Create an image (AMI) for the Linux agent to be installed TeamCity agent.
bạn ssh vào agent và xoa tocken trong config.
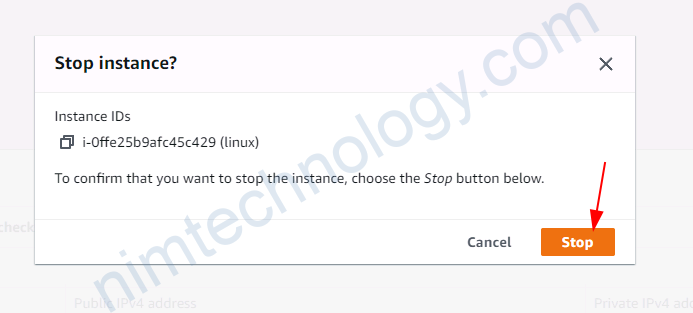
trợ lại UI của AWS tạo image(AMI)

Giờ bạn trở lại UI của teamcity server.


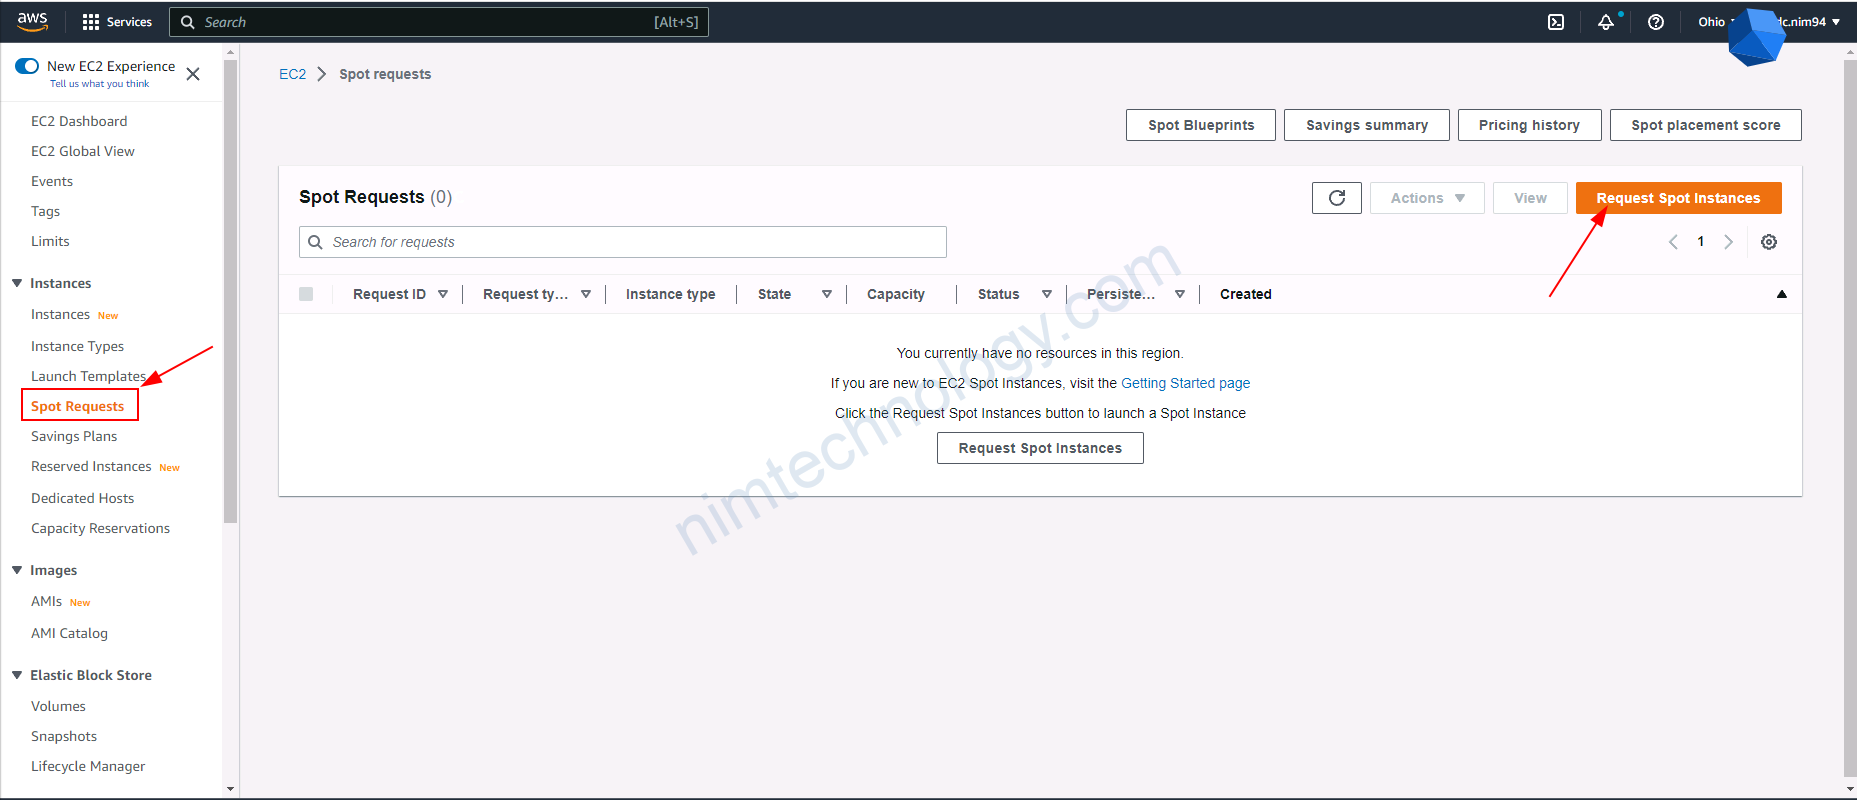
1.4) Amazon EC2 Spot Fleet support
Ngoài ra teamcity cũng sẽ hỗ trợ chúng chạy các instance Amazon EC2 Spot Fleet
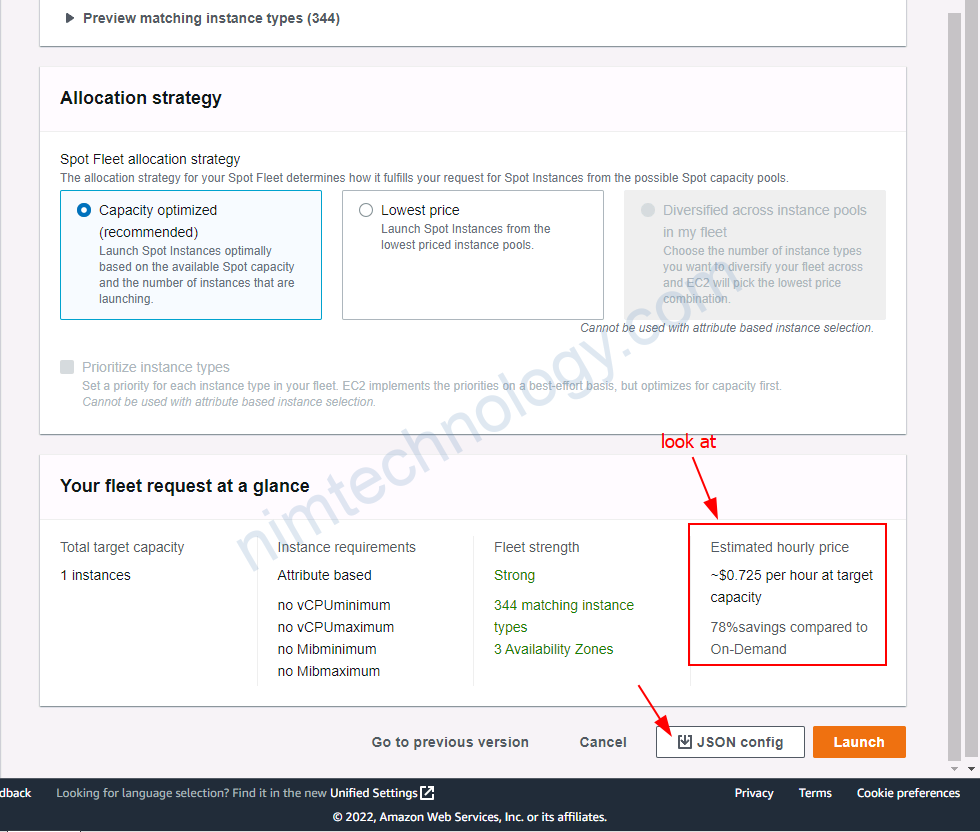
Việc của chúng ta là tìm được JSON config của EC2 Spot mà chúng ta muốn.
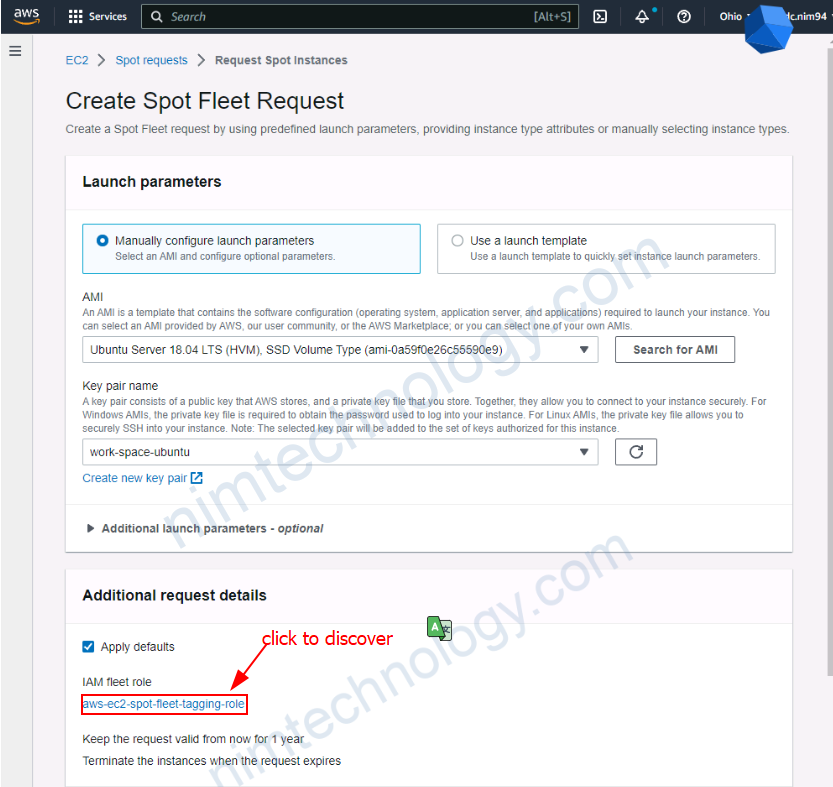
1.4.1) Get JSON config of EC2 Spot
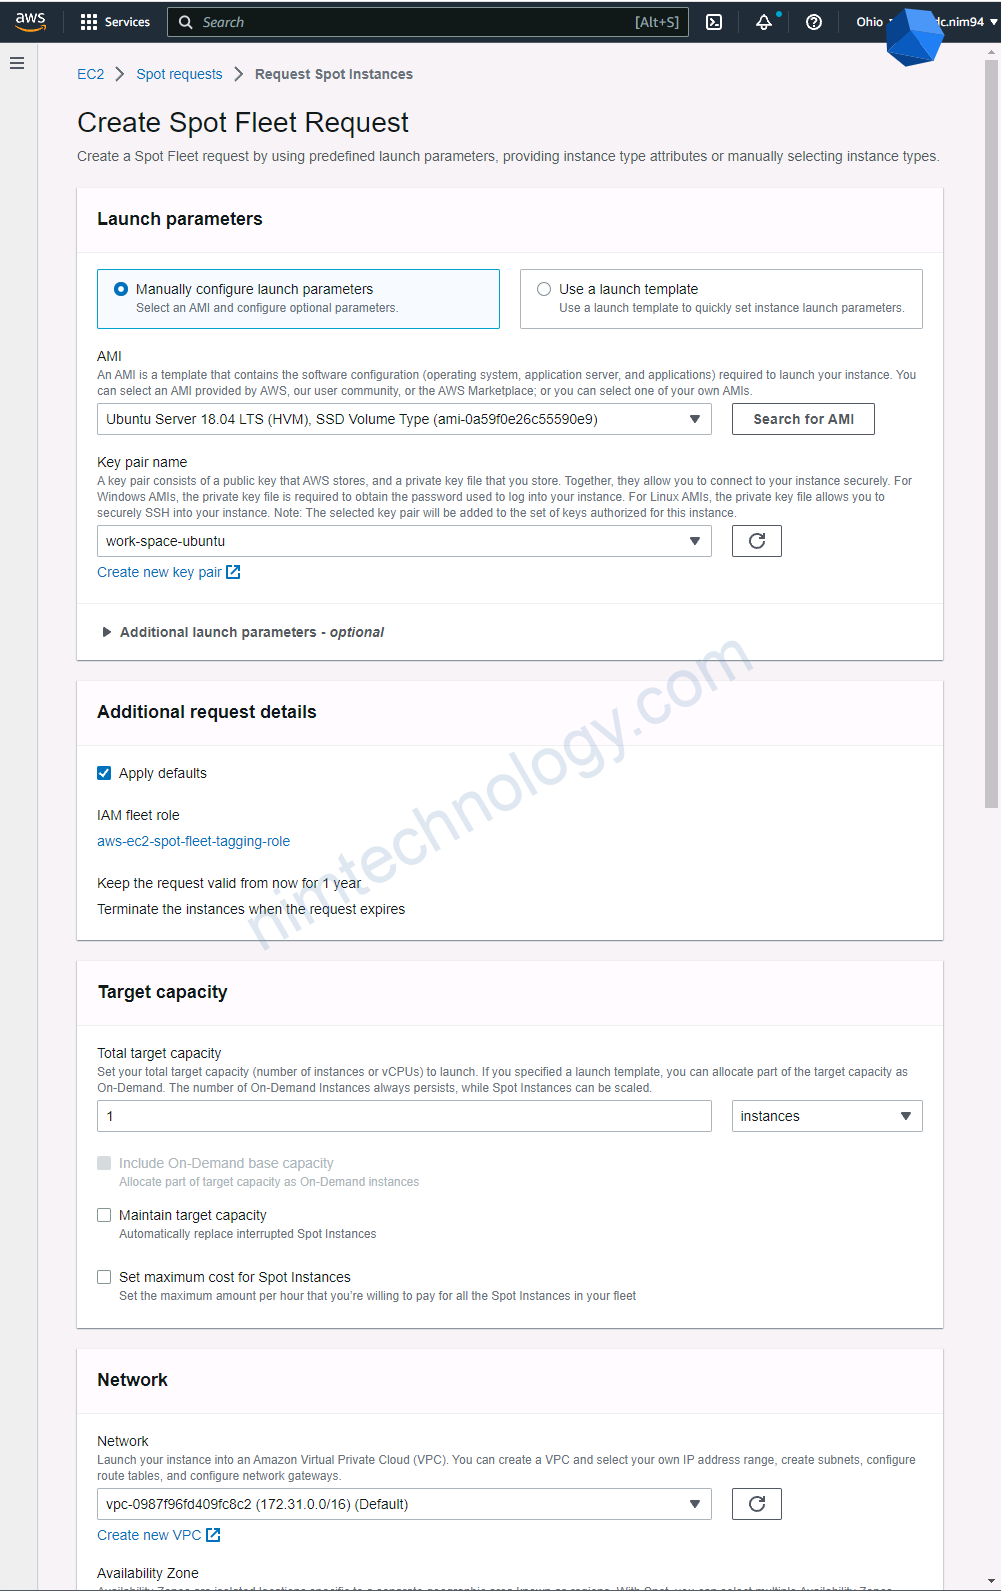
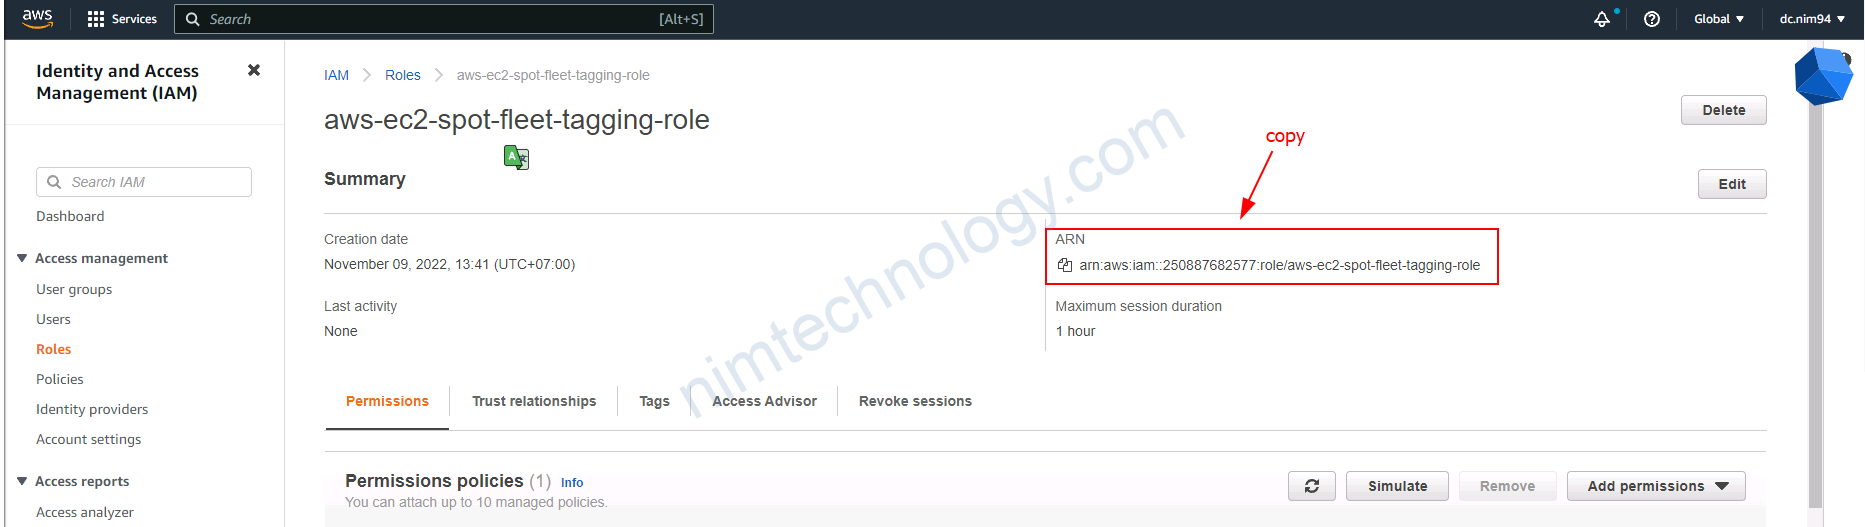
1.4.2) Get ARN role
Bạn để ý ở ảnh trên thì nó đã tạo 1 role: aws-ec2-spot-fleet-tagging-role
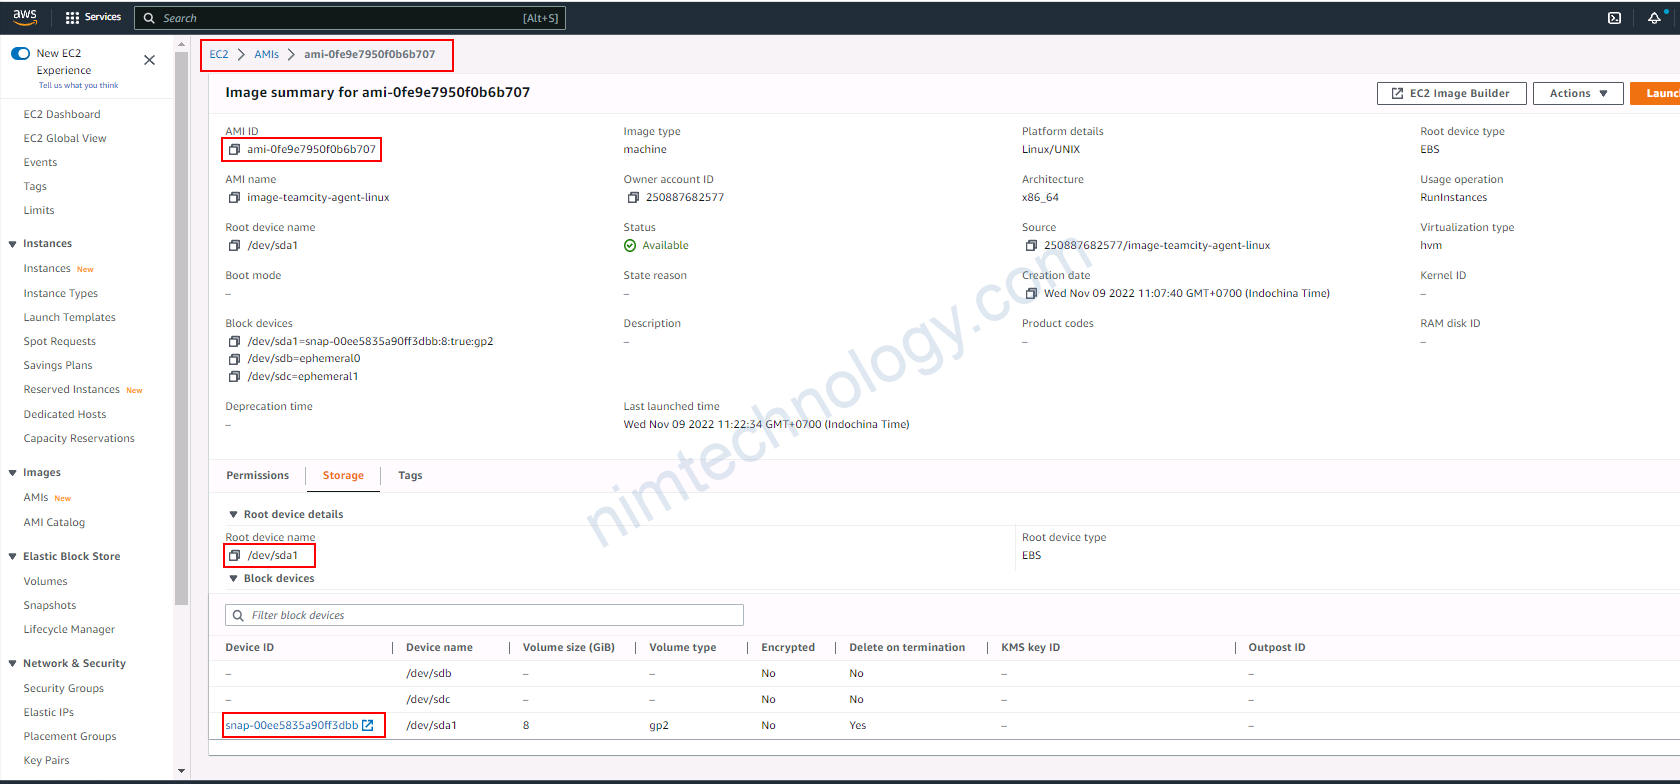
1.4.3) Get information to be related to AMI
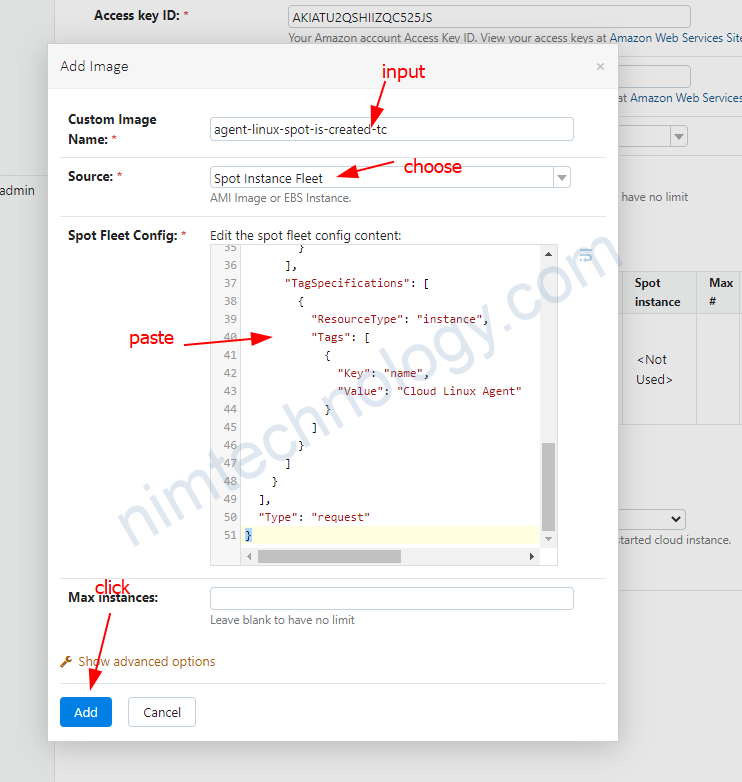
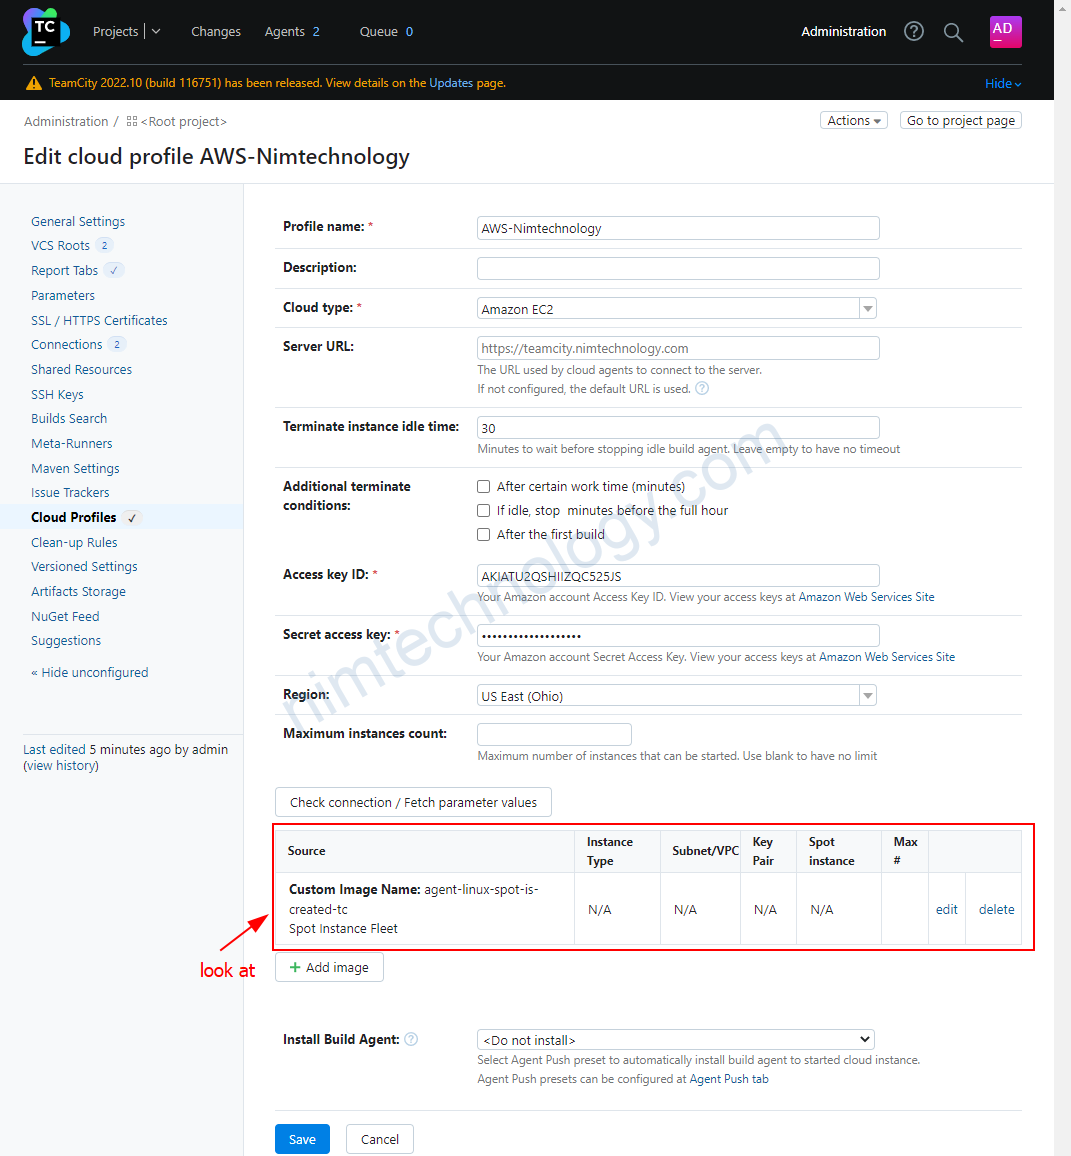
1.4.4) Create agent teamcity with spot fleet style.
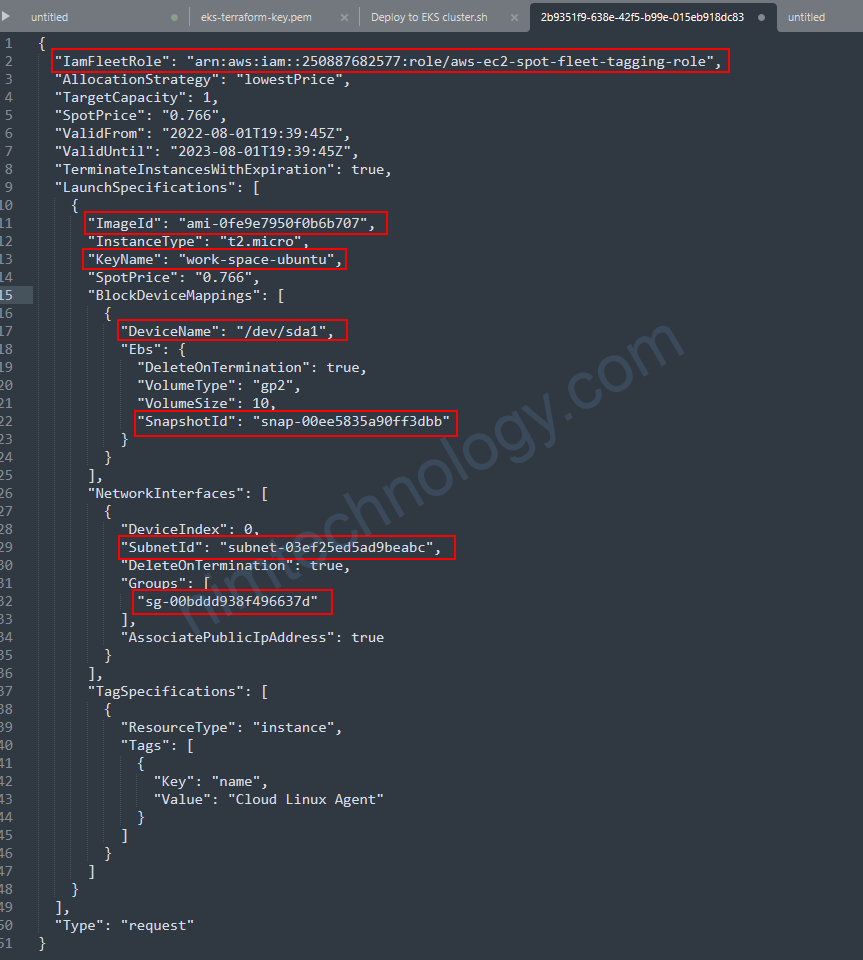
JSON config Linux
{
  "IamFleetRole": "arn:aws:iam::250887682577:role/aws-ec2-spot-fleet-tagging-role",
  "AllocationStrategy": "lowestPrice",
  "TargetCapacity": 1,
  "SpotPrice": "0.766",
  "ValidFrom": "2022-08-01T19:39:45Z",
  "ValidUntil": "2023-08-01T19:39:45Z",
  "TerminateInstancesWithExpiration": true,
  "LaunchSpecifications": [
    {
      "ImageId": "ami-0fe9e7950f0b6b707",
      "InstanceType": "t2.micro",
      "KeyName": "work-space-ubuntu",
      "SpotPrice": "0.766",
      "BlockDeviceMappings": [
        {
          "DeviceName": "/dev/sda1",
          "Ebs": {
            "DeleteOnTermination": true,
            "VolumeType": "gp2",
            "VolumeSize": 10,
            "SnapshotId": "snap-00ee5835a90ff3dbb"
          }
        }
      ],
      "NetworkInterfaces": [
        {
          "DeviceIndex": 0,
          "SubnetId": "subnet-03ef25ed5ad9beabc",
          "DeleteOnTermination": true,
          "Groups": [
            "sg-00bddd938f496637d"
          ],
          "AssociatePublicIpAddress": true
        }
      ],
      "TagSpecifications": [
        {
          "ResourceType": "instance",
          "Tags": [
            {
              "Key": "name",
              "Value": "Cloud Linux Agent"
            }
          ]
        }
      ]
    }
  ],
  "Type": "request"
}
JSON config windows
{
  "IamFleetRole": "arn:aws:iam::250887682577:role/aws-ec2-spot-fleet-tagging-role",
  "AllocationStrategy": "lowestPrice",
  "TargetCapacity": 1,
  "SpotPrice": "0.6",
  "ValidFrom": "2020-11-20T23:24:08Z",
  "ValidUntil": "2022-11-20T23:24:08Z",
  "TerminateInstancesWithExpiration": true,
  "LaunchSpecifications": [
    {
      "ImageId": "ami-0e7820e354aedf56c",
      "InstanceType": "c4.2xlarge",
      "KeyName": "TeamCity-key",
      "BlockDeviceMappings": [
        {
          "DeviceName": "/dev/sda1",
          "Ebs": {
            "DeleteOnTermination": true,
            "SnapshotId": "snap-07eb94ff6c274a92e",
            "VolumeSize": 196,
            "VolumeType": "gp2",
            "Encrypted": false
          }
        }
      ],
      "NetworkInterfaces": [
        {
          "DeviceIndex": 0,
          "SubnetId": "subnet-0f095b2a41dfedb56",
          "DeleteOnTermination": true,
          "Groups": [
            "sg-06bb8c51e59a07a5f",
            "sg-01be05bcee8c4e7e3"
          ],
          "AssociatePublicIpAddress": true
        }
      ],
      "IamInstanceProfile": {
        "Arn": "arn:aws:iam::250887682577:instance-profile/TeamCityAccessRole"
      },
      "TagSpecifications": [
        {
          "ResourceType": "instance",
          "Tags": [
            {
              "Key": "name",
              "Value": "c4.xl New Windows Agent"
            }
          ]
        }
      ],
      "EbsOptimized": true
    }
  ],
  "Type": "request"
}
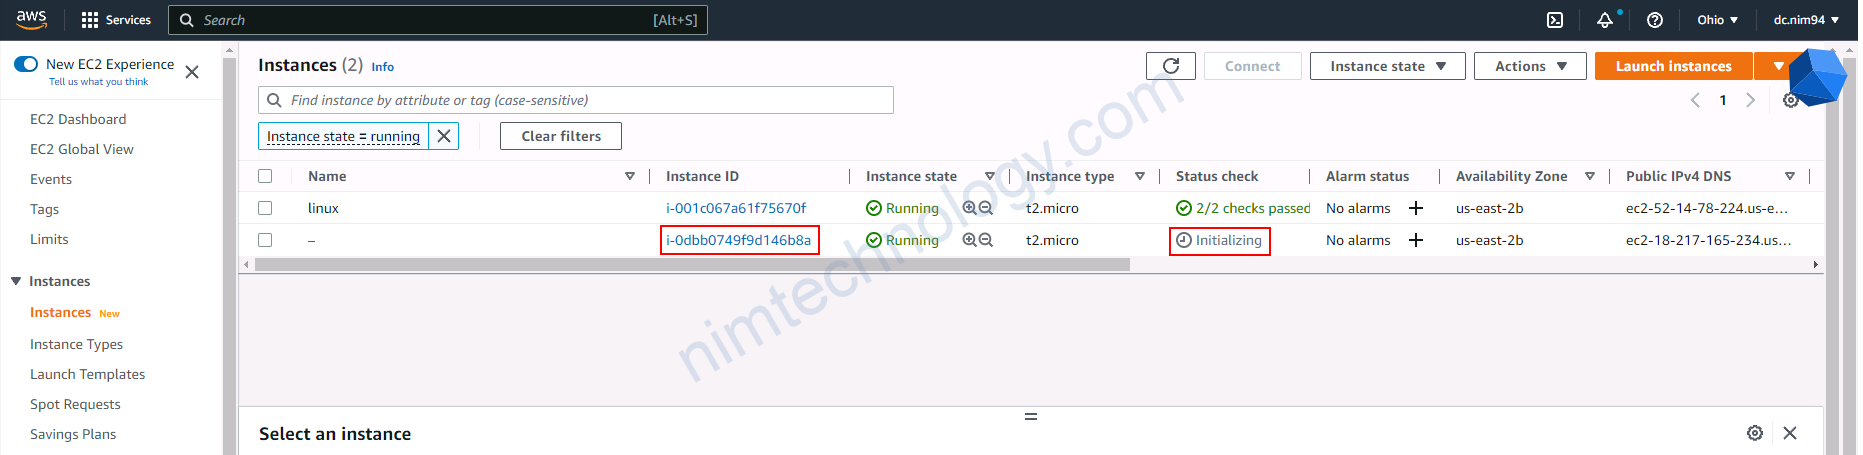
trên teamcity đã hiện instance
Bạn tiến hành start agent spot fleet.
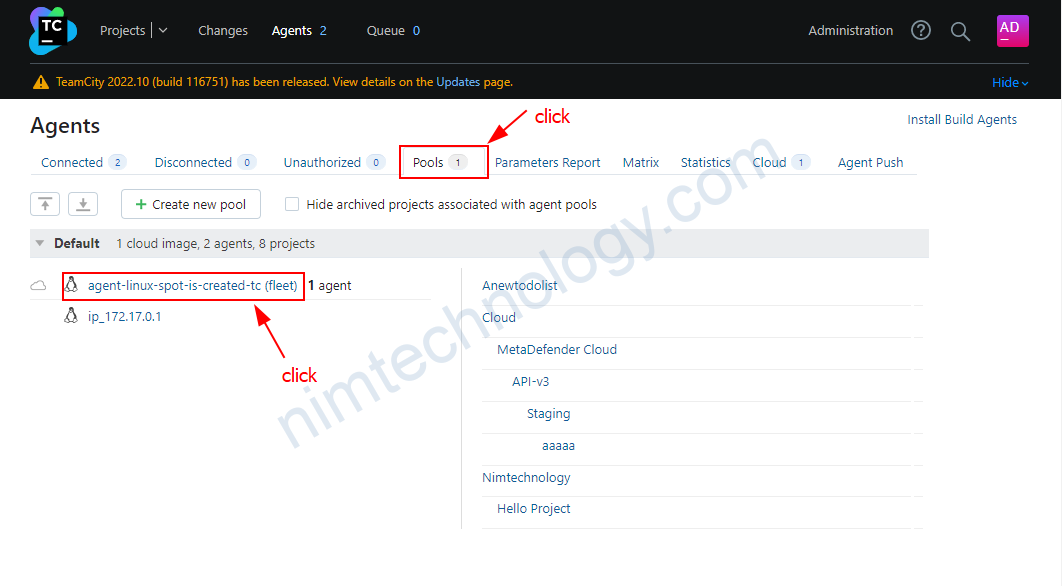
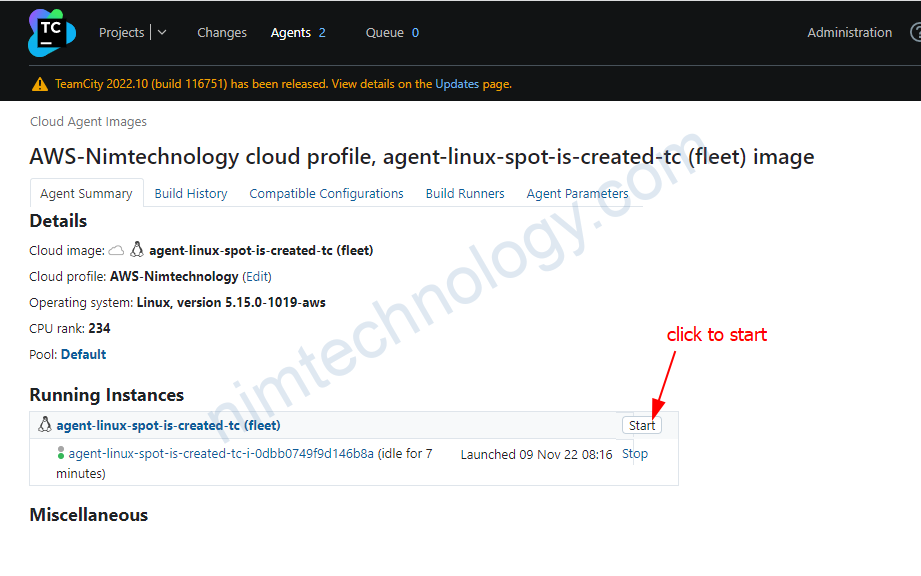
Nếu config spot fleet đúng thì bạn sẽ thấy trên aws có 1 instance mới.