Bạn đang chưa biết gì về Cache Azure hay đọc ngay post này.
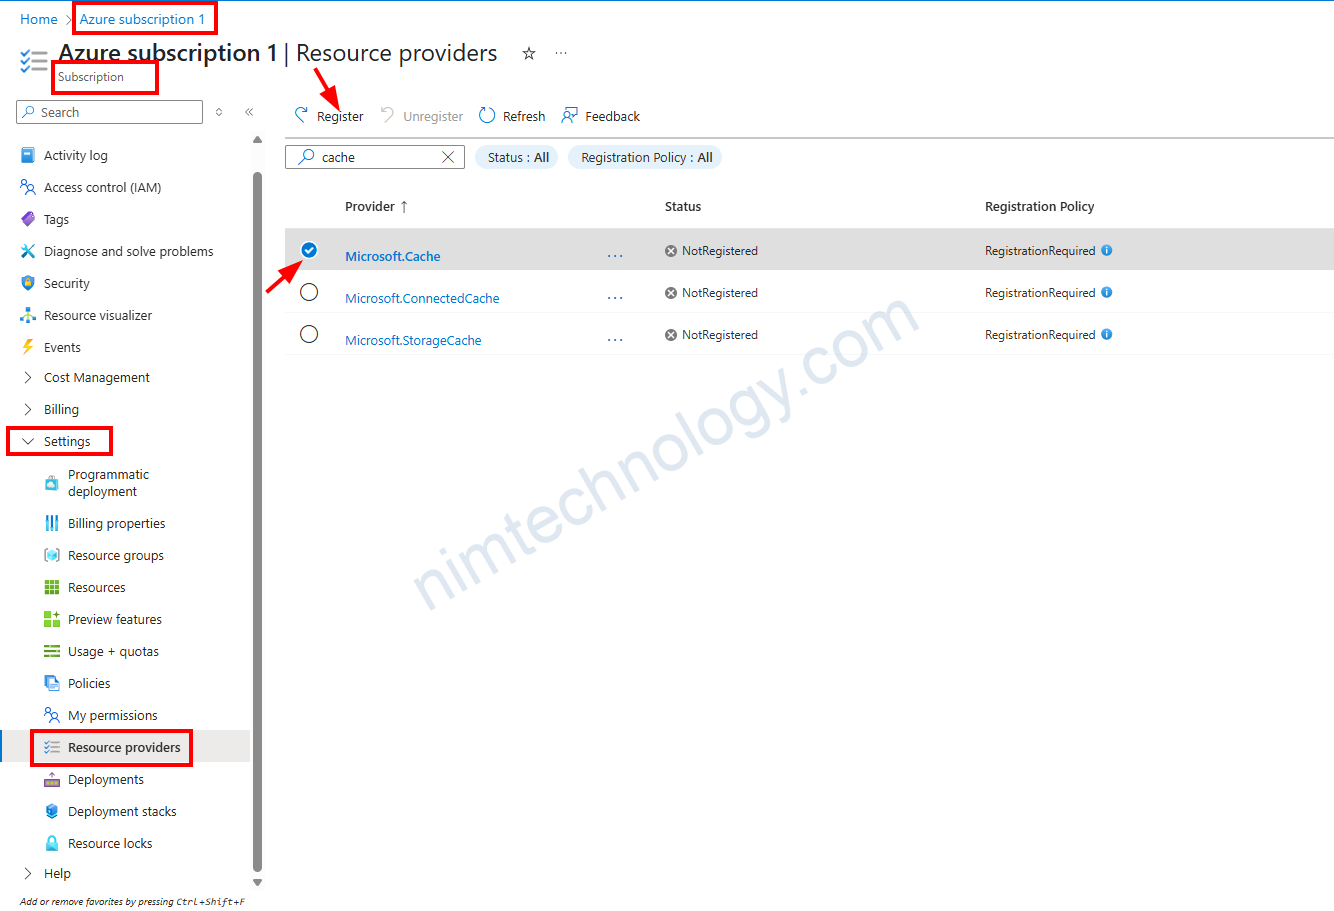
Đầu tiên để tạo redis trên azure bạn cần register “Microsoft.Cache”
╷
│ Error: creating Redi (Subscription: "7f8e5acb-a937-4163-80b1-f874c3a4d62c"
│ Resource Group Name: "nimtechnology"
│ Redis Name: "redis-elearning"): performing Create: unexpected status 409 (409 Conflict) with error: MissingSubscriptionRegistration: The subscription is not registered to use namespace 'Microsoft.Cache'. See https://aka.ms/rps-not-found for how to register subscriptions.
│
│   with module.redis.azurerm_redis_cache.this,
│   on .terraform/modules/redis/main.rediscache.tf line 4, in resource "azurerm_redis_cache" "this":
│    4: resource "azurerm_redis_cache" "this" {
│
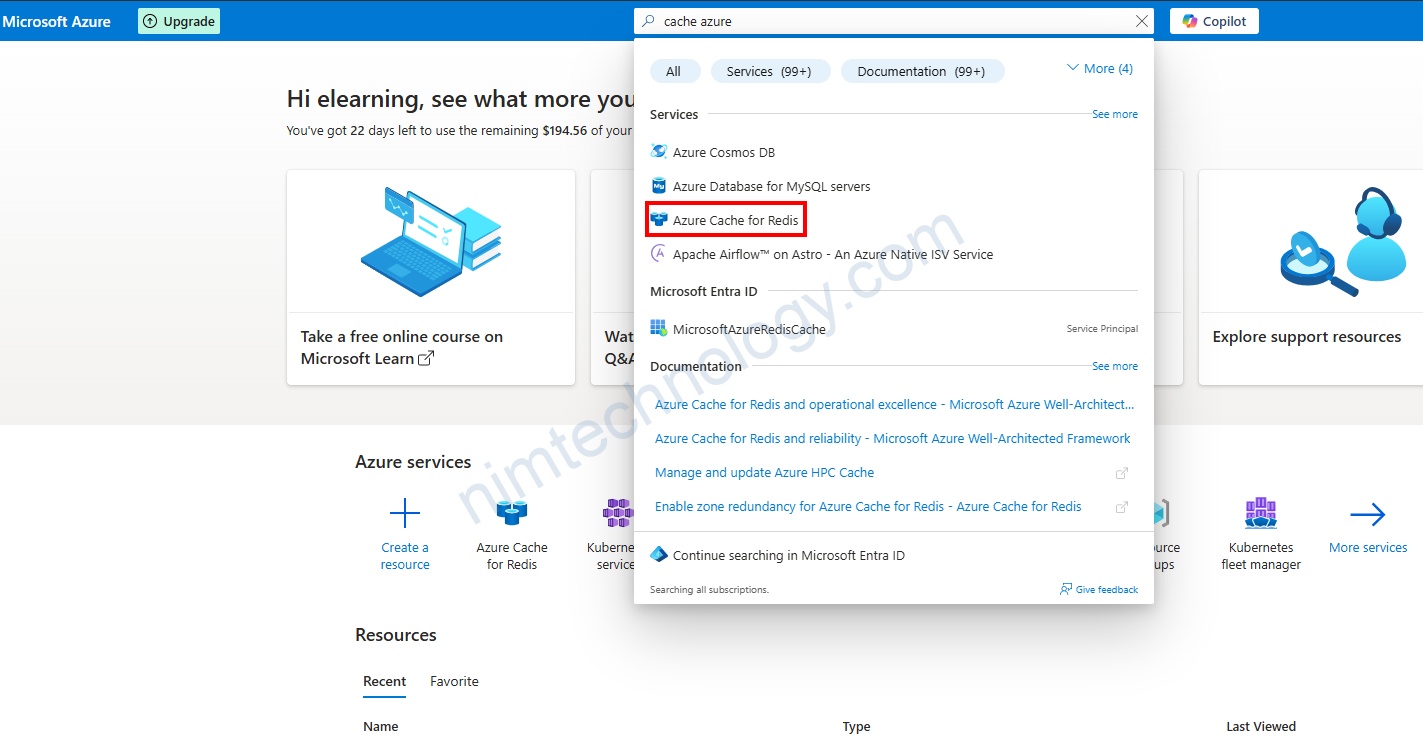
Giờ bắt đầu tạo redis trên azure:
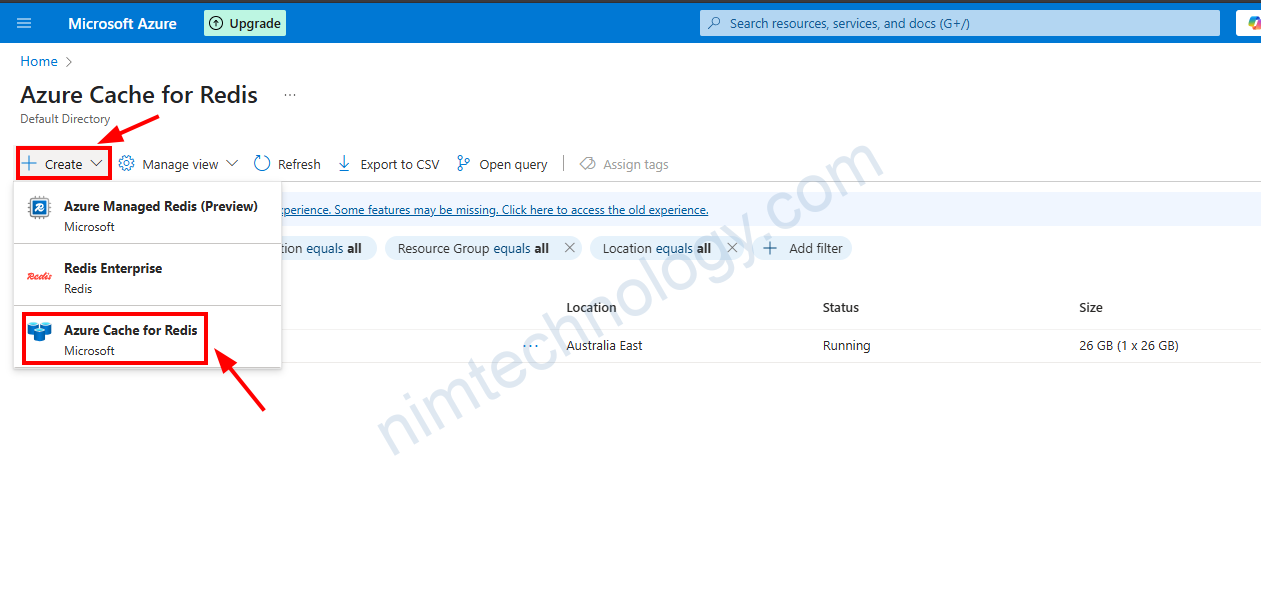
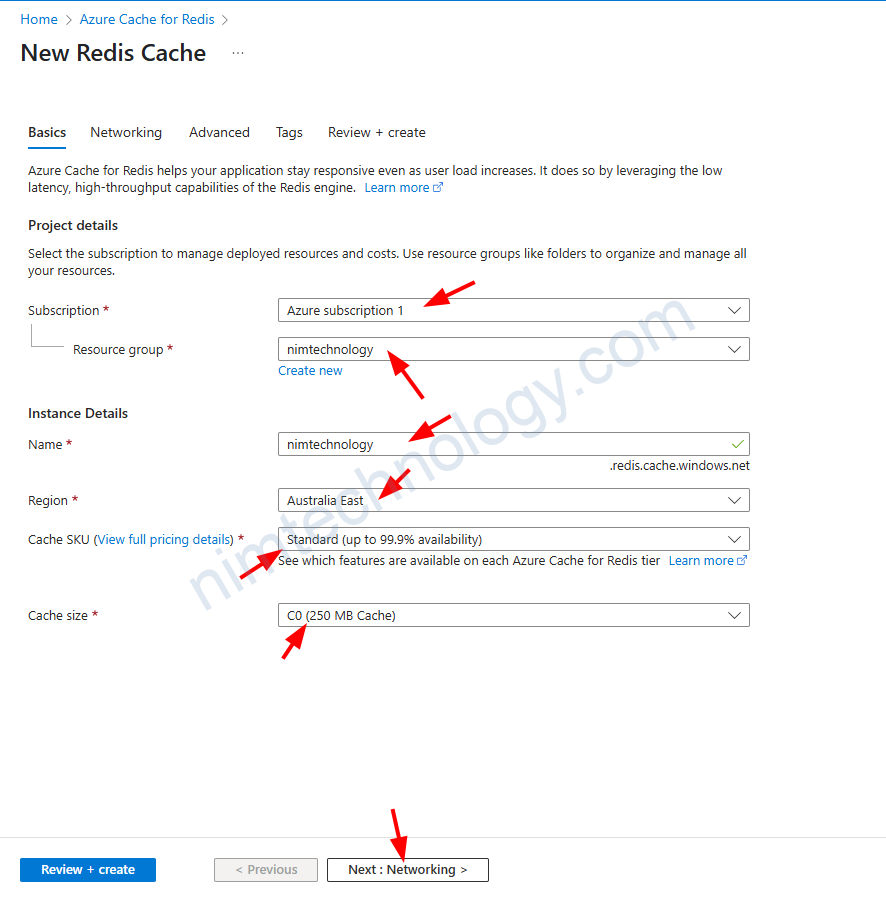
Bạn thực hiện Chọn subscription, Resource Group, Region, rồi anh em khai báo tên redis cluster của anh em.
Ở đây mình cần giải thích thêm: Cache SKU và cache size:
Cache SKU đề cập đến các loại cấu hình (Stock Keeping Unit) khác nhau của bộ nhớ đệm (cache) được cung cấp bởi Azure. SKU của Azure Cache giúp xác định tính năng, hiệu suất, và giá của một cache instance.
Chúng ta cũng có nhiều SKU:
| Basic | Standard | Premium | Enterprise | Enterprise Flash |
|---|
Bạn có thể tìm lun ở link này:
https://azure.microsoft.com/en-us/pricing/details/cache/
Tiếp theo cache size trong Azure Cache đề cập đến dung lượng bộ nhớ đệm mà bạn muốn cấp phát cho một cache instance trong Azure. Kích thước này quyết định lượng dữ liệu mà bộ nhớ đệm có thể lưu trữ tại một thời điểm, và nó ảnh hưởng trực tiếp đến hiệu suất và khả năng mở rộng của hệ thống cache
Ví dụ trong SKU Basic sẽ có các loại cache size từ C0 đến C6
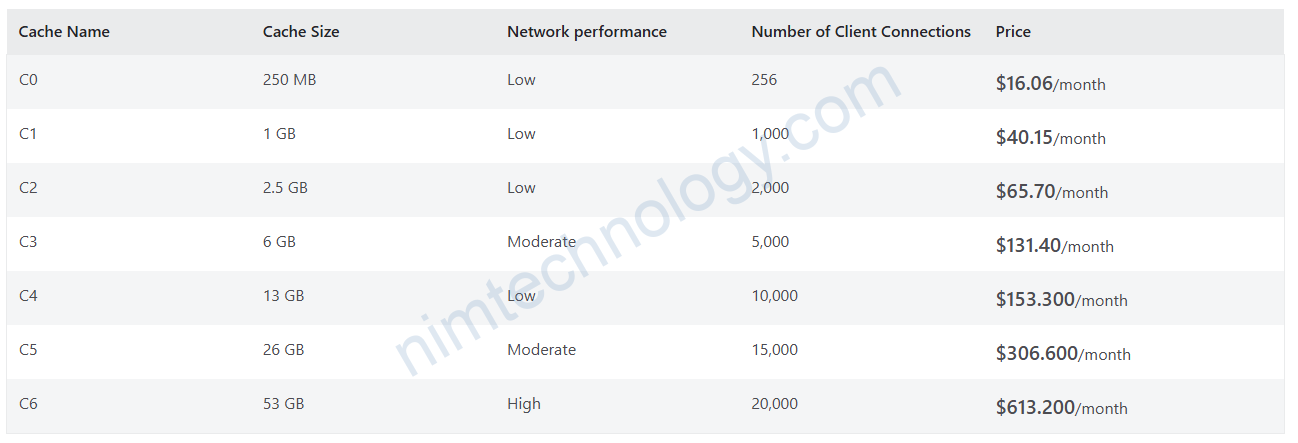
Và tương tự các SKU khác cũng có các cấu hình khác nhau:
https://azure.microsoft.com/en-us/pricing/details/cache/
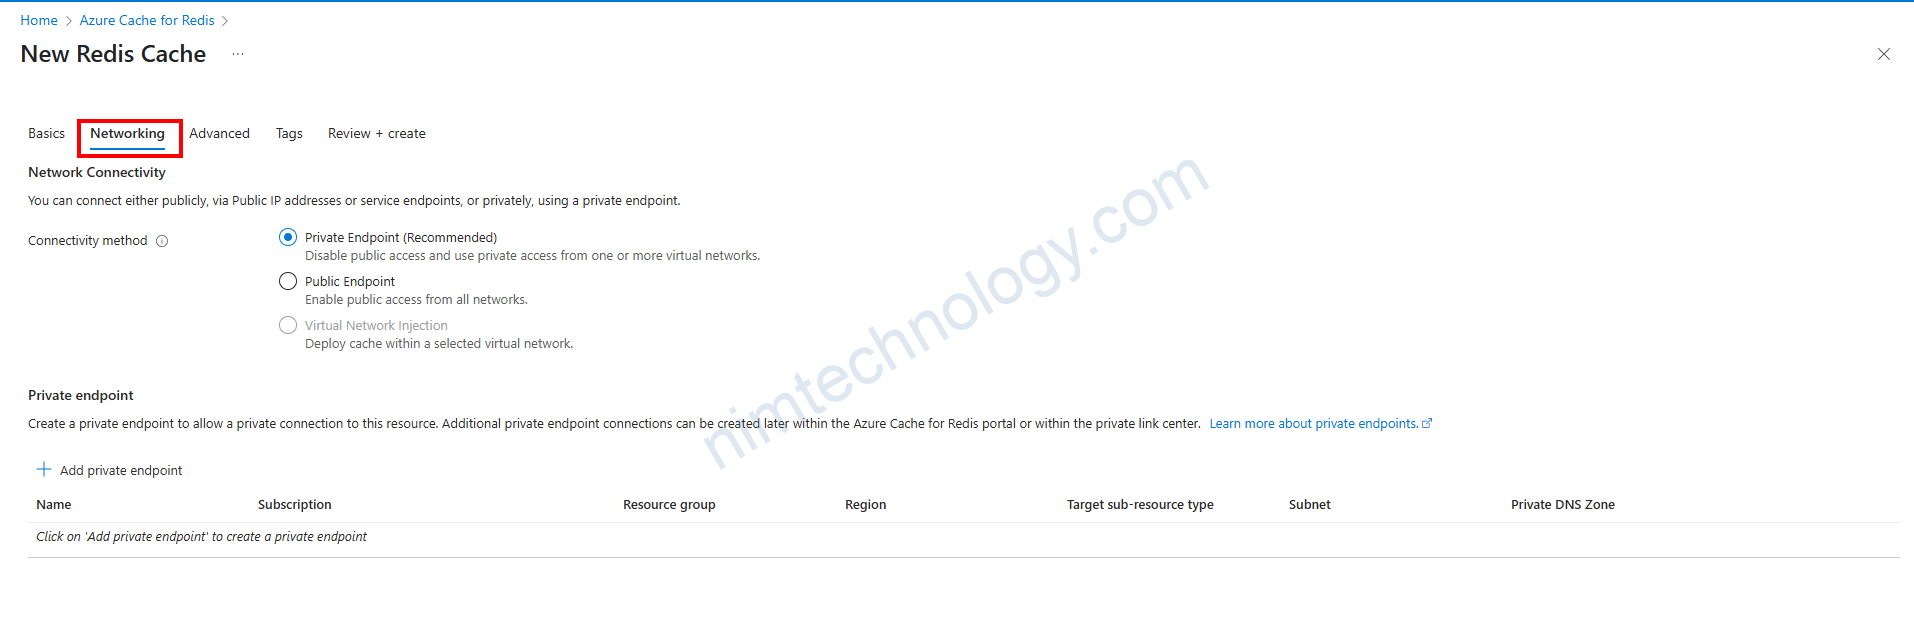
Phần network chúng ta sẽ chọn dạng Private Endpoint hay là Public Endpoint.
Phần này mình tạm thời chọn Public Endpoint.
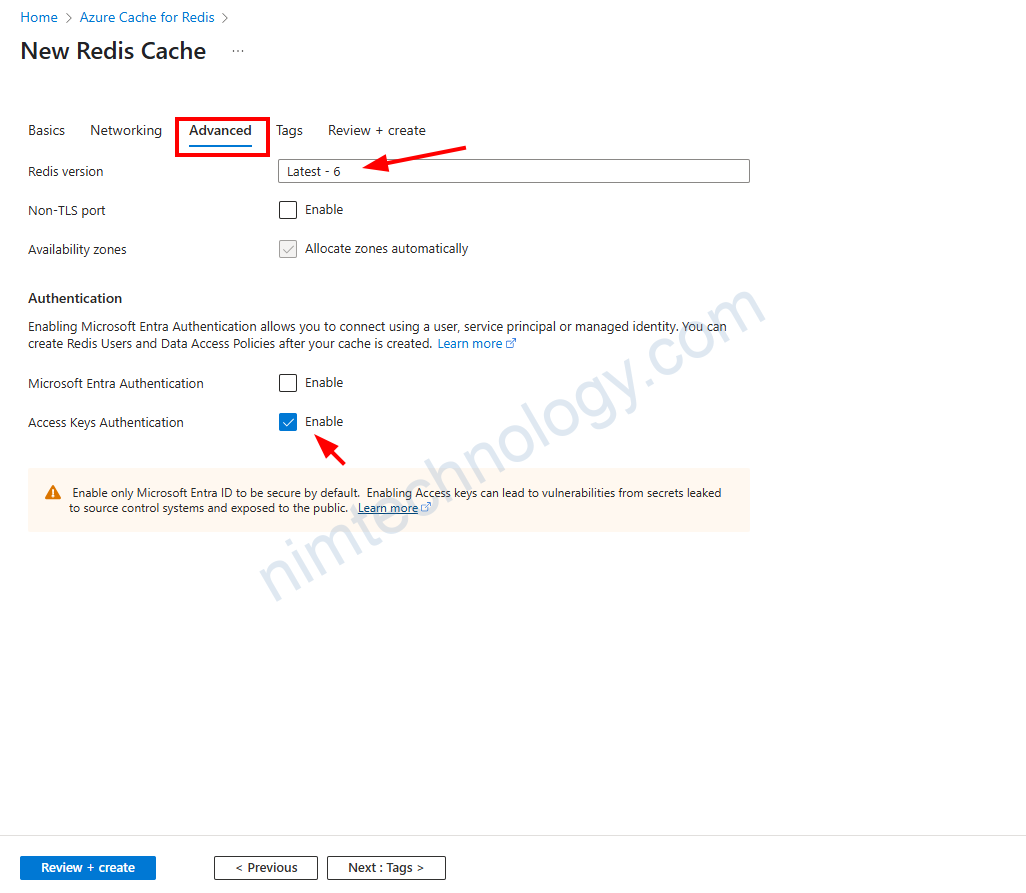
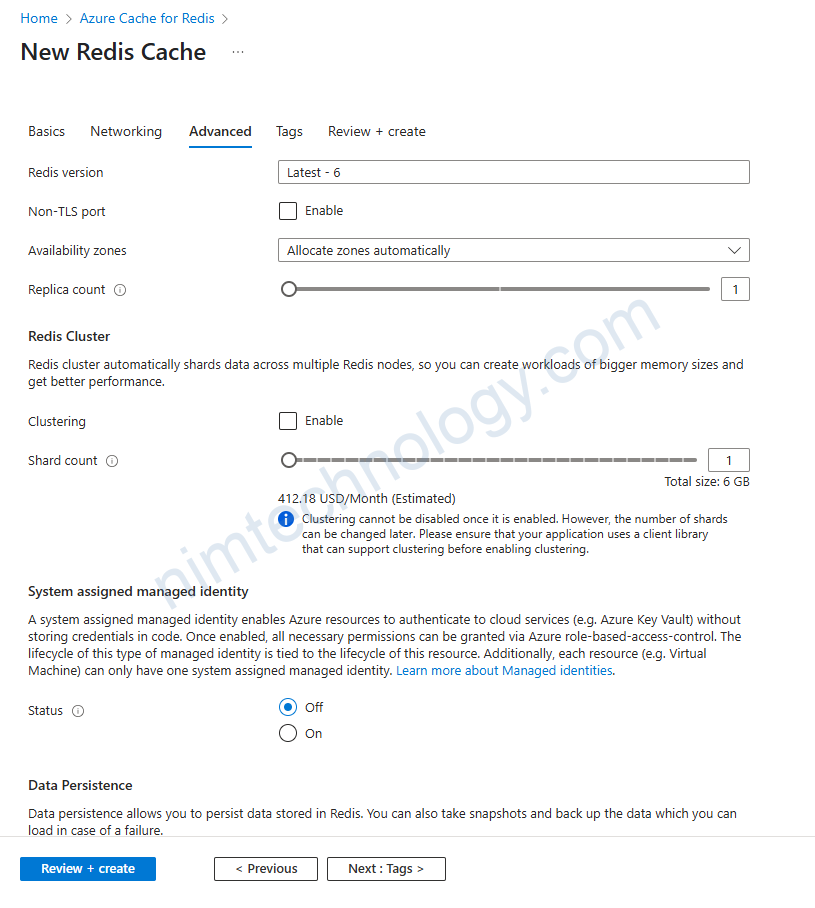
Phần này thì các bọn chọn version 6 đang là mới nhất.
Chọn access key authentication để tý đăng nhập vào redis chúng ta sẽ có key kiểu như username và password.
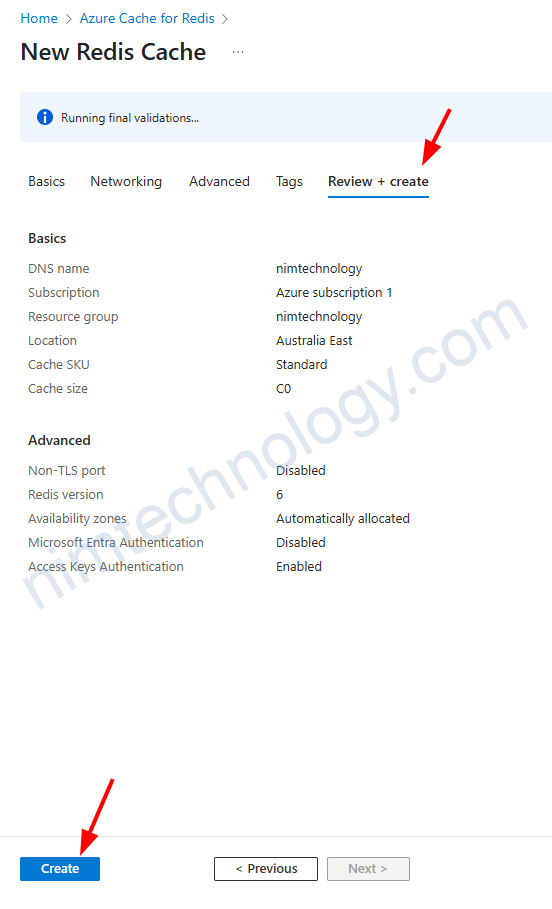
Phần cuối cùng thì nhấn review và create thôi.
Phải nói thêm nếu bạn SKU là Premium thì phần advance bạn có nhiều option hơn đê custom:
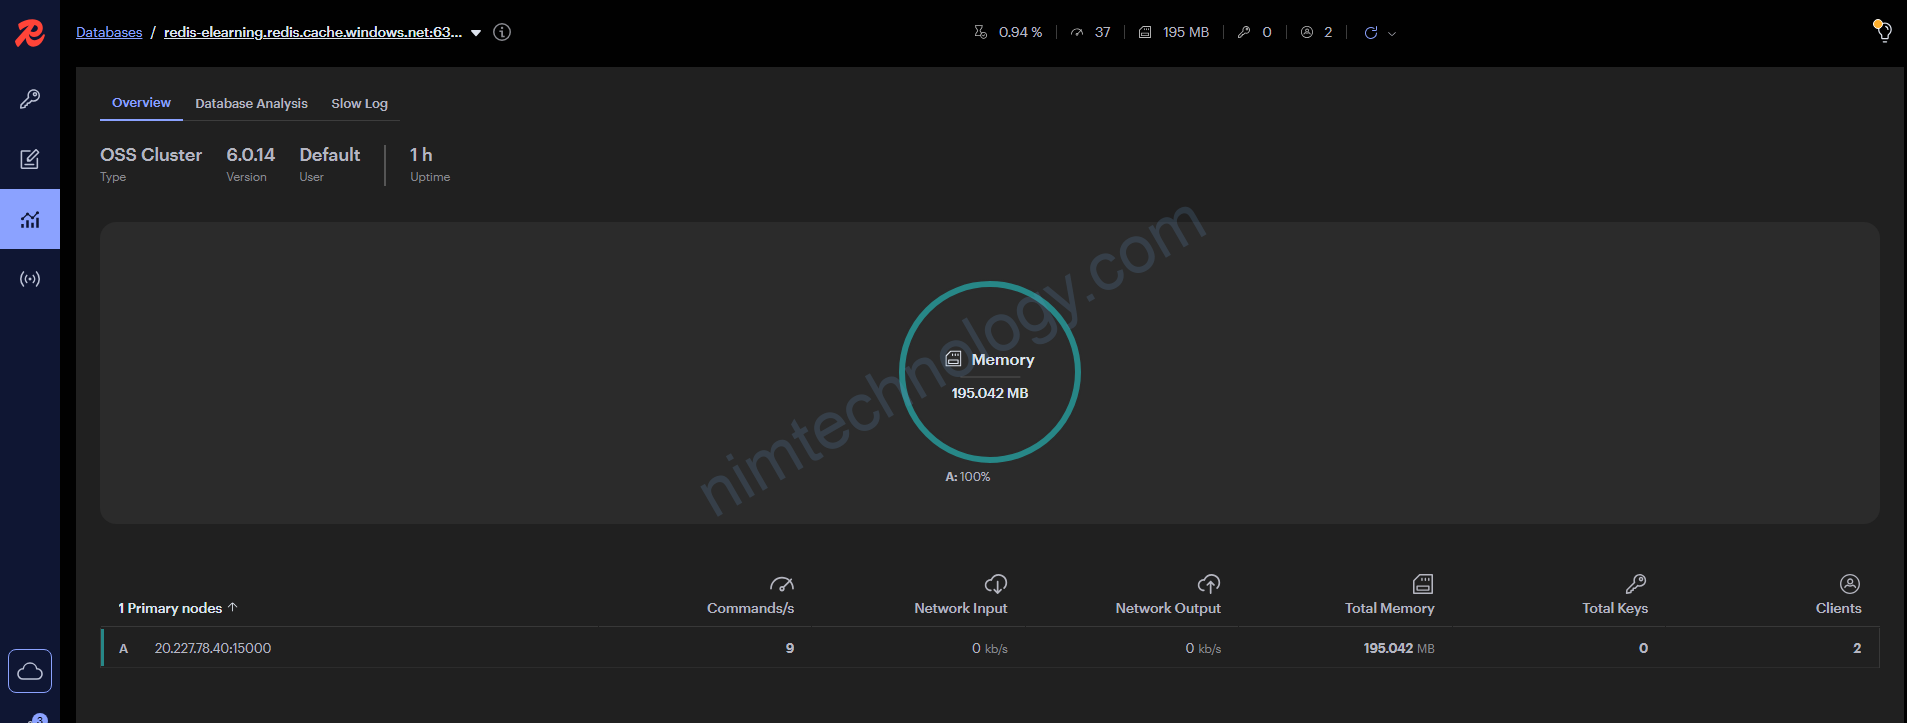
Để access và Redis cluster thì bạn vào Setting > Properties
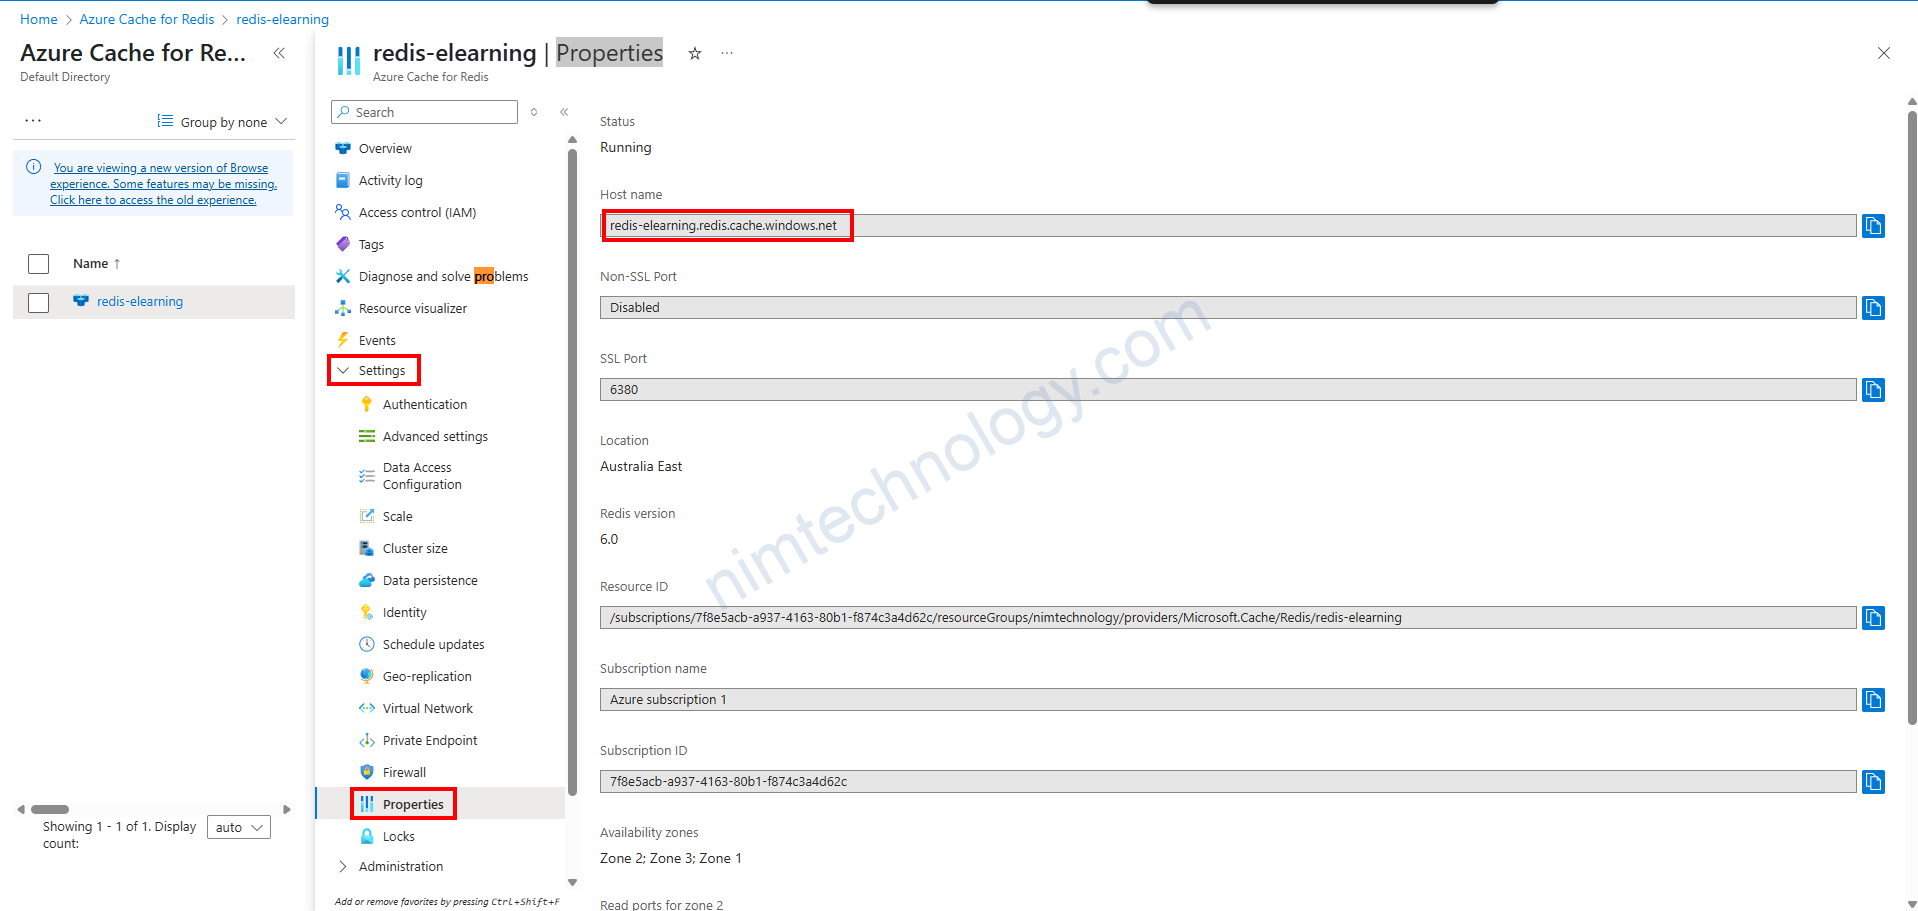
Mình có curl từ máy mình thì con redis này public internet thật

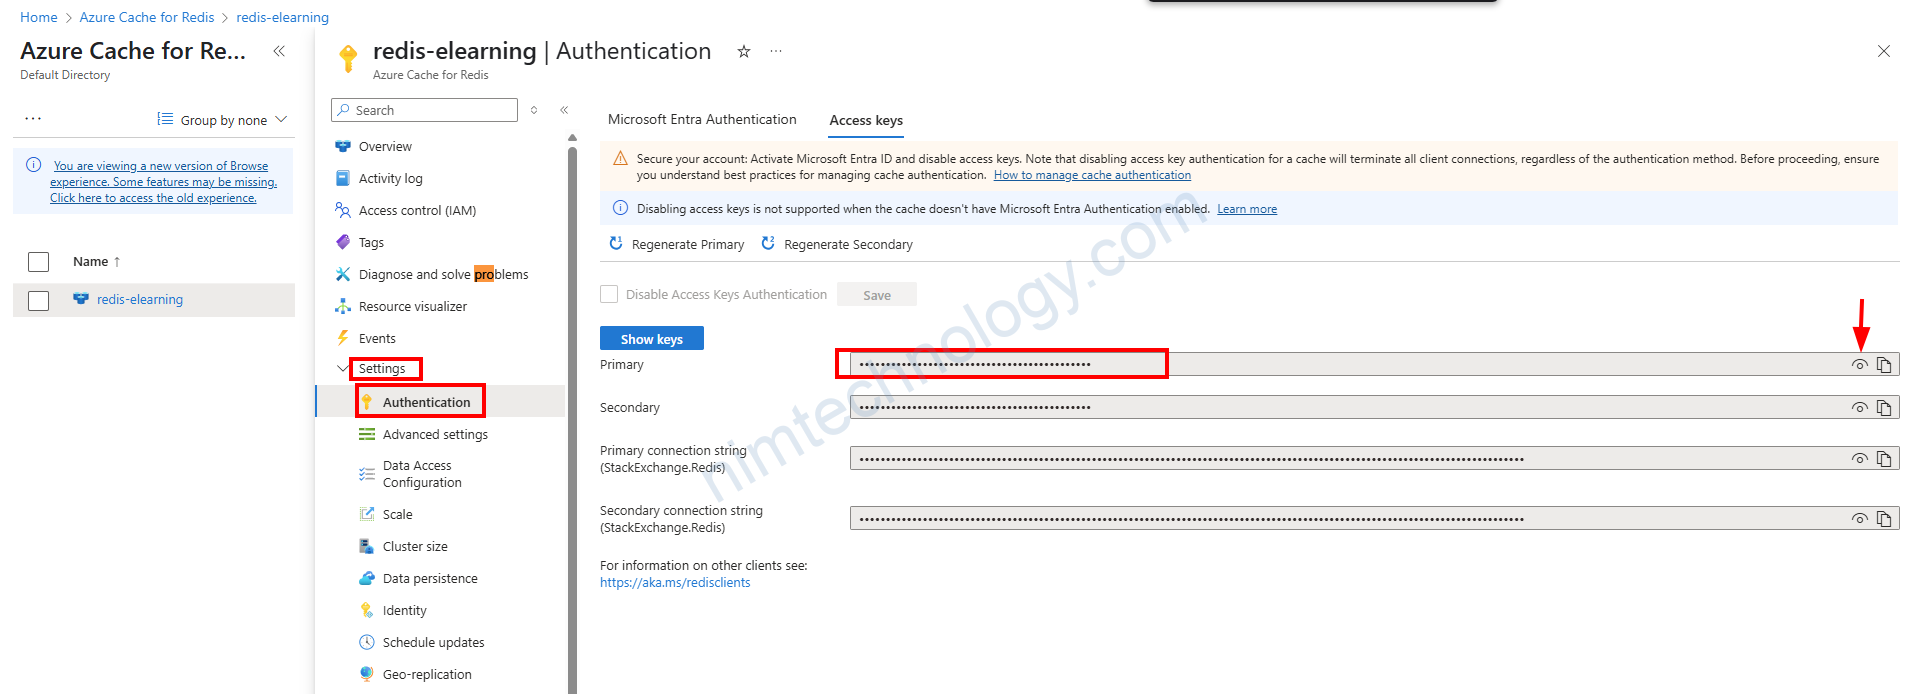
Password của redis thì bạn lấy ở setting > Authentication
Để connect test vào Cache Azure thì bạn sử dụng:
https://nimtechnology.com/2024/09/04/redisinsight-developer-gui-for-redis-by-redis/

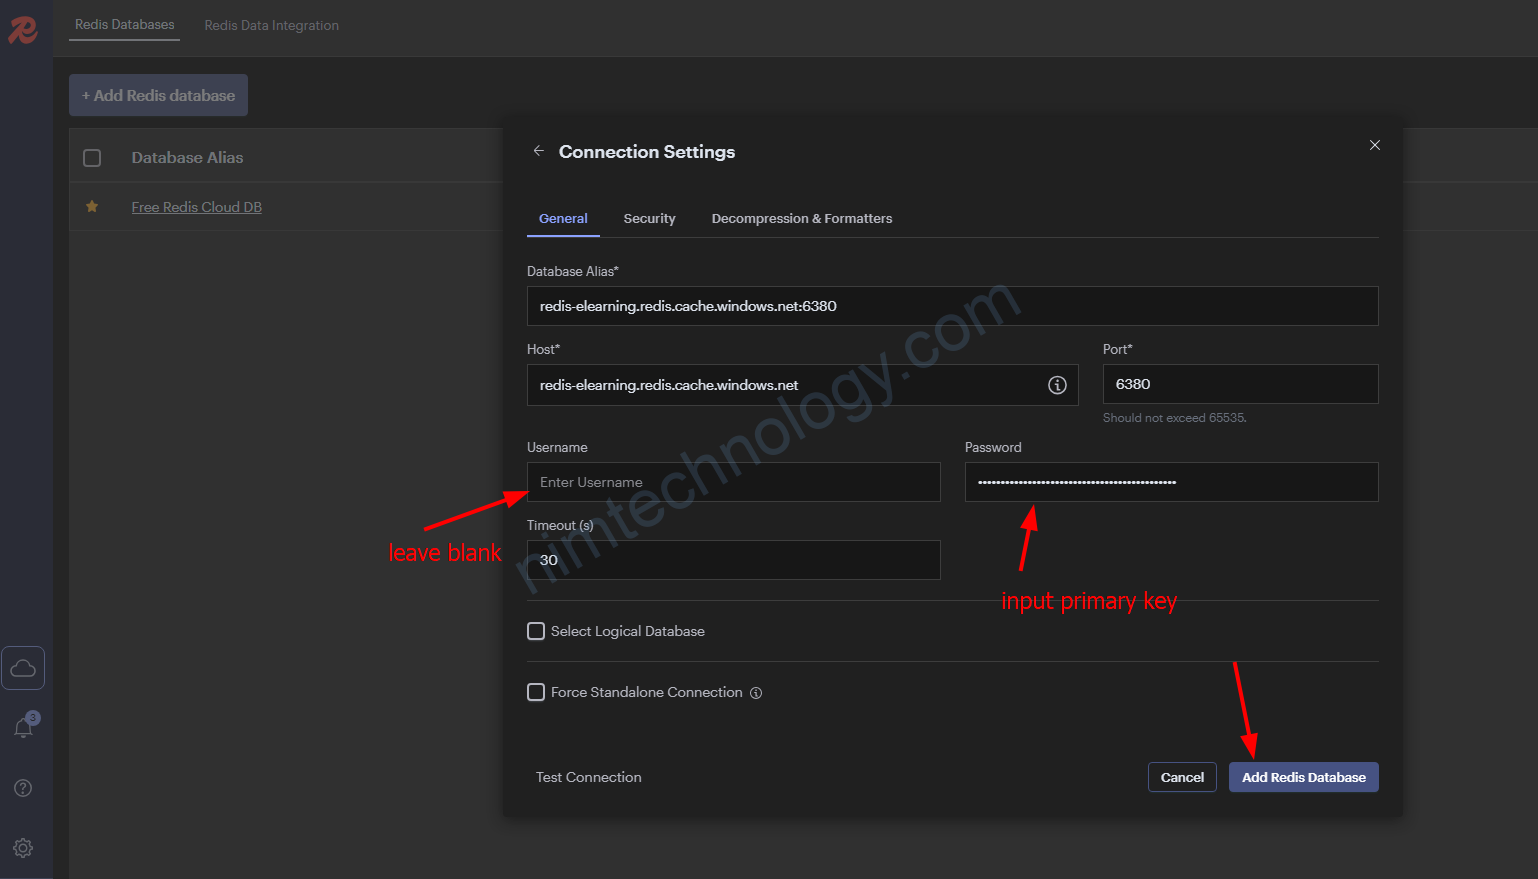
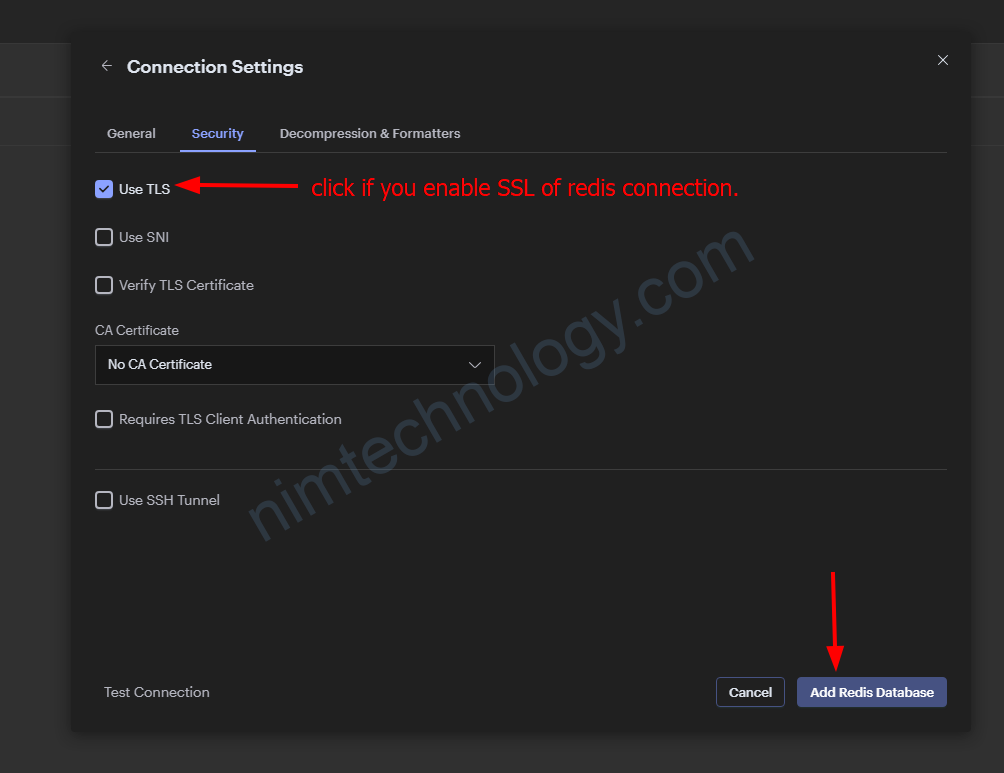
Nếu bạn có enable ssl trong connection của redis.

Nếu bạn chán click thì có thể sử dụng thẳng terraform.
module "redis" {
  source  = "Azure/avm-res-cache-redis/azurerm"
  version = "0.4.0"
  name    = "redis-elearning"
  resource_group_name =  var.resource_group_name
  location = var.resource_group_location
  sku_name            = "Premium"
  capacity = 3
  redis_version = "6.0"
  replicas_per_master = 1
  shard_count = 1
  access_keys_authentication_enabled = true
  redis_configuration = {
    enable_authentication = true # If false, use Entra ID for authentication
  }
  managed_identities = {
    system_assigned = true
  }
}
Apply Private Endpoint for Azure cache for redis.
resource "azurerm_private_dns_zone" "this" {
  name                = "privatelink.redis.cache.windows.net"
  resource_group_name = var.resource_group_name
}

resource "azurerm_private_dns_zone_virtual_network_link" "this" {
  name                  = "vnet-link"
  private_dns_zone_name = azurerm_private_dns_zone.this.name
  resource_group_name   = var.resource_group_name
  virtual_network_id    = module.vnet.vnet_id
}


module "redis" {
  source  = "Azure/avm-res-cache-redis/azurerm"
  version = "0.4.0"
  name    = "redis-elearning"
  resource_group_name =  var.resource_group_name
  location = var.resource_group_location
  sku_name            = "Premium"
  capacity = 3
  redis_version = "6.0"
  replicas_per_master = 1
  shard_count = 1
  access_keys_authentication_enabled = true
  redis_configuration = {
    enable_authentication = true # If false, use Entra ID for authentication
  }
  private_endpoints = {
    endpoint1 = {
      subnet_resource_id            = module.vnet.subnet_ids[0]
      private_dns_zone_group_name   = "private-dns-zone-group"
      private_dns_zone_resource_ids = [azurerm_private_dns_zone.this.id]
    }
  }
  managed_identities = {
    system_assigned = true
  }
}
Bạn sẽ để ý chúng ta sẽ có phần setup private endpoints ở đây:
resource "azurerm_private_dns_zone" "this" {
  name                = "privatelink.redis.cache.windows.net"
  resource_group_name = var.resource_group_name
}
Terraform tạo một Khu vực DNS Riêng tư trong Azure có tên là privatelink.redis.cache.windows.net trong nhóm tài nguyên được chỉ định.
Mục đích: DNS zone này sẽ được sử dụng để phân giải tên miền riêng tư trong mạng ảo (VNet) của bạn.
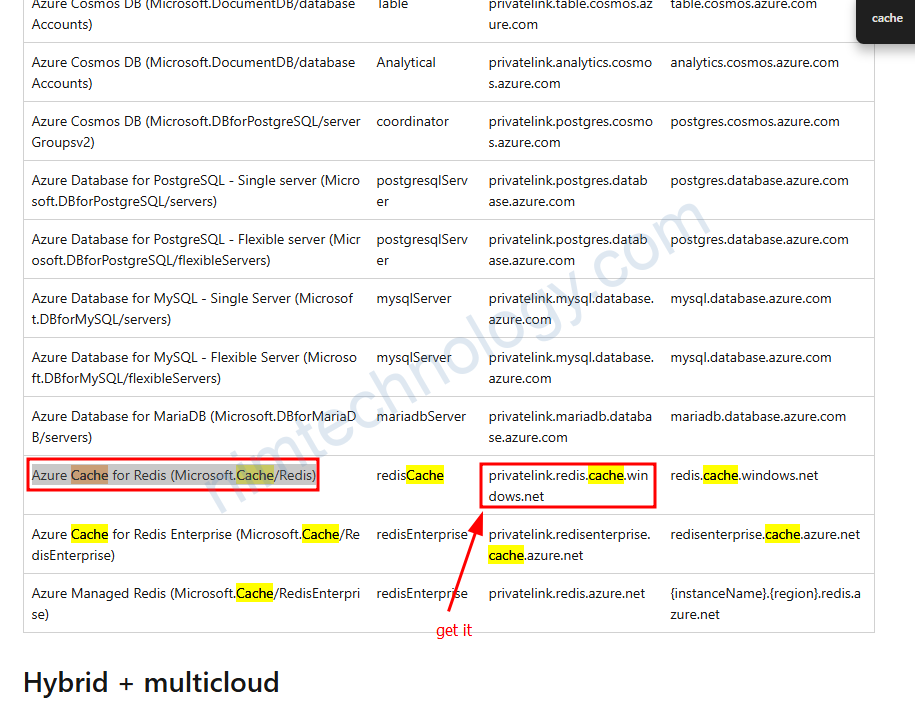
ở phần này có 1 lưu ý là không phải bạn thích khai báo domain nào cho private dns zone cũng được nó sẽ cần tuân thủ như sau:
Bước 1 bạn cần vào:
https://learn.microsoft.com/en-us/azure/private-link/private-endpoint-dns
Bước 2 bạn cần biết bạn sử dụng service nào của azure
Ở bài này chúng ta đang tạo: Azure Cache for Redis thì cần sử dụng domain là: privatelink.redis.cache.windows.net
Link DNS Zone to Virtual Network
resource "azurerm_private_dns_zone_virtual_network_link" "this" {
  name                  = "vnet-link"
  private_dns_zone_name = azurerm_private_dns_zone.this.name
  resource_group_name   = var.resource_group_name
  virtual_network_id    = module.vnet.vnet_id
}
- What happens: Terraform tạo một link between the Private DNS Zone và VNet của bạn.
- Purpose: Điều này cho phép các tài nguyên trong VNet resolve các DNS records trong private DNS zone (e.g., *.azure.nimtechnology.academy).
Provision Azure Cache for Redis with Private Endpoint
module "redis" {
  source  = "Azure/avm-res-cache-redis/azurerm"
  # ... other config ...
  private_endpoints = {
    endpoint1 = {
      subnet_resource_id            = module.vnet.subnet_ids[0]
      private_dns_zone_group_name   = "private-dns-zone-group"
      private_dns_zone_resource_ids = [azurerm_private_dns_zone.this.id]
    }
  }
}
- What happens:
- The Redis instance is created.
- A Private Endpoint được tạo trên 1 subnet nhất định.
- The Private Endpoint được liên với the Private DNS Zone thông qua một DNS Zone Group Name.
- Purpose:
- The Private Endpoint exposes(tiết lộ) a private IP address in your VNet for the Redis instance.
- The DNS Zone Group links the Private Endpoint to the DNS zone, so DNS queries for the Redis hostname resolve to the private IP.
How the Domain is Linked to the Private IP
- When the Private Endpoint is created:
- Azure automatically creates a DNS record (e.g., redis-elearning.privatelink.redis.cache.windows.net) in the Private DNS Zone.
- This record points to the private IP address assigned to the Private Endpoint in your VNet.
- Because the VNet is linked to the DNS Zone:
- Any VM or service in the VNet can resolve the Redis hostname to the private IP, ensuring traffic stays within the Azure network.
Bạn kiểm tra private endpoint như sau:
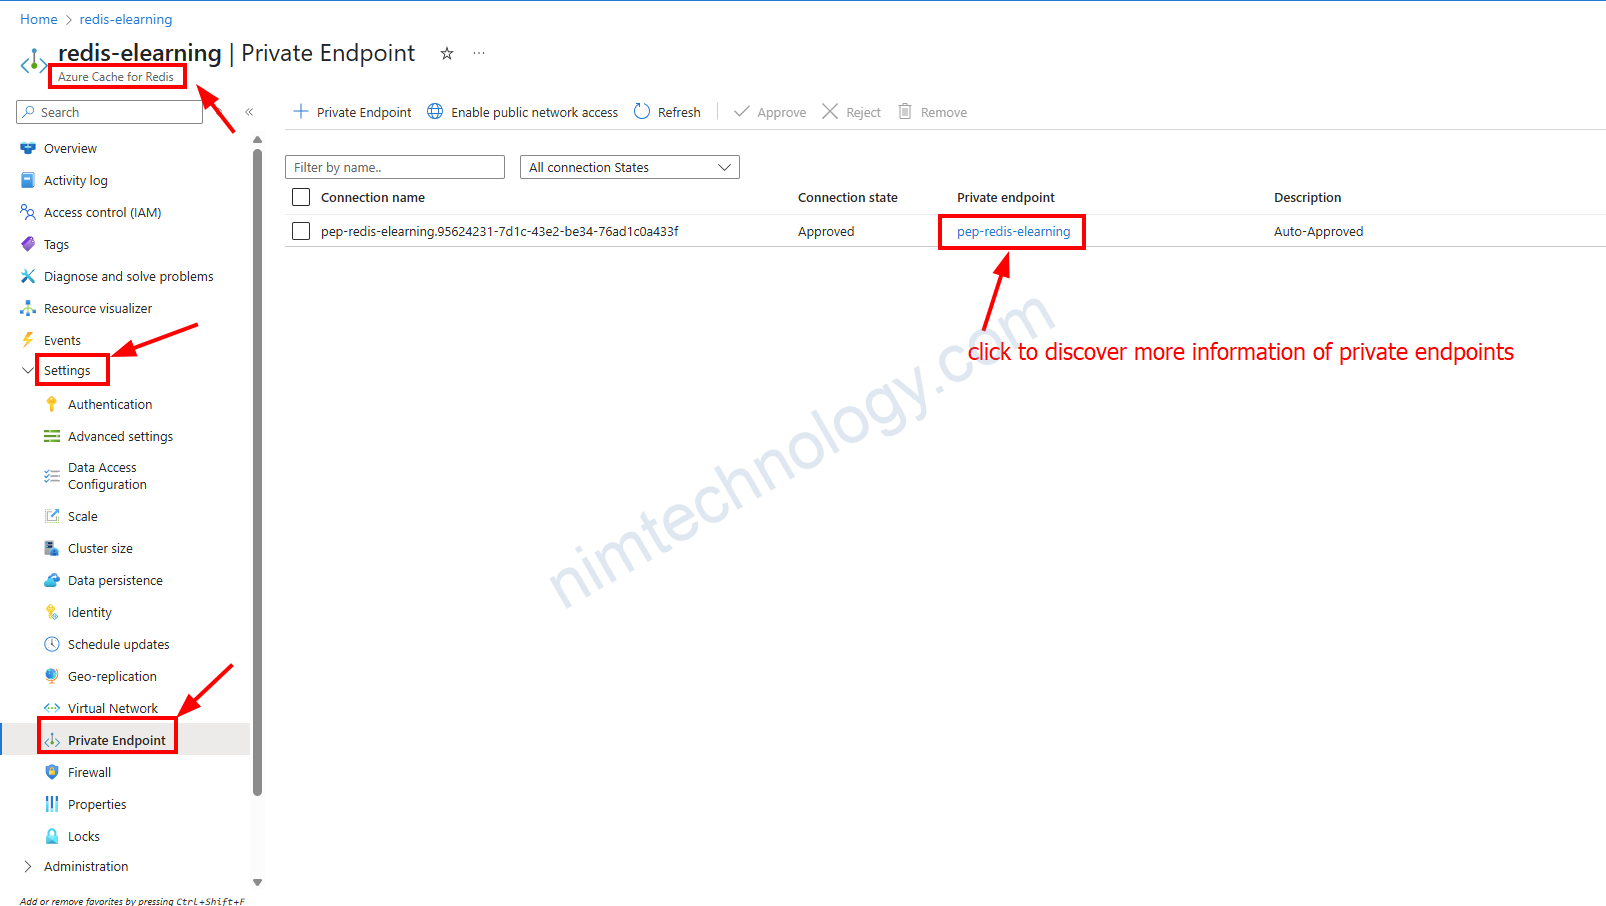
Tiếp đến bạn click vào private endpoint:
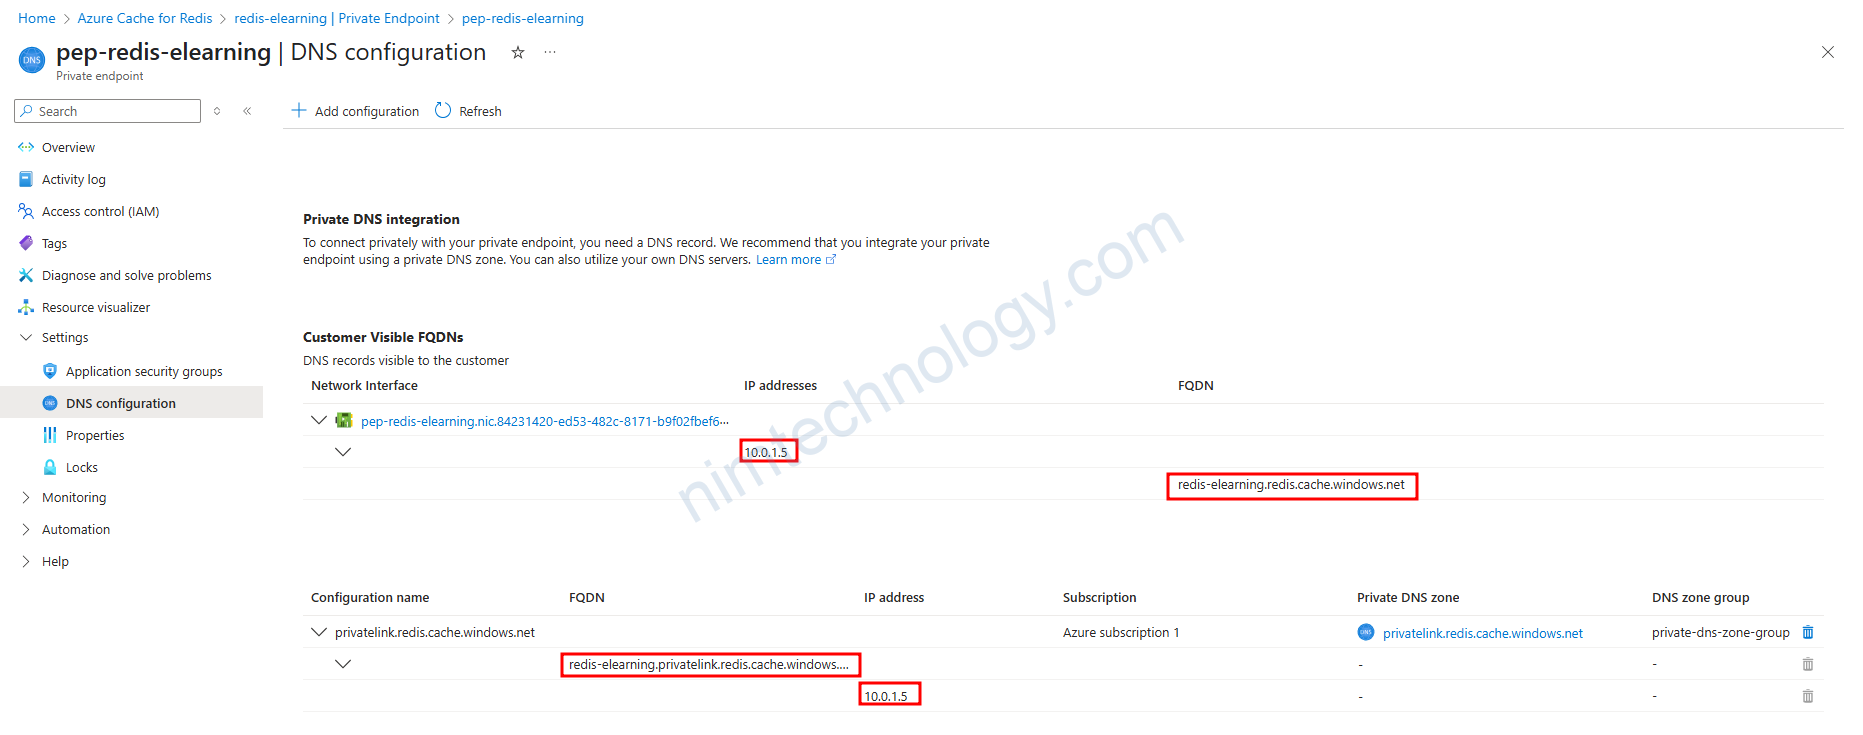
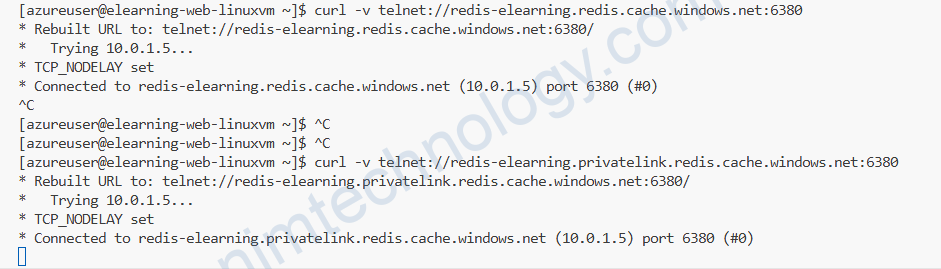
Tiếp đến là kiểm tra endpoint
Ngoài ra nếu bạn cần tạo firewall cho azure cache hoàn toàn dễ dàng:
bạn có thể tham khảo variabe sau:
variable "cache_access_policies" {
  type = map(object({
    name        = string
    permissions = string
  }))
  default     = {}
  description = <<DESCRIPTION
A map of objects describing one or more Redis cache access policies.
- `<map key>` - The map key is deliberately arbitrary to avoid issues where map keys may be unknown at plan time.
  - `name` - (Required) - The name string of the Redis Cache Access Policy. Changing this forces a new policy to be created.
  - `permissions` - (Required) - A string describing the permissions to be assigned to this Redis Cache Access Policy. Changing this forces a new policy to be created.

Example Input:

```hcl
cache_access_policies = {
  example_policy = {
    name = "example policy"
    permissions = "+@read +@connection +cluster|info"
  }
}
```