1) Introduction to AWS EC2
Nhắc đến EC2 thì anh em hiểu đơn giản đó là một máy áo trên AWS.
Nếu anh em còn xa lạ với Ec2 thì coi clip bên dưới.
Anh em có thể làm theo video để hiểu thêm.
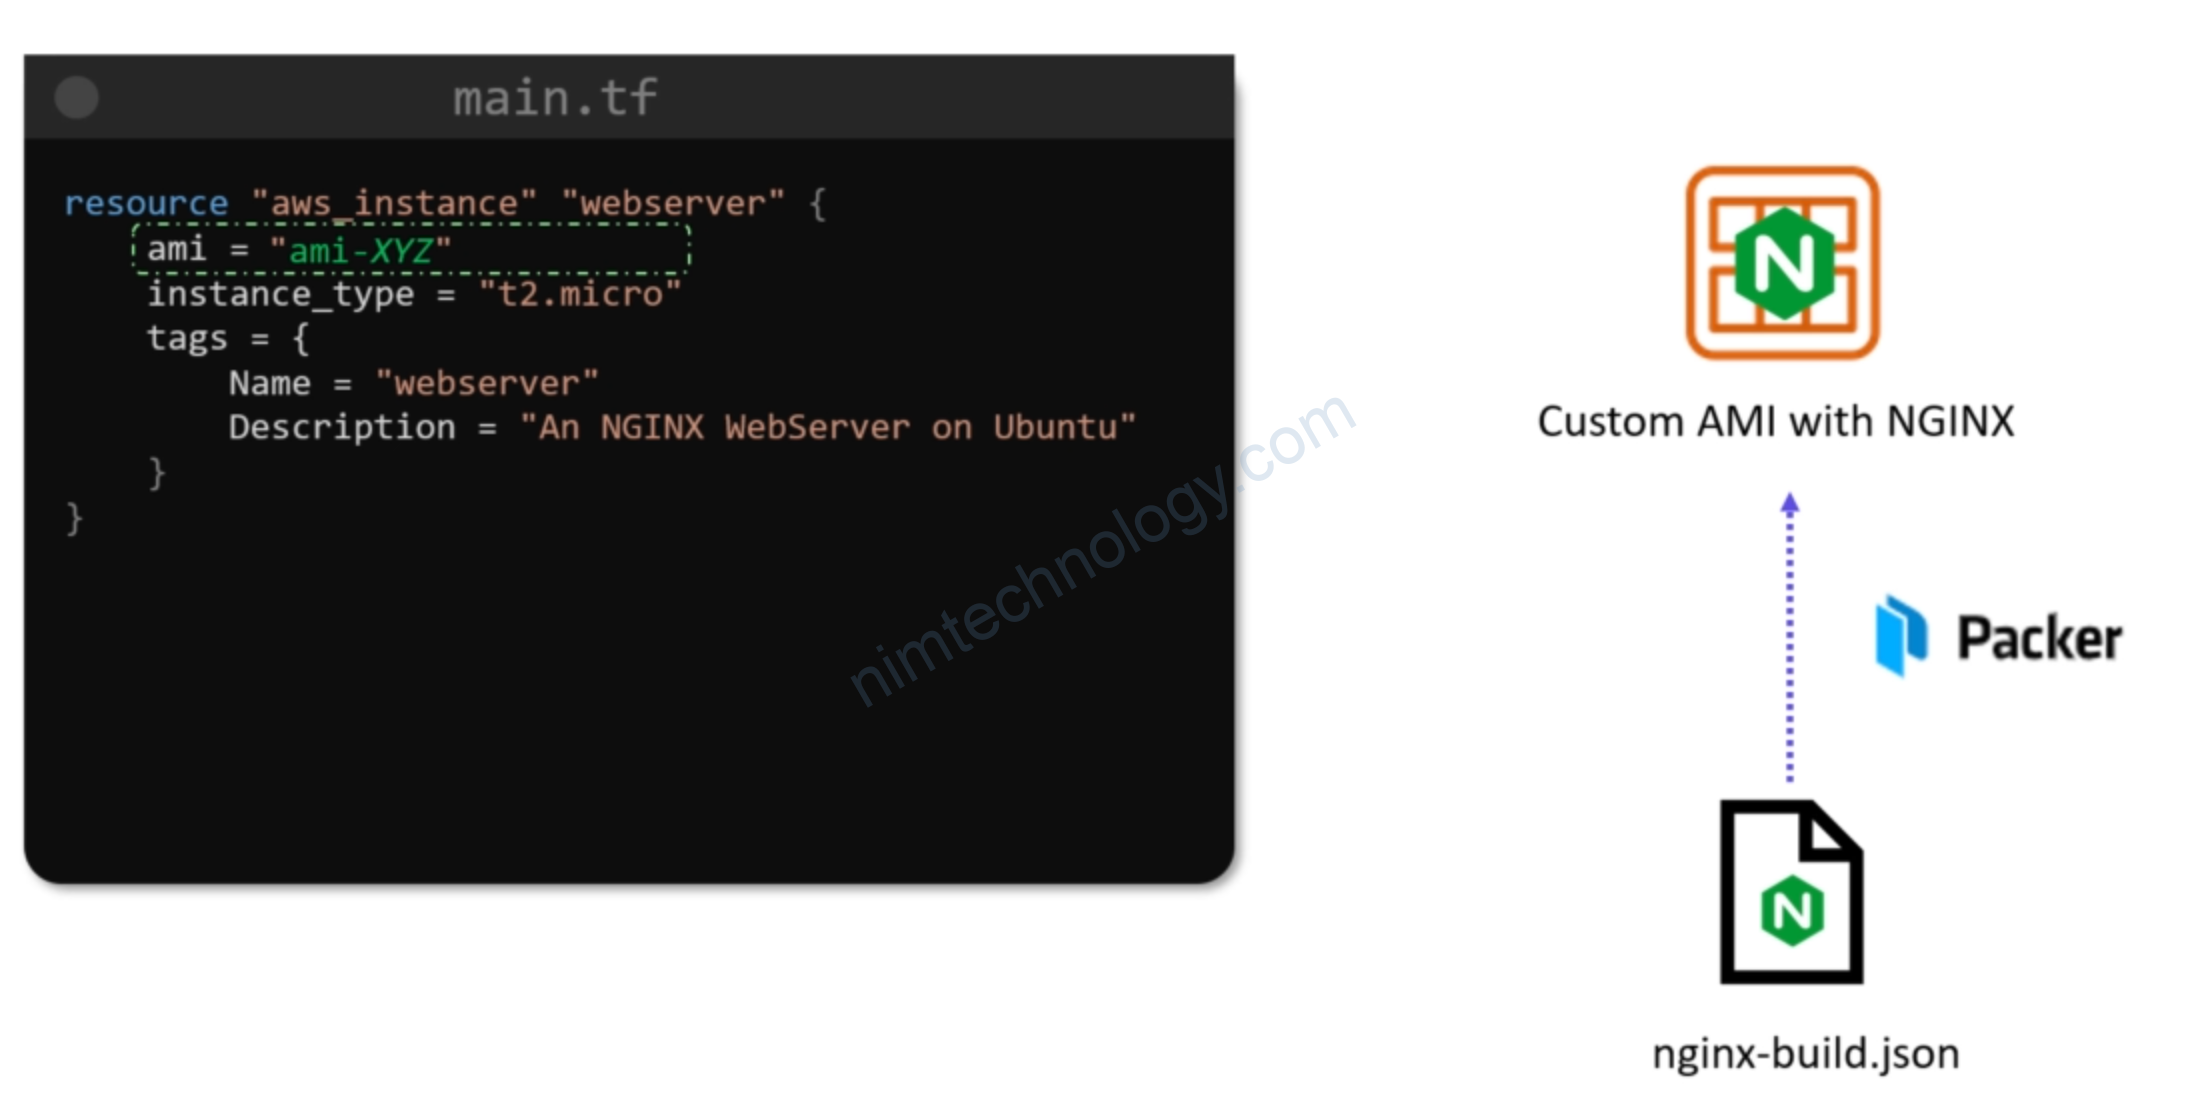
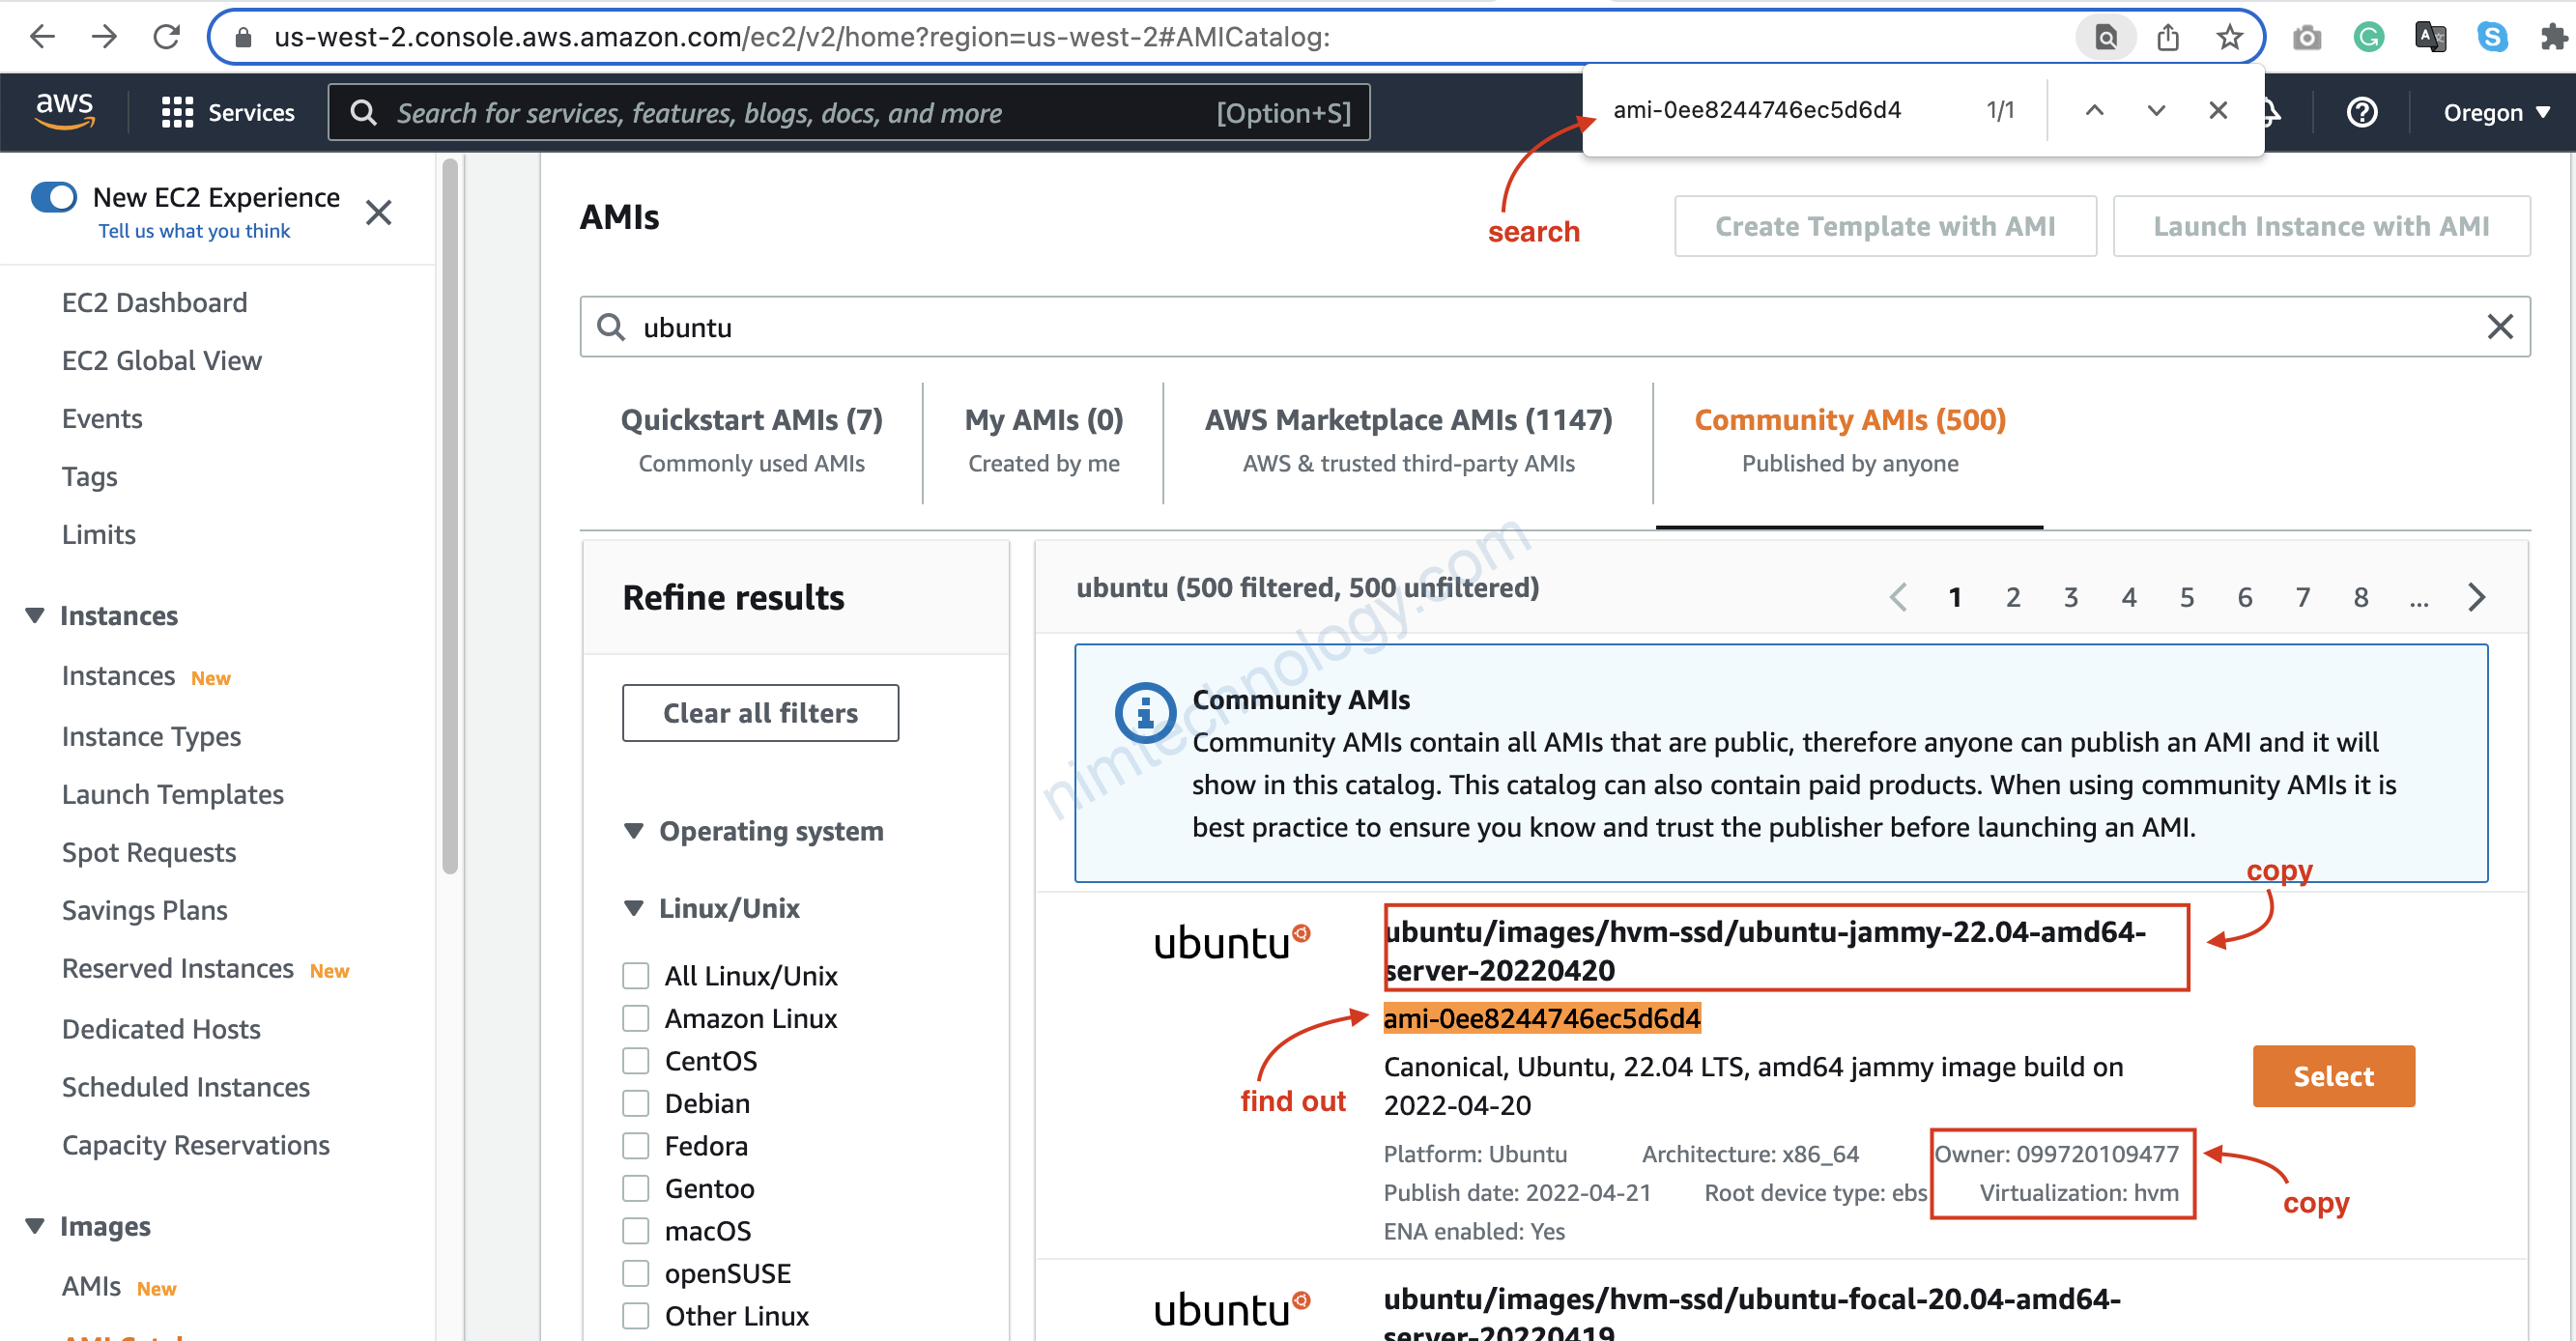
Tiếp đến là anh em tìm hiểu về AMI.
Nếu như anh em đã tạo ami trên web console và anh em có để ý thì cũng có 1 phần chọn ami
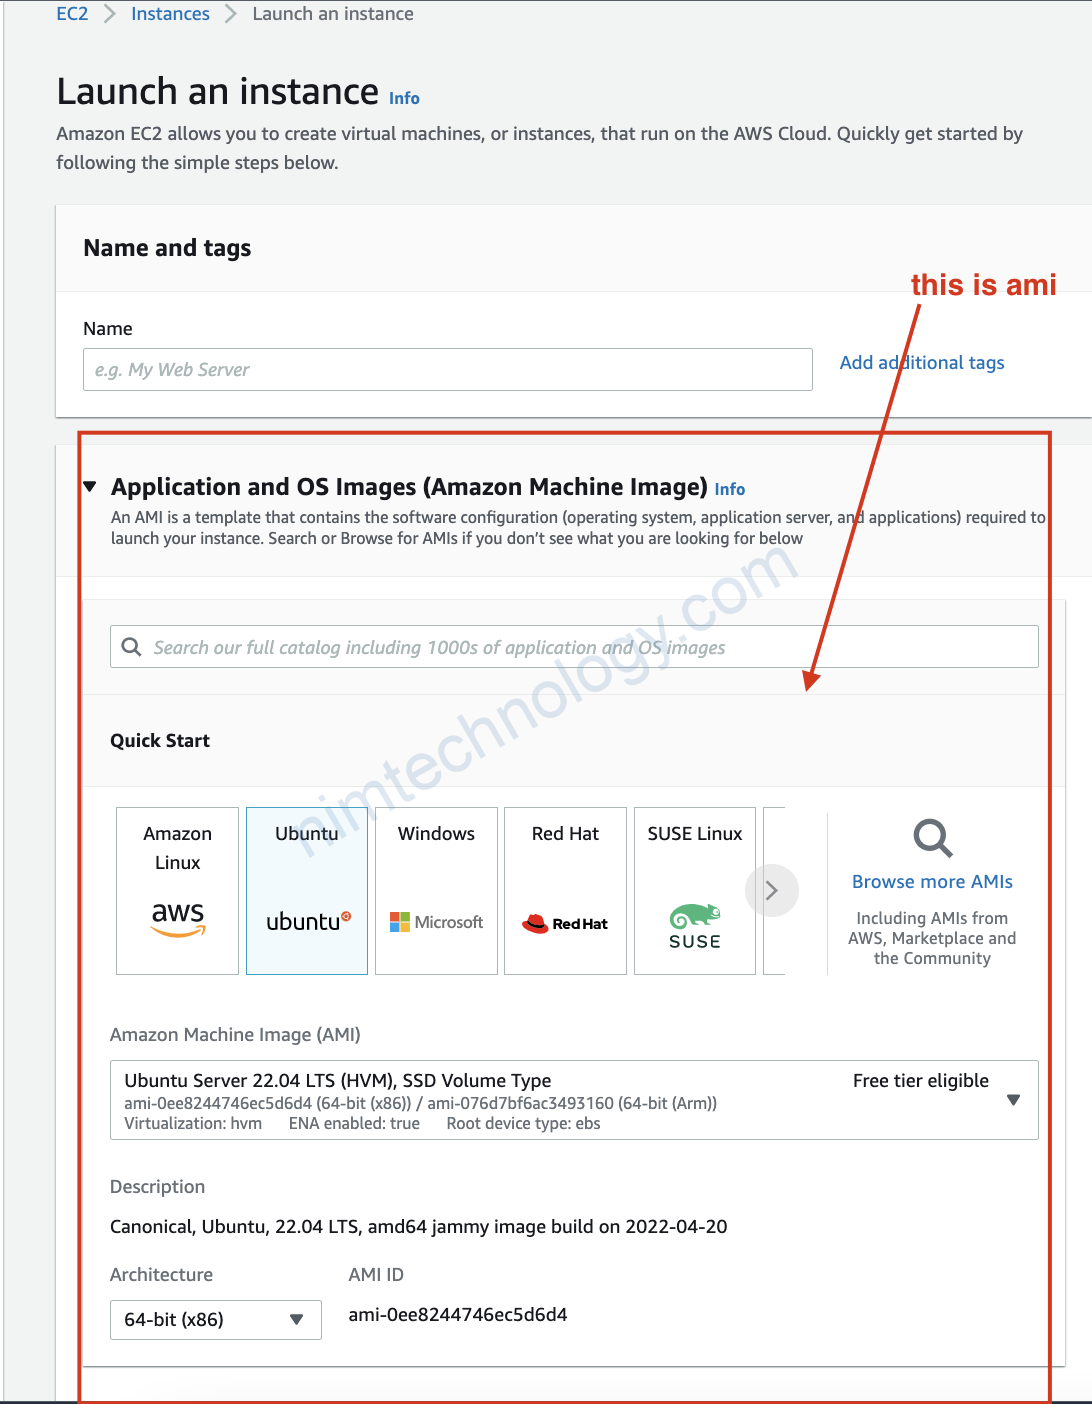
Hoặc bạn có thể sử dụng các AMI có sẵn của AWS như hình bên dưới.
mình có lướt sơ thì có khá nhiều bài viết nói về AMI là gì?
Mình tóm đơn giản.
Nếu bạn cài win cho laptop thì bạn sẽ cấn đĩa có file ISO windows đúng hem?
Còn tạo VM trên AWS thì bạn cần đến AMI vì trong AMI nó có thông tin hệ điều hành như là: ubuntu, centos, windows11, … và 1 số thông tin khác.
Ở bài lab này mình đang cần tạo VM ubuntu. vì học hành nên chúng ta chọn các ami có chữ Free tier eligible
2) AWS EC2 with Terraform
2.1) Create Instance Ubuntu
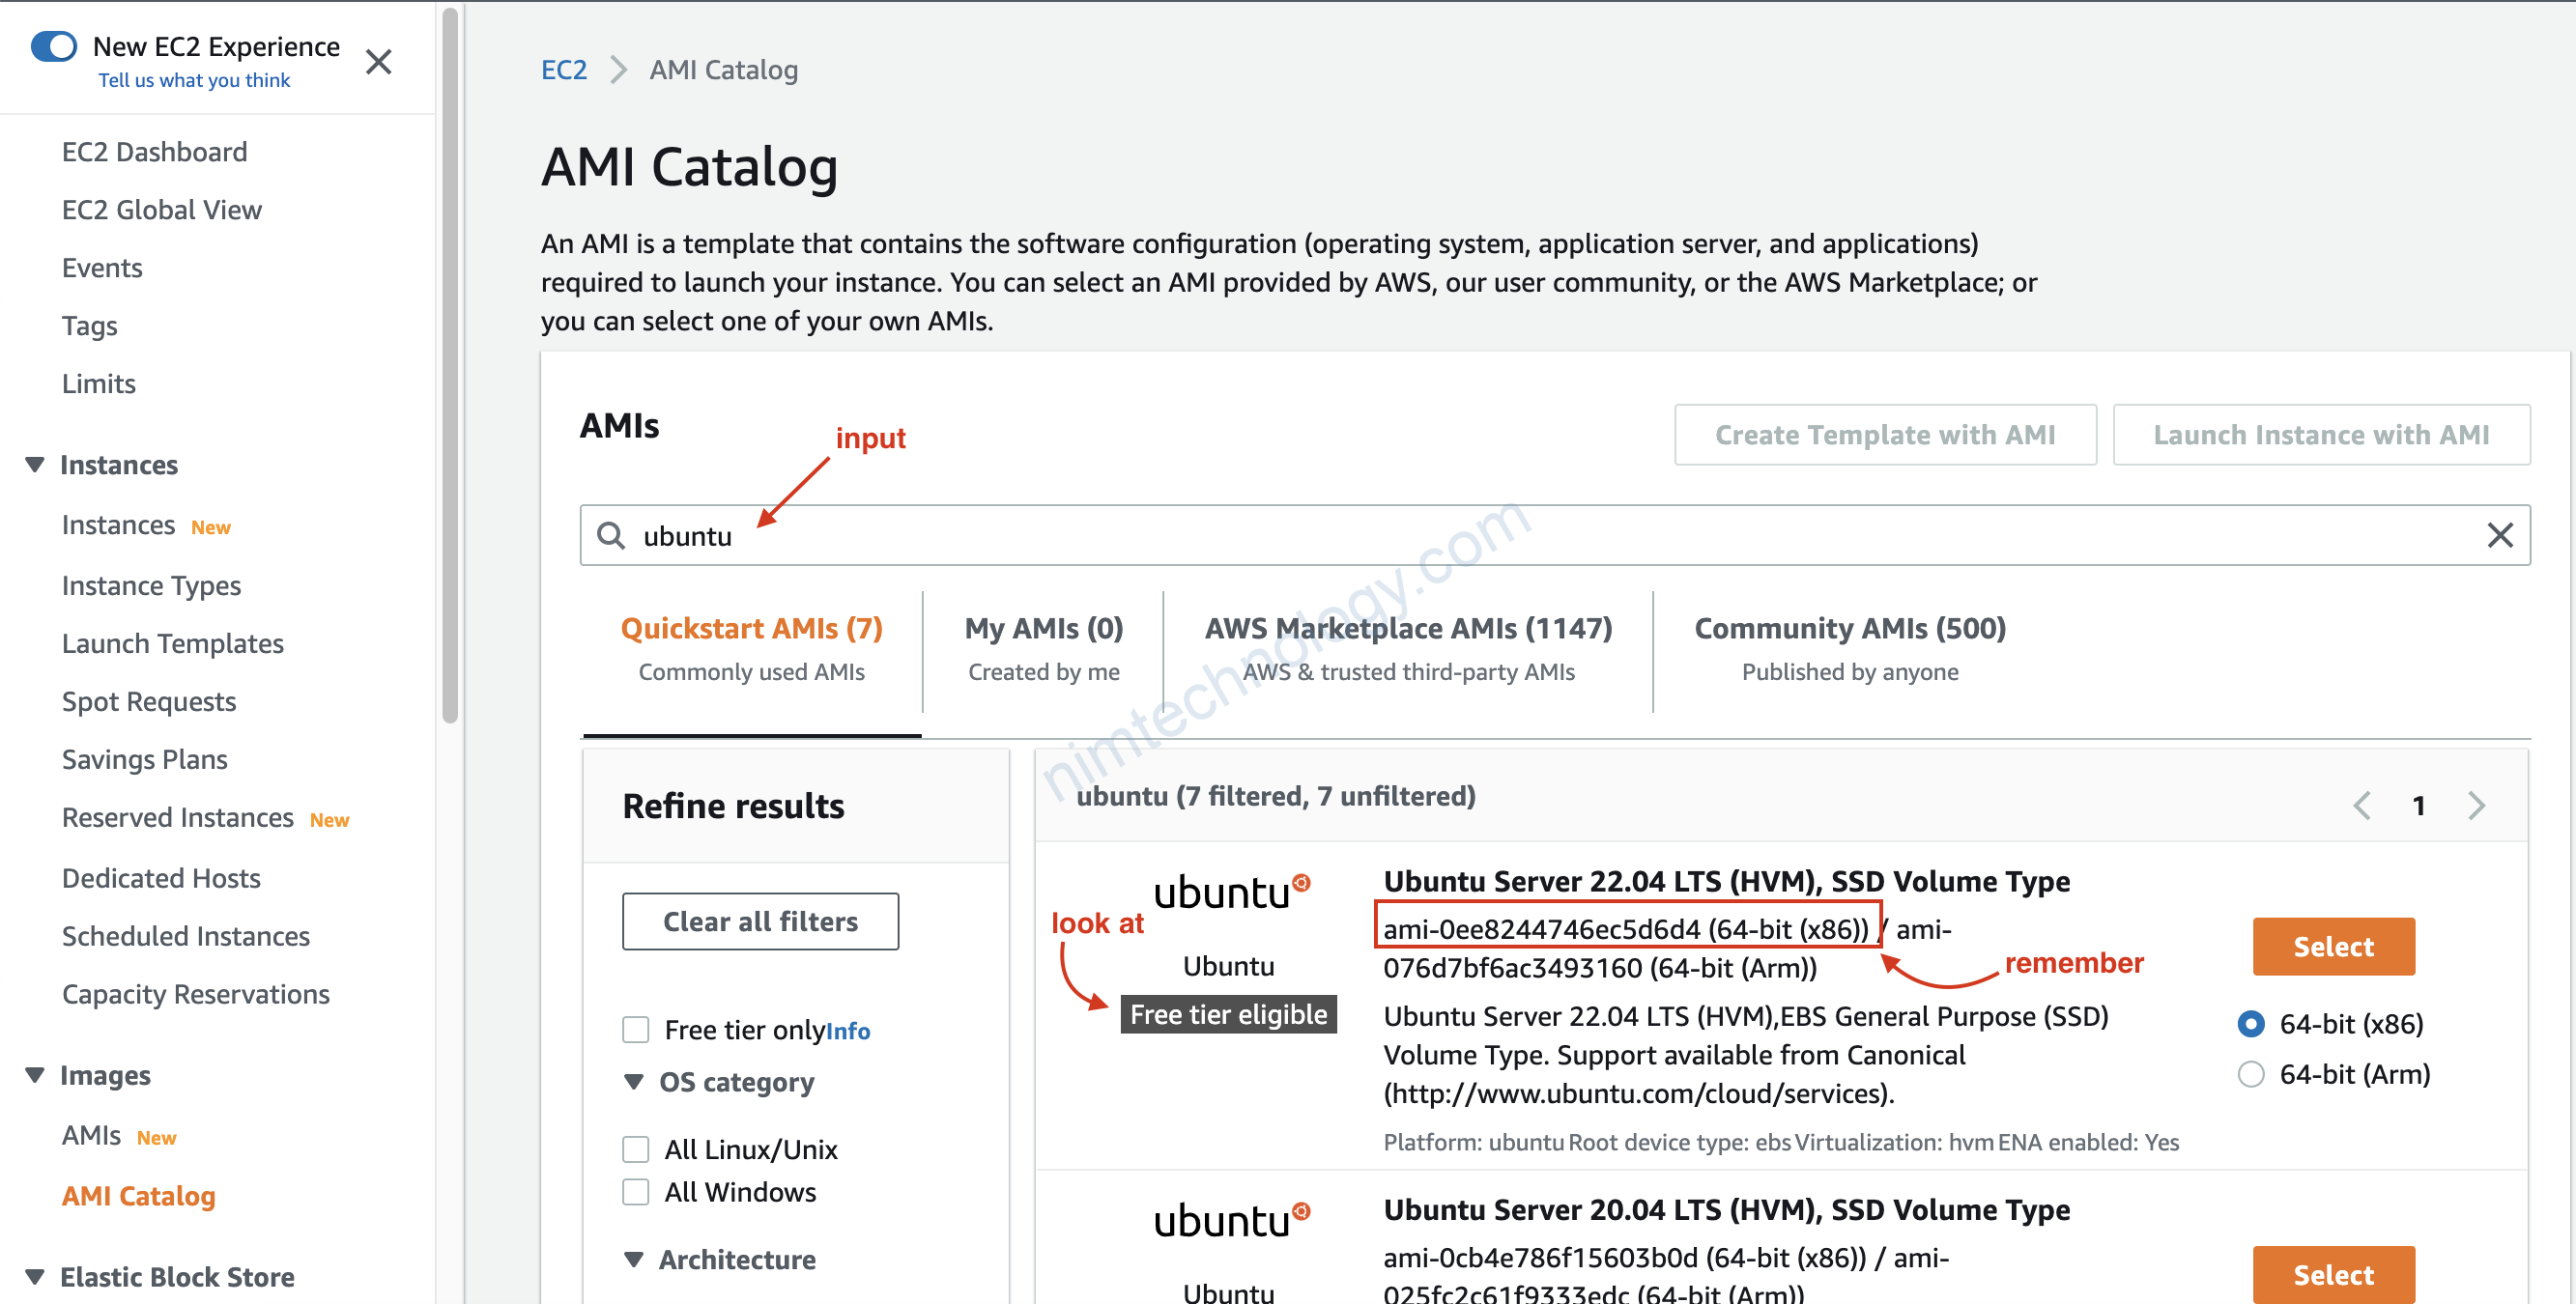
Ở ảnh trên bạn cần nhờ Virtualization Types là Hardware Virtual Machine (HVM) hay Paravirtual (PV)
Cái mình chọn là HVM.
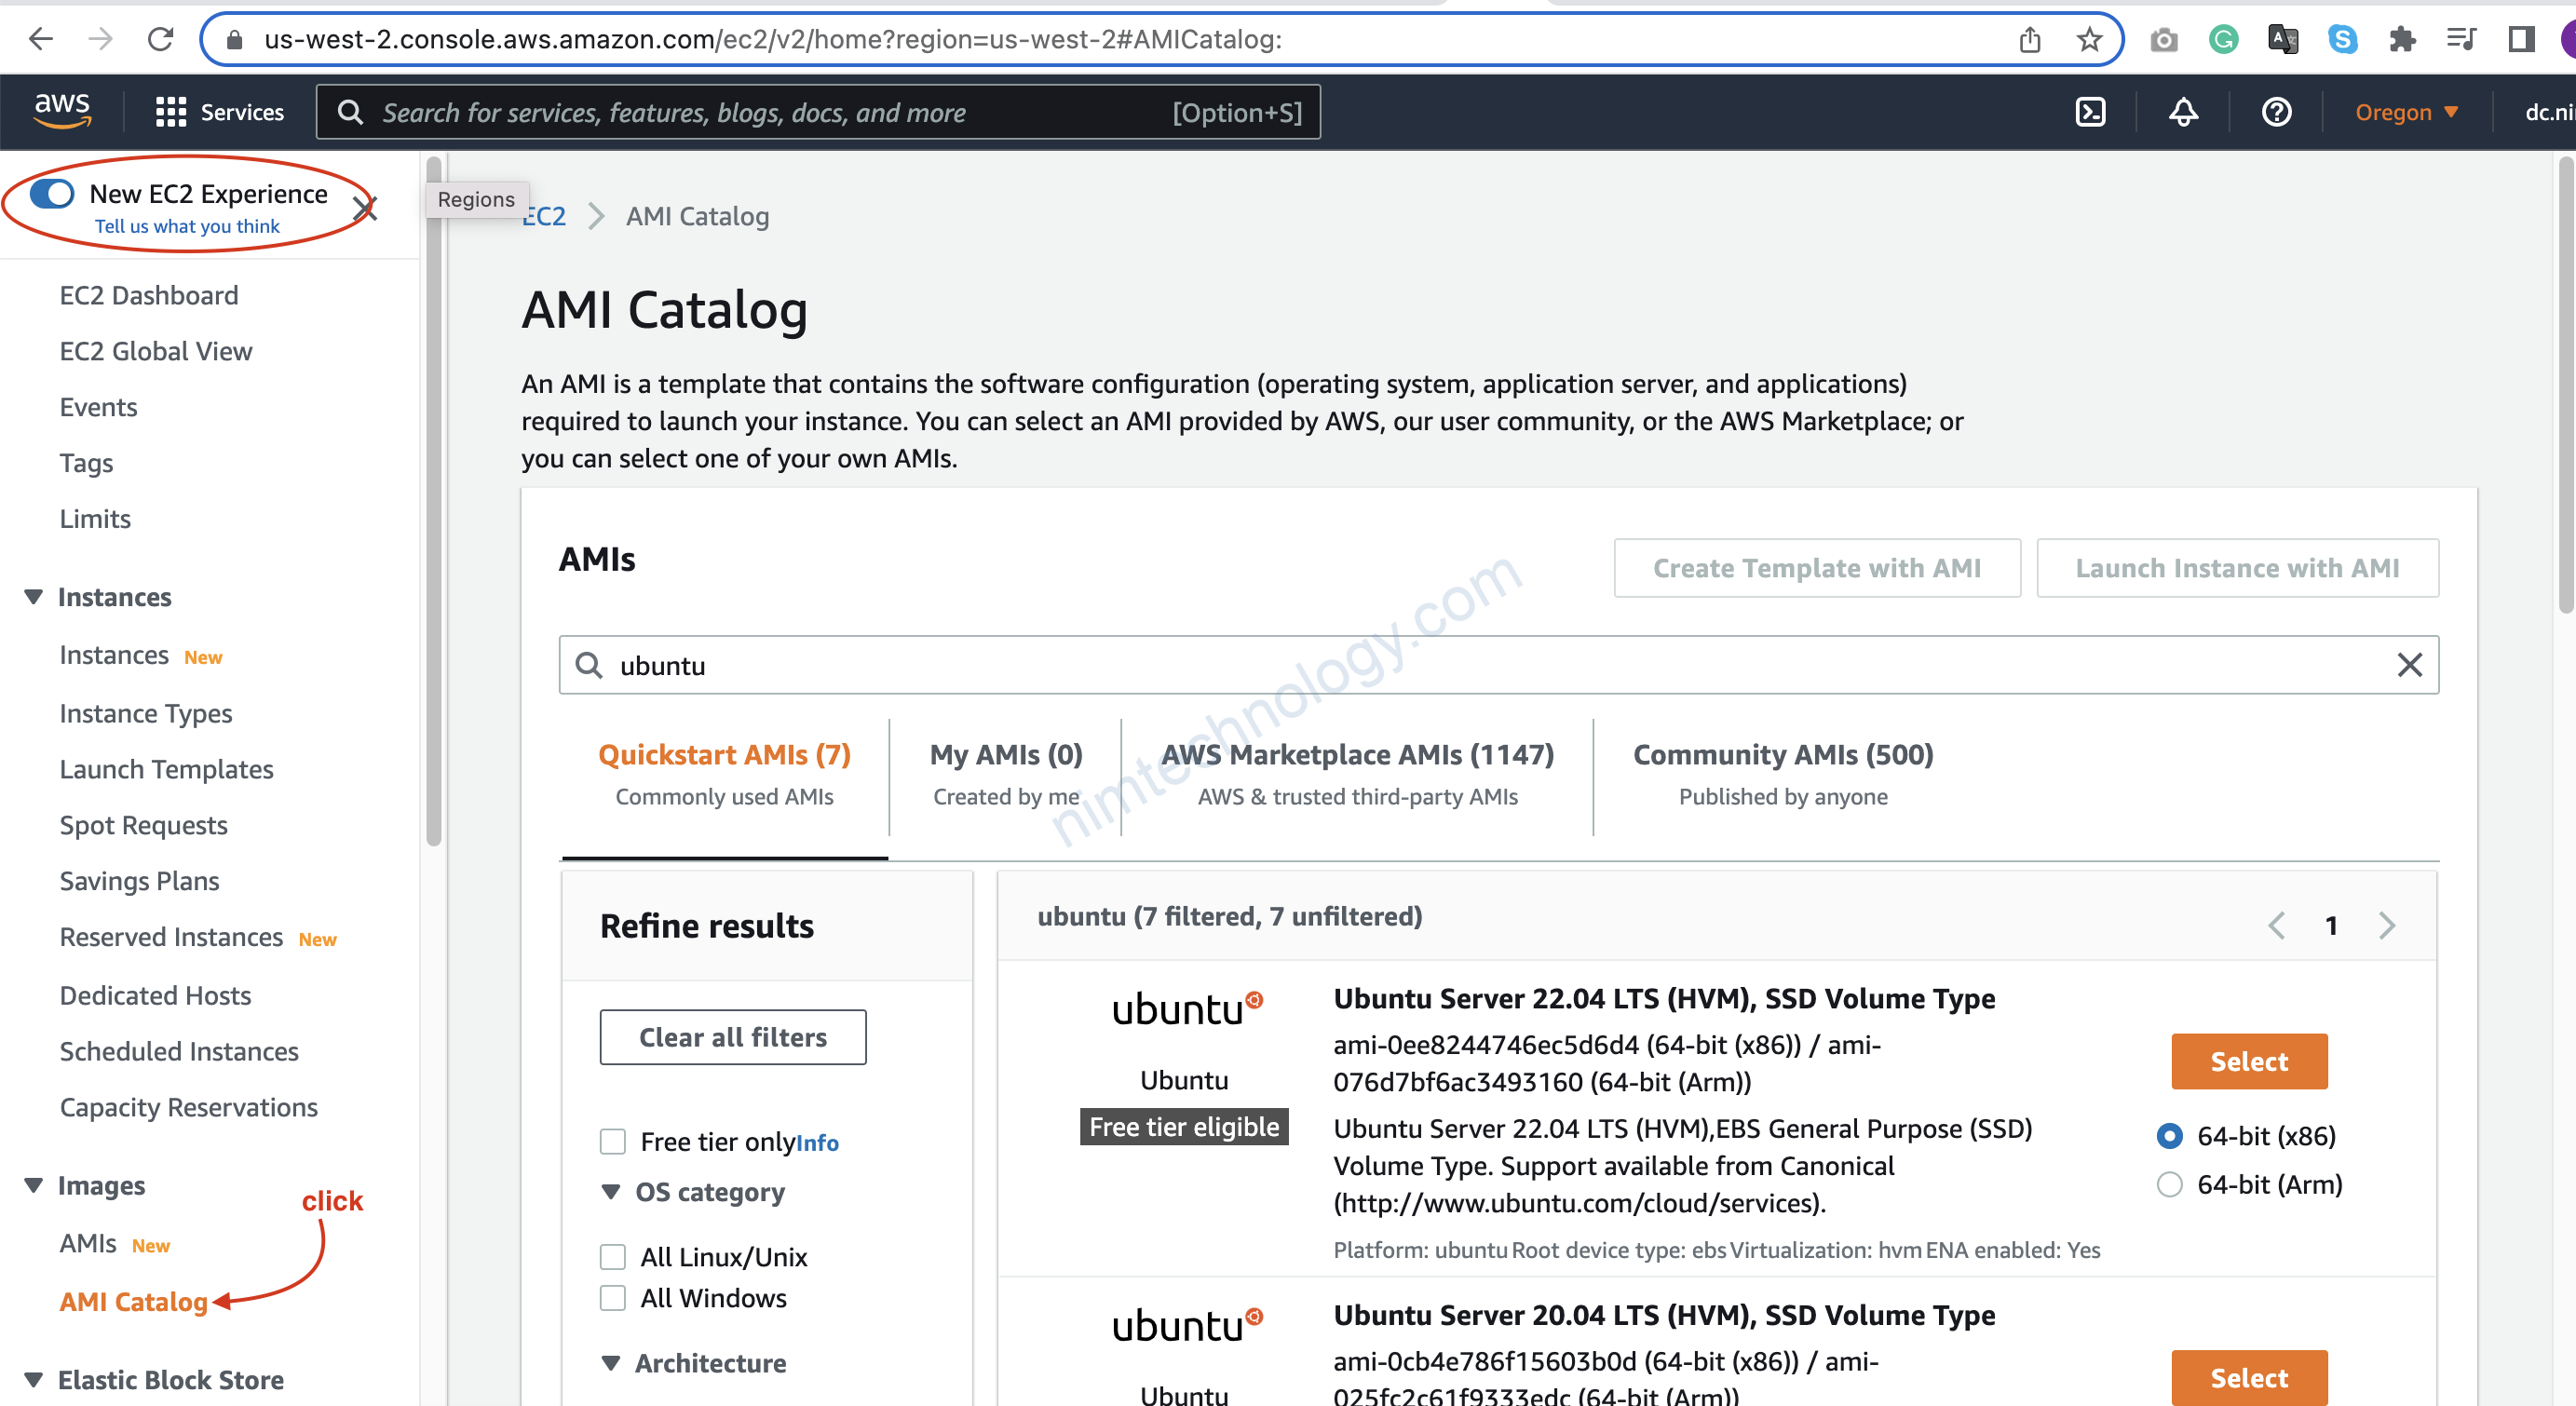
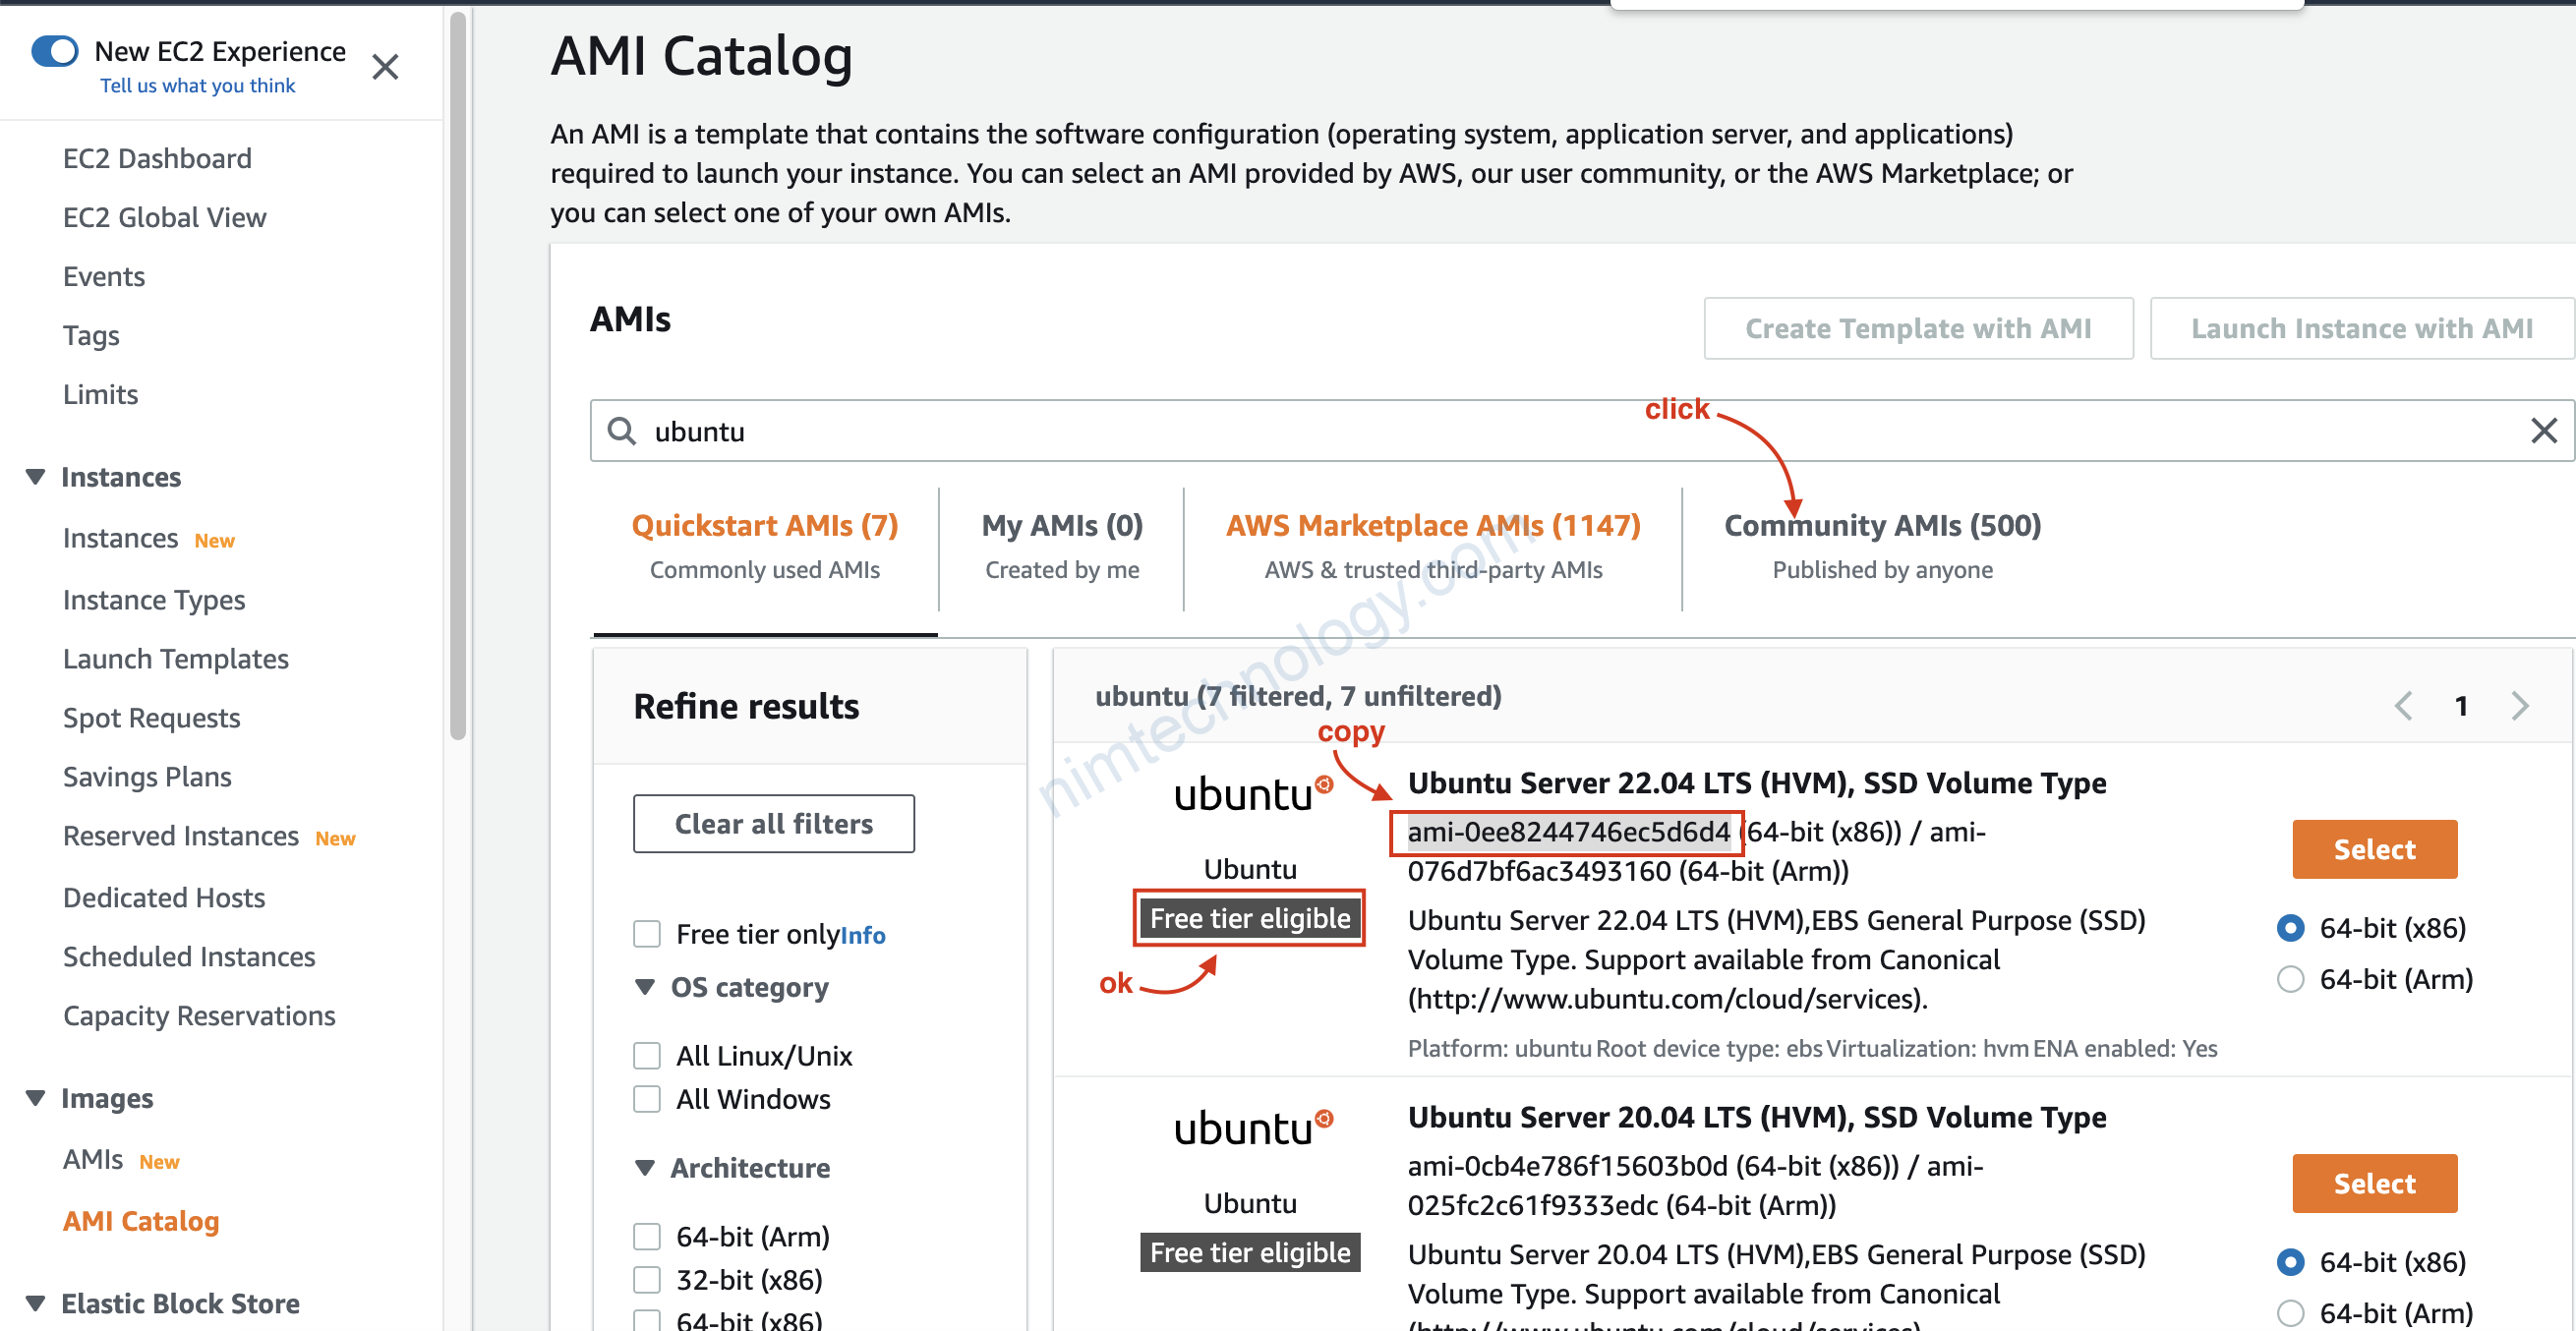
Chúng ta chuyển qua tab community để tìm tìm các thông số cần thiết.
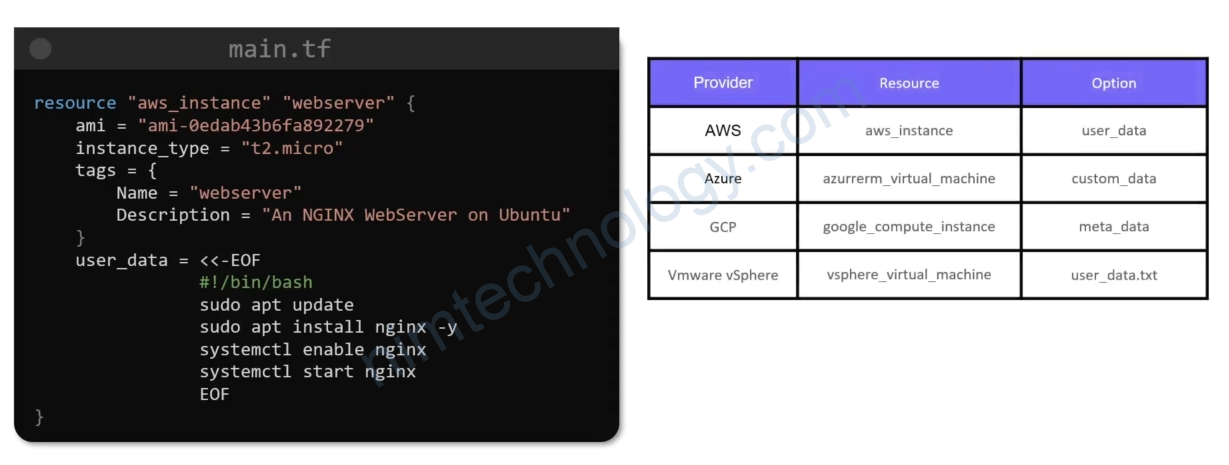
###main.tf
##########

data "aws_ami" "ubuntu" {
  most_recent = true

  filter {
    name   = "name"
    values = ["ubuntu/images/hvm-ssd/ubuntu-jammy-22.04-amd64-server-20220420"]
  }

  filter {
    name   = "virtualization-type"
    values = ["hvm"]
  }

  owners = ["099720109477"]
}


resource "aws_instance" "webserver" {
  ami           = data.aws_ami.ubuntu.id
  instance_type = "t2.micro"

  tags = {
    Name = "webserver"
    Desciption = "A Nginx Webserver on Ubuntu"
  }
  user_data = <<-EOF
                #!/bin/bash
                sudo apt update -y
                sudo apt install nginx -y
                systemctl enable nginx
                systemctl start nginx
                EOF
}
https://registry.terraform.io/providers/hashicorp/aws/latest/docs/resources/instance

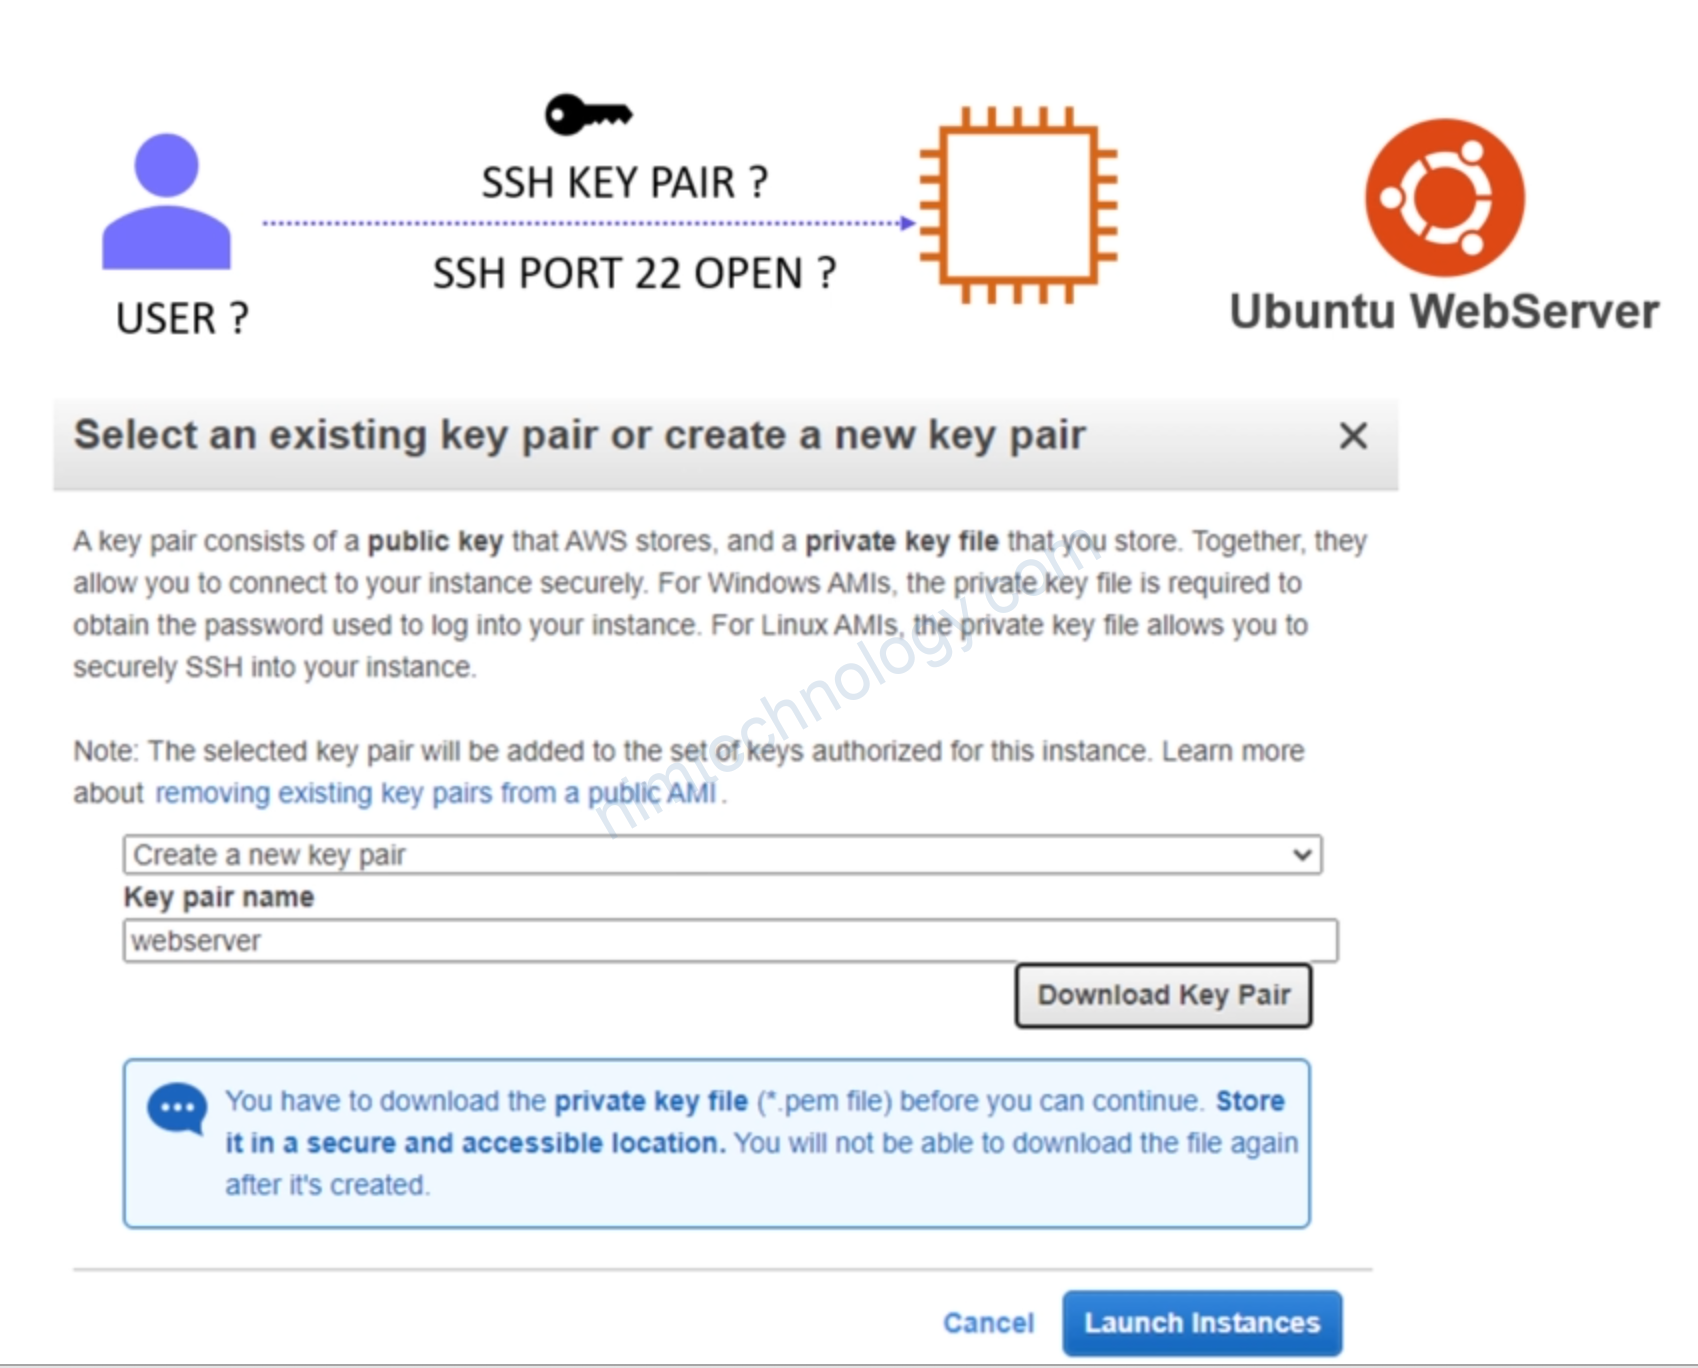
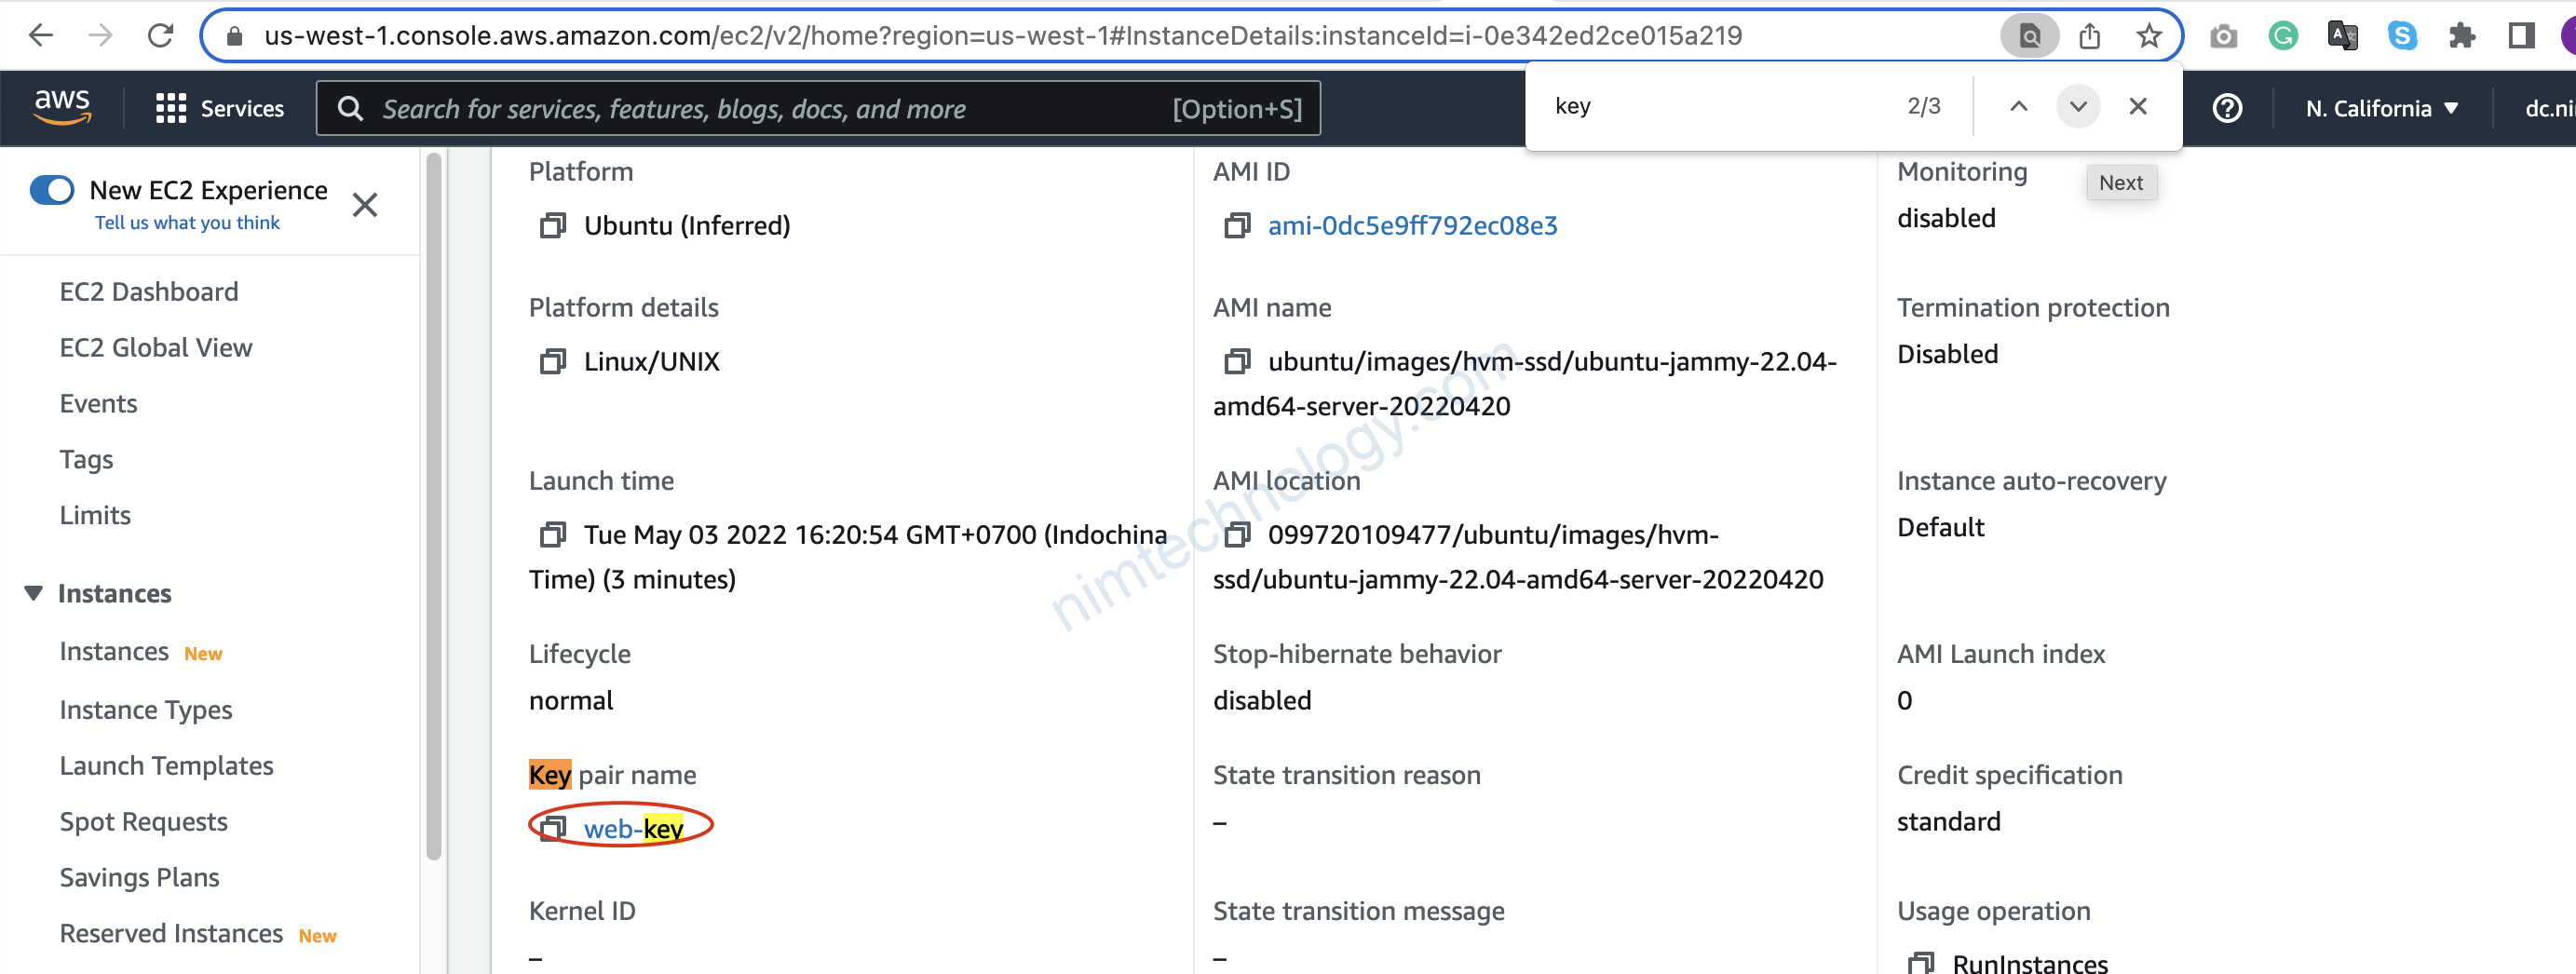
2.2) add Public key to VM
Vấn đề tiếp theo là làm sao ssh vào vm được?
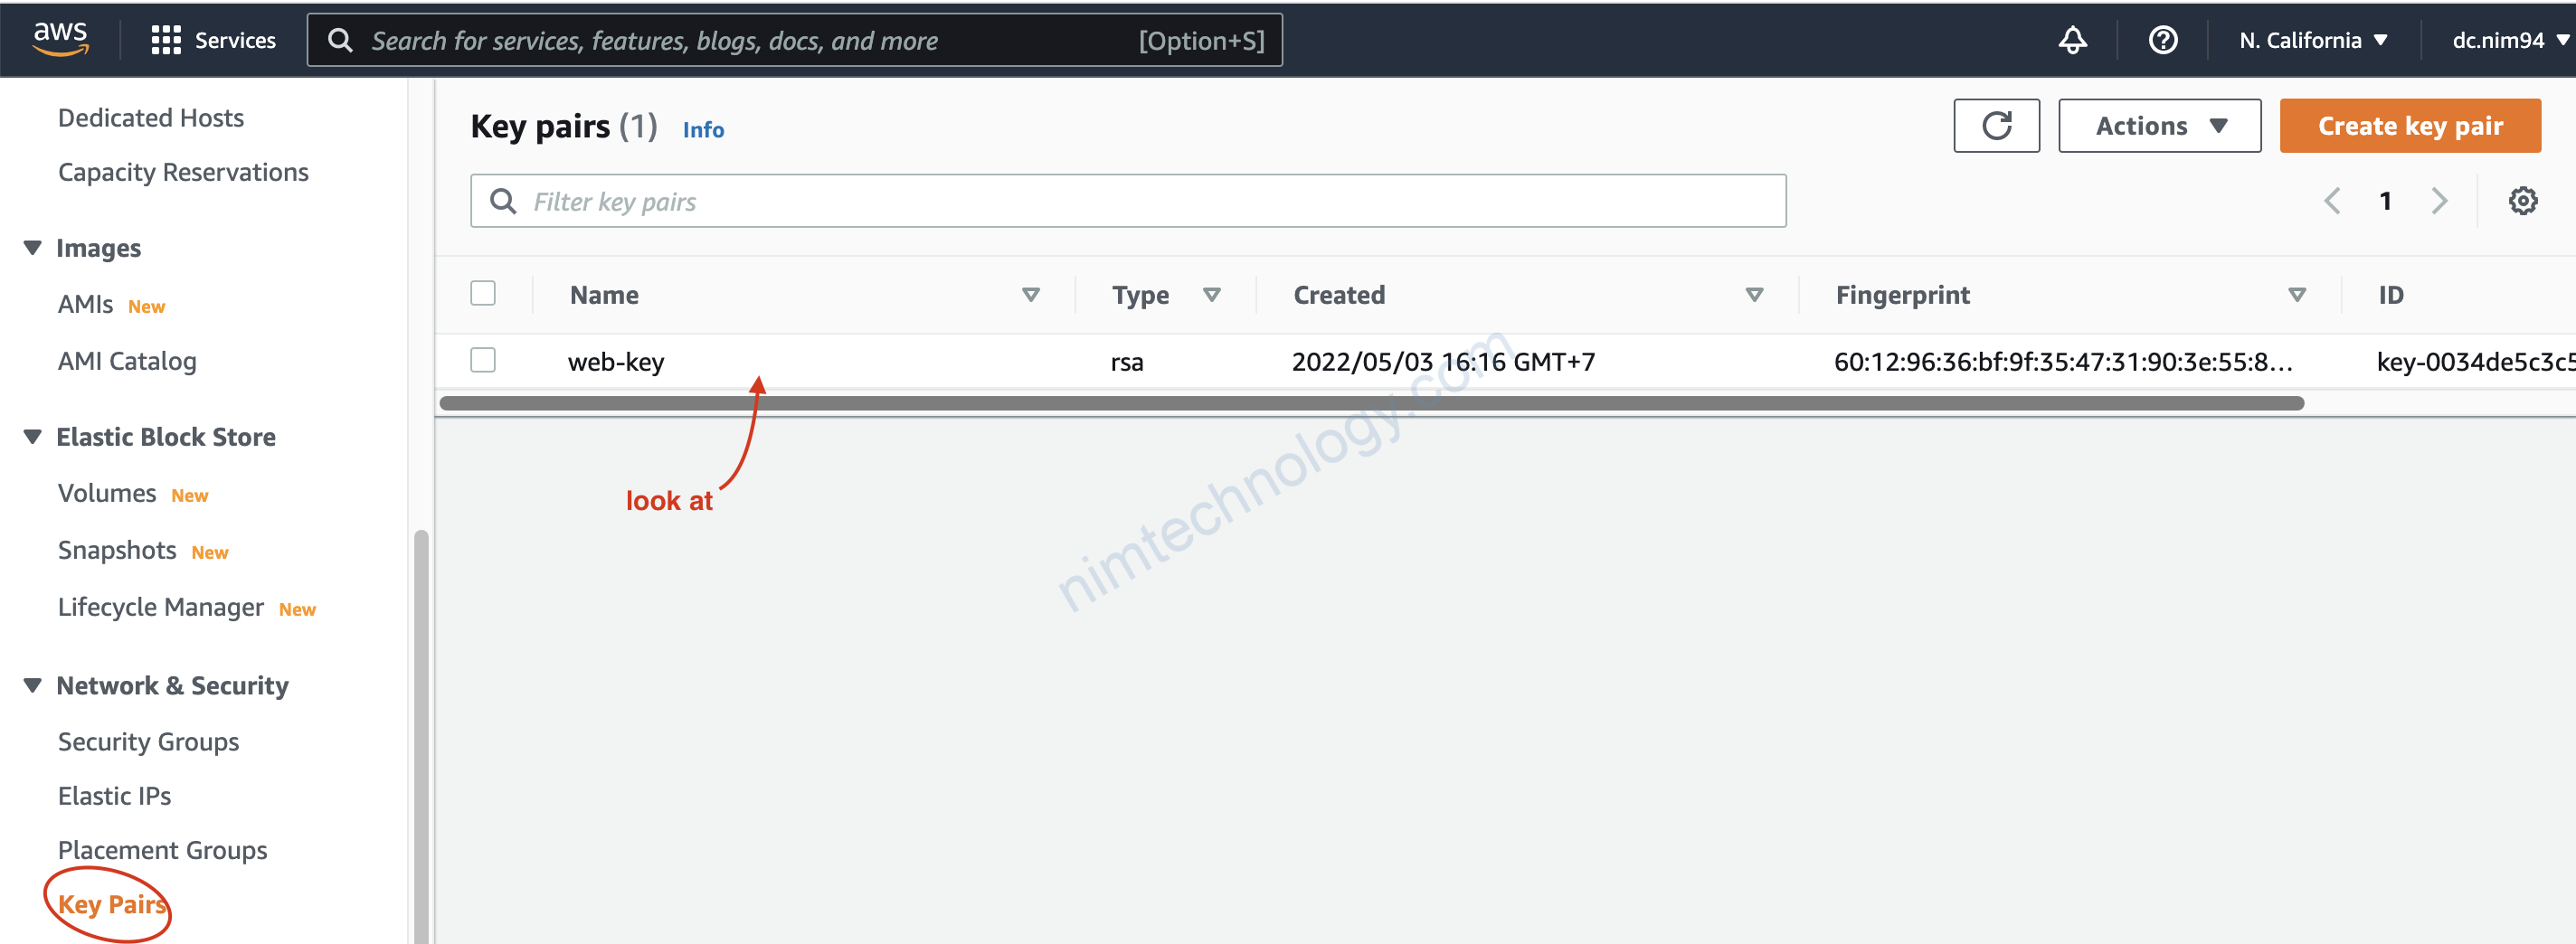
https://registry.terraform.io/providers/hashicorp/aws/latest/docs/resources/key_pair
Bạn cần thêm public key cho VM
data "aws_ami" "ubuntu" {
  most_recent = true

  filter {
    name   = "name"
    values = ["ubuntu/images/hvm-ssd/ubuntu-jammy-22.04-amd64-server-20220420"]
  }

  filter {
    name   = "virtualization-type"
    values = ["hvm"]
  }

  owners = ["099720109477"]
}


resource "aws_instance" "webserver" {
  ami           = data.aws_ami.ubuntu.id
  instance_type = "t2.micro"

  tags = {
    Name = "webserver"
    Desciption = "A Nginx Webserver on Ubuntu"
  }
  user_data = <<-EOF
                #!/bin/bash
                sudo apt update -y
                sudo apt install nginx -y
                systemctl enable nginx
                systemctl start nginx
                EOF
    key_name = aws_key_pair.web.id
}

resource "aws_key_pair" "web" {
  key_name   = "web-key"
  public_key = file("id_rsa.pub")
}
tiếp tục terraform apply
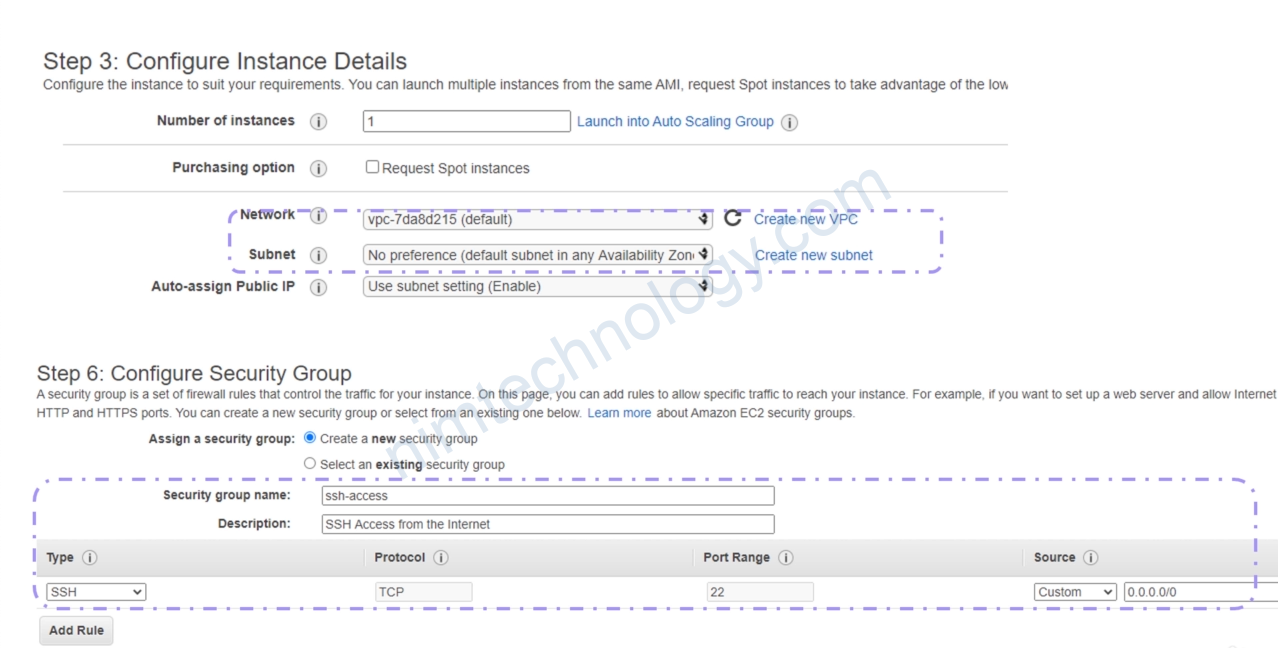
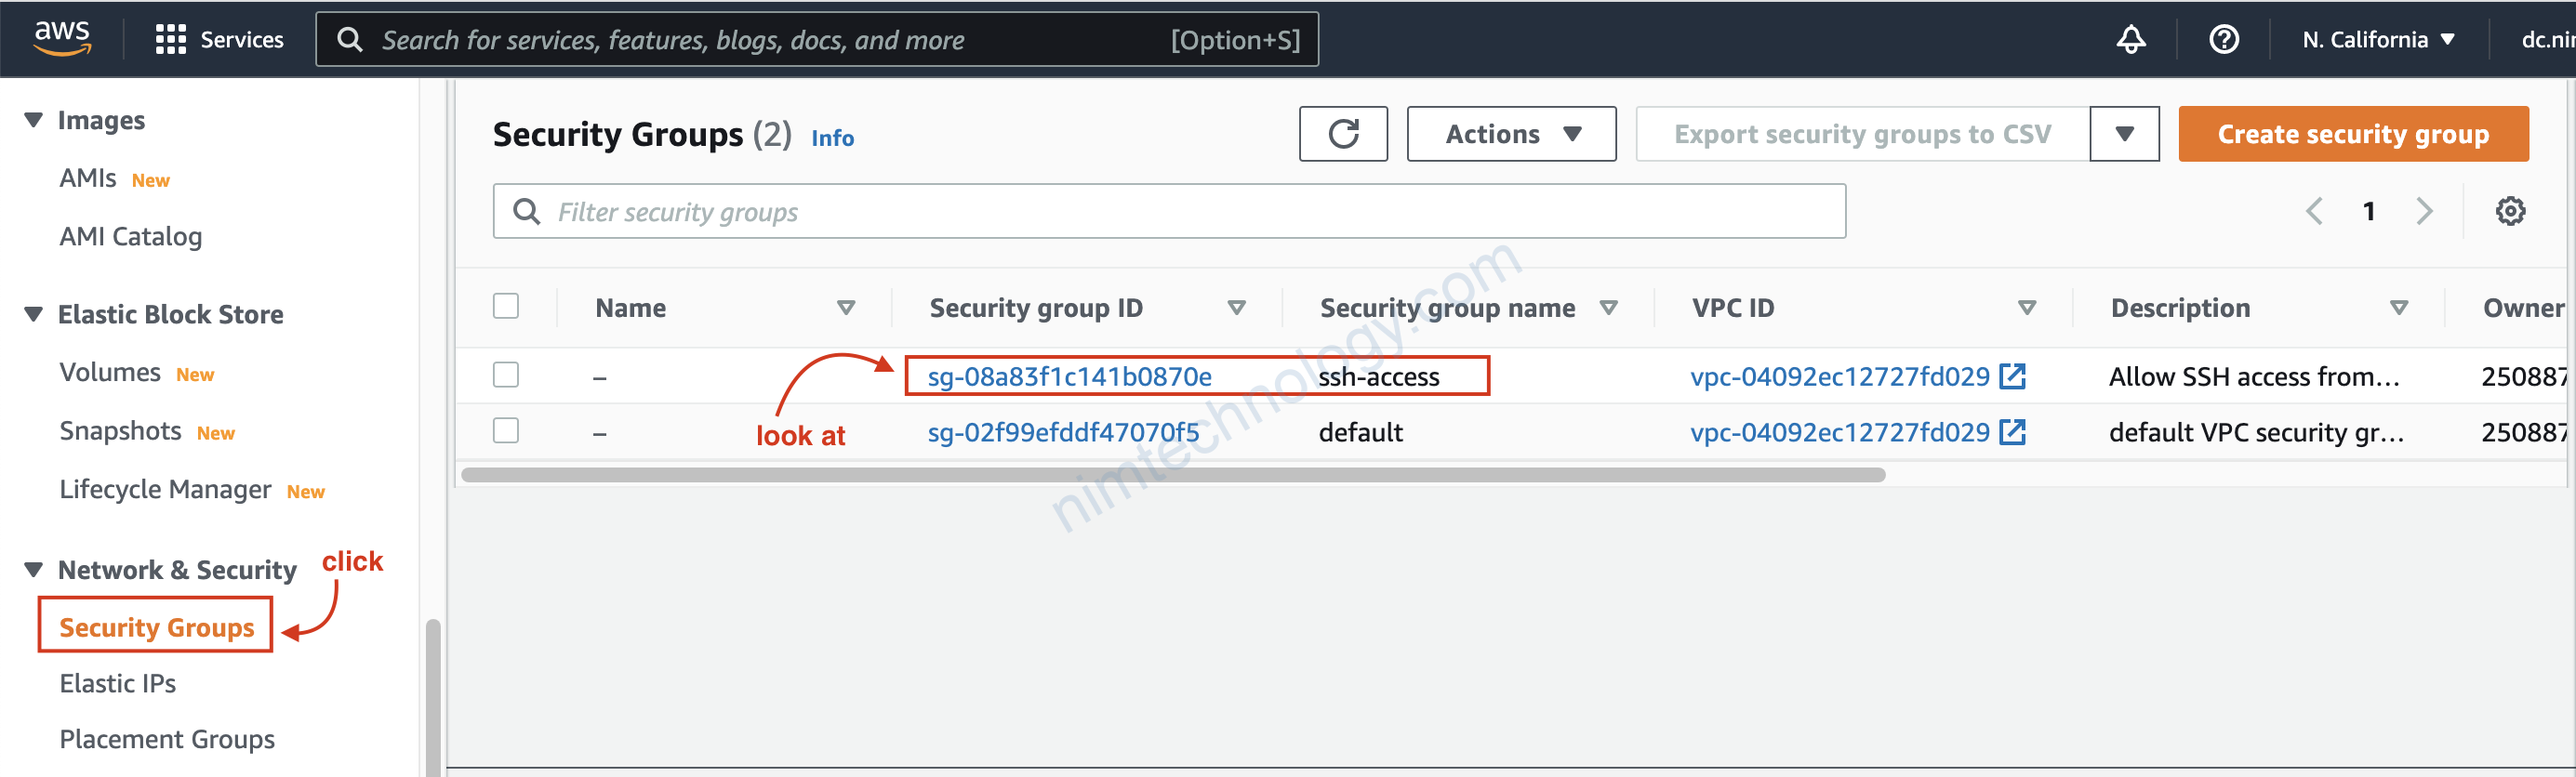
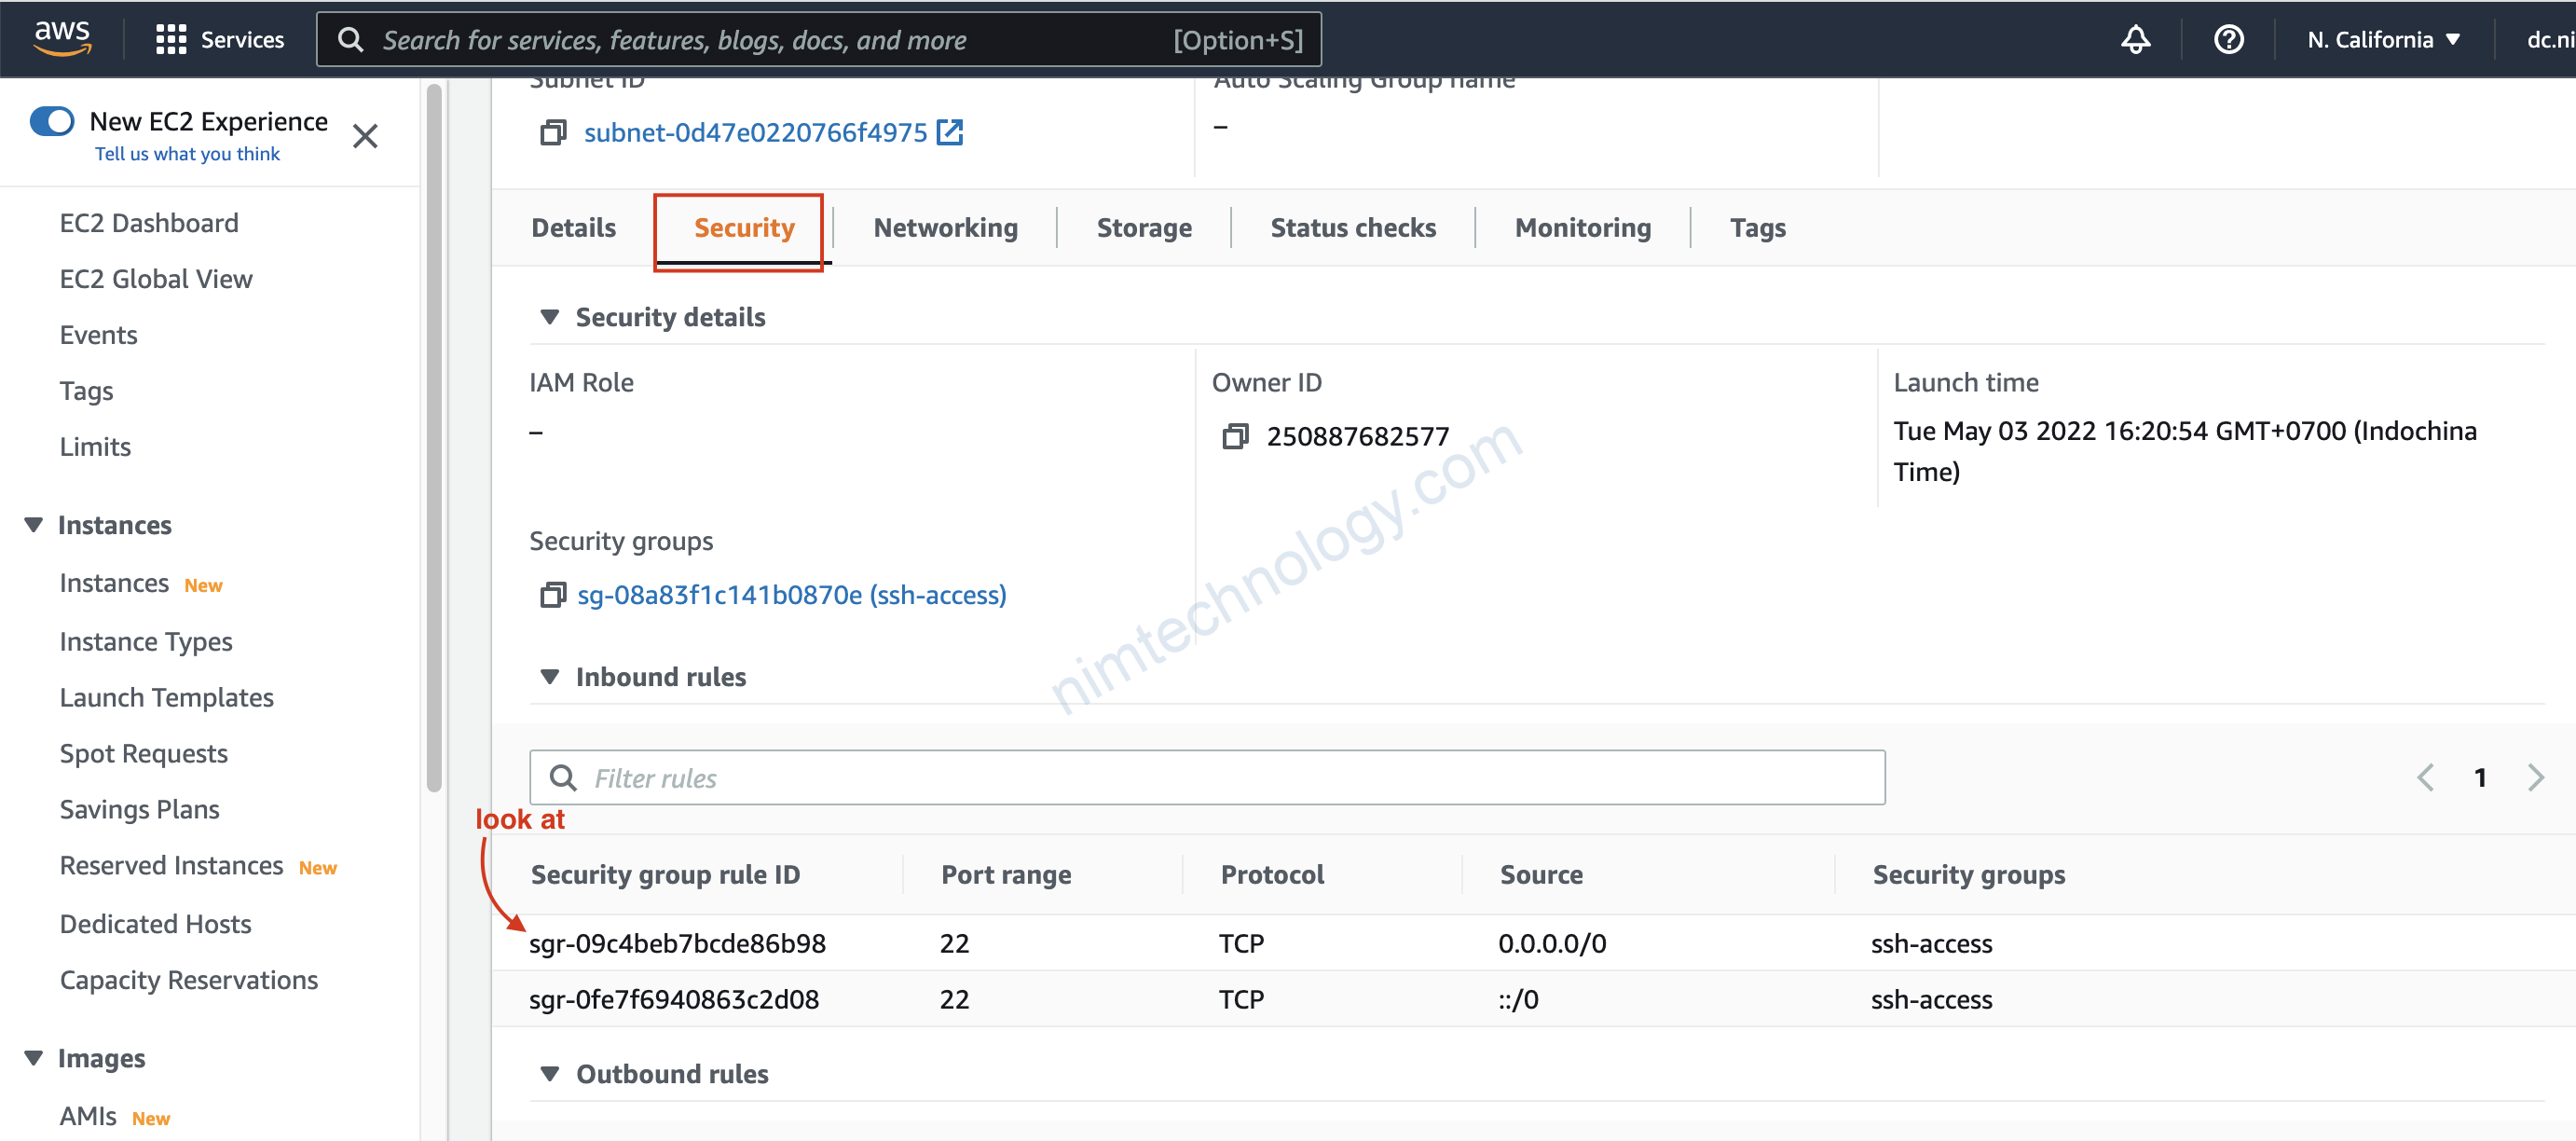
2.3) Configure Security Group.
https://registry.terraform.io/providers/hashicorp/aws/latest/docs/resources/security_group
Giờ mình cần cấu hình security hay còn gọi là firewall.
Cho phép ssh từ internet vào thì nó là ingress
data "aws_ami" "ubuntu" {
  most_recent = true

  filter {
    name   = "name"
    values = ["ubuntu/images/hvm-ssd/ubuntu-jammy-22.04-amd64-server-20220420"]
  }

  filter {
    name   = "virtualization-type"
    values = ["hvm"]
  }

  owners = ["099720109477"]
}


resource "aws_instance" "webserver" {
  ami           = data.aws_ami.ubuntu.id
  instance_type = "t2.micro"

  tags = {
    Name = "webserver"
    Desciption = "A Nginx Webserver on Ubuntu"
  }
  user_data = <<-EOF
                #!/bin/bash
                sudo apt update -y
                sudo apt install nginx -y
                systemctl enable nginx
                systemctl start nginx
                EOF
    key_name = aws_key_pair.web.id
    vpc_security_group_ids = [aws_security_group.ssh-access.id]
}

resource "aws_key_pair" "web" {
  key_name   = "web-key"
  public_key = file("id_rsa.pub")
}

resource "aws_security_group" "ssh-access" {
  name = "ssh-access"
  description = "Allow SSH access from the Internet"

  ingress {
    from_port        = 22
    to_port          = 22
    protocol         = "tcp"
    cidr_blocks      = ["0.0.0.0/0"]
    ipv6_cidr_blocks = ["::/0"]
  }
}
Tiếp tục terraform apply.
2.4) Get IP Public
Giờ muốn ssh vào server để kiểm tra thì chúng ta cần có được ip public của server.
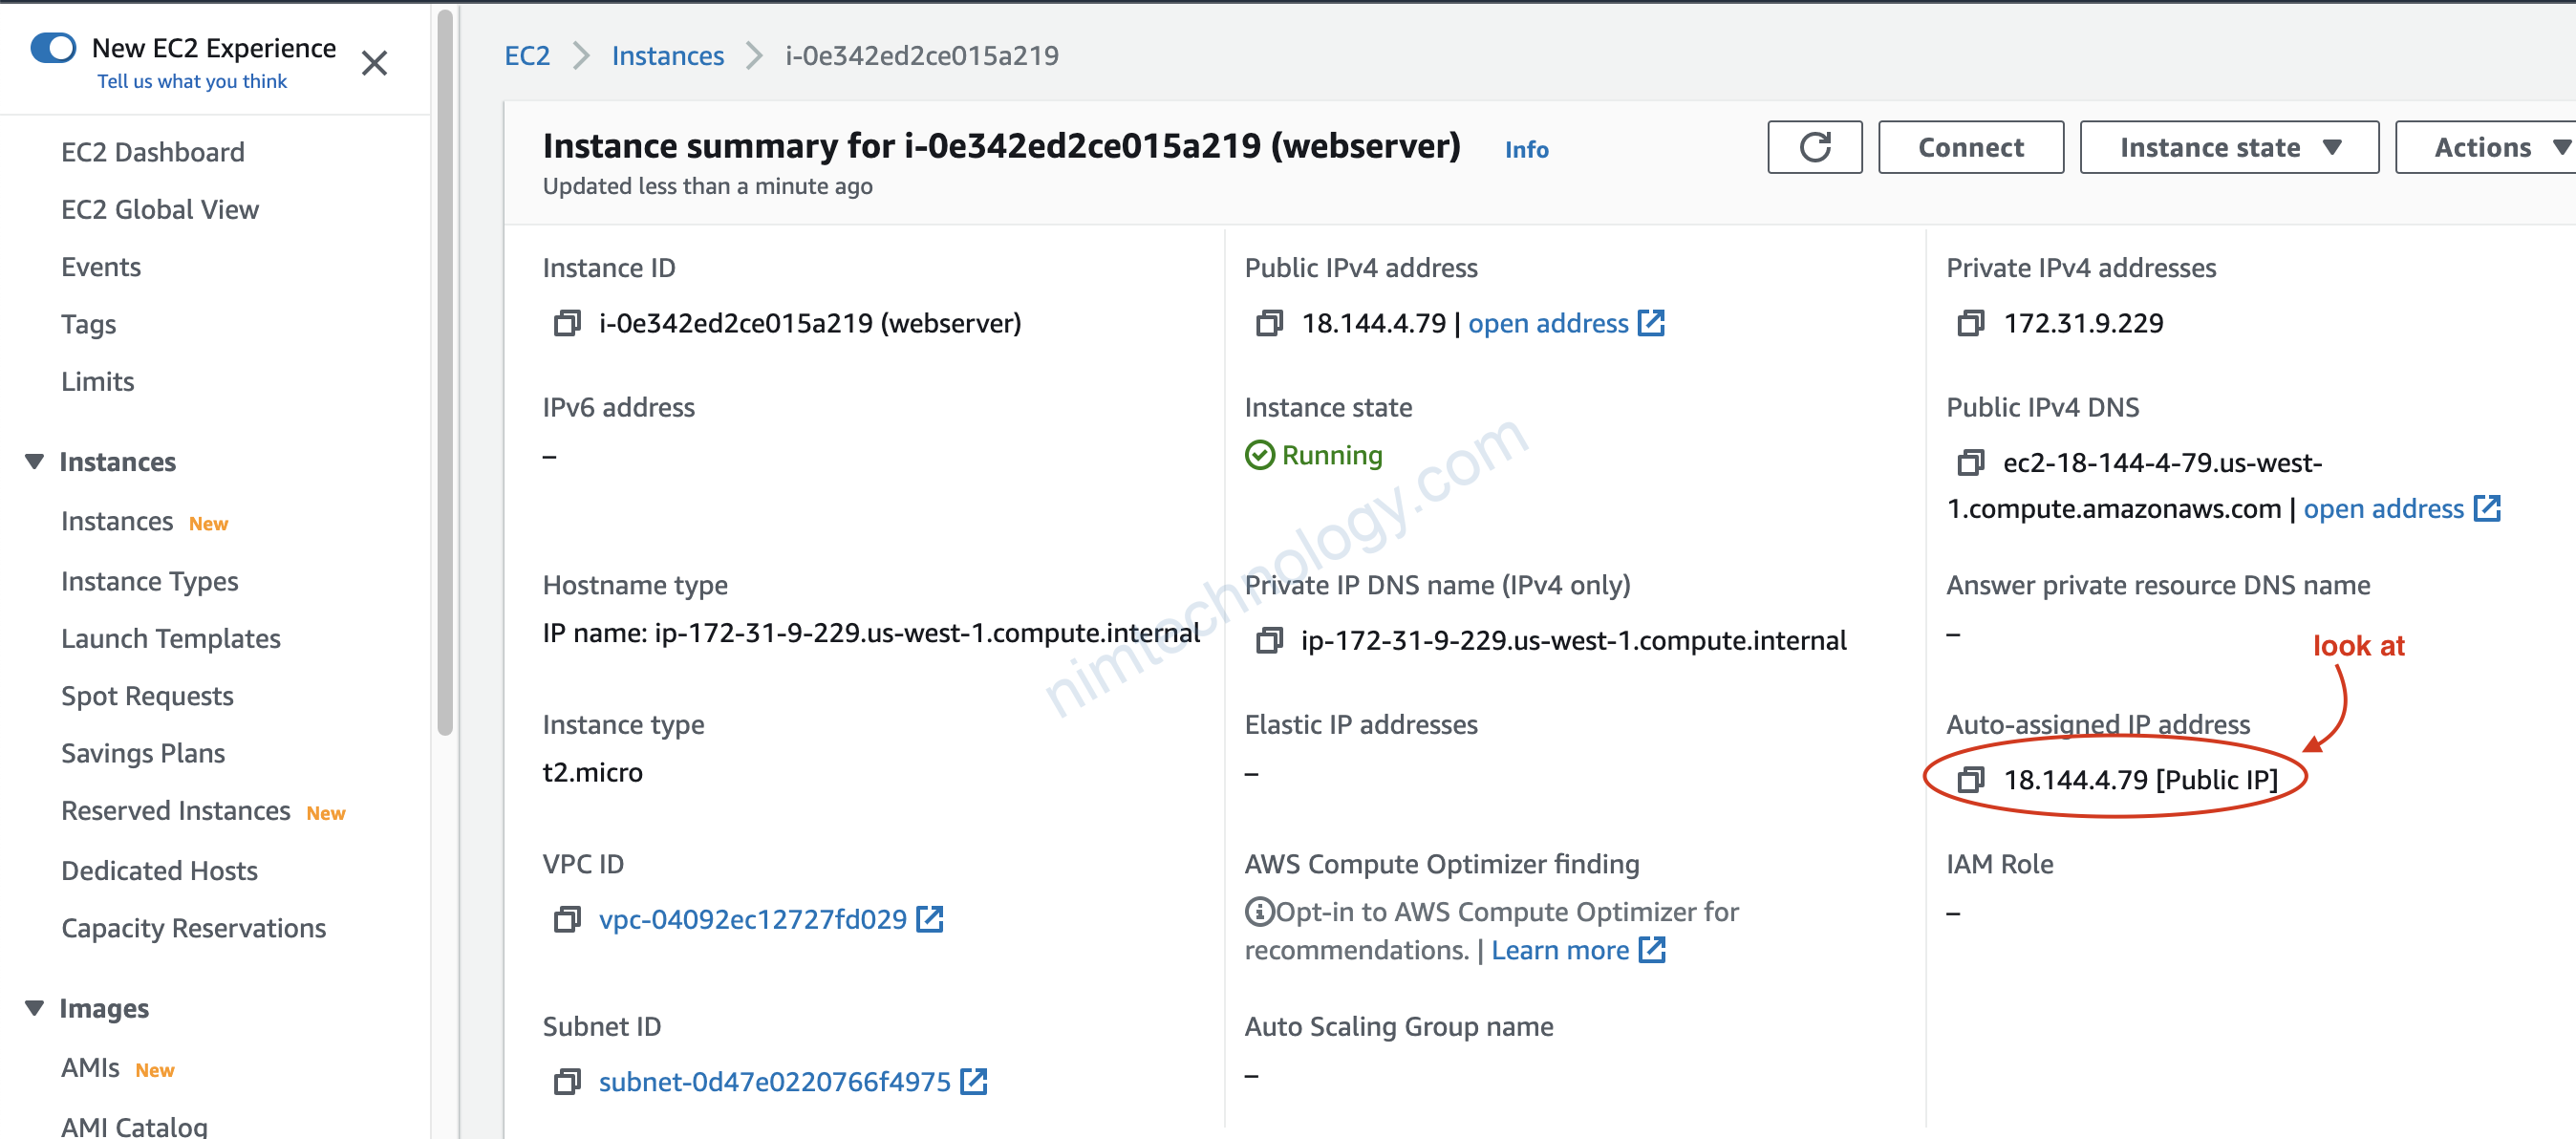
Cách tiếp theo có vẻ pro hơn. thêm output vào cuối file.
output public-ip {
  value       = aws_instance.webserver.public_ip
}

Giờ thực hiện ssh vào VM
ssh -i .ssh/id_rsa ubuntu@18.144.4.79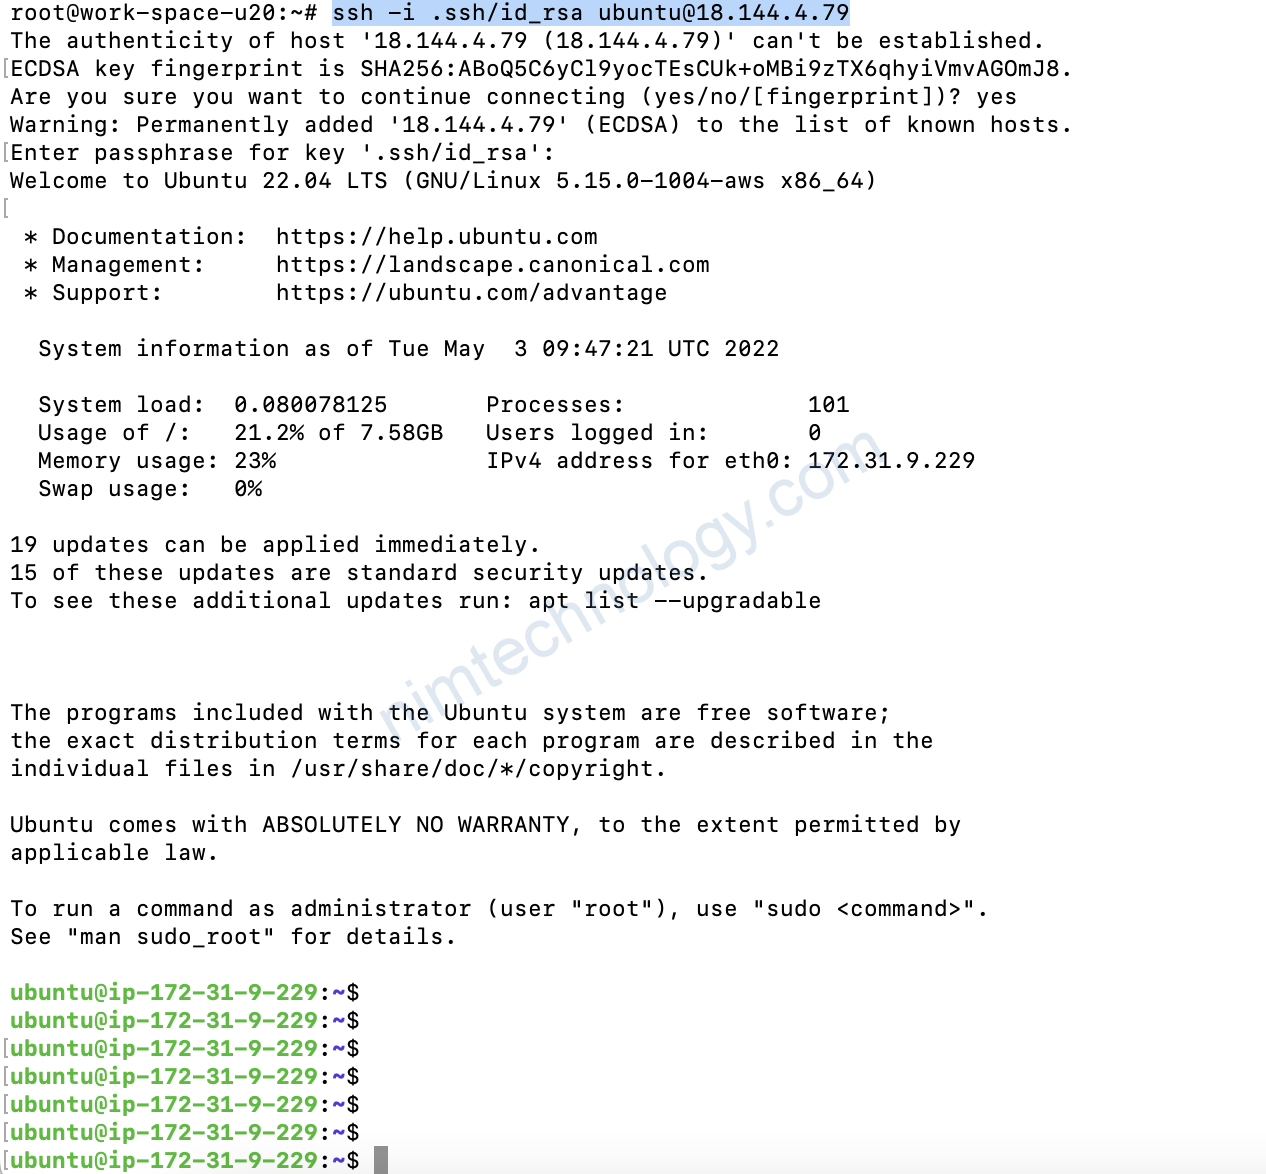
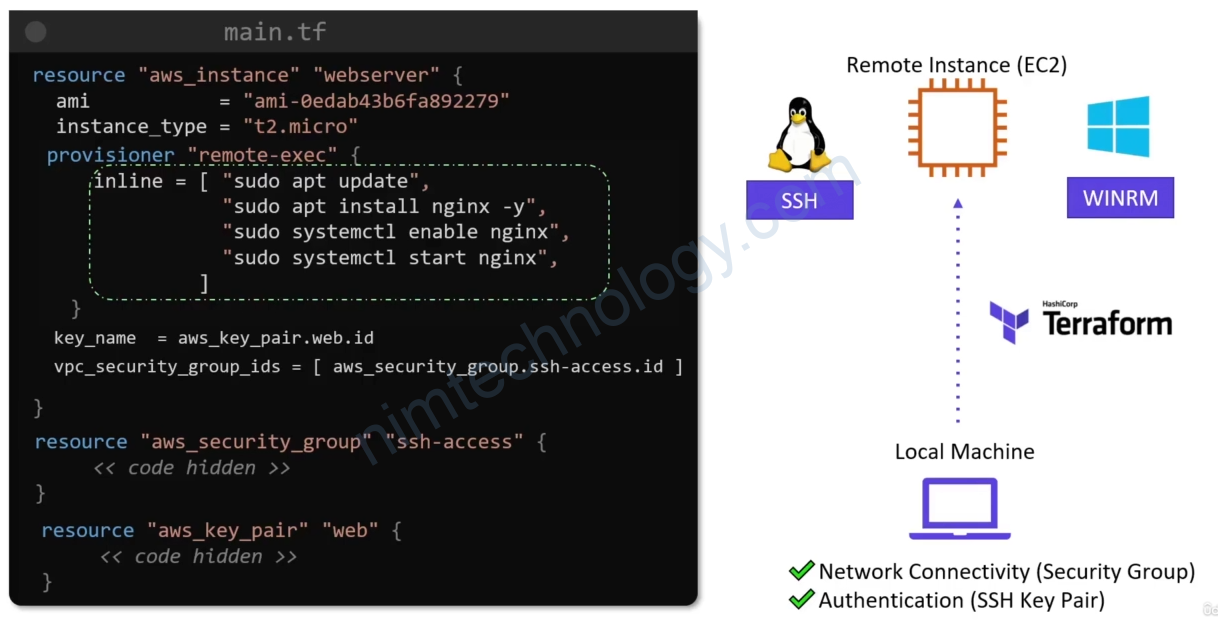
3) Terraform Provisioners
Provisioners can be used to model specific actions on the local machine or on a remote machine in order to prepare servers or other infrastructure objects for service.
3.1) Remote Exec

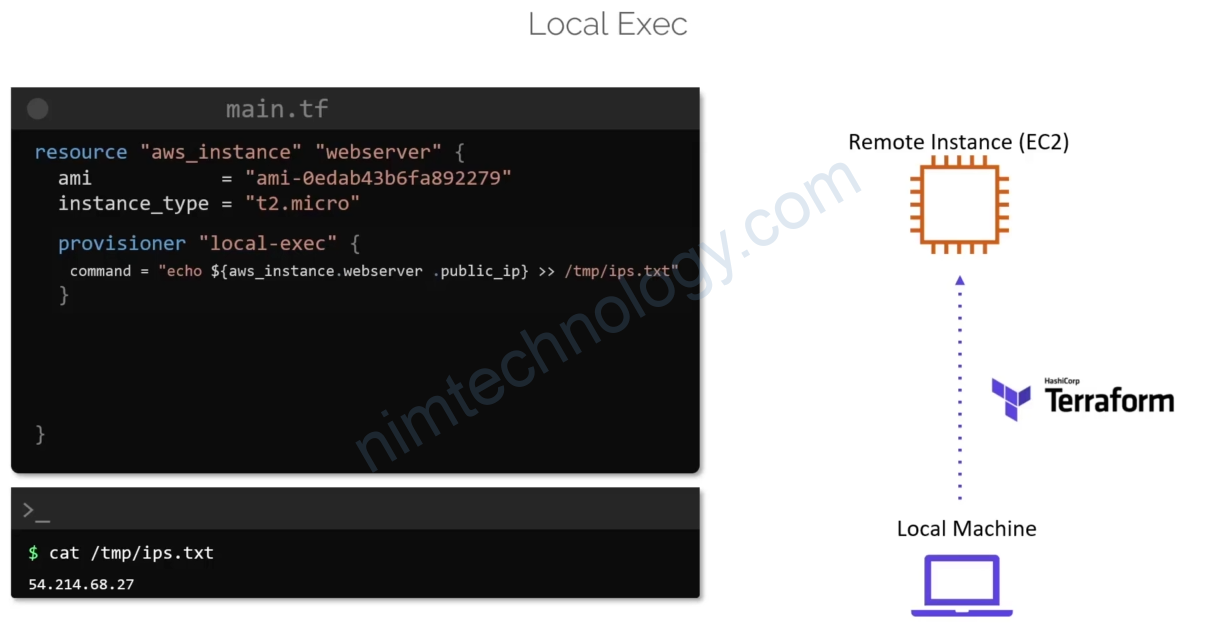
3.2) Local Exec
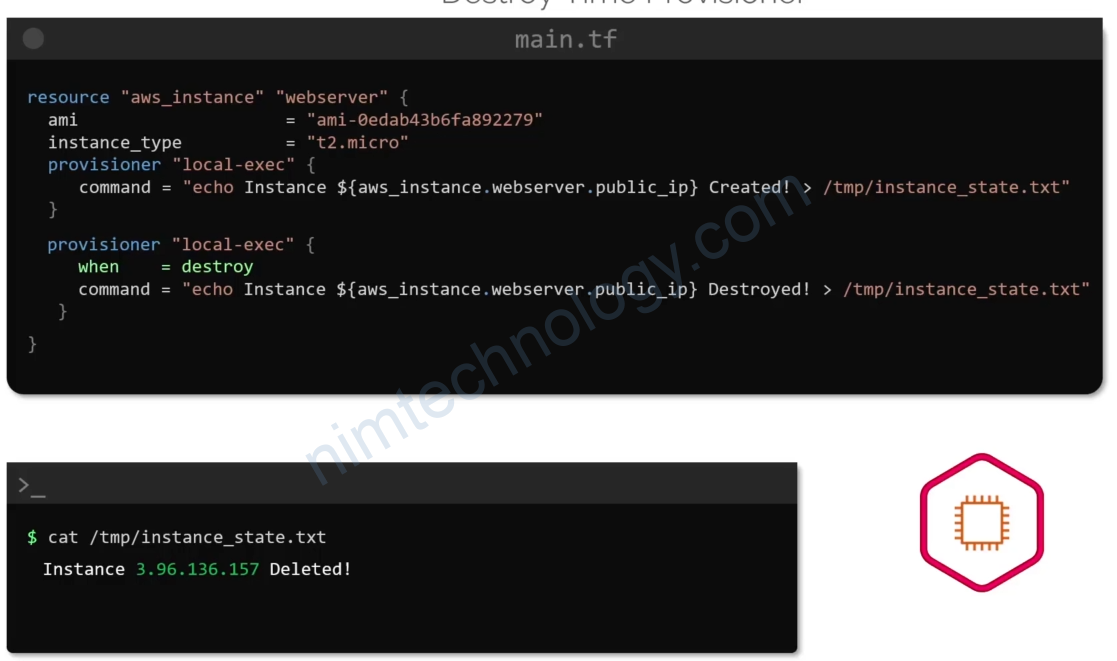
3.3) Destroy Time Provisioner
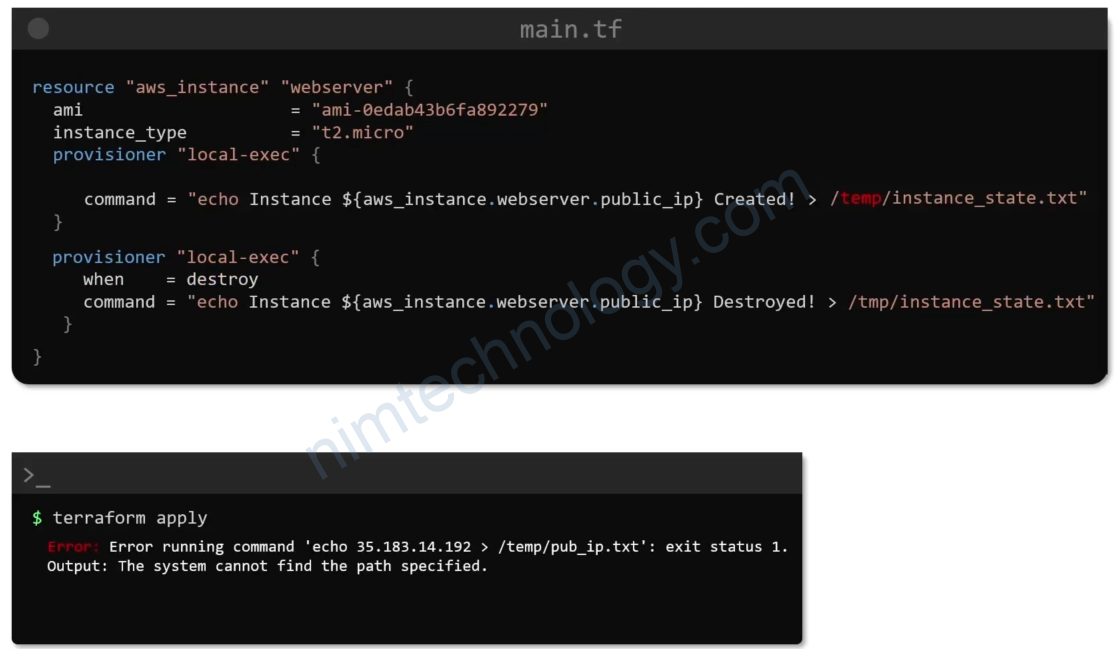
3.4) Failure Behavior
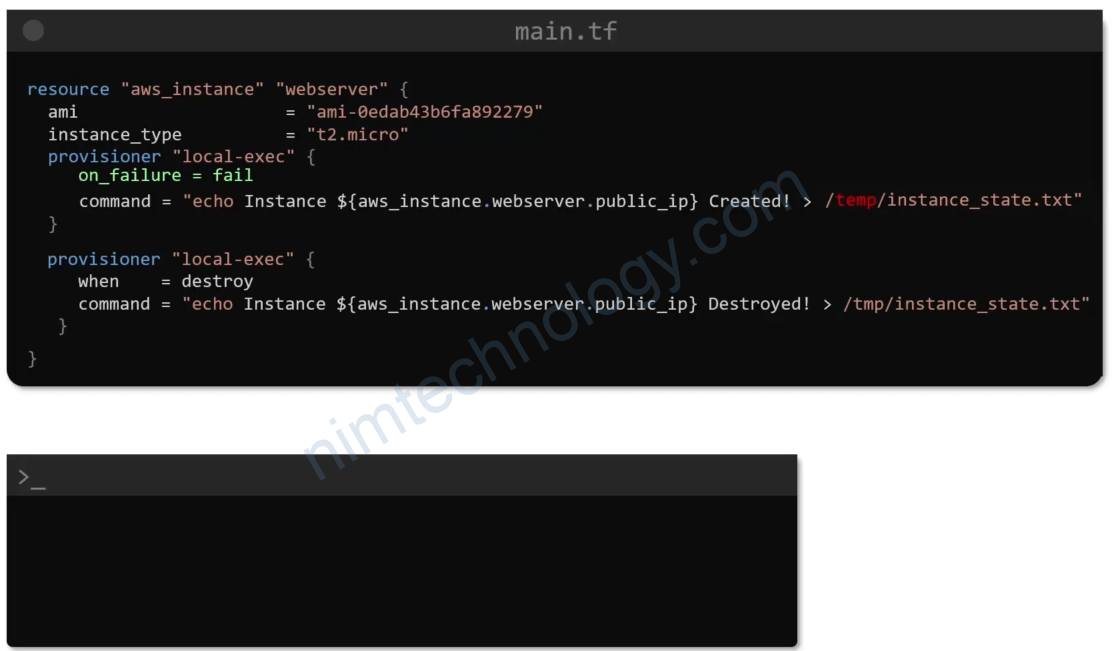
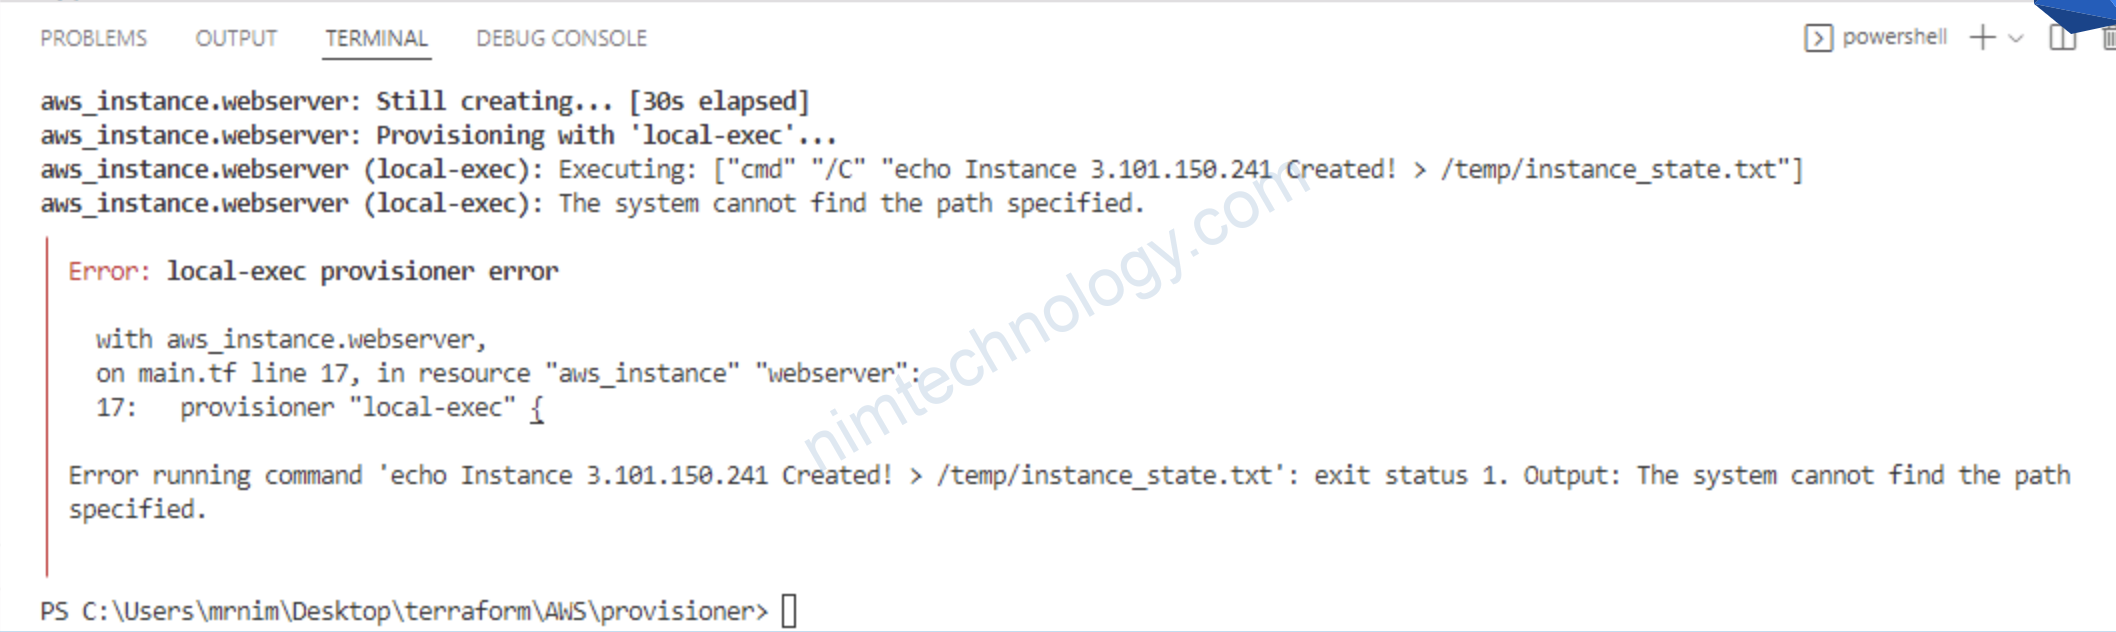
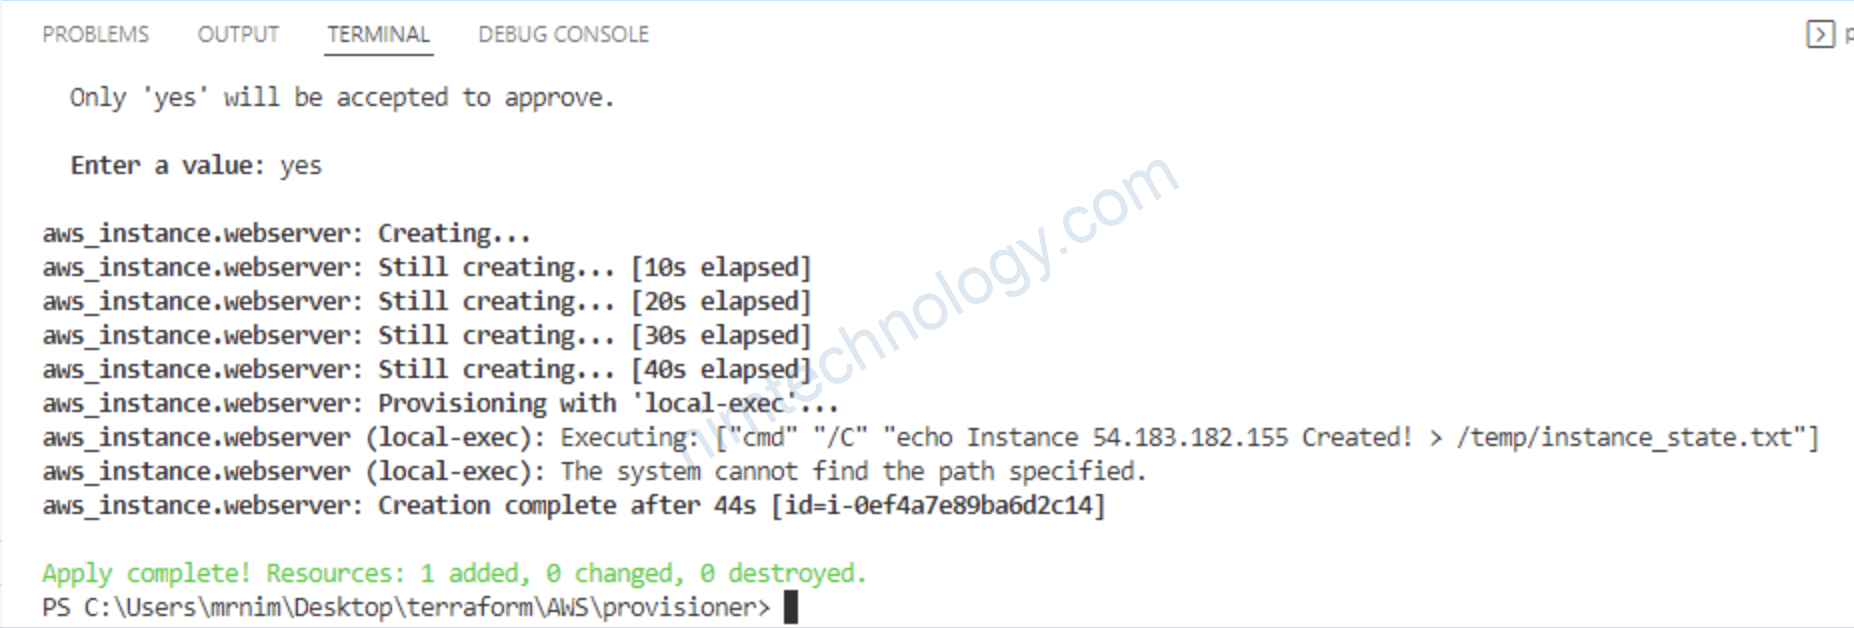
Ở case on_failure = fail

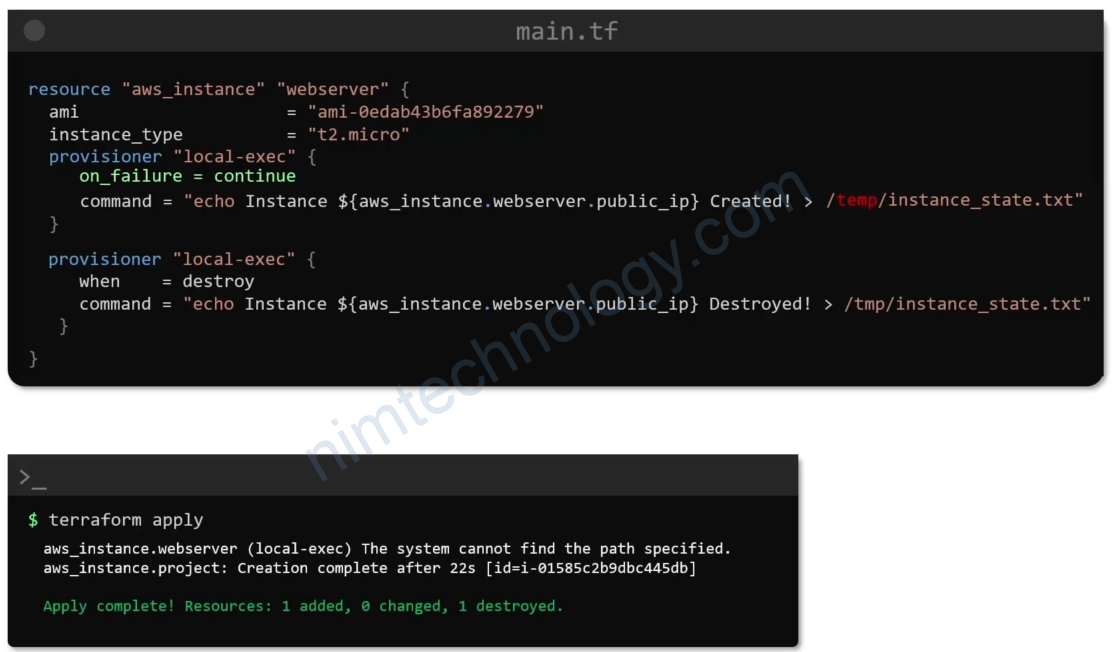
Ở case on_failure = continue
3.5) Best Practice for Provisioner.