Refer to
https://github.com/dasmeta/terraform-aws-rabbitmq
https://github.com/vainkop/terraform-aws-rabbitmq
1) Create VPC
Đầu tiên chúng ta cần tạo vpc:
vpc.tf
>>>>>>>>>
>>>>>>>>>>>

# Create VPC Terraform Module
module "vpc" {
  source  = "terraform-aws-modules/vpc/aws"
  version = "3.11.0"
  #version = "~> 3.11"

  # VPC Basic Details
  name = local.rabbitmq_cluster_name
  cidr = var.vpc_cidr_block
  azs             = data.aws_availability_zones.available.names
  public_subnets  = var.vpc_public_subnets
  private_subnets = var.vpc_private_subnets

  # NAT Gateways - Outbound Communication
  enable_nat_gateway = var.vpc_enable_nat_gateway
  single_nat_gateway = var.vpc_single_nat_gateway

  # VPC DNS Parameters
  enable_dns_hostnames = true
  enable_dns_support   = true


  tags = local.common_tags
  vpc_tags = local.common_tags

  # Additional Tags to Subnets
  public_subnet_tags = {
    Type = "Public Subnets"
    "kubernetes.io/role/elb" = 1
    "kubernetes.io/cluster/${local.rabbitmq_cluster_name}" = "shared"
  }
  private_subnet_tags = {
    Type = "private-subnets"
    "kubernetes.io/role/internal-elb" = 1
    "kubernetes.io/cluster/${local.rabbitmq_cluster_name}" = "shared"
  }

  elasticache_subnet_tags = {
    Type = "database-subnets"
  }
}

data "aws_availability_zones" "available" {}
Ở đây mình sử dụng vpc module để create 1 public subnet và 1 private subnet
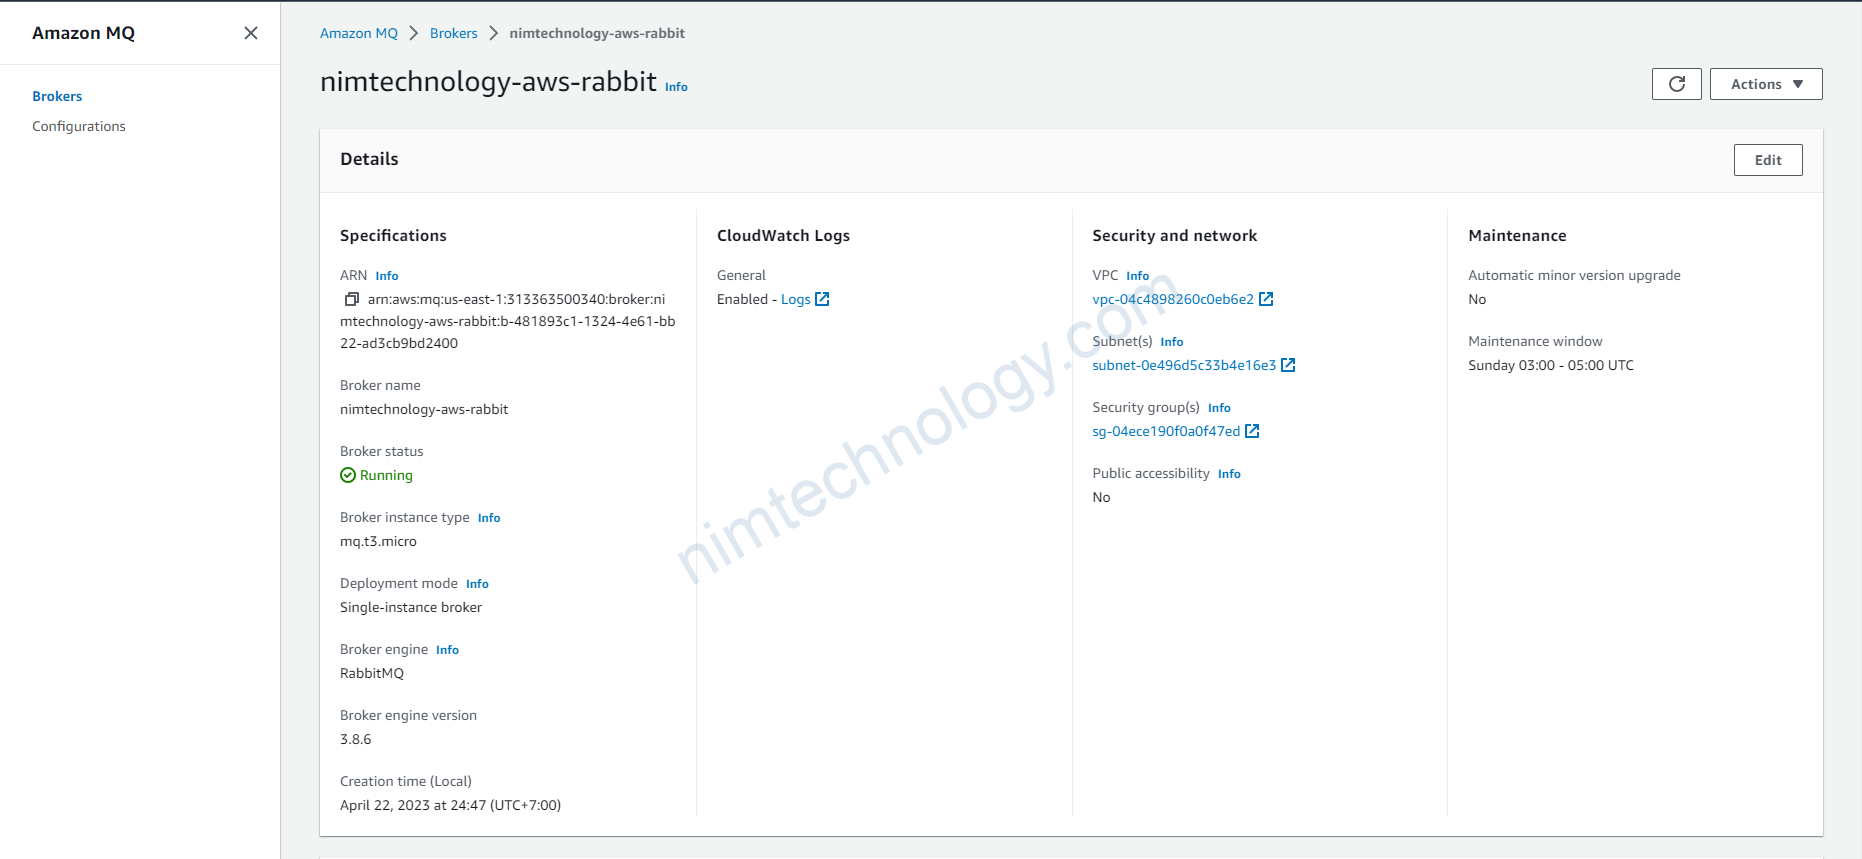
2) RabbitMQ on AWS
Tạo rabbitmq
Bạn sẽ cần tạo rabbitmq thông qua Resource: aws_mq_broker
https://registry.terraform.io/providers/hashicorp/aws/latest/docs/resources/mq_broker
Và bạn có thể tạo security Group thông qua module:
https://registry.terraform.io/modules/terraform-aws-modules/security-group/aws/latest
Và sau đó mình đã tạo 1 module cho rabbitmq để các bạn dễ dàng apply.
Và đây là các sử dụng aws rabbitmq module của mình.
https://registry.terraform.io/modules/mrnim94/rabbitmq/aws/latest?tab=inputs
AWS does provide a managed RabbitMQ service called Amazon Managed RabbitMQ, which was announced in November 2021.
To set up a RabbitMQ broker using Amazon Managed RabbitMQ, you can choose between two deployment modes: Single-node and Cluster.
- Single-node: In this deployment mode, you run a single RabbitMQ node. This mode is suitable for development and testing environments where high availability and fault tolerance are not critical requirements. If the single node fails, there will be a service interruption until the node is replaced.
- Cluster: In this deployment mode, Amazon Managed RabbitMQ deploys multiple RabbitMQ nodes, distributing the load and providing redundancy. The cluster offers high availability and fault tolerance, making it suitable for production environments.
2.1) SINGLE_INSTANCE

provider "aws" {
  region     = var.aws_region
}

module "rabbitmq" {
  source  = "mrnim94/rabbitmq/aws"
  version = "0.0.12"
  # insert the 2 required variables here
  rabbitmq_name = "rabbitmq-${var.business_divsion}-${var.environment}"
  engine_version = "3.8.6"
  deployment_mode = "SINGLE_INSTANCE"
  subnet_ids = [module.vpc.public_subnets[0]]
  vpc_id = module.vpc.vpc_id
  create_security_group = "true"
  ingress_with_cidr_blocks = [
    {
      from_port   = 5671
      to_port     = 5671
      protocol    = "tcp"
      description = "access to RabbitMQ"
      cidr_blocks = "0.0.0.0/0"
    },
    {
      from_port   = 443
      to_port     = 443
      protocol    = "tcp"
      description = "access to https"
      cidr_blocks = "0.0.0.0/0"
    },
    {
      from_port   = 80
      to_port     = 80
      protocol    = "tcp"
      description = "access to http"
      cidr_blocks = "0.0.0.0/0"
    }
  ]
}
variables.tf
>>>>>

locals {
  name = "nimtechnology"
  common_tags = {
    Component   = "nimtechnology"
    Environment = var.env
  }
  rabbitmq_cluster_name = "${local.name}-${var.cluster_name}"
}

# Input Variables
# AWS Region
variable "aws_region" {
  description = "Region in which AWS Resources to be created"
  type = string
  default = "us-east-1"
}

variable "env" {
  description = "Environment in which AWS Resources to be created"
  type = string
  default = "develop"
}

variable "cluster_name" {
  default = "aws-rabbit"
}

# VPC CIDR Block
variable "vpc_cidr_block" {
  description = "VPC CIDR Block"
  type = string
  default = "10.0.0.0/16"
}

# VPC Public Subnets
variable "vpc_public_subnets" {
  description = "VPC Public Subnets"
  type = list(string)
  default = ["10.0.101.0/24", "10.0.102.0/24"]
}

# VPC Private Subnets
variable "vpc_private_subnets" {
  description = "VPC Private Subnets"
  type = list(string)
  default = ["10.0.1.0/24", "10.0.2.0/24"]
}

# VPC Enable NAT Gateway (True or False)
variable "vpc_enable_nat_gateway" {
  description = "Enable NAT Gateways for Private Subnets Outbound Communication"
  type = bool
  default = true
}

# VPC Single NAT Gateway (True or False)
variable "vpc_single_nat_gateway" {
  description = "Enable only single NAT Gateway in one Availability Zone to save costs during our demos"
  type = bool
  default = true
}
Mình để cho terraform generate password nên là mình lấy tạo output.
output "username" {
  value = module.rabbitmq.application_username
}

output "password" {
  value = module.rabbitmq.application_password
  sensitive = true
}
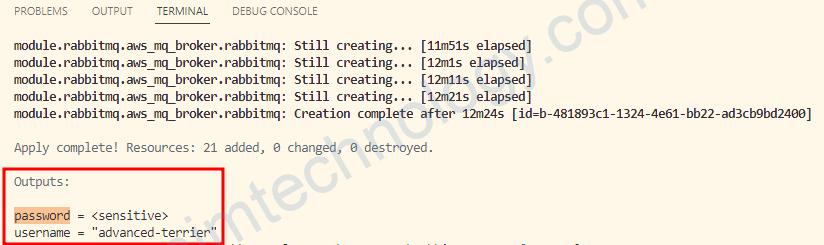
Vì password ở chế độ sensitive. Nên bạn sẽ cần vào file terraform.tfstate để coi.
2.2) Publicly accessible
Whether to enable connections from applications outside of the VPC that hosts the broker’s subnets.
data "aws_vpc" "selected" {
  tags = {
    Name = "dev-mdcl-XXX-engine" # Replace with your VPC's tag name
  }
}

data "aws_subnet" "selected" {
  vpc_id = data.aws_vpc.selected.id

  tags = {
    Name = "dev-mdcl-XXX-engine-private-us-west-2b" # Replace with your Subnet's tag name
  }
}

# output "vpc_id" {
#   value = data.aws_vpc.selected.id
# }

# output "subnet_id" {
#   value = data.aws_subnet.selected.id
# }

module "rabbitmq" {
  source  = "mrnim94/rabbitmq/aws"
  version = "0.0.12"
  # insert the 2 required variables here
  rabbitmq_name = "rabbitmq-${var.business_divsion}-${var.environment}"
  engine_version = "3.8.6"
  deployment_mode = "SINGLE_INSTANCE"
  subnet_ids = [data.aws_subnet.selected.id]
  vpc_id = data.aws_vpc.selected.id
  publicly_accessible = "true"
}
Bạn sẽ xóa phần security Group đi.
Có 1 vấn đề nó sẽ public con Rabbitmq ra Internet.
3) Install RabbitMQ on AWS by Module by Nimtechnology.
Đây là module của mình tự viết.
https://registry.terraform.io/modules/mrnim94/rabbitmq/aws/latest
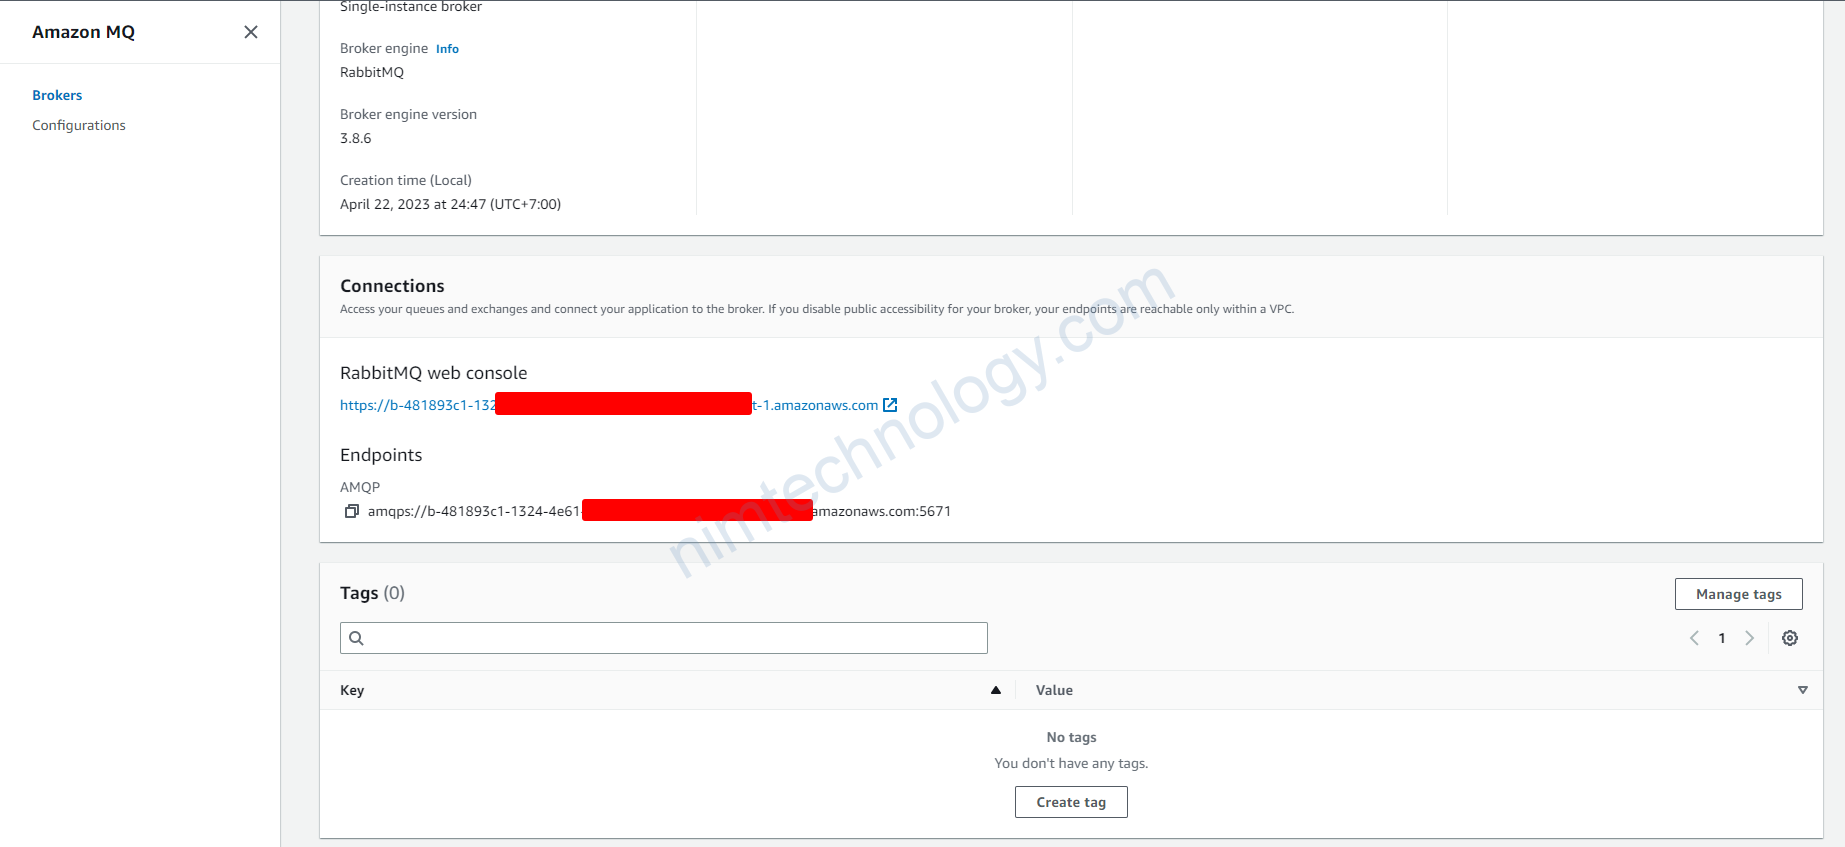
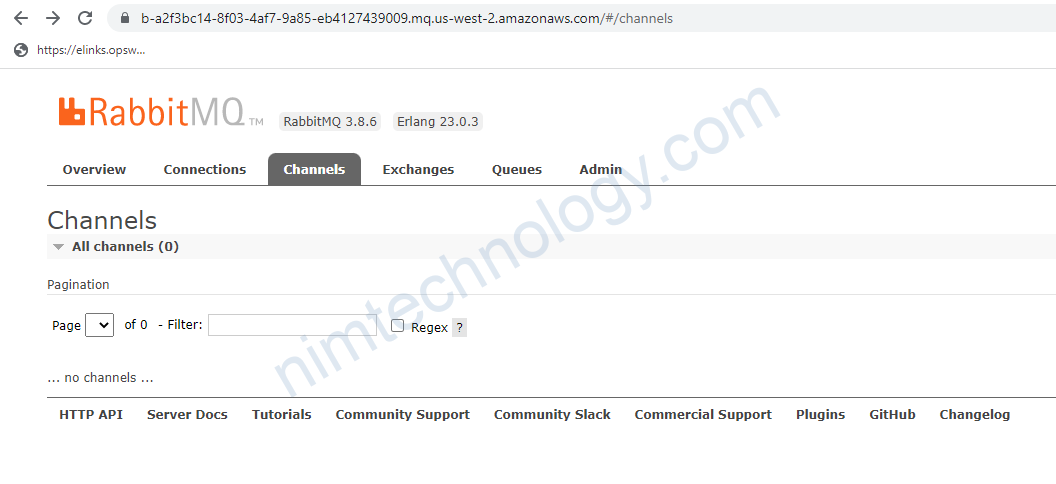
4) How to check Rabbitmq
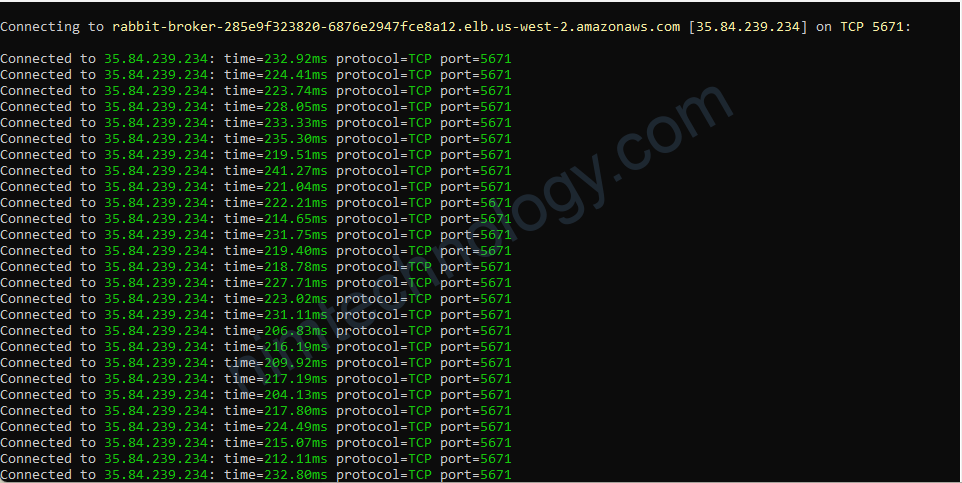
Đầu tiên bạn cần lấy link của web rabbit mình ví trụ trên AWS sẽ là:https://b-c94704fa-6151-b163f31ca936.mq.eu-central-1.amazonaws.com
rabbitmqadmin --host=b-c94704fa-6151-b163f31ca936.mq.eu-central-1.amazonaws.com --port=15672 --ssl --vhost=/ --username=YOUR_USERNAME --password=YOUR_PASSWORD list queues