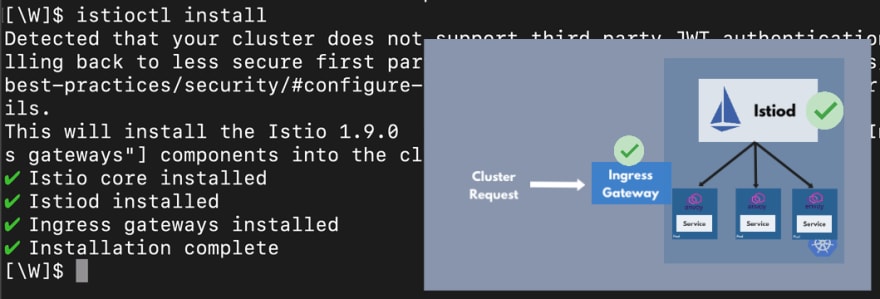
https://istio.io/latest/docs/setup/install/
Ở đây mình cài đặt istio version 1.9.9
Đầu tiền tải và cài đặt istioctl:
curl -L https://istio.io/downloadIstio | ISTIO_VERSION=1.9.9 TARGET_ARCH=x86_64 sh -
giờ có 2 cách để run istioctl:
Cách 1:
cd istio-1.9.9
export PATH=$PWD/bin:$PATH
istioctl version
Cách 2
cd istio-1.9.9
mv bin/istioctl /usr/local/bin/
istioctl version
Mình sài cách 3 vì mình cấn switch qua các version khách nhau
root@spinnaker-ubuntu16:~/mylab-istio# /root/istio-1.9.9/bin/istioctl version
client version: 1.9.9
Istio có rất nhiều profile
https://istio.io/latest/docs/setup/additional-setup/config-profiles/

Sử dụng istioctl để dump istio-operator với profile default
./istio-1.9.9/bin/istioctl profile dump default > /root/istio-operator-1.9.9-default.yaml
Giờ chúng ta nói 1 chút về file istio-operator-1.9.7-default.yaml

apiVersion: install.istio.io/v1alpha1
kind: IstioOperator
spec:
  components:
    base:
      enabled: true
      k8s:
        overlays:
          - kind: ValidatingWebhookConfiguration
            name: istiod-istio-system
            patches:
              - path: webhooks.[name:validation\.istio\.io].clientConfig.service.name # << json path to reach the target value to fix
                value: istiod-1-9-8
    cni:
      enabled: false
    egressGateways:
    - enabled: false
      name: istio-egressgateway
    ingressGateways:
    - enabled: true
      name: istio-ingressgateway
      k8s:
        env:
          - name: ISTIO_META_ROUTER_MODE
            value: "sni-dnat"
    istiodRemote:
      enabled: false
    pilot:
      enabled: true
  hub: docker.io/istio
  meshConfig:
    defaultConfig:
      proxyMetadata: {}
    enablePrometheusMerge: true
  profile: default
  tag: 1.9.8
  revision: 1-9-8

Update Sun 5 Sep -> pull image từ private

Bình thường các tutorial trên mạng họ chỉ bạn là auto inject istio theo namespace
Chỉ cần workload của bạn deploy trong namespace đó là được inject sidecar ngay
kubectl label namespace default istio-injection=enabled --overwrite
Nhưng mà mình ko sài command trên
Tiếp đến khi đã custom file Operator theo ý của bạn xong chúng ta tiếp tục gen file manifest để có thể apply bằng k8s nhé
Nếu bạn muốn apply được file Operatior trên thì một bạn sử dụng istioctl hoặc bạn cài 1 service tên là istio-operator link bên dưới bạn tự đọc nhé:
https://istio.io/latest/docs/setup/install/operator/
Vì mình không muốn cài nhiều thứ ko quá cần thiết nên gen file manifest
./istio-1.9.9/bin/istioctl manifest generate -f /root/istio-operator-1.9.9-default.yaml > /root/mylab-istio/istio-1.9.9.yaml
Tiếp đến create ns và apply
kubectl create ns istio-system

kubectl -n istio-system apply -f /root/mylab-istio/istio-1.9.7.yaml


Nếu bạn sử dụng k8s ở local tự cài thì bạn cần cài trước metrics-server và metallb nhé
Giờ bạn muốn auto inject sidecar thì làm như sau
kubectl label namespace default istio-injection- istio.io/rev=1-9-7 --overwrite

>>>>bạn file sai command này vì chúng ra đánh revision cho istio
Có lần mình quên và đã run “kubectl label namespace default istio-injection=enabled –overwrite” nó bị lỗi vì nó call về service là istiod nhưng bạn nhìn service của mình là istio-1-9-7 bạn cần run command mình chỉ nhé

spec:
  template: # template for the pods
    metadata:
      annotations:
        sidecar.istio.io/inject: "true"
Nếu bạn install GCP và muốn sử dụng “internal load balancer on GCP” cho ingress thì làm như sau:
    ingressGateways:
    - enabled: true
      k8s:
        service_annotations:
          cloud.google.com/load-balancer-type: Internal
      name: istio-ingressgateway


Comments on “[istio] Sử dụng istio-operator và istioctl để cài đặt Istio”