I refer to: https://infosecwriteups.com/how-to-install-openvas-52b6337ba29a
If you’re starting off in cybersecurity you may have heard of vulnerability scanners. A vulnerability scanner is a software or program that identifies security vulnerabilities or weaknesses in a system, application or network. It’s used by both attackers and defenders to figure out the security posture of the target system.
In this article, you’ll learn how to install a vulnerability scanner called OpenVAS, an offshoot of Nessus. OpenVAS is an open-source framework and vulnerability scanner extensively used for identifying and evaluating security vulnerabilities in computer systems and networks.
So without further adieu, let’s jump in 🙃.
Requirements
- A Computer with at least 4GB RAM and 20GB Storage
- A stable internet connection
- A Linux OS (Debian or Ubuntu LTS)
- A lot of patience ⏳
Important Concept: Containers
There are two ways to install OpenVAS:
- From the source
- Using Docker Containers
Installing from the source can be quite tasking and could even end up still not working in the end (Trust me, I’ve been there 🤧). However, using a docker container makes the process simple and almost seamless.
A docker container is a lightweight, standalone, executable software package that includes everything needed to run an application, including the code, runtime environment, system tools, and libraries. This allows the application in the container to be deployable almost anywhere.
We don’t really need to get into the specifics of things but basically think of it like a Lego set and its box. The Lego set is your application and the box is the container. The box contains the instructions and pieces you need to build the structure.
Likewise, the container has everything you need for deploying your application anywhere. And because it’s so versatile, you can create multiple containers to deploy multiple applications without putting much strain on your hardware.
Now that you have an idea of how containers work, lets look at how to install OpenVAS using them.
Installation Steps
We’ll start off by opening up a terminal and installing curl and docker.io.
sudo apt install curl docker.io
Next, install docker.compose
sudo apt install python3 python3-pip
python3 -m pip install --user docker-compose
Now we need to add the current user to the docker user group so you can use containers. Type in the following.
sudo usermod -aG docker $USER && su $USER
Logout and log back in for the changes to be applied to your system.
We need to create a directory for the docker compose file. A compose file contains instructions to setup the container, just like instructions for the Lego set. Let’s create a directory to put it in.
export DOWNLOAD_DIR=$HOME/greenbone-community-container && mkdir -p $DOWNLOAD_DIR
Note: The download directory in this tutorial is /home/<user>/greenbone-community-container. If you restart your computer at any point during the setup, the DOWNLOAD_DIR variable will loose its value. In such cases, replace DOWNLOAD_DIR with ./greenbone-community-container in the commands.
Let’s download the actual compose file.
cd $DOWNLOAD_DIR && curl -f -L <https://greenbone.github.io/docs/latest/_static/docker-compose-22.4.yml> -o docker-compose.yml

Once that’s done, we can now setup (pull) the actual containers for OpenVAS. Feel free to pull up an episode of Phineas and Ferb while waiting for the downloads 🍹.
docker-compose -f $DOWNLOAD_DIR/docker-compose.yml -p greenbone-community-edition pull
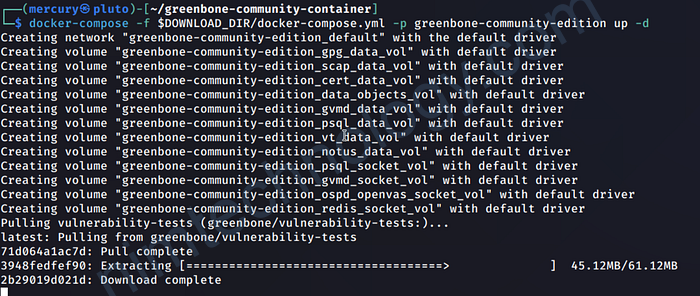
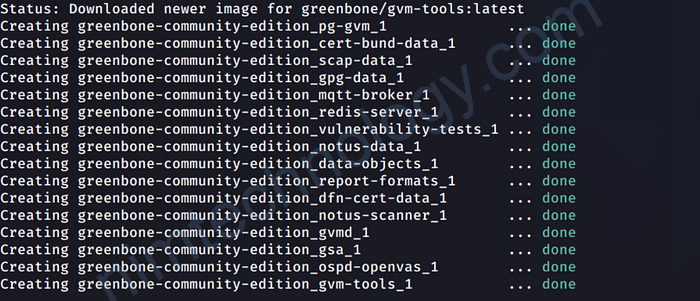
And now, we can start the containers. It should take a few minutes.
docker-compose -f $DOWNLOAD_DIR/docker-compose.yml -p greenbone-community-edition up -d
To open up the web interface for OpenVAS, run the command below.
xdg-open "<http://127.0.0.1:9392>" 2>/dev/null >/dev/null &
Alternatively, you could open up Firefox and type in the following.
<http://127.0.0.1:9392>
An interface just like the one below should pop up.

The default username and password are admin and admin respectively. This is insecure so you might want to change them later.Qư!234567890
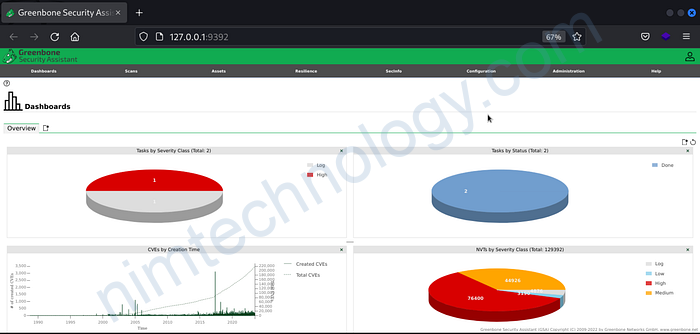
I’ve already run a few scans so my dashboard looks a bit different. Nevertheless, you should see something similar to the image above.
It’s important to note that the scanner won’t work immediately until all components are loaded. You can check this in this in the Feed Status under the Administration Tab. Depending on your hardware resources, it might take about 30 mins to a few hours (You might want to pull up another episode 👀🍹).
Once the feeds are updated, the column should show current on all tabs. Now to verify everything is working, we need to run a scan on our local host. Go to the Dashboard and click on the Wand icon at the top left to run a quick scan.
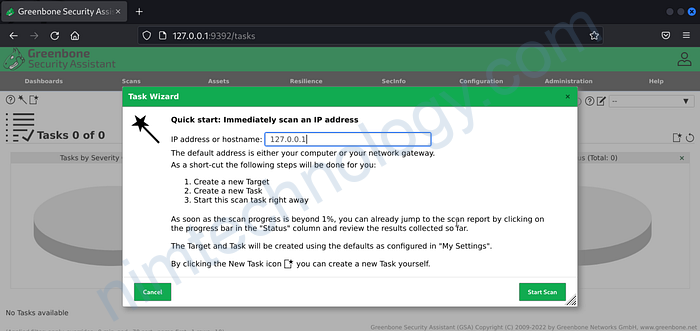
Put the address 127.0.0.1 and hit ‘Start Scan’.
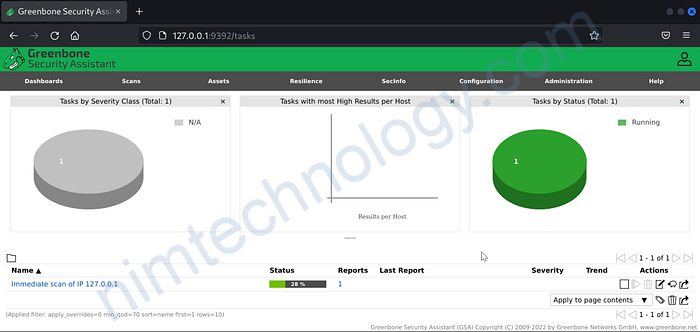
If your Status bar goes past the1% mark, give yourself a pat on the back. You have successfully installed OpenVAS 🍾🥂.
To stop the containers, run the following command.
docker-compose -f ./greenbone-community-container/docker-compose.yml -p greenbone-community-edition down
For more information, check out Greenbone’s documentation or watch this video.
Conclusion
OpenVAS can be quite frustrating and time taking to install. However, once you know how to do it, you can carry out vulnerability scanning on various systems (and without paying a dime 🪙). As always, use hacking tools for appropriate purposes and don’t scan infrastructure you aren’t legally allowed to.
Happy Hacking 🙃.