Case của mình là như sau:
Đầu tiên mình có Dockerfile:
FROM ubuntu:18.04
CMD ["sleep", "100000"]
Mình sẽ thử build image
docker build -t docker.nimtechnology.com/nim/non-root:0.0.1 --force-rm -f Dockerfile .Sau đó mình running trên k8s
OK giờ mình ko muốn nó run với user root thì làm sao:
https://code.visualstudio.com/remote/advancedcontainers/add-nonroot-user
Có 2 cách như link bên trên:
Creating a non-root user
ARG USERNAME=user-name-goes-here
ARG USER_UID=1000
ARG USER_GID=$USER_UID

# Create the user
RUN groupadd --gid $USER_GID $USERNAME \
    && useradd --uid $USER_UID --gid $USER_GID -m $USERNAME \
    #
    # [Optional] Add sudo support. Omit if you don't need to install software after connecting.
    && apt-get update \
    && apt-get install -y sudo \
    && echo $USERNAME ALL=\(root\) NOPASSWD:ALL > /etc/sudoers.d/$USERNAME \
    && chmod 0440 /etc/sudoers.d/$USERNAME

# ********************************************************
# * Anything else you want to do like clean up goes here *
# ********************************************************

# [Optional] Set the default user. Omit if you want to keep the default as root.
USER $USERNAME
Change the UID/GID of an existing container user
ARG USERNAME=user-name-goes-here
ARG USER_UID=1000
ARG USER_GID=$USER_UID

RUN groupmod --gid $USER_GID $USERNAME \
    && usermod --uid $USER_UID --gid $USER_GID $USERNAME \
    && chown -R $USER_UID:$USER_GID /home/$USERNAME
Note that on Alpine Linux, you’ll need to install the shadow package first.
RUN apk add --no-cache shadowGiờ Dockerfile của mình sẽ thay đổi như sau:
FROM ubuntu:18.04

ARG USERNAME=nimtechnology
ARG USER_UID=1000
ARG USER_GID=$USER_UID

# Create the user
RUN groupadd --gid $USER_GID $USERNAME \
    && useradd --uid $USER_UID --gid $USER_GID -m $USERNAME \
    #
    # [Optional] Add sudo support. Omit if you don't need to install software after connecting.
    && apt-get update \
    && apt-get install -y sudo \
    && echo $USERNAME ALL=\(root\) NOPASSWD:ALL > /etc/sudoers.d/$USERNAME \
    && chmod 0440 /etc/sudoers.d/$USERNAME

# ********************************************************
# * Anything else you want to do like clean up goes here *
# ********************************************************

# [Optional] Set the default user. Omit if you want to keep the default as root.


USER $USERNAME

CMD ["sleep", "100000"]
OK đã chuẩn bị đầy đủ.
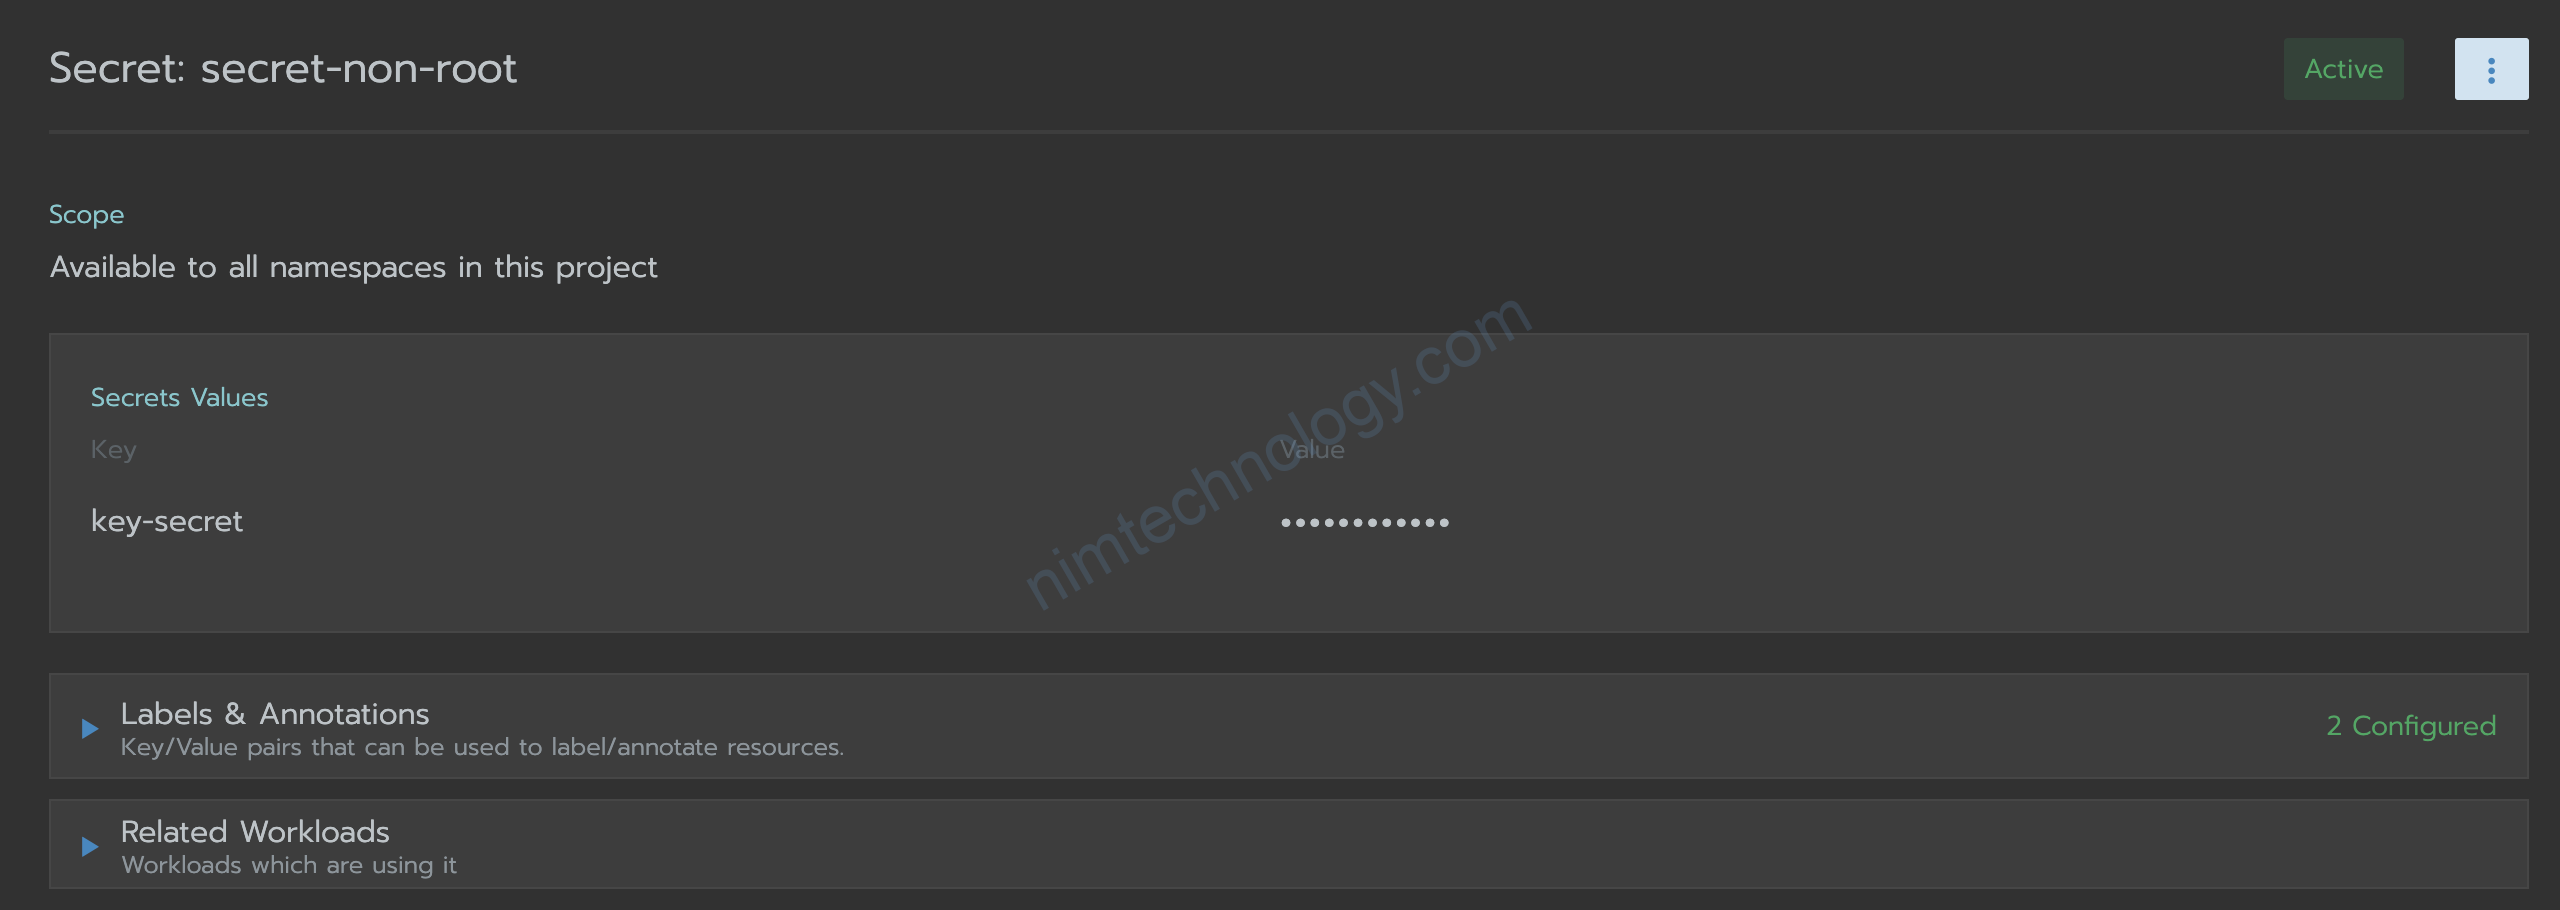
Giờ mình thực hiện tạo 1 secret trên k8s.
Với file yaml bên dưới:
zapiVersion: v1
data:
  key-secret: dmFsdWUtc2VjcmV0
kind: Secret
metadata:
  labels:
  name: secret-non-root
  namespace: default
type: Opaque
Giờ bạn thực hiện tạo ra 1 deployment và mount secret thành volume
apiVersion: apps/v1
kind: Deployment
metadata:
  labels:
    workload.user.cattle.io/workloadselector: deployment-default-container-non-root
  name: container-non-root
  namespace: default
spec:
  replicas: 1
  selector:
    matchLabels:
      workload.user.cattle.io/workloadselector: deployment-default-container-non-root
  strategy:
    rollingUpdate:
      maxSurge: 1
      maxUnavailable: 0
    type: RollingUpdate
  template:
    metadata:
      labels:
        workload.user.cattle.io/workloadselector: deployment-default-container-non-root
    spec:
      containers:
      - image: docker.nimtechnology.com/nim/non-root:0.0.5
        name: container-non-root
        volumeMounts:
        - mountPath: /secert
          name: secret-volume
      volumes:
      - name: secret-volume
        secret:
          defaultMode: 420
          secretName: secret-non-root
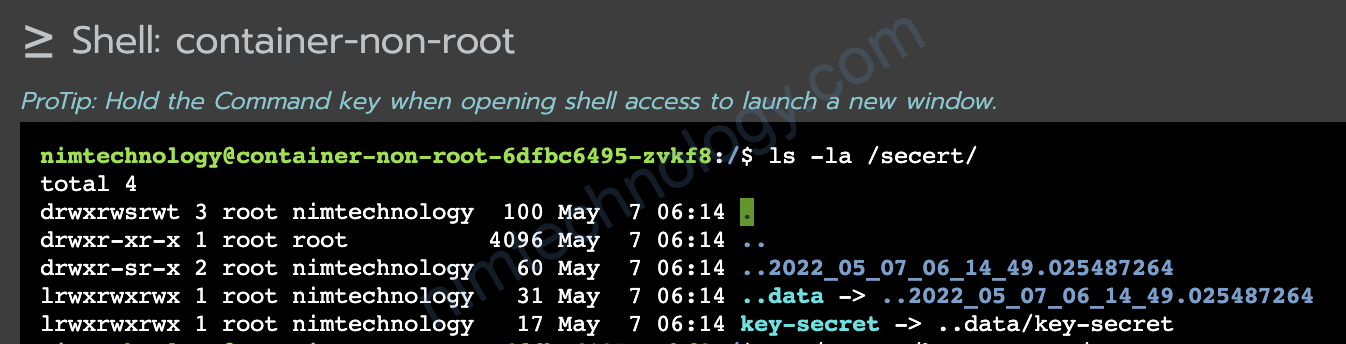
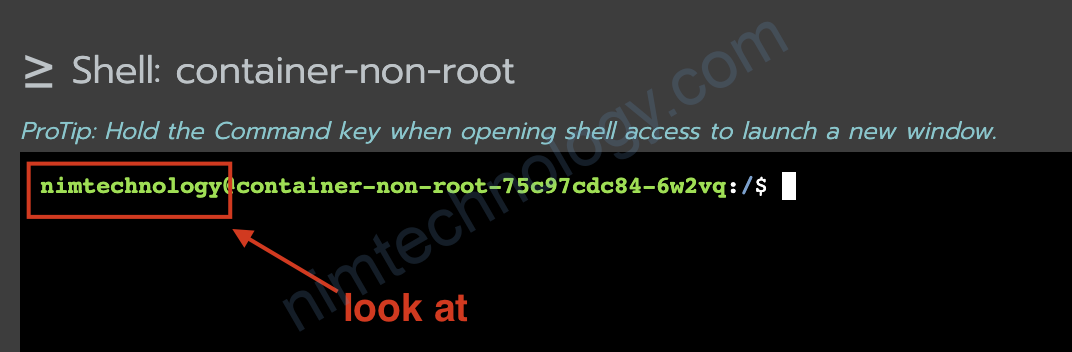
Bạn đoán là file secret được mount sẽ có permission thuộc user nào?
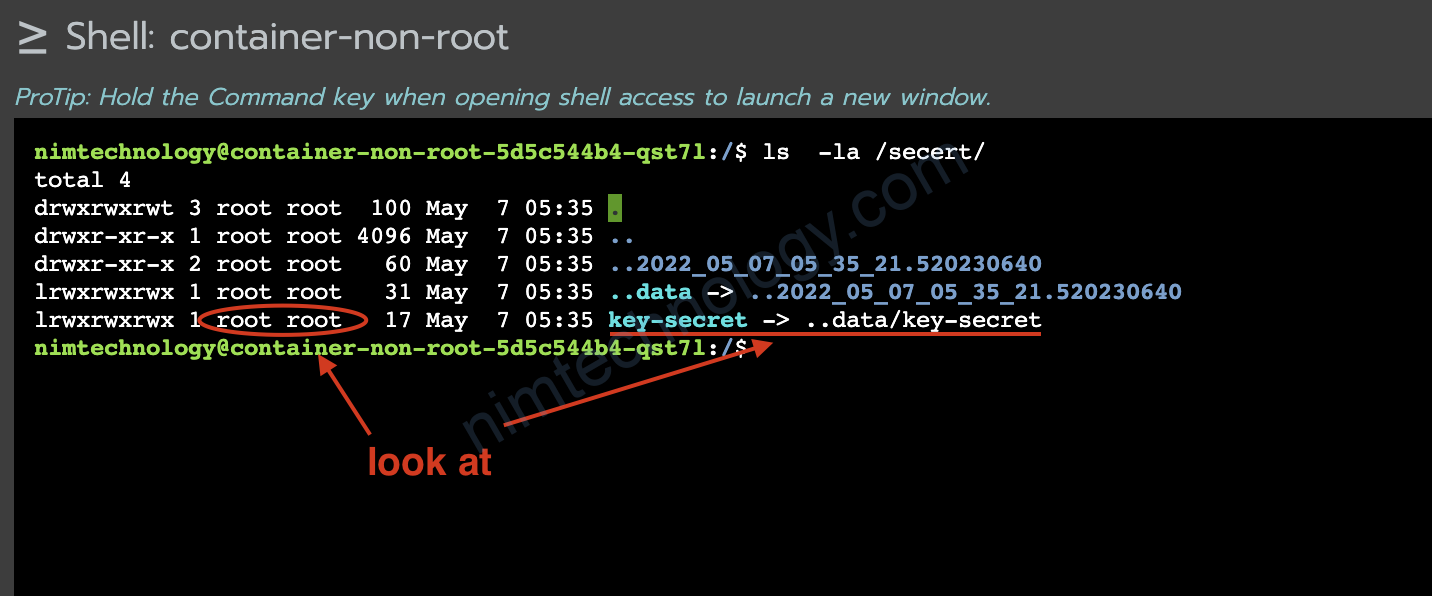
nhưng file được cấp quyền cho user root
Nếu code của bạn muốn copy file key-secret thì sẽ không có quyền

OK! Giờ tìm hiểu thôi!
Để hiểu defaultMode: 420 thì đọc link dưới
https://support.huaweicloud.com/intl/en-us/cce_faq/cce_faq_00288.html
Ok giờ làm sao để mount file secret với user nimtechnology.
lại đọc bài dưới:
https://docs.portworx.com/portworx-install-with-kubernetes/storage-operations/create-pvcs/access-via-non-root-users/
Bạn thêm như anh bên dưới:
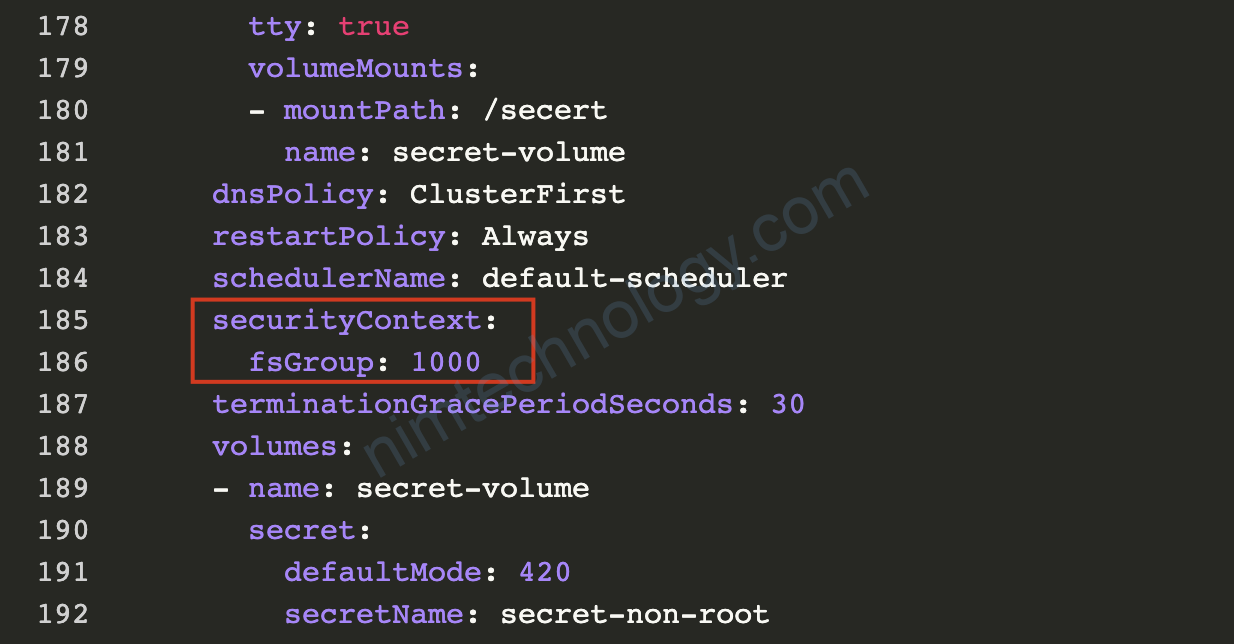
dnsPolicy: ClusterFirst
      restartPolicy: Always
      schedulerName: default-scheduler
      securityContext:
        fsGroup: 1000
      terminationGracePeriodSeconds: 30