Làm sao để tạo 1 cluster k8s trên GCP bằng terraform
https://antonputra.com/google/create-gke-cluster-using-terraform/
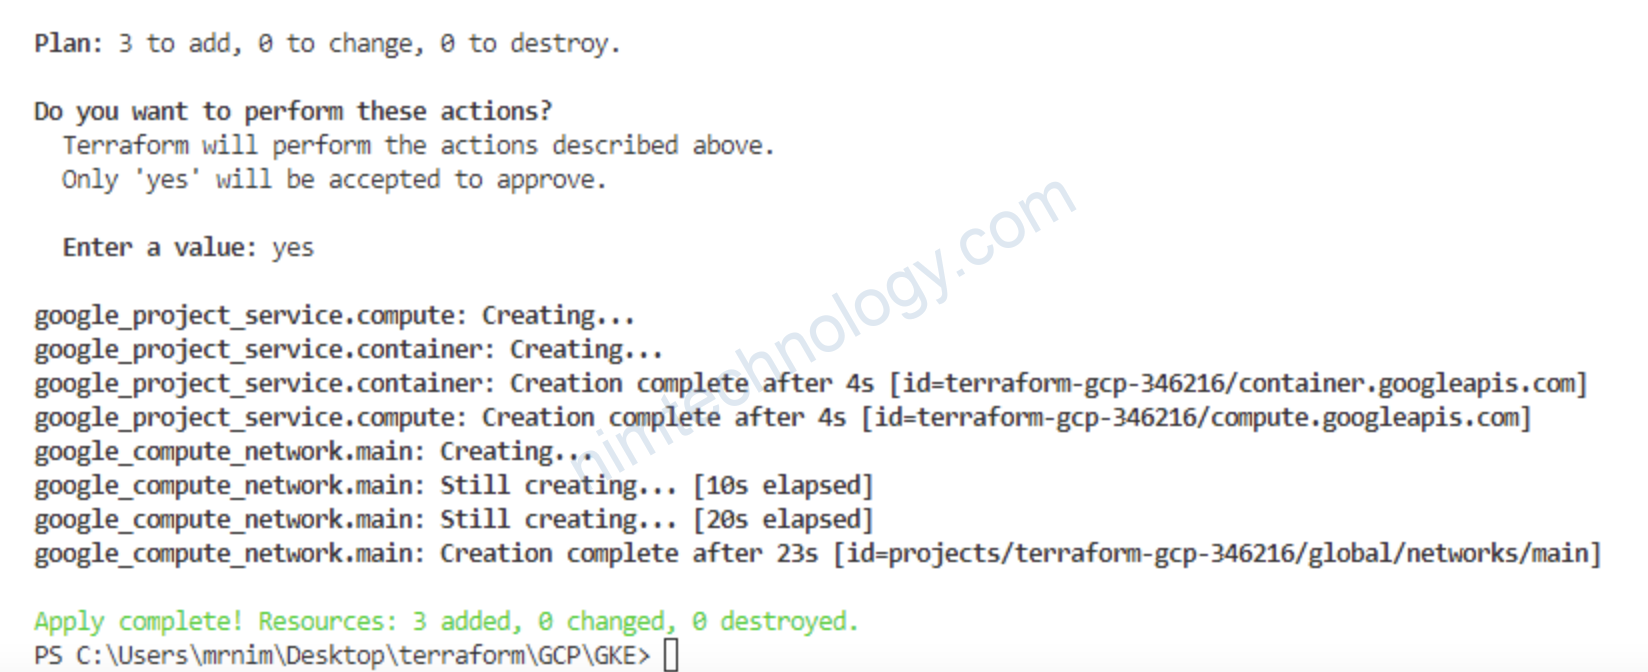
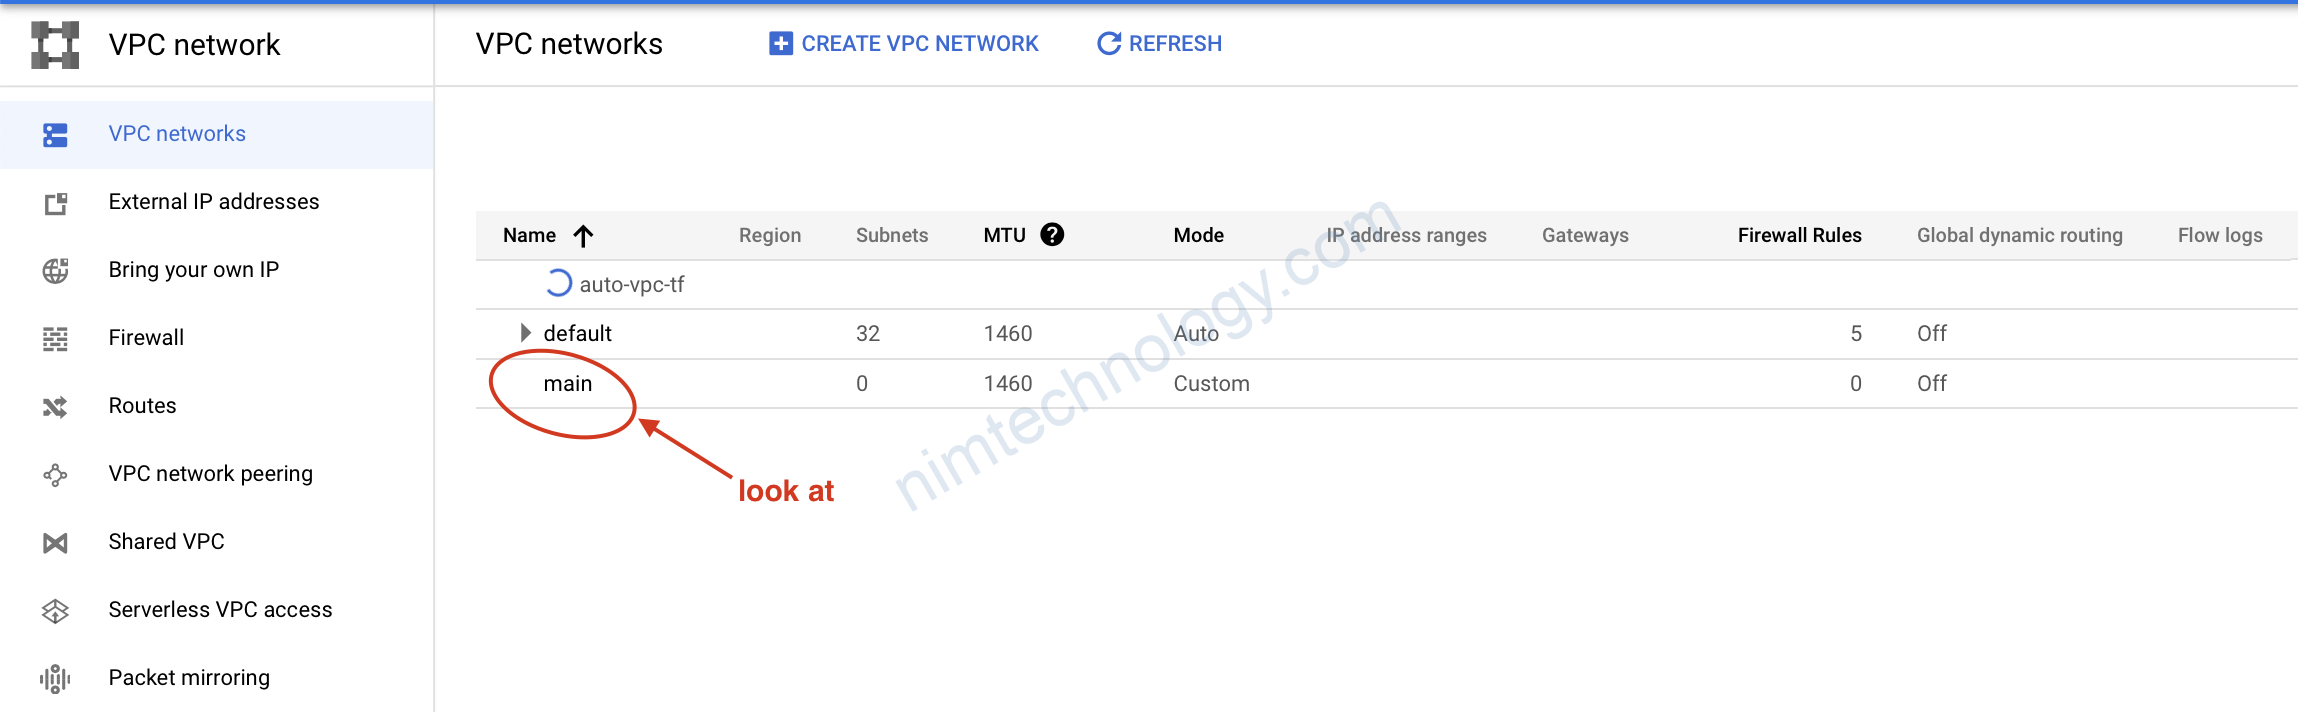
1) Create VPC in GCP using Terraform
Đầu tiên chúng ta cần tạo VPC cho 1 new project GCP. => chúng ta cần enable compute API
Để tạo 1 cluster GKE (k8s) => chúng ta cần enable container google API
==> Chúng ta enble api bằng terraform luôn.
2-vpc.tf

>>>>
# https://registry.terraform.io/providers/hashicorp/google/latest/docs/resources/google_project_service
resource "google_project_service" "compute" {
  service = "compute.googleapis.com"
}

resource "google_project_service" "container" {
  service = "container.googleapis.com"
}

# https://registry.terraform.io/providers/hashicorp/google/latest/docs/resources/compute_network
resource "google_compute_network" "main" {
  name                            = "main"
  routing_mode                    = "REGIONAL"
  auto_create_subnetworks         = false
  mtu                             = 1460
  delete_default_routes_on_create = false

  depends_on = [
    google_project_service.compute,
    google_project_service.container
  ]
}
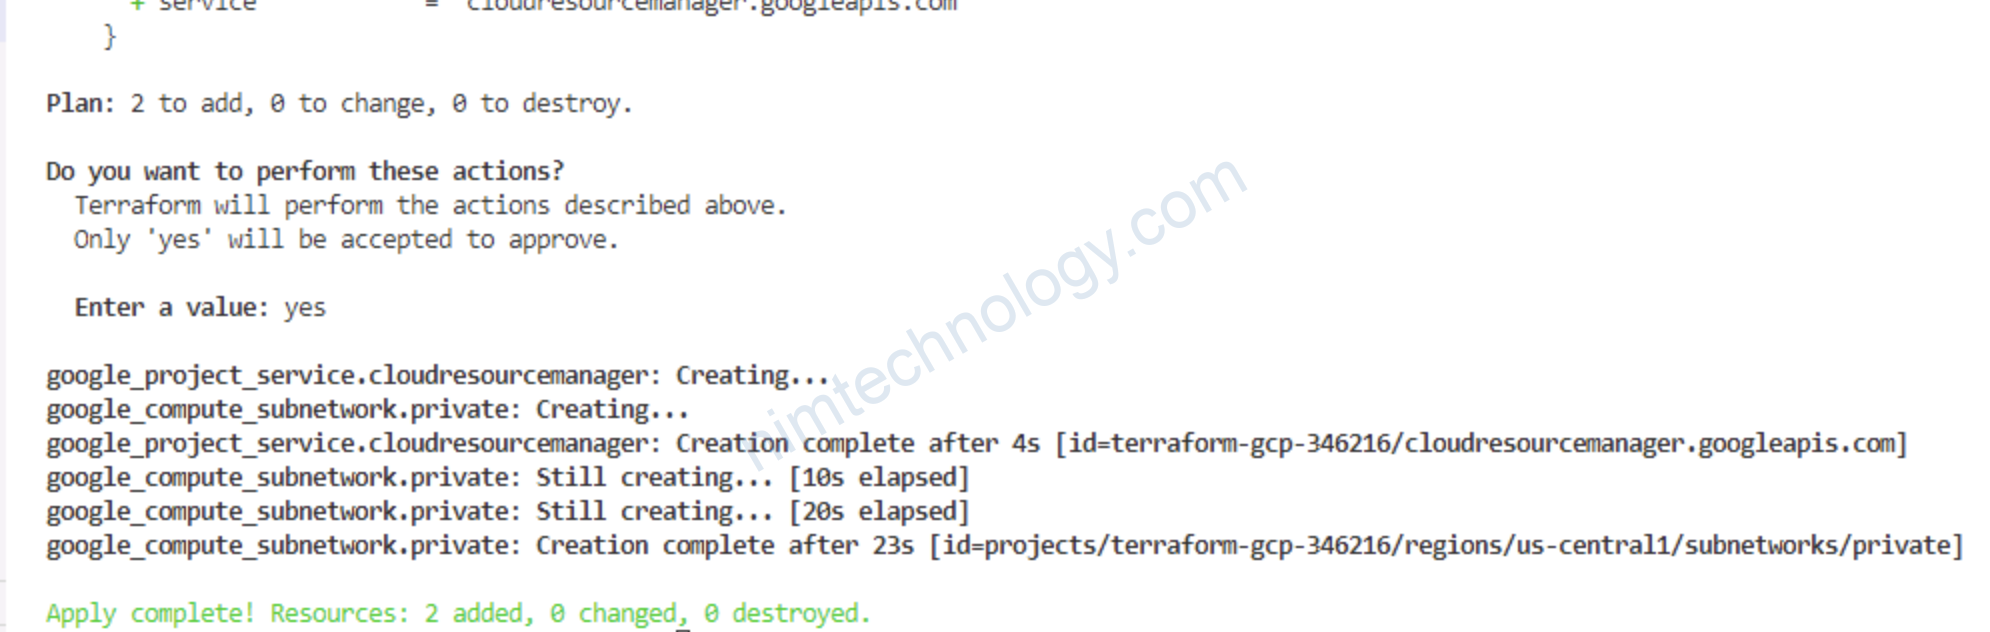
Giờ chúng ta gõ: terraform init
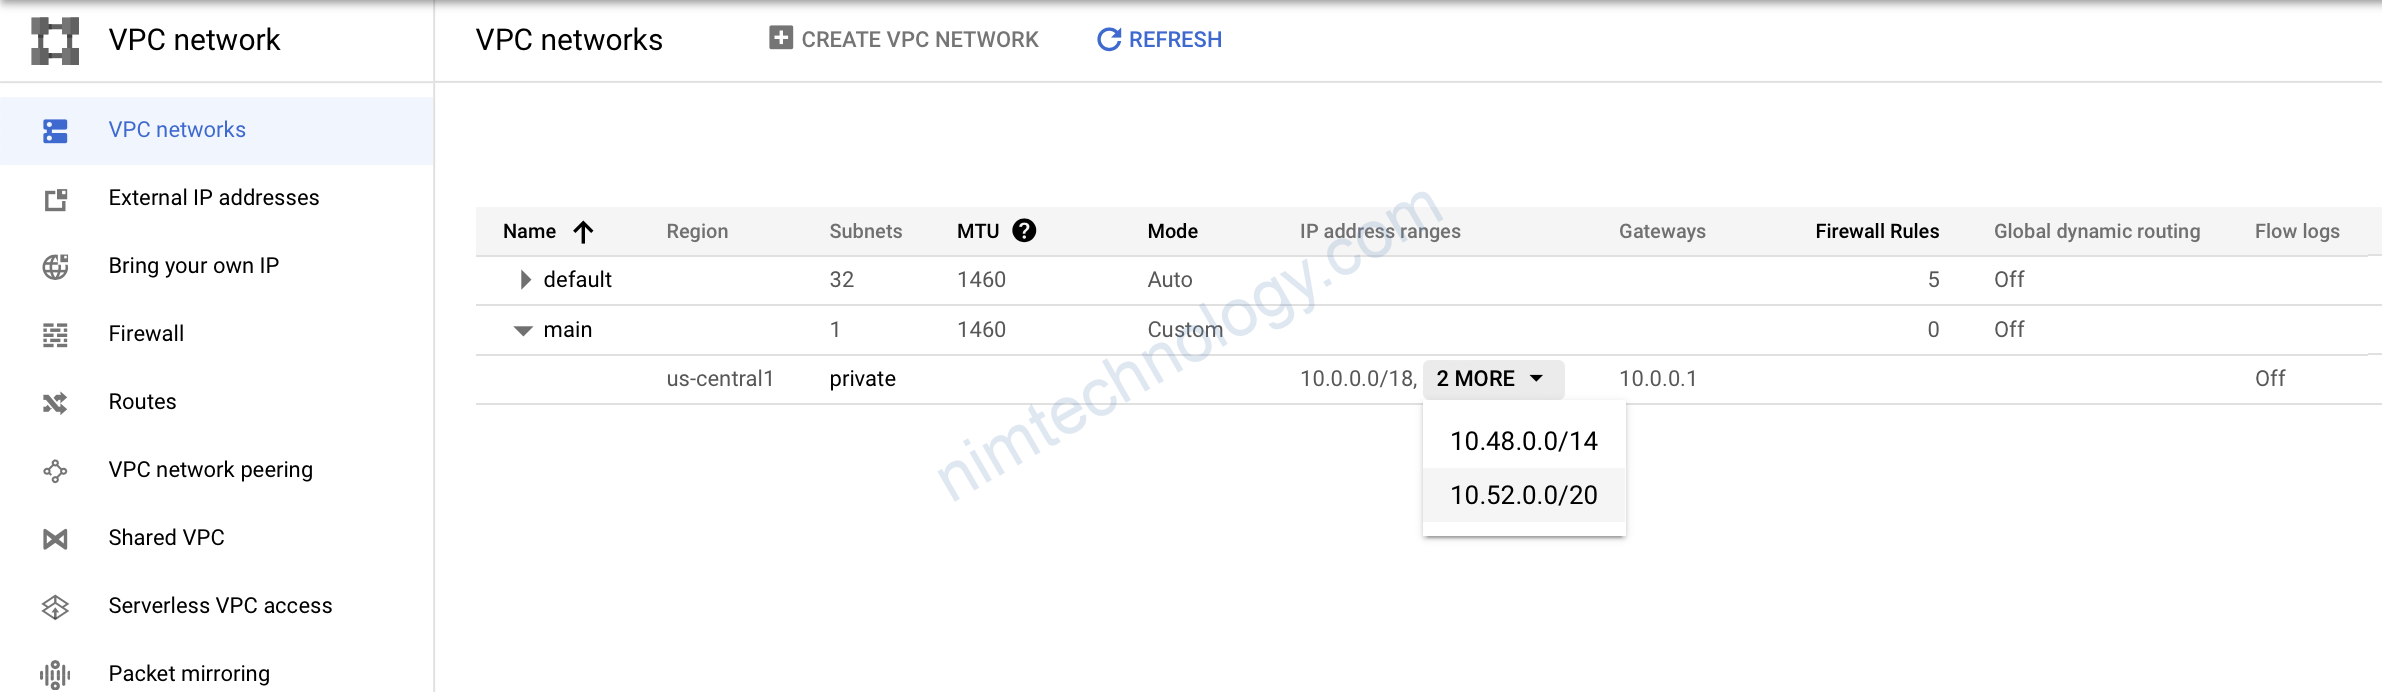
2) Create Subnet in GCP using Terraform
3-subnets.tf
>>>>

# https://registry.terraform.io/providers/hashicorp/google/latest/docs/resources/compute_subnetwork
resource "google_compute_subnetwork" "private" {
  name                     = "private"
  ip_cidr_range            = "10.0.0.0/18"
  region                   = "us-central1"
  network                  = google_compute_network.main.id
  private_ip_google_access = true

  secondary_ip_range {
    range_name    = "k8s-pod-range"
    ip_cidr_range = "10.48.0.0/14"
  }
  secondary_ip_range {
    range_name    = "k8s-service-range"
    ip_cidr_range = "10.52.0.0/20"
  }
}
Bạn để ý bên trên chúng ta có quy hoặc range IP dành cho pod và 1 range IP dành cho service
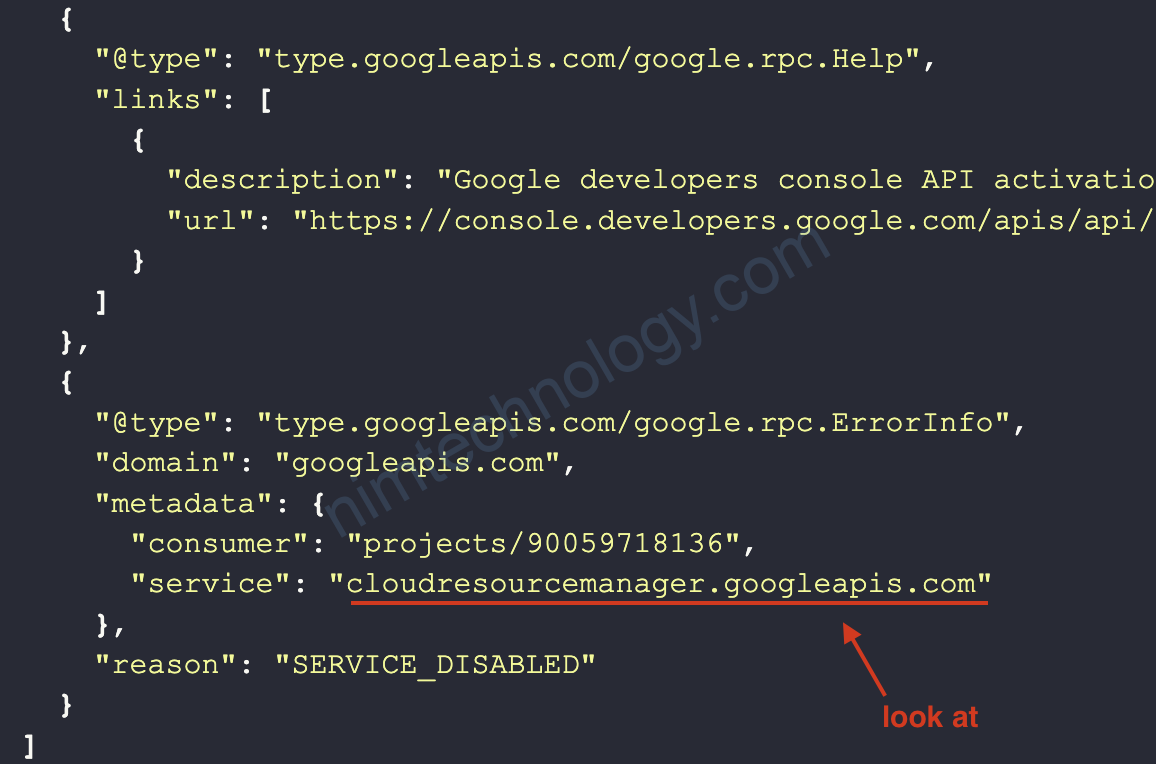
KHi mình apply thì gặp lỗi:
Error: Error when reading or editing Project Service terraform-gcp-346216/container.googleapis.com: googleapi: Error 403: Cloud Resource Manager API has
not been used in project 90059718136 before or it is disabled. Enable it by visiting https://console.developers.google.com/apis/api/cloudresourcemanager.googleapis.com/overview?project=90059718136 then retry. If you enabled this API recently, wait a few minutes for the action to propagate to our systems and retry.
│ Details:
│ [
│   {
│     "@type": "type.googleapis.com/google.rpc.Help",
│     "links": [
│       {
│         "description": "Google developers console API activation",
│         "url": "https://console.developers.google.com/apis/api/cloudresourcemanager.googleapis.com/overview?project=90059718136"
│       }
│     ]
│   },
│   {
│     "@type": "type.googleapis.com/google.rpc.ErrorInfo",
│     "domain": "googleapis.com",
│     "metadata": {
│       "consumer": "projects/90059718136",
│       "service": "cloudresourcemanager.googleapis.com"
│     },
│     "reason": "SERVICE_DISABLED"
│   }
│ ]
│ , accessNotConfigured
│
│   with google_project_service.container,
│   on 2-vpc.tf line 6, in resource "google_project_service" "container":
│    6: resource "google_project_service" "container" {
Ý là service cloudresourcemanager.googleapis.com chưa được enable
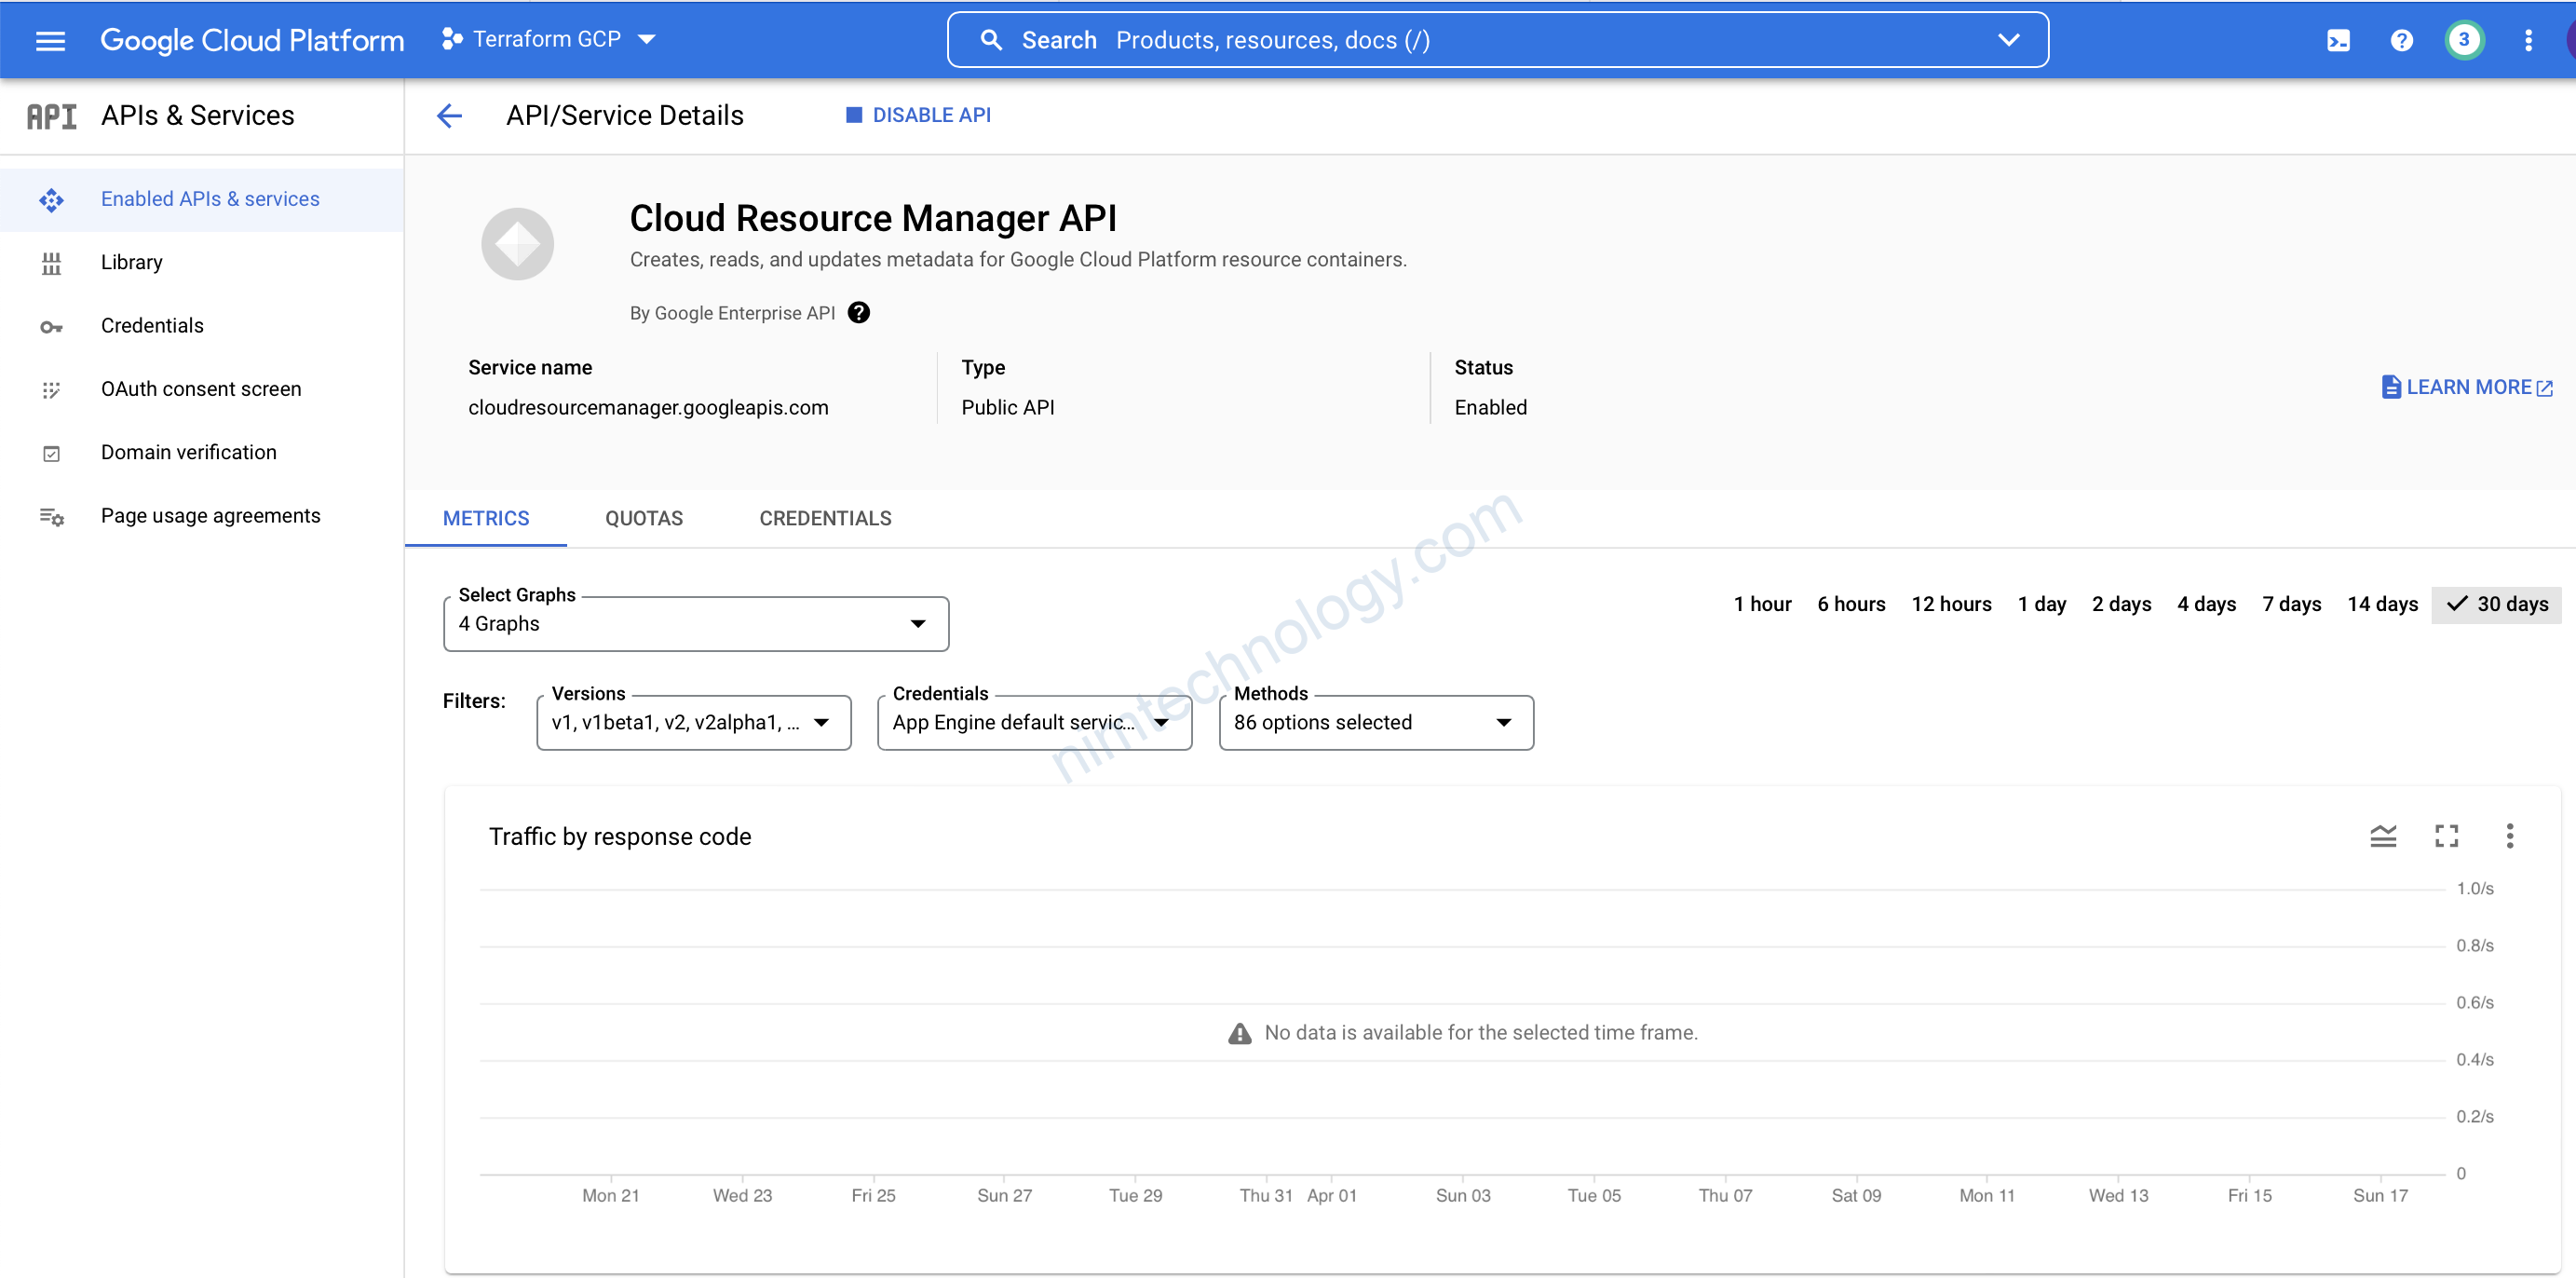
chỗ này chúng ta cần click để enable thủ công “Cloud Resource Manager API” trên UI
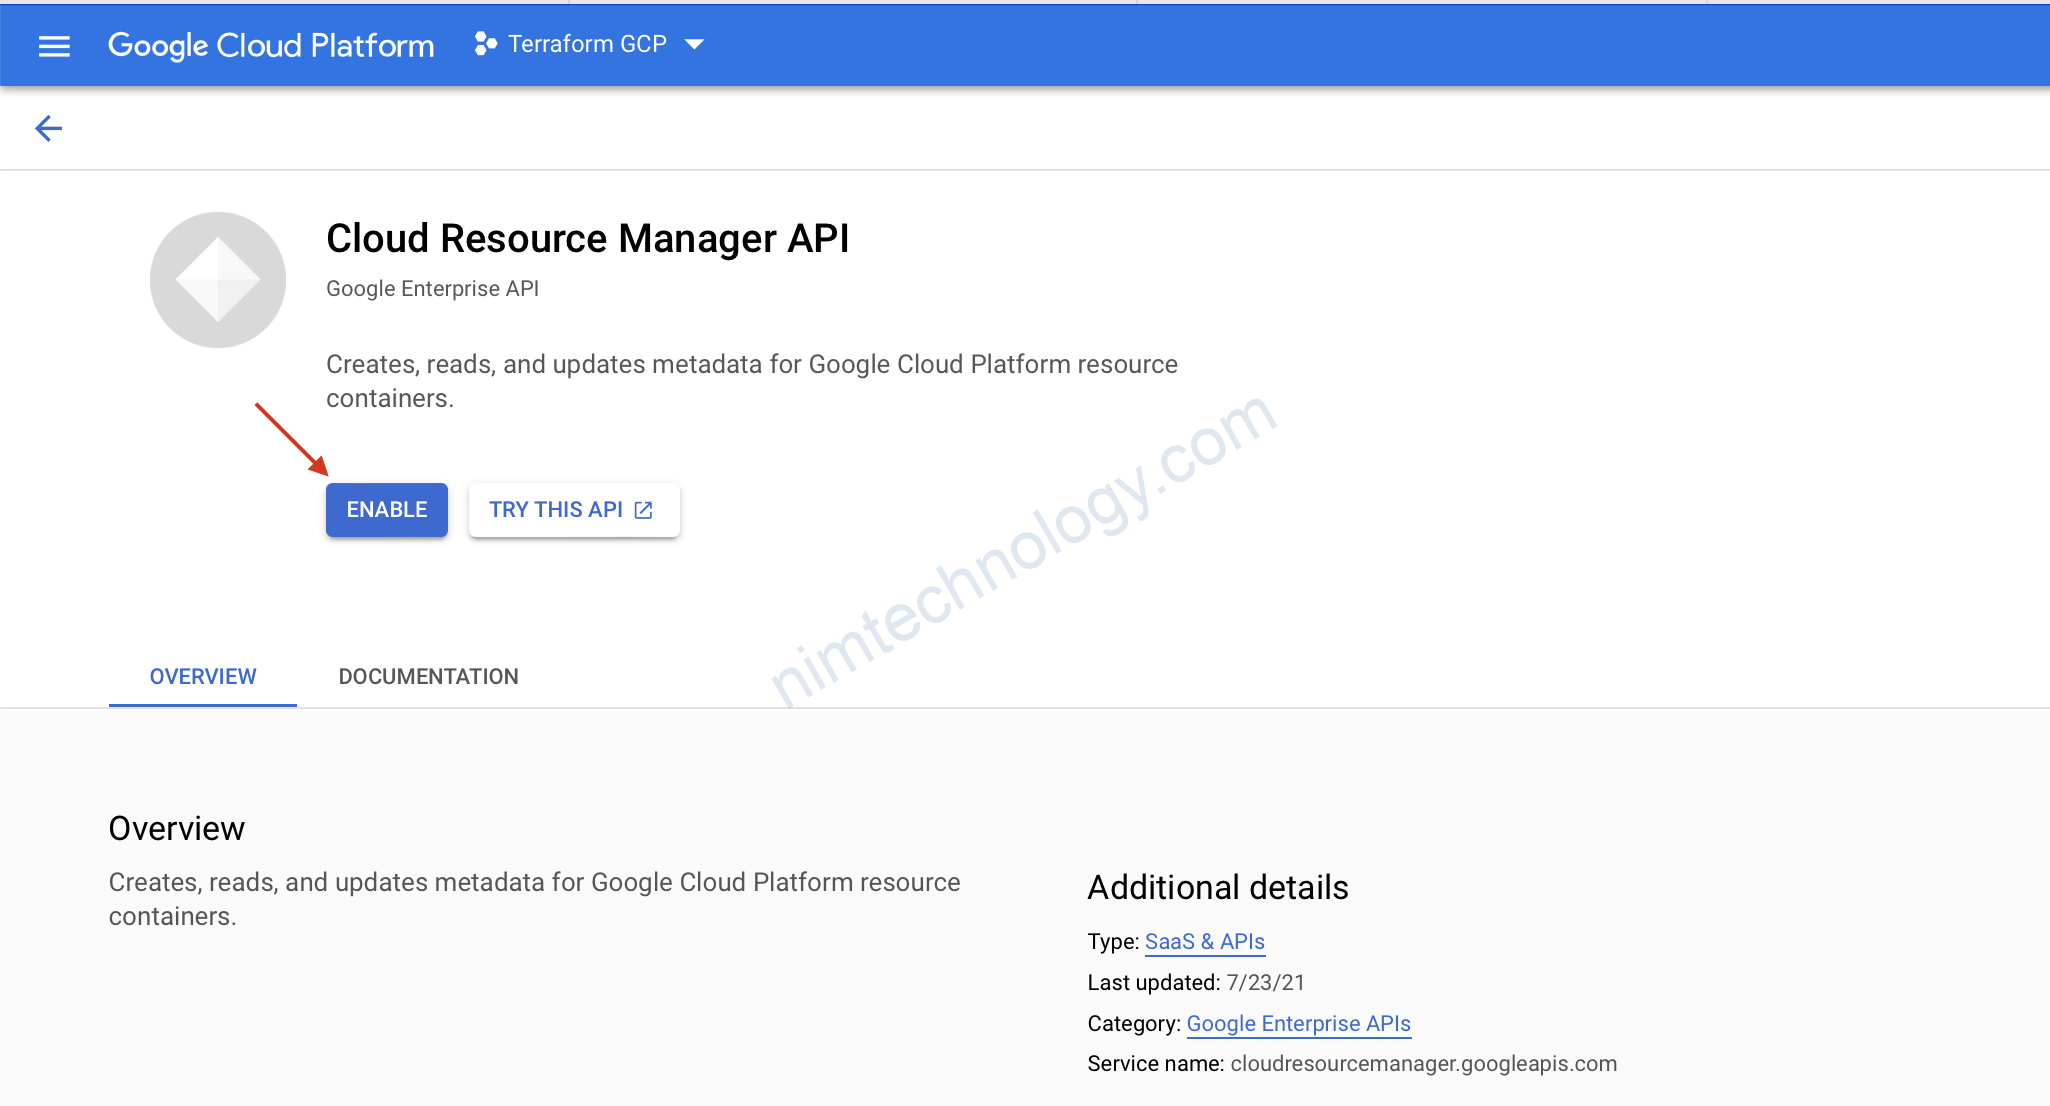
OK giờ apply lại thôi.
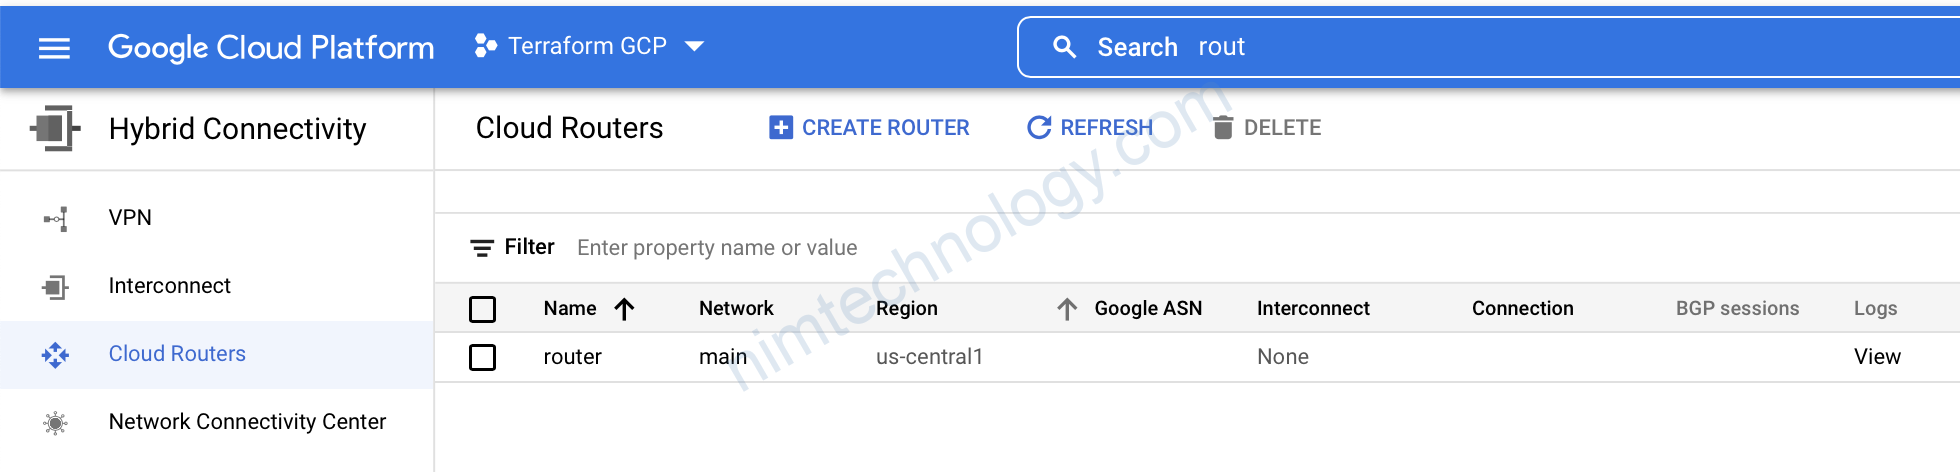
3) Create Cloud Router in GCP using Terraform
Tiếp theo chúng ta cần tạo Cloud Router để quảng bá các routes. Nó sẽ được sử dụng với NAT gateway để cho phép VM không có IP public có thể access ra ngoài internet.
For example, Kubernetes nodes will be able to pull docker images from the docker hub.
4-router.tf
>>>>

# https://registry.terraform.io/providers/hashicorp/google/latest/docs/resources/compute_router
resource "google_compute_router" "router" {
  name    = "router"
  region  = "us-central1"
  network = google_compute_network.main.id
}

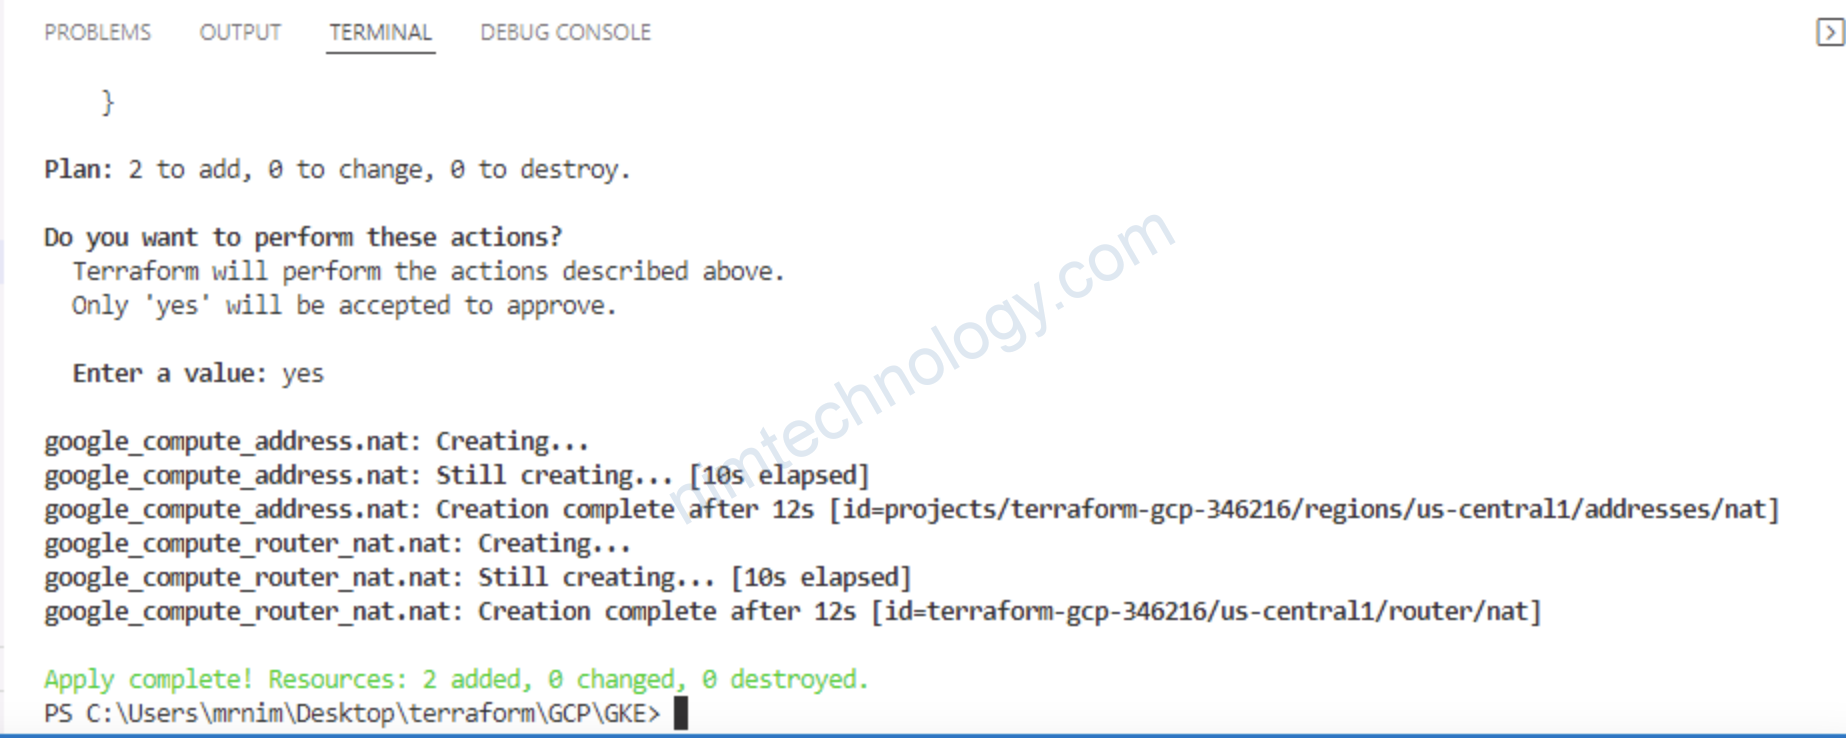
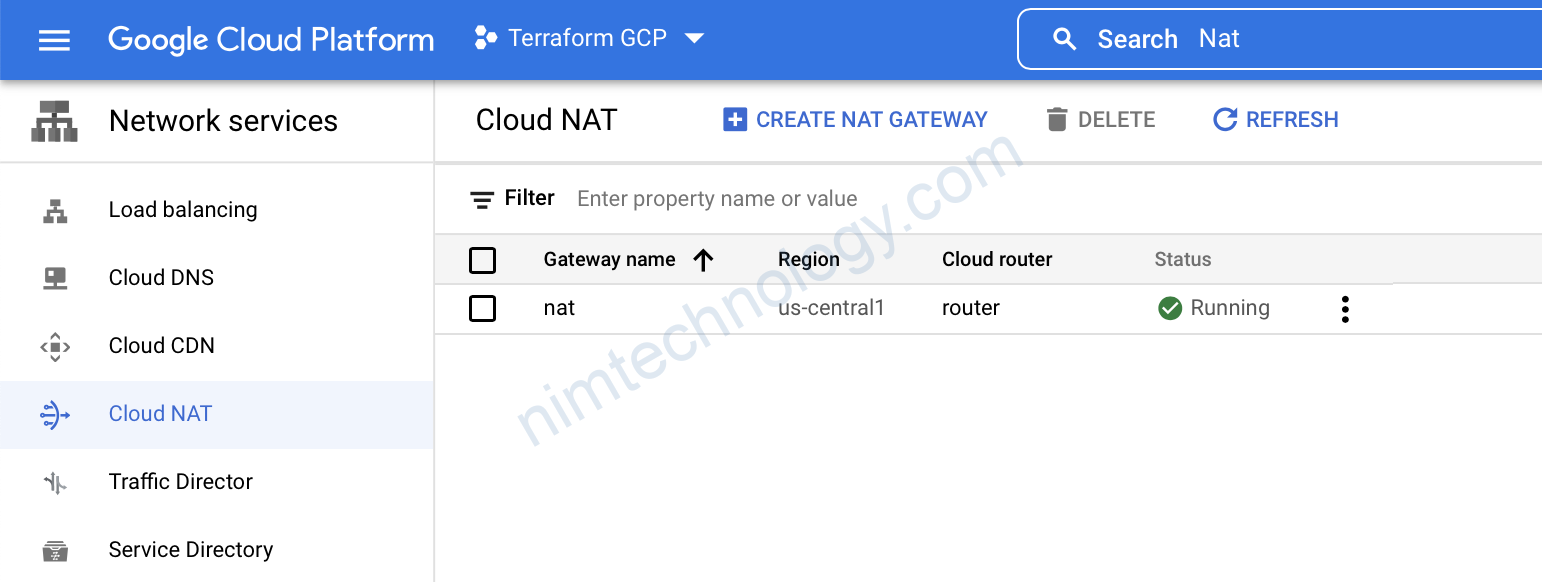
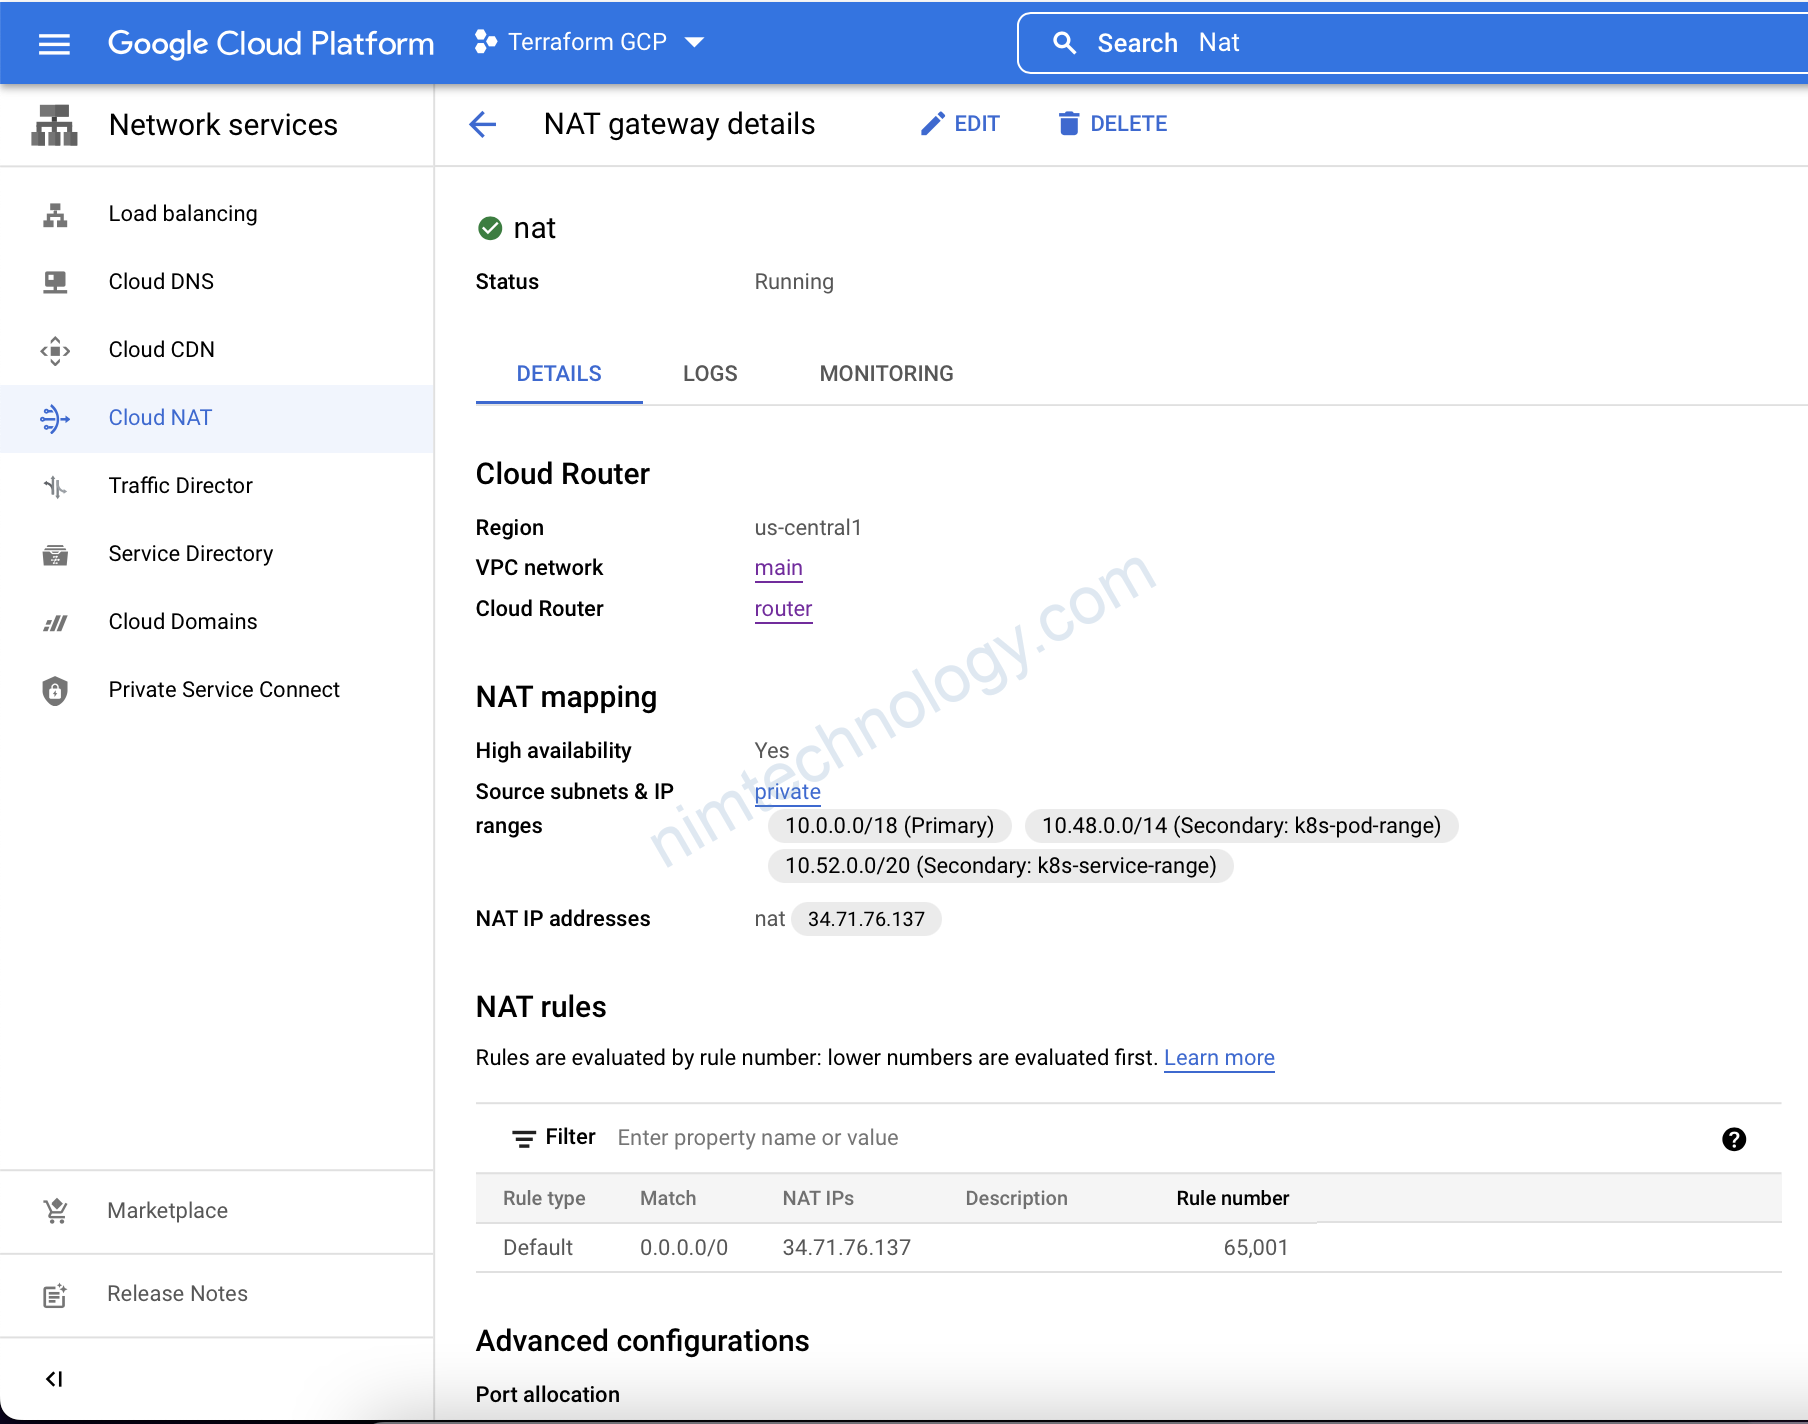
4) Create Cloud NAT in GCP using Terraform
Bây giờ thì chúng ta sẽ tạo Cloud NAT, Lấy cho Nó 1 cái tên và tham khảo đến Cloud Router ở bước trên. sau đó là chọn region us-central1.
Bạn có thể quyết định quảng bá Cloud NAT đó đến tất cả các subnets trong VPC mà chúng ta đã tạo Hoặc là bạn có thể chỉ định 1 subnet củ thể.
In this example, I will choose the private subnet only.
5-nat.tf
>>>>>

# https://registry.terraform.io/providers/hashicorp/google/latest/docs/resources/compute_router_nat
resource "google_compute_router_nat" "nat" {
  name   = "nat"
  router = google_compute_router.router.name
  region = "us-central1"

  source_subnetwork_ip_ranges_to_nat = "LIST_OF_SUBNETWORKS"
  nat_ip_allocate_option             = "MANUAL_ONLY"

  subnetwork {
    name                    = google_compute_subnetwork.private.id
    source_ip_ranges_to_nat = ["ALL_IP_RANGES"]
  }

  nat_ips = [google_compute_address.nat.self_link]
}

# https://registry.terraform.io/providers/hashicorp/google/latest/docs/resources/compute_address
resource "google_compute_address" "nat" {
  name         = "nat"
  address_type = "EXTERNAL"
  network_tier = "PREMIUM"

  depends_on = [google_project_service.compute]
}
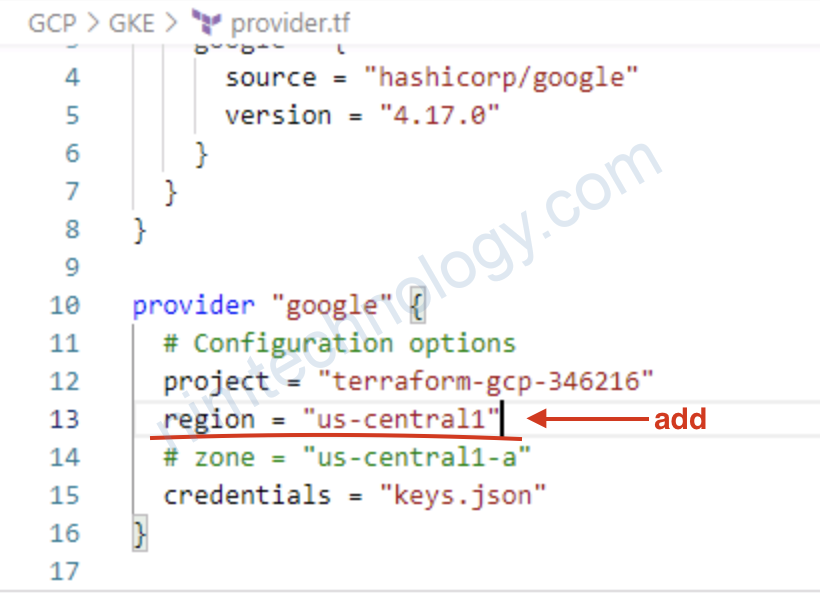
Mình gặp lỗi sau:
Error: Cannot determine region: set in this resource, or set provider-level ‘region’ or ‘zone’.
sau đó mình edit file provider
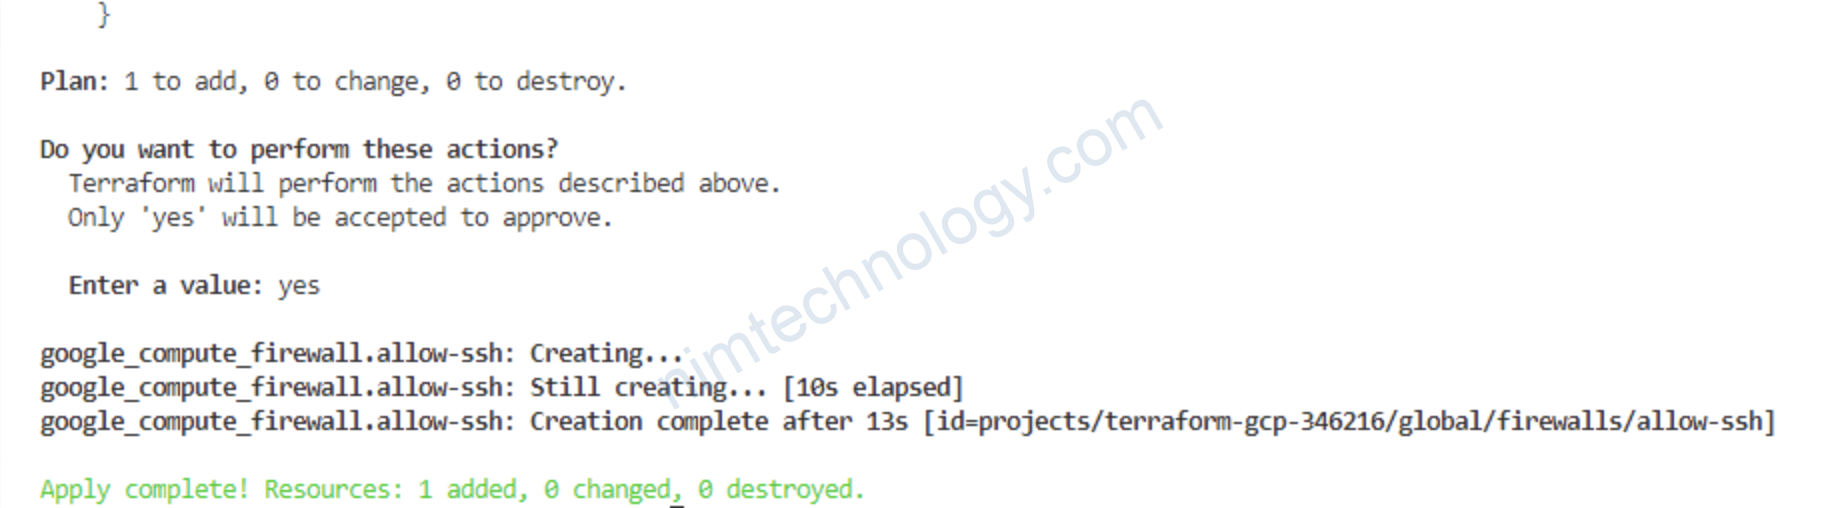
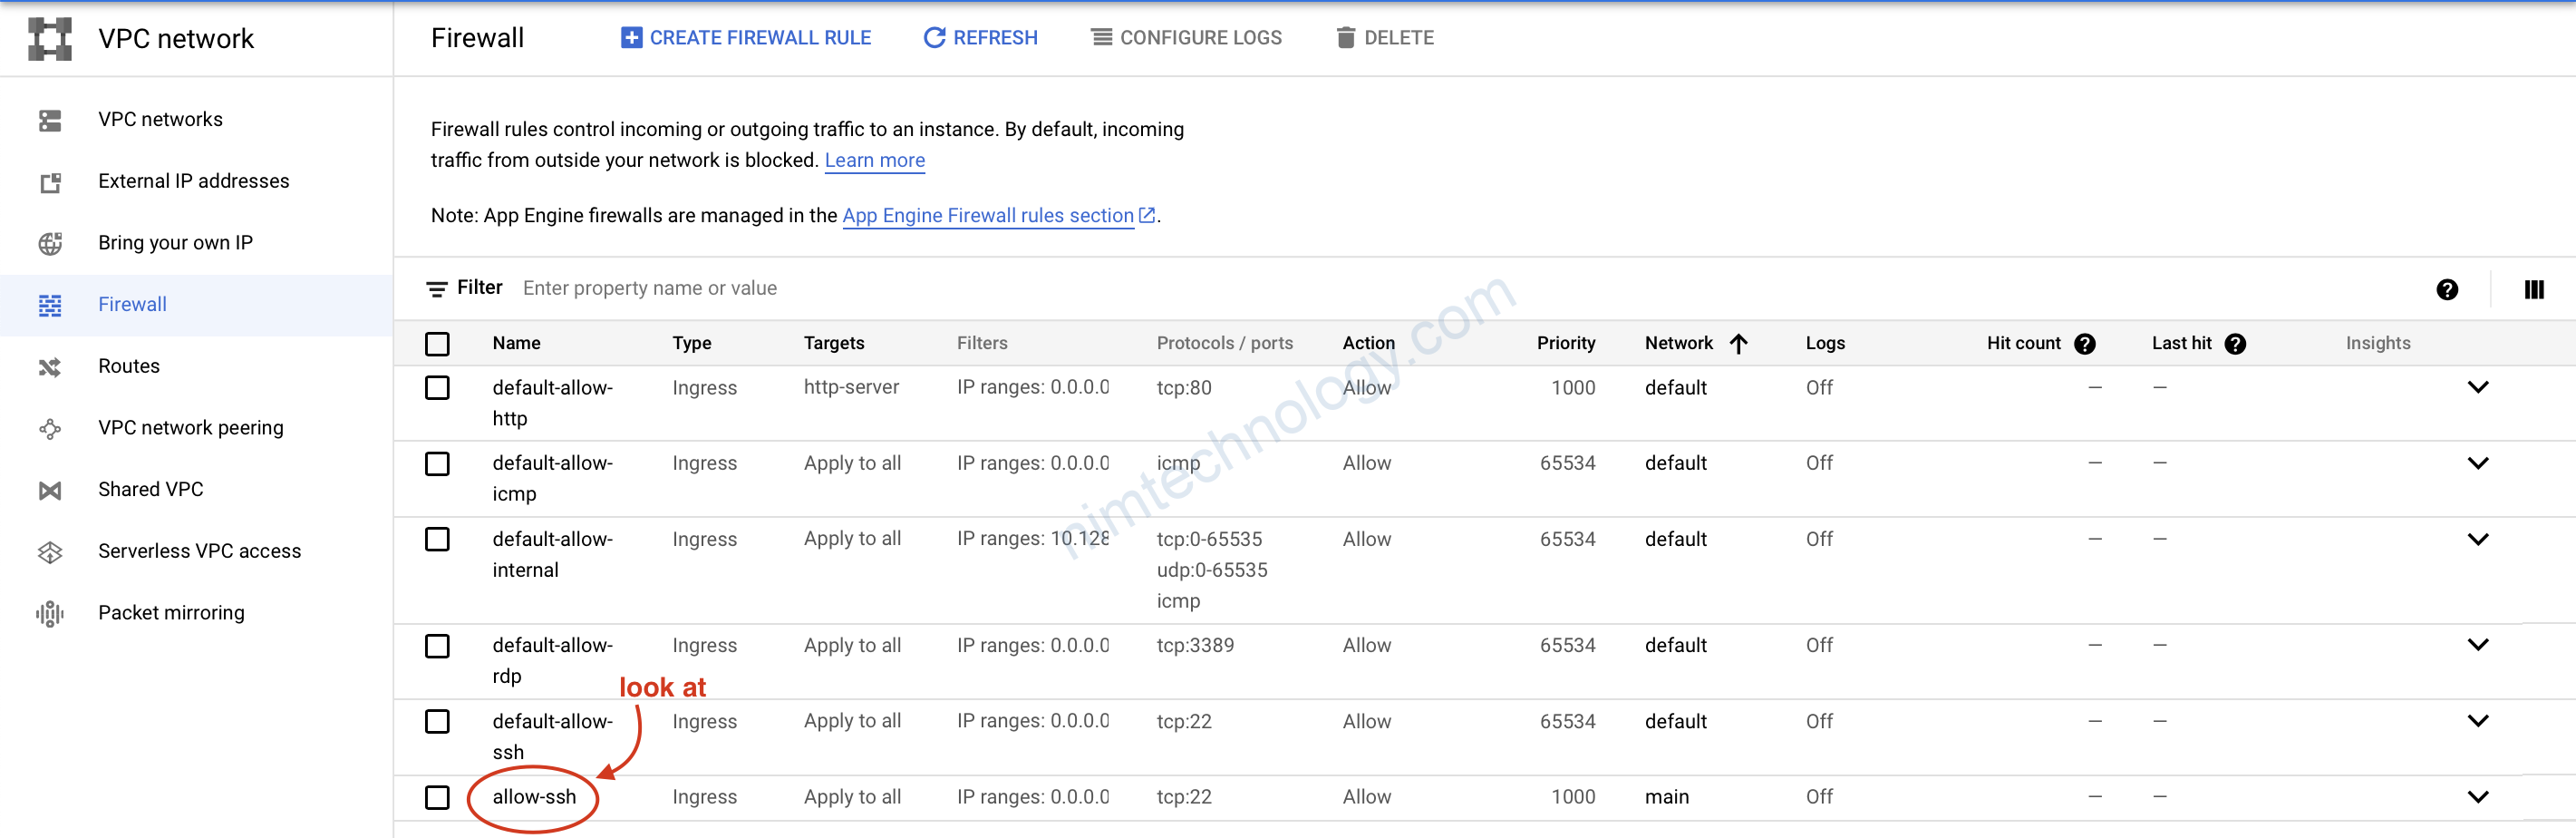
5) Create Firewall in GCP using Terraform
It’s just to give you an example. This firewall will allow sshing to the compute instances within VPC.
6-firewalls.tf
>>>>>

# https://registry.terraform.io/providers/hashicorp/google/latest/docs/resources/compute_firewall
resource "google_compute_firewall" "allow-ssh" {
  name    = "allow-ssh"
  network = google_compute_network.main.name

  allow {
    protocol = "tcp"
    ports    = ["22"]
  }

  source_ranges = ["0.0.0.0/0"]
}
6) Create GKE Cluster Using Terraform
Finally, we got to Kubernetes resource. First, we need to configure the control plane of the cluster itself.
7-kubernetes.tf
>>>>>

# https://registry.terraform.io/providers/hashicorp/google/latest/docs/resources/container_cluster
resource "google_container_cluster" "primary" {
  name                     = "primary"
  location                 = "us-central1-a"
  remove_default_node_pool = true
  initial_node_count       = 1
  network                  = google_compute_network.main.self_link
  subnetwork               = google_compute_subnetwork.private.self_link
  logging_service          = "logging.googleapis.com/kubernetes"
  monitoring_service       = "monitoring.googleapis.com/kubernetes"
  networking_mode          = "VPC_NATIVE"

  # Optional, if you want multi-zonal cluster
  node_locations = [
    "us-central1-b"
  ]

  addons_config {
    http_load_balancing {
      disabled = true
    }
    horizontal_pod_autoscaling {
      disabled = false
    }
  }

  release_channel {
    channel = "REGULAR"
  }

  workload_identity_config {
    workload_pool = "devops-v4.svc.id.goog"
  }

  ip_allocation_policy {
    cluster_secondary_range_name  = "k8s-pod-range"
    services_secondary_range_name = "k8s-service-range"
  }

  private_cluster_config {
    enable_private_nodes    = true
    enable_private_endpoint = false
    master_ipv4_cidr_block  = "172.16.0.0/28"
  }

  #   Jenkins use case
  #   master_authorized_networks_config {
  #     cidr_blocks {
  #       cidr_block   = "10.0.0.0/18"
  #       display_name = "private-subnet-w-jenkins"
  #     }
  #   }
}
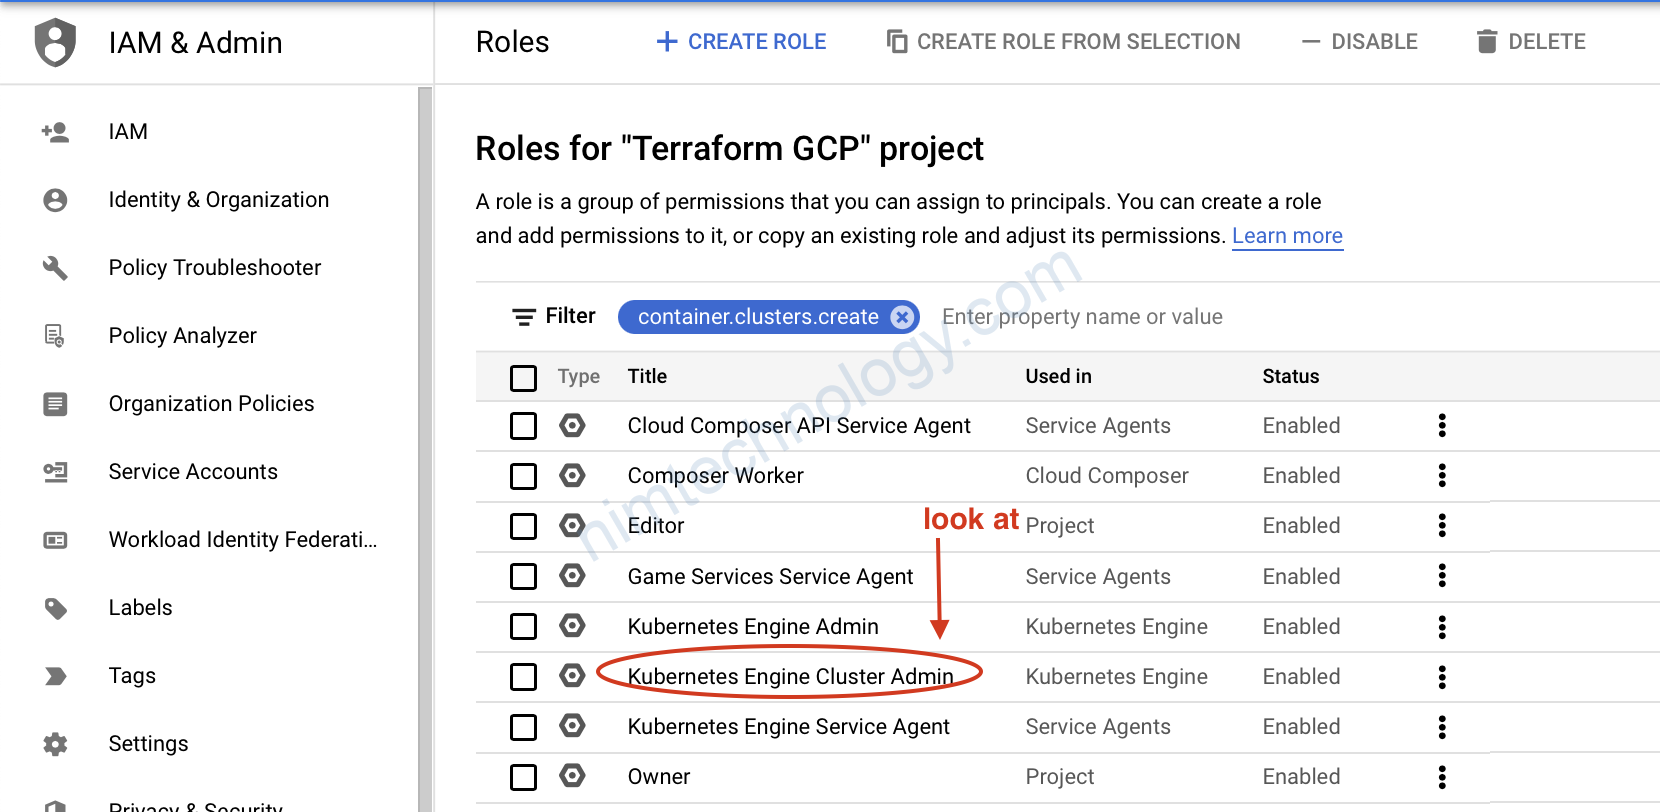
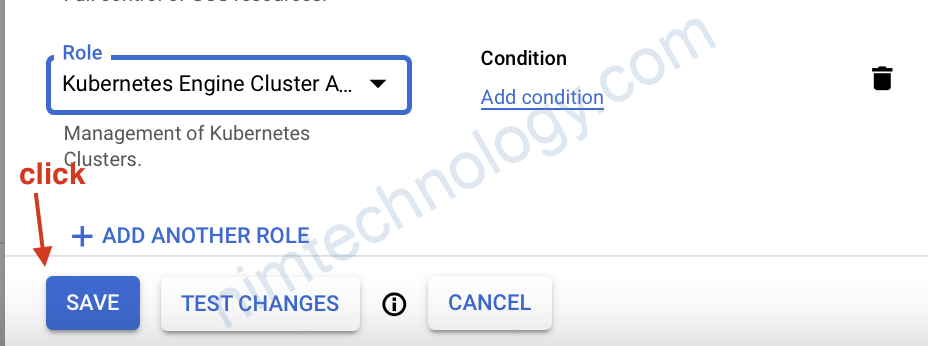
Error: googleapi: Error 403: Required “container.clusters.create” permission(s) for “projects/90059718136”., forbidden
Error: googleapi: Error 400: Currently, the only supported value for workload pool is “terraform-gcp-346216.svc.id.goog”., badRequest
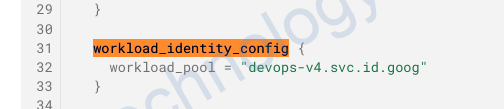
và change vể đúng như lỗi yêu cầu
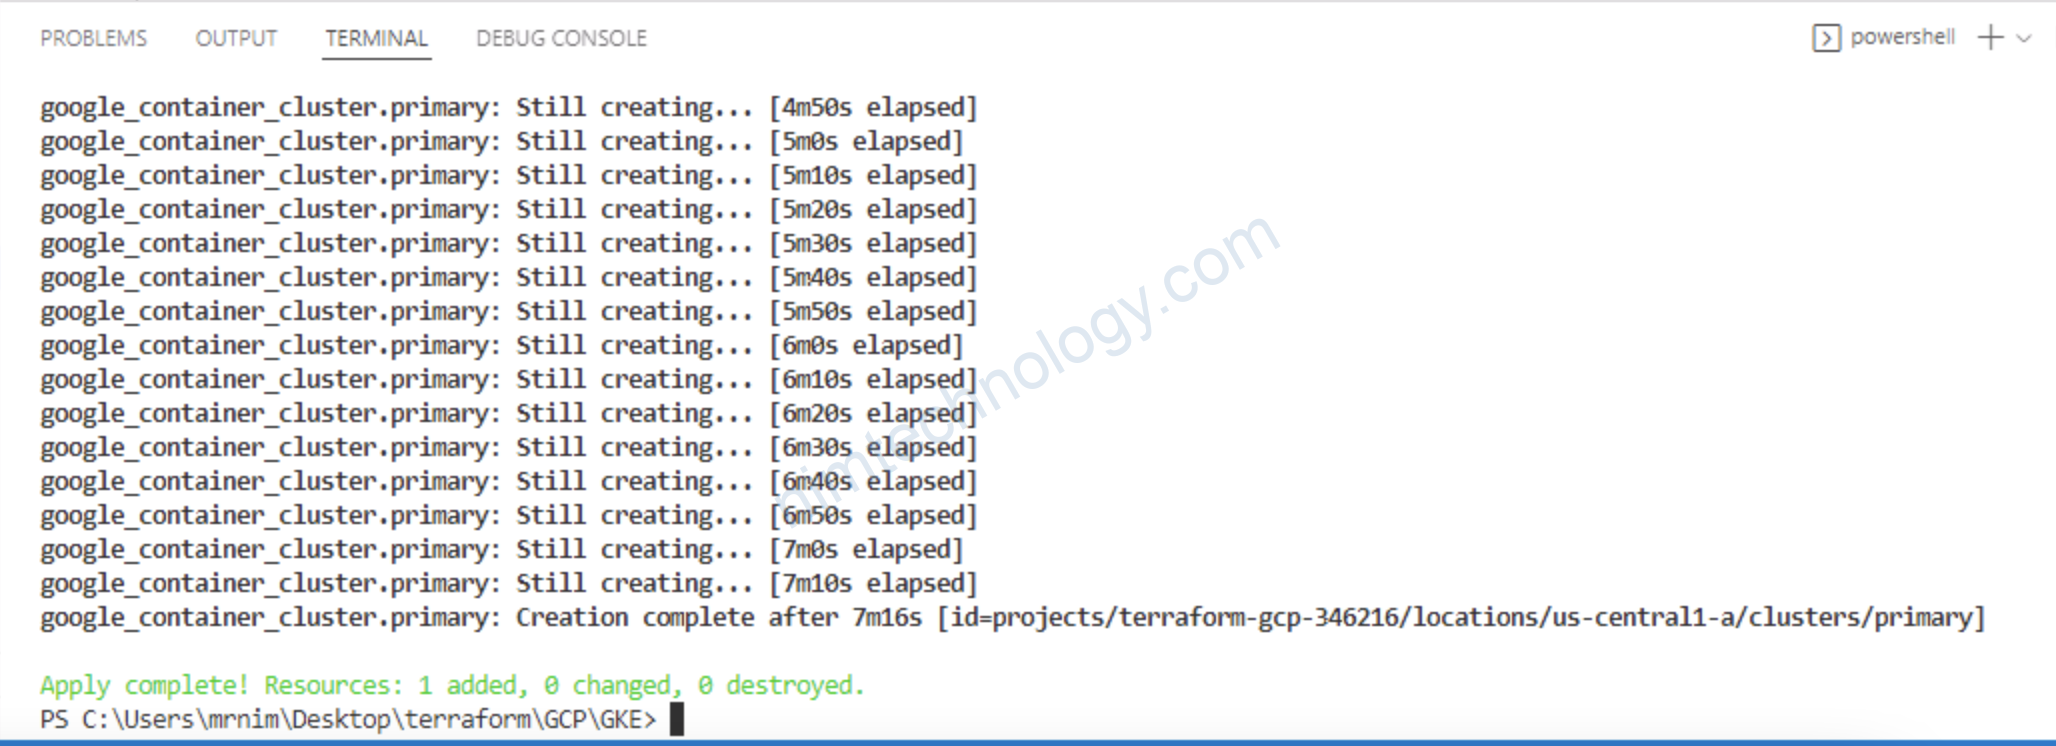
Giờ apply thôi:


7) Create GKE Node Pools using Terraform
Before we can create node groups for Kubernetes, if we want to follow best practices, we need to create a dedicated service account. In this tutorial, we will create two node groups.
8-node-pools.tf
>>>>>

# https://registry.terraform.io/providers/hashicorp/google/latest/docs/resources/google_service_account
resource "google_service_account" "kubernetes" {
  account_id = "kubernetes"
}

# https://registry.terraform.io/providers/hashicorp/google/latest/docs/resources/container_node_pool
resource "google_container_node_pool" "general" {
  name       = "general"
  cluster    = google_container_cluster.primary.id
  node_count = 1

  management {
    auto_repair  = true
    auto_upgrade = true
  }

  node_config {
    preemptible  = false
    machine_type = "e2-small"

    labels = {
      role = "general"
    }

    service_account = google_service_account.kubernetes.email
    oauth_scopes = [
      "https://www.googleapis.com/auth/cloud-platform"
    ]
  }
}

resource "google_container_node_pool" "spot" {
  name    = "spot"
  cluster = google_container_cluster.primary.id

  management {
    auto_repair  = true
    auto_upgrade = true
  }

  autoscaling {
    min_node_count = 0
    max_node_count = 10
  }

  node_config {
    preemptible  = true
    machine_type = "e2-small"

    labels = {
      team = "devops"
    }

    taint {
      key    = "instance_type"
      value  = "spot"
      effect = "NO_SCHEDULE"
    }

    service_account = google_service_account.kubernetes.email
    oauth_scopes = [
      "https://www.googleapis.com/auth/cloud-platform"
    ]
  }
}
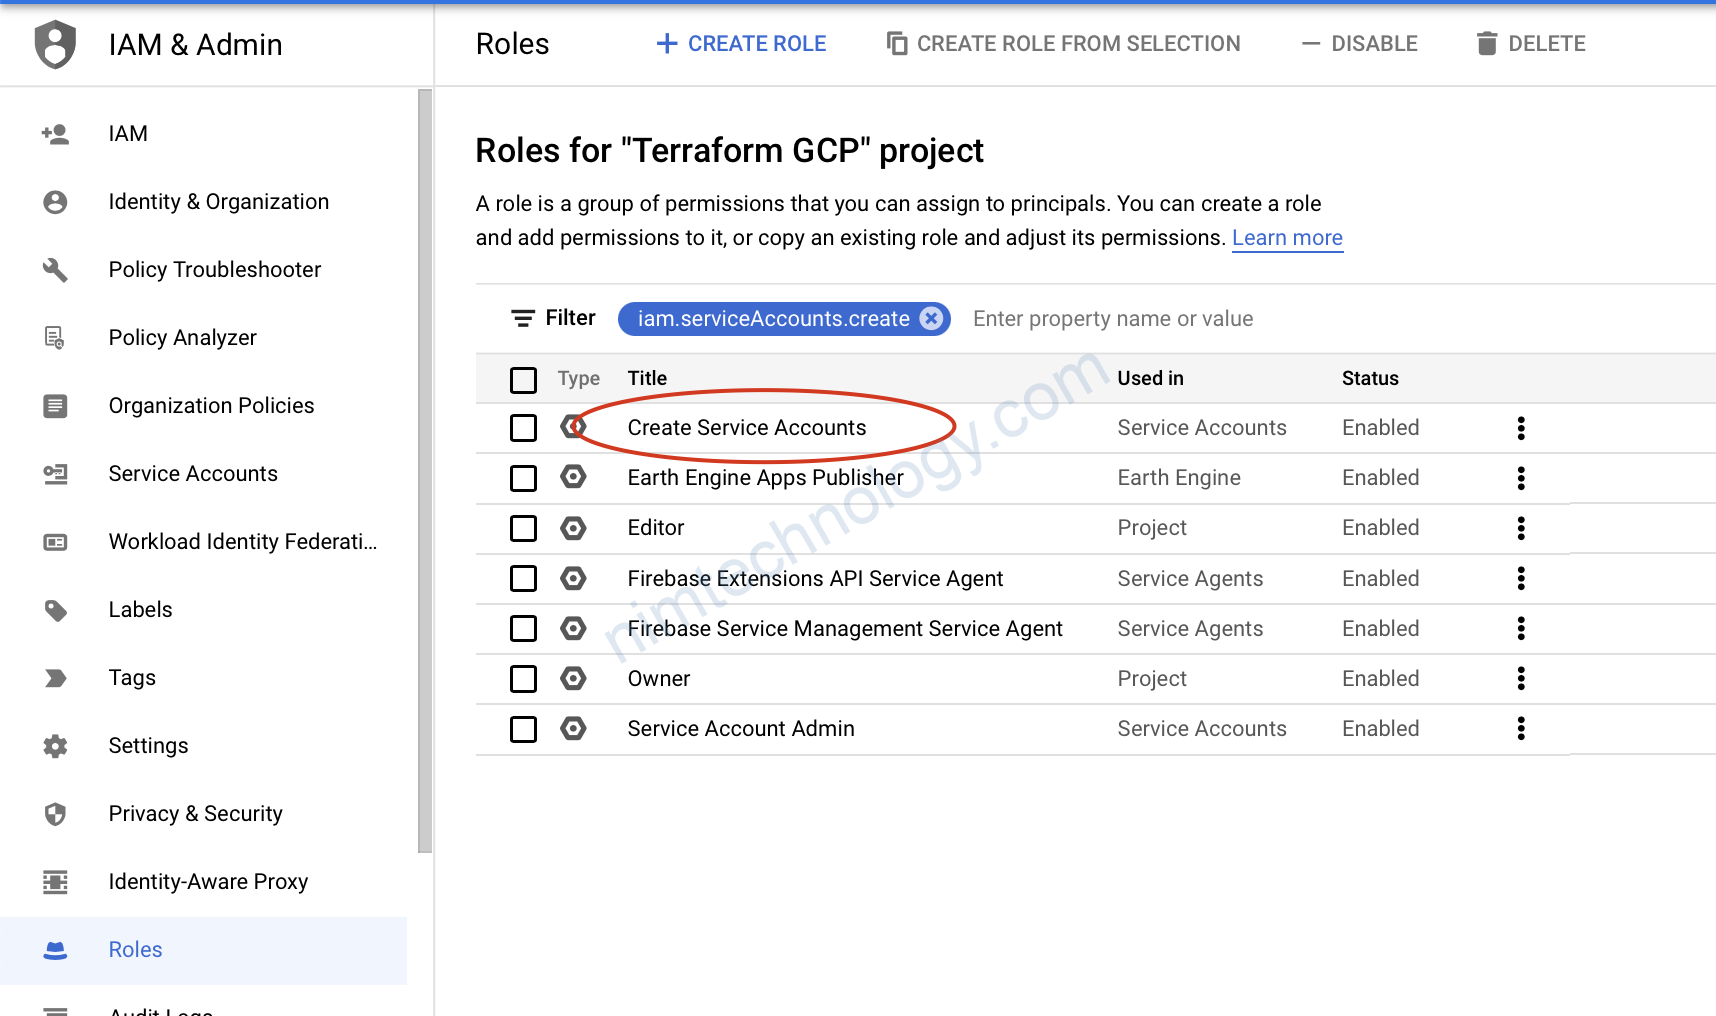
Error: Error creating service account: googleapi: Error 403: Permission iam.serviceAccounts.create is required to perform this operation on project projects/terraform-gcp-346216., forbidden
apply không lỗi mới lạ

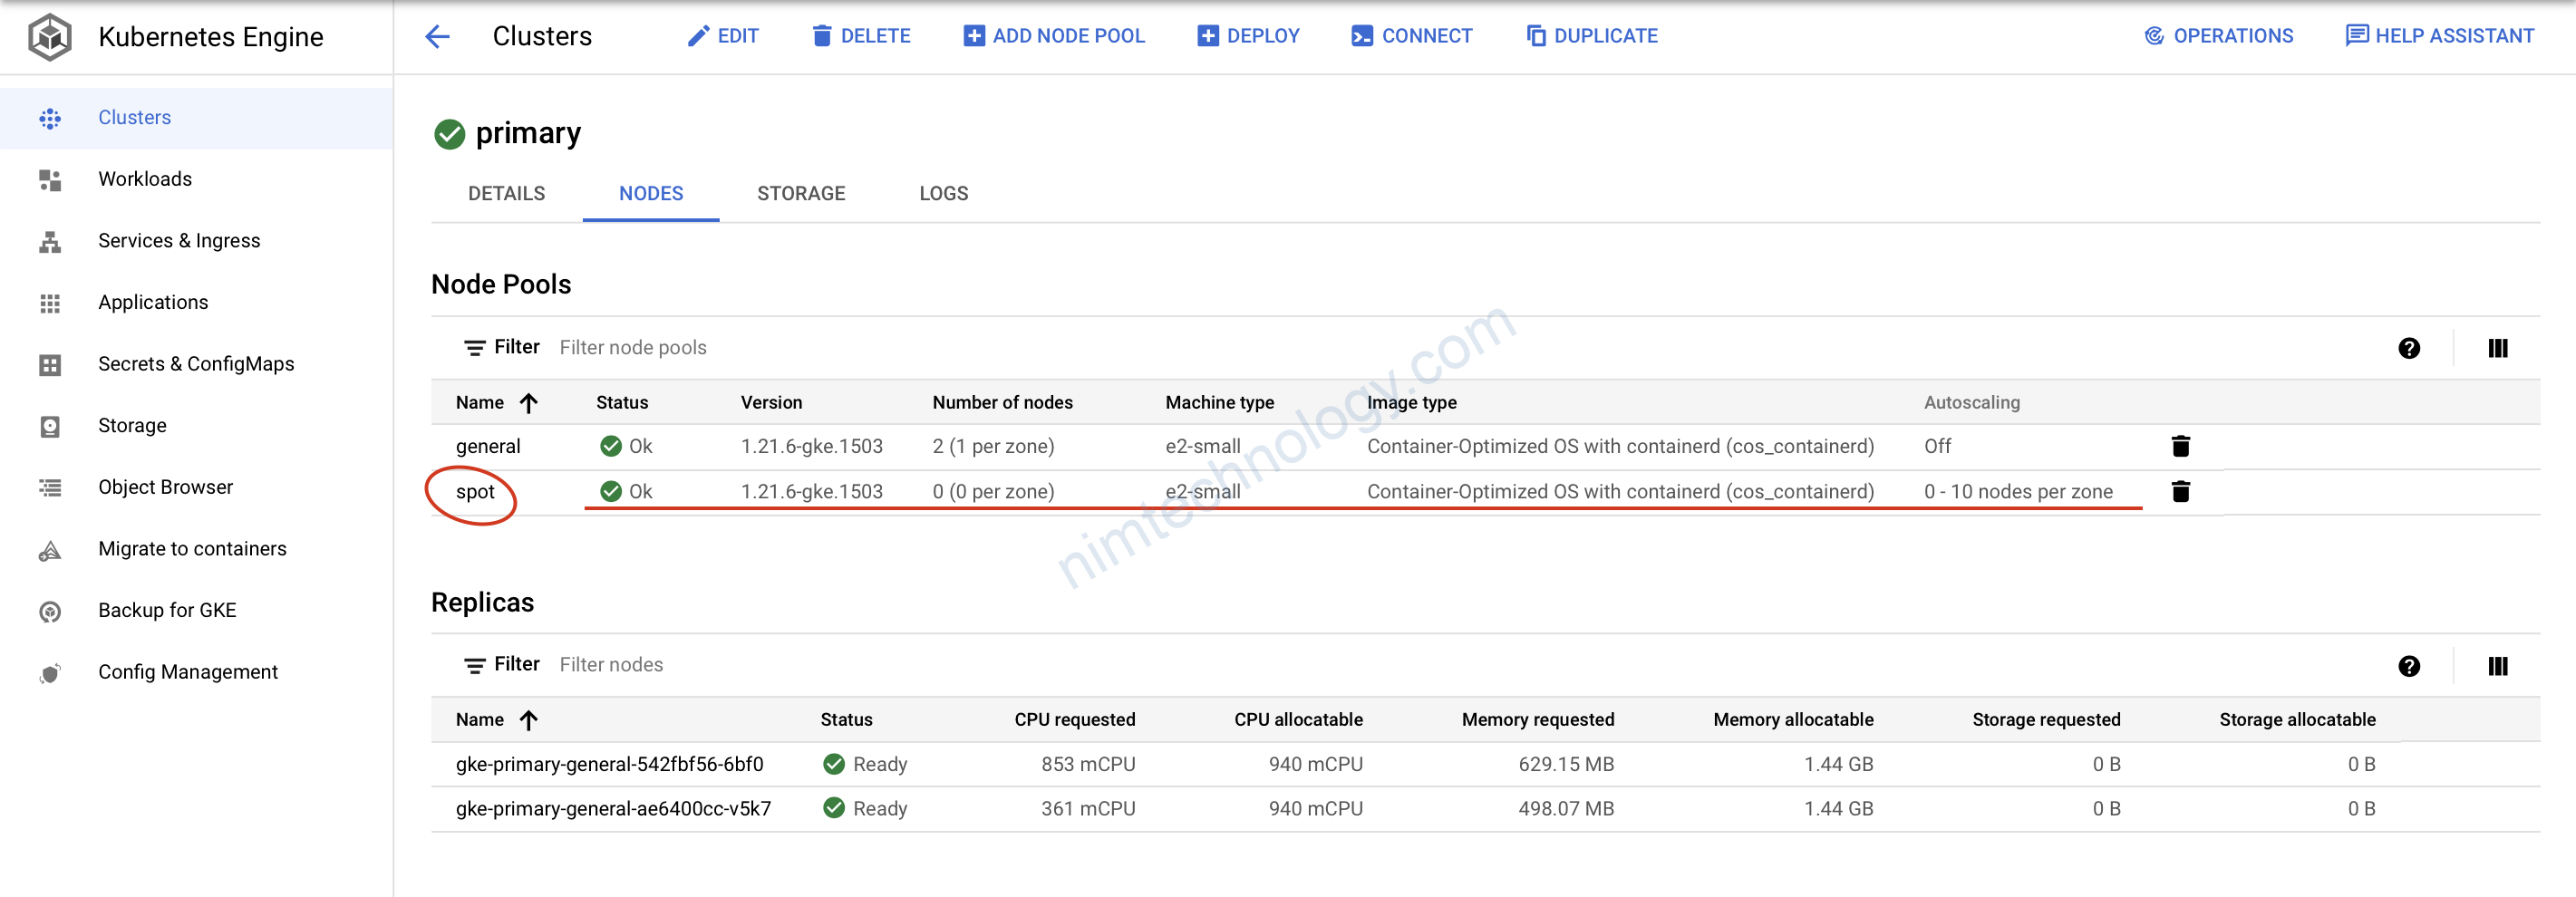
có khả năng auto scale
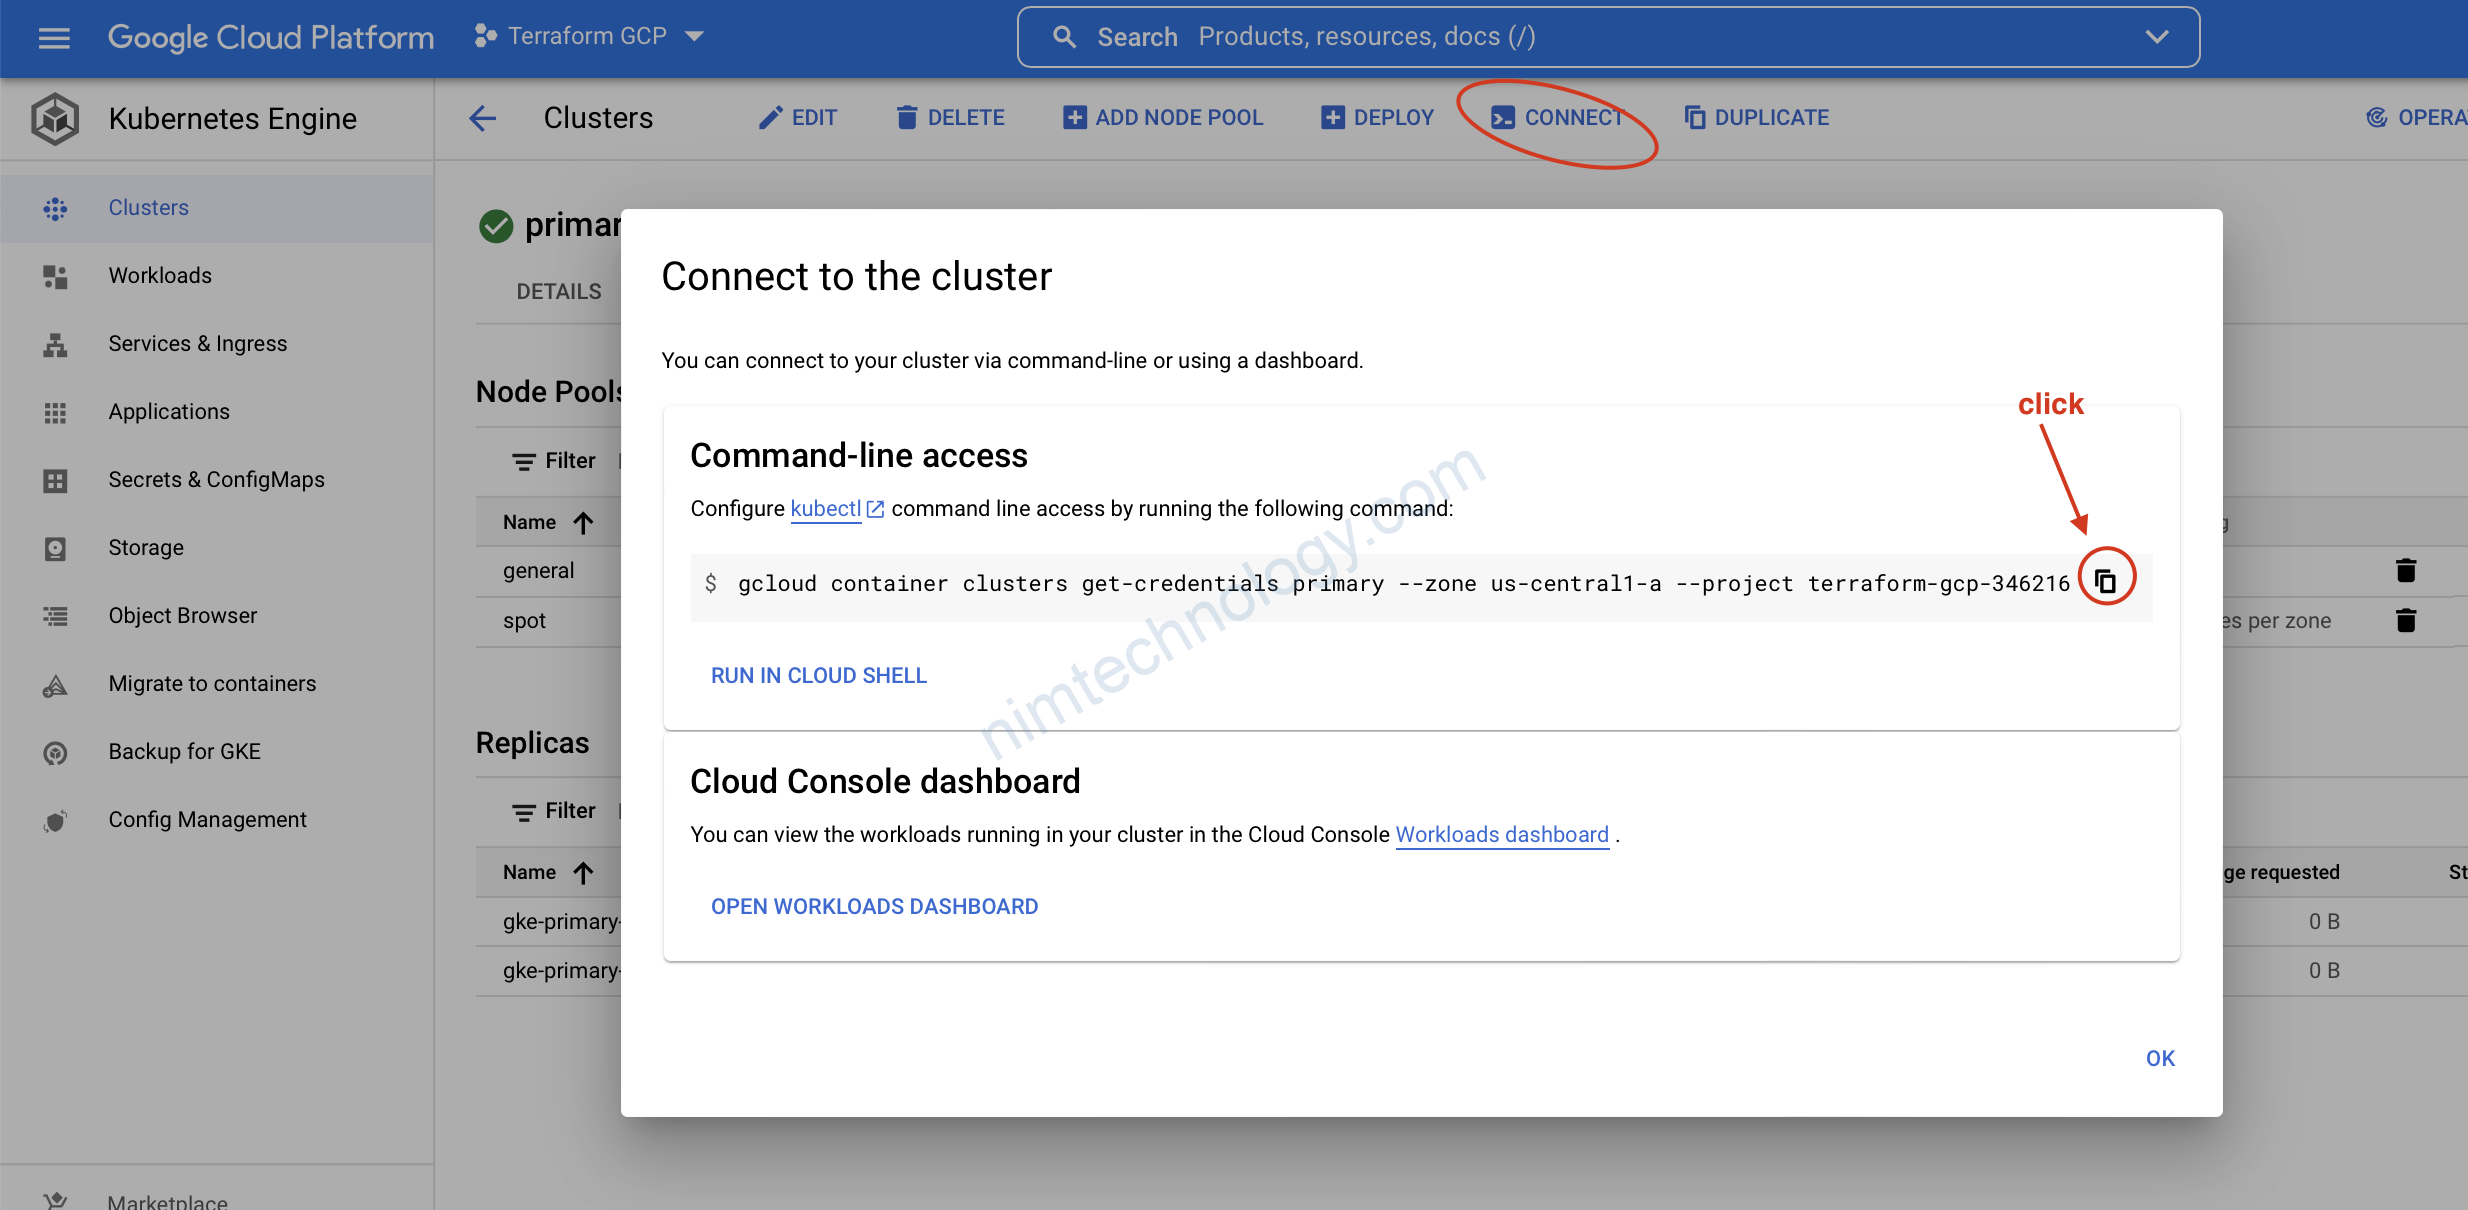
gcloud components install kubectl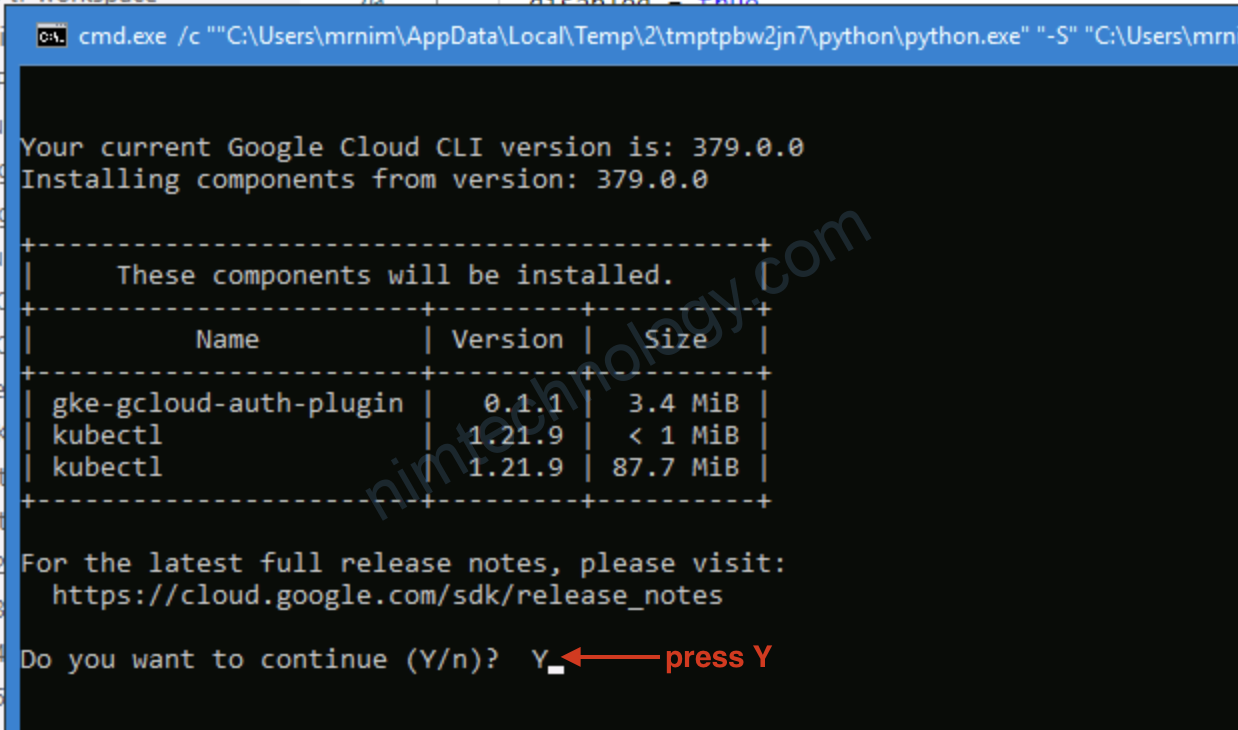
gcloud container clusters get-credentials primary --zone us-central1-a --project terraform-gcp-346216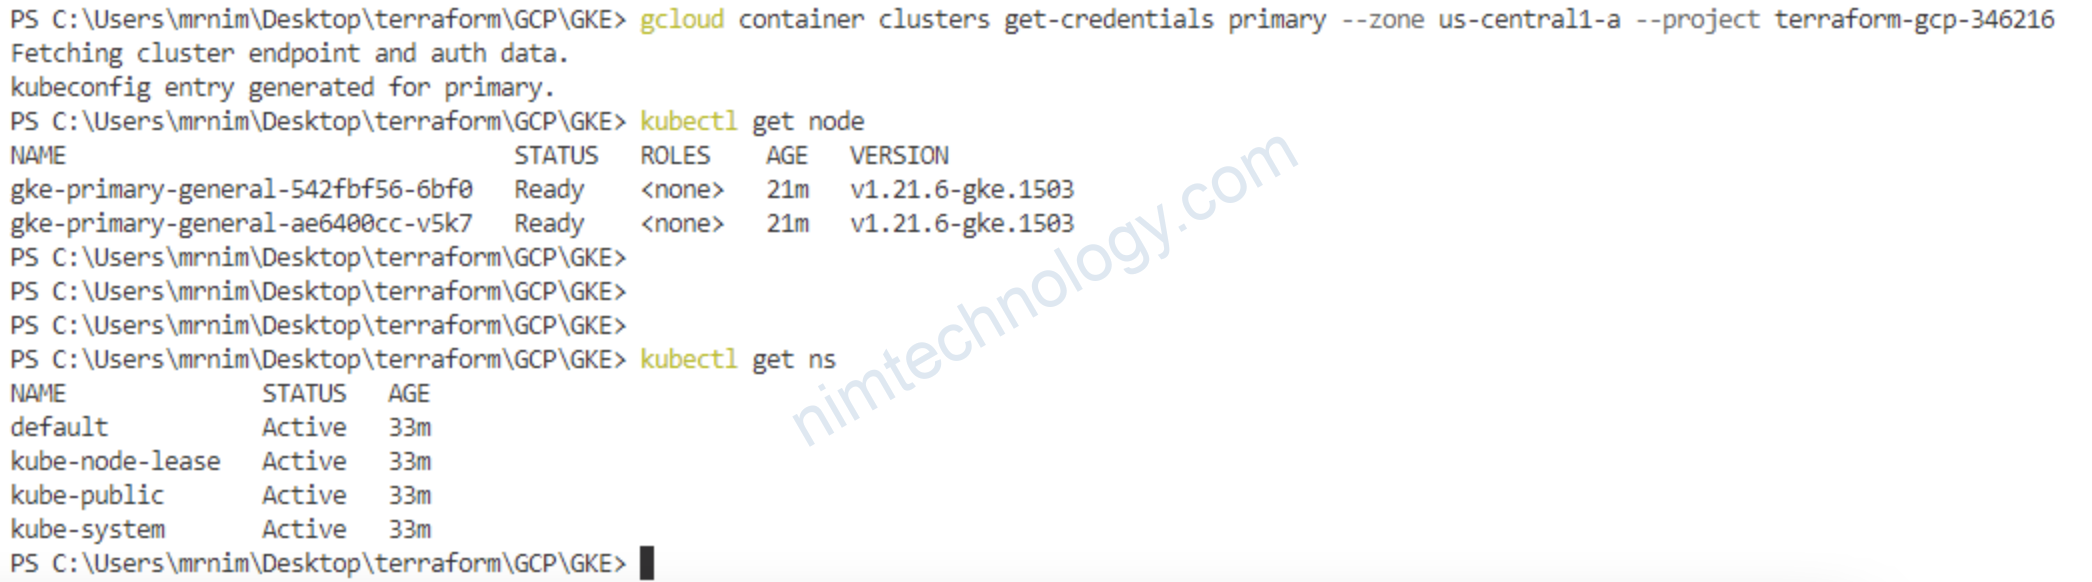
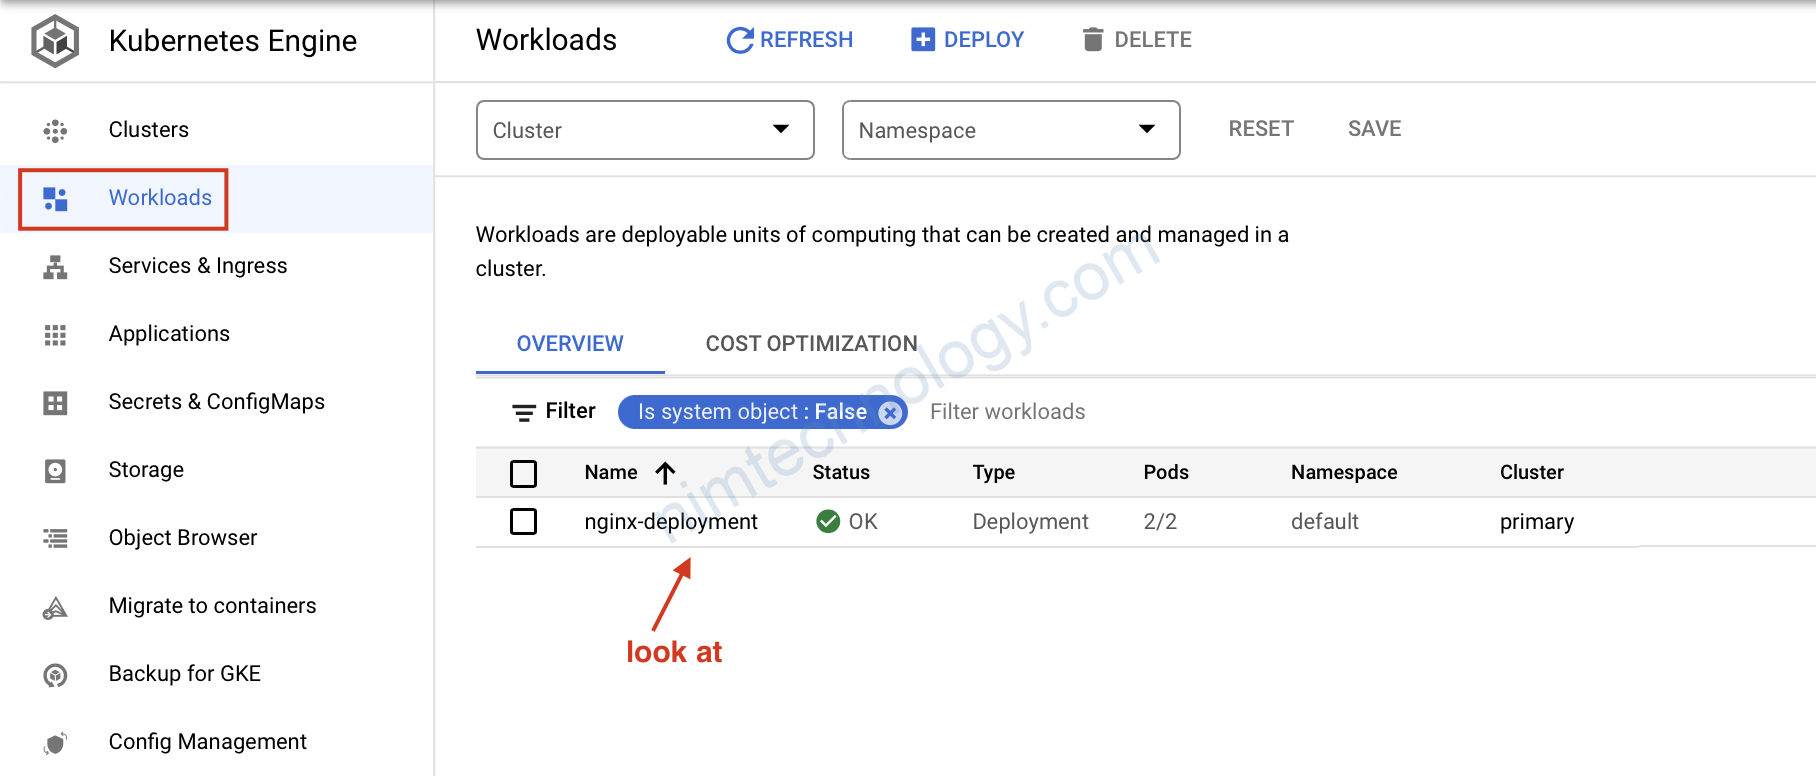
8) GKE Autoscaling Demo.
Như bạn cũng đã thấy chúng ta đã tạo ra cluster k8s có khả năng auto scale.
Giờ chúng ta sẽ deploy lên node pool đó sẽ k8s scale được hem! từ 0 lên mấy node?
1-example.yaml
=========
---
apiVersion: apps/v1
kind: Deployment
metadata:
  name: nginx-deployment
  namespace: default
spec:
  replicas: 2
  selector:
    matchLabels:
      app: nginx
  template:
    metadata:
      labels:
        app: nginx
    spec:
      containers:
      - name: nginx
        image: nginx:1.14.2
        ports:
        - containerPort: 80
      tolerations:
      - key: instance_type
        value: spot
        effect: NoSchedule
        operator: Equal
      affinity:
        nodeAffinity:
          requiredDuringSchedulingIgnoredDuringExecution:
            nodeSelectorTerms:
            - matchExpressions:
              - key: team
                operator: In
                values:
                - devops
        podAntiAffinity:
          requiredDuringSchedulingIgnoredDuringExecution:
          - labelSelector:
              matchExpressions:
              - key: app
                operator: In
                values:
                - nginx
            topologyKey: kubernetes.io/hostname
Sau đó apply:
kubectl apply -f 1-example.yaml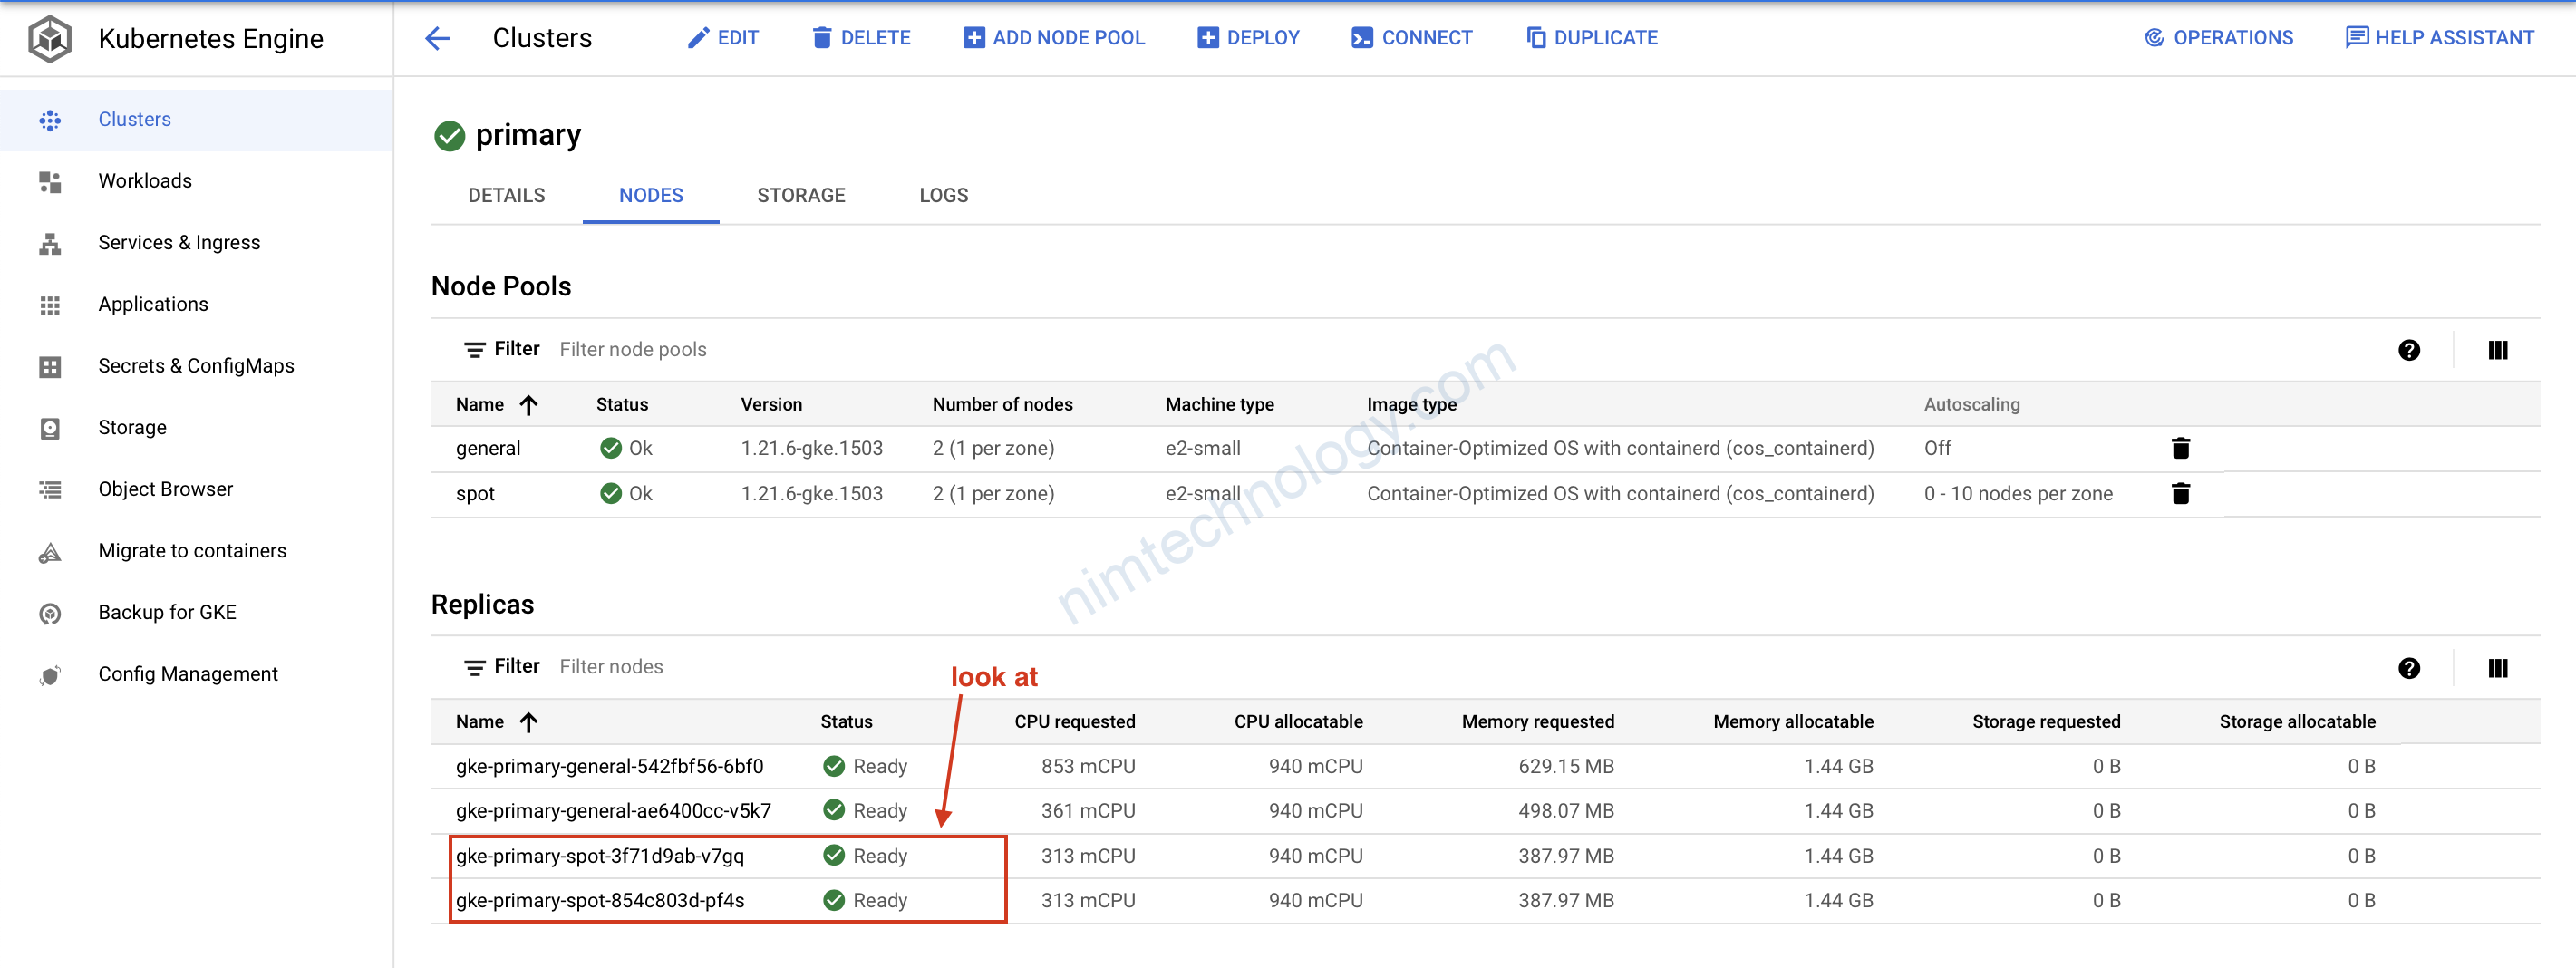
Sau khi làm xong hết để tiết kiệm tiền thì
terraform destroy