1) Demo Setup an AWS Account.
Để register and init setup account AWS thì bạn đọc bài viết này
2) Introduction to IAM
Để hiểu sơ sơ về IAM thì mình xin giới thiếu các bạn 1 video.
Tiếp đến là phần hướng dẫn của mình.
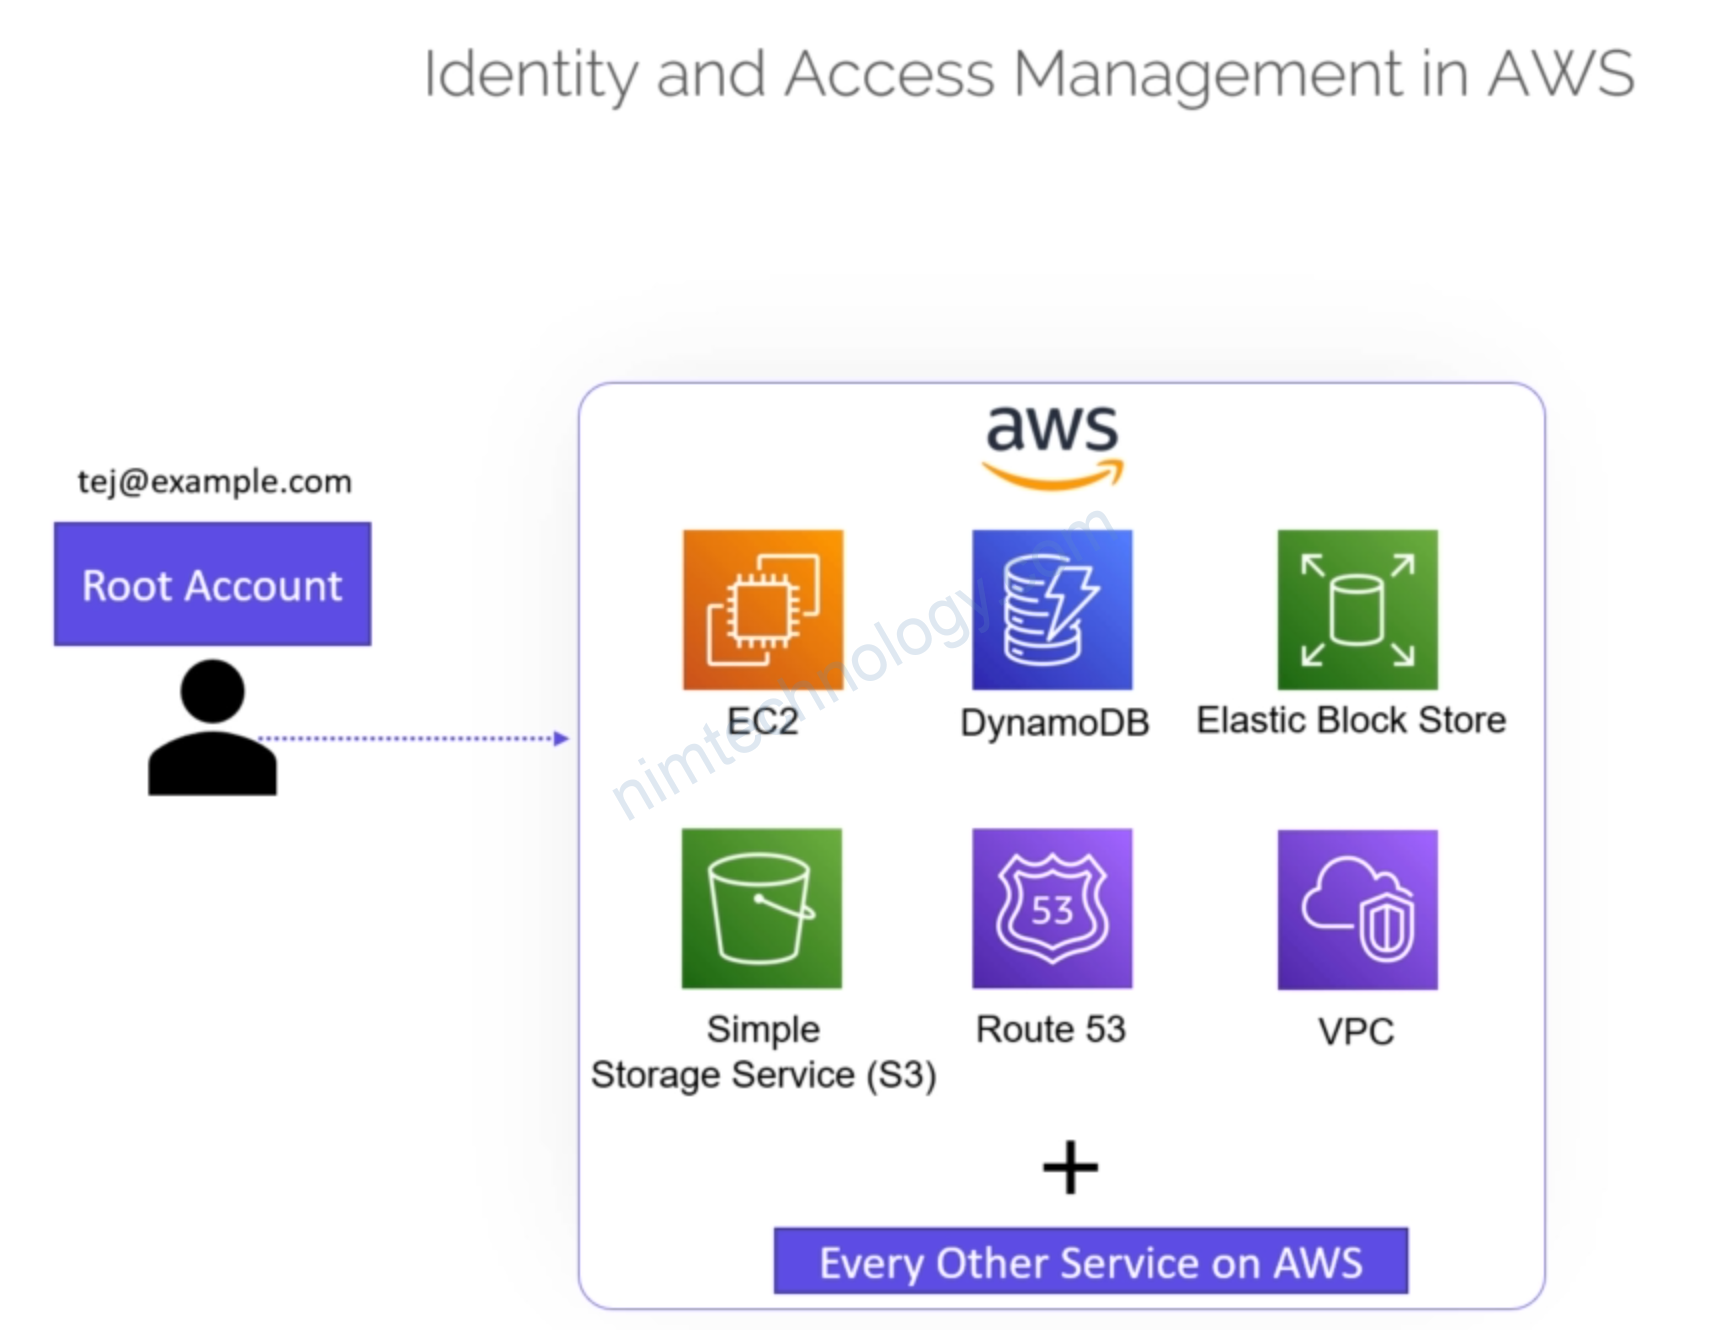
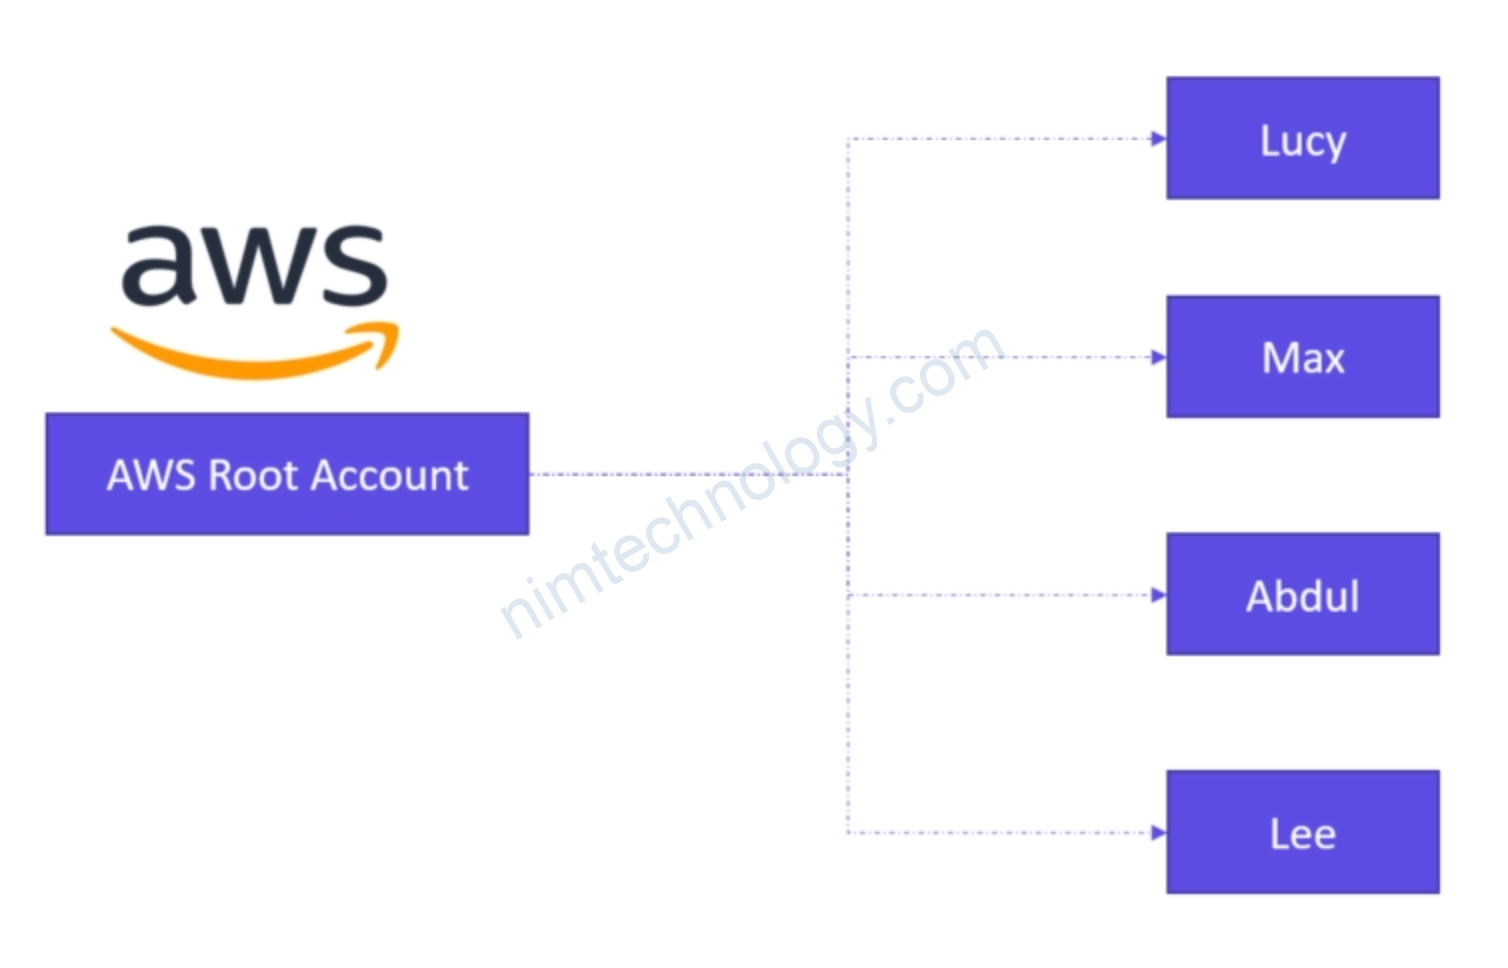
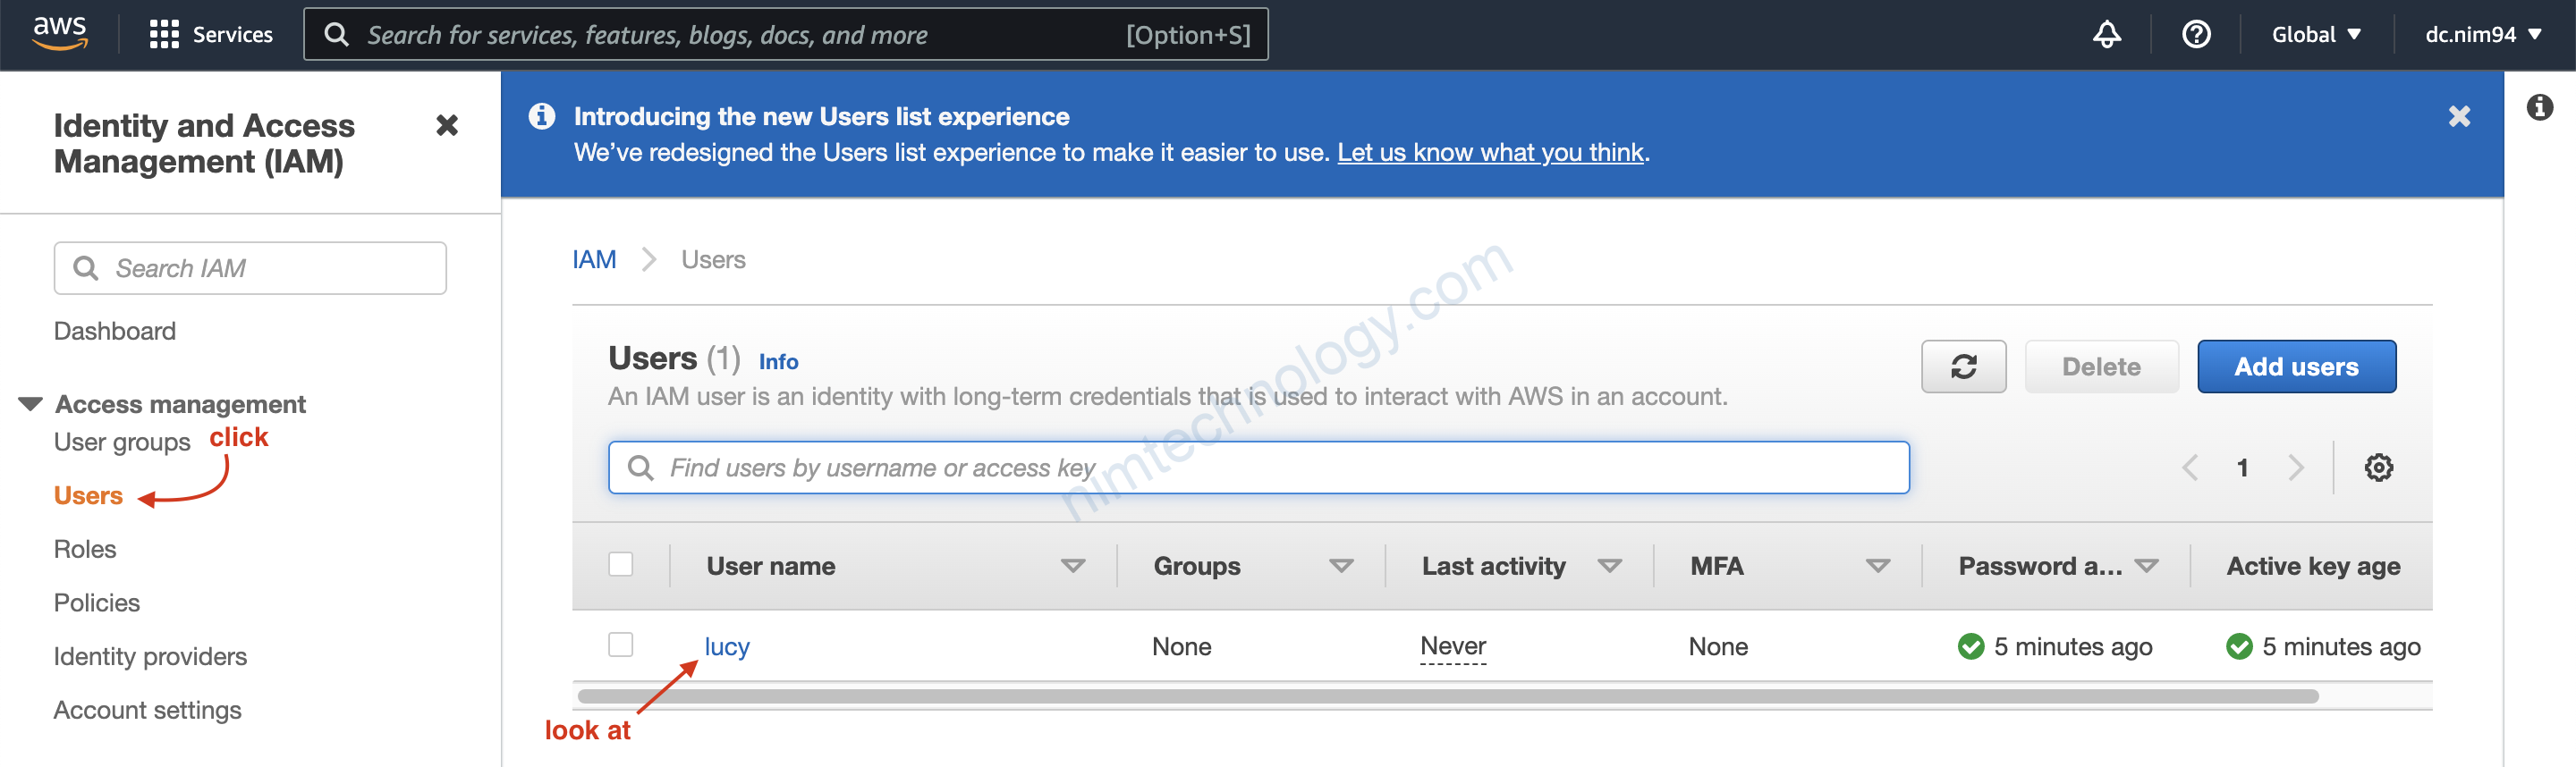
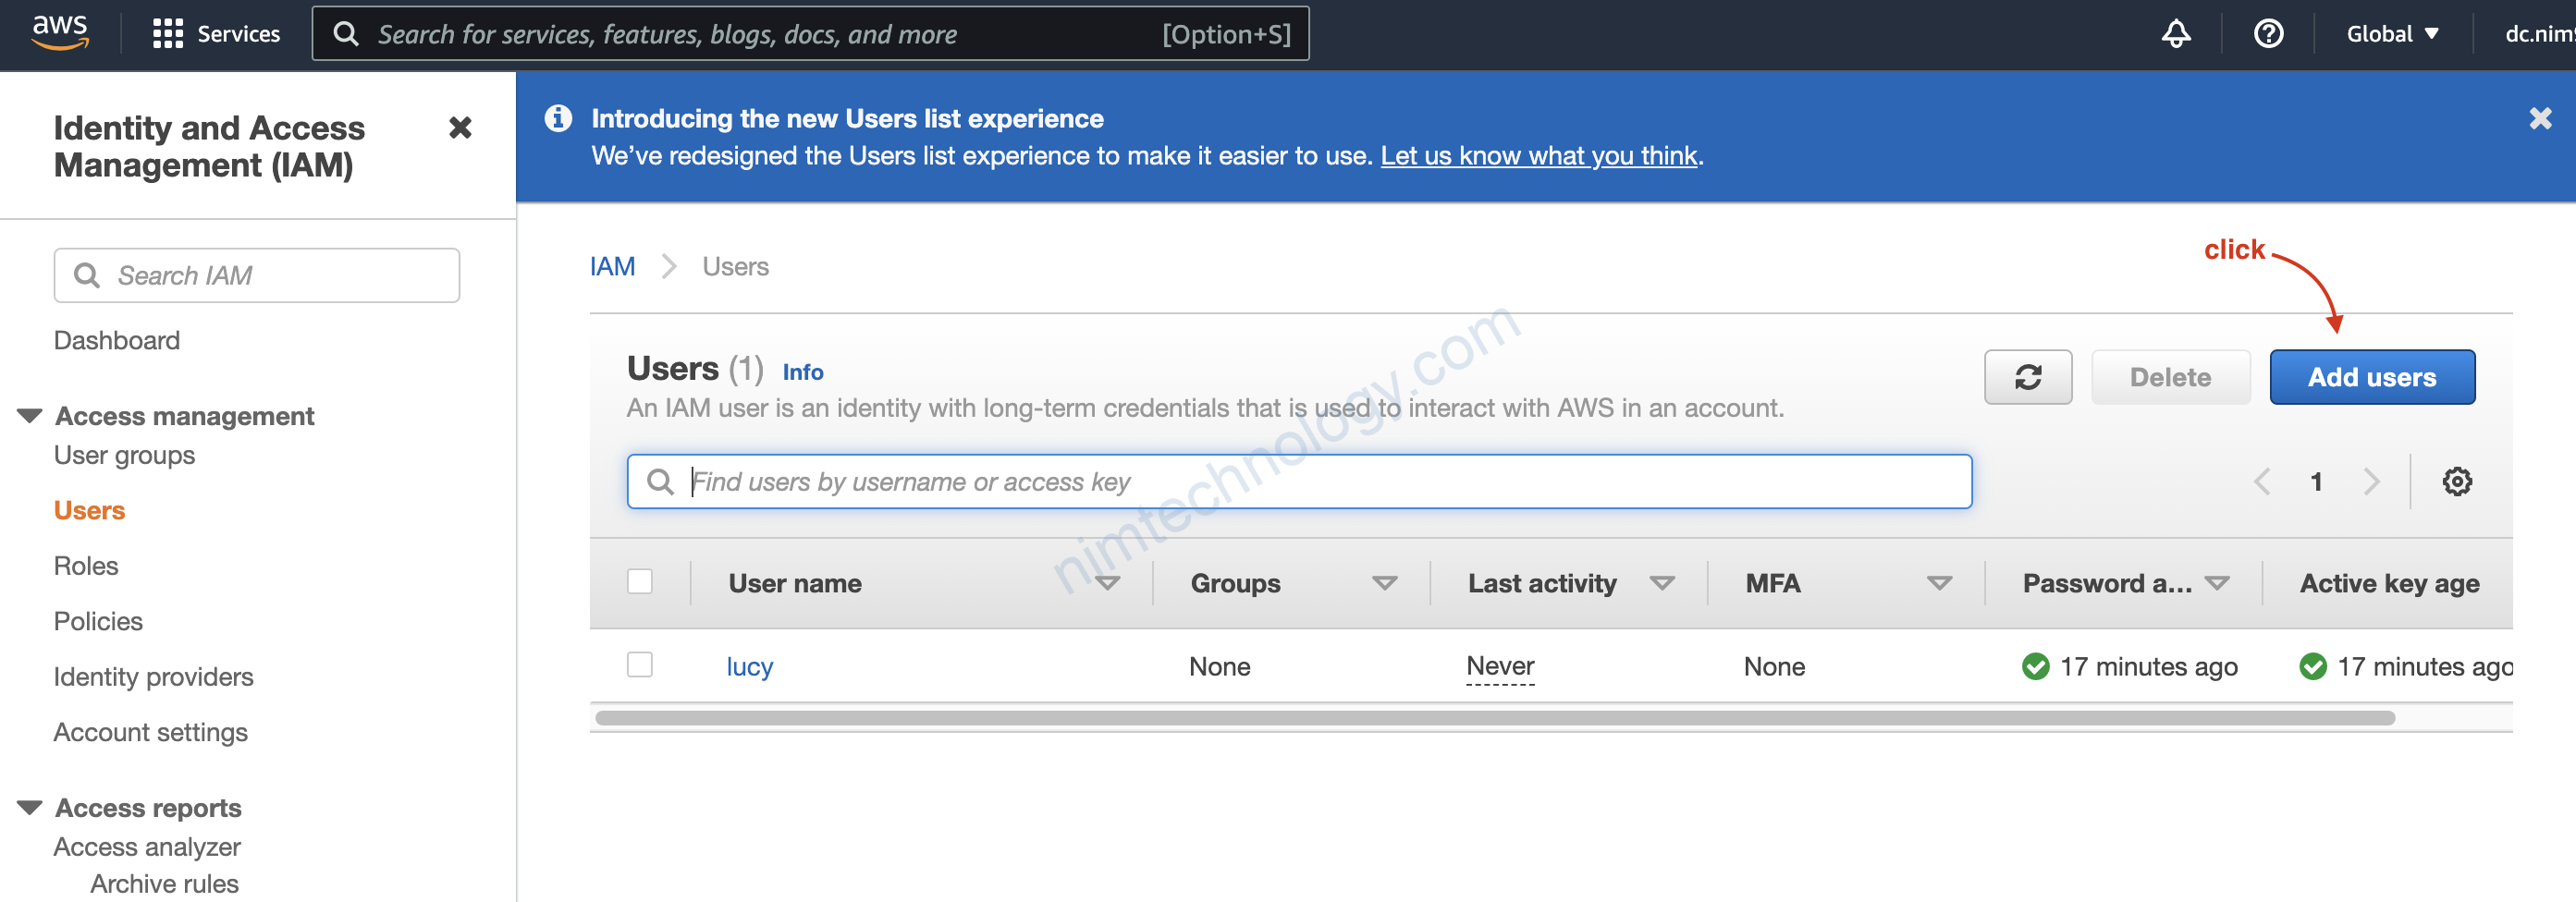
Từ user root sẽ tạo ra 4 user IAM.
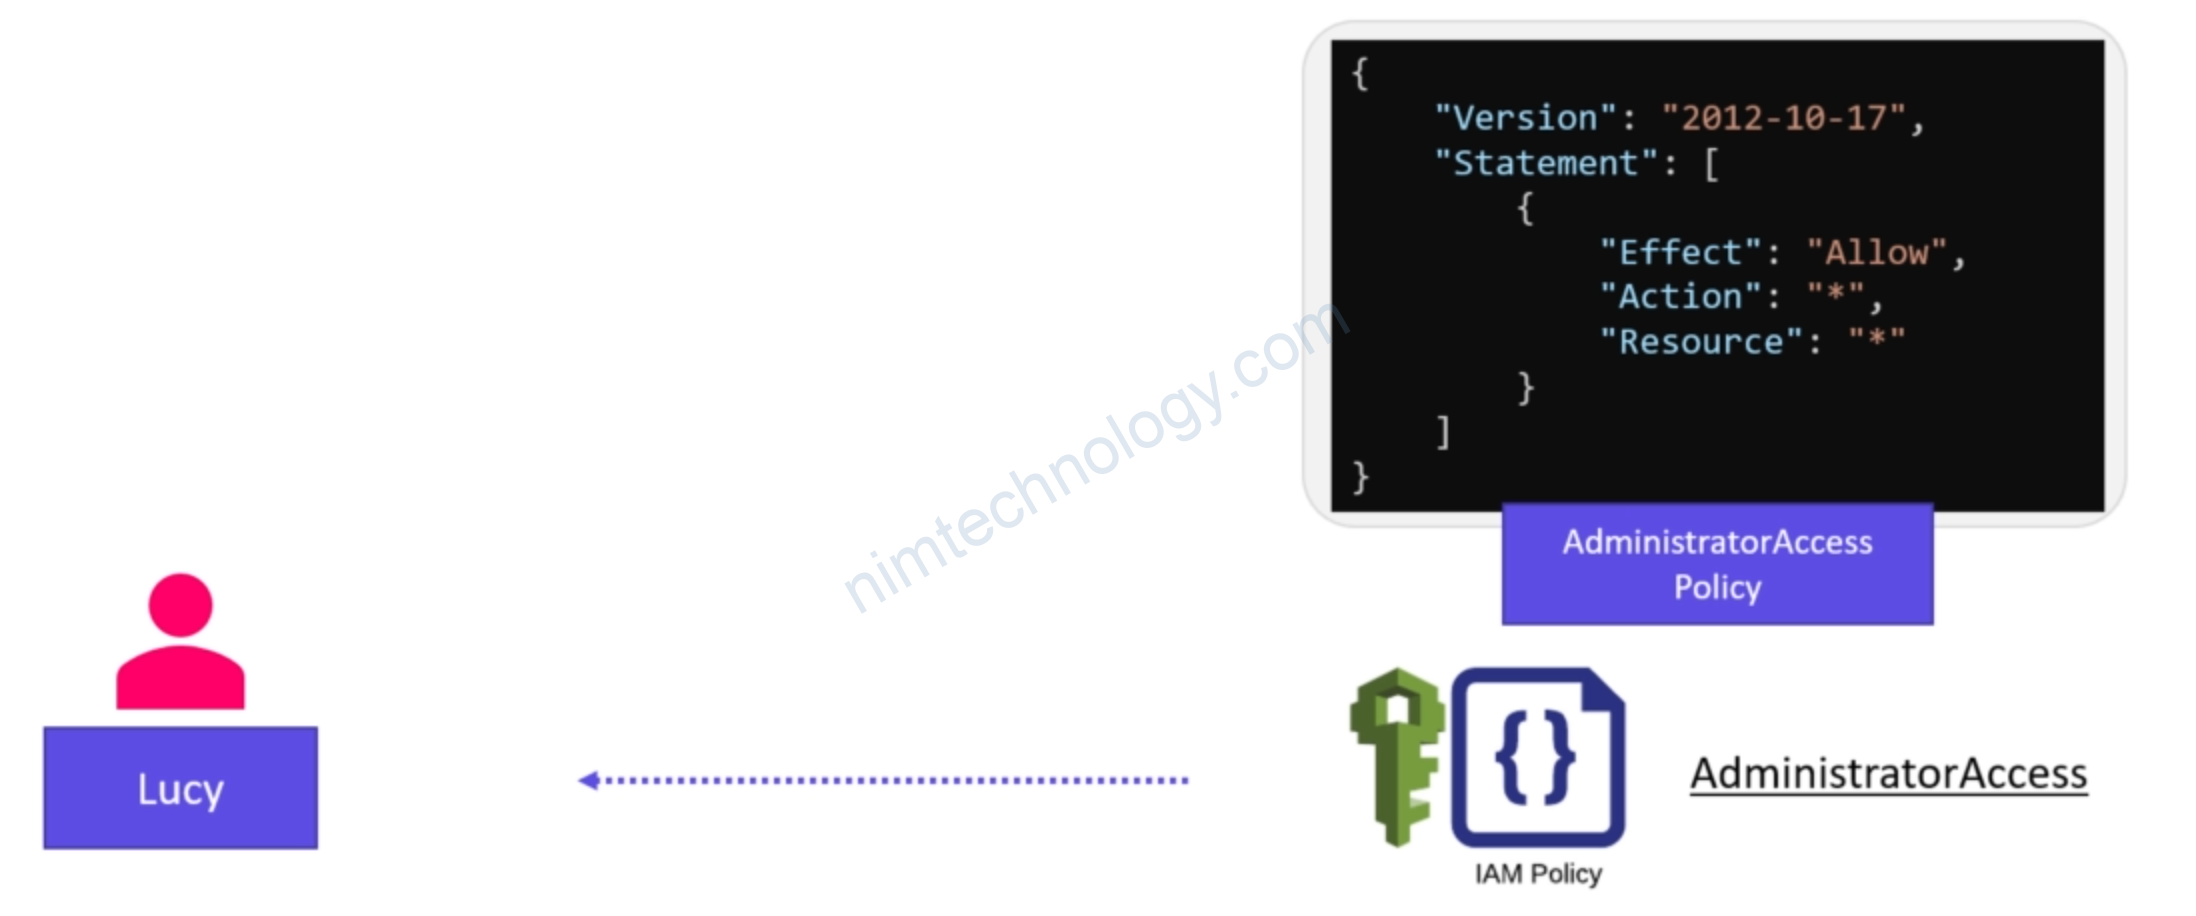
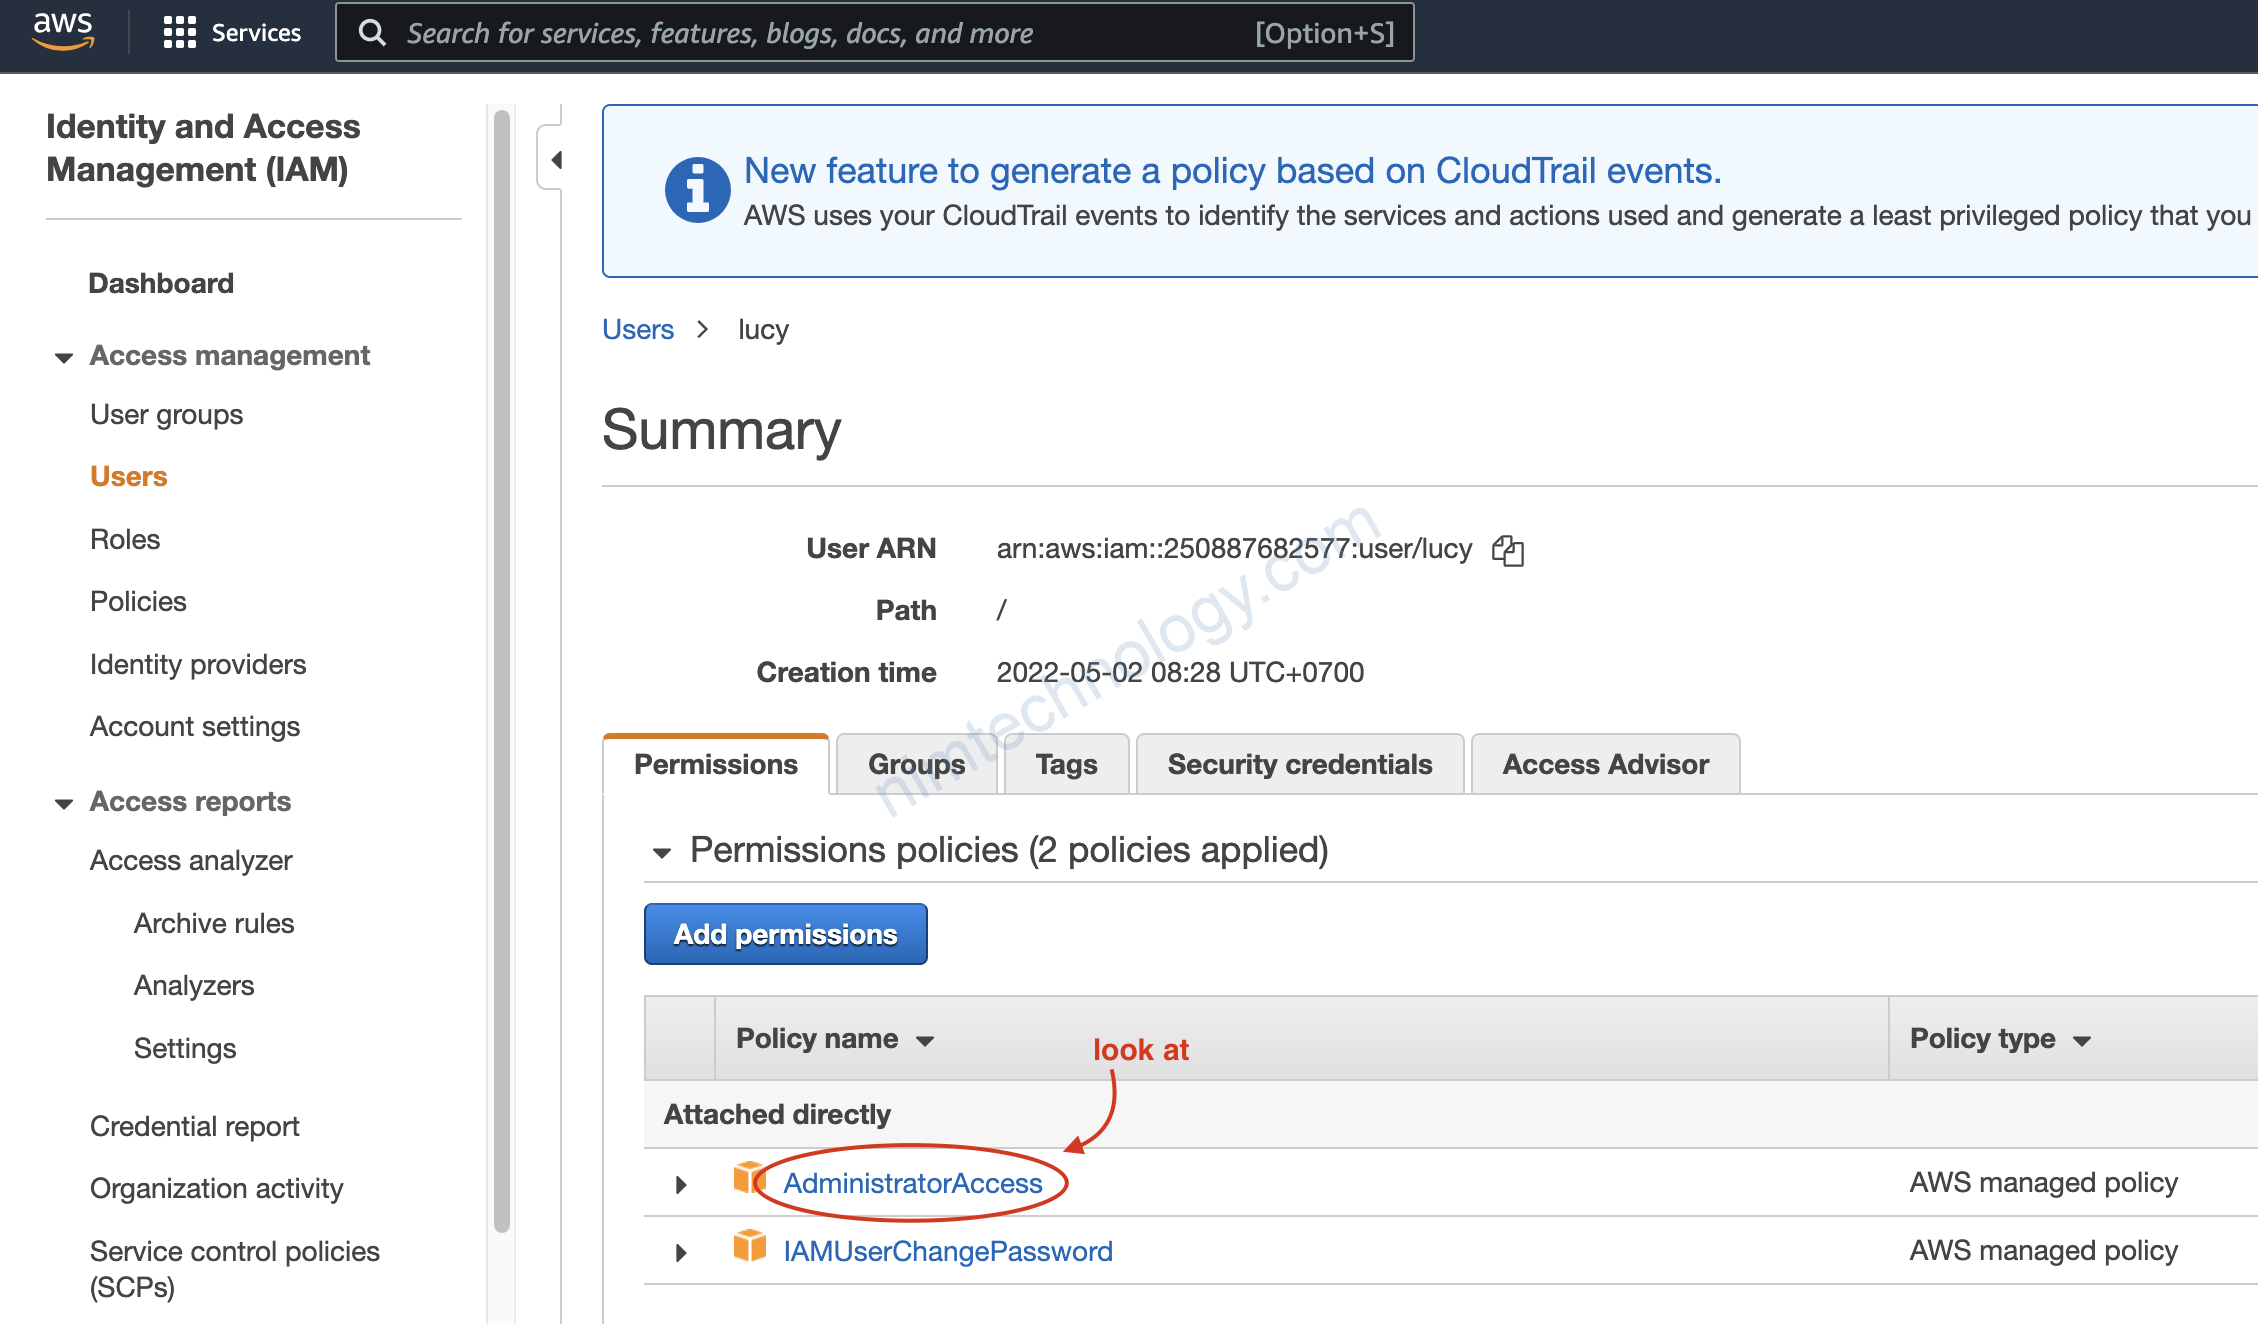
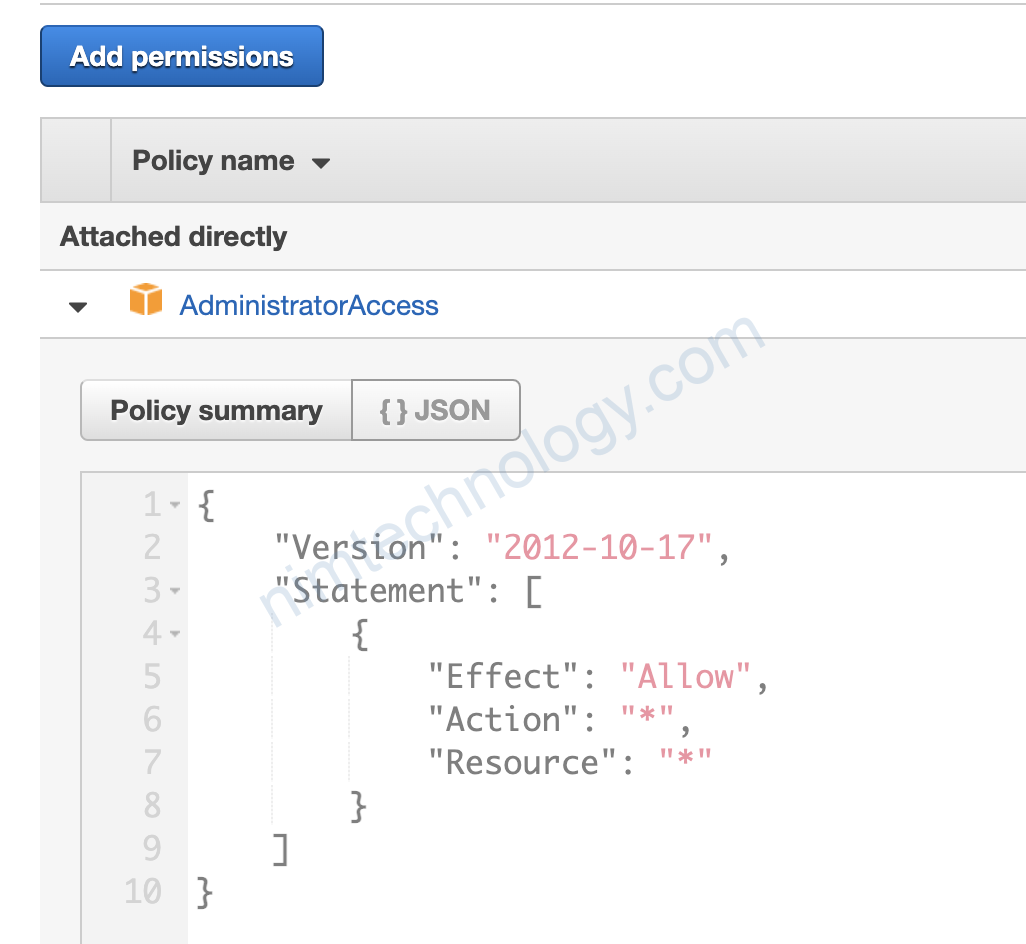
Bạn thấy Lucy có quền mọi action và lên mọi resource.
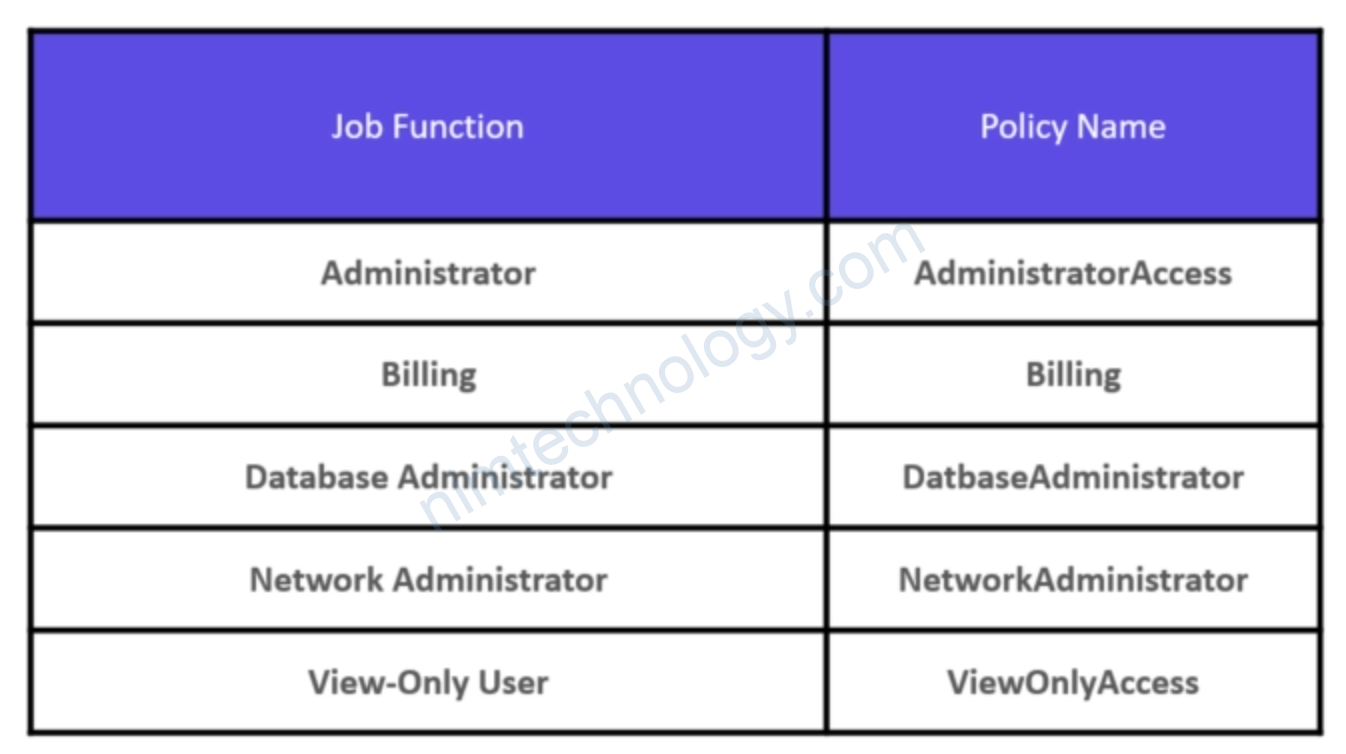
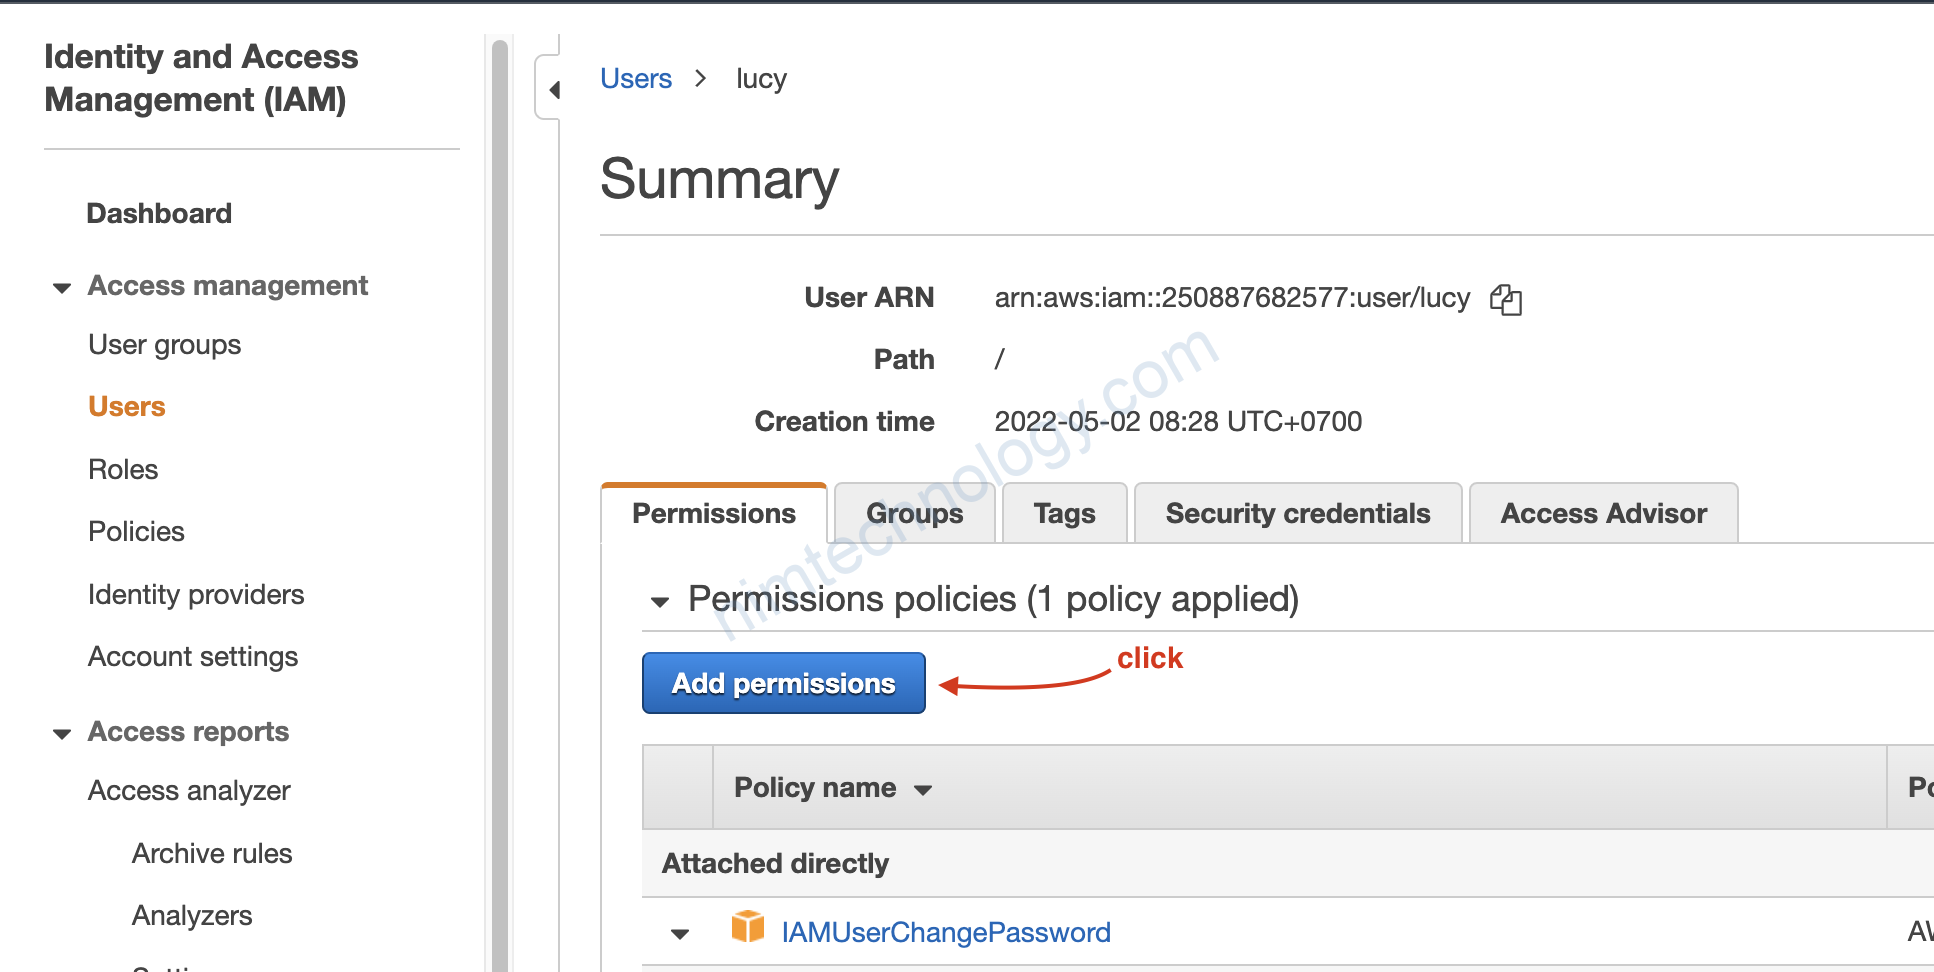
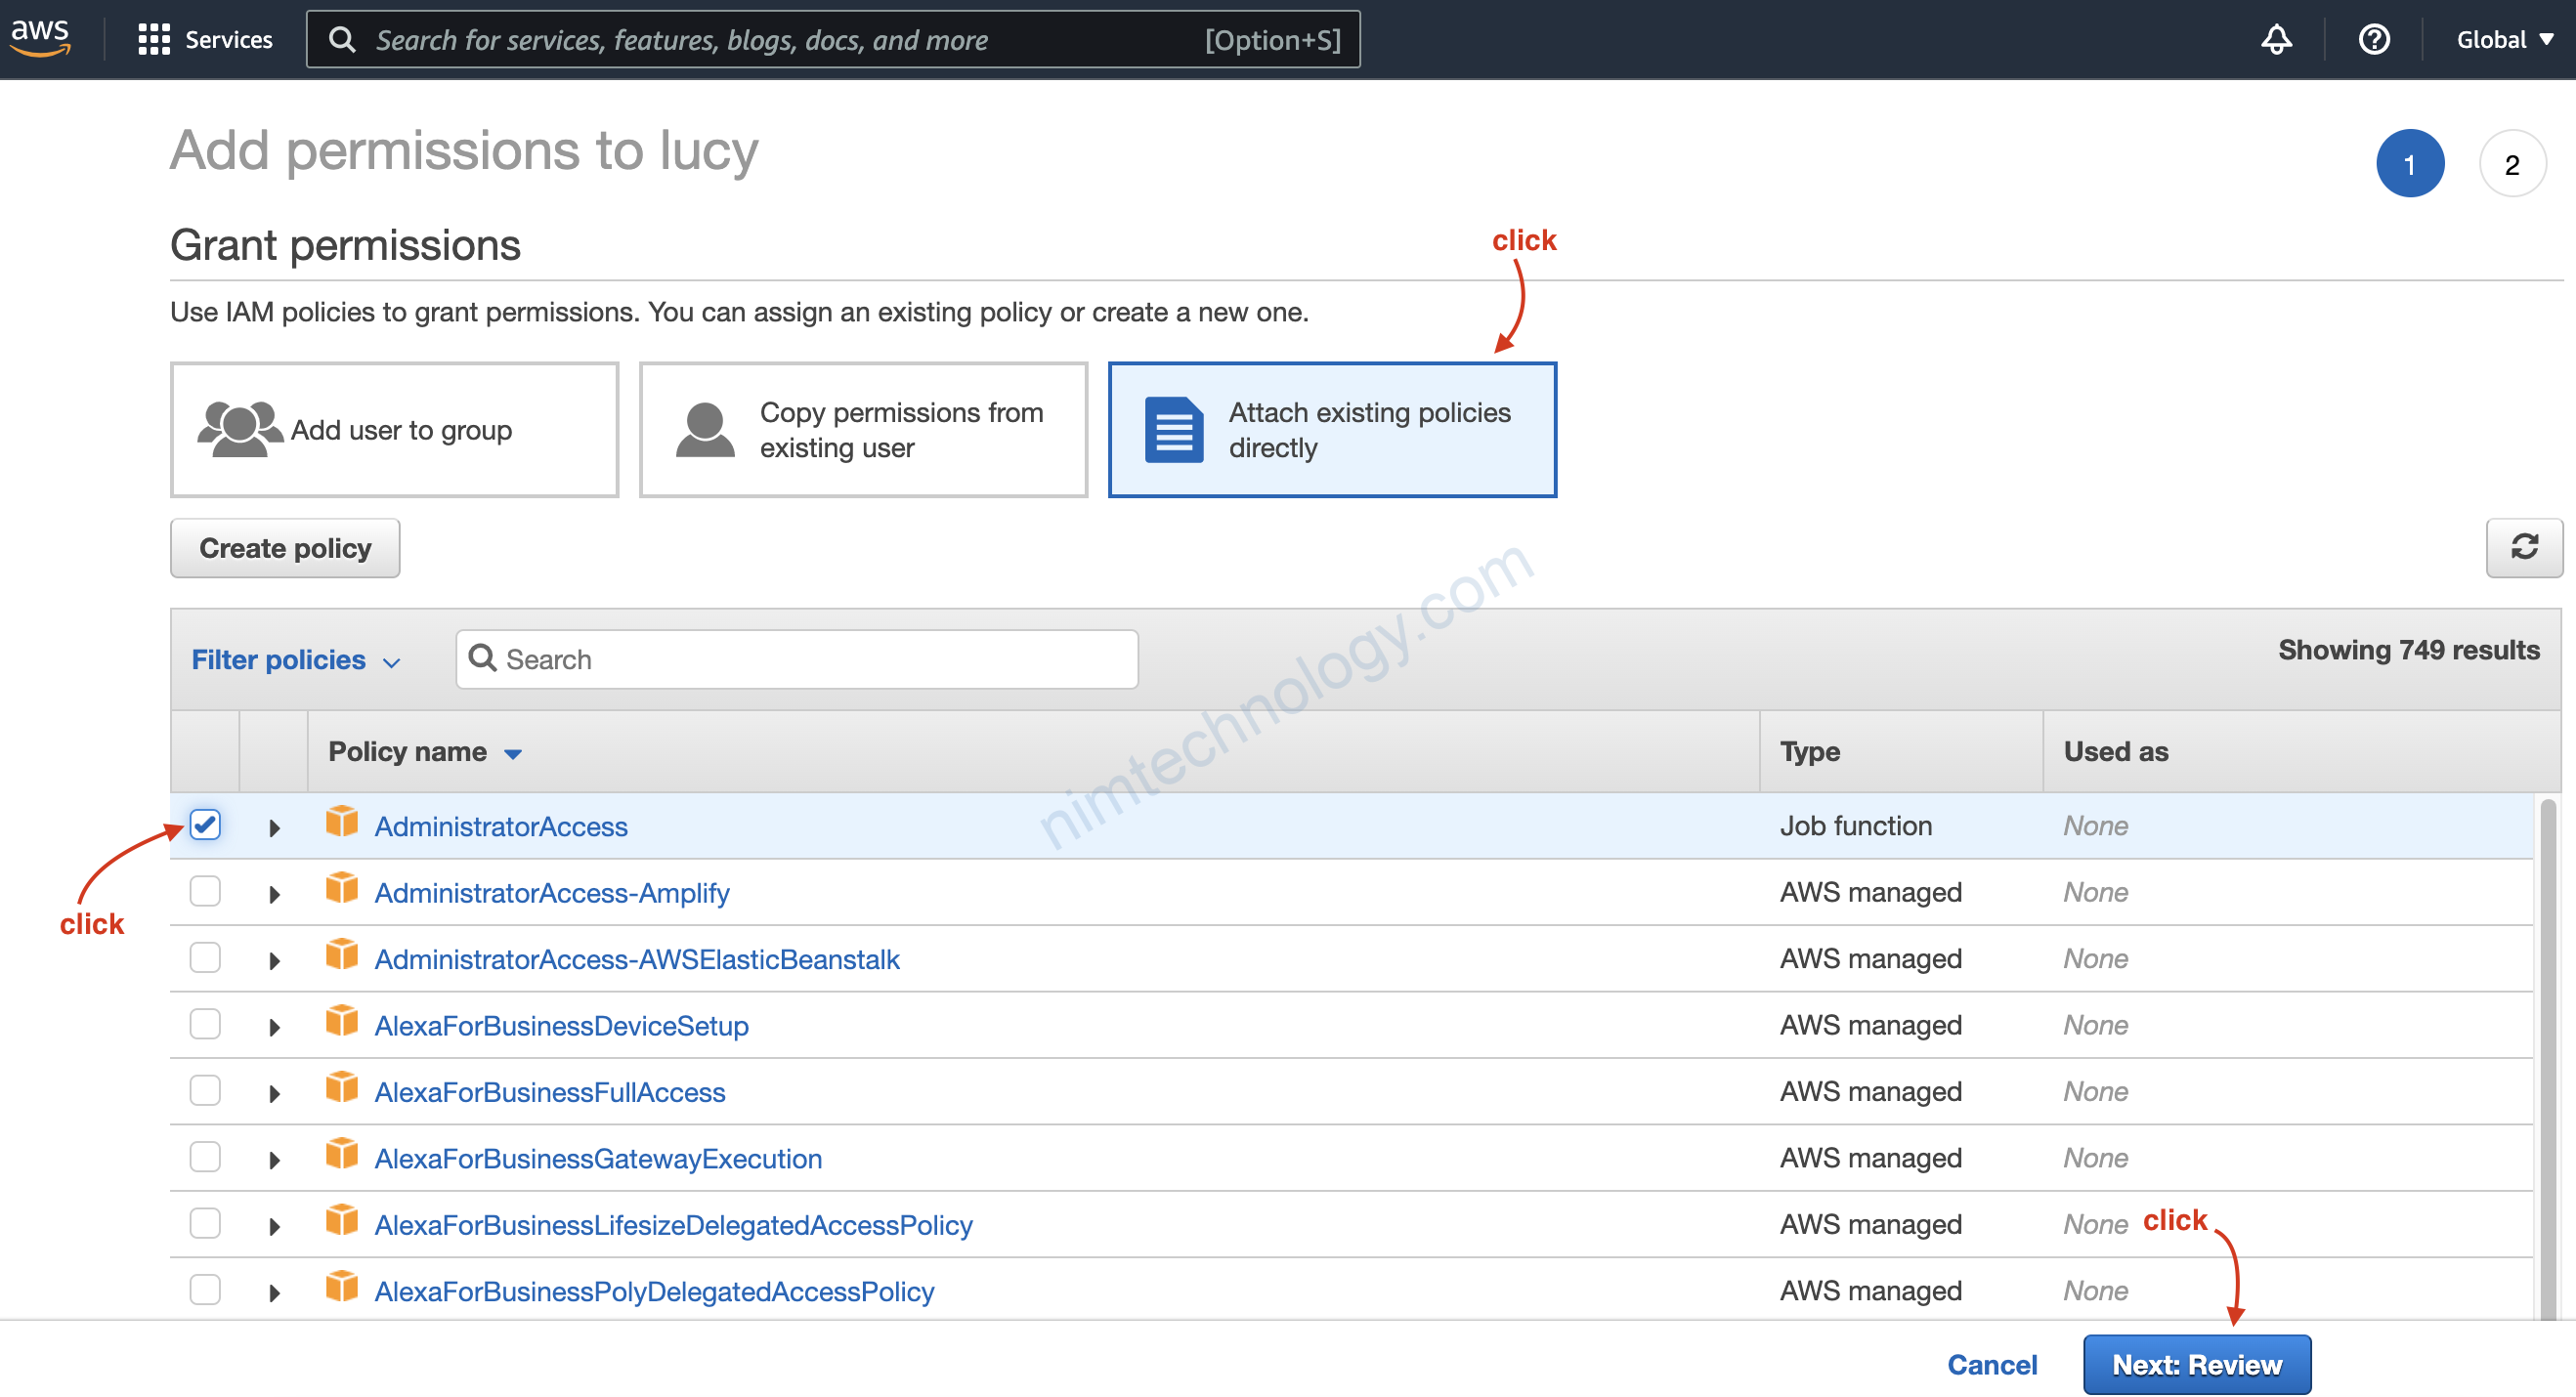
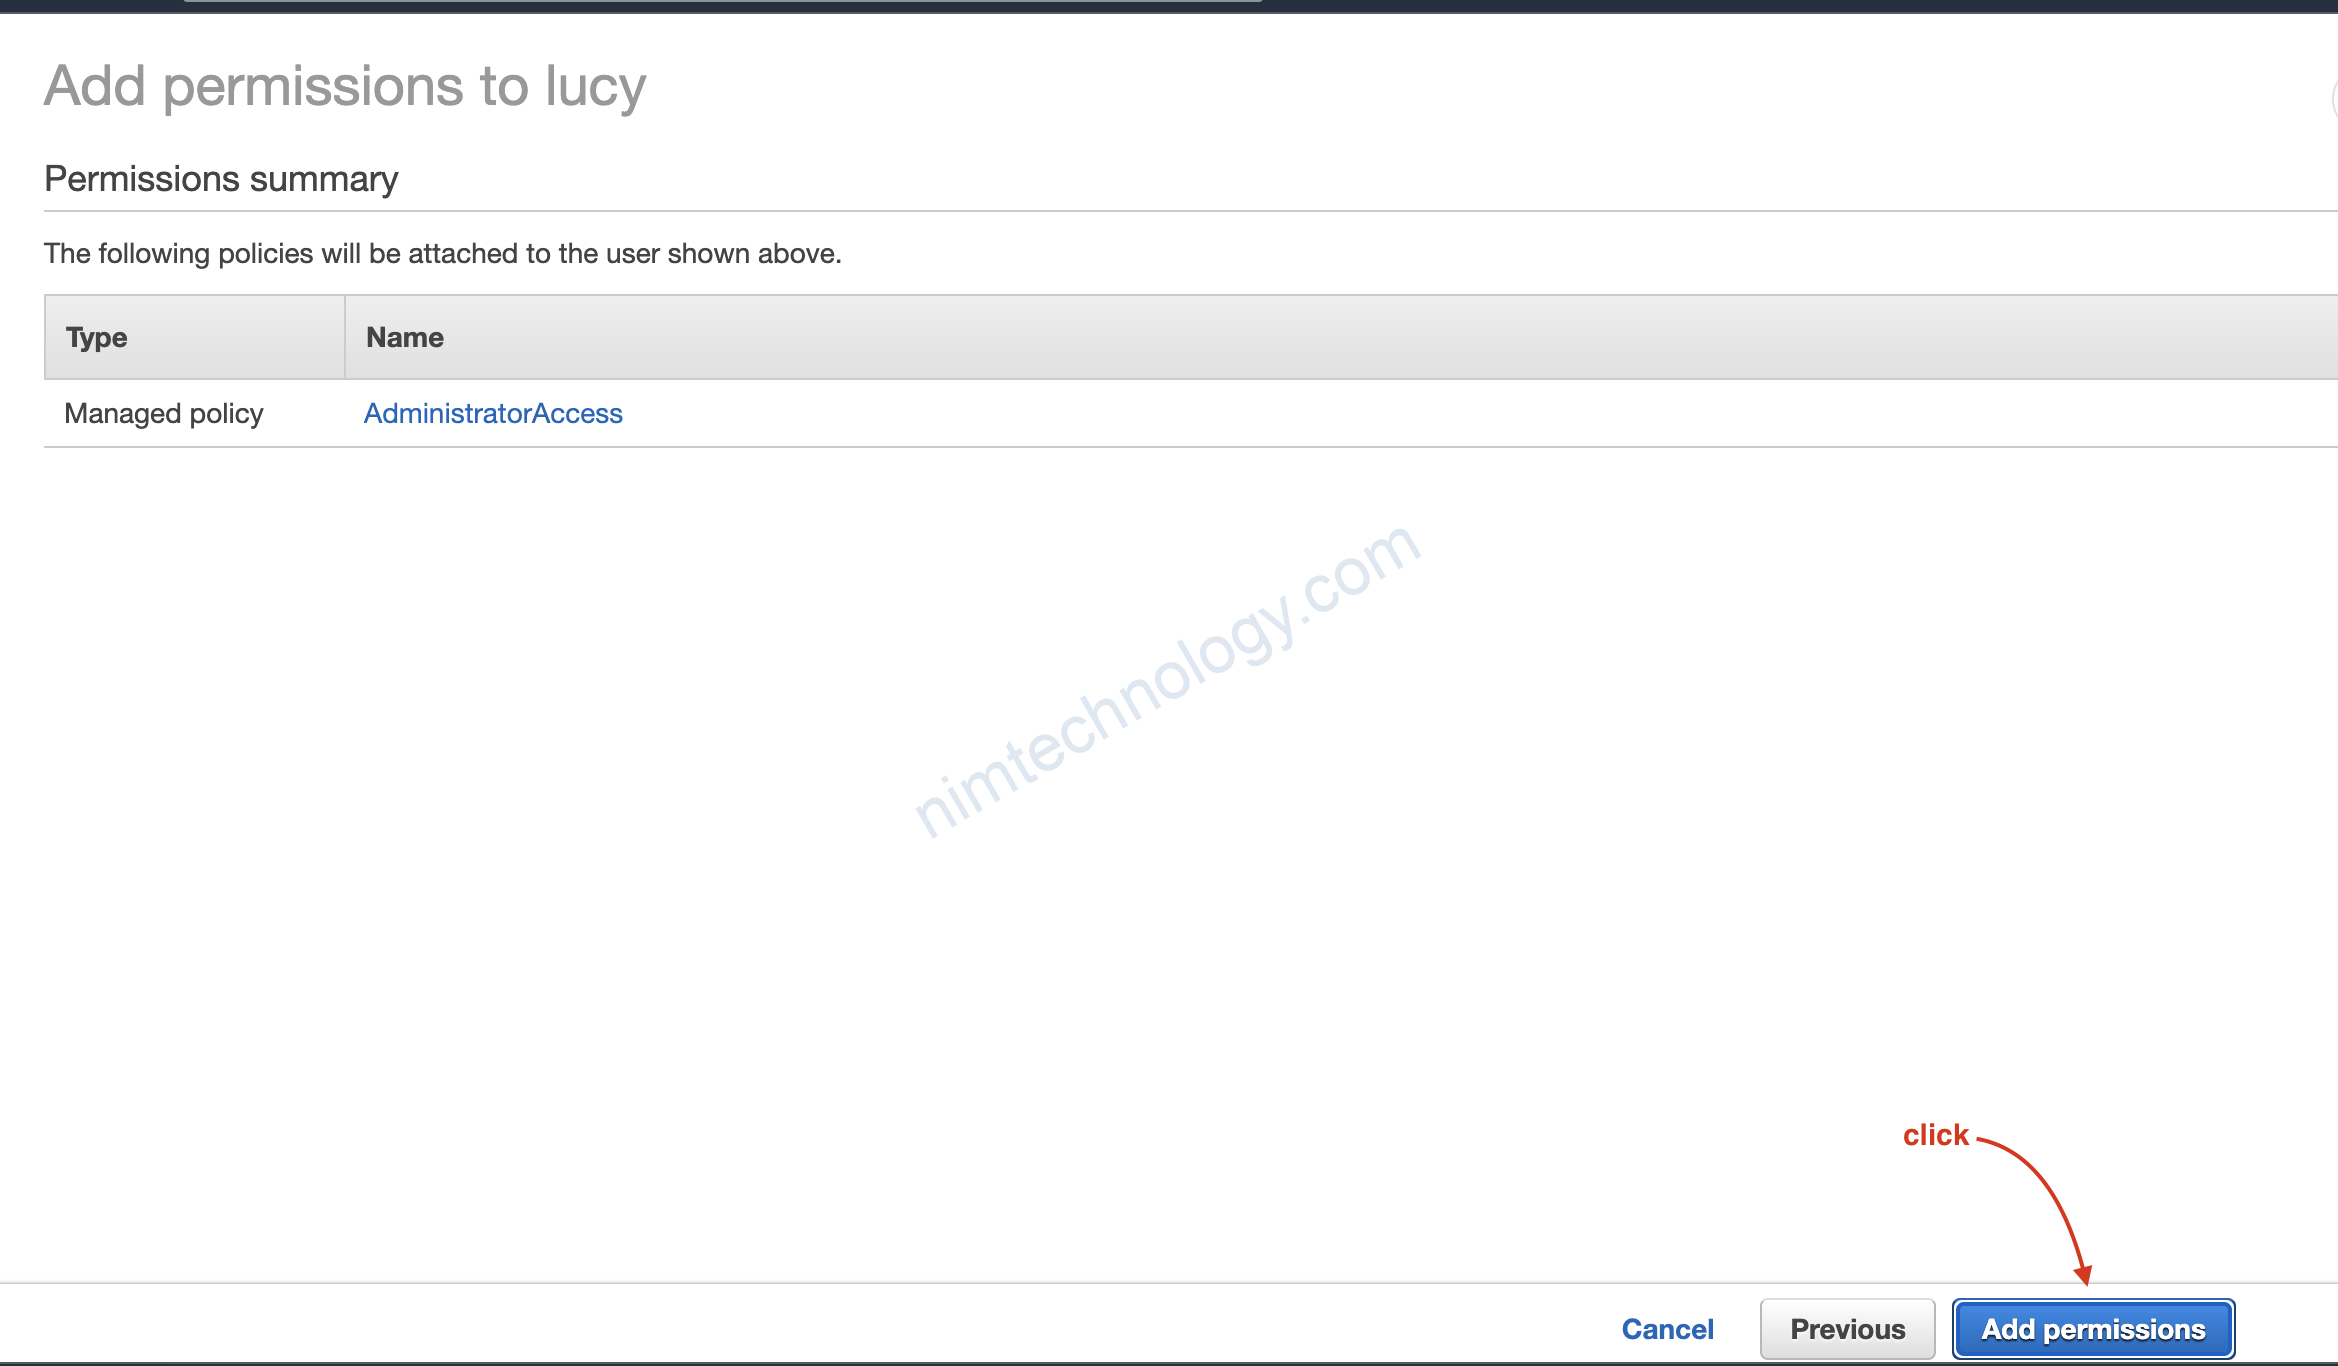
Nếu bạn muốn cấp cho user đó quyền Administrator thì bạn sẽ gán policy name là AdministratorAccess

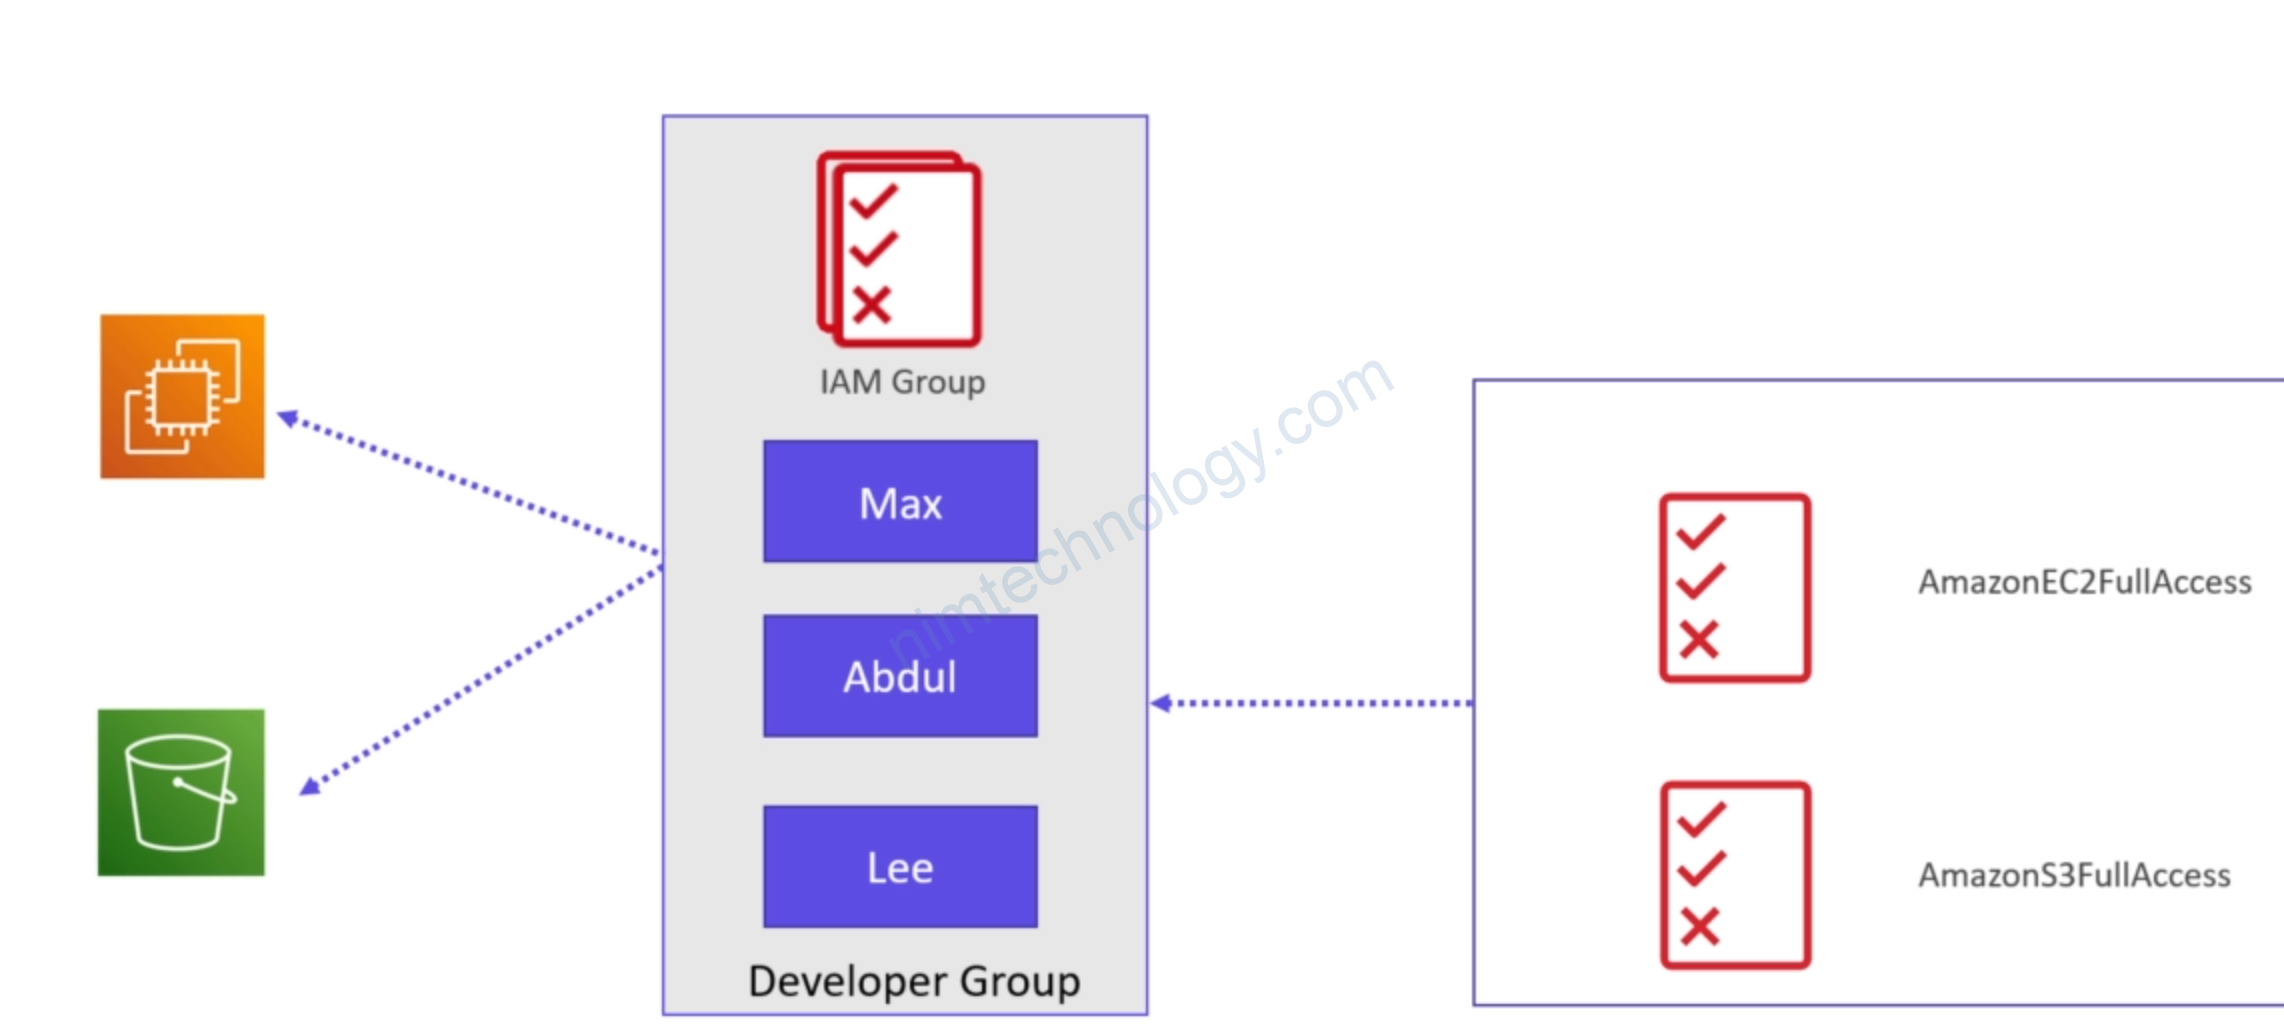
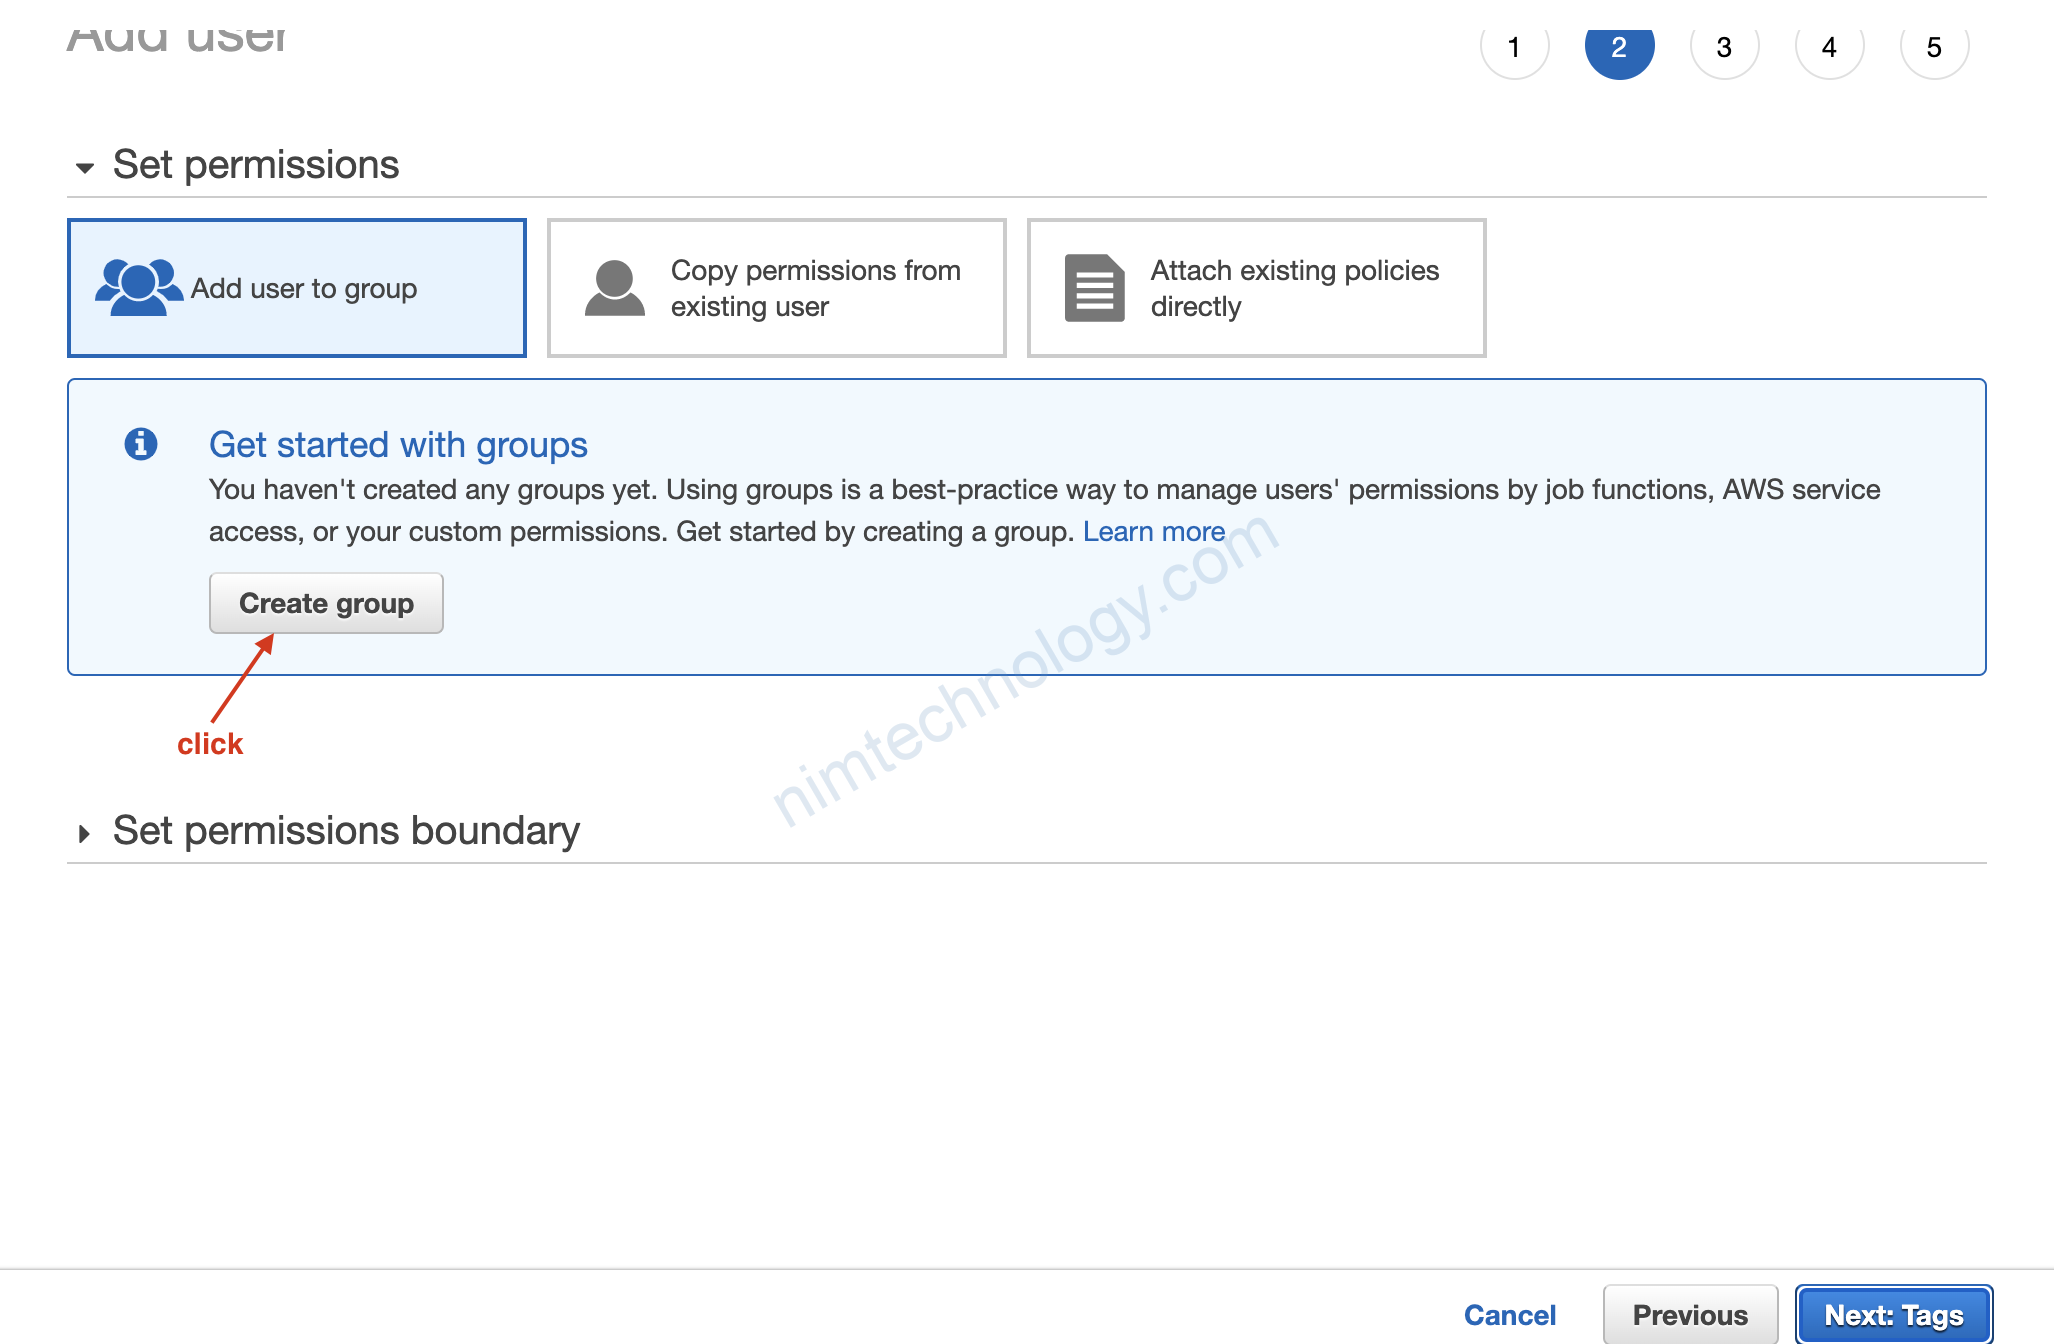
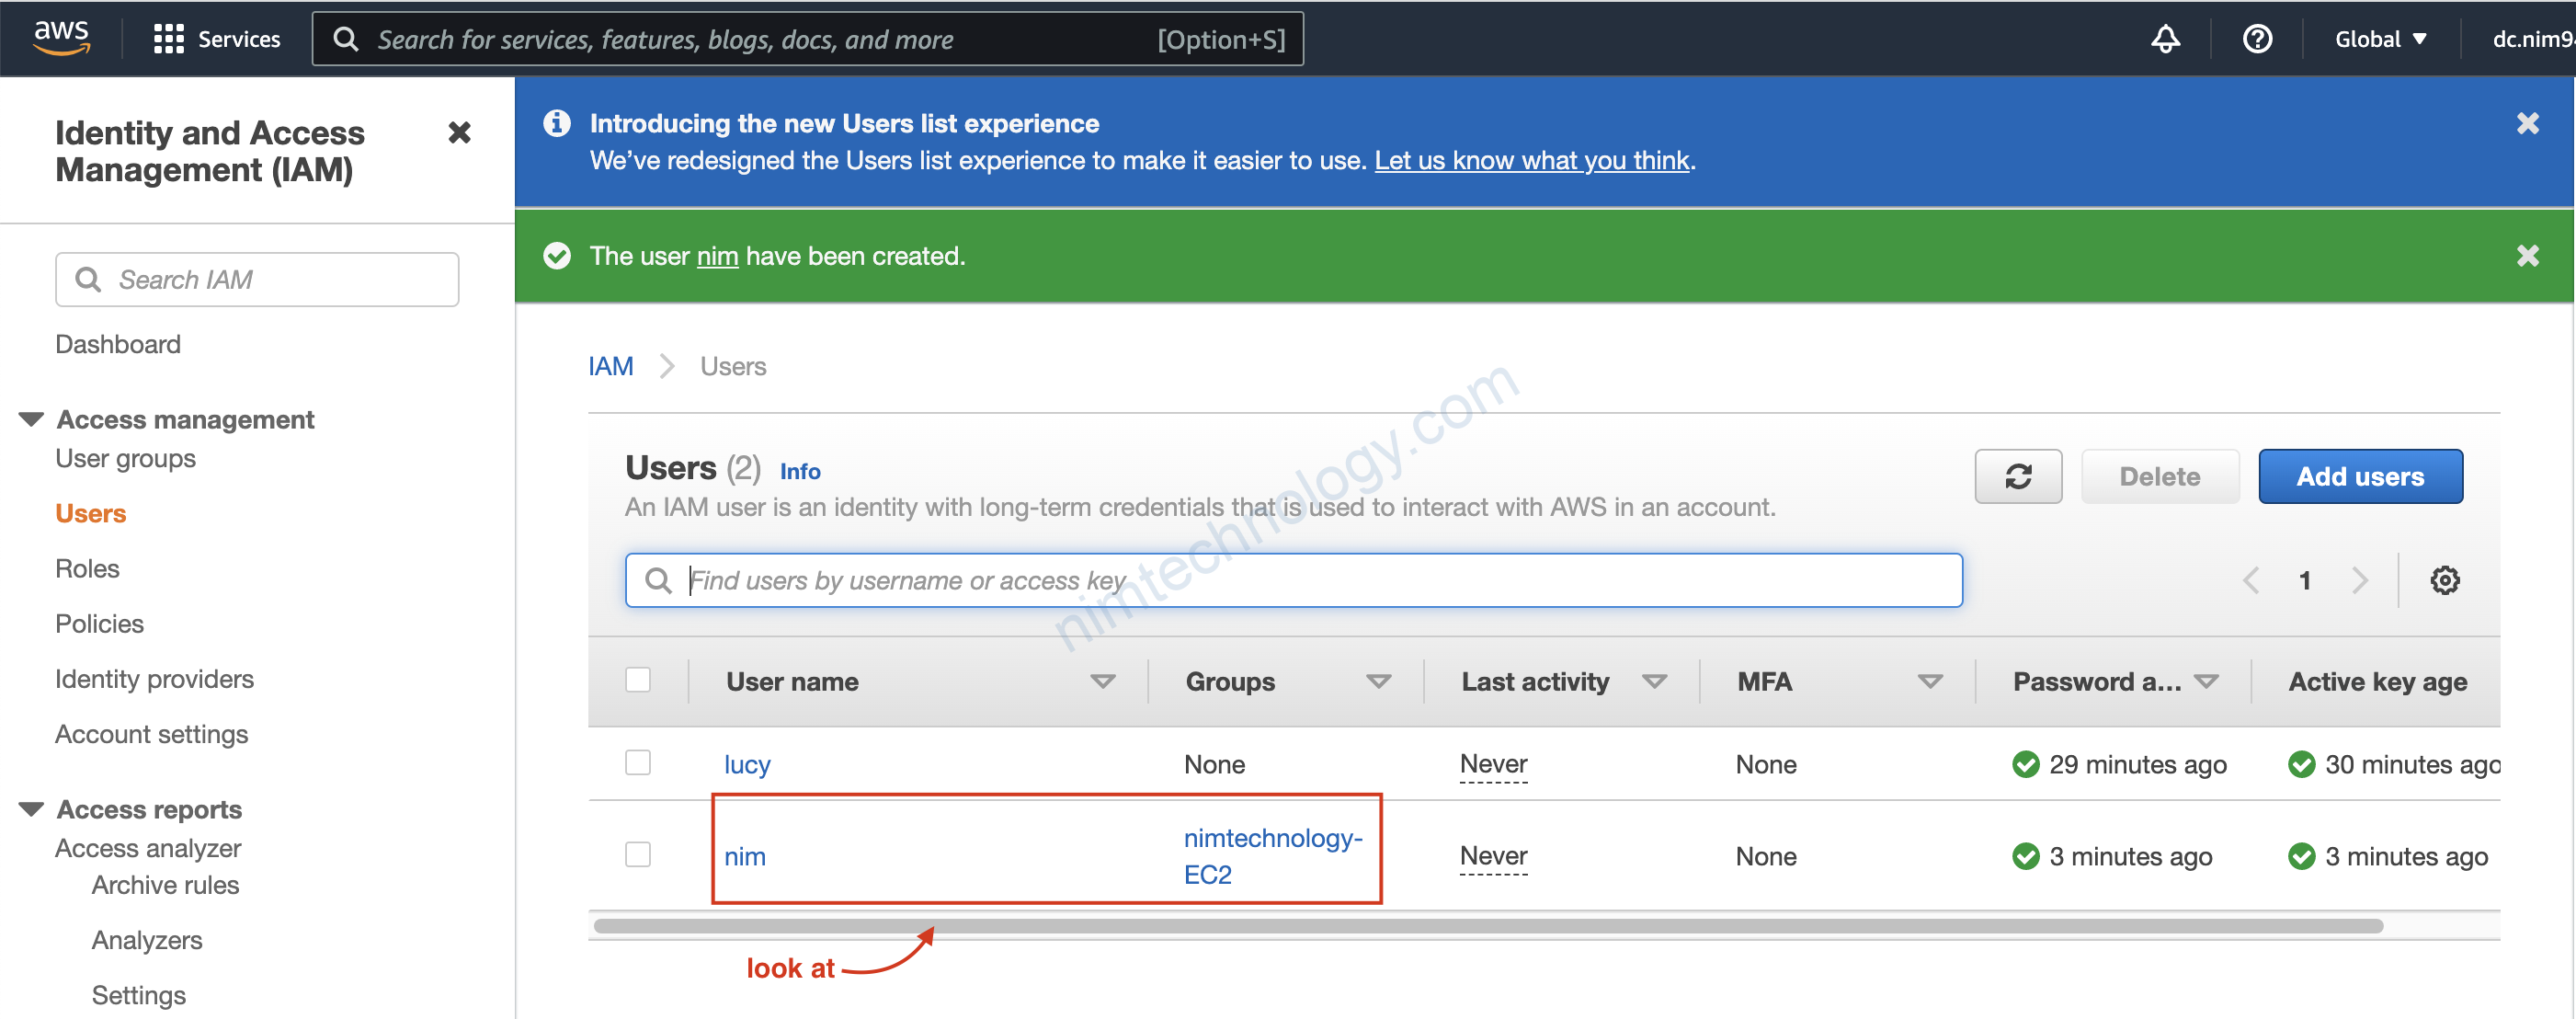
Sau đó chúng ta có user mới là sẽ add thêm vào group là ok.
3) Demo IAM
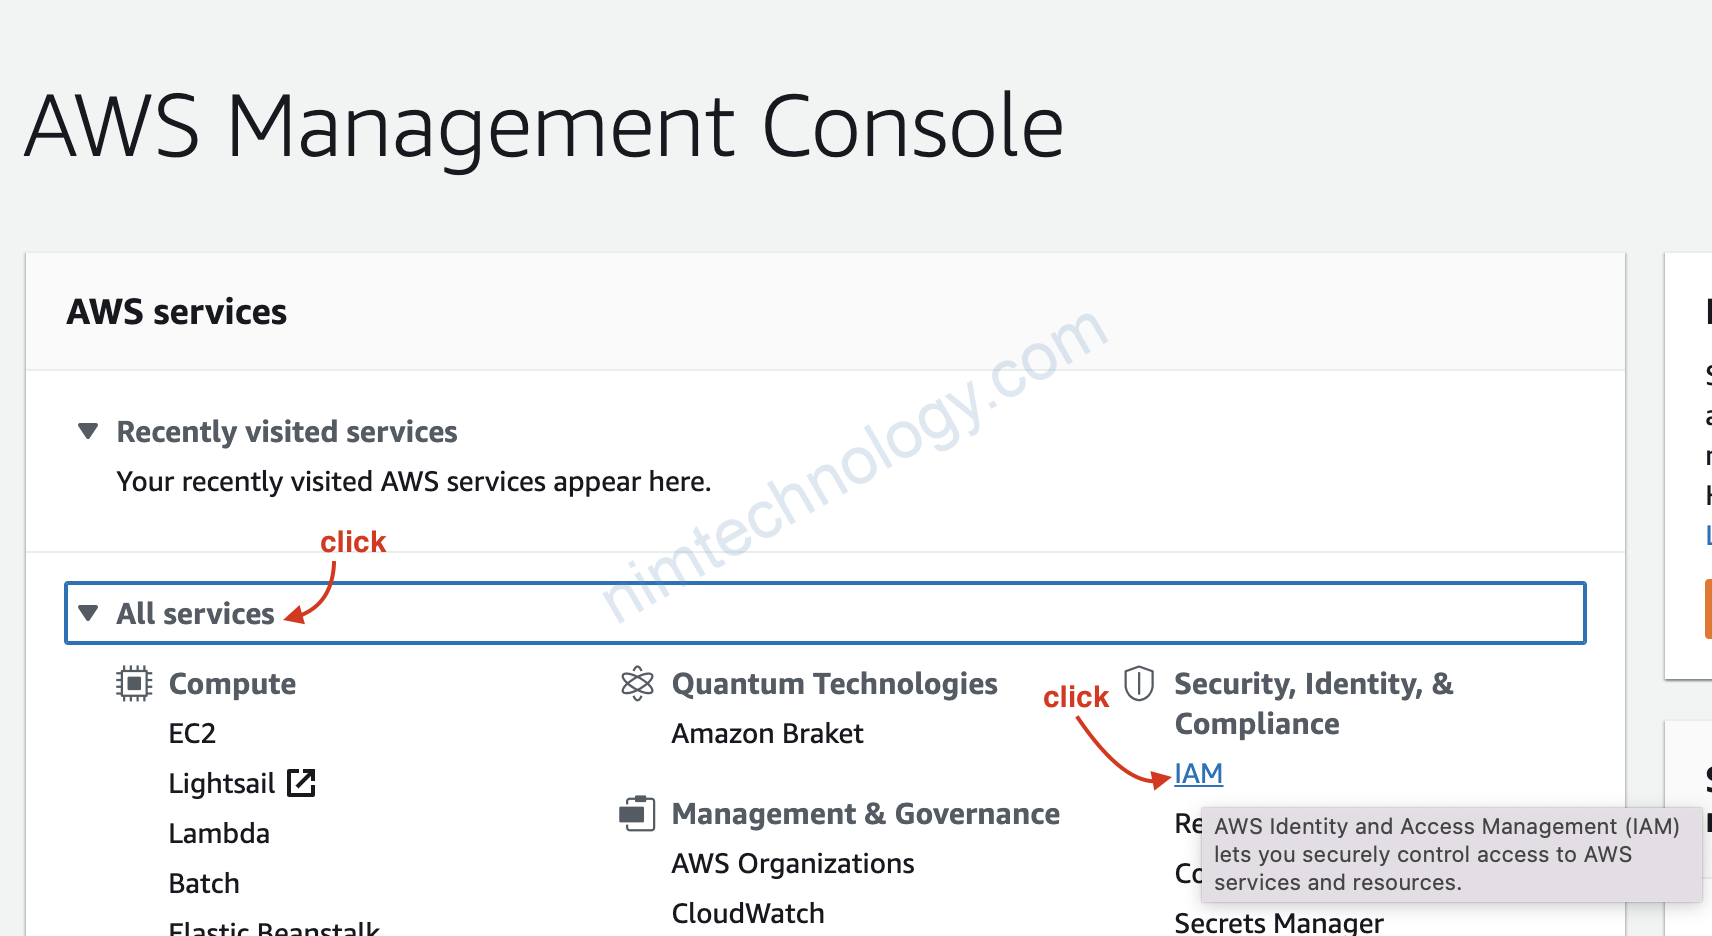
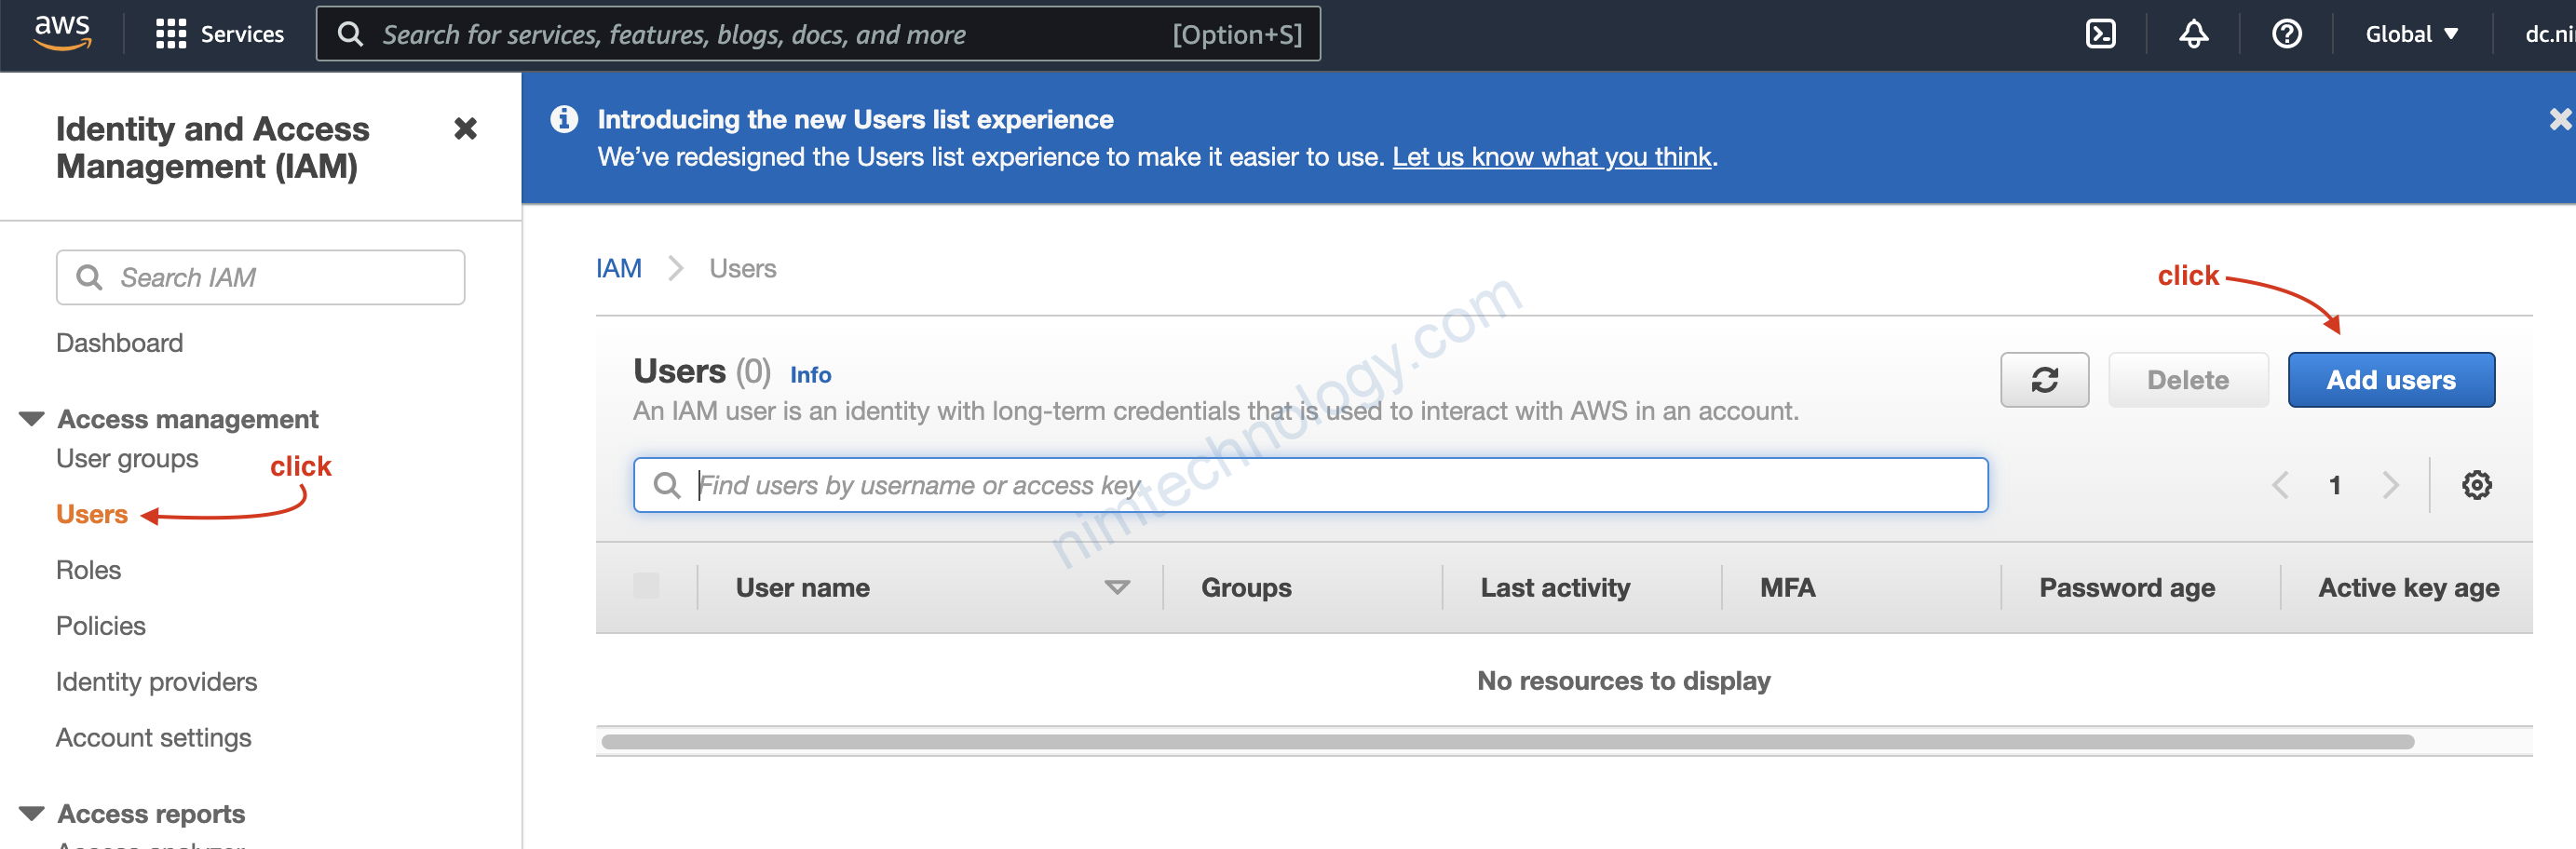
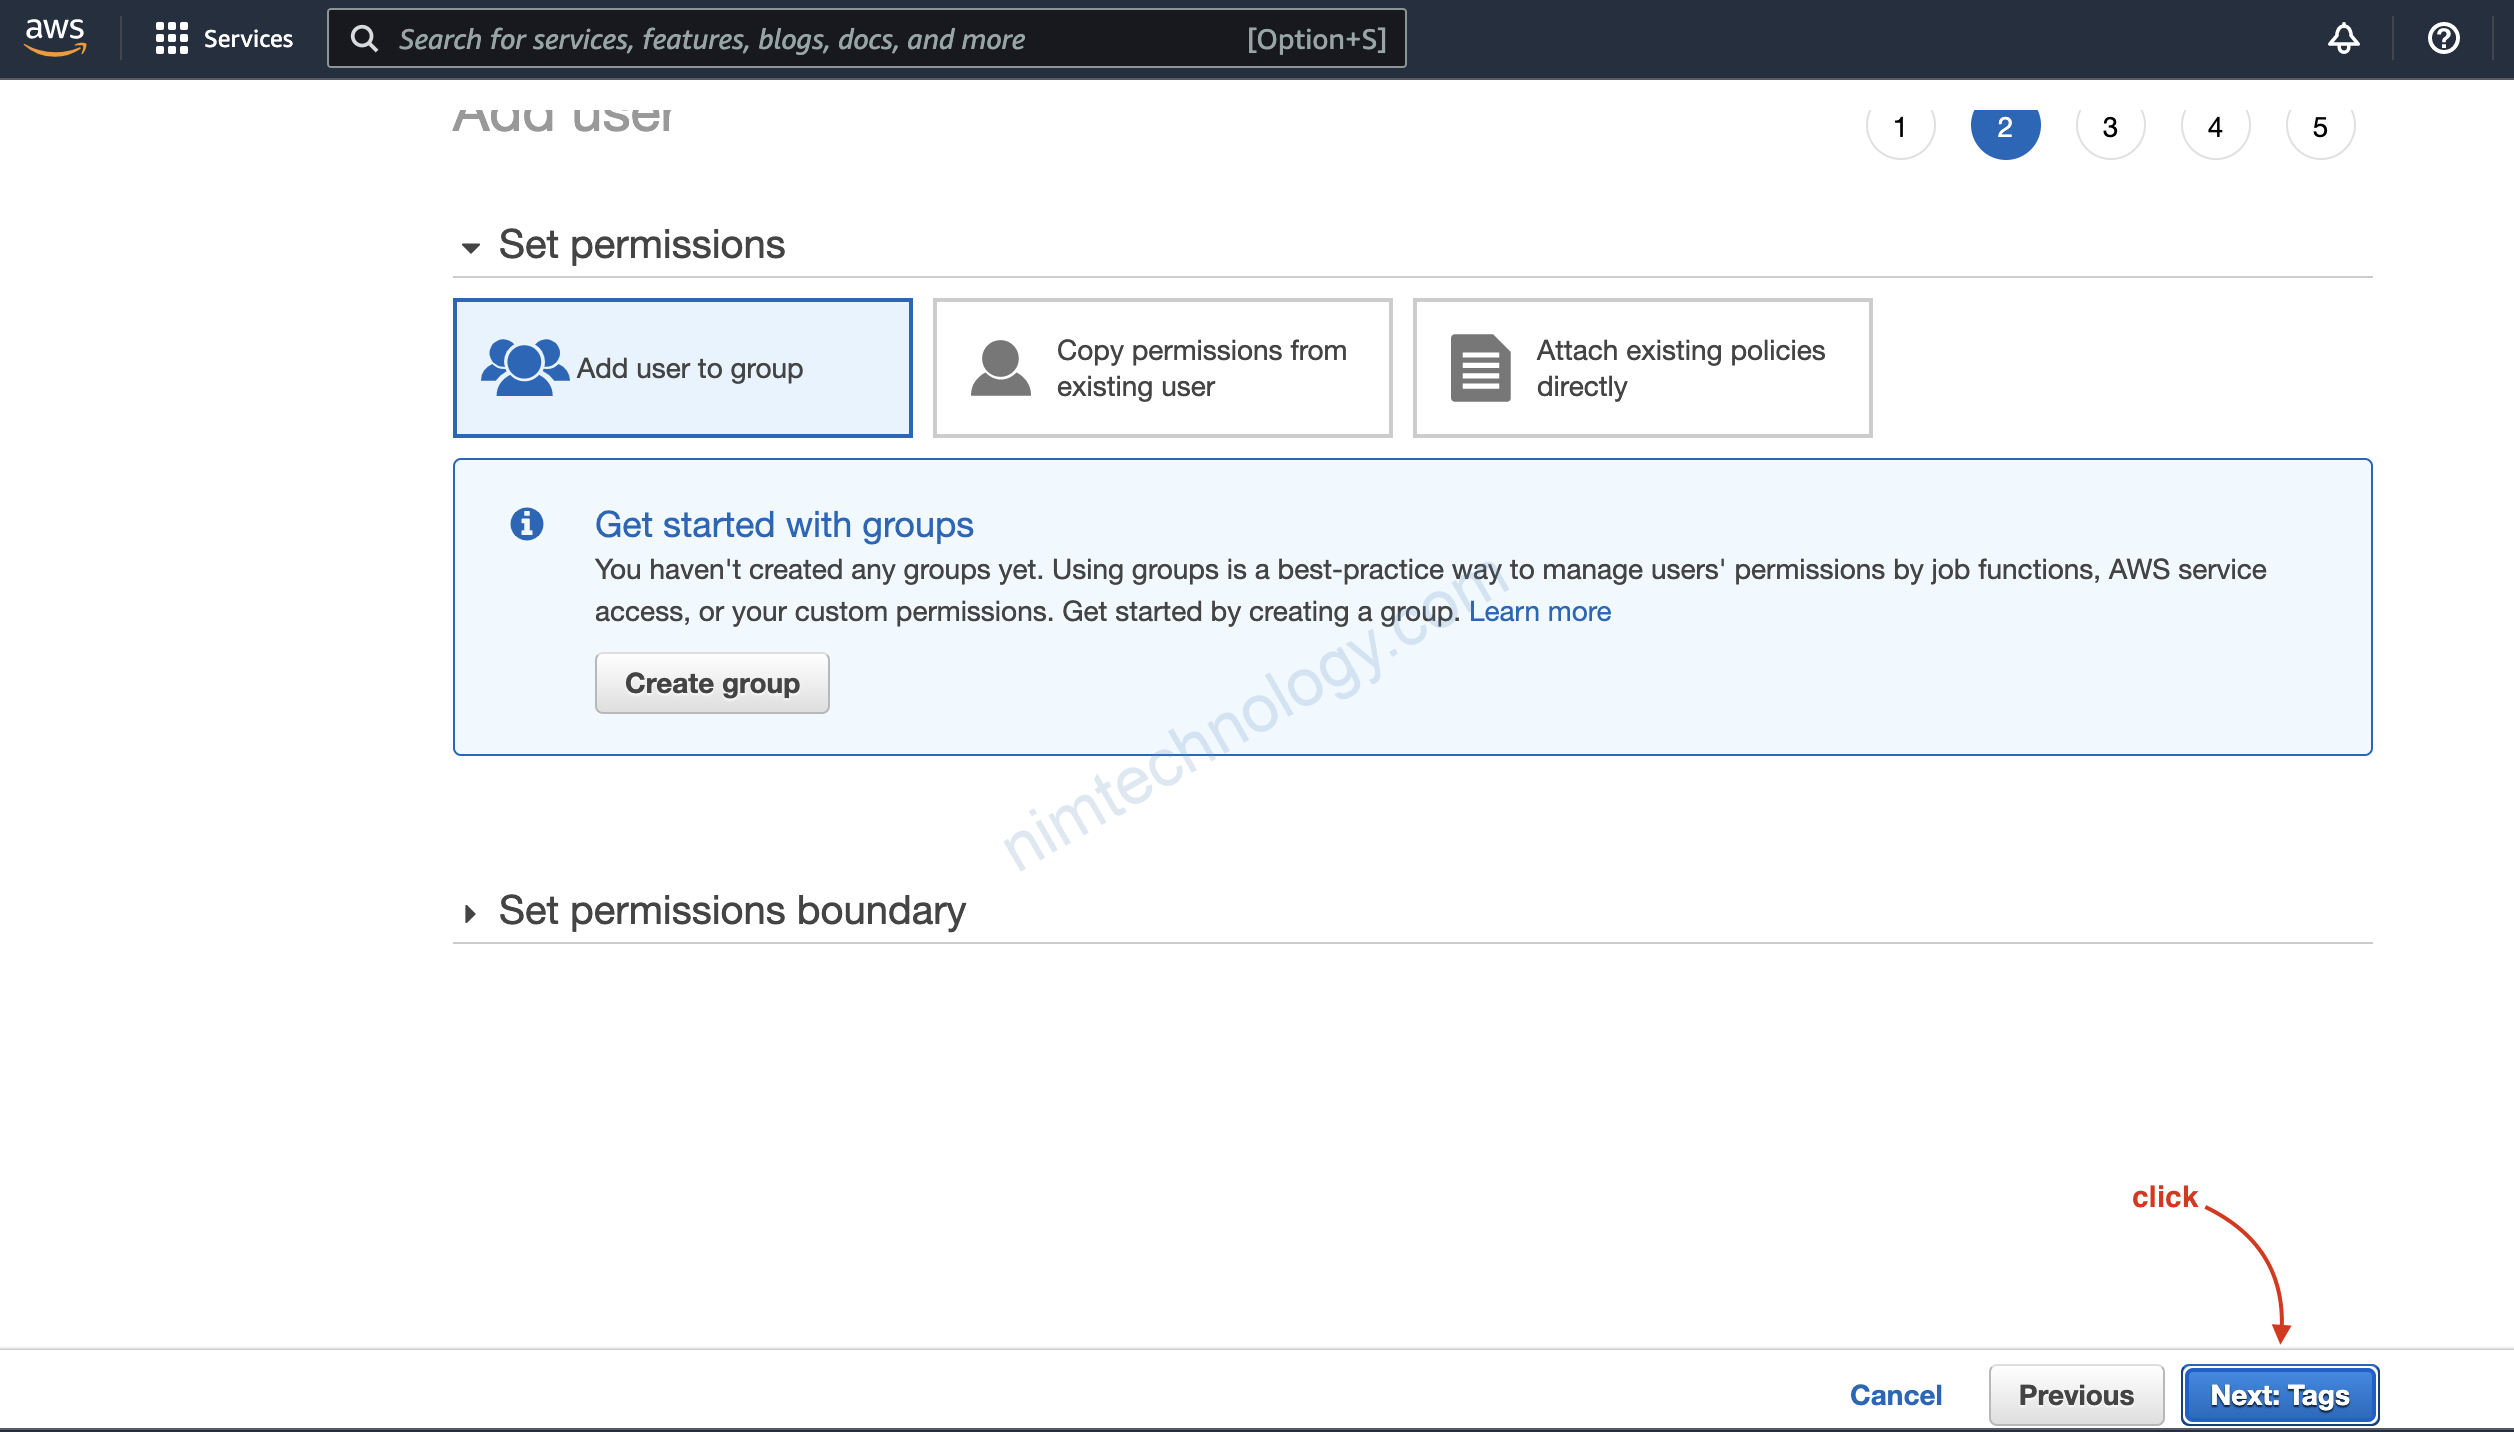
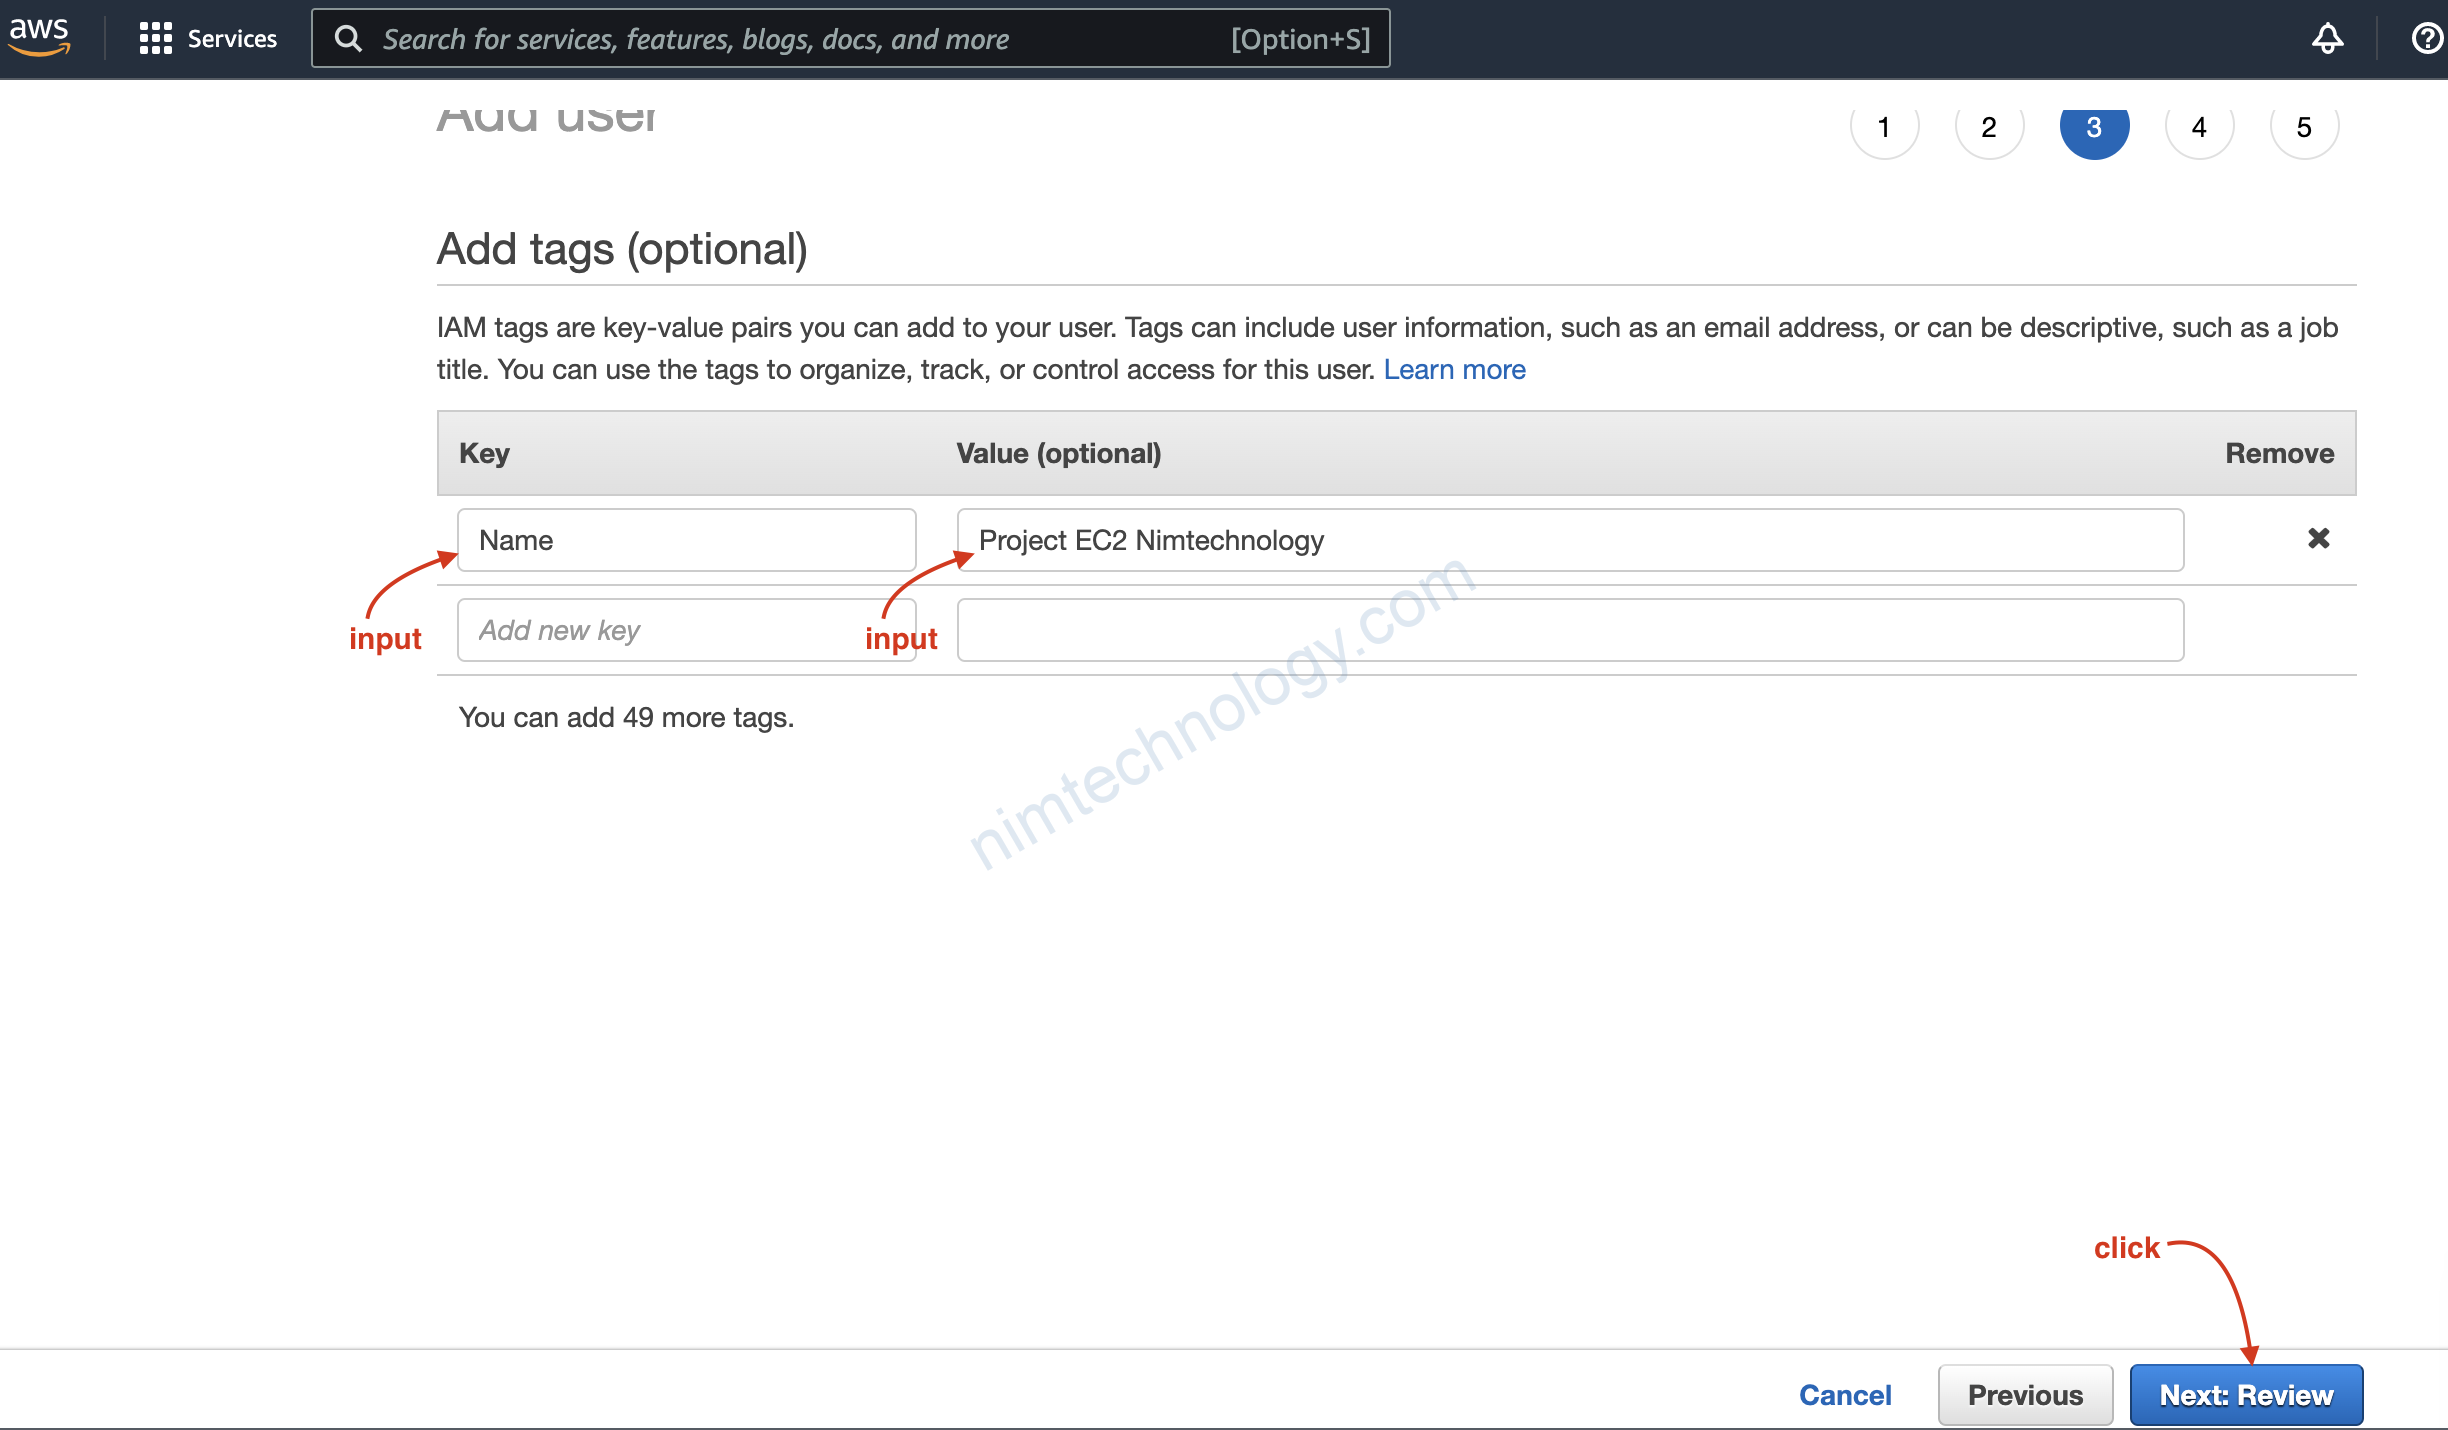
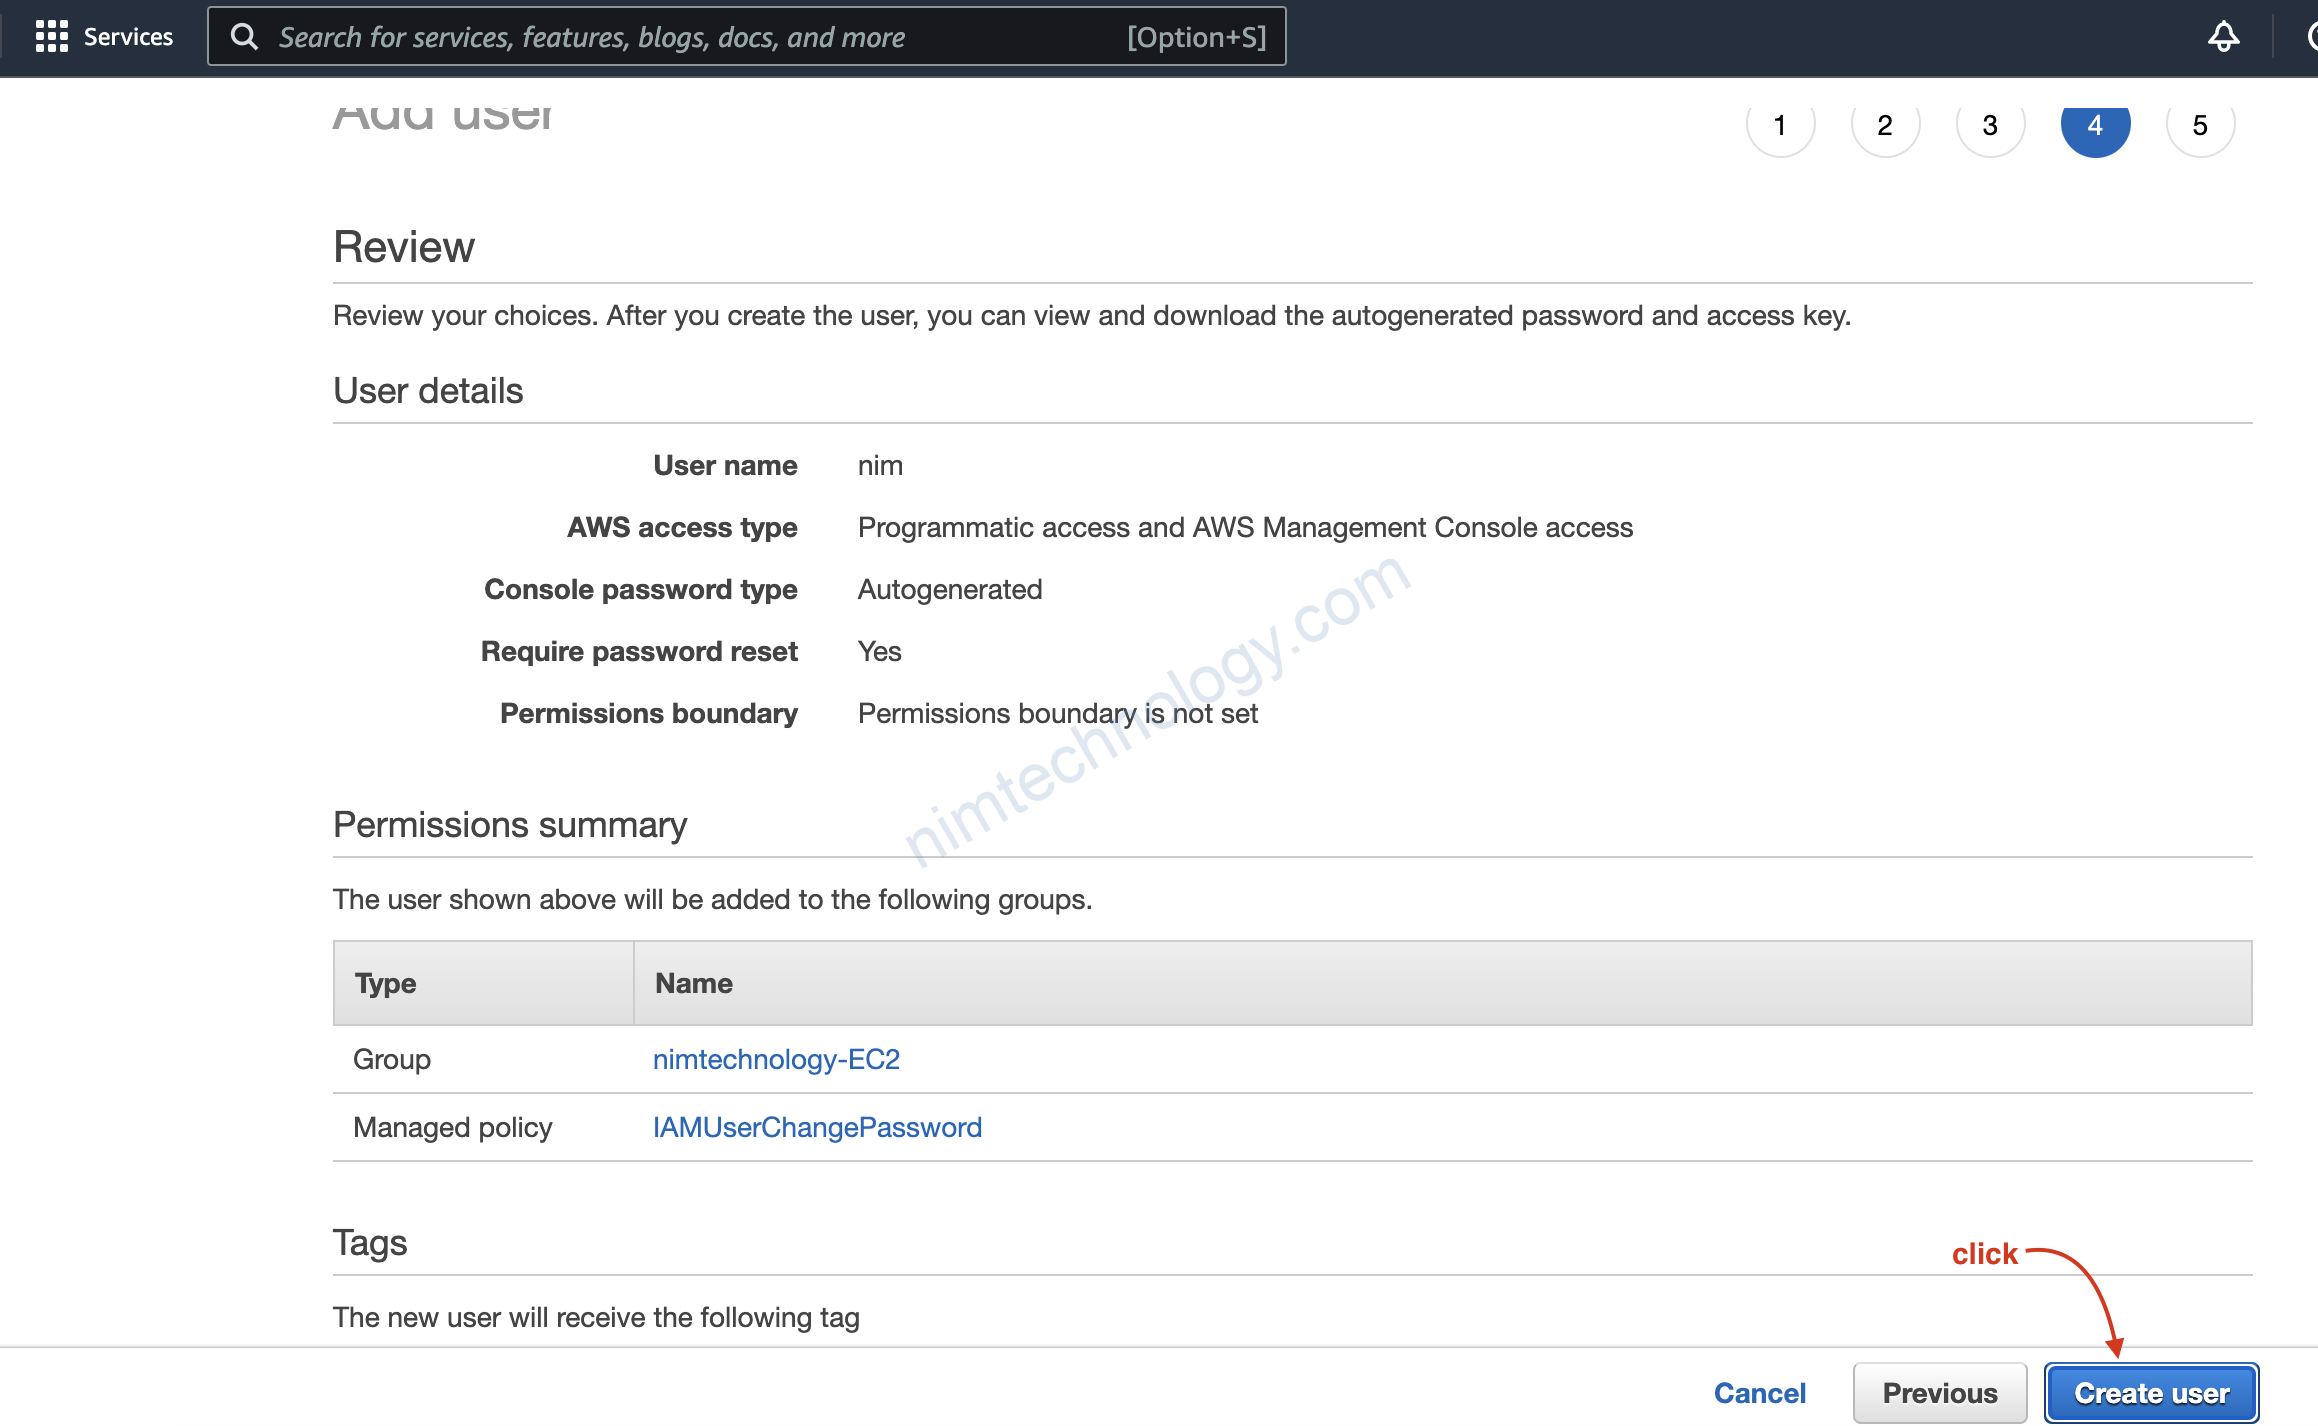
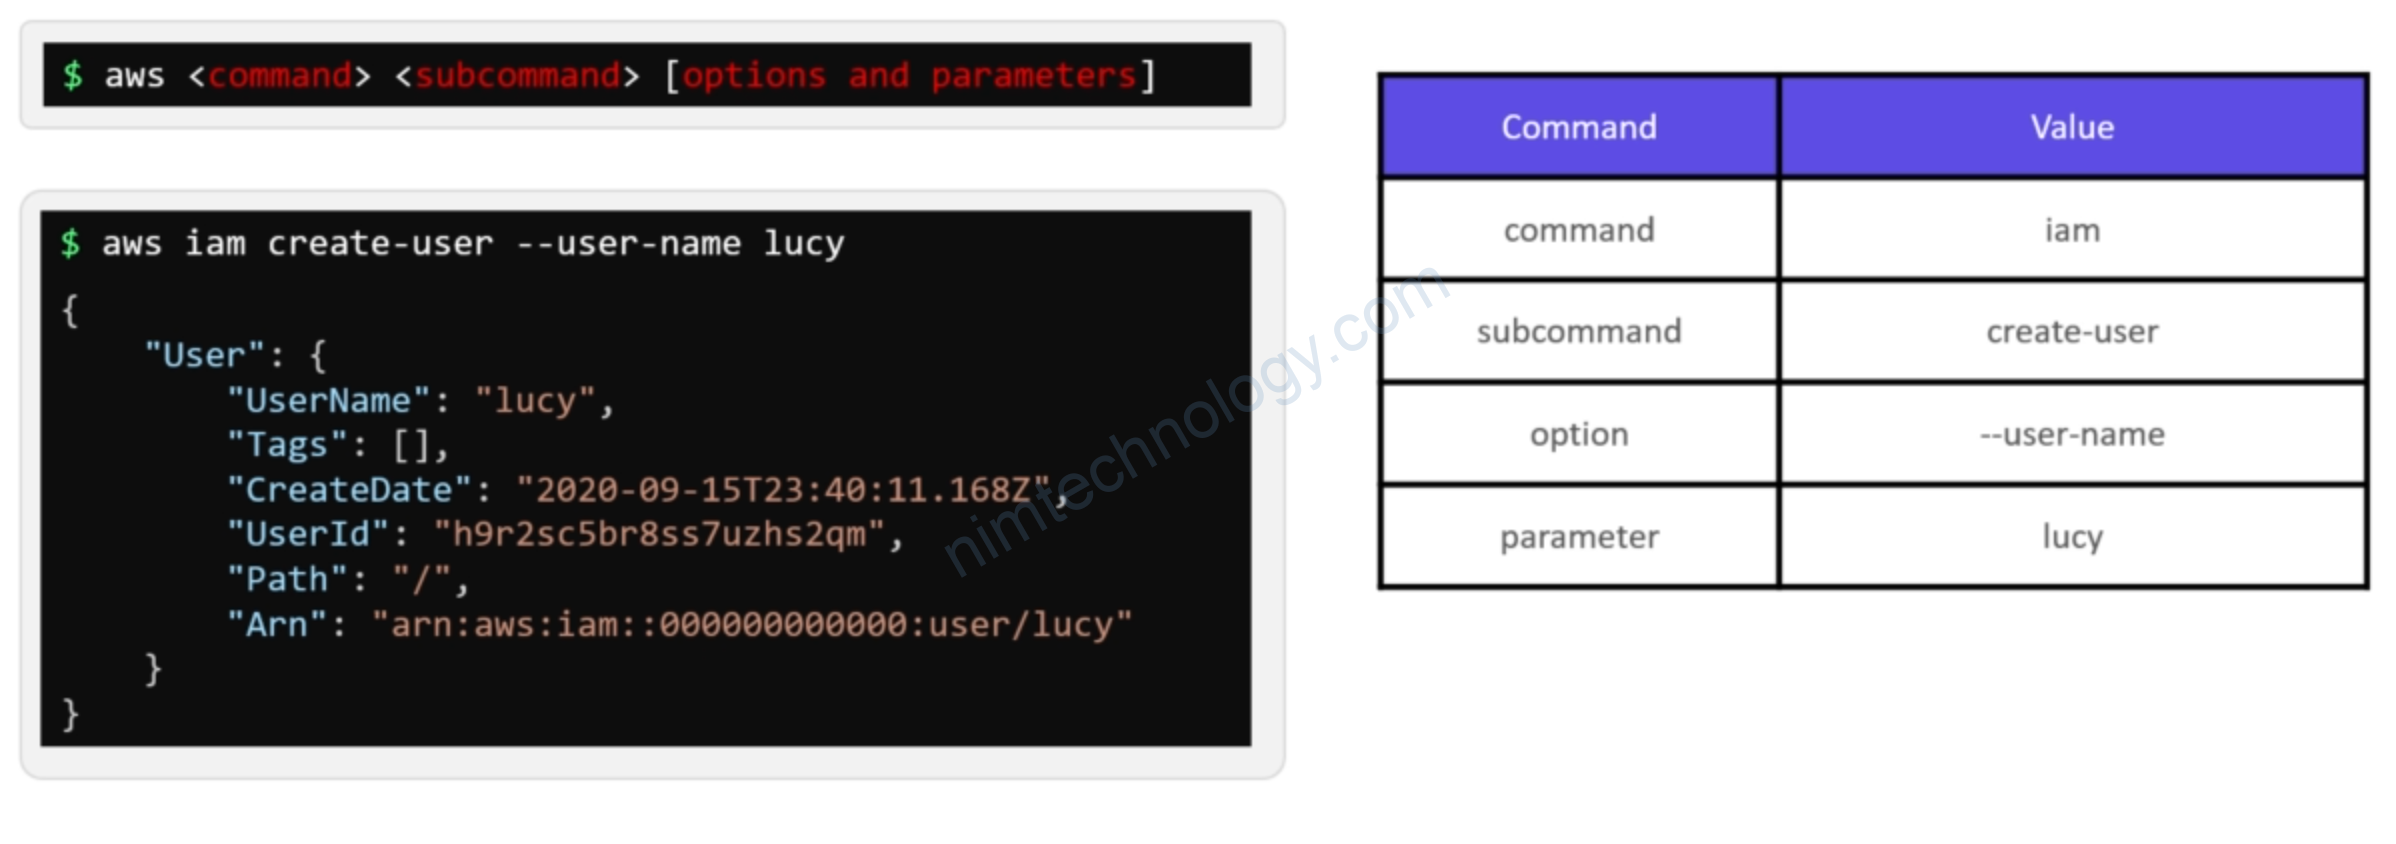
3.1) Create Administrator User
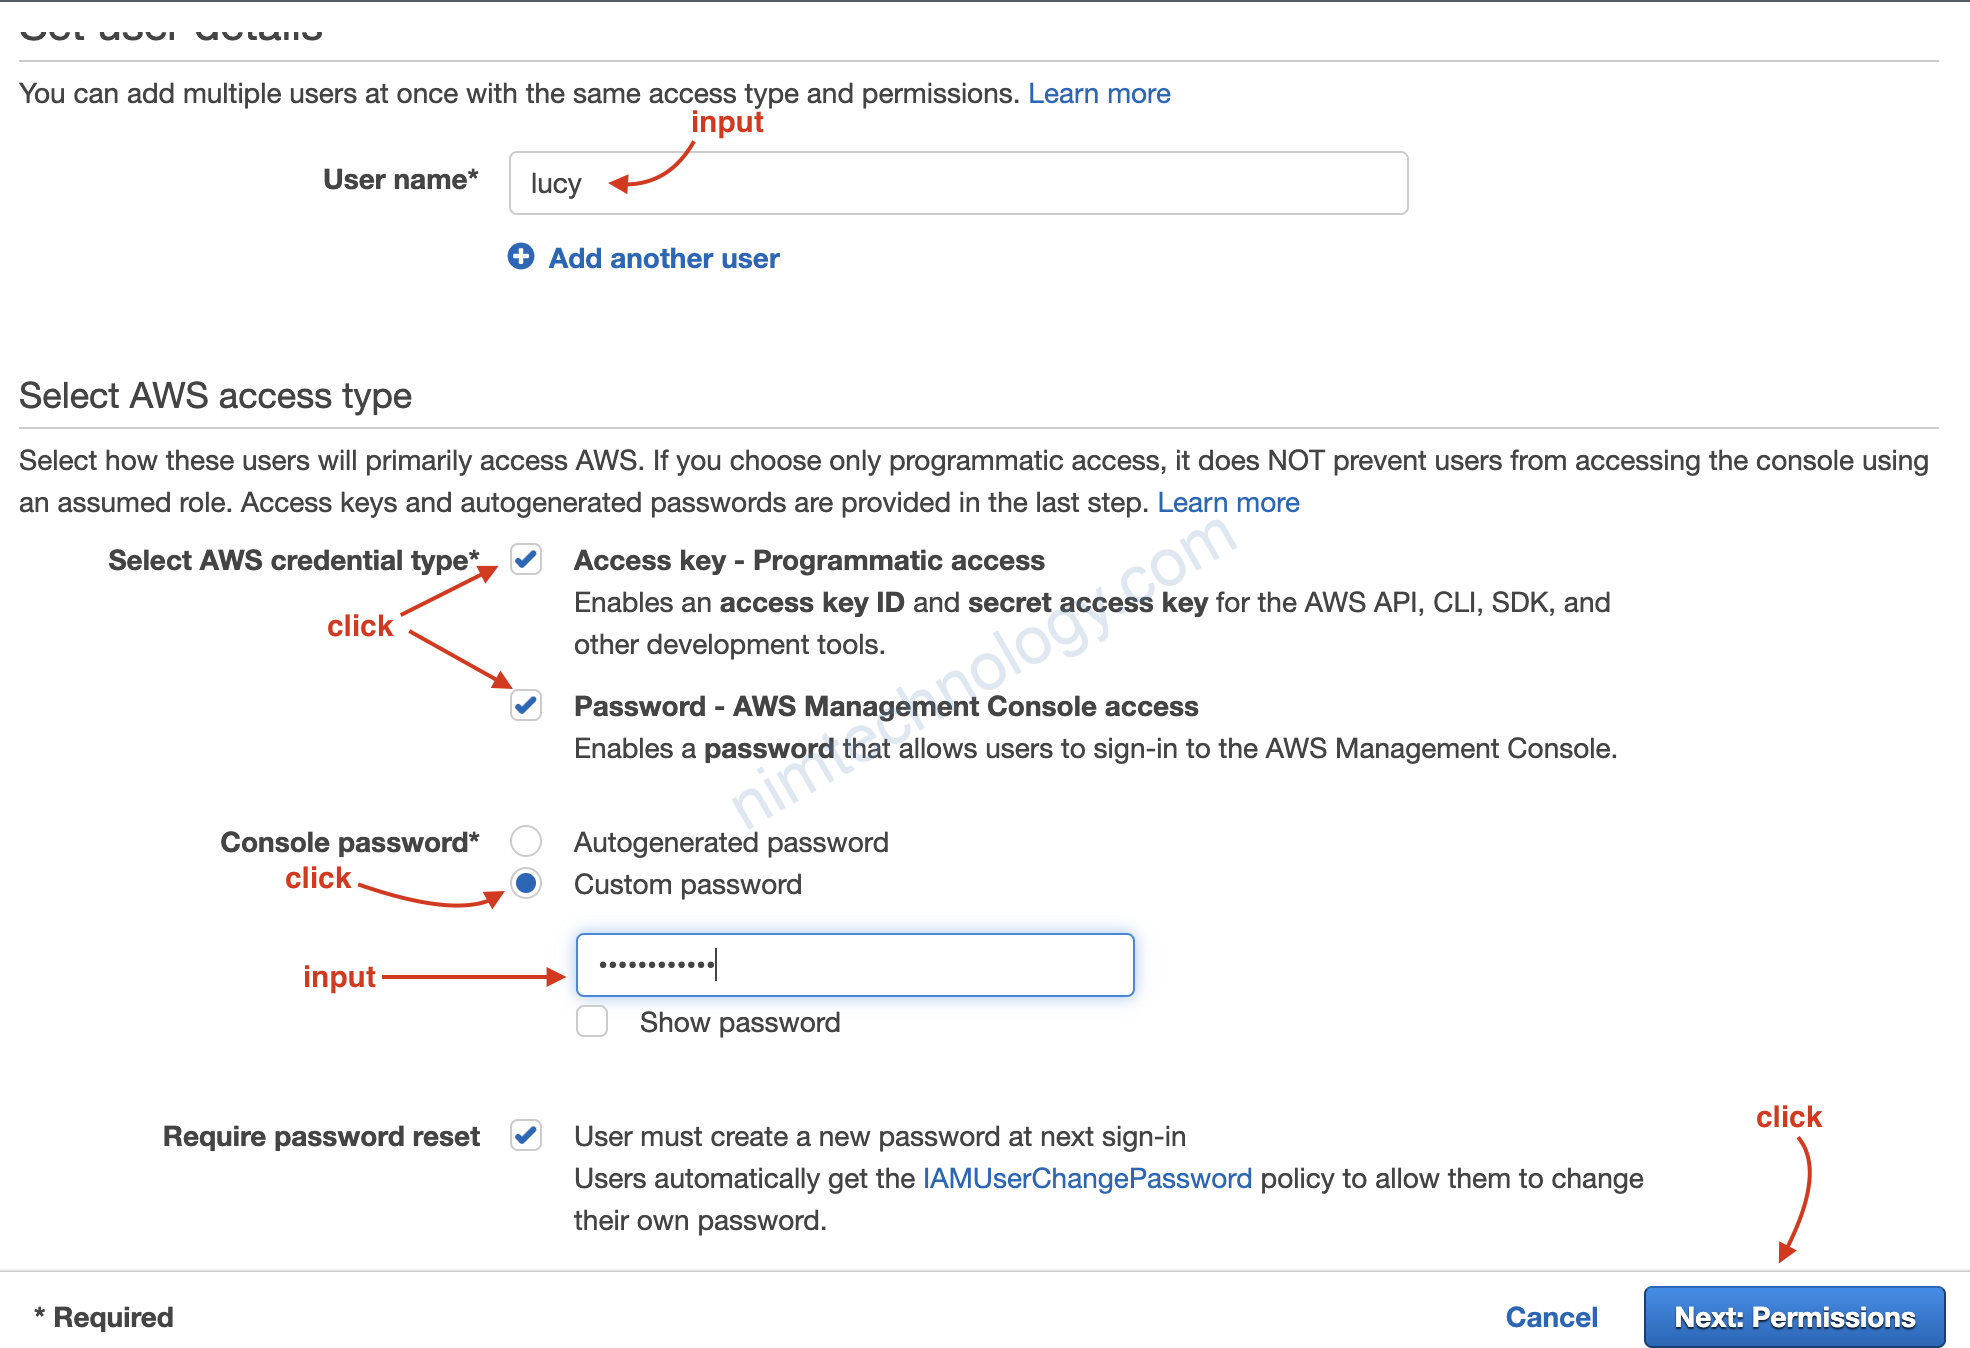
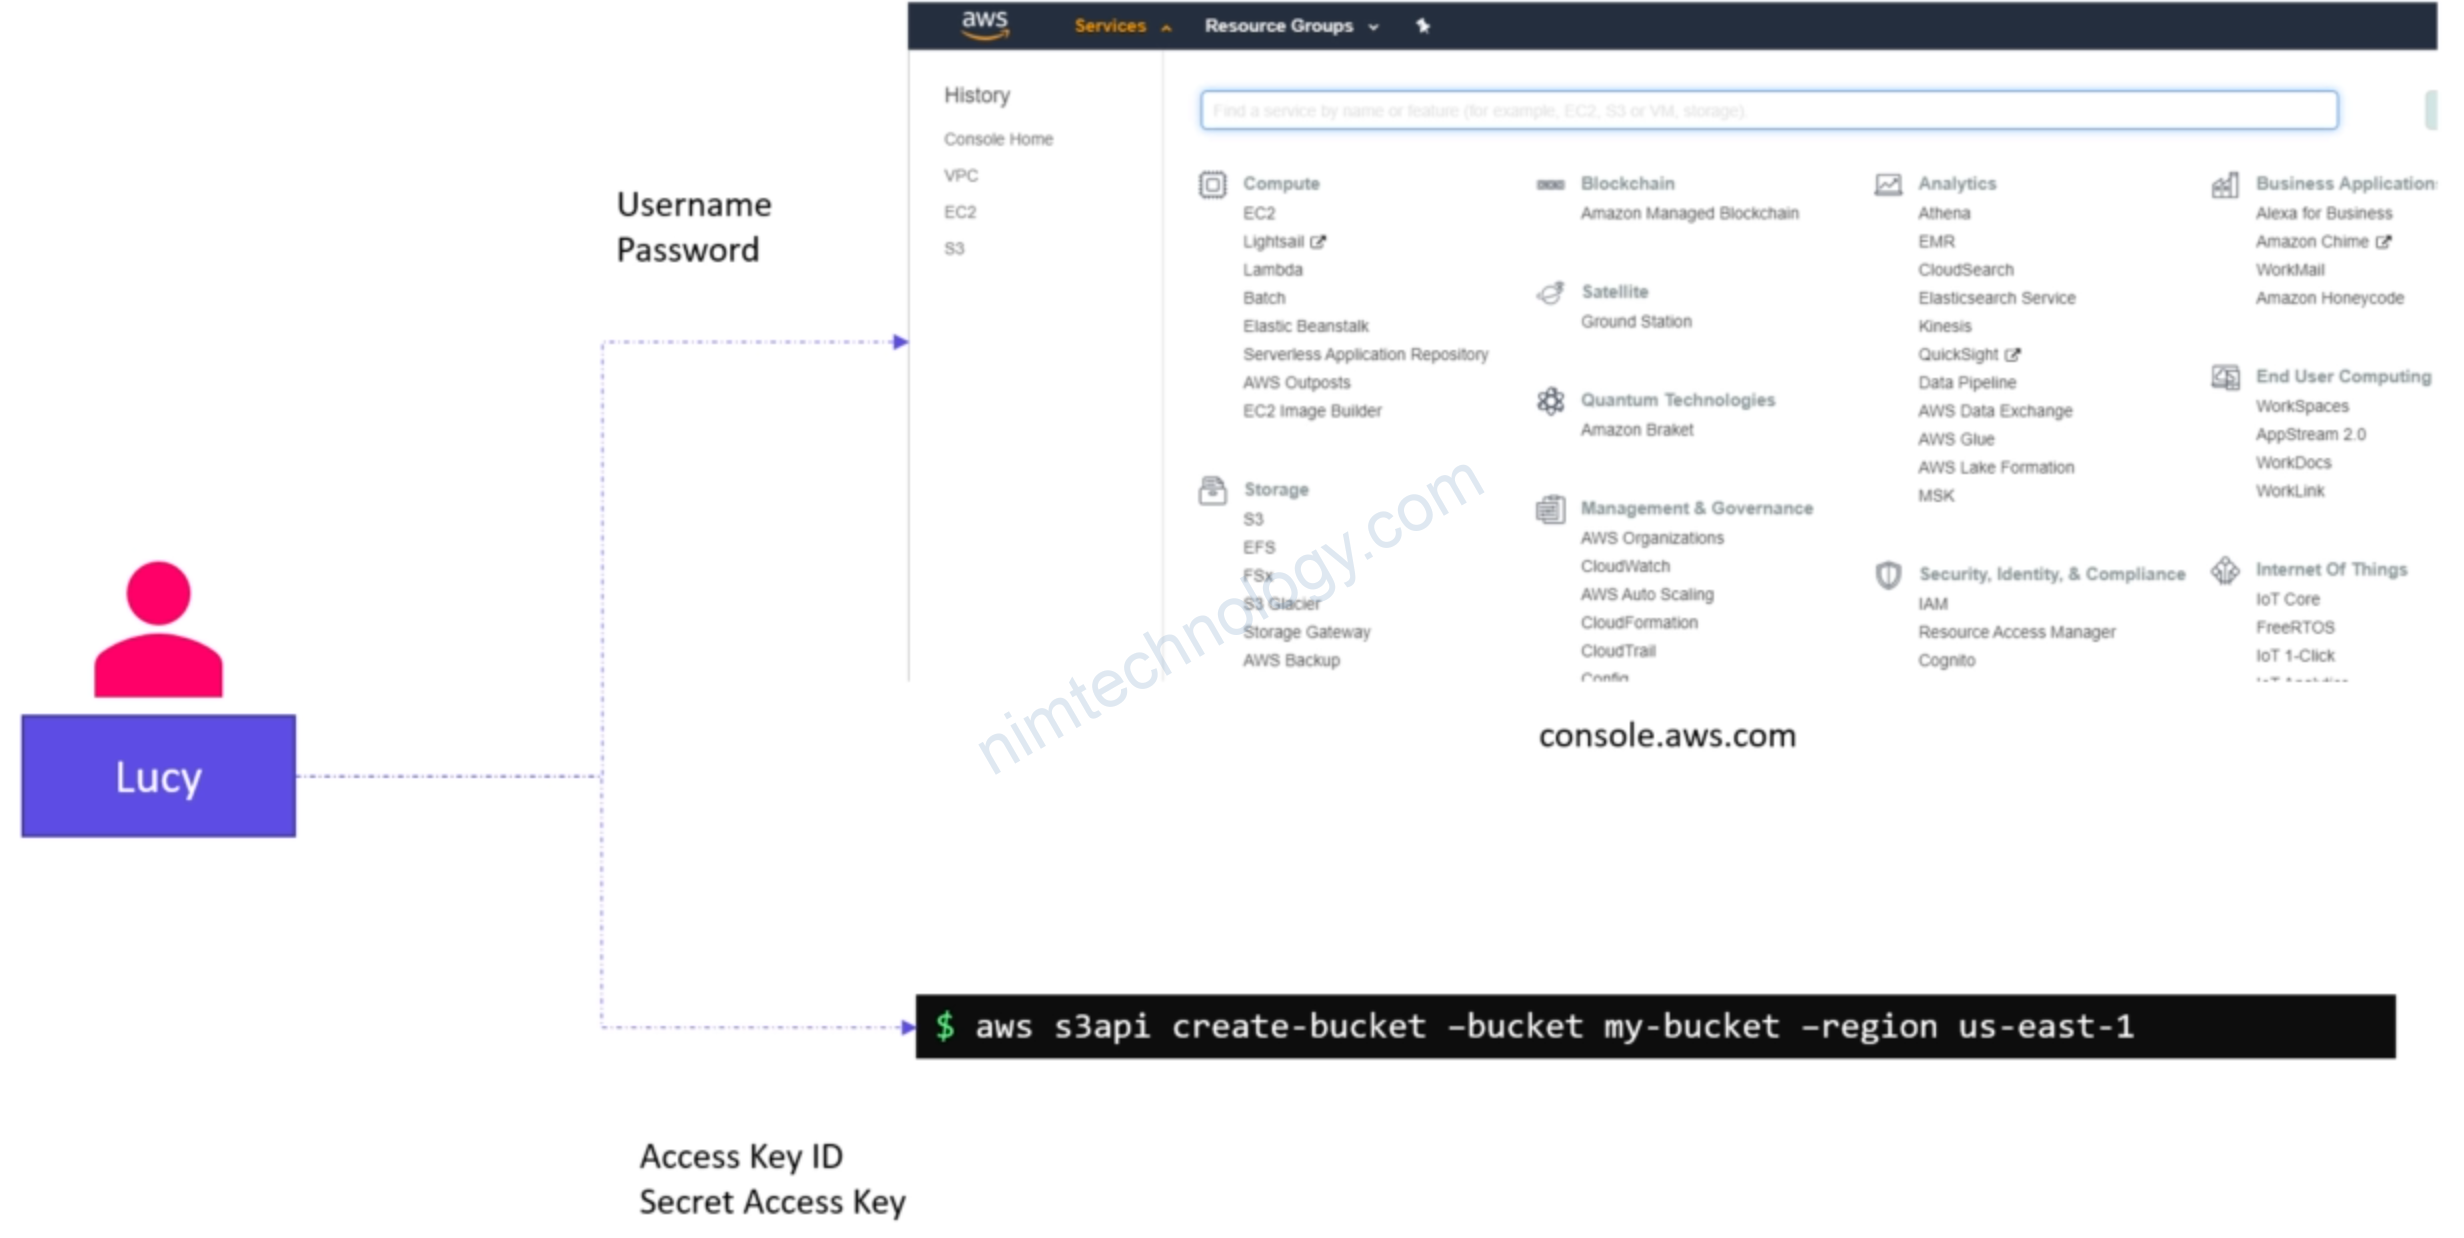
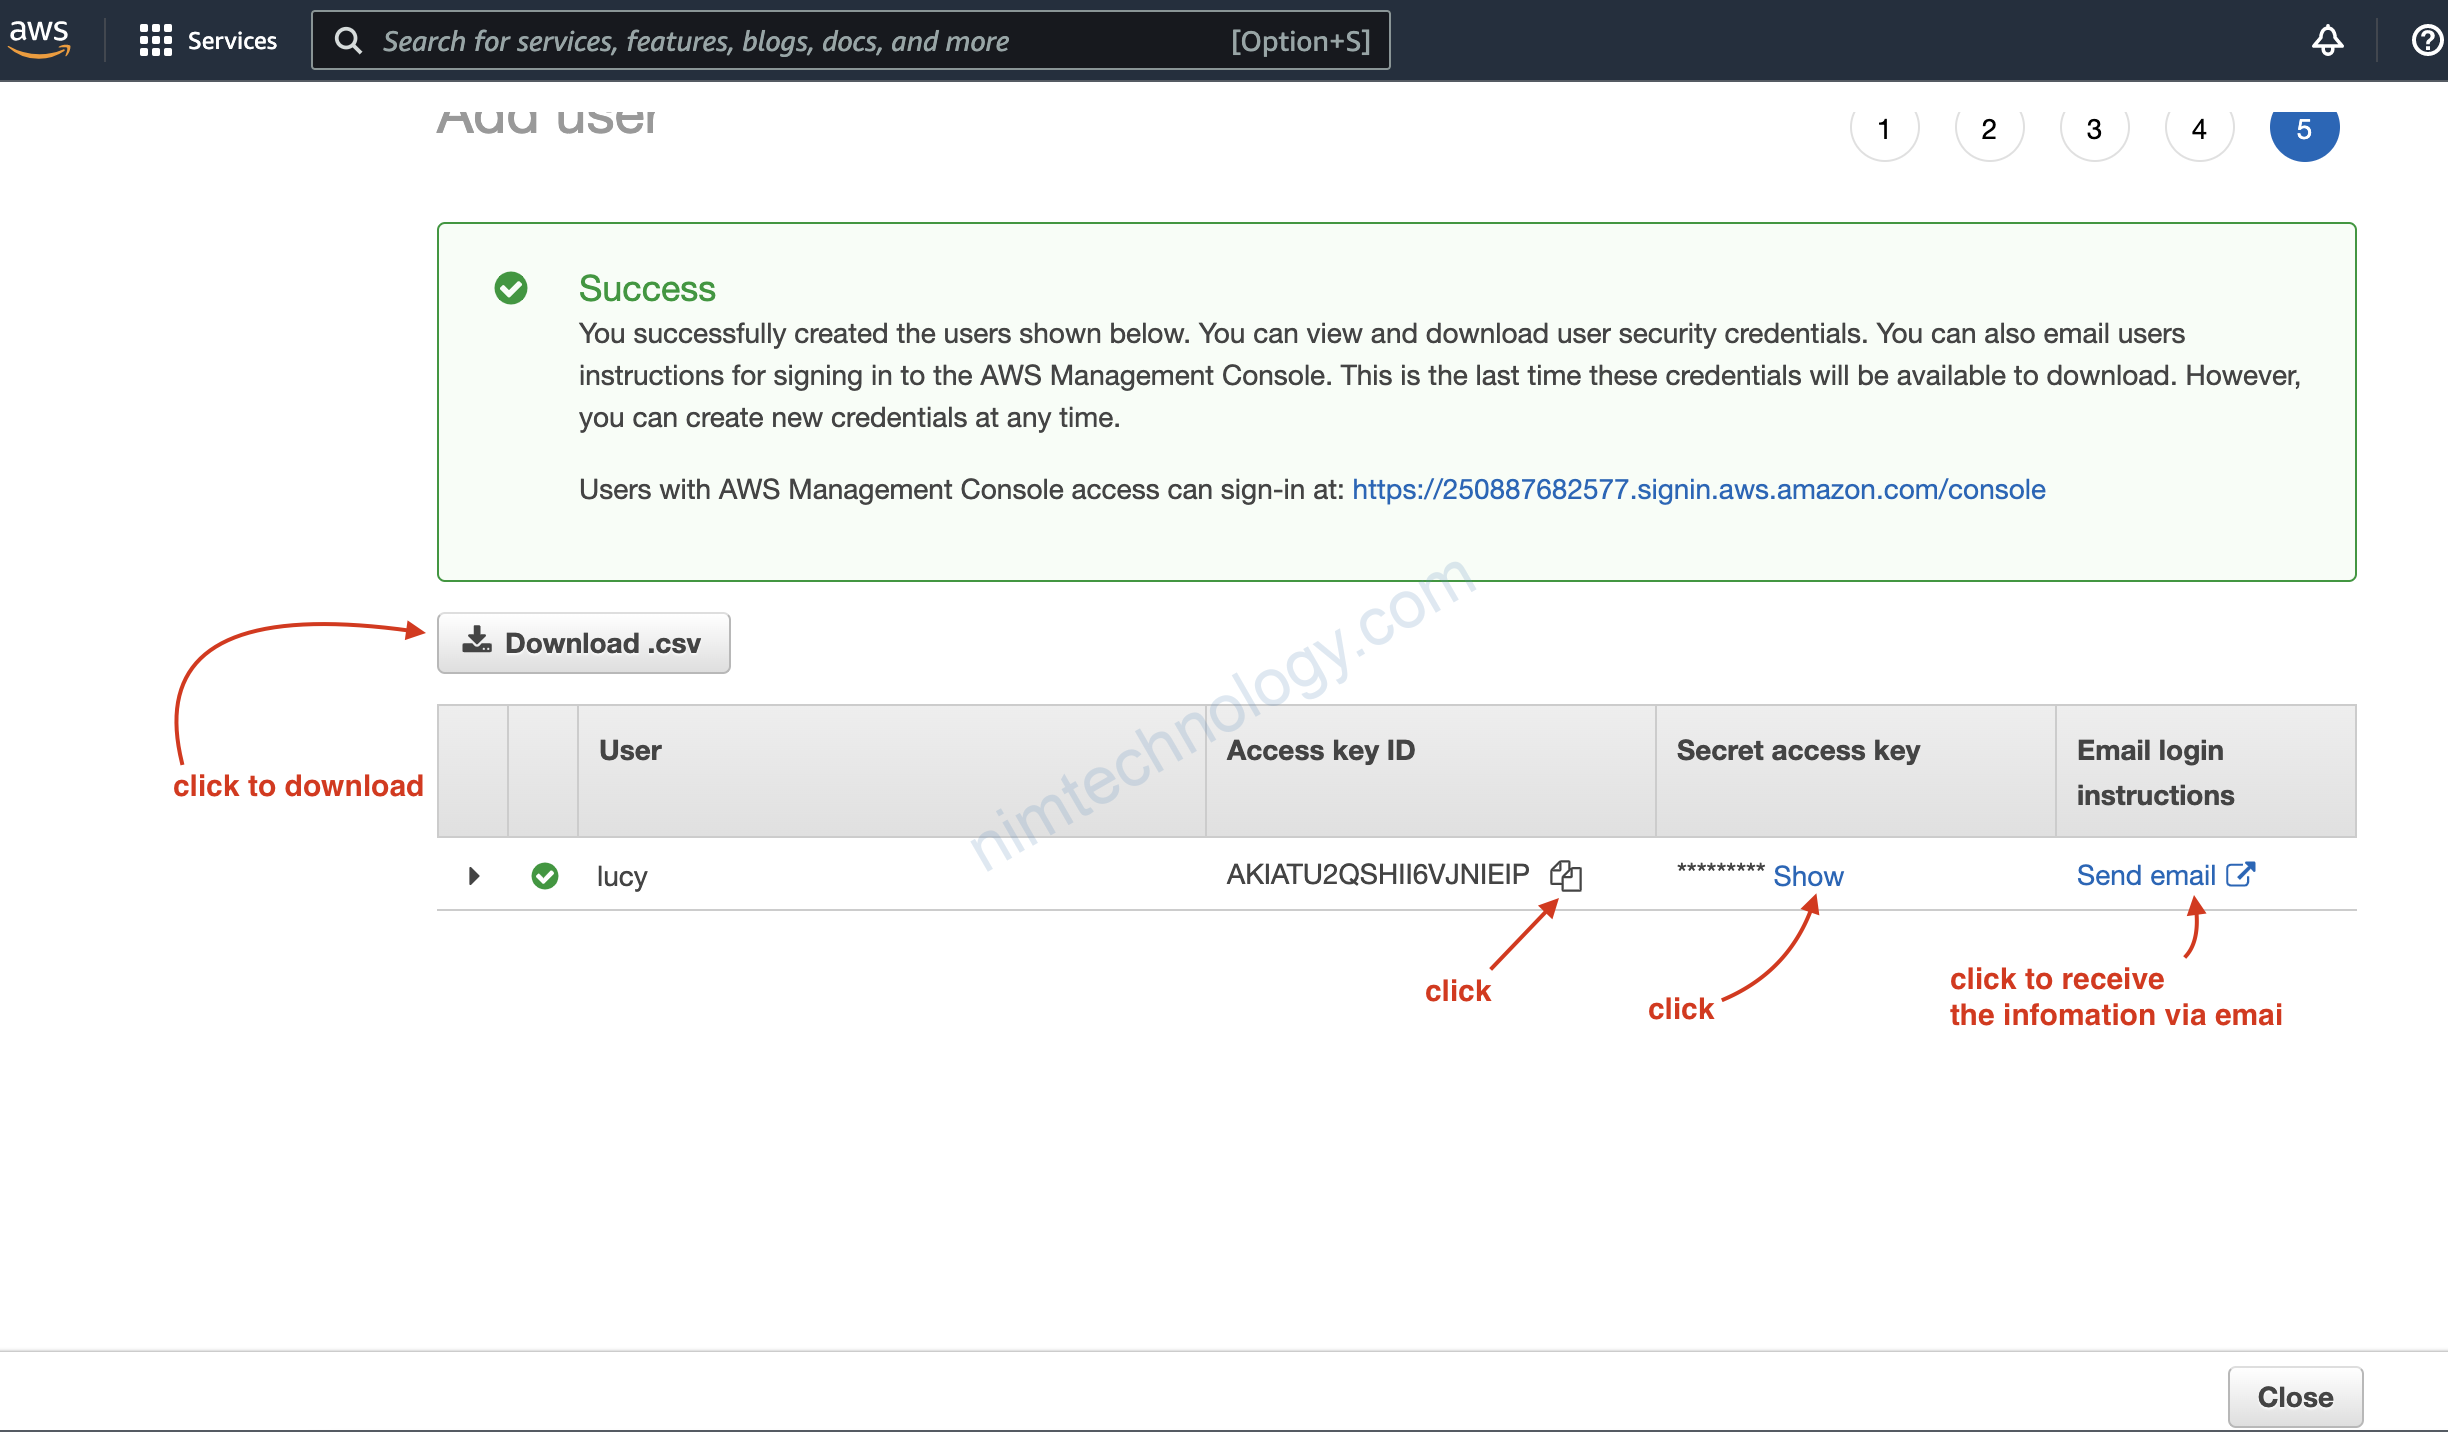
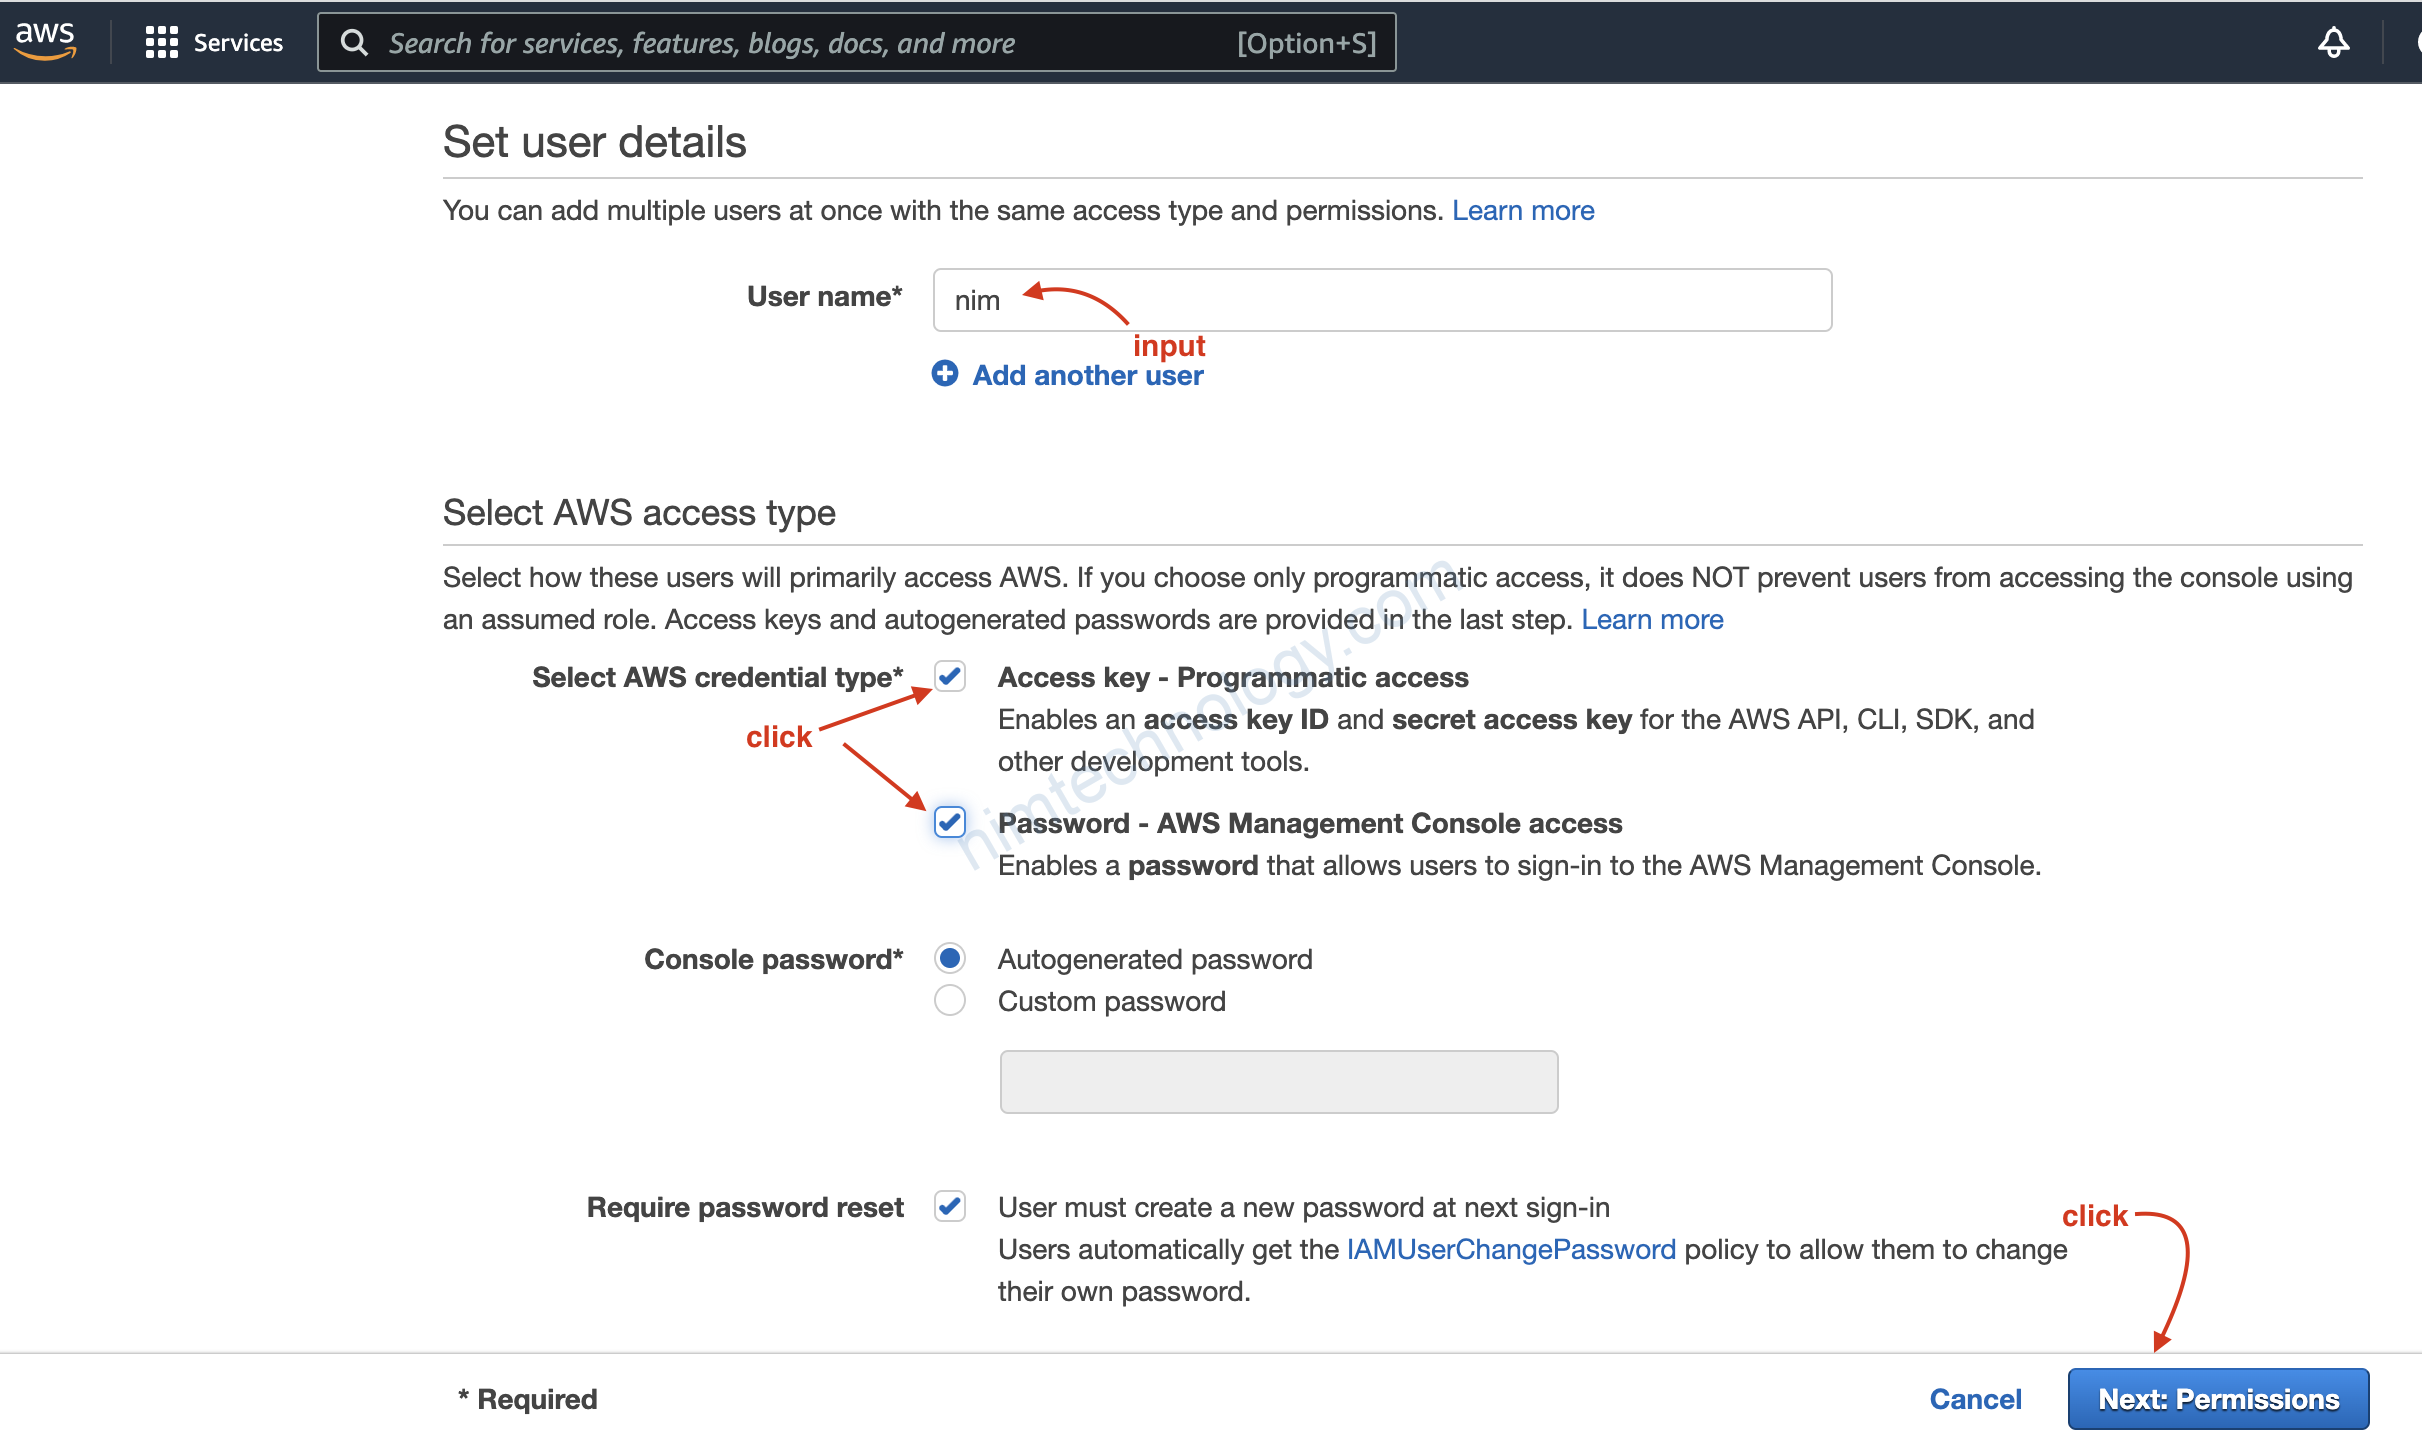
Chúng ta tạo user lucy. user này có access key để chúng ta sử dụng terraform, có thế login web console.

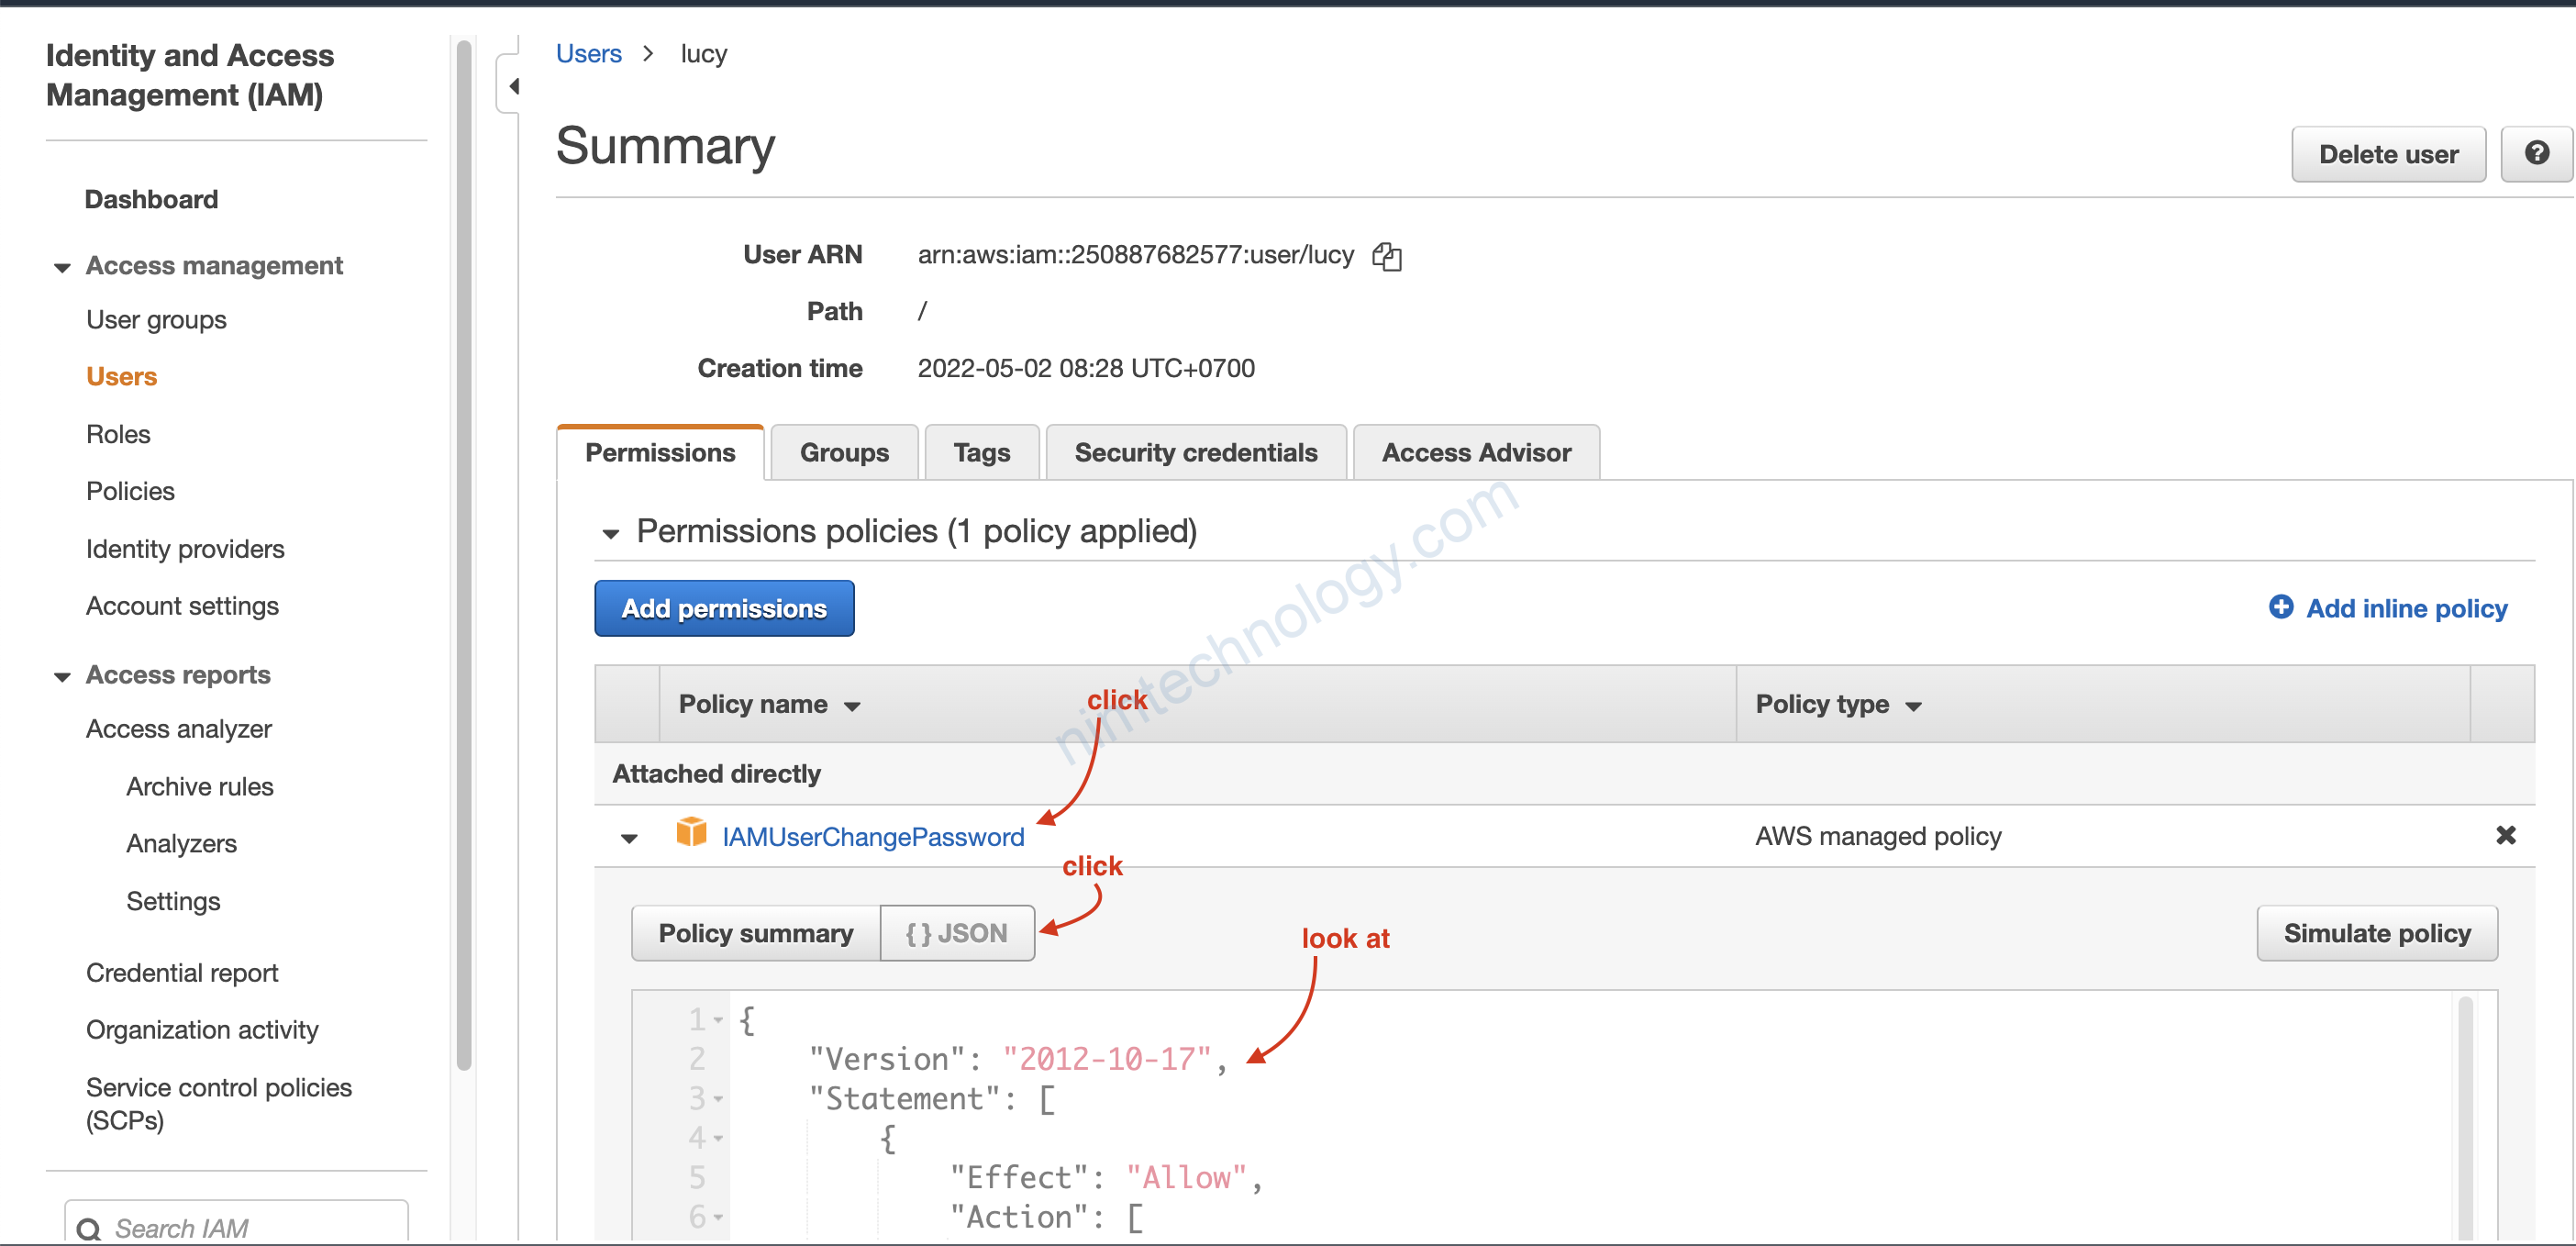
{
    "Version": "2012-10-17",
    "Statement": [
        {
            "Effect": "Allow",
            "Action": [
                "iam:ChangePassword"
            ],
            "Resource": [
                "arn:aws:iam::*:user/${aws:username}"
            ]
        },
        {
            "Effect": "Allow",
            "Action": [
                "iam:GetAccountPasswordPolicy"
            ],
            "Resource": "*"
        }
    ]
}
3.2) Create a Group And Users of this group.
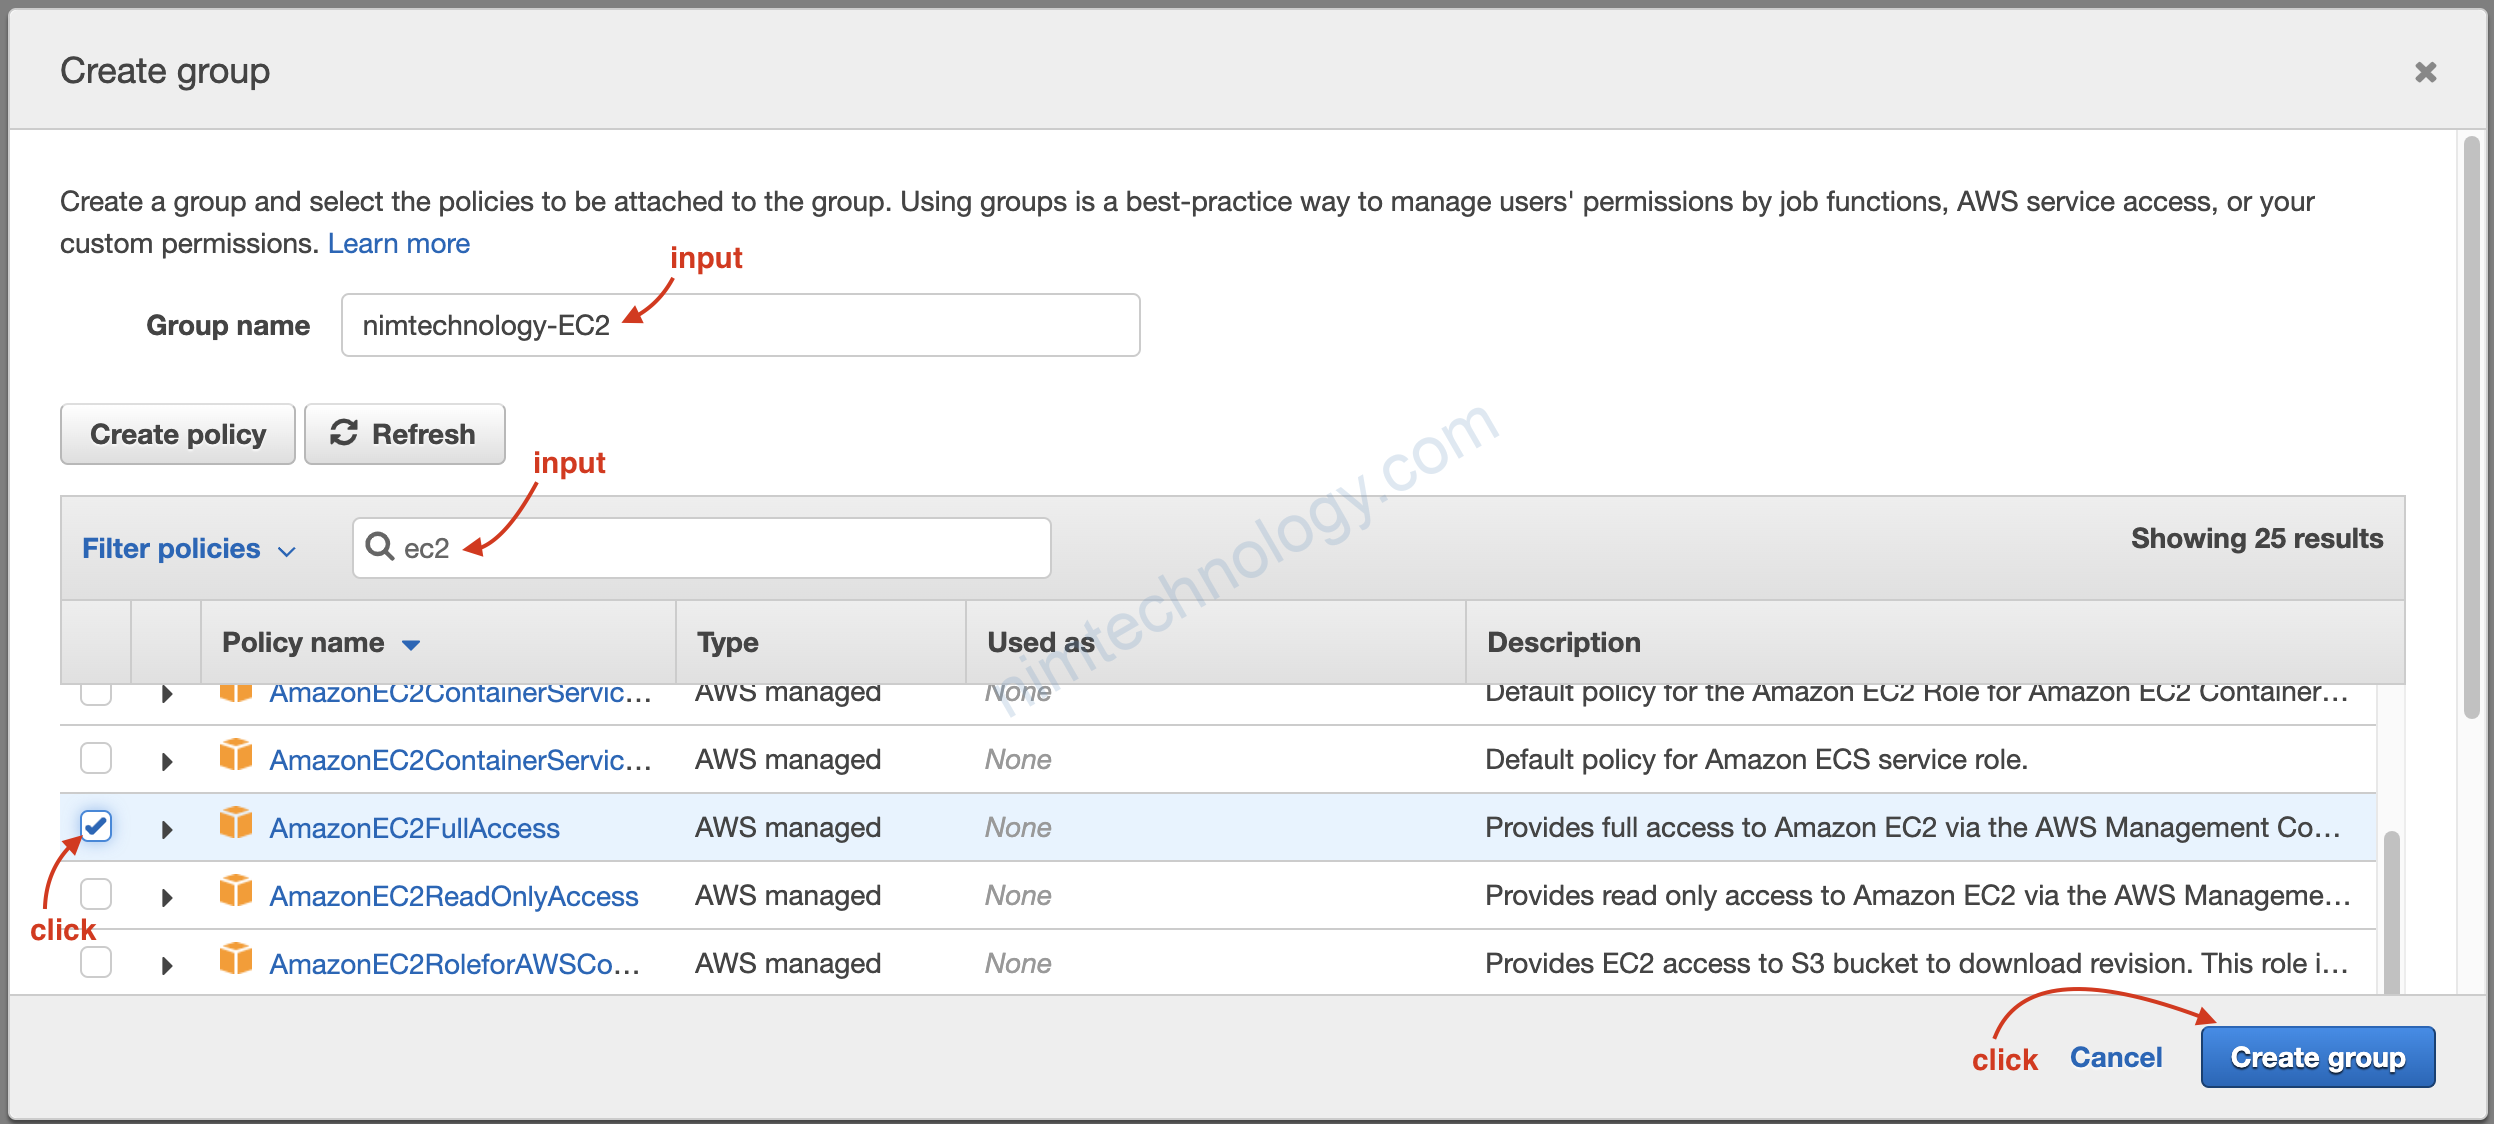

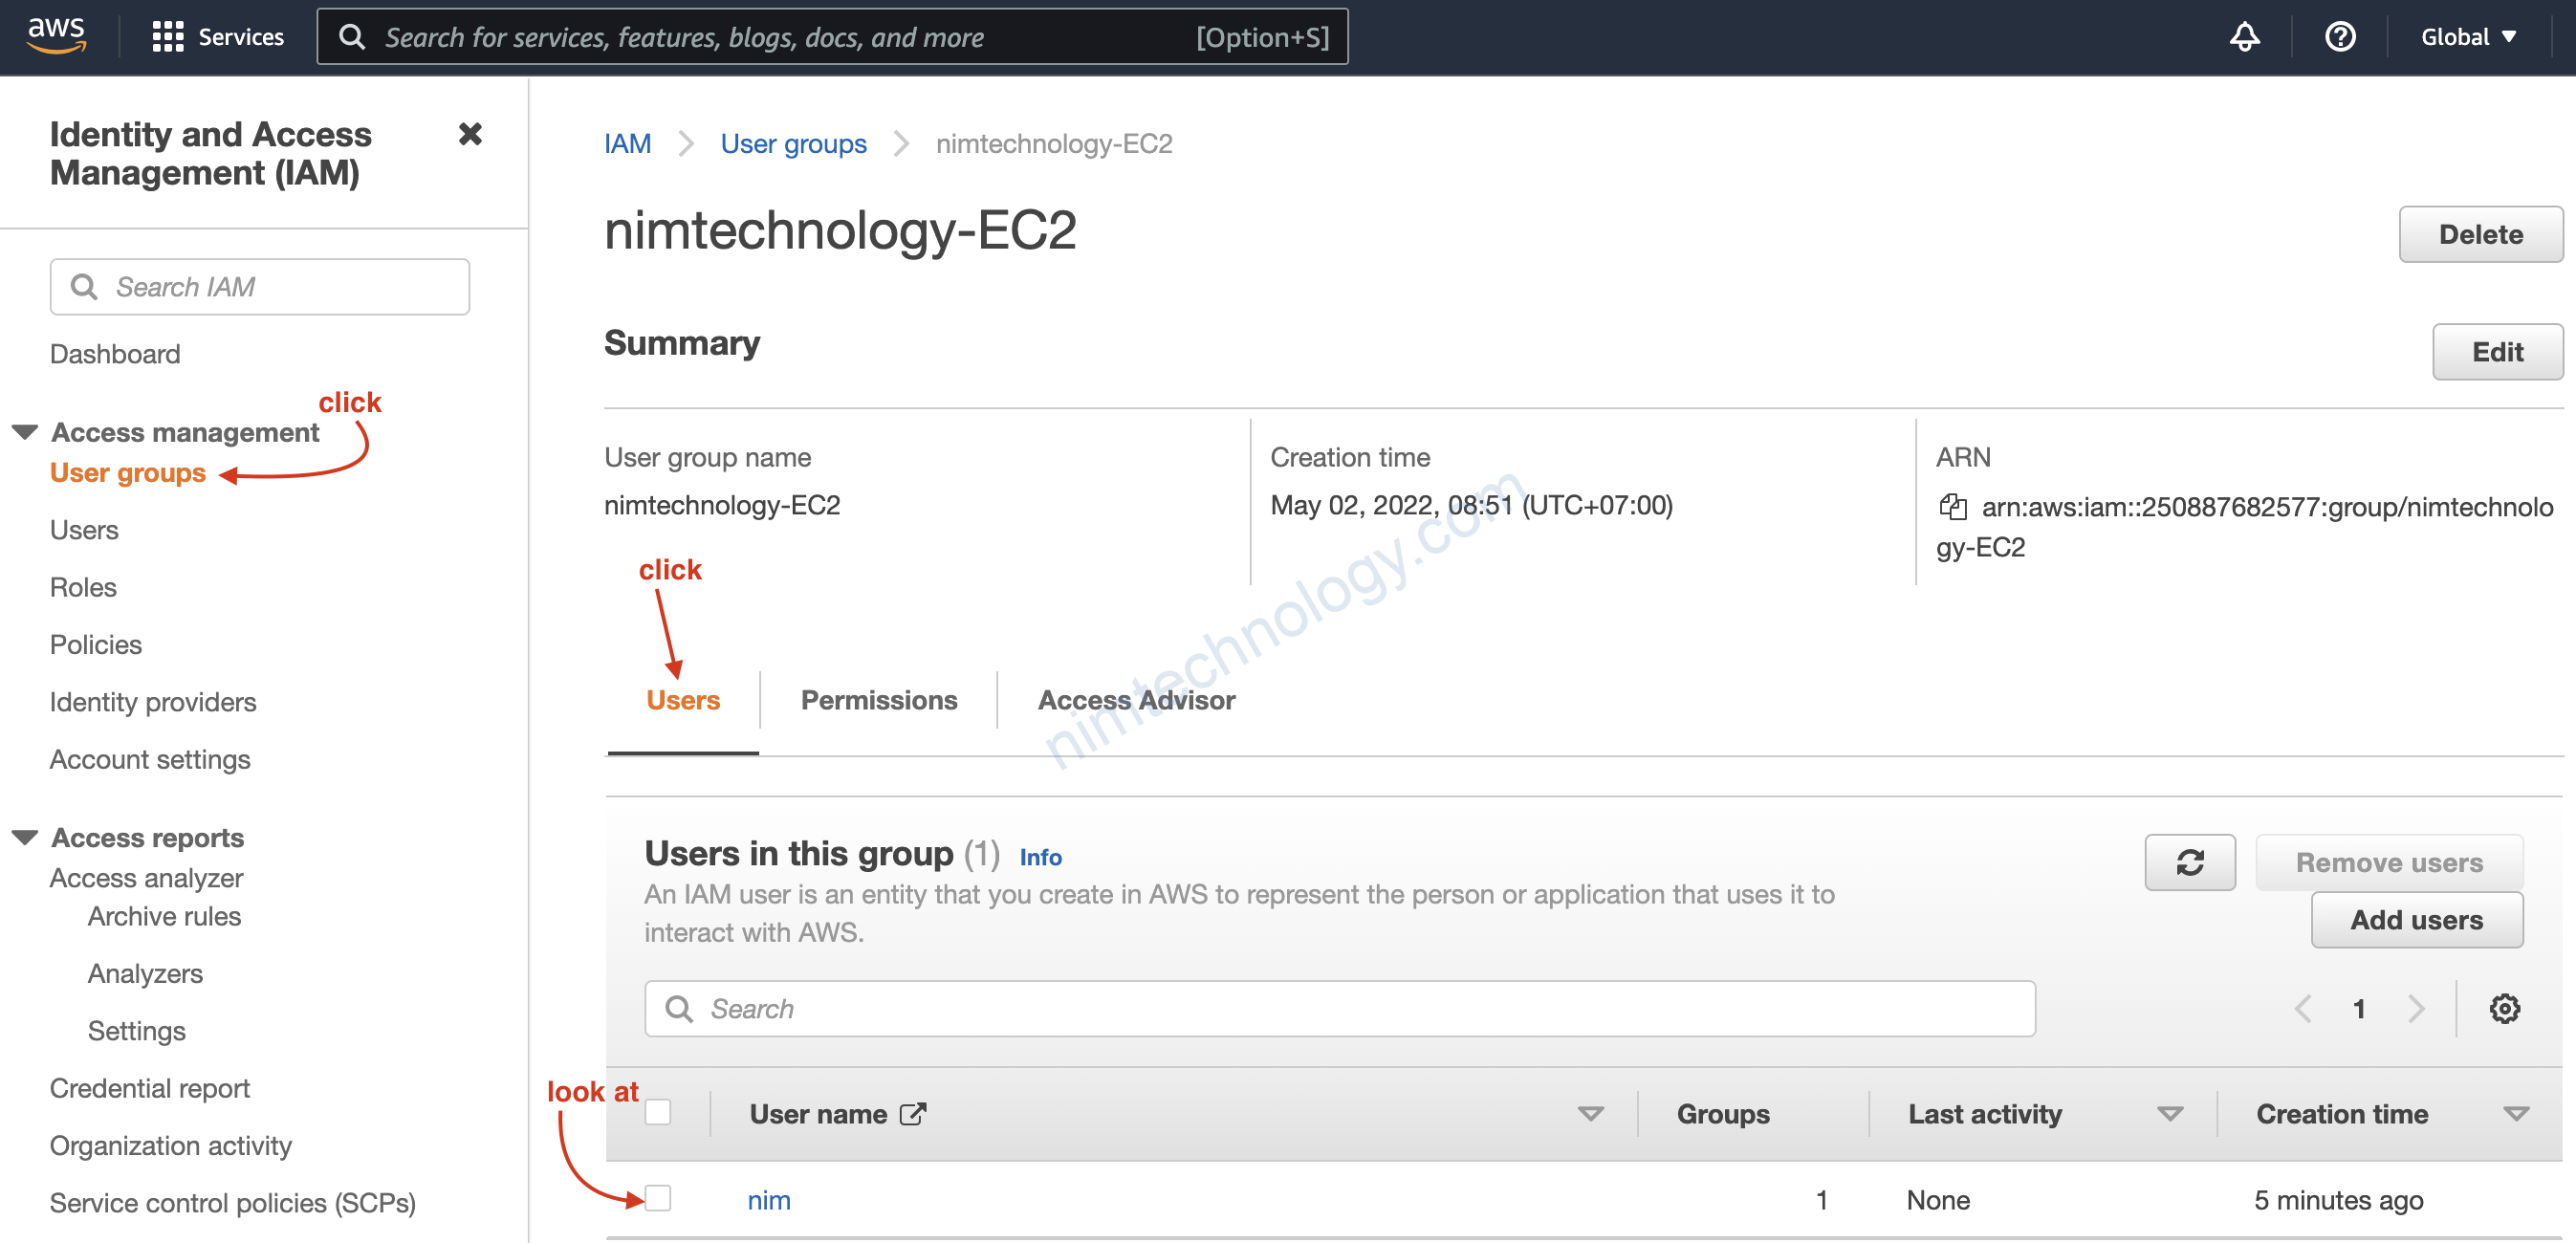
Như hình trên chúng ta thấy được là User đang chưa các User Nào?
và có thể add thêm policy cho Group.
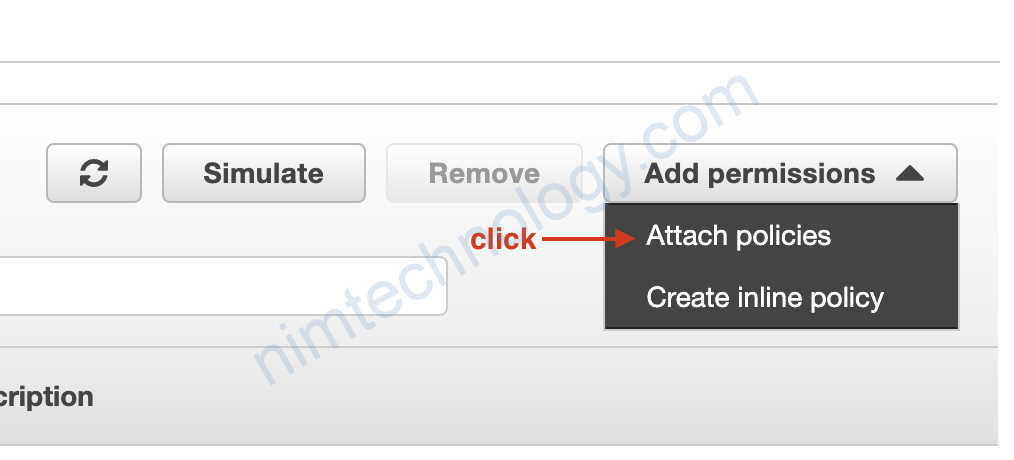
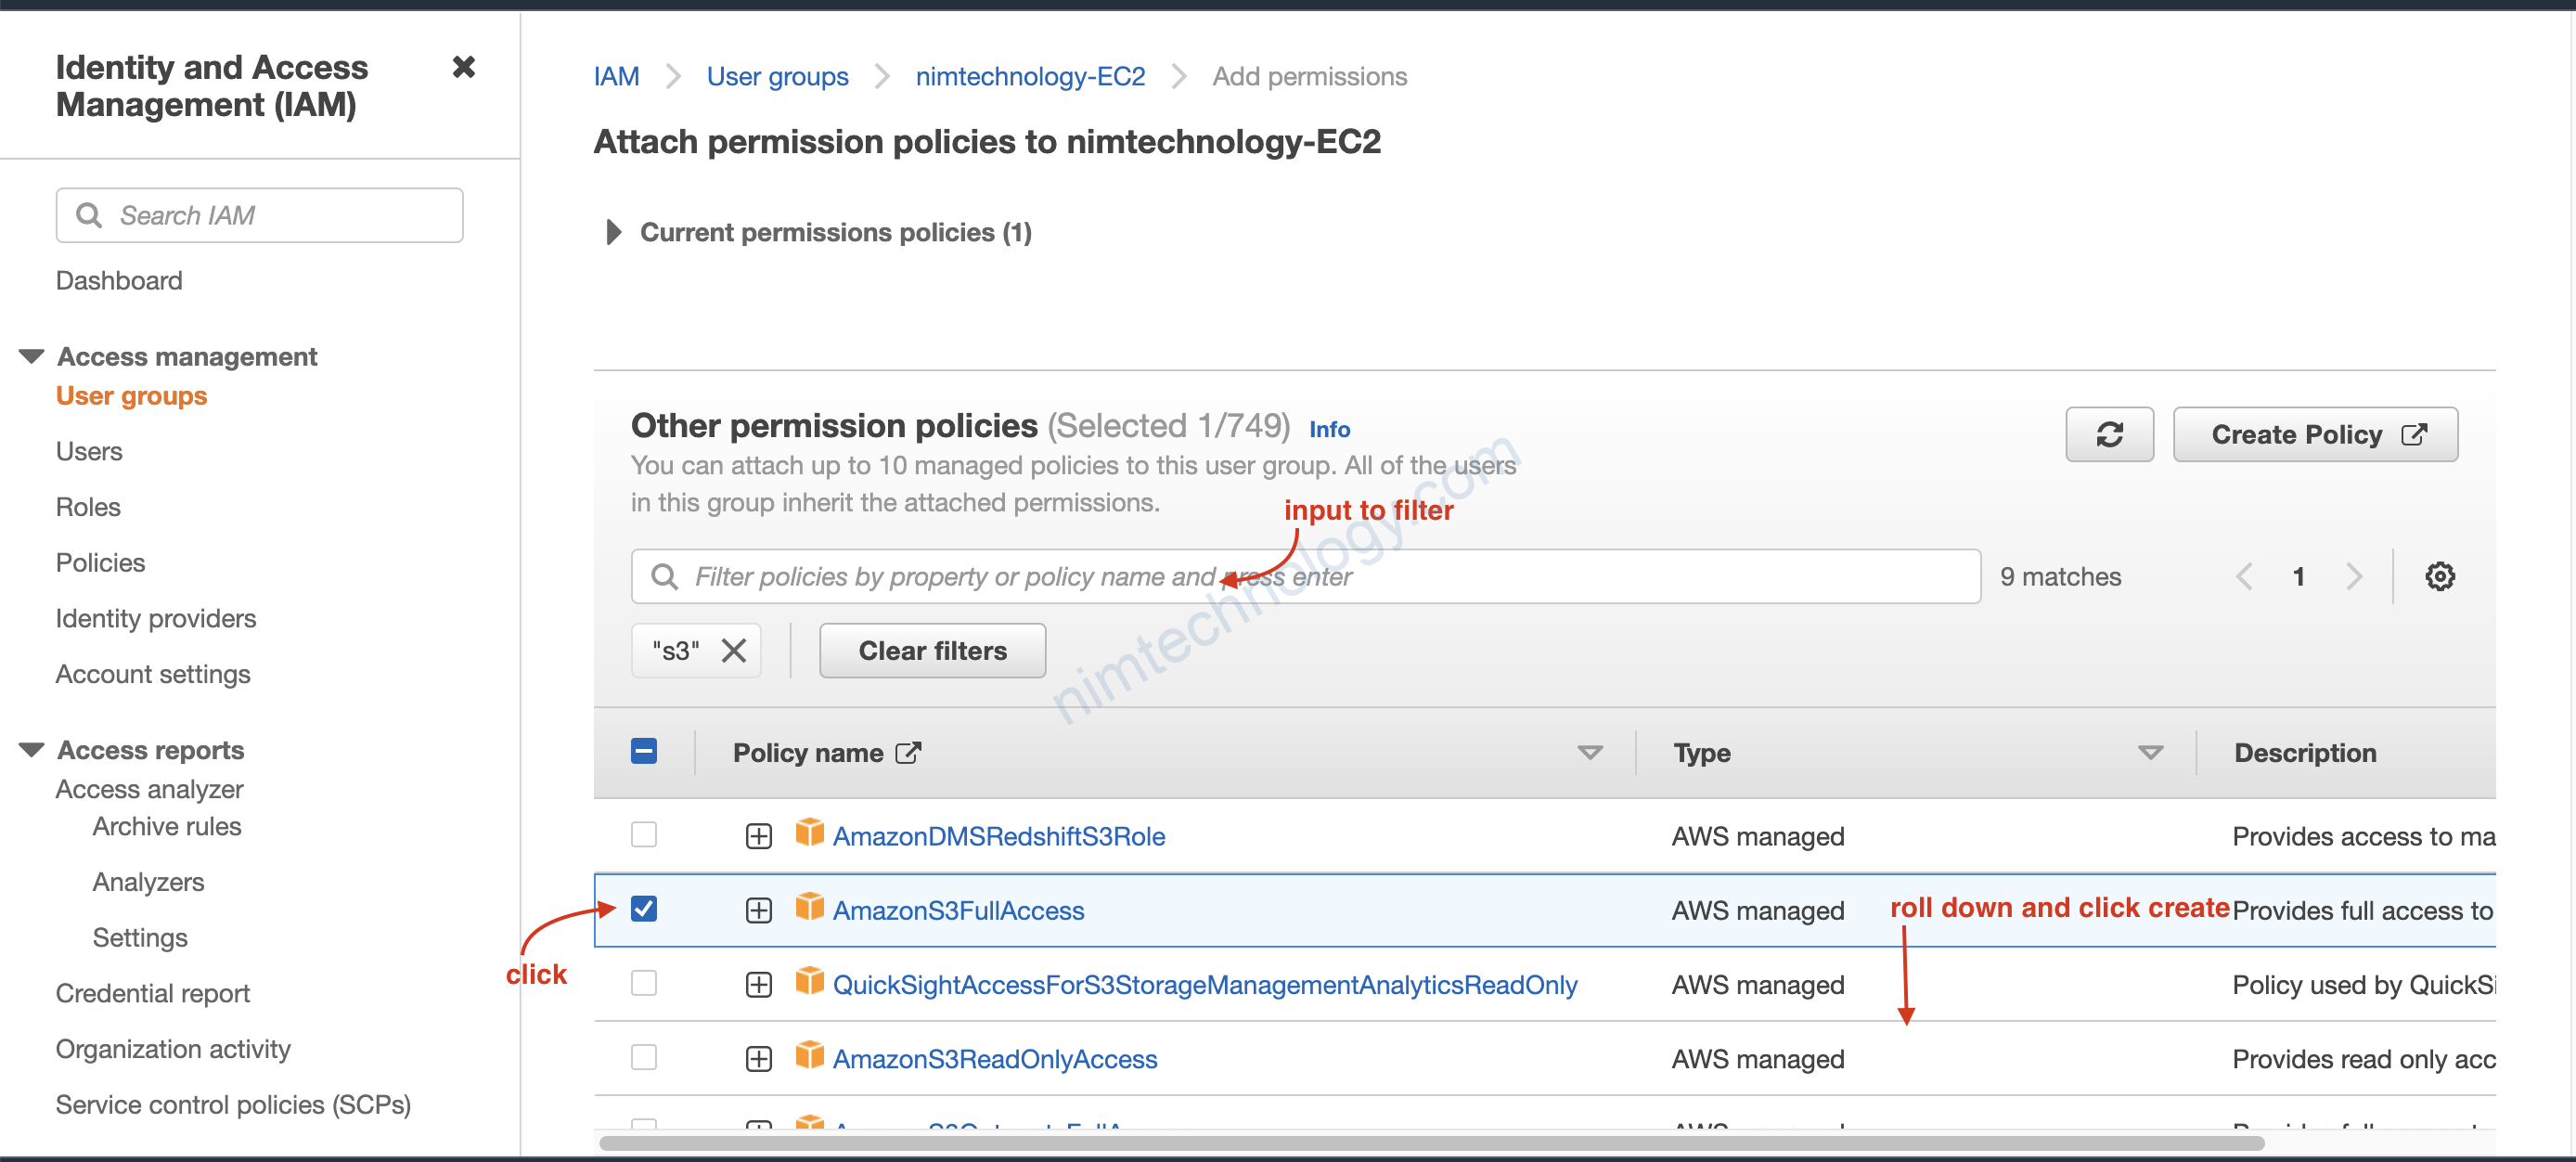
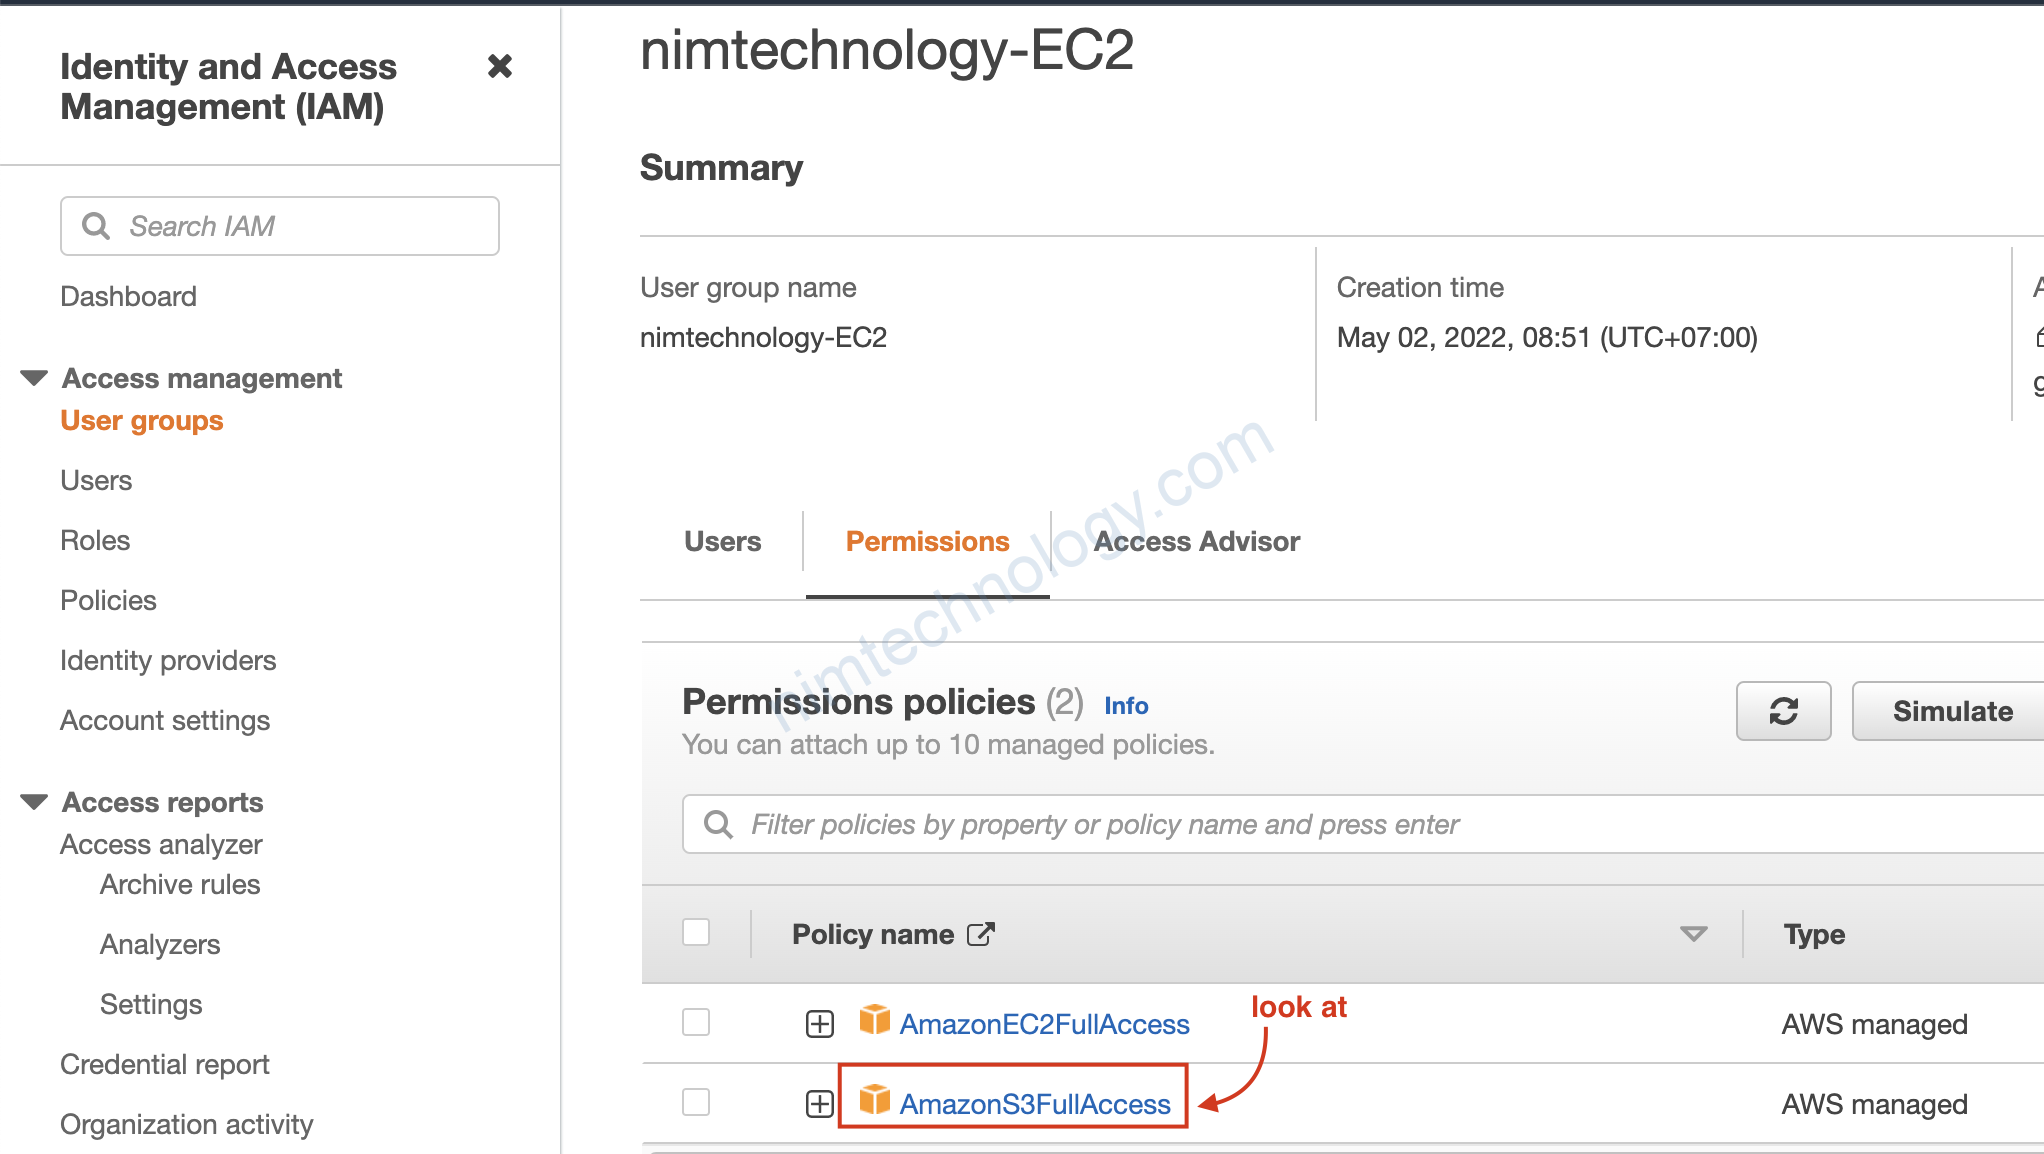
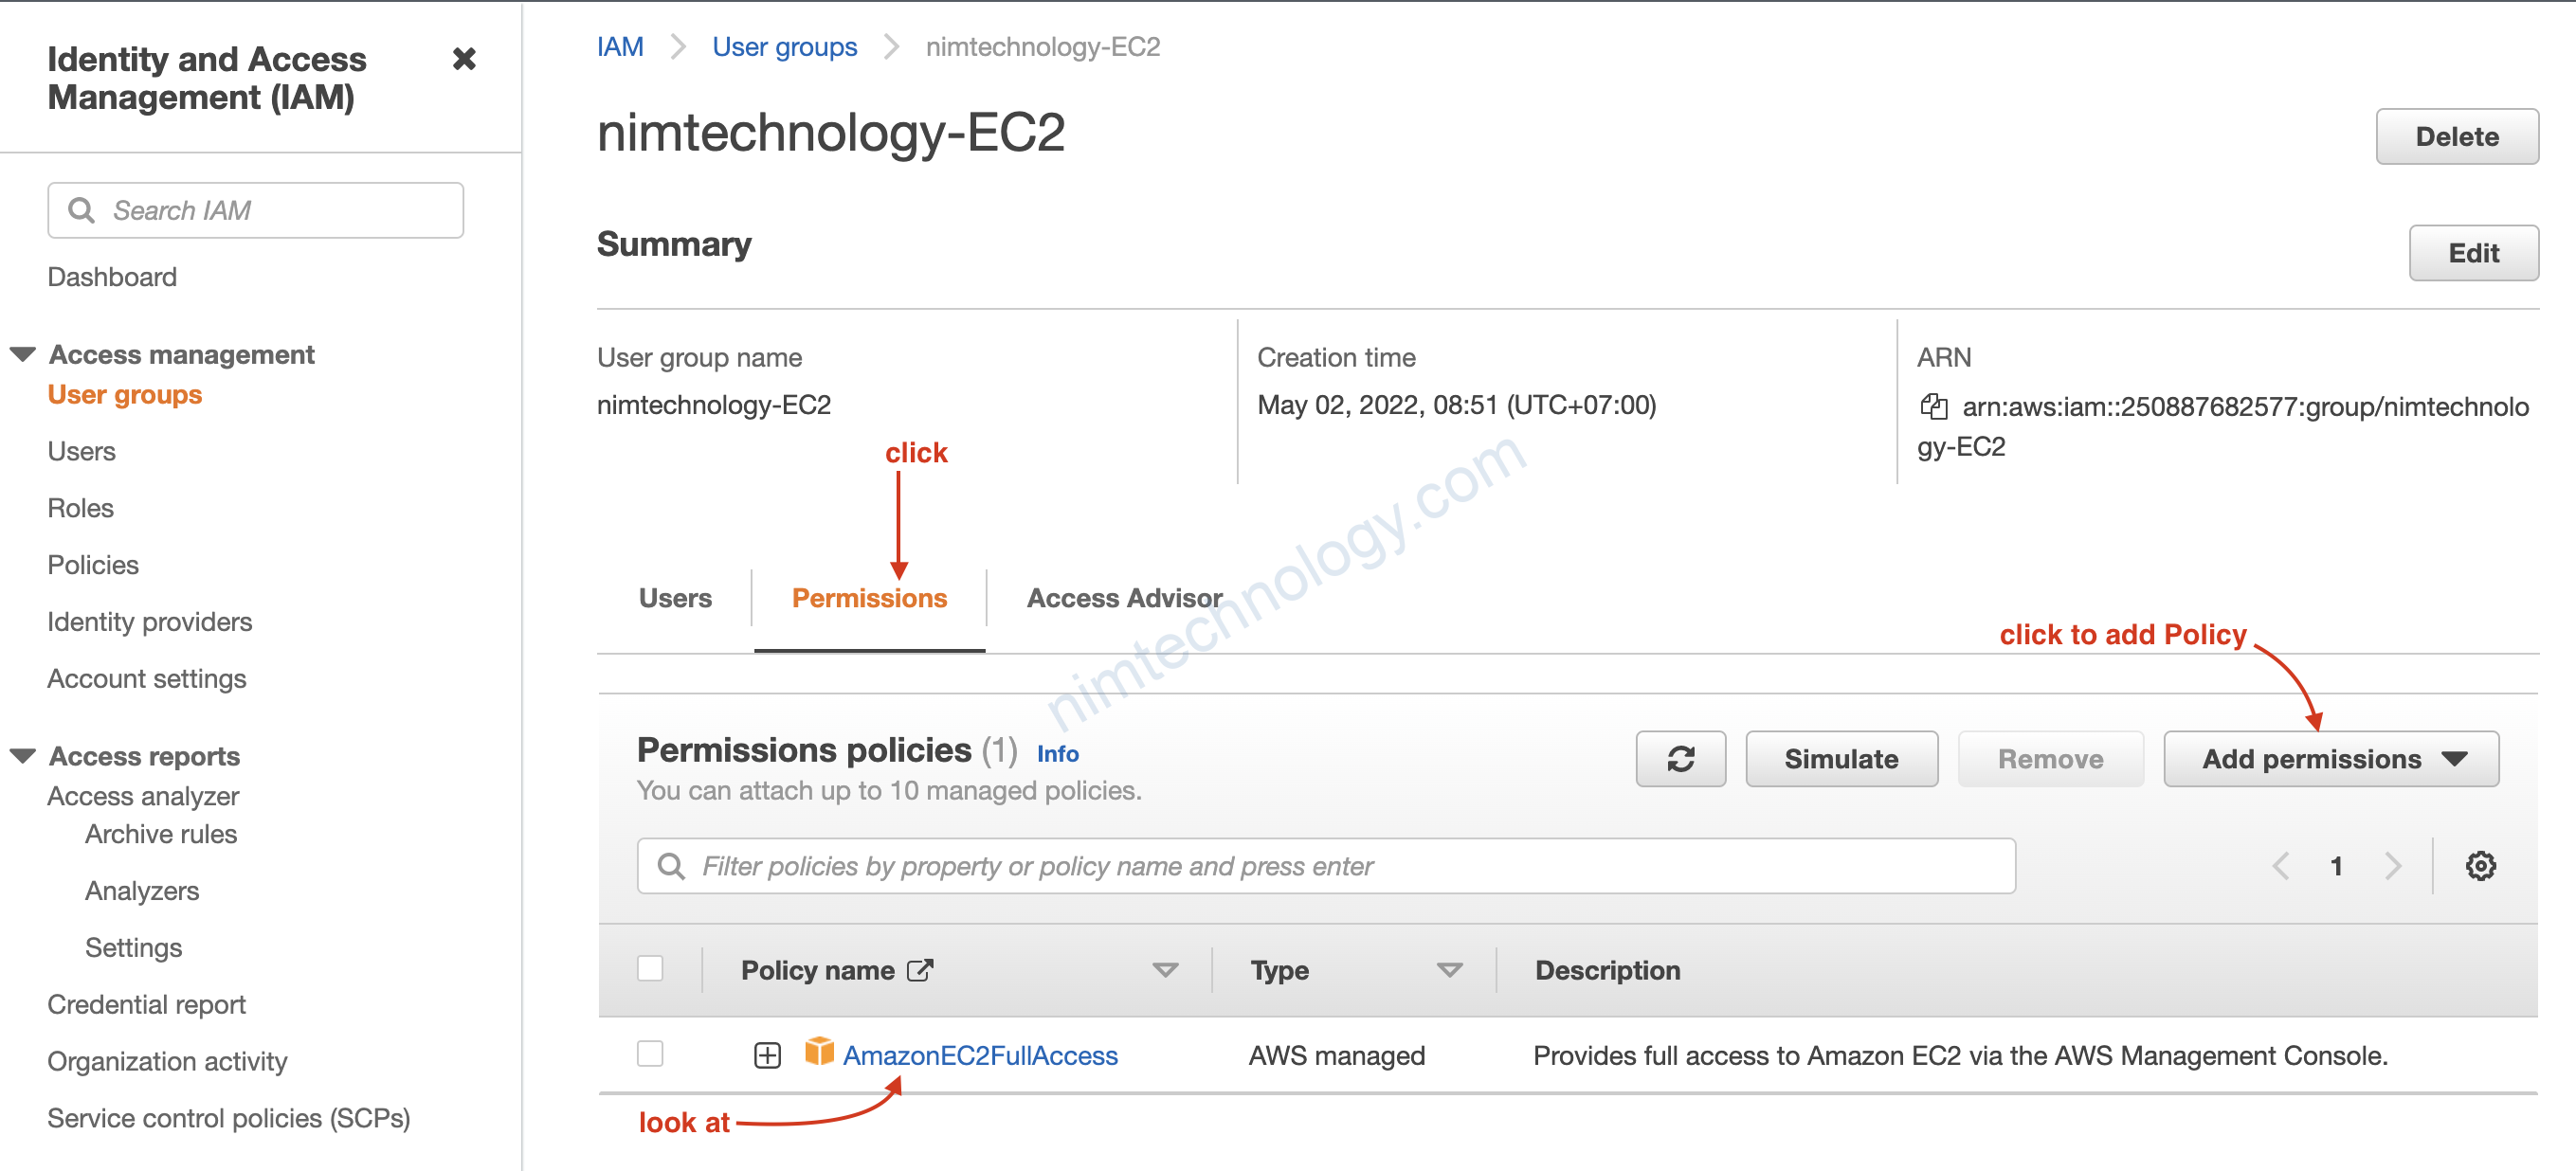
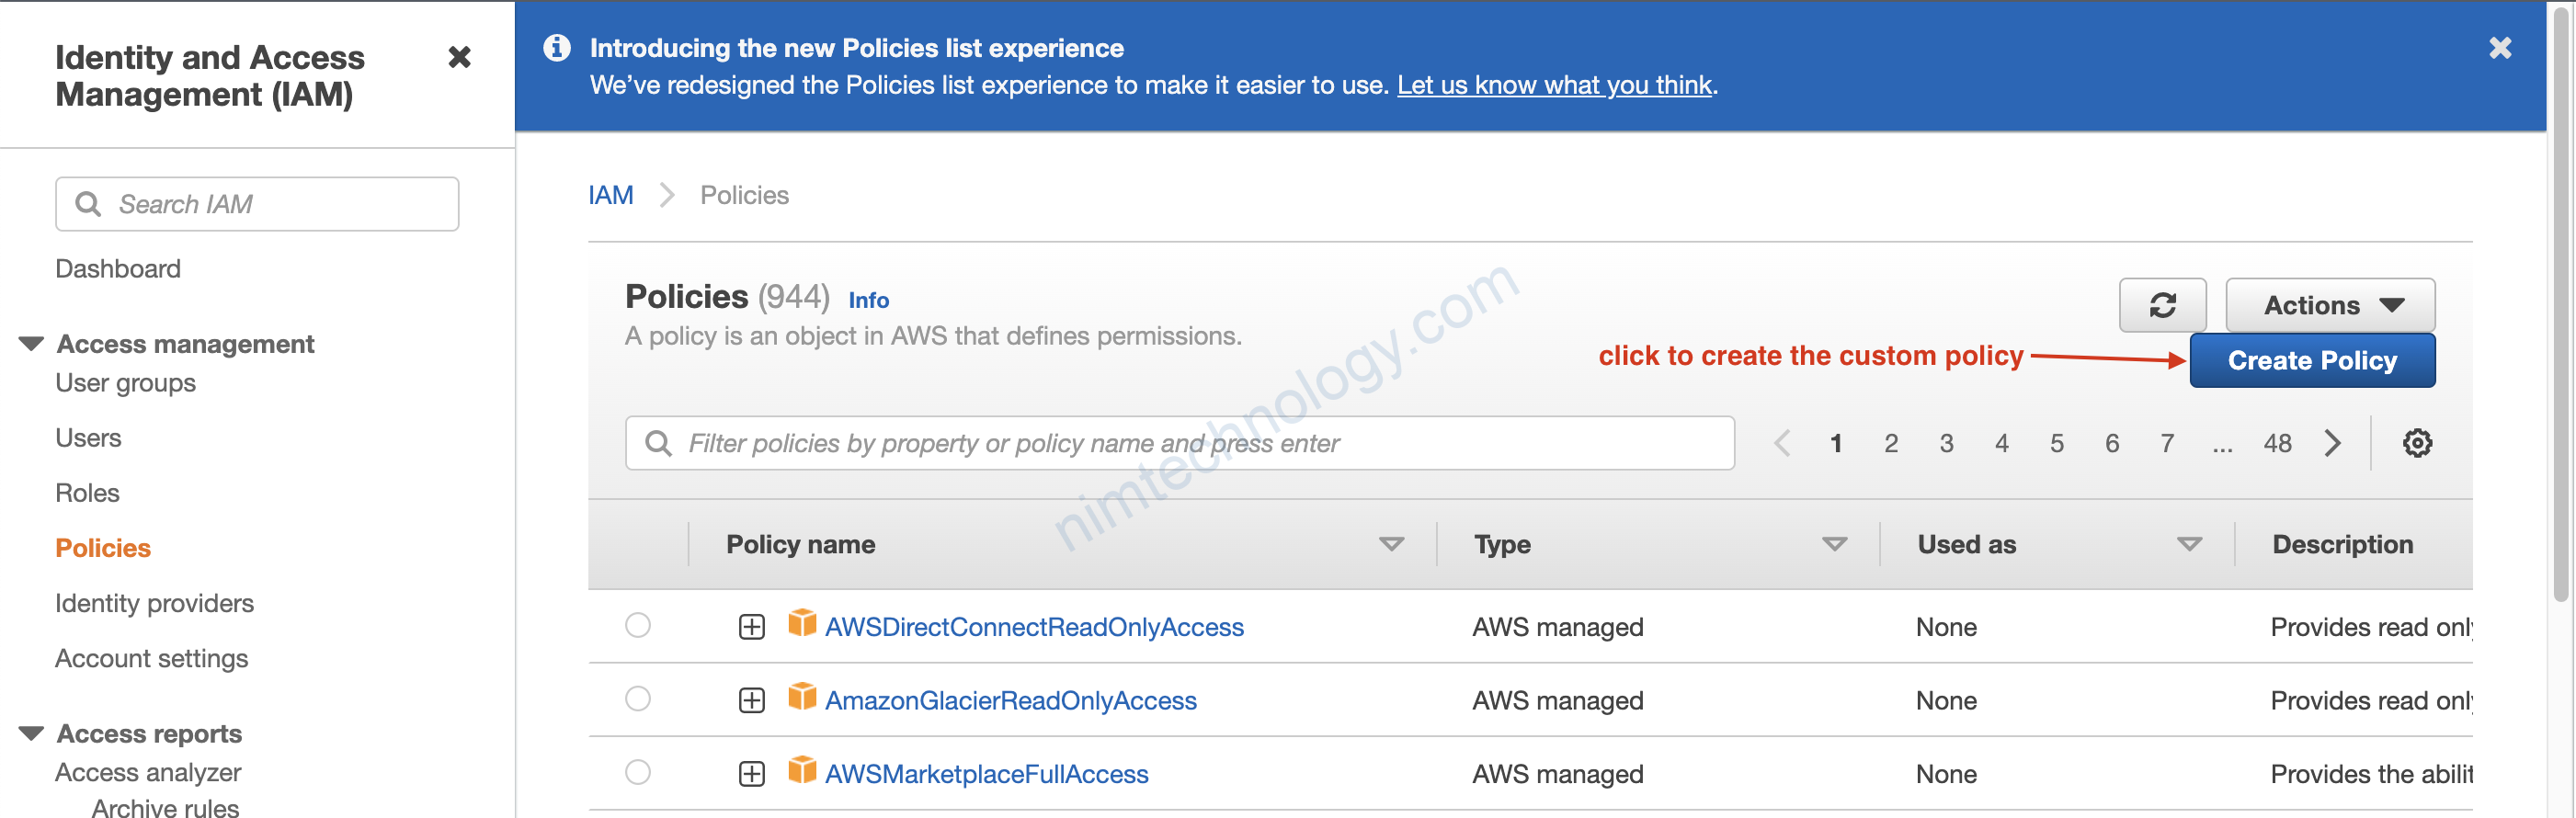
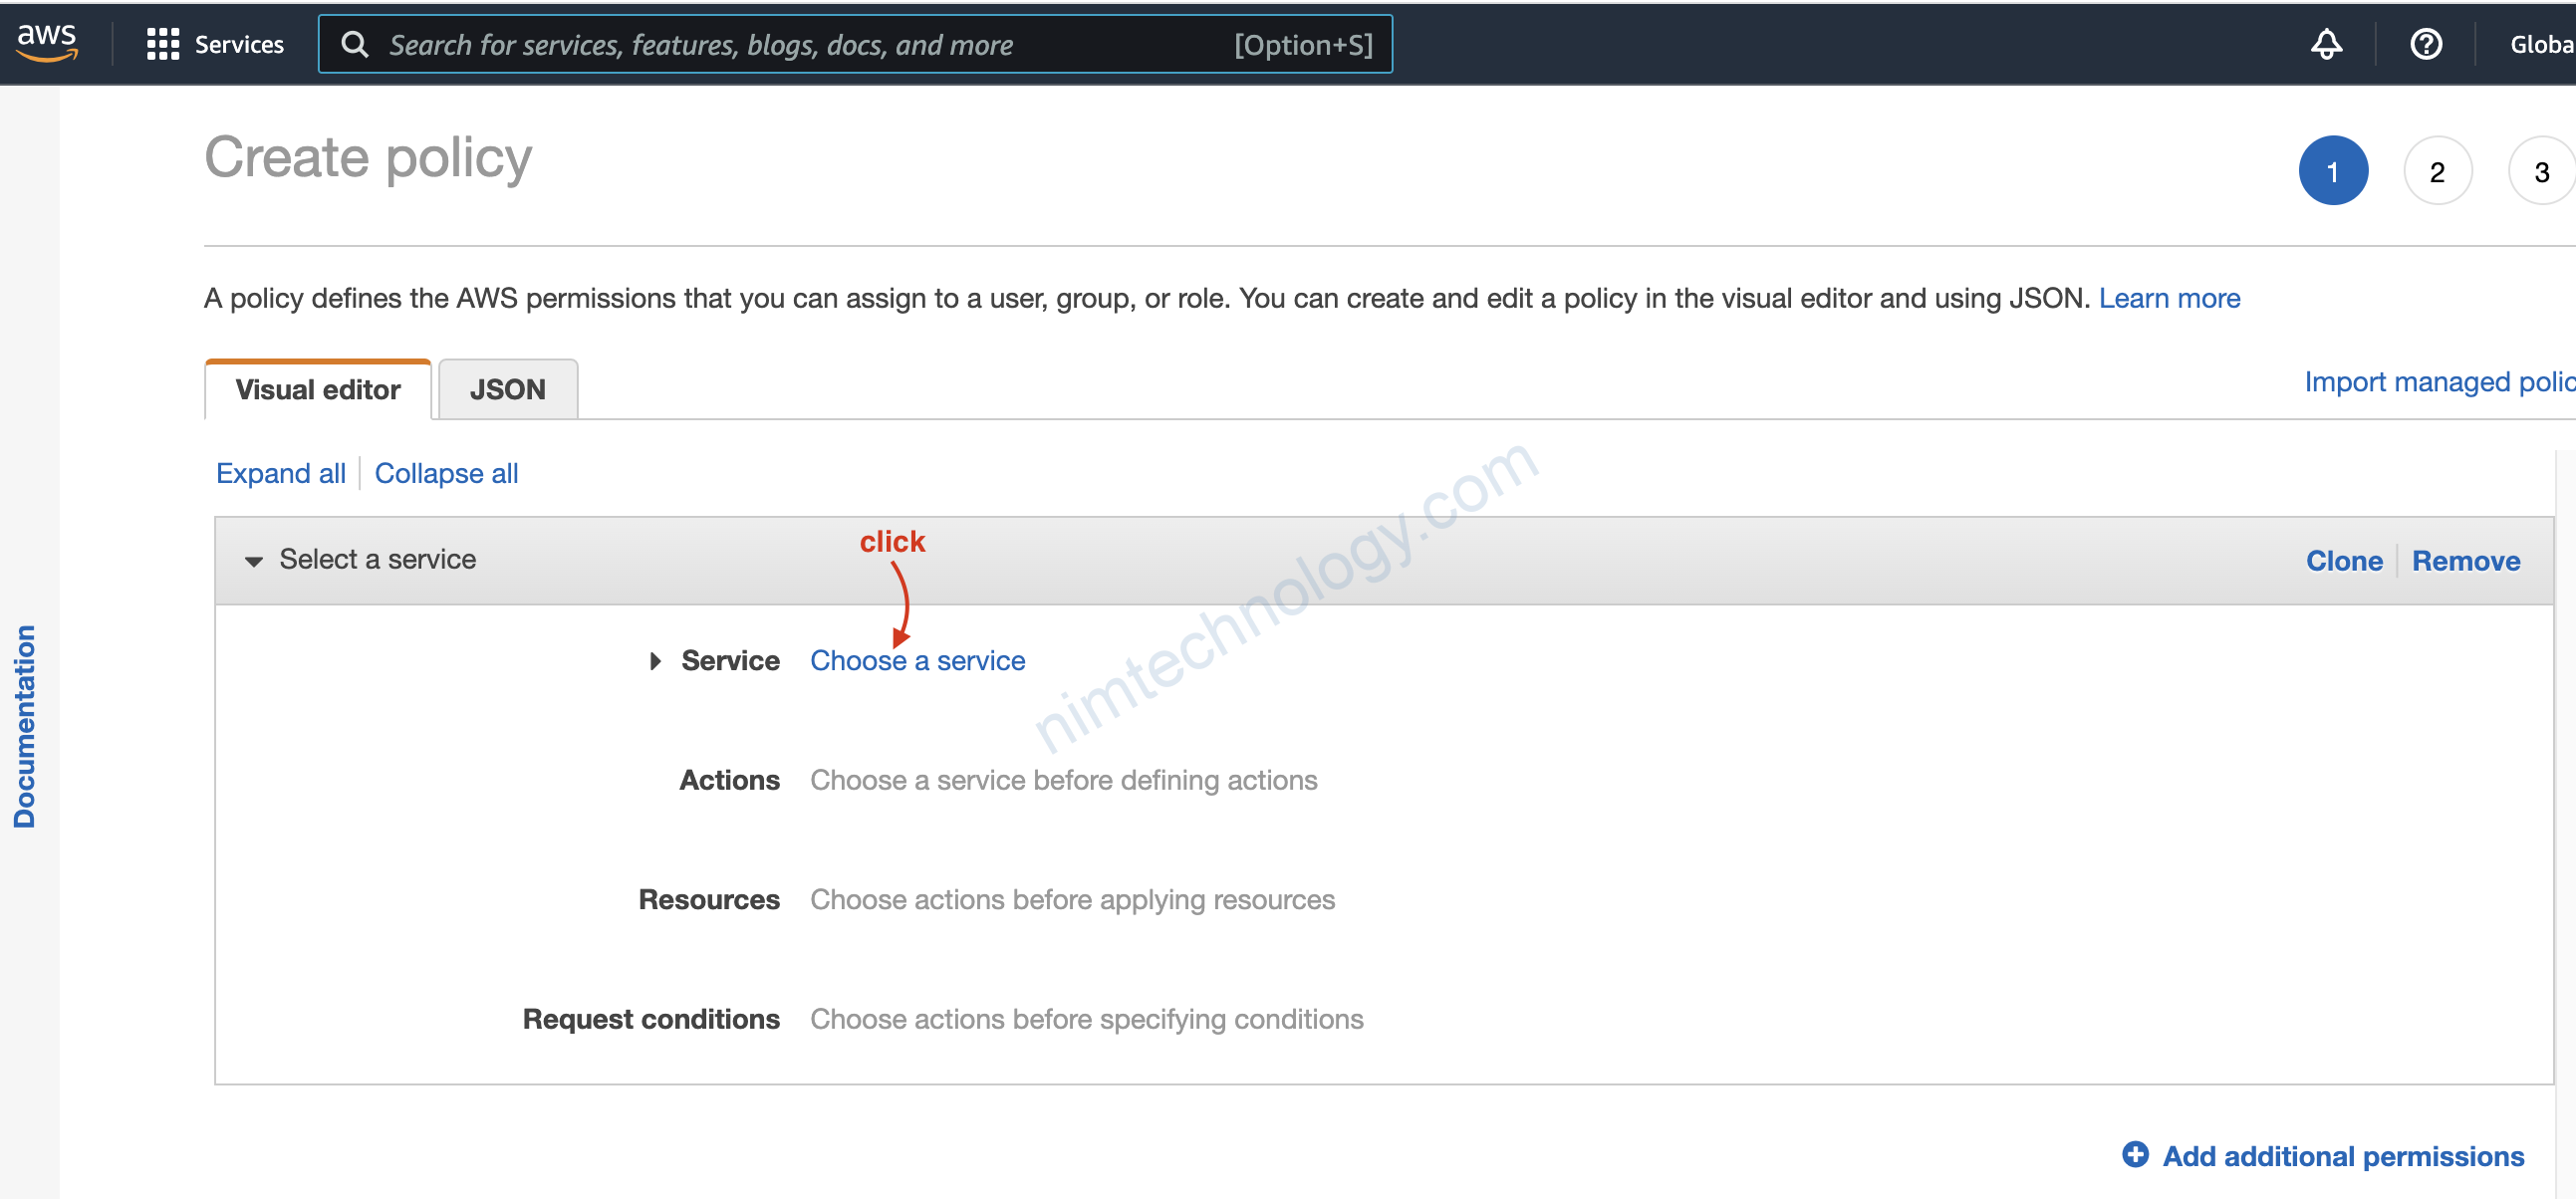
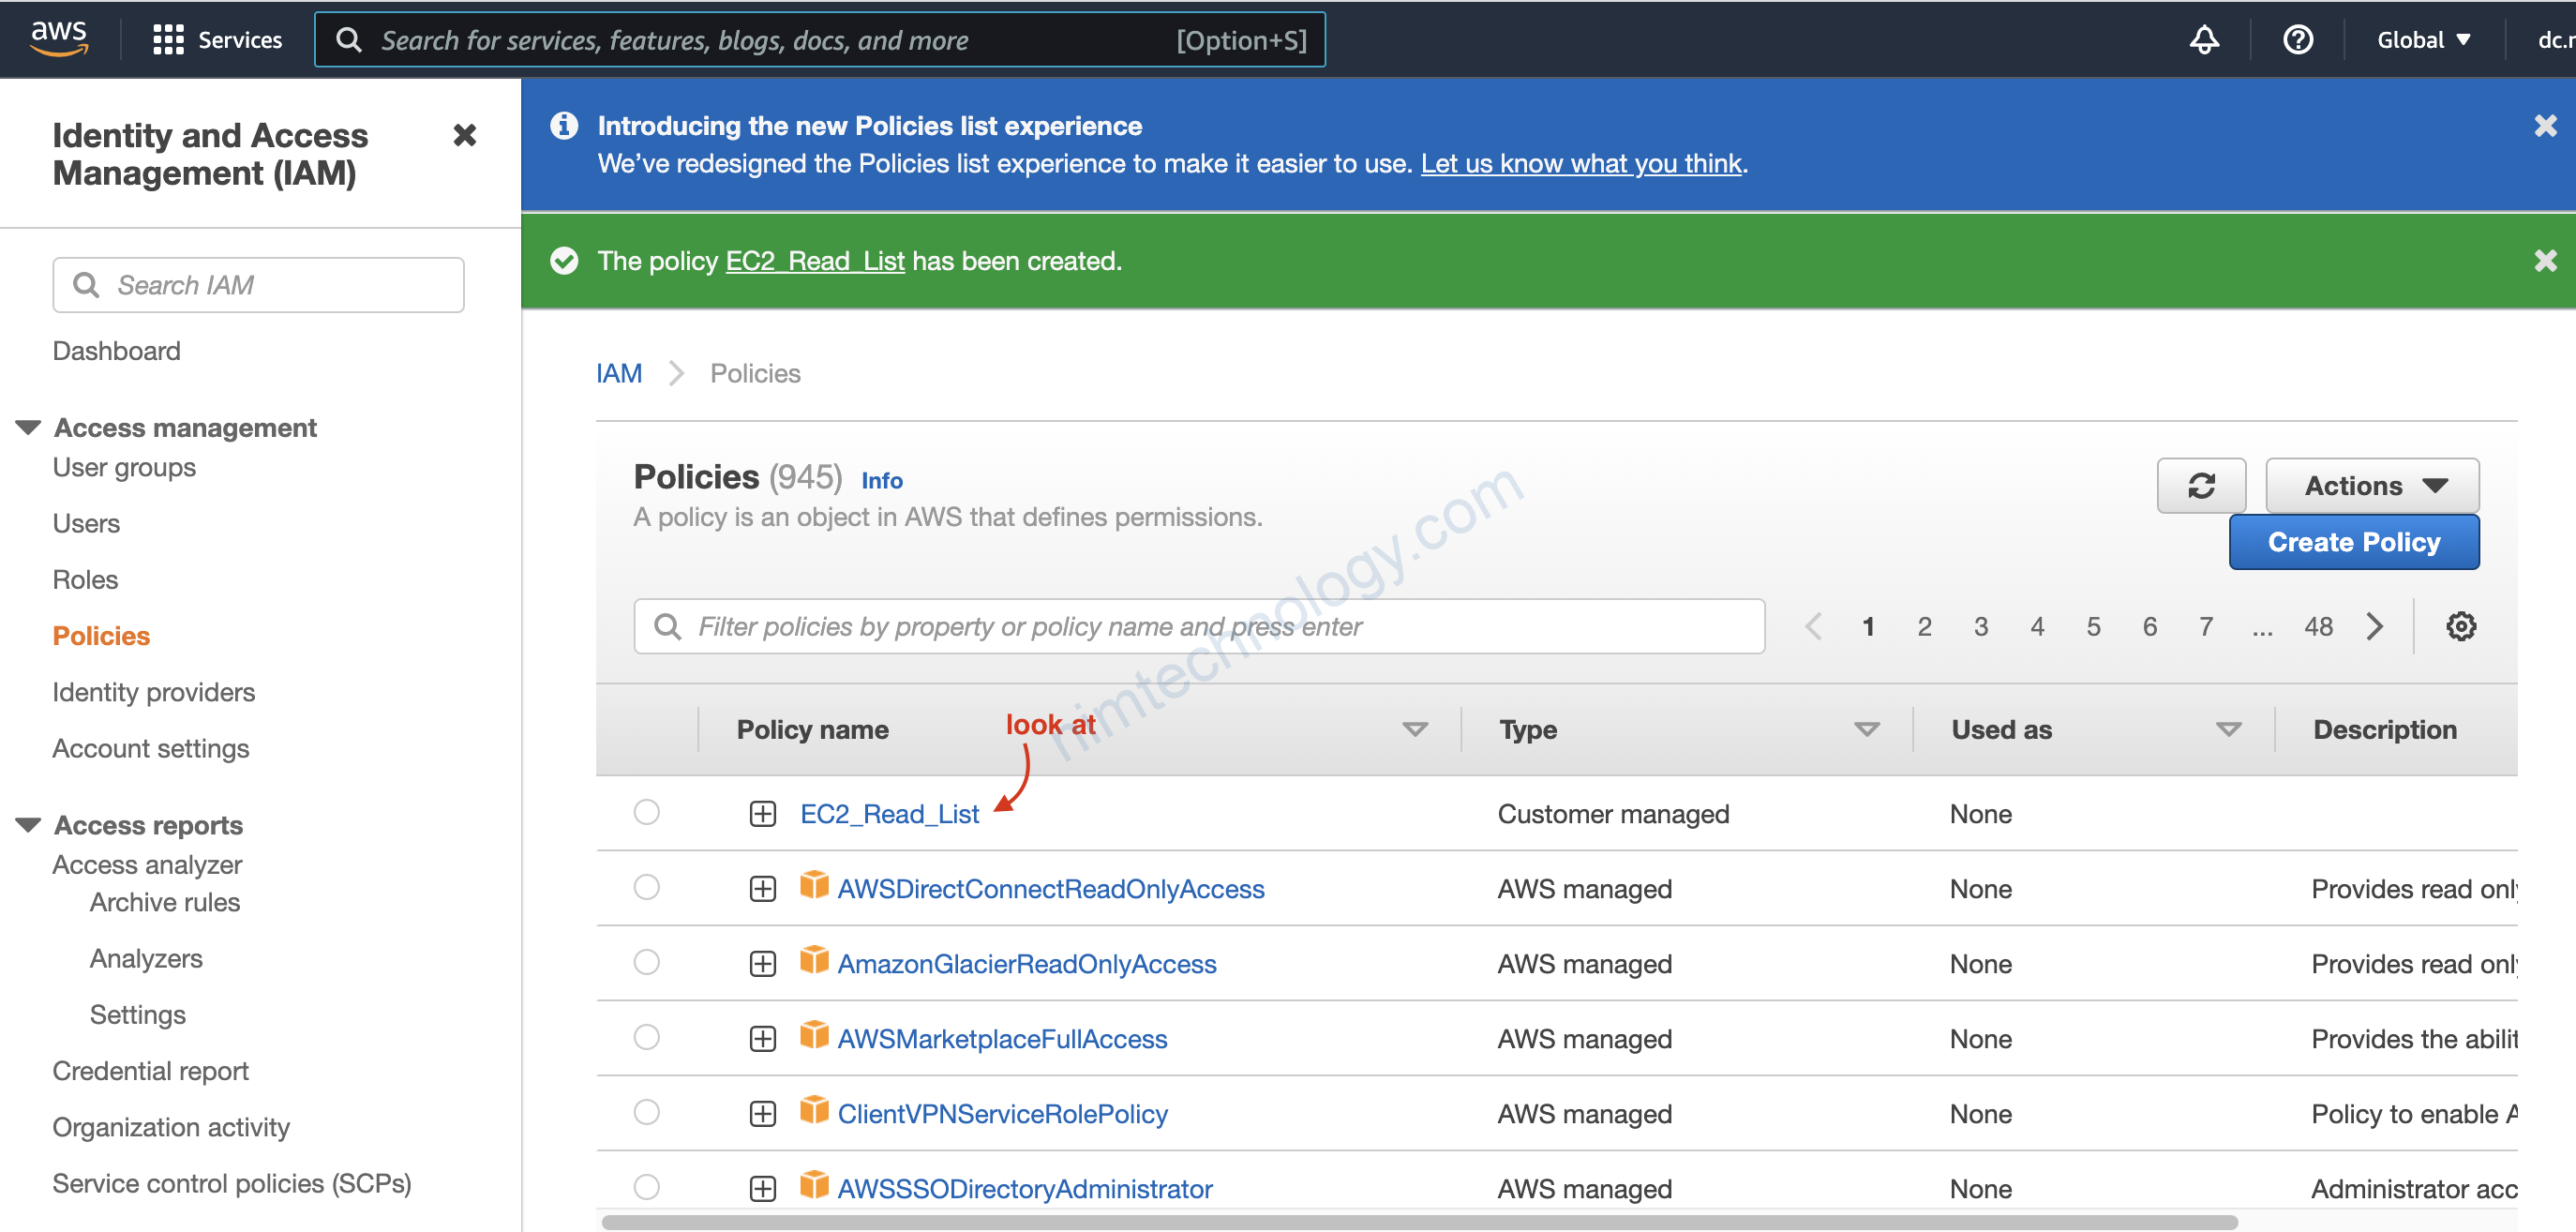
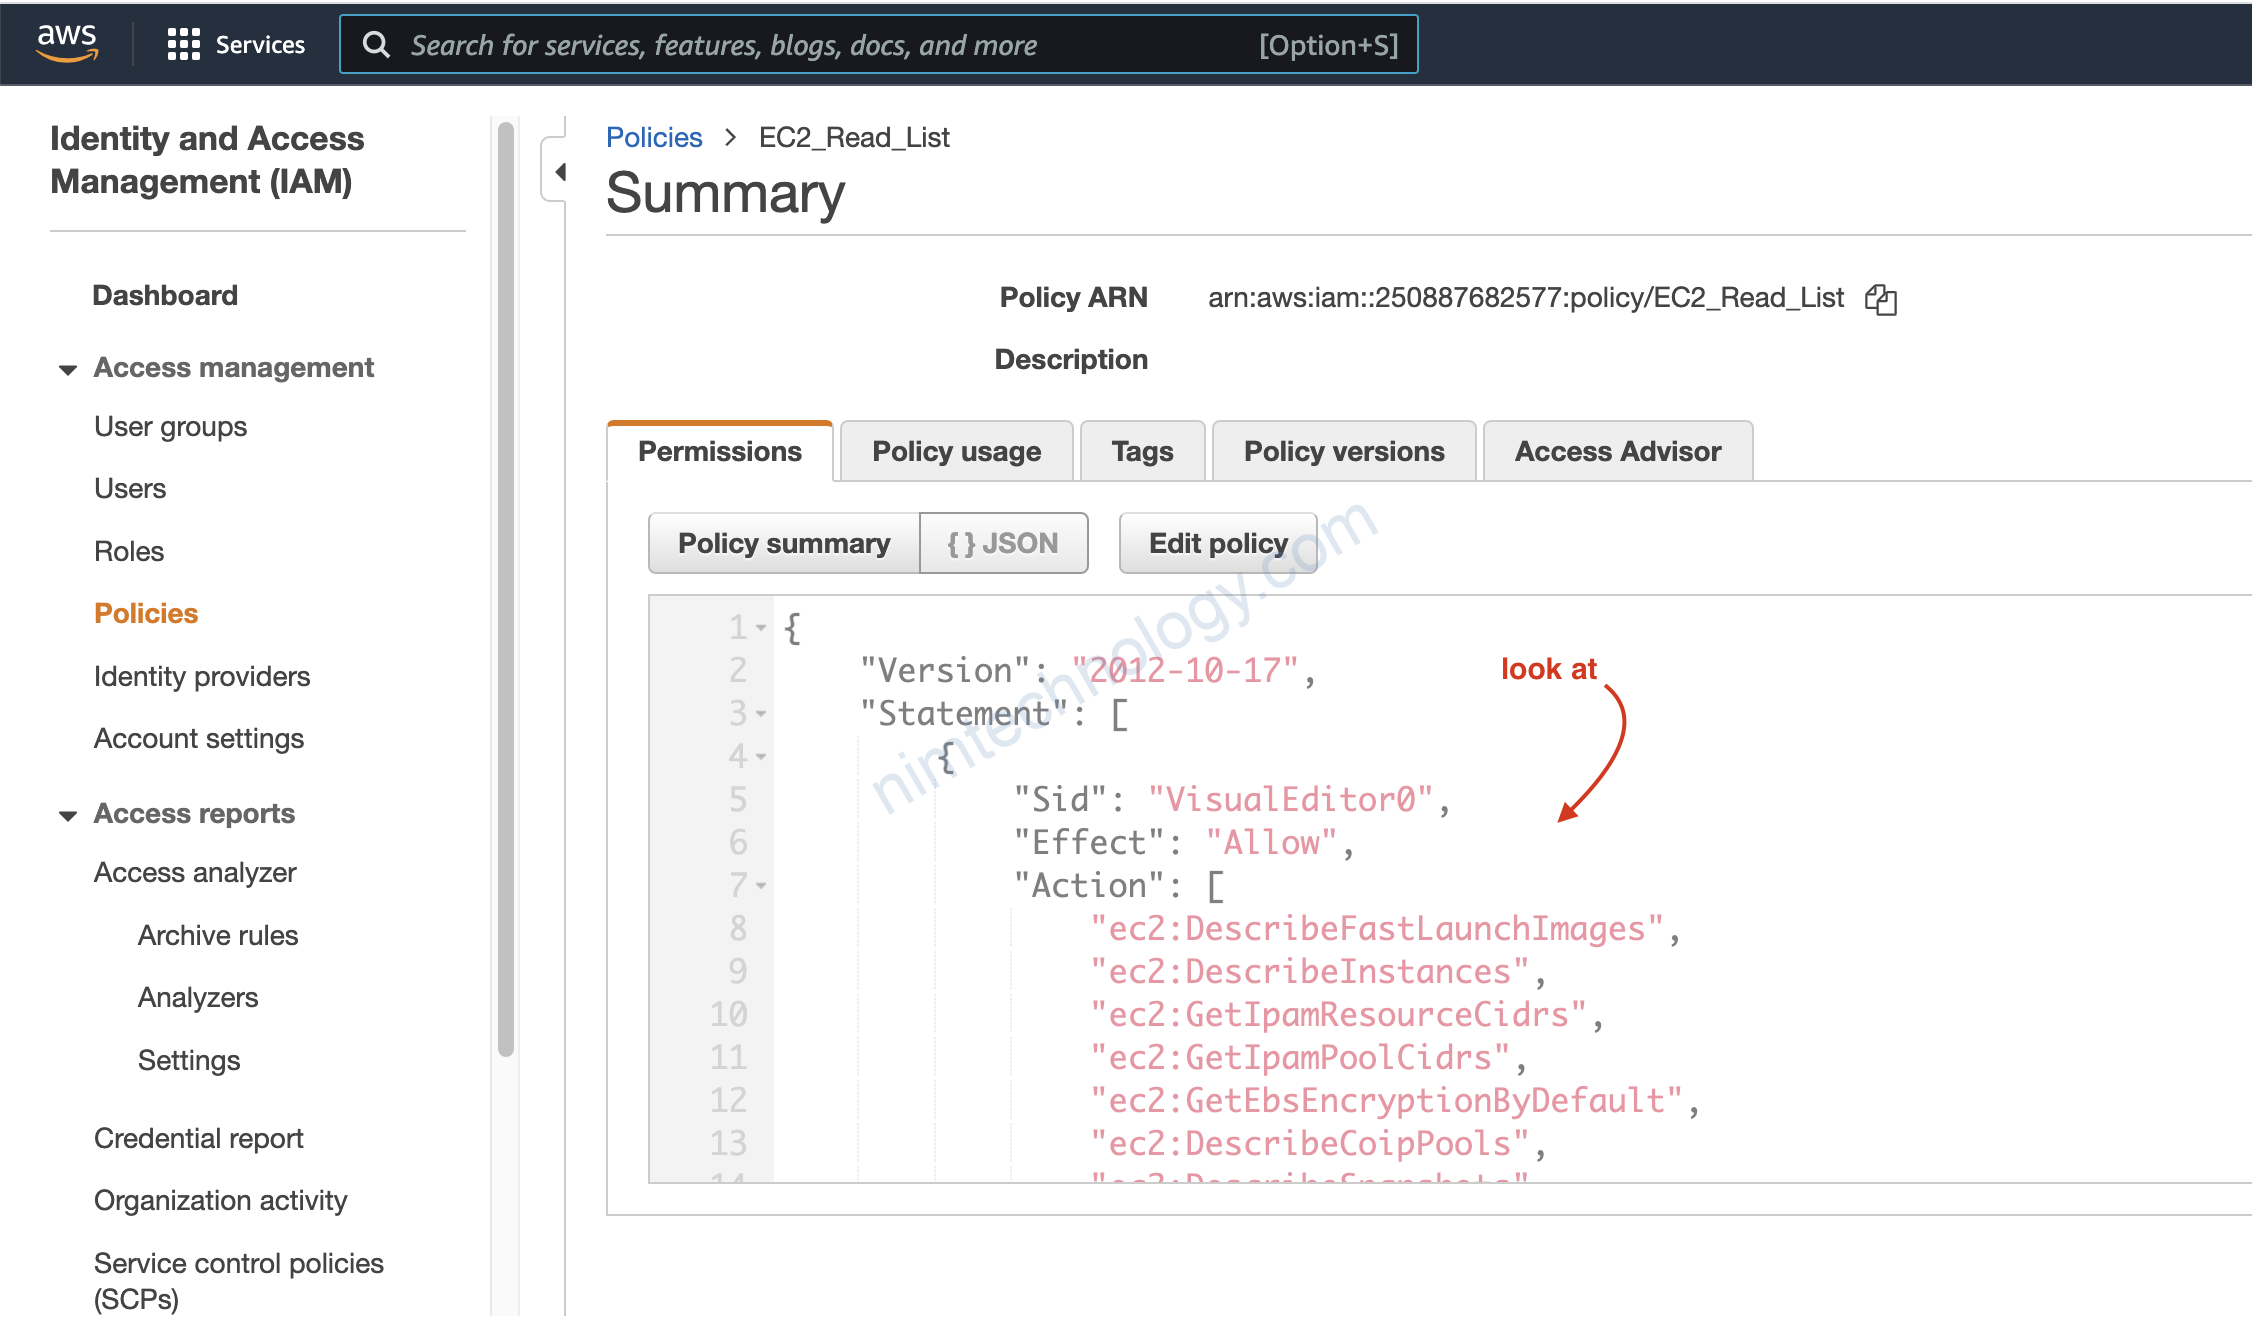
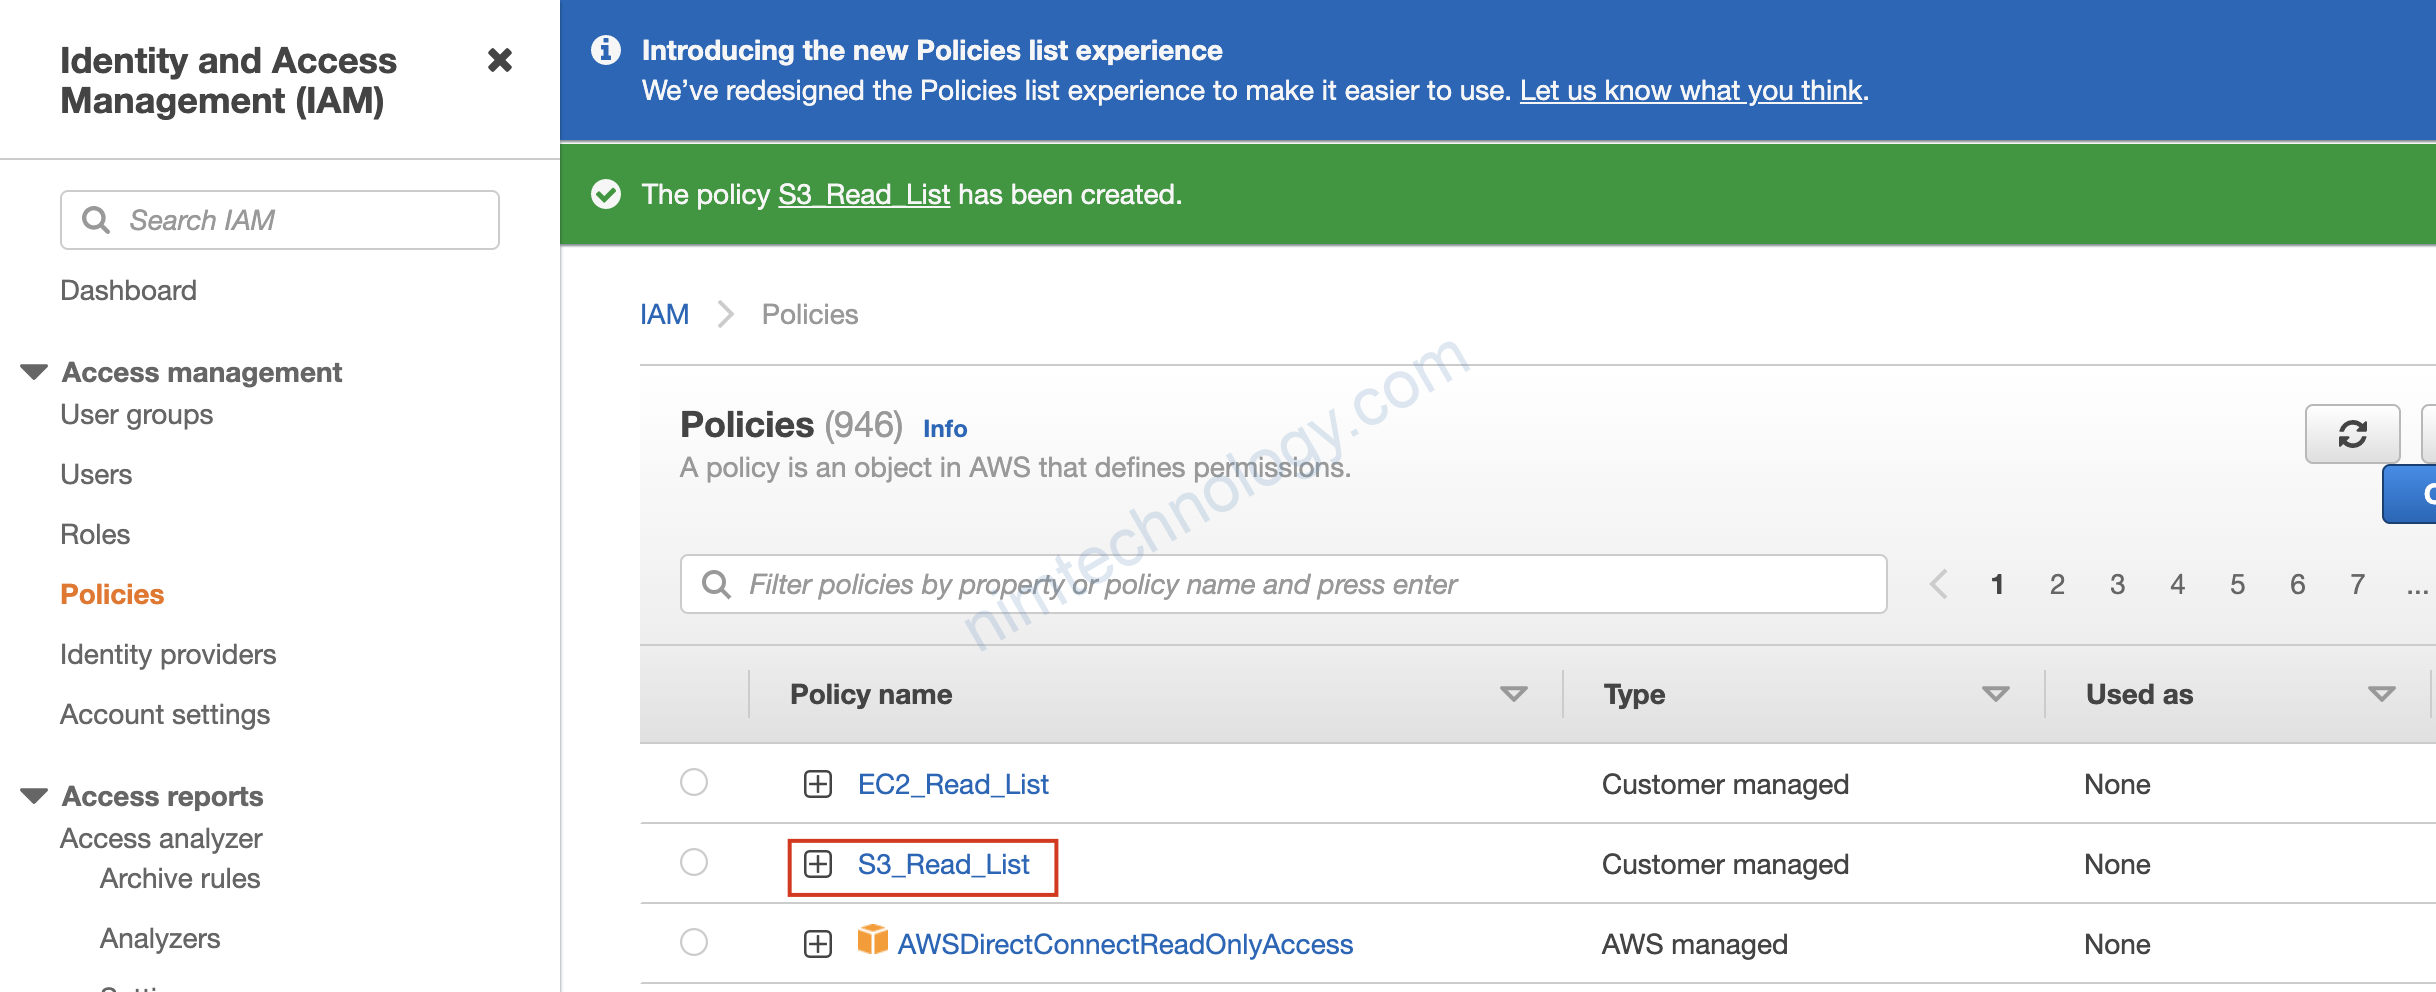
3.3) View Policy and Create Custom Policy.
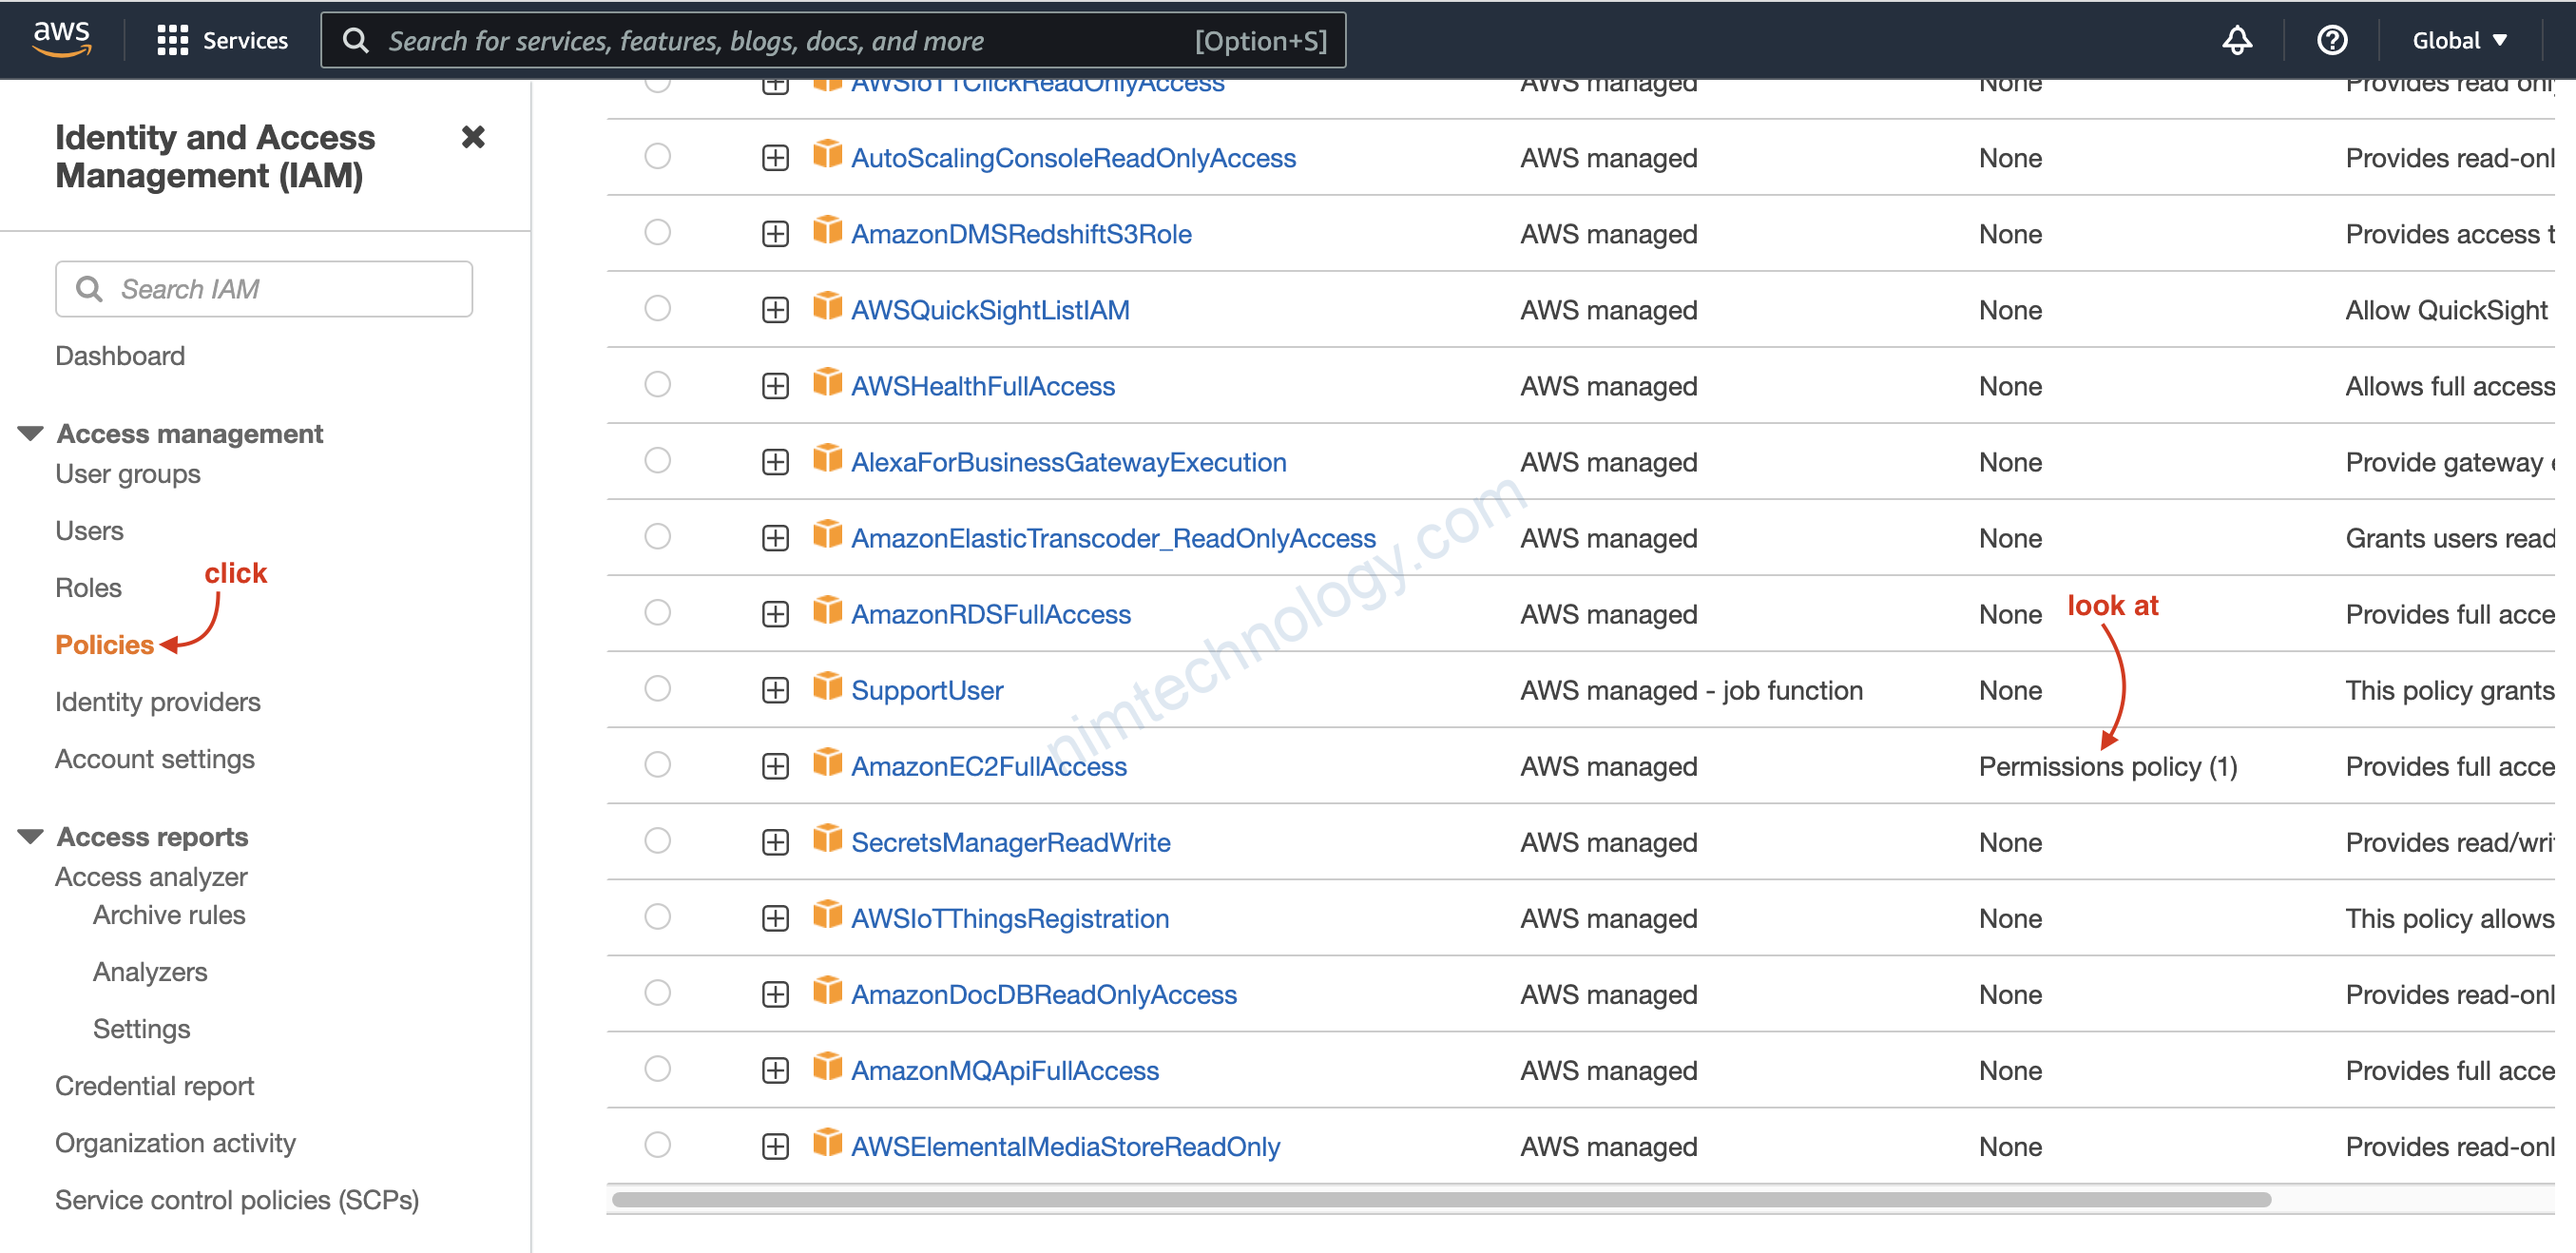
Cũng như biết được policy đó đã được map với ai đó hay group nào đó.
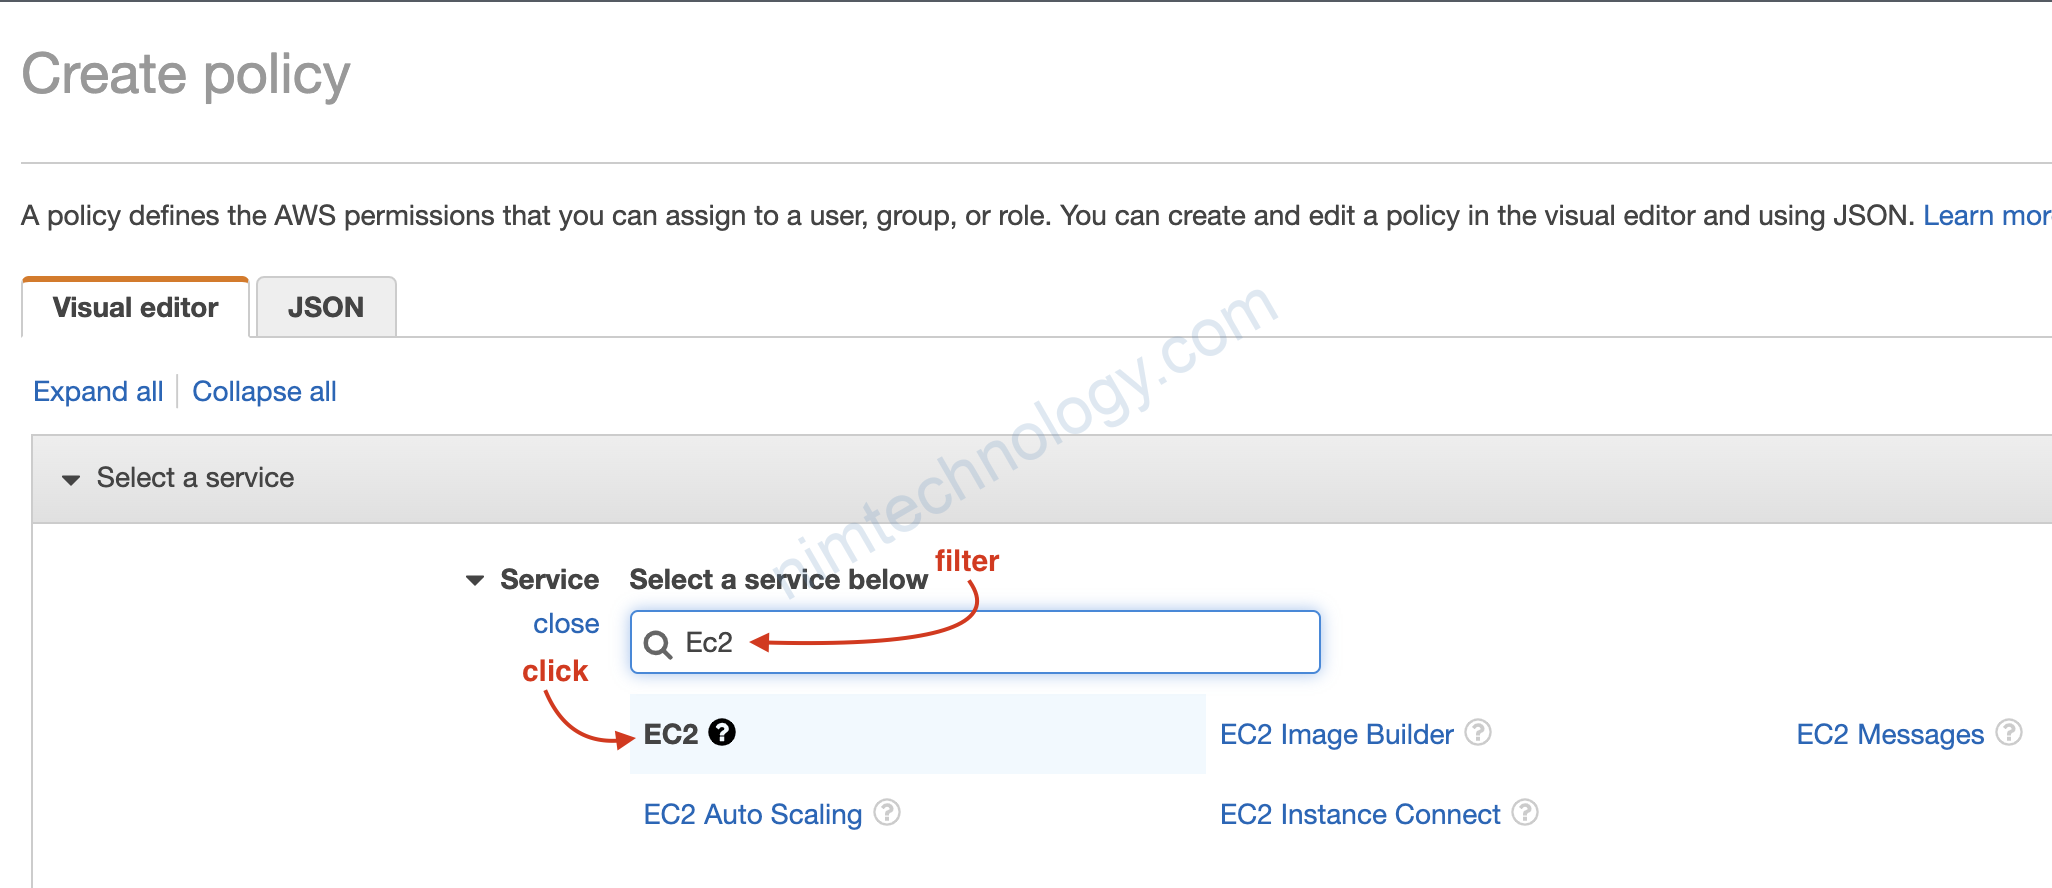
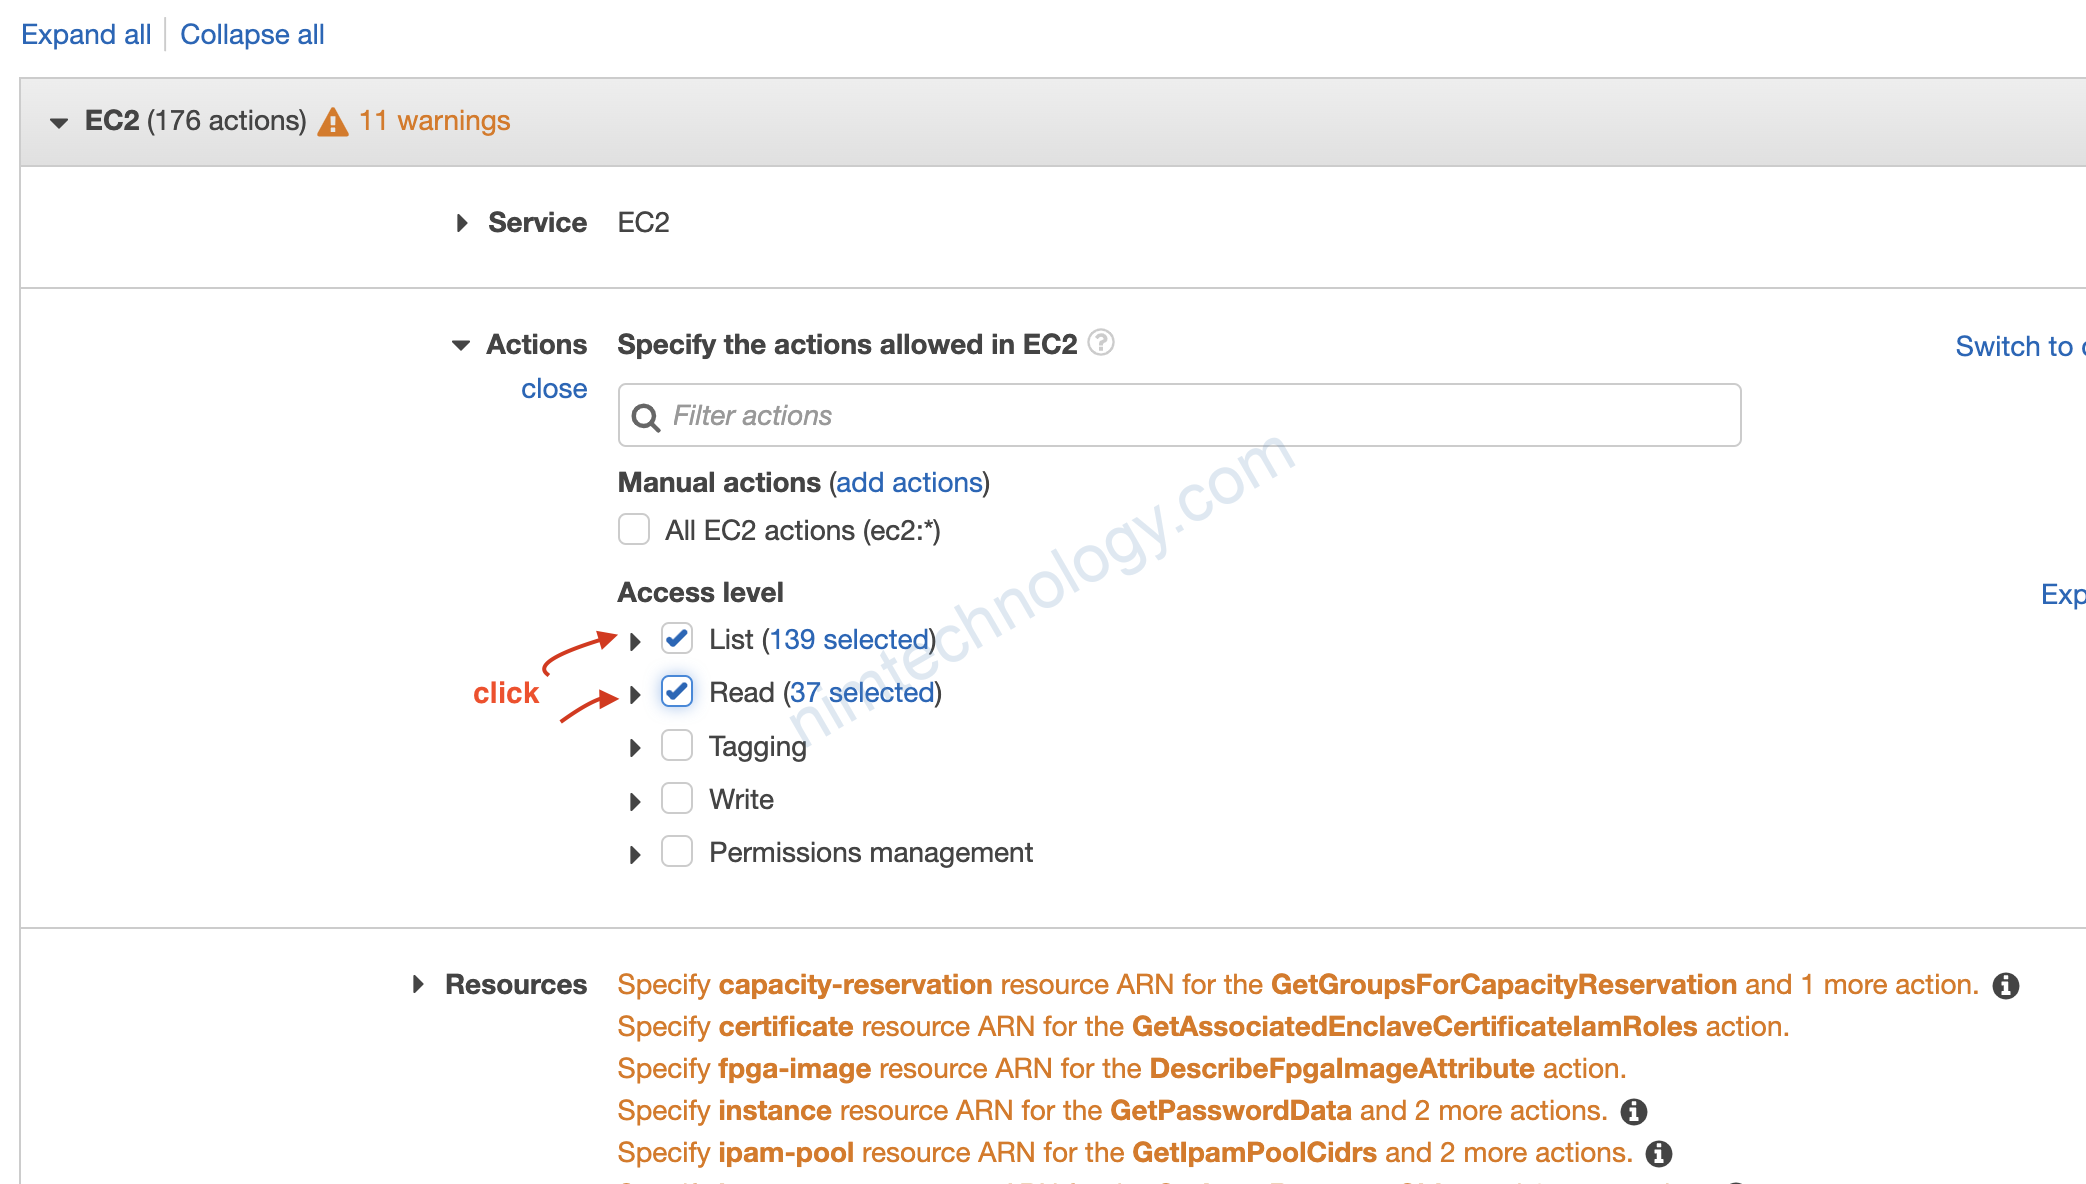
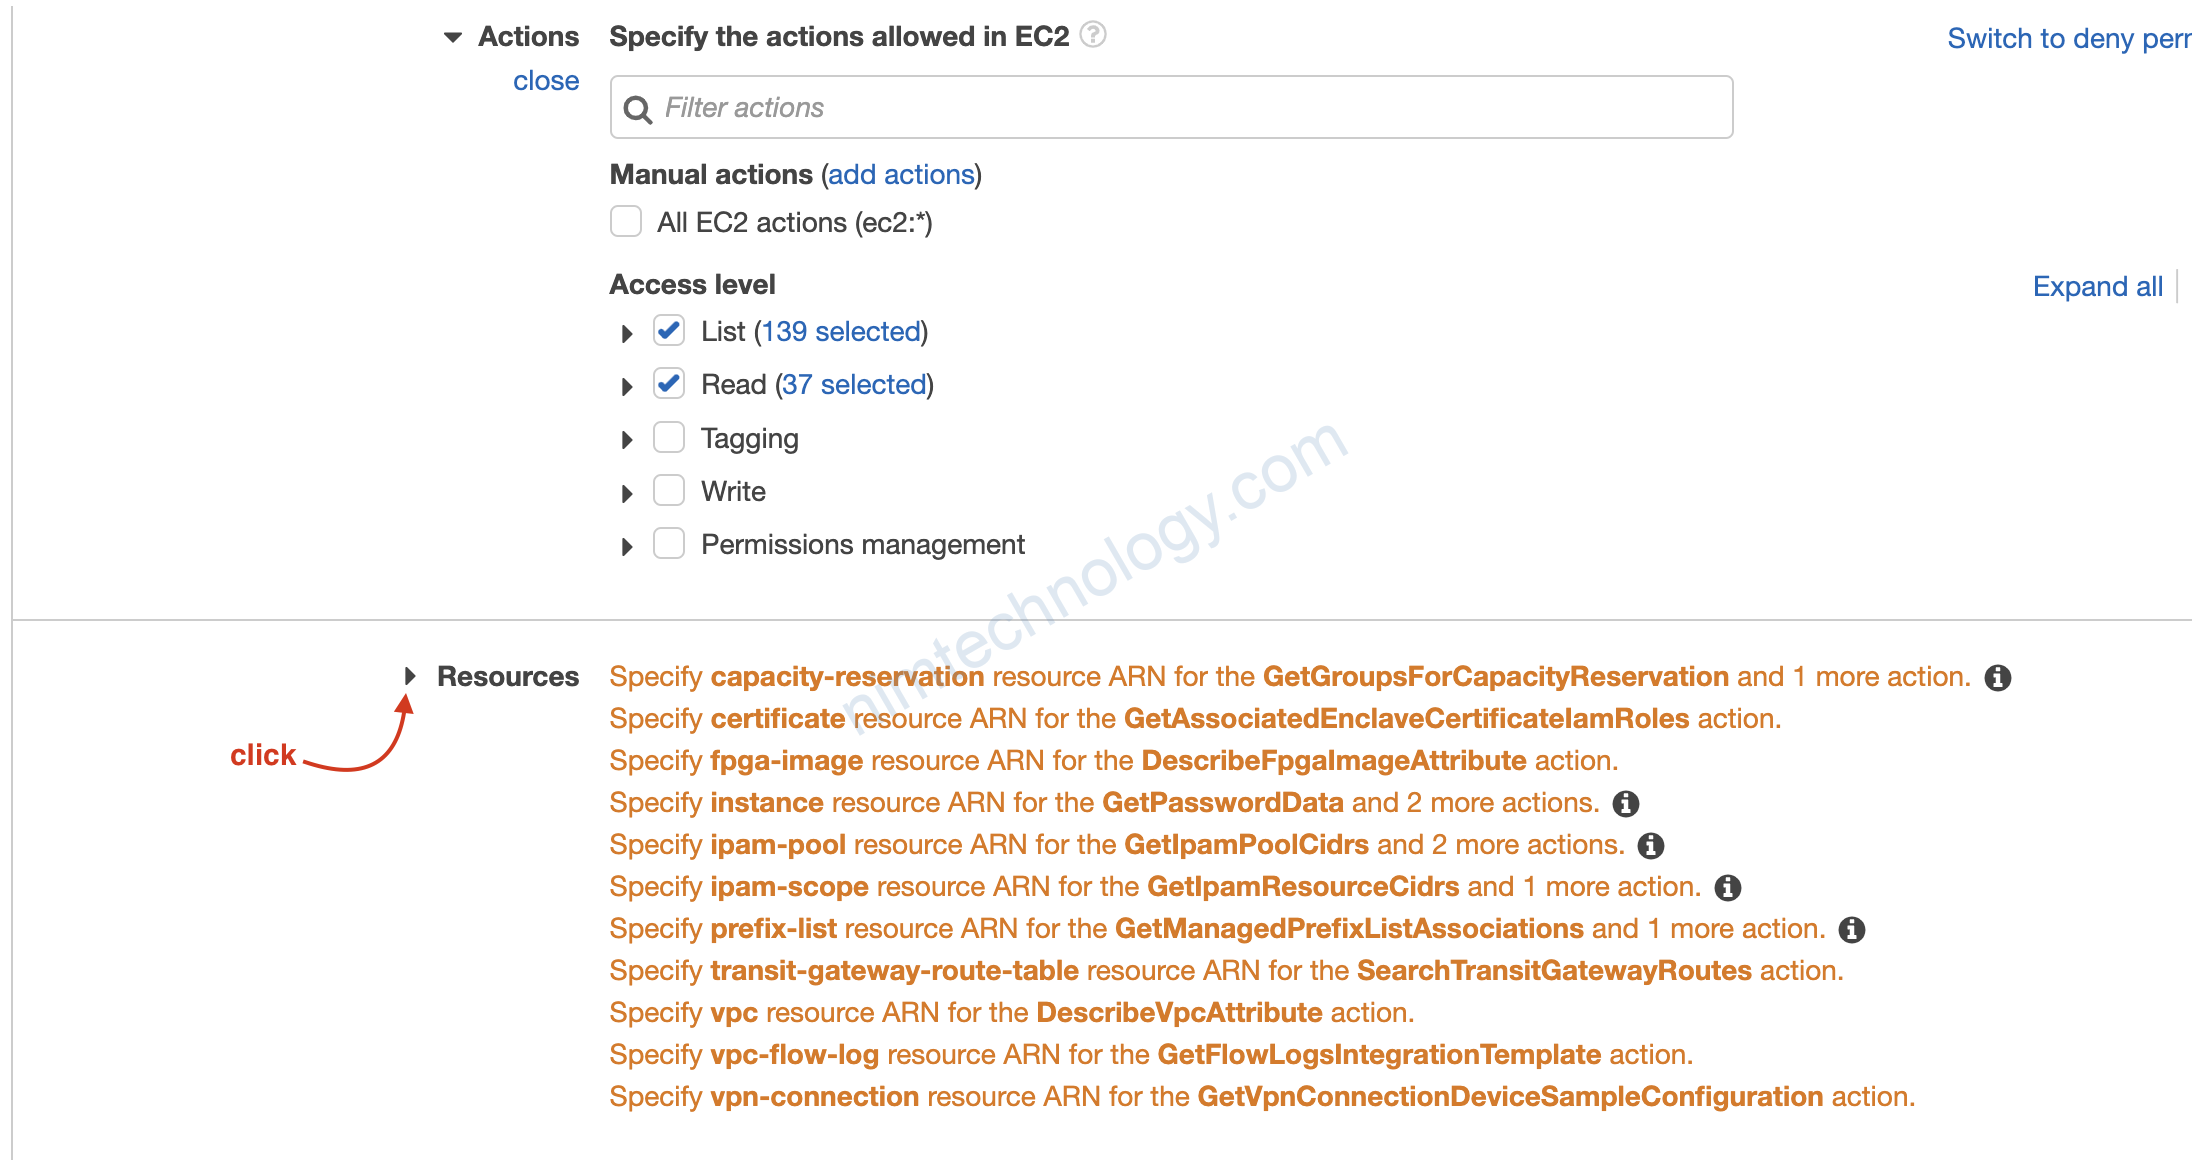
Giờ chúng ta sẽ thầy nó list và read được cái gì?
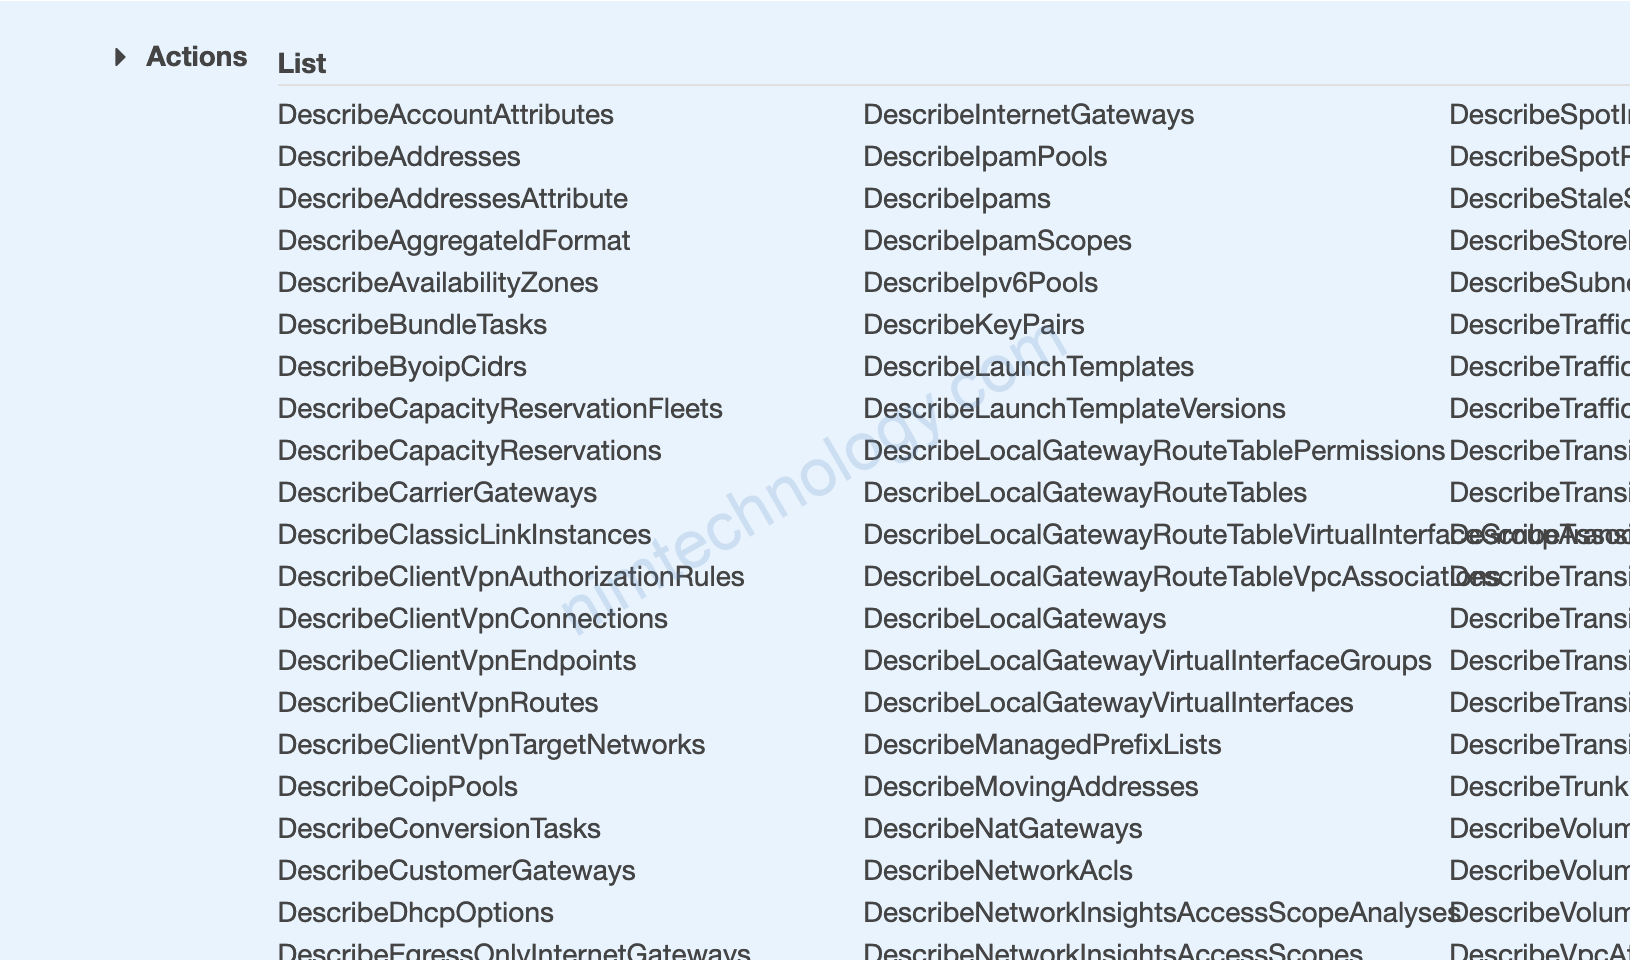
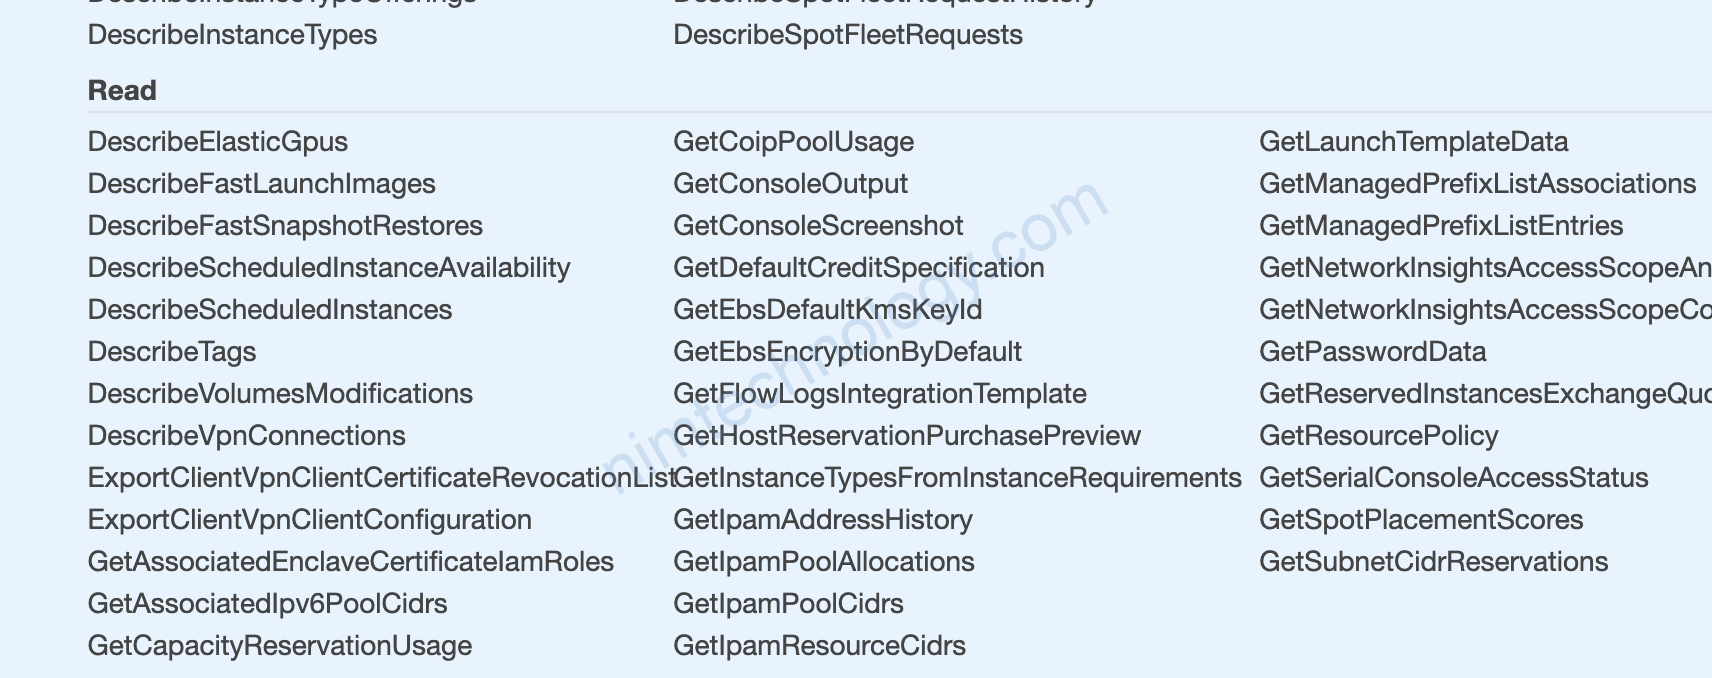
Lăn xuống tiếp
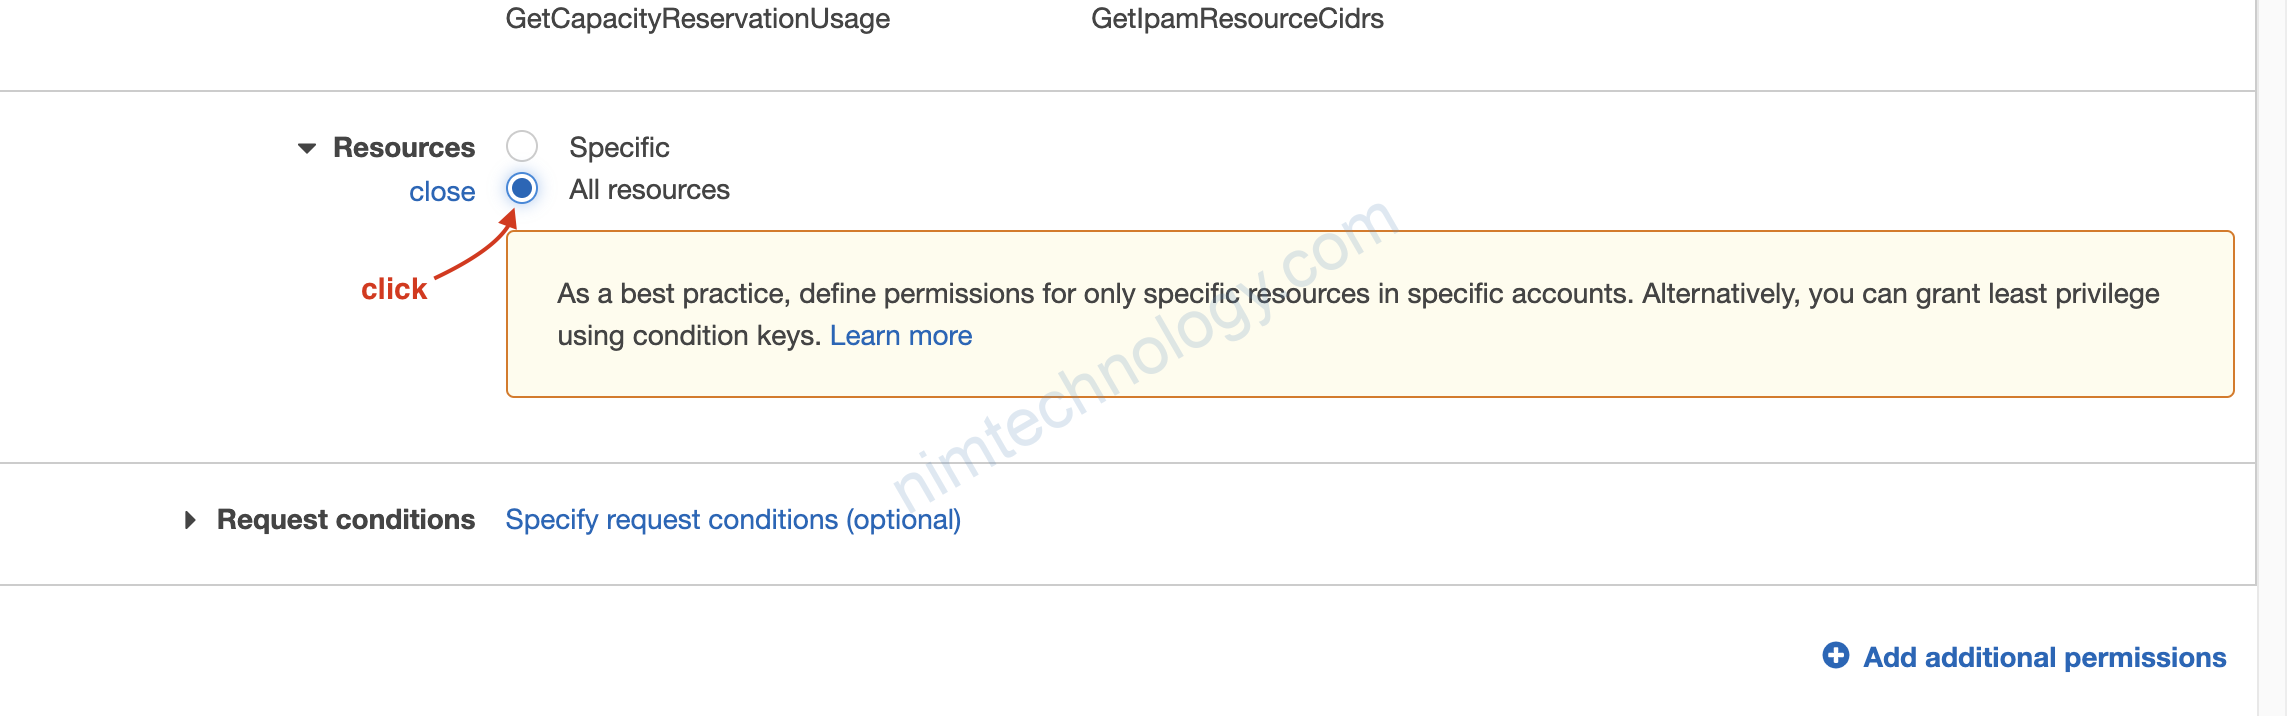
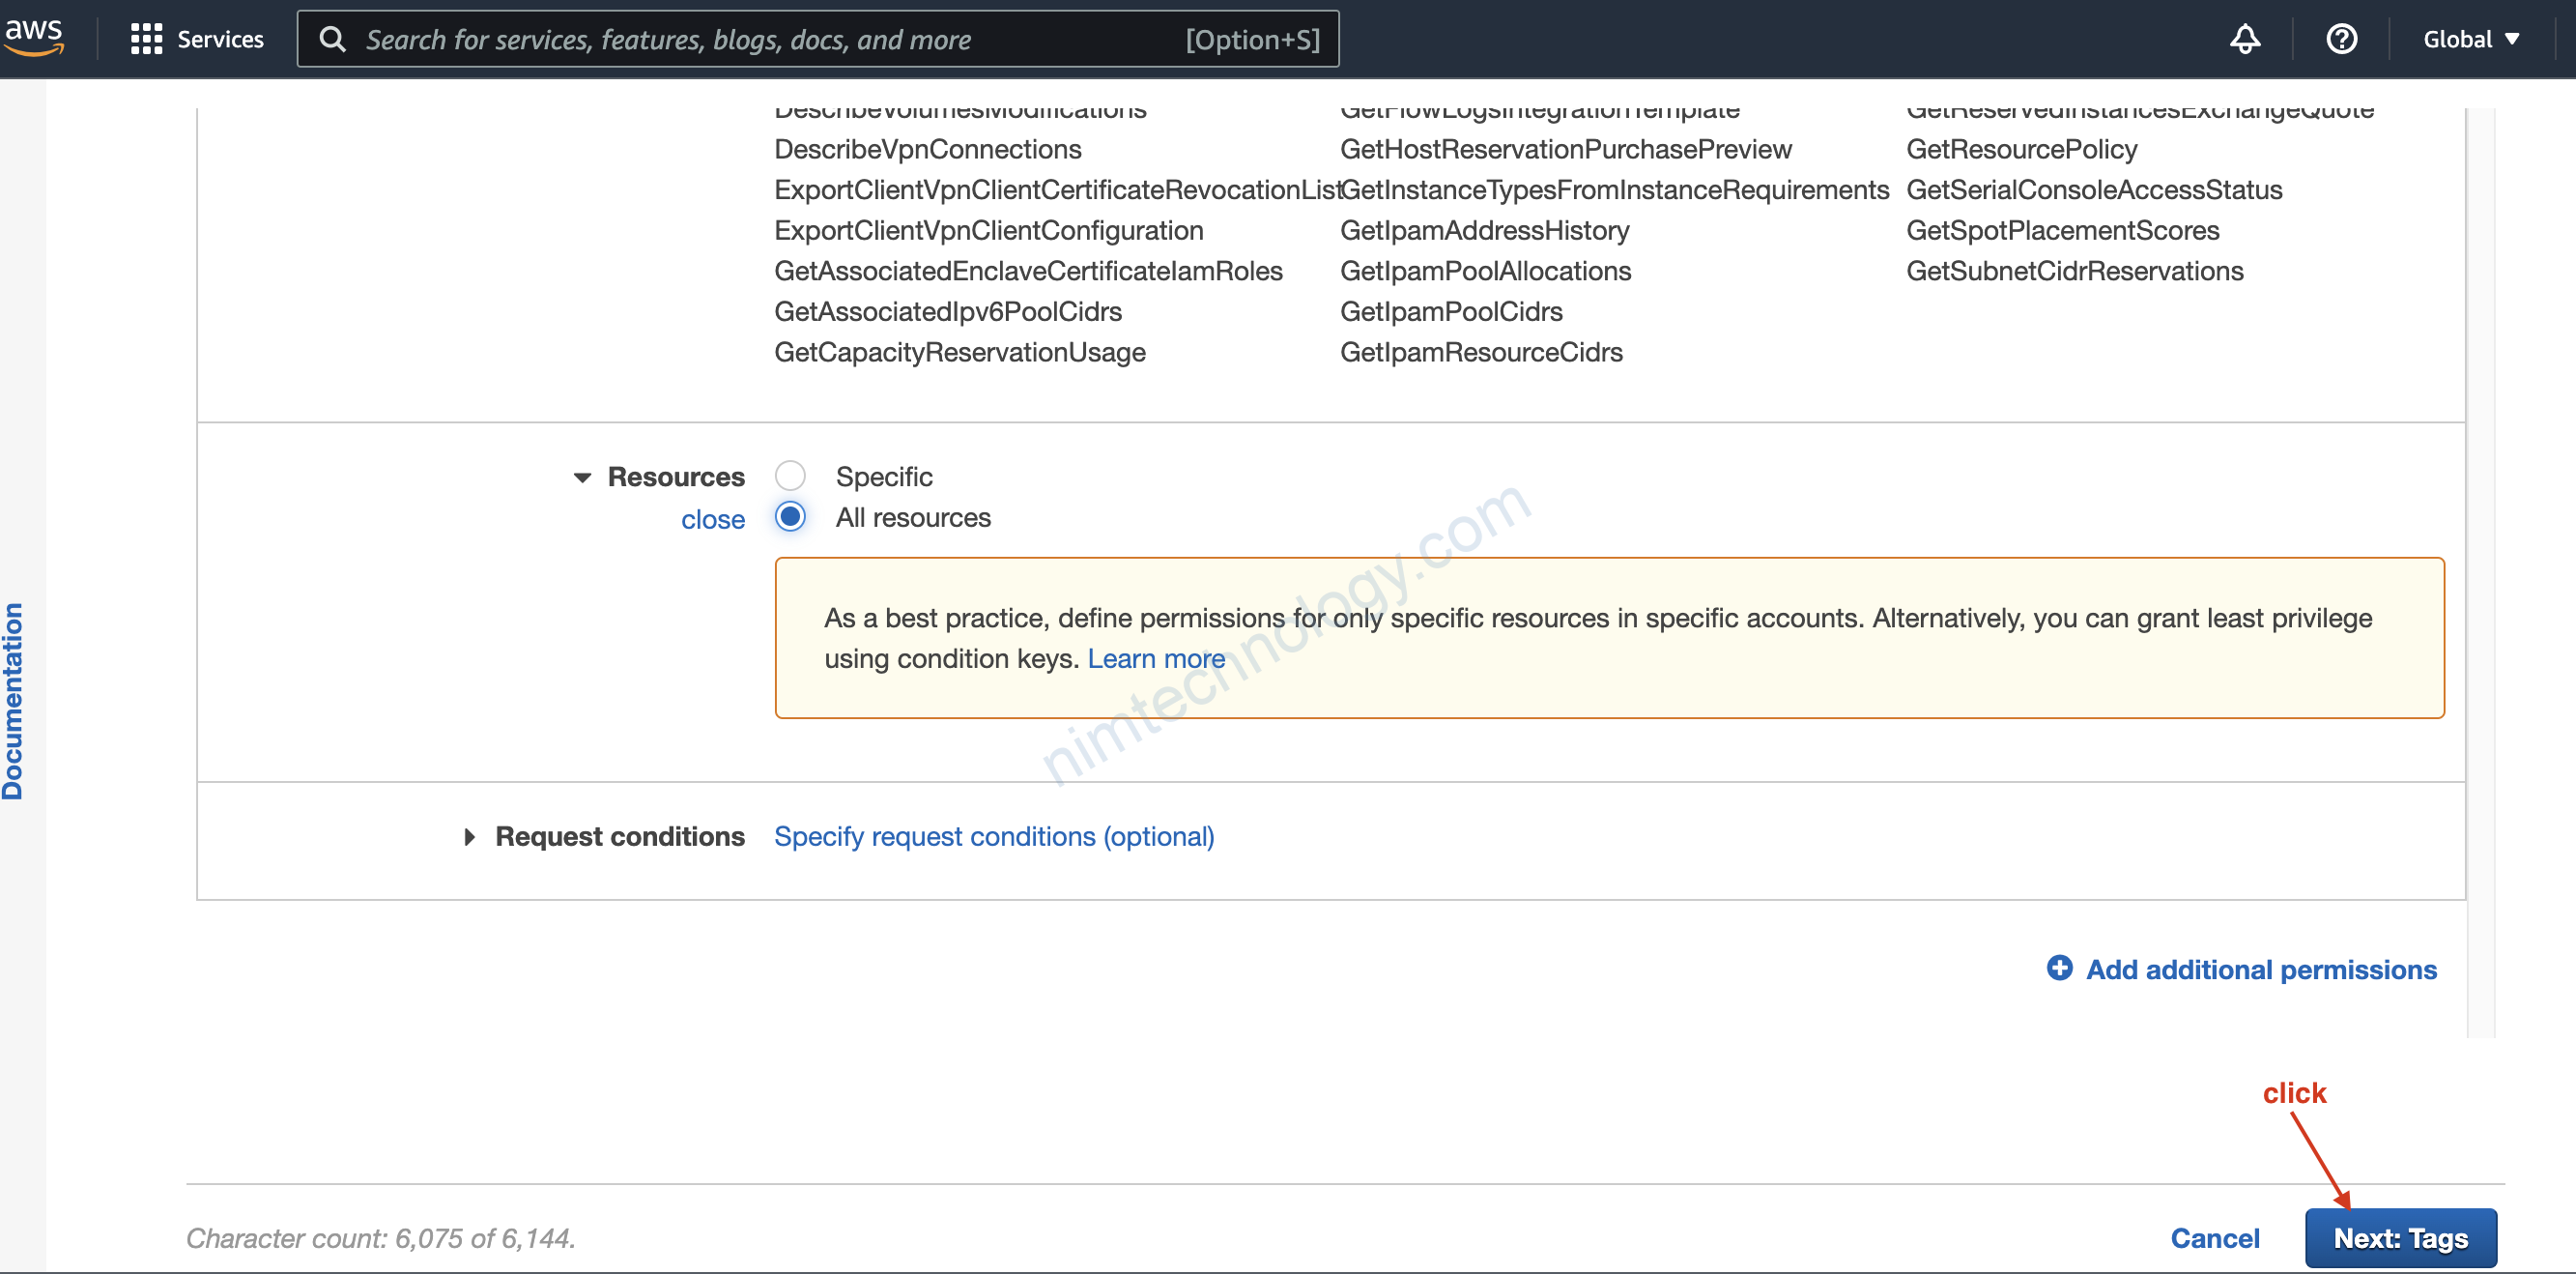
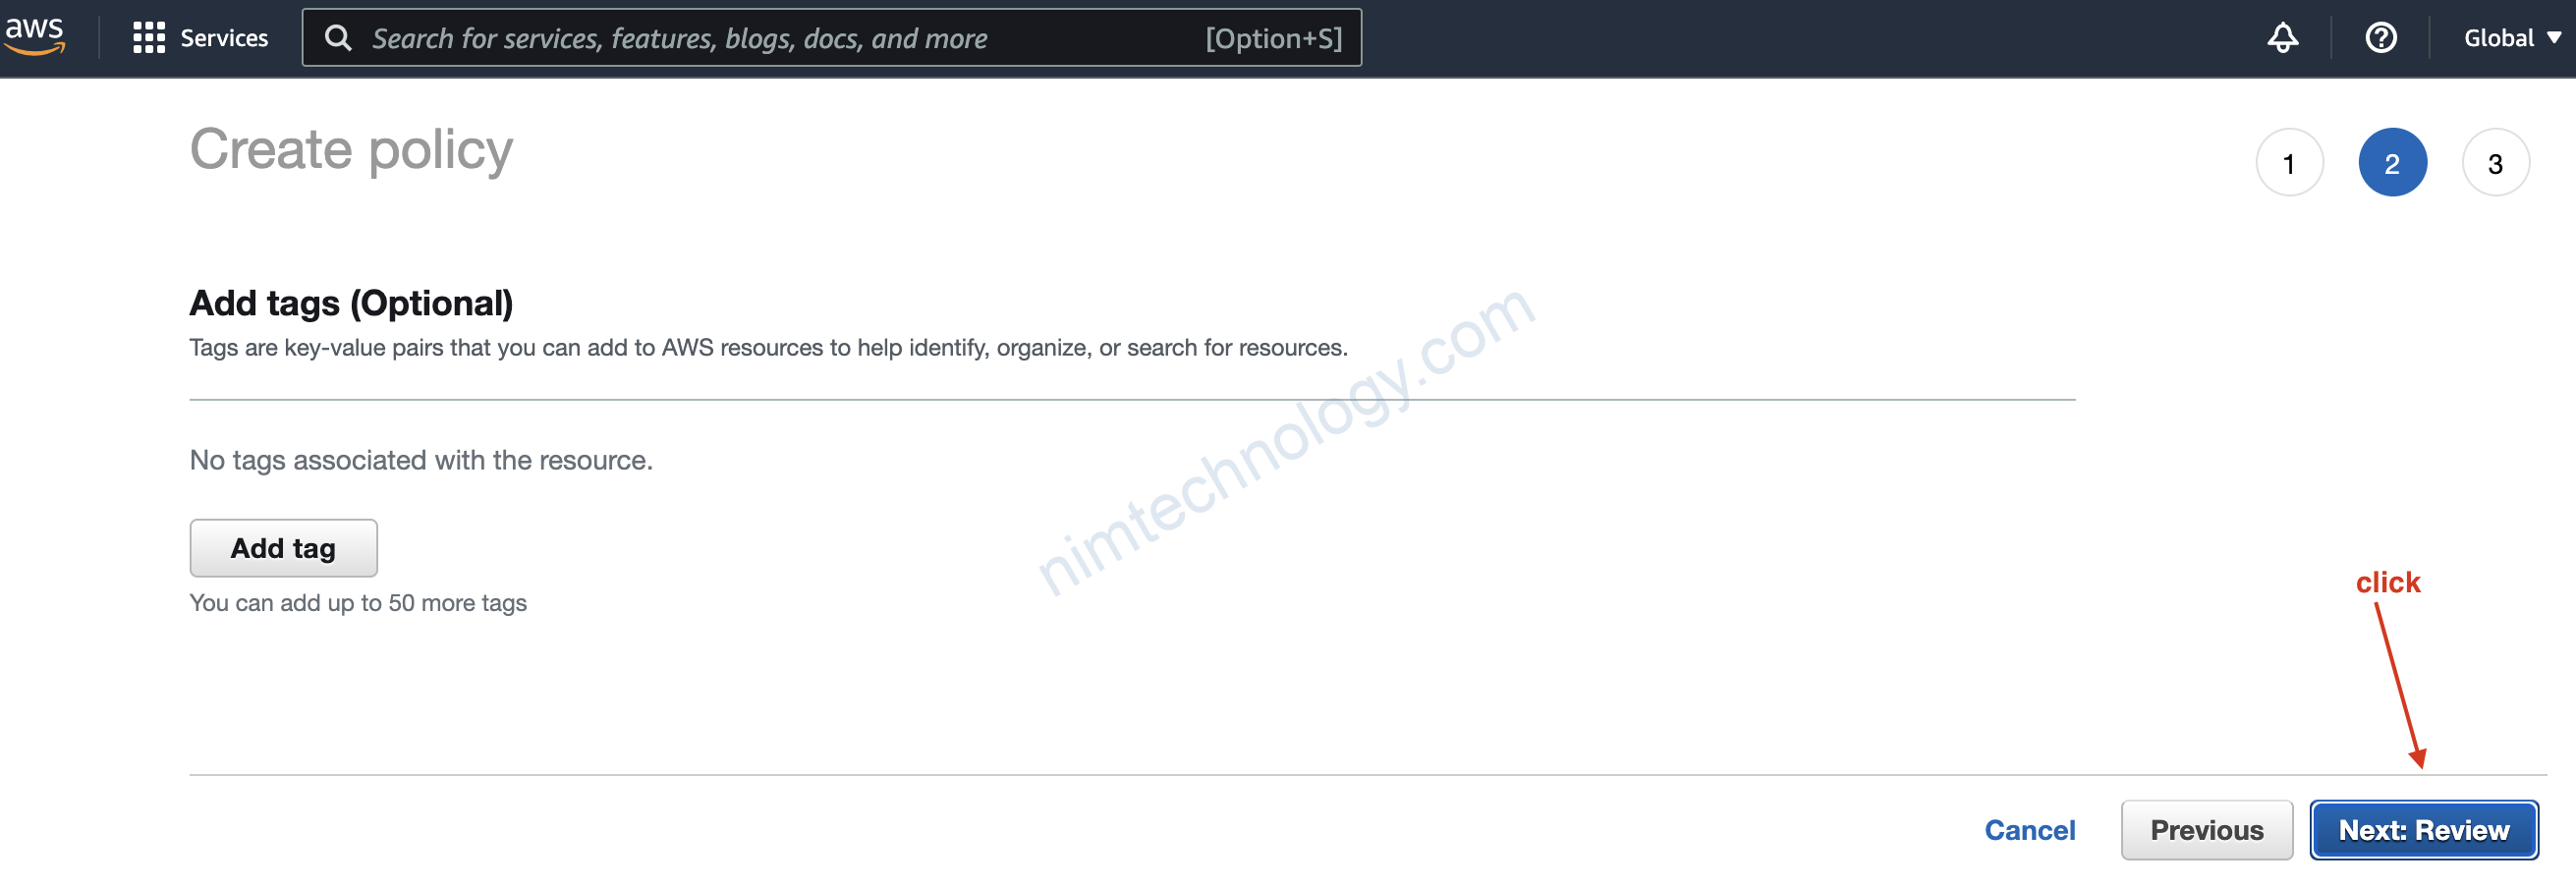
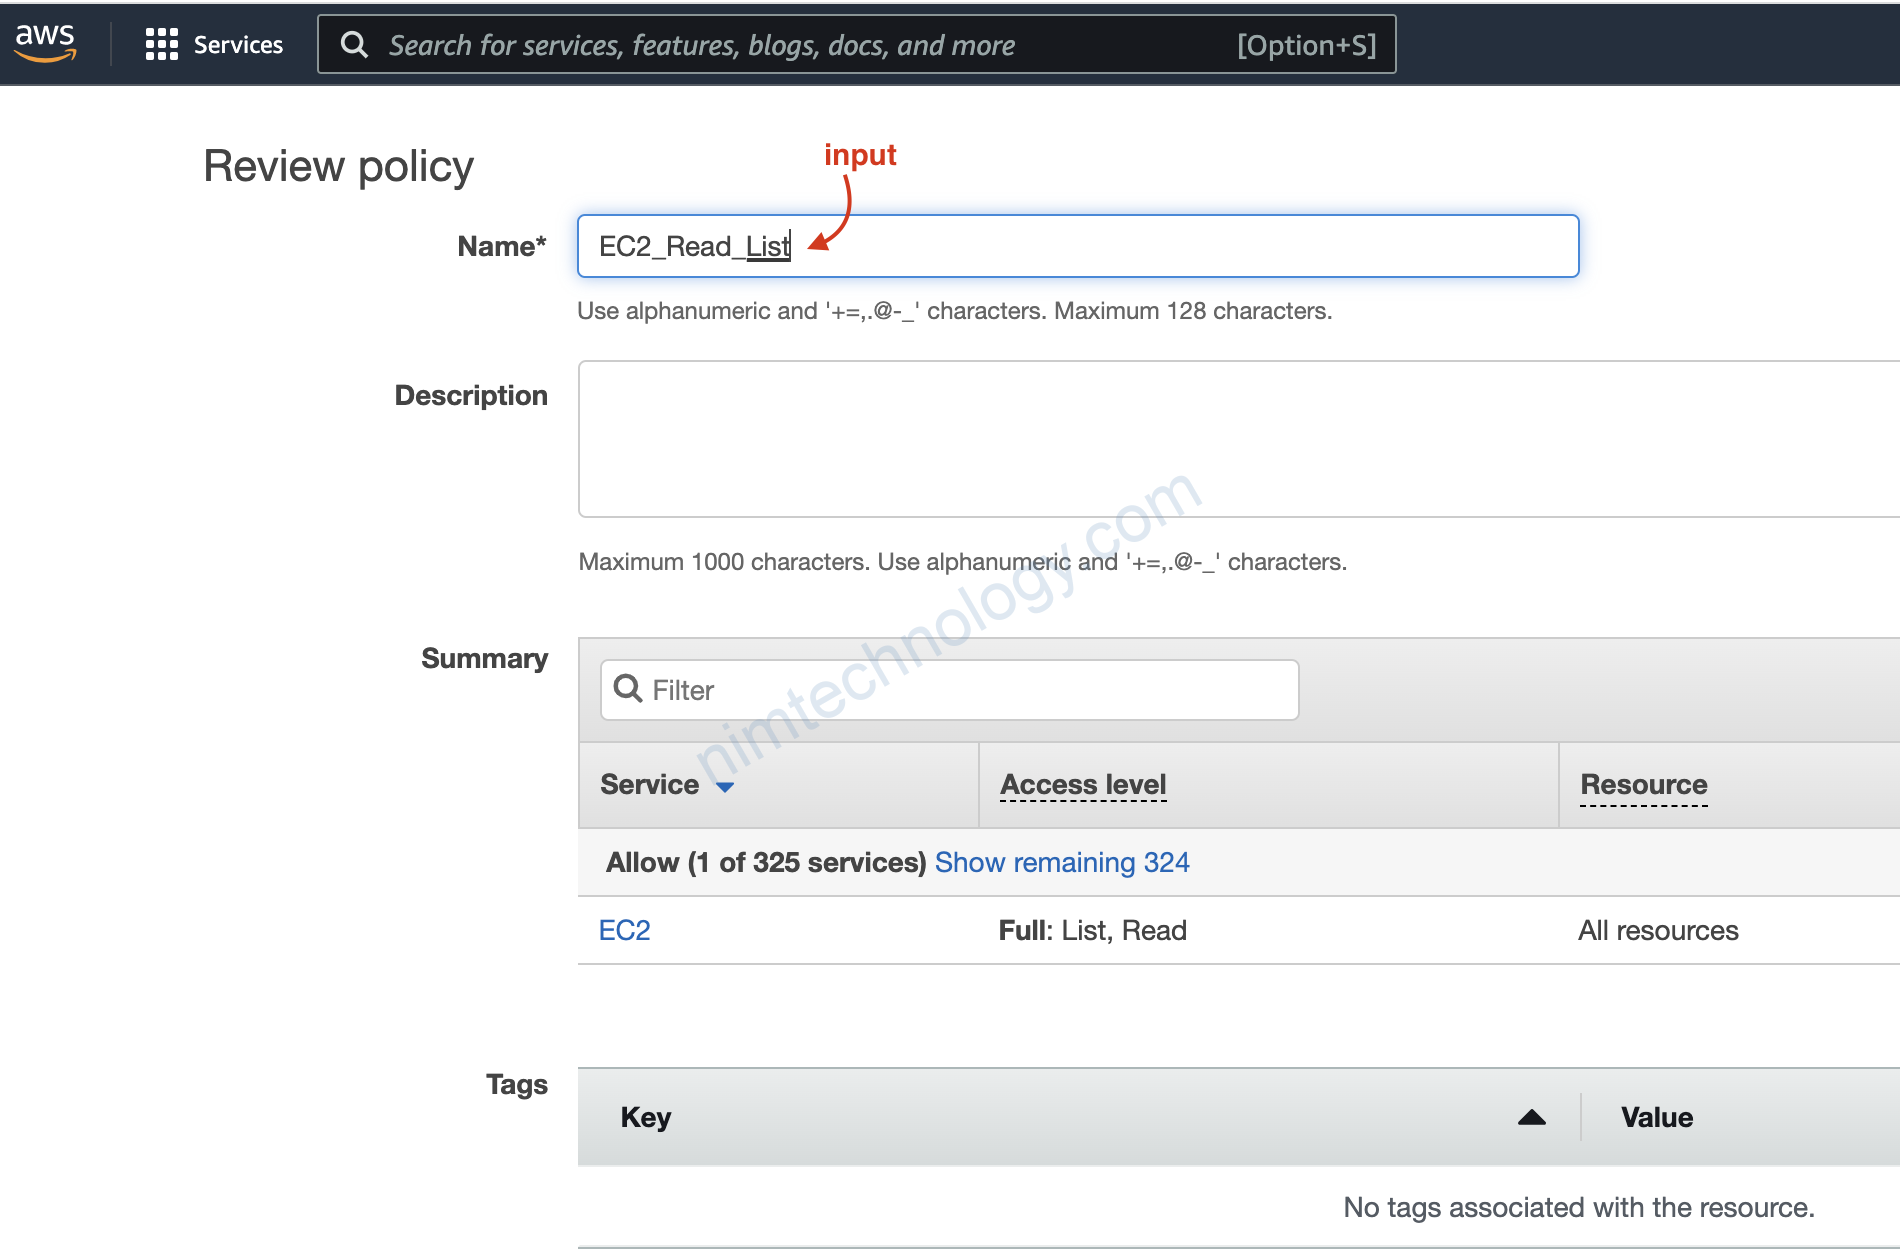
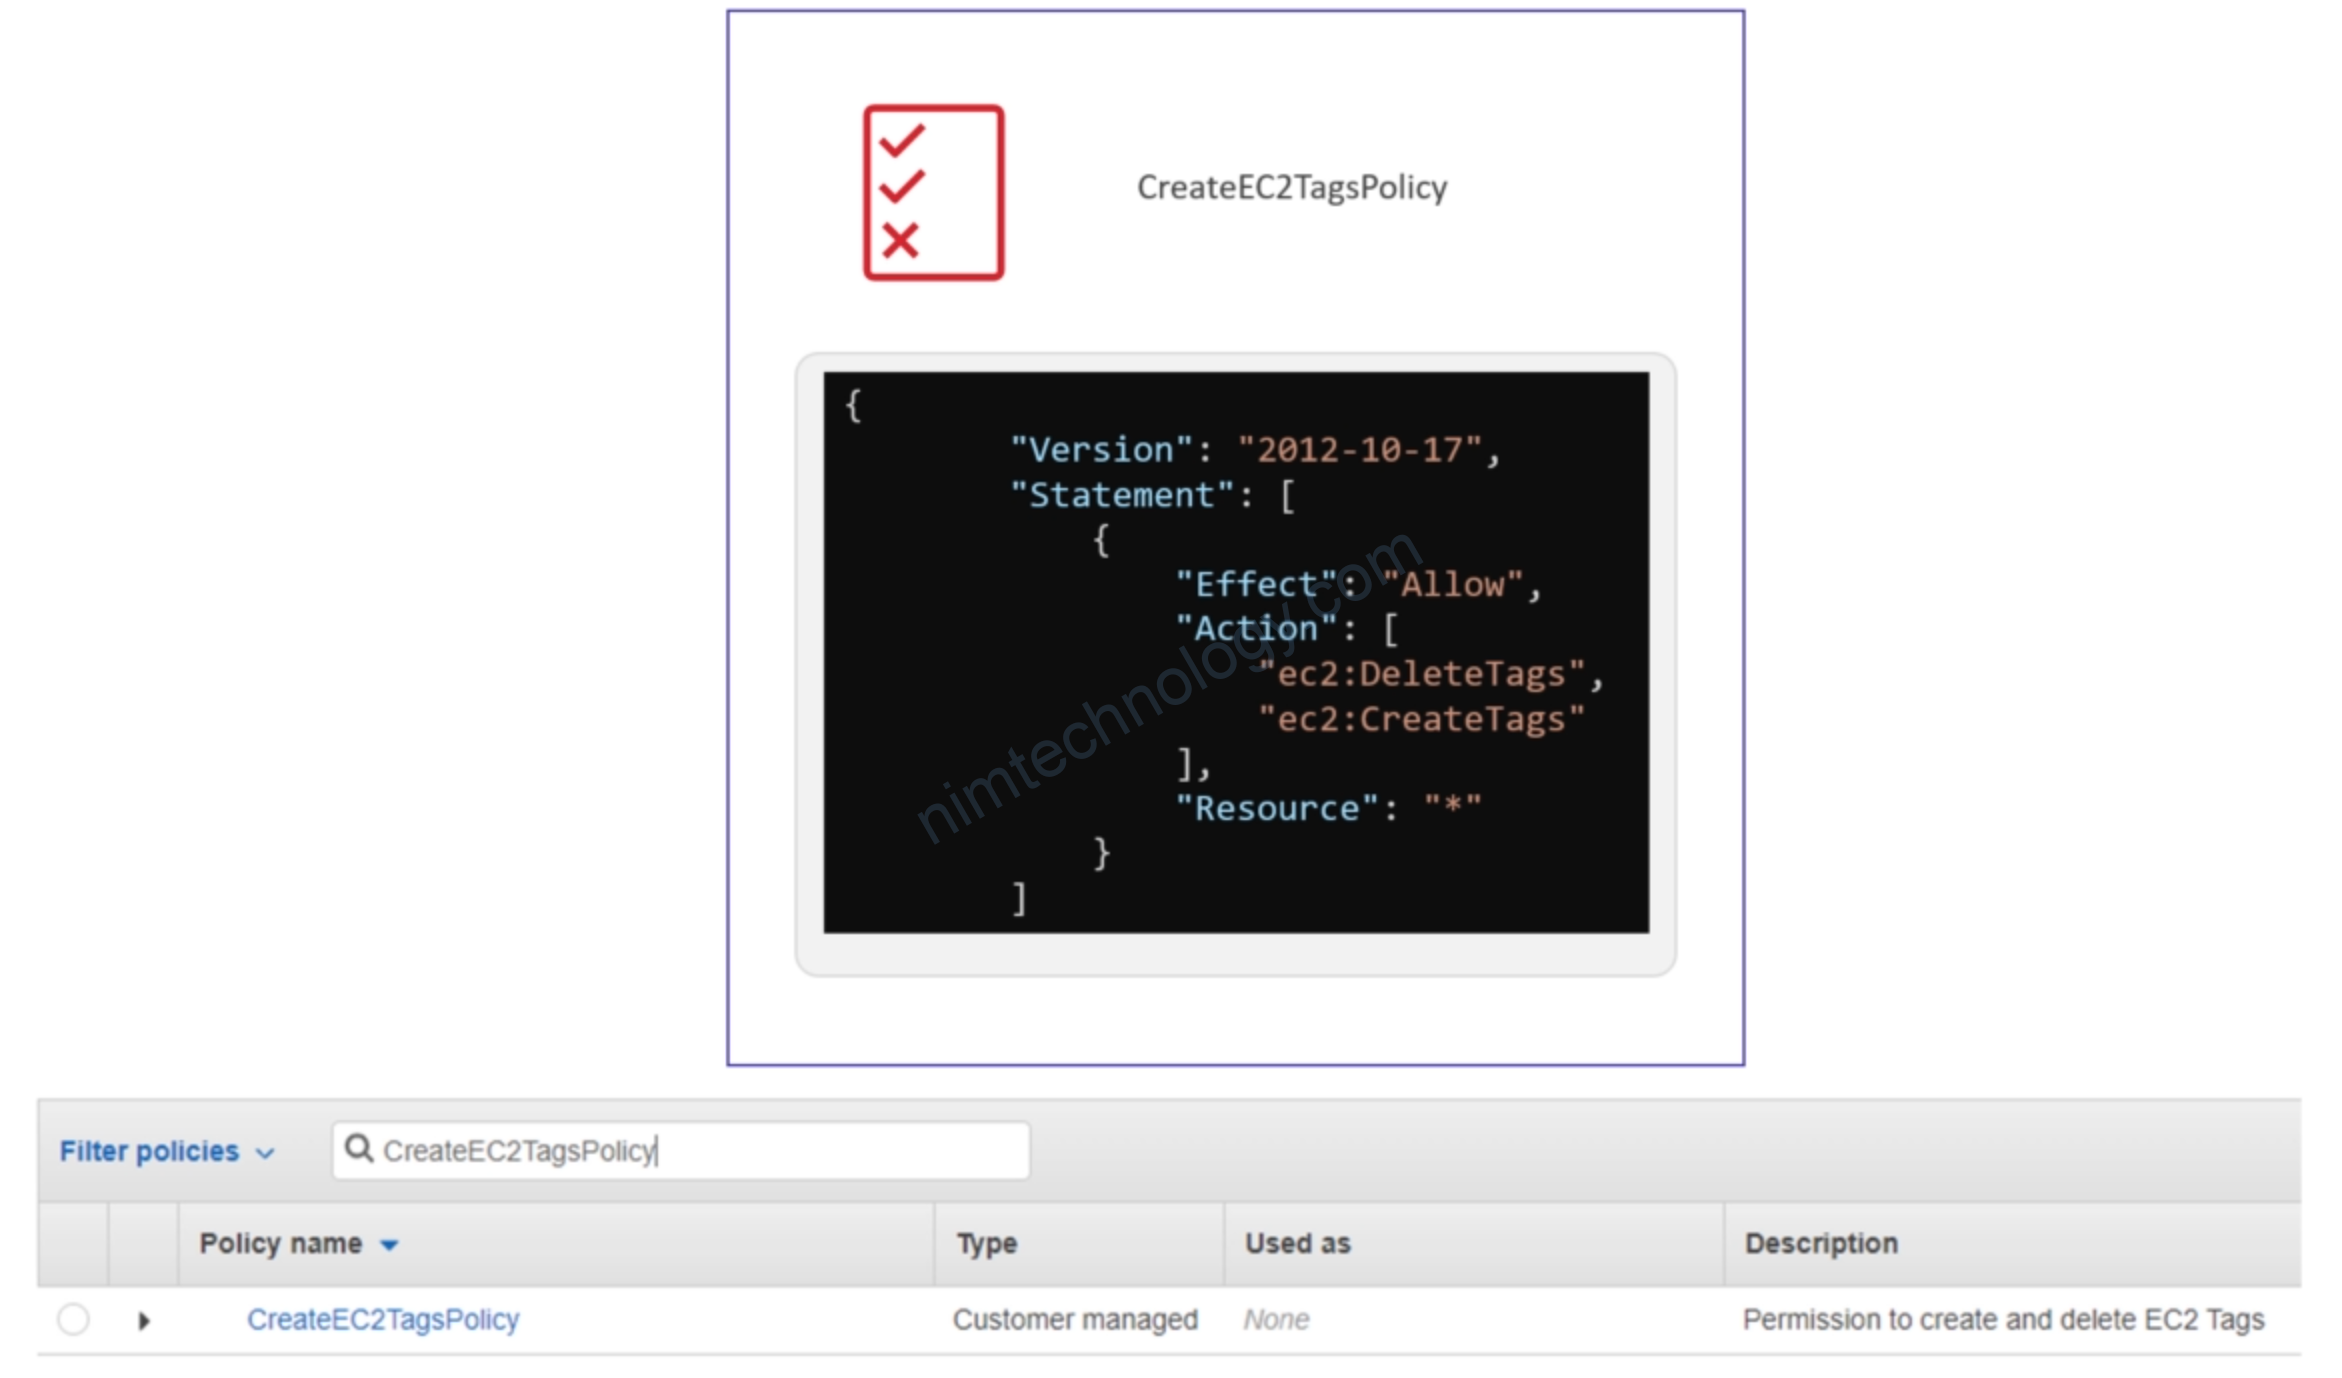
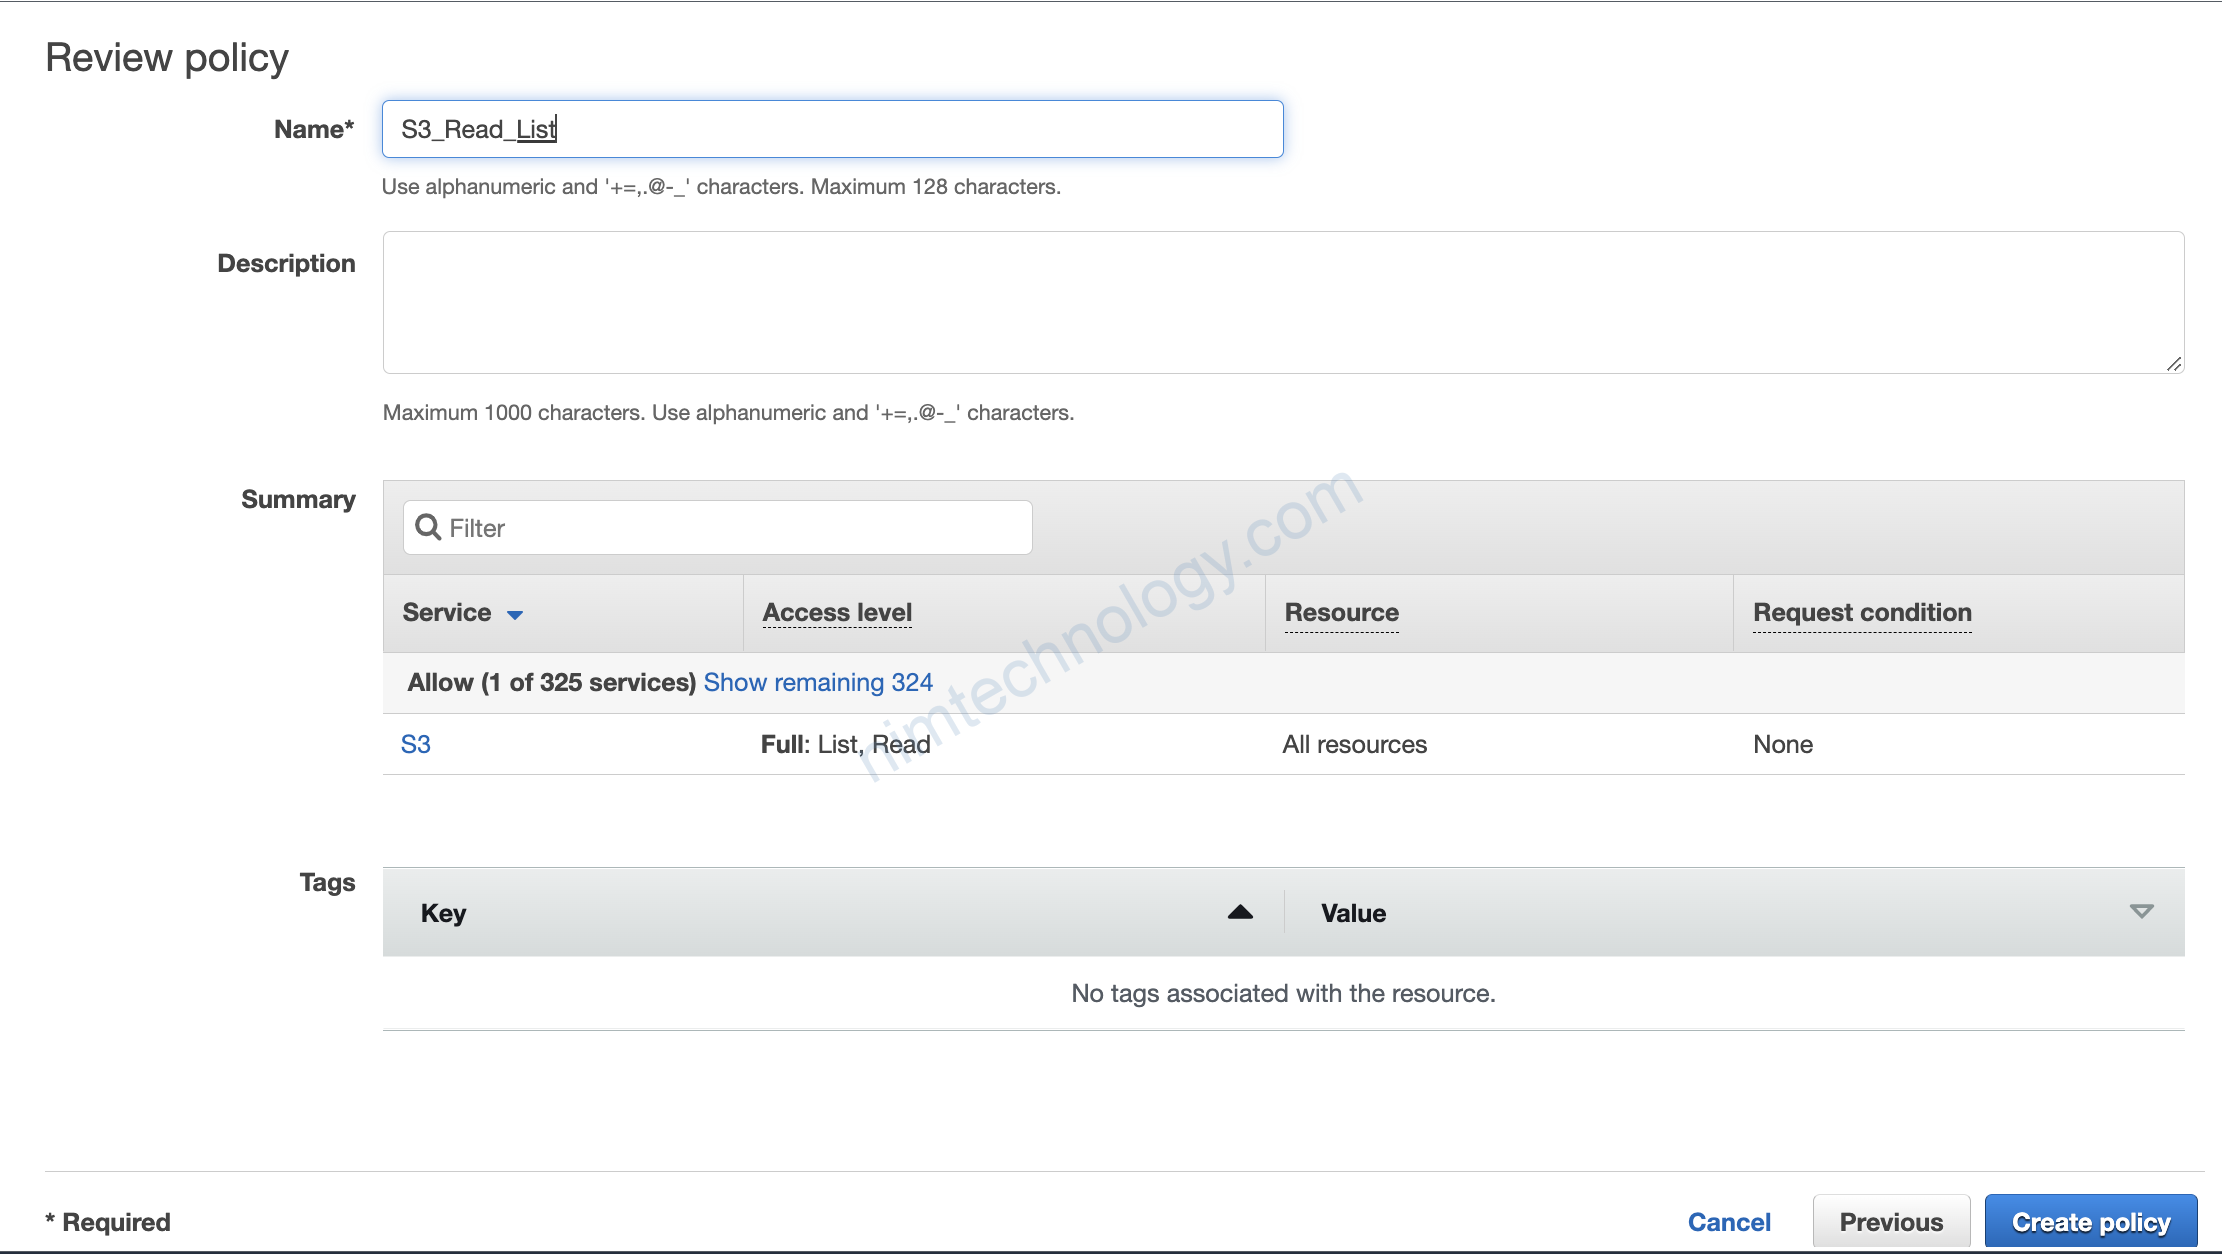
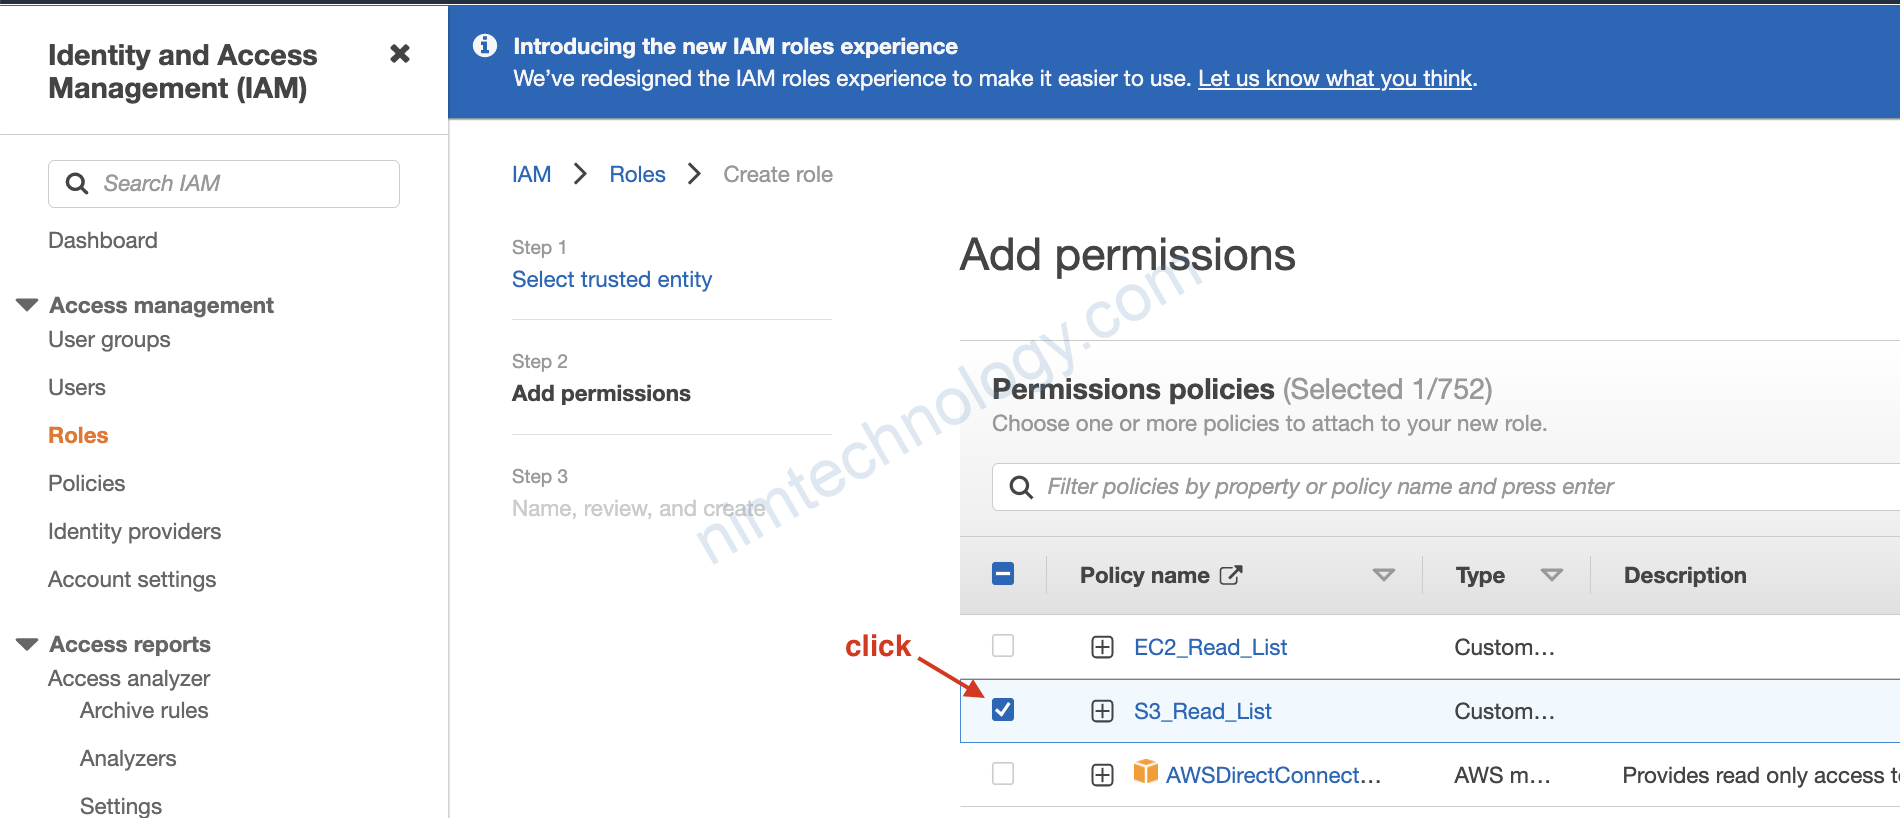
tường tự như trên chúng ta sẽ tạo Policy Read and List S3
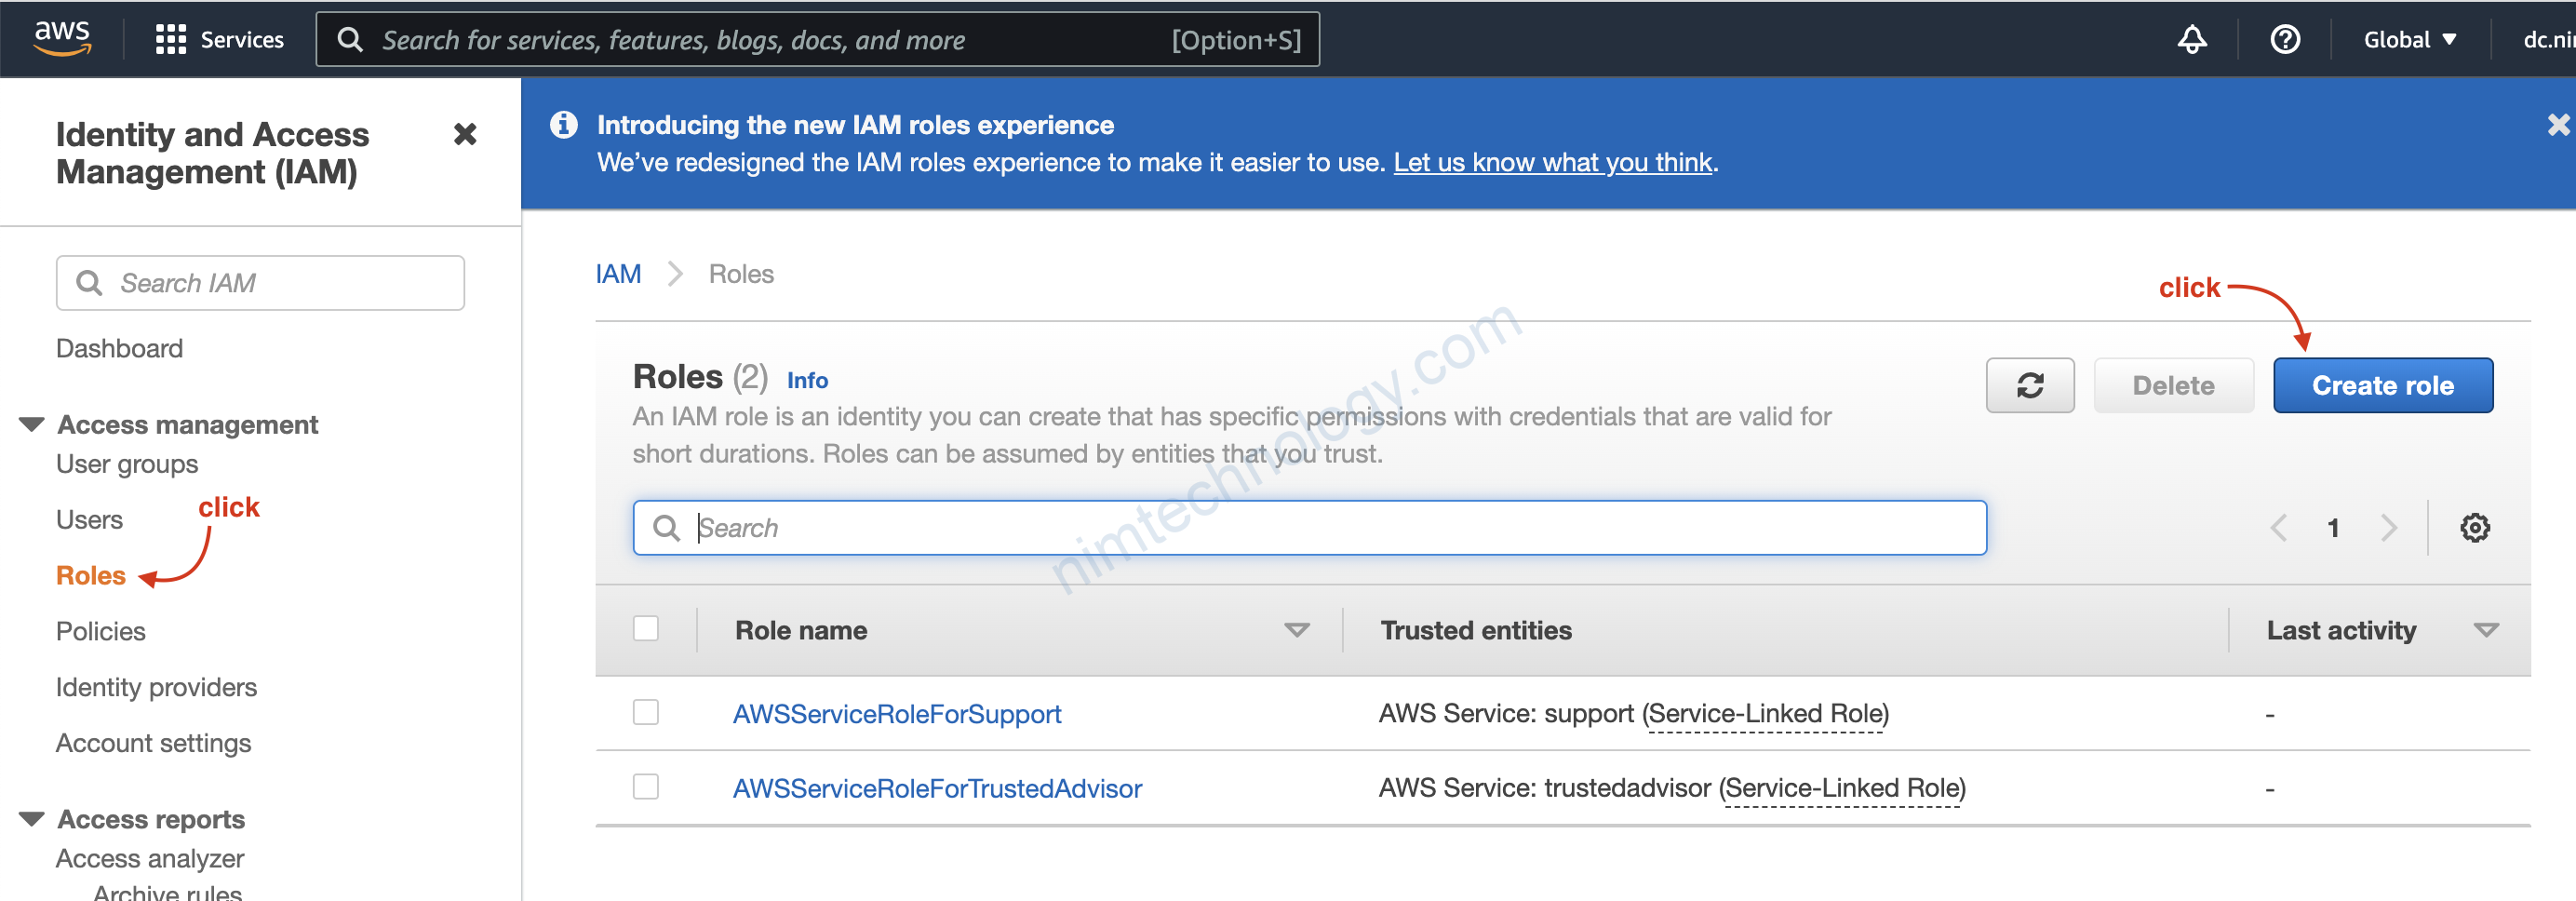
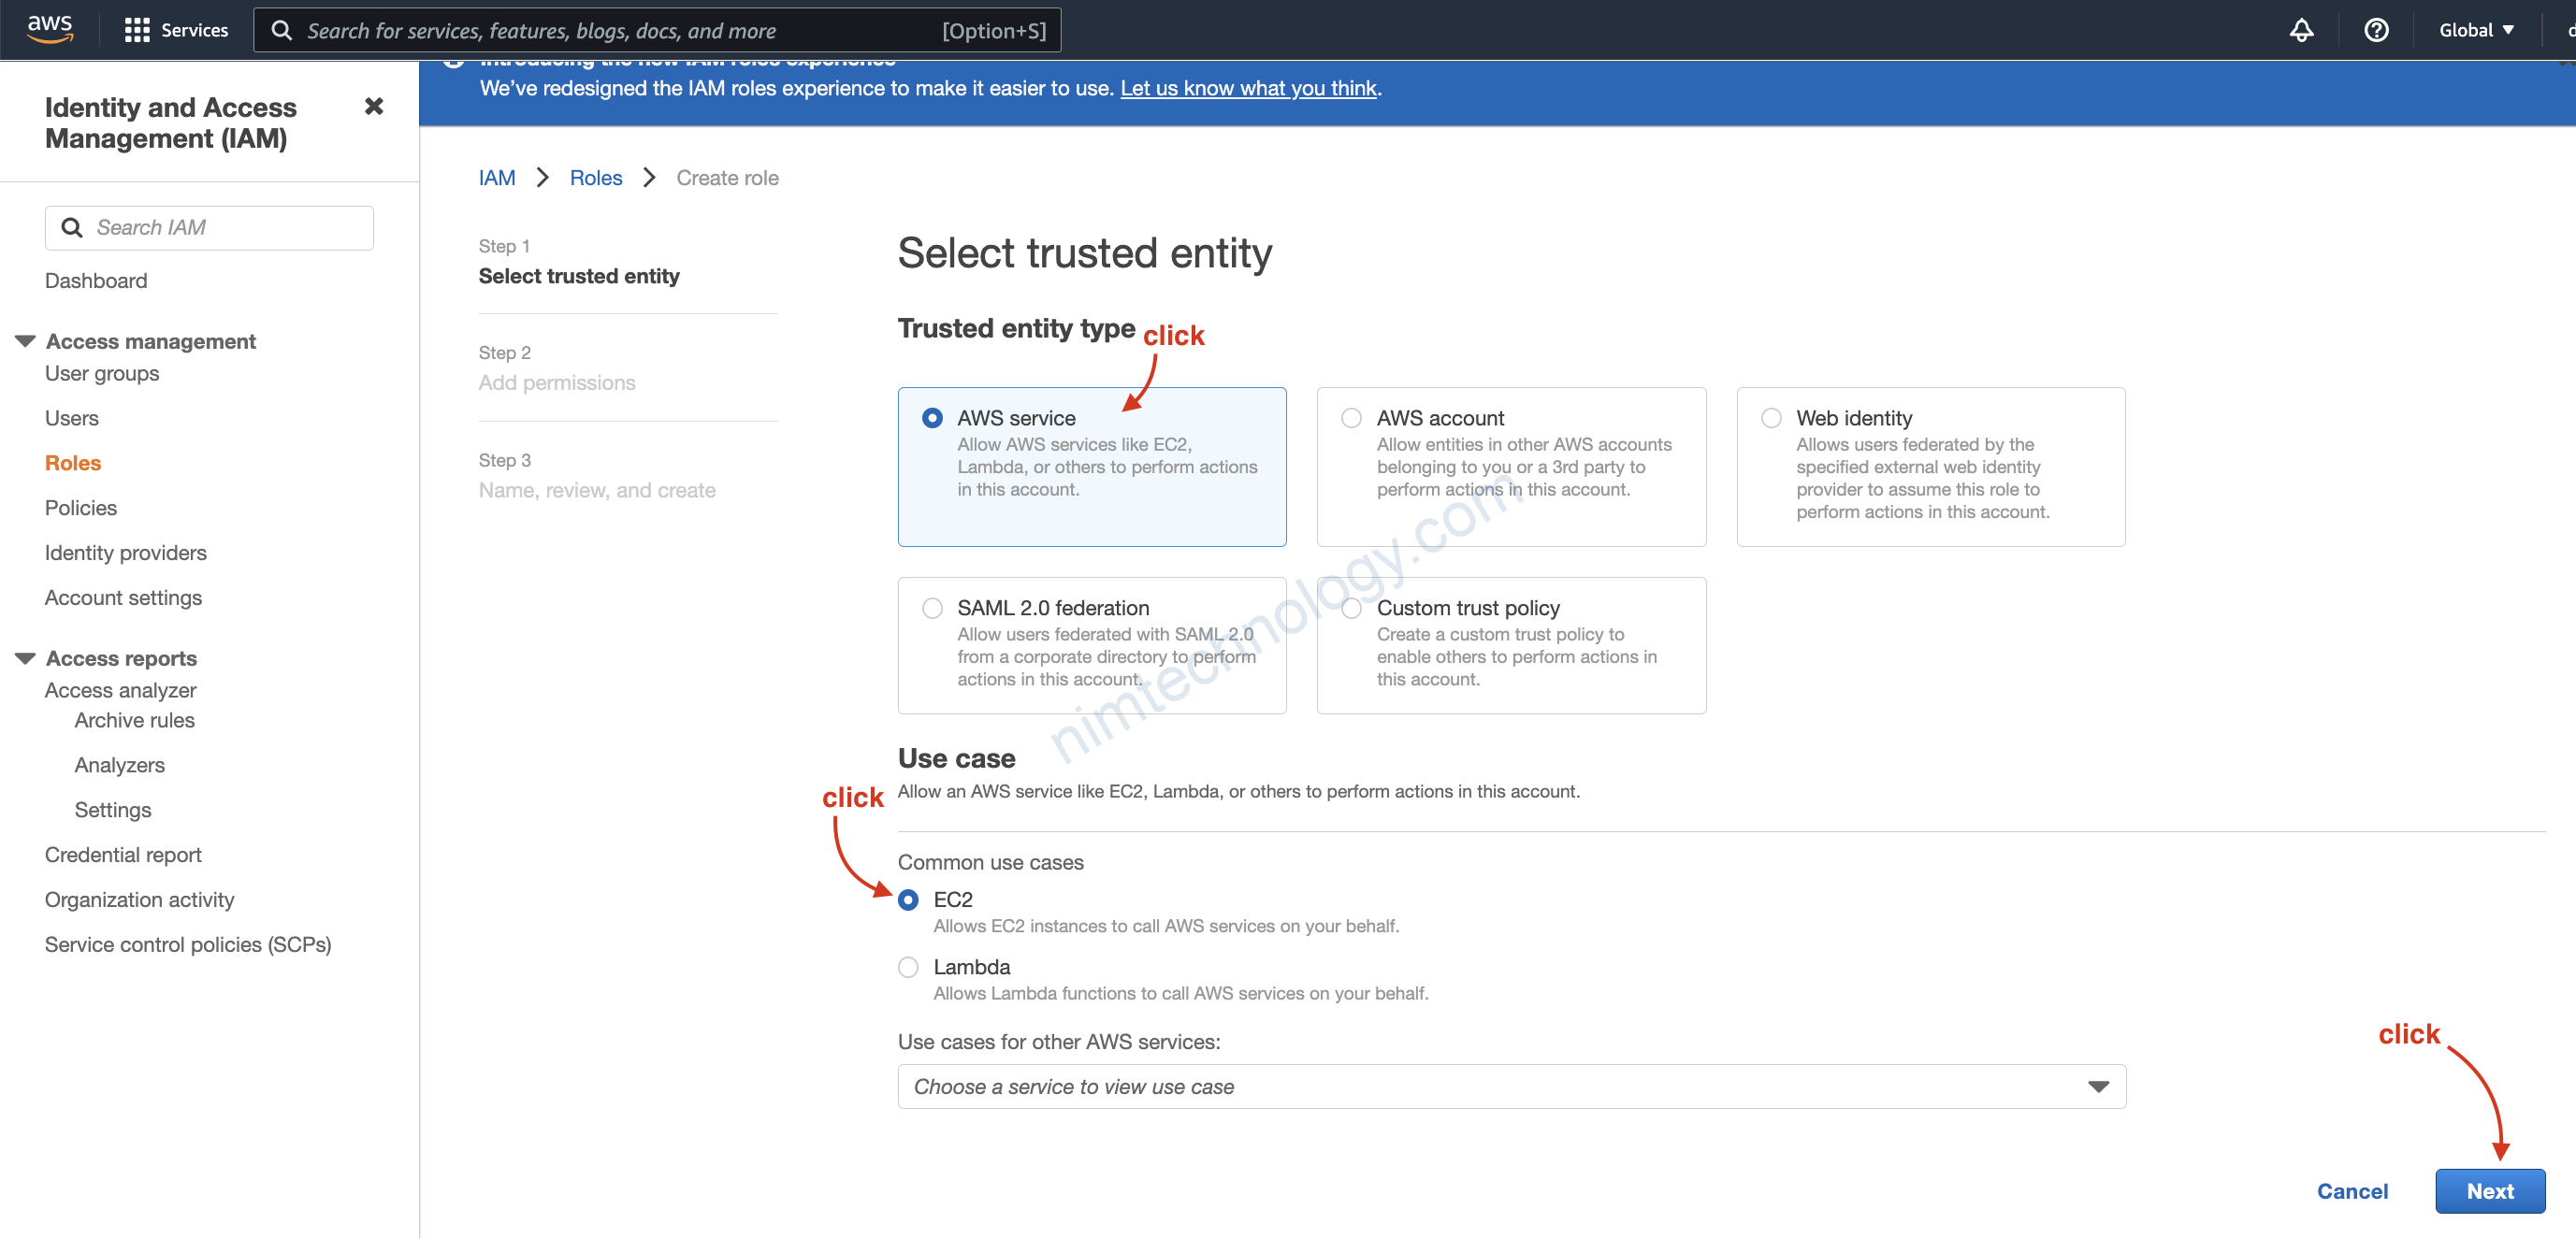
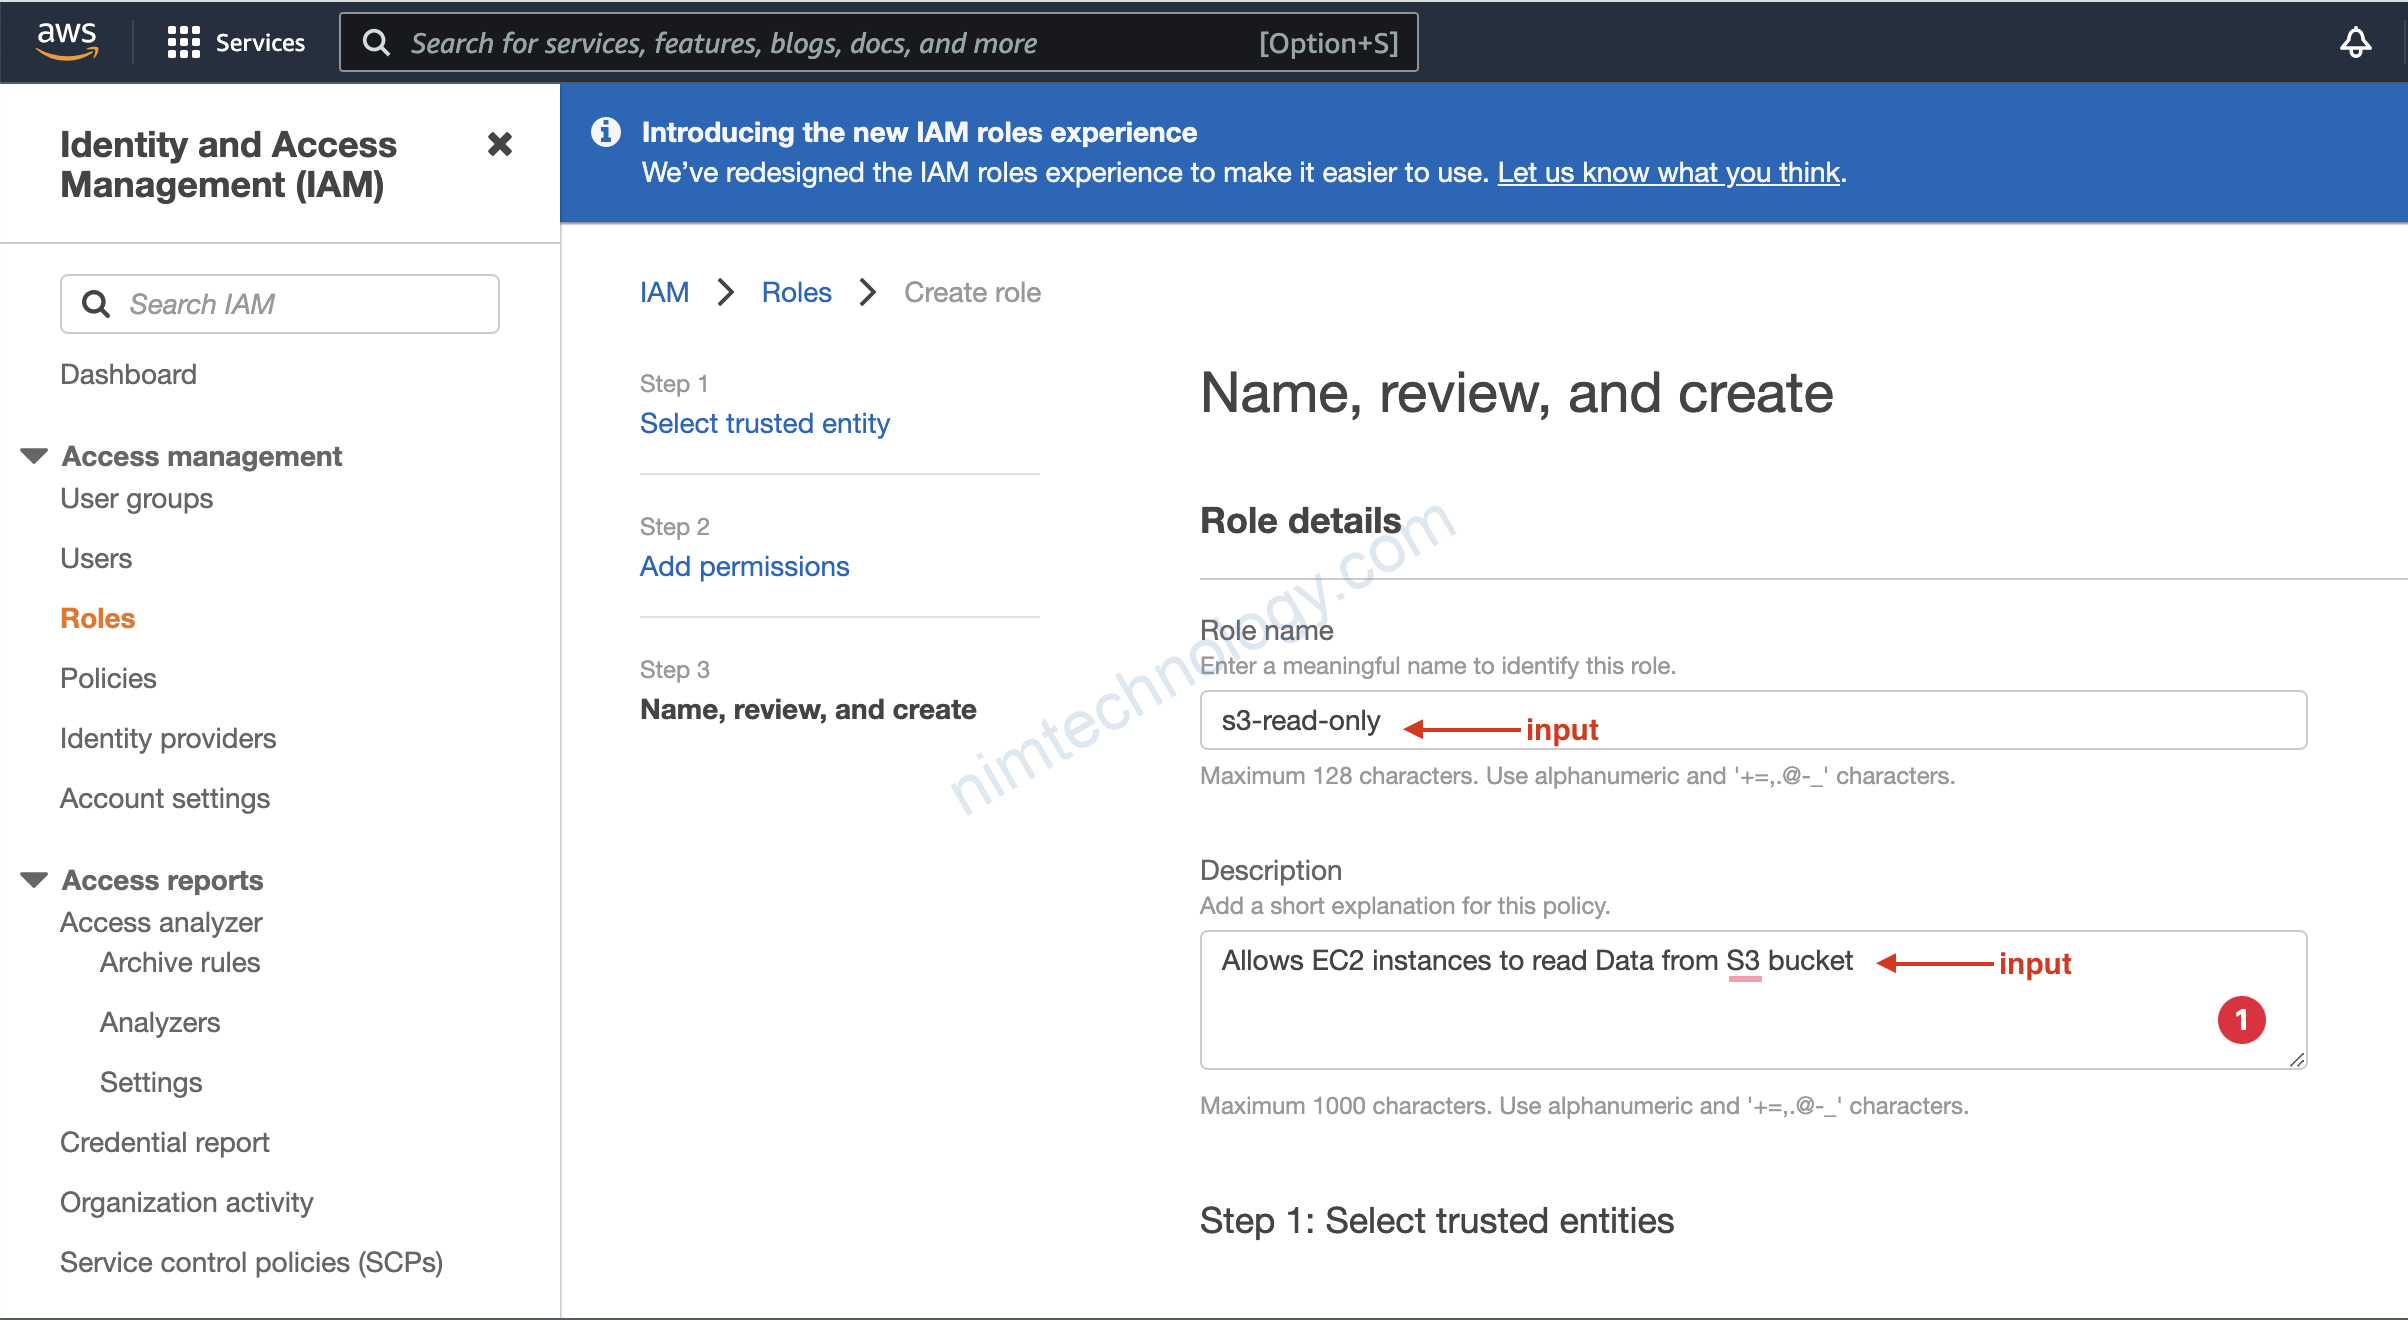
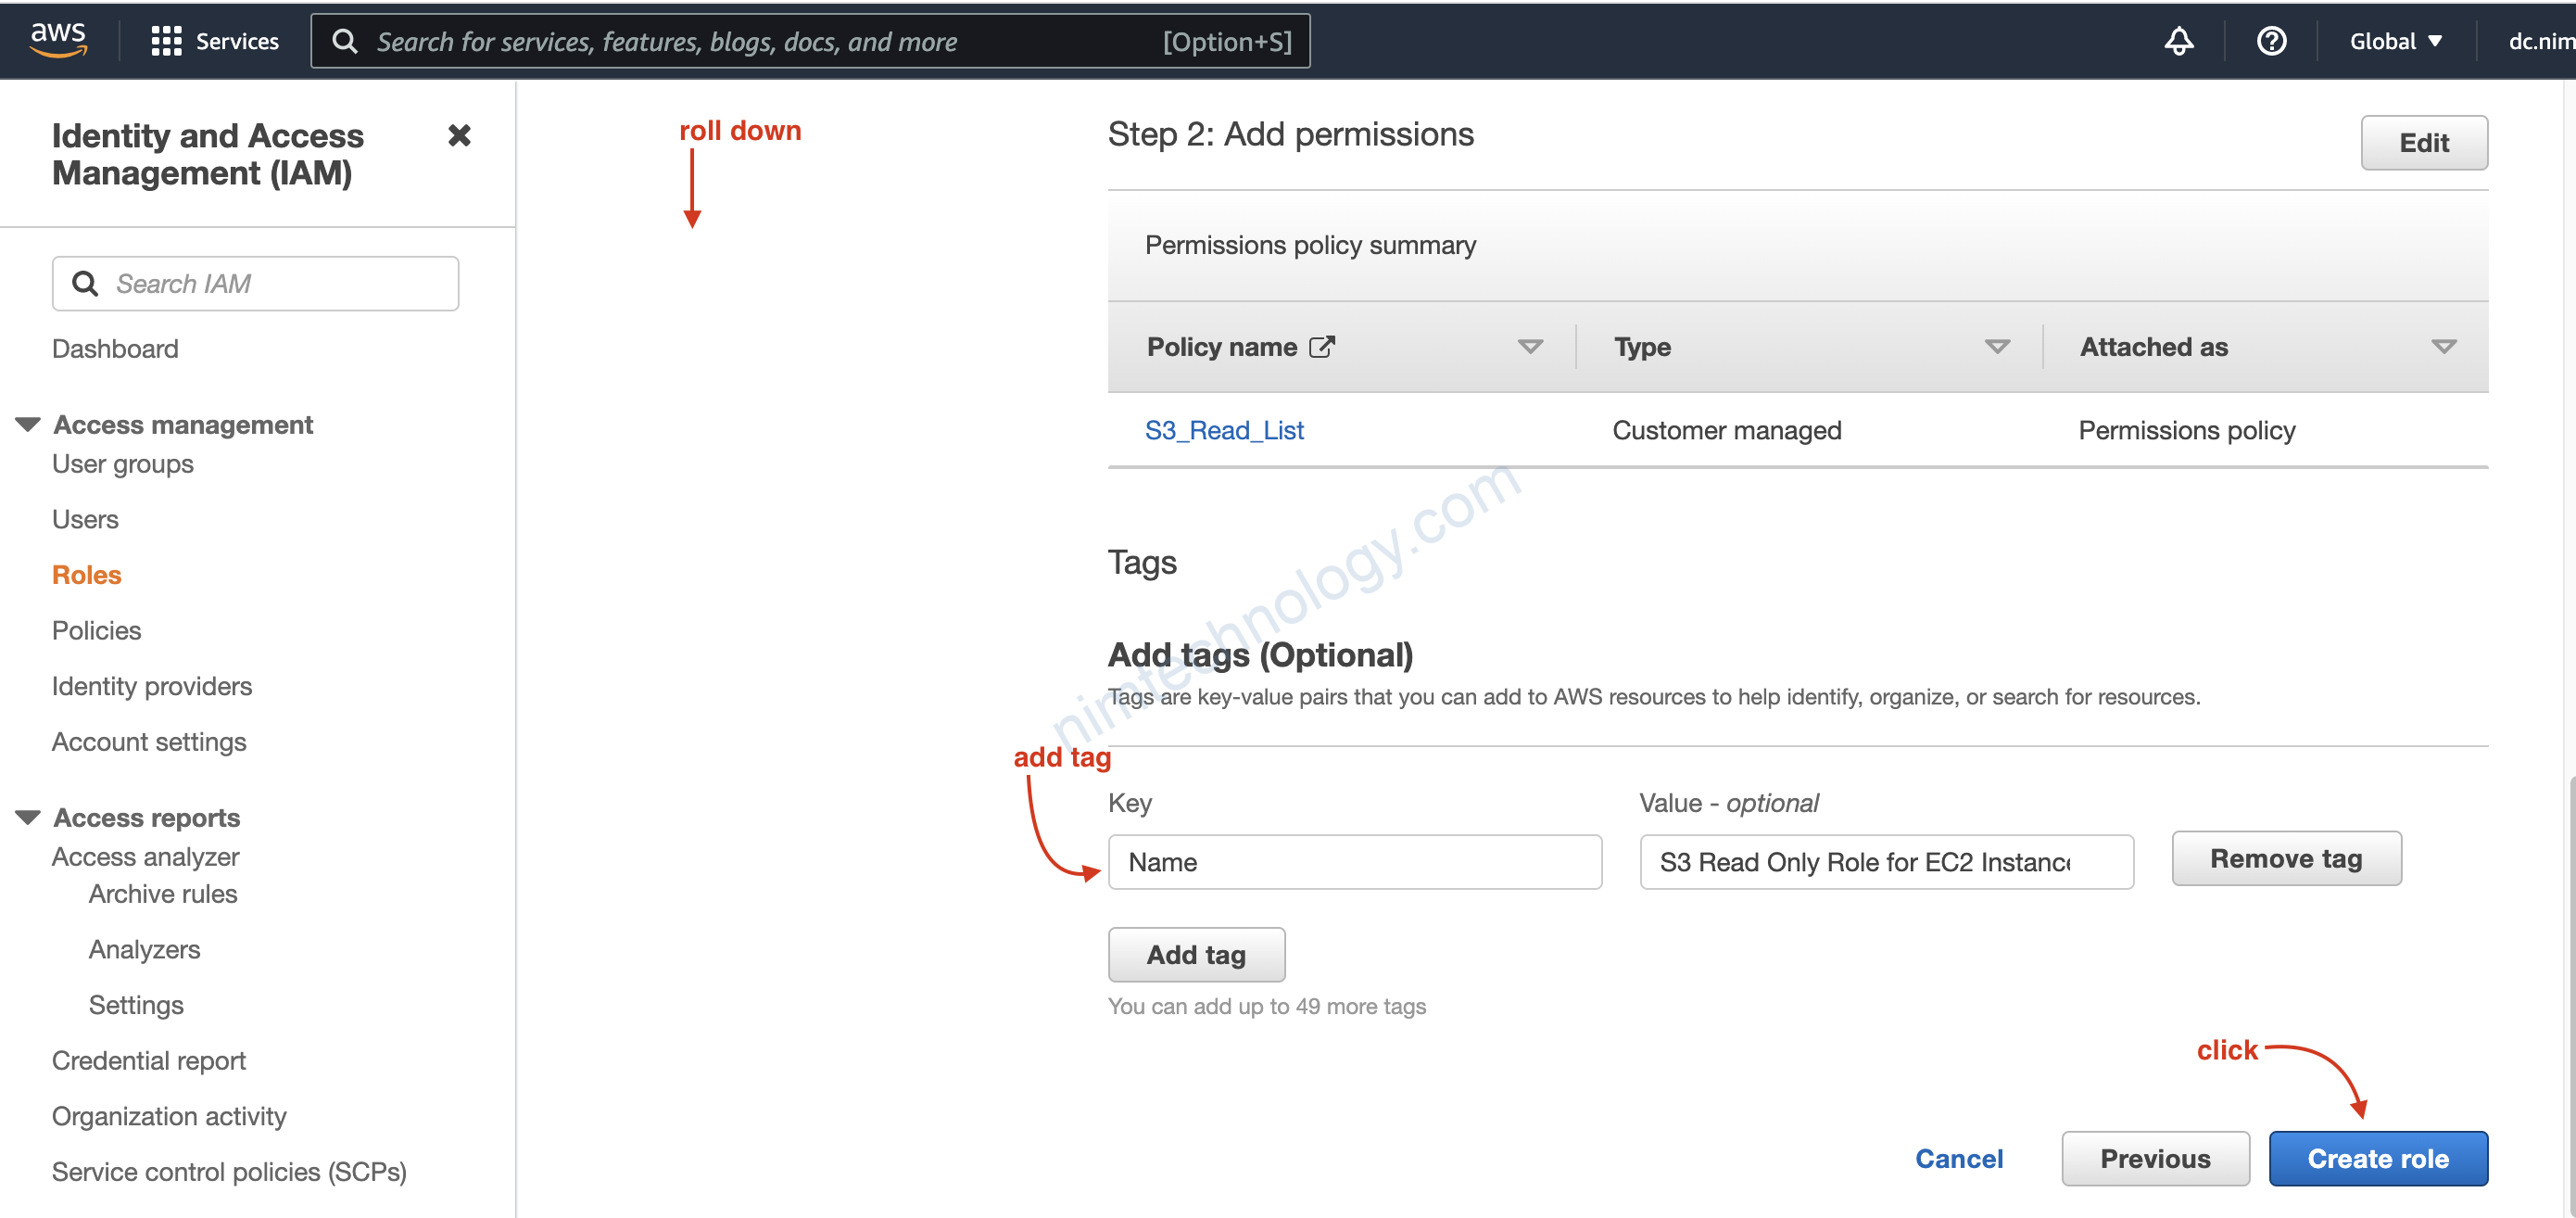
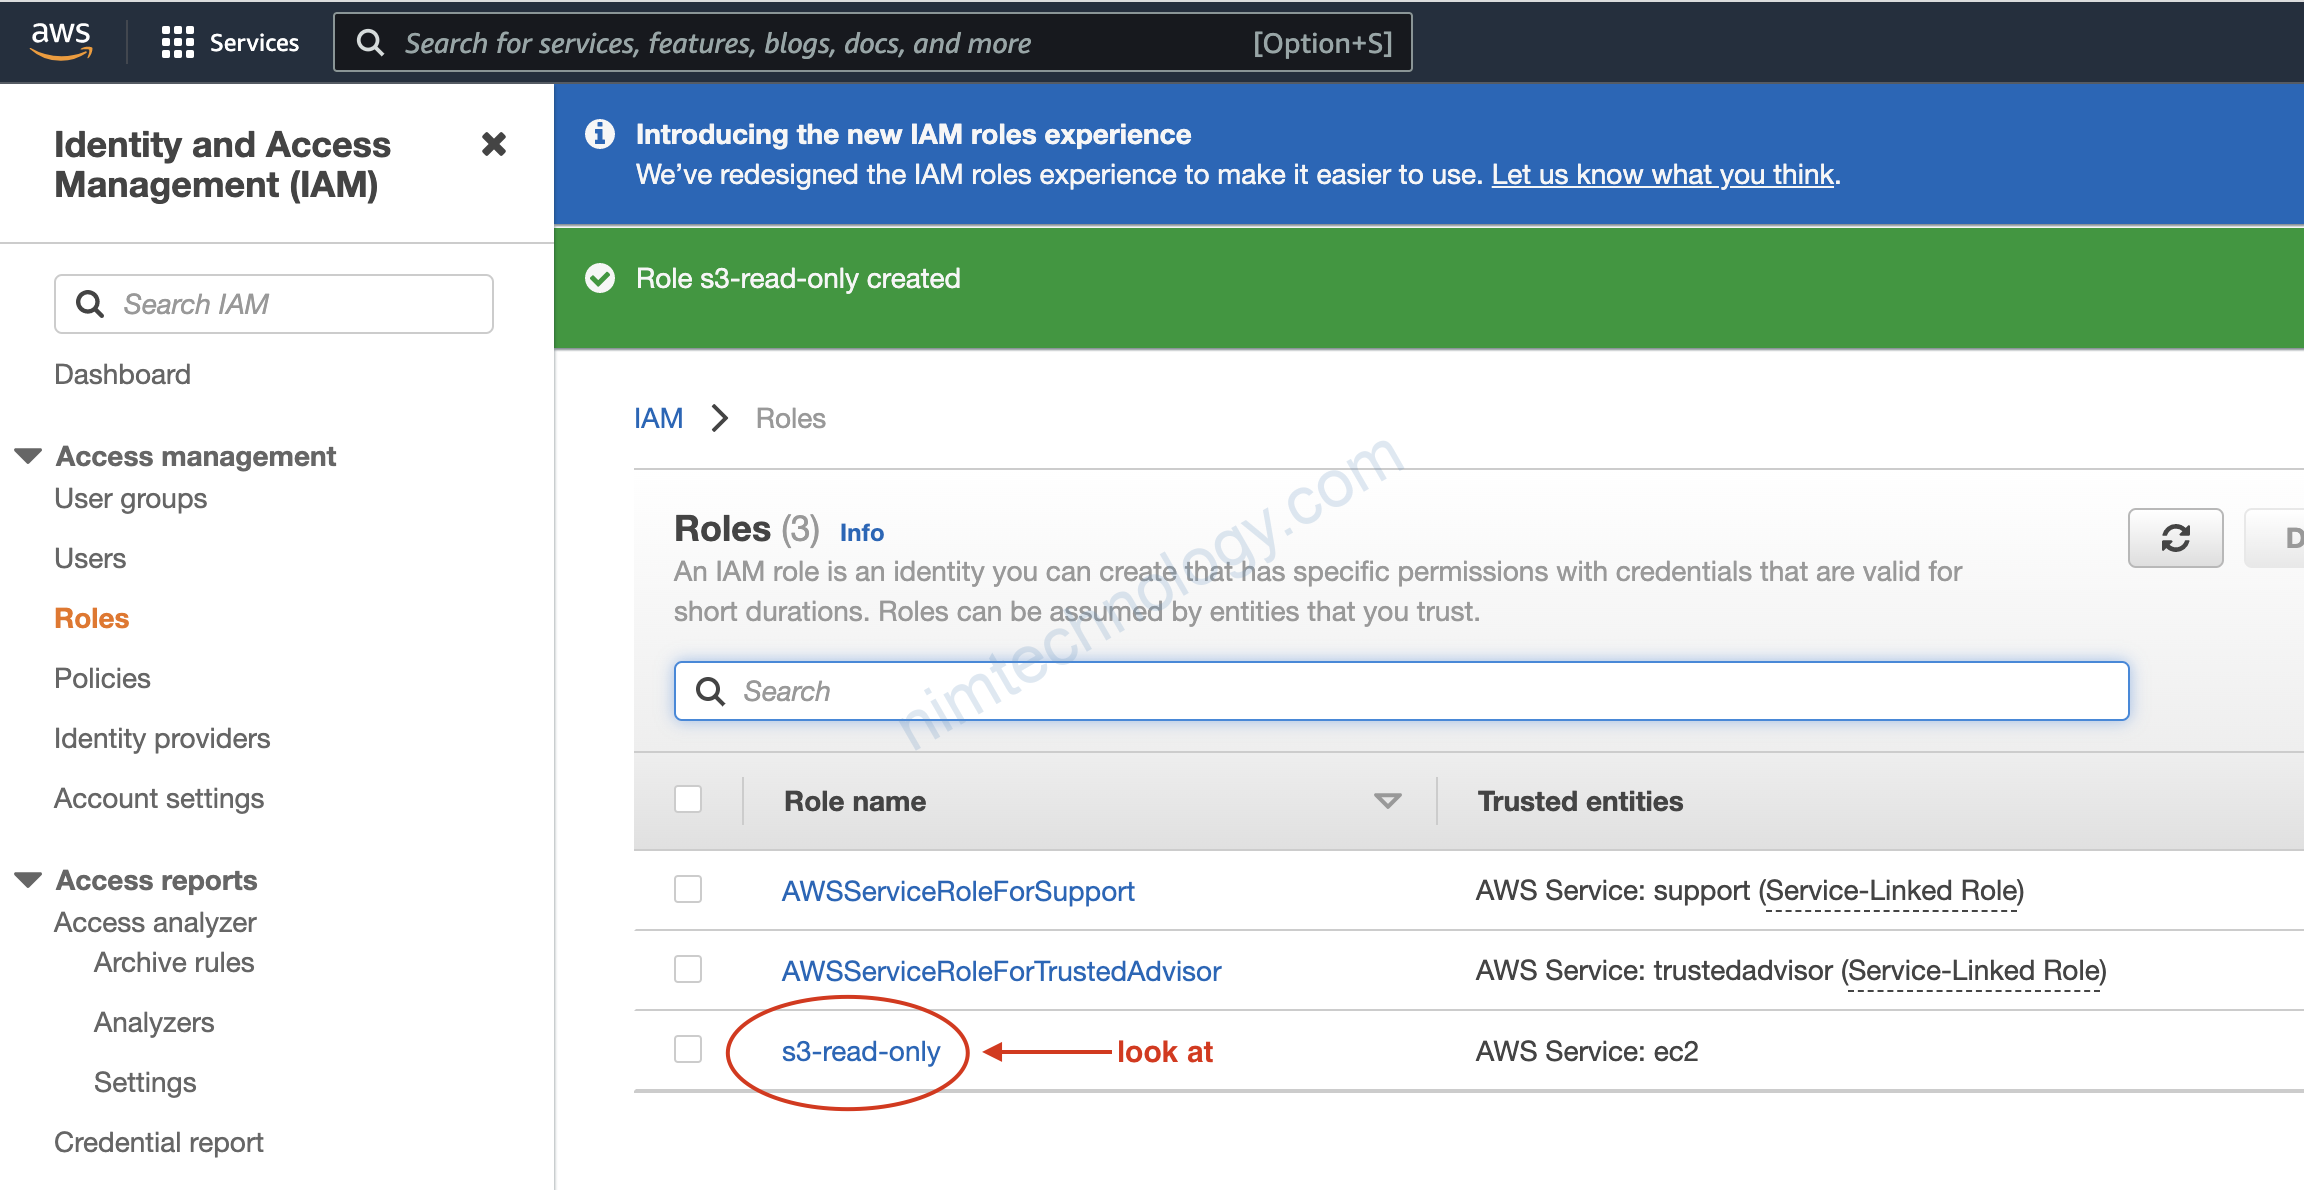
3.4) Create Role
Role bạn chỉ nhớ đơn giản dùng để grant permission từ Service A đến service B
ví dụ. Ec2 có thể list và read S3
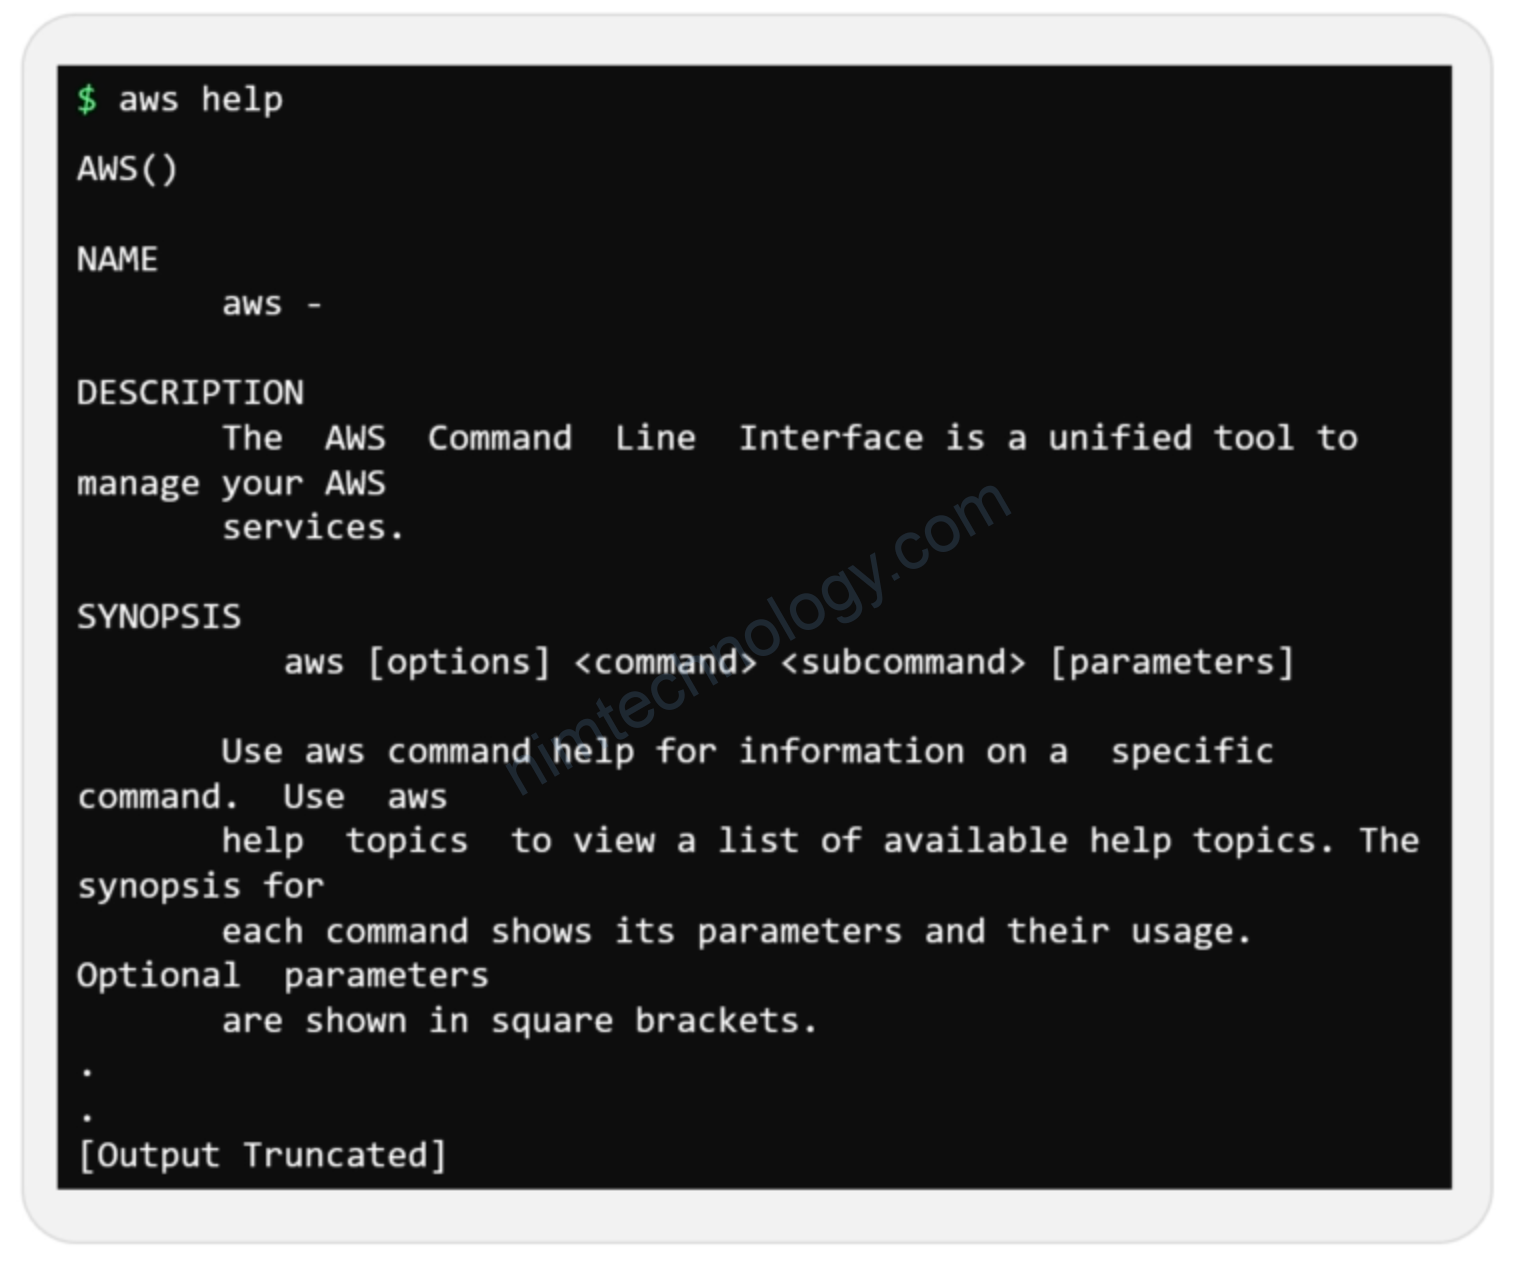
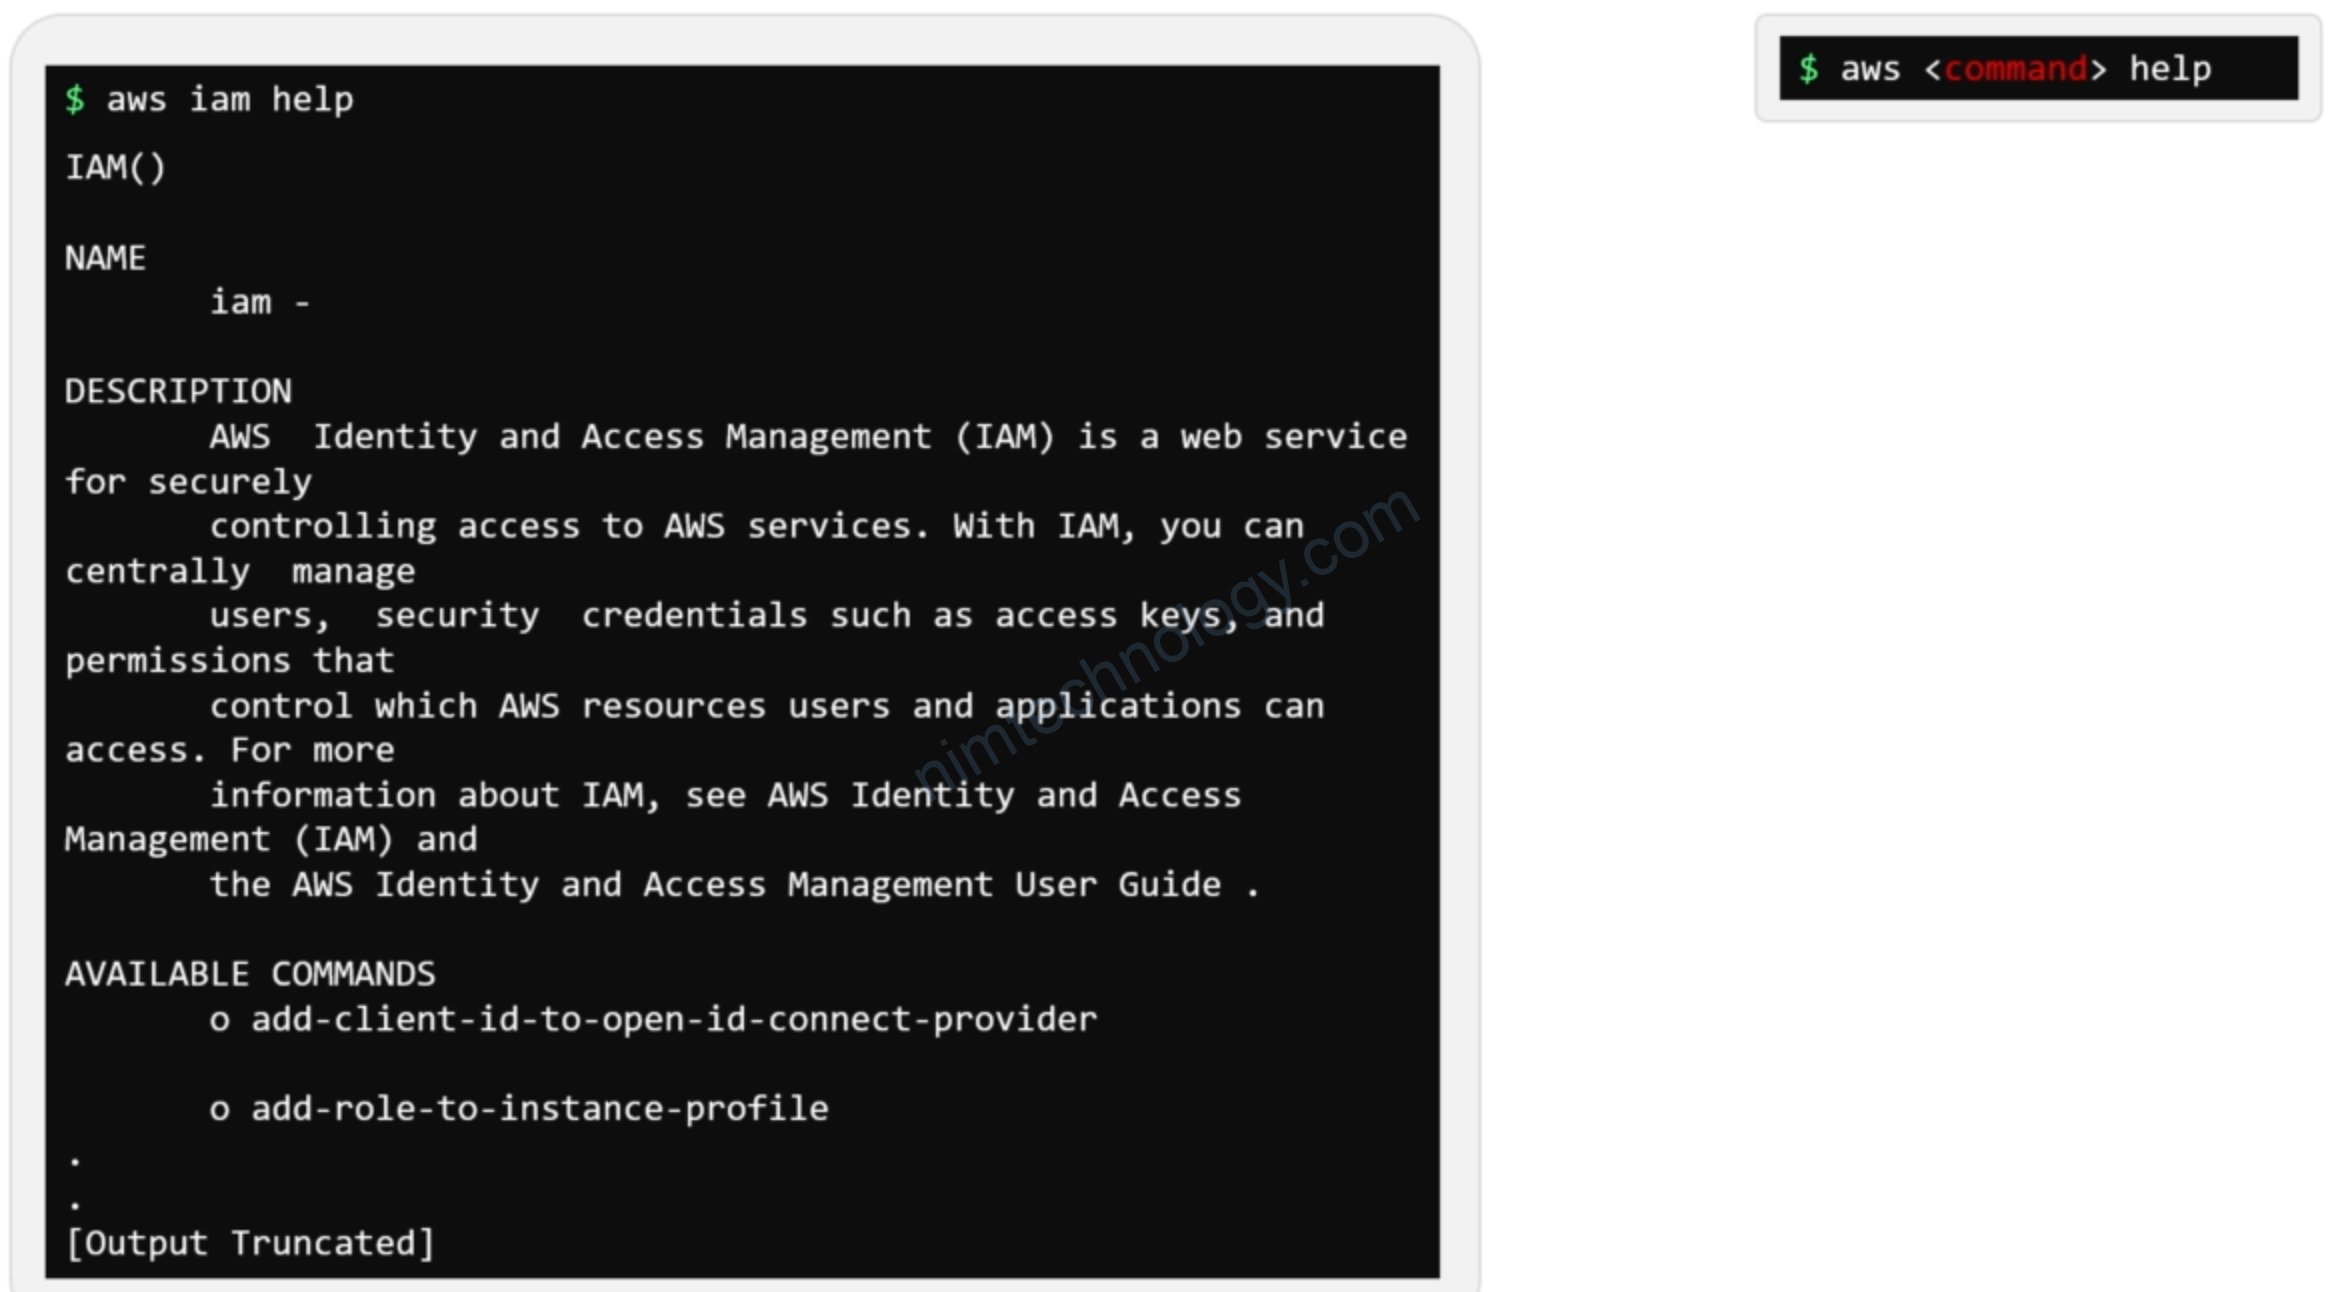
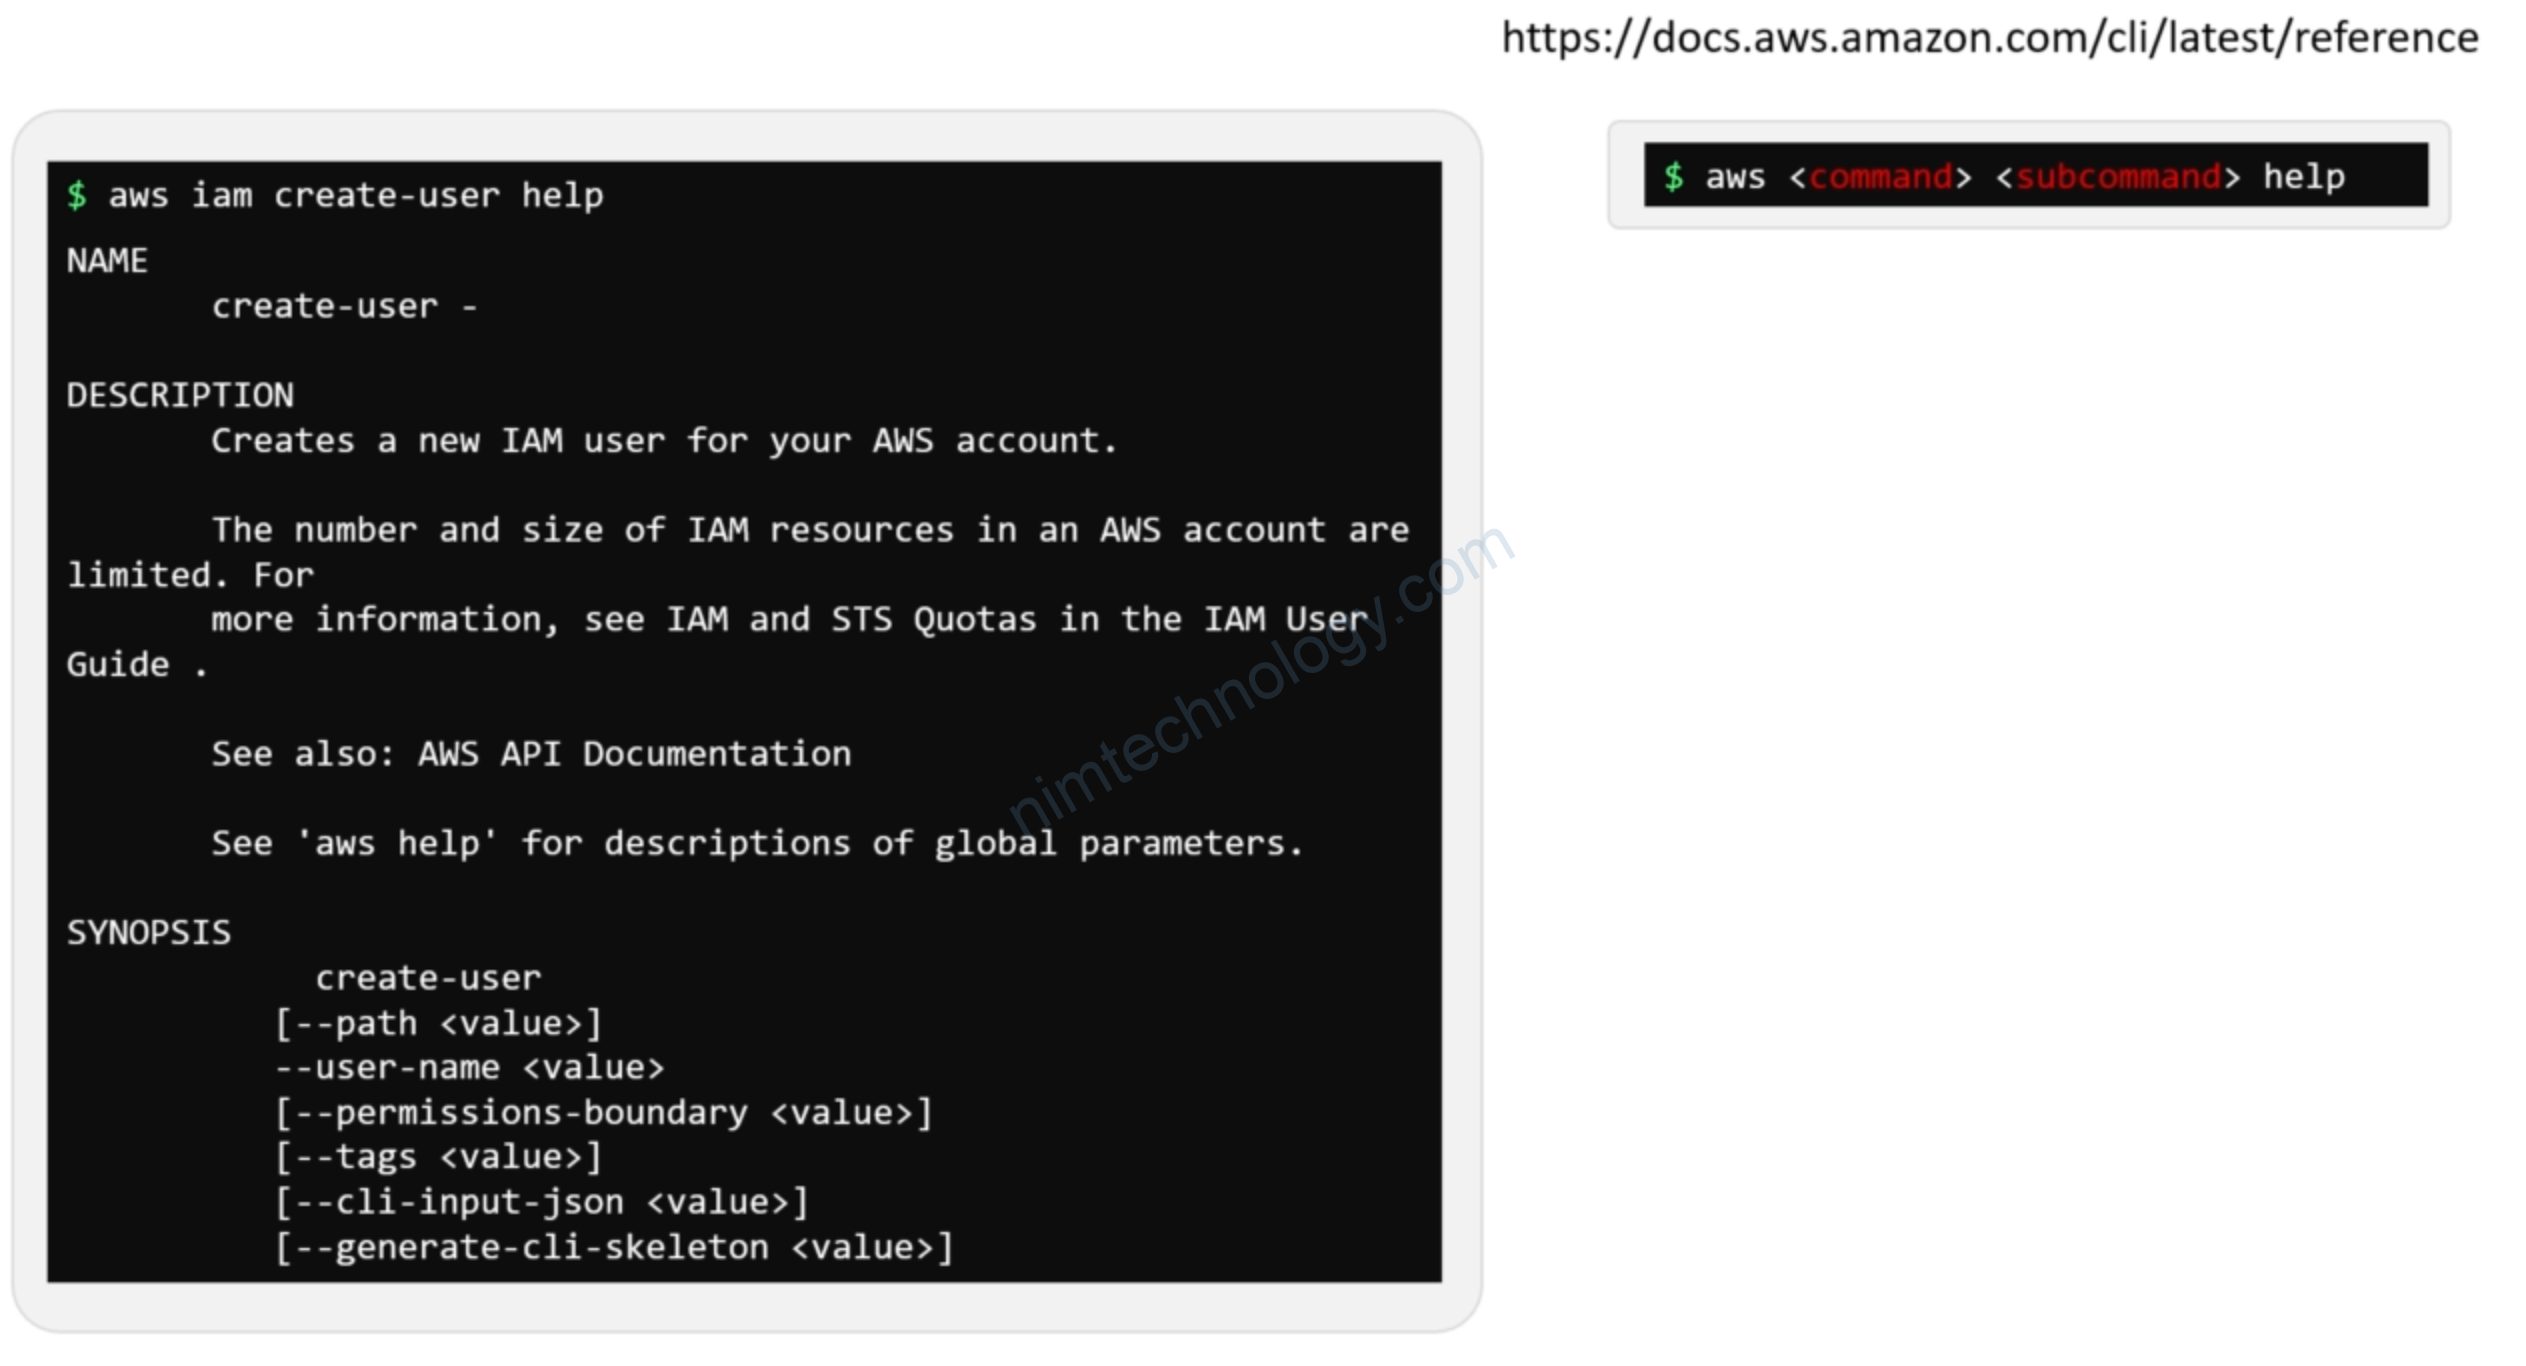
4) Programmatic Access
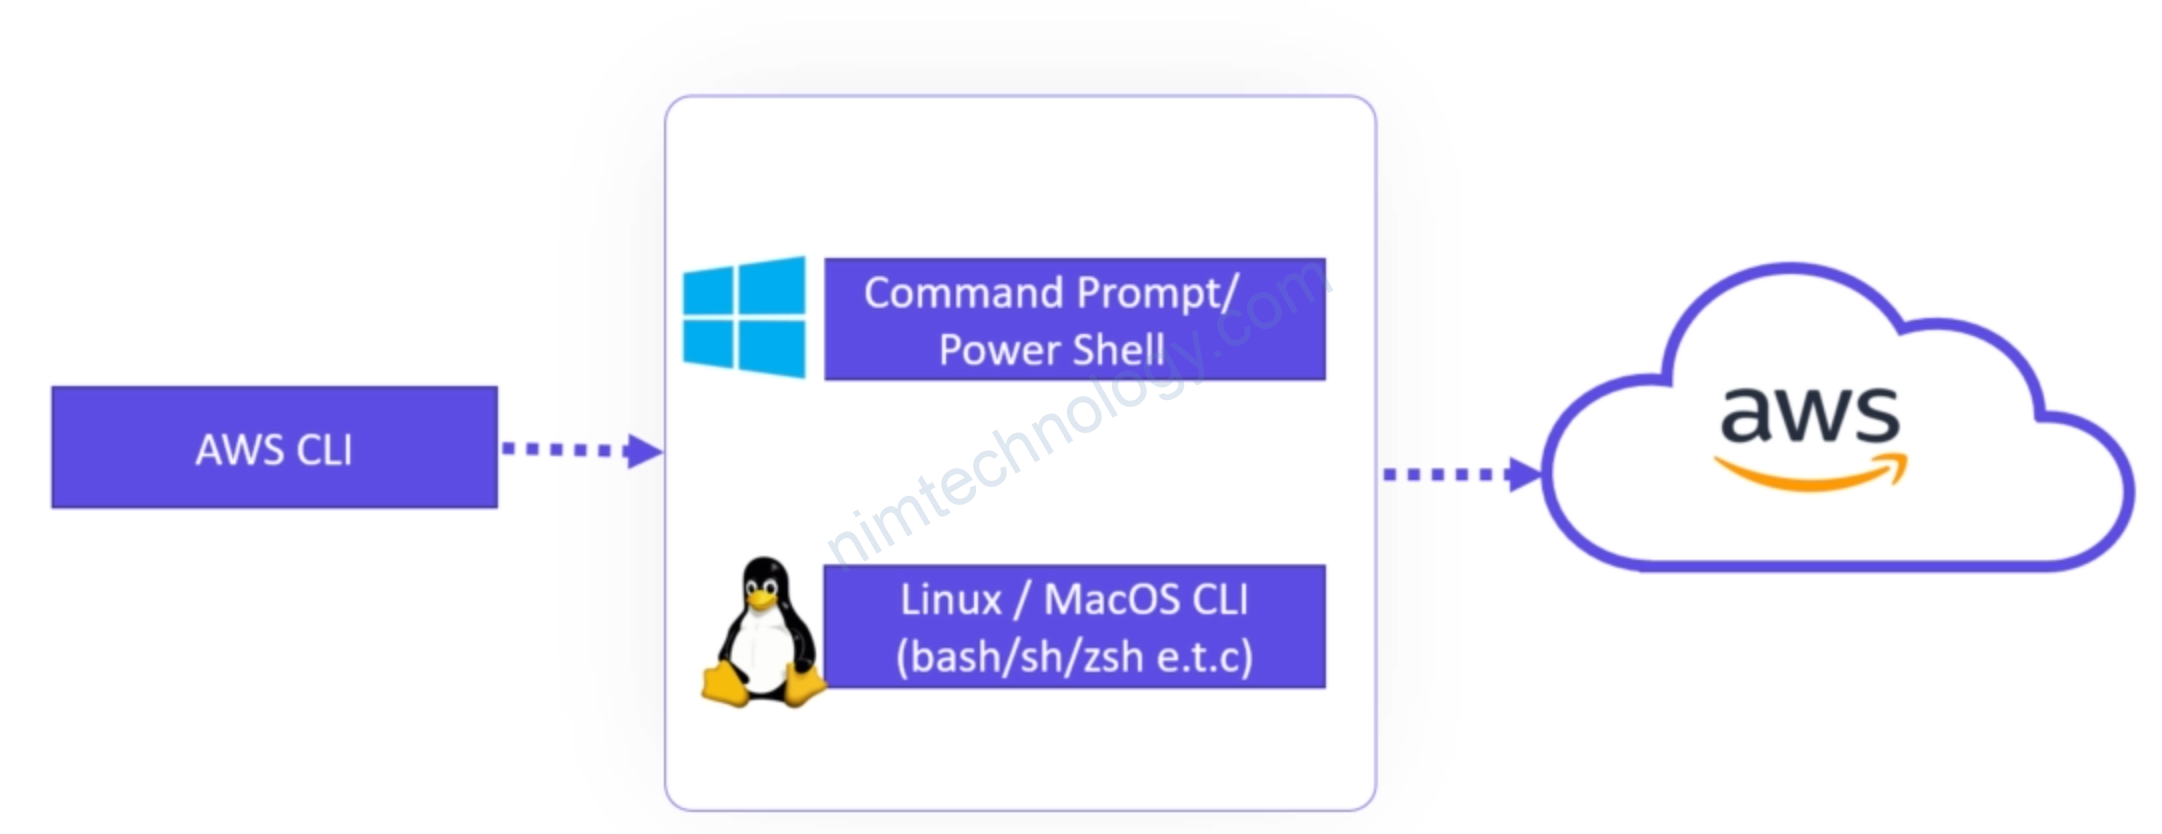
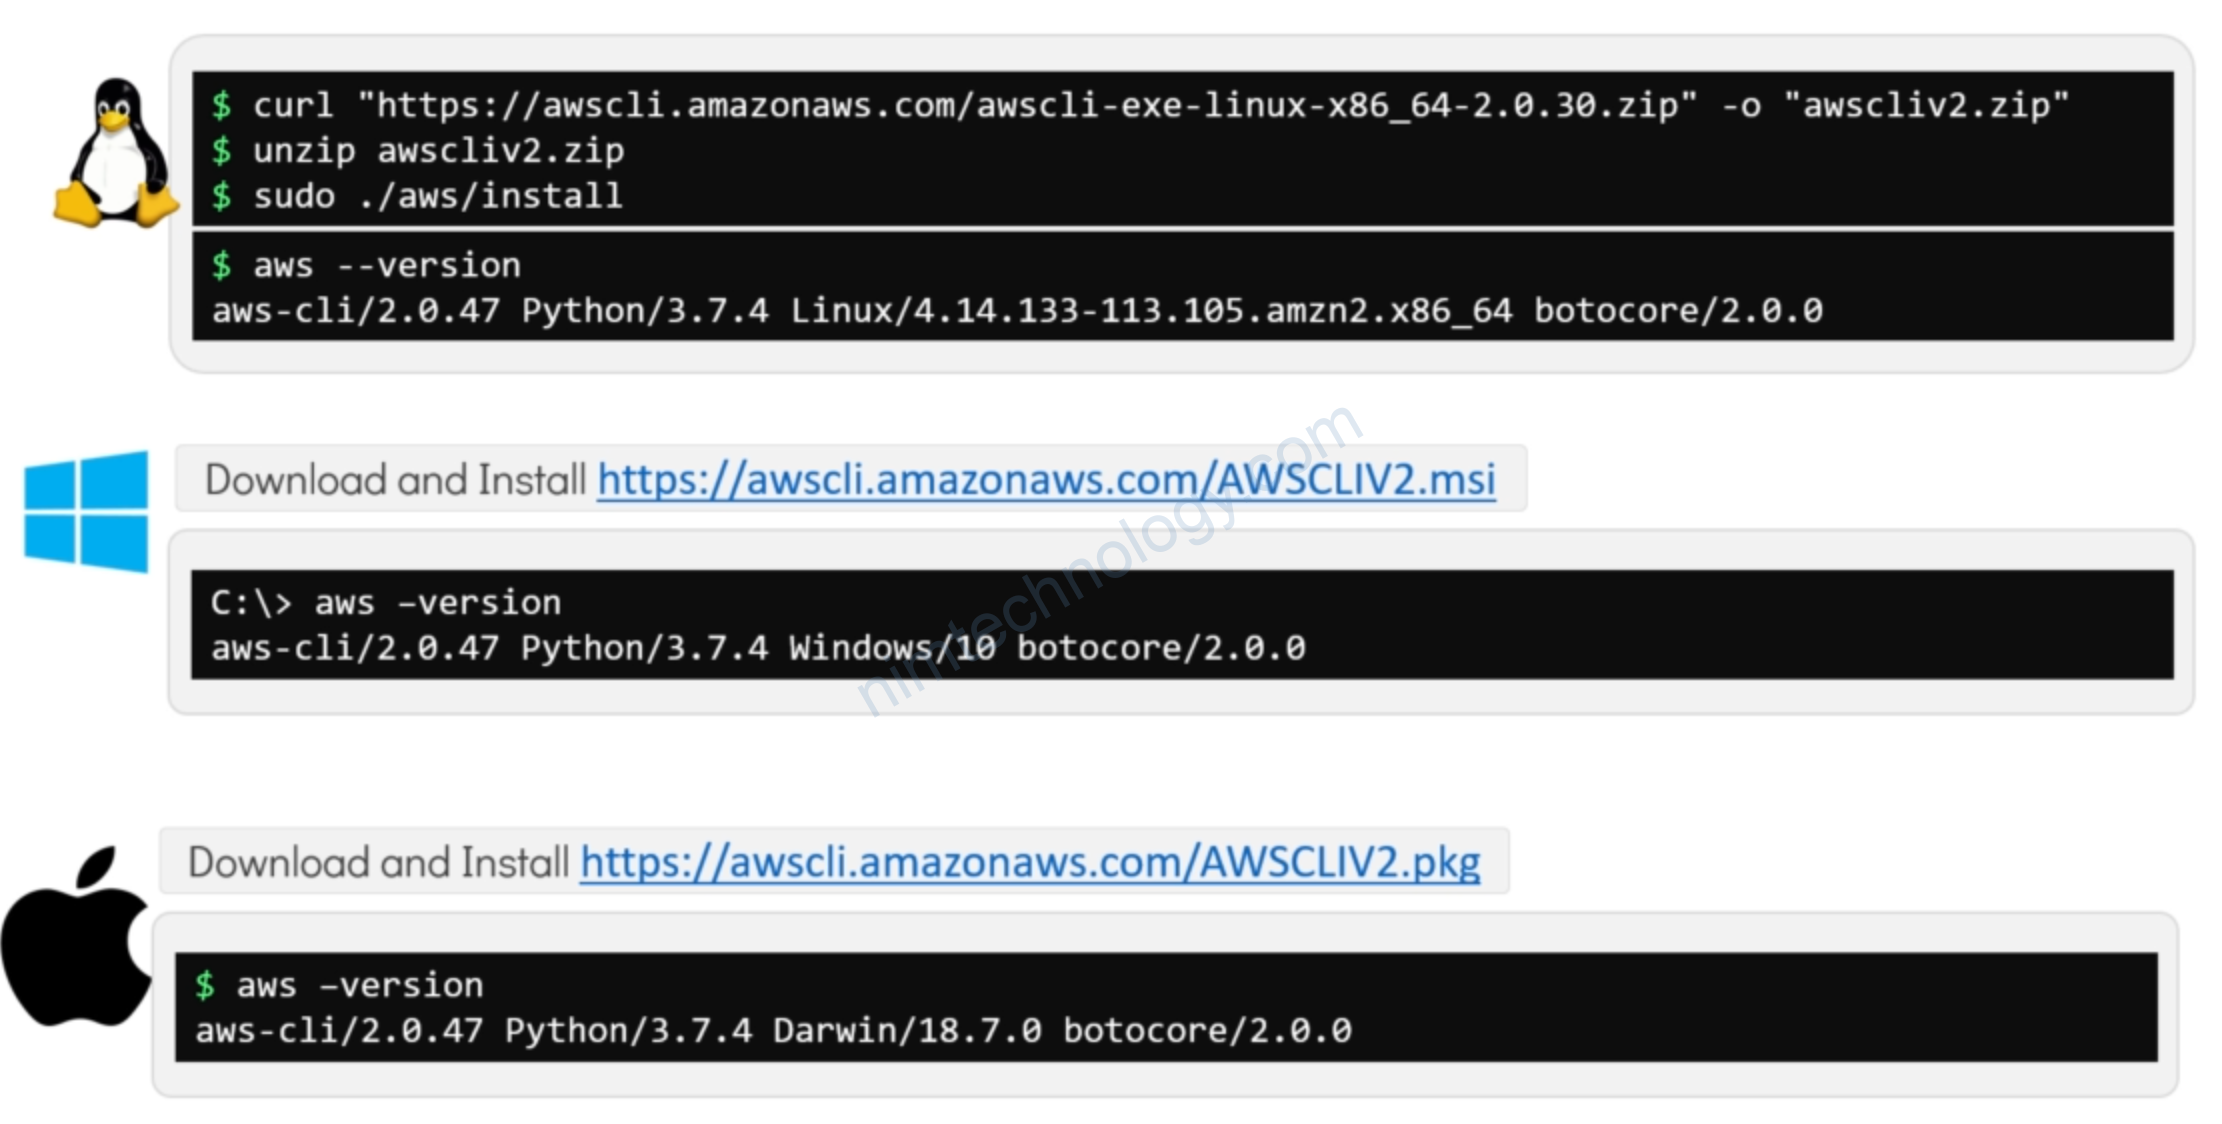
Mình sẽ cài lên ubuntu:
https://docs.aws.amazon.com/cli/latest/userguide/getting-started-install.html
curl "https://awscli.amazonaws.com/awscli-exe-linux-x86_64.zip" -o "awscliv2.zip"
unzip awscliv2.zip
sudo ./aws/install
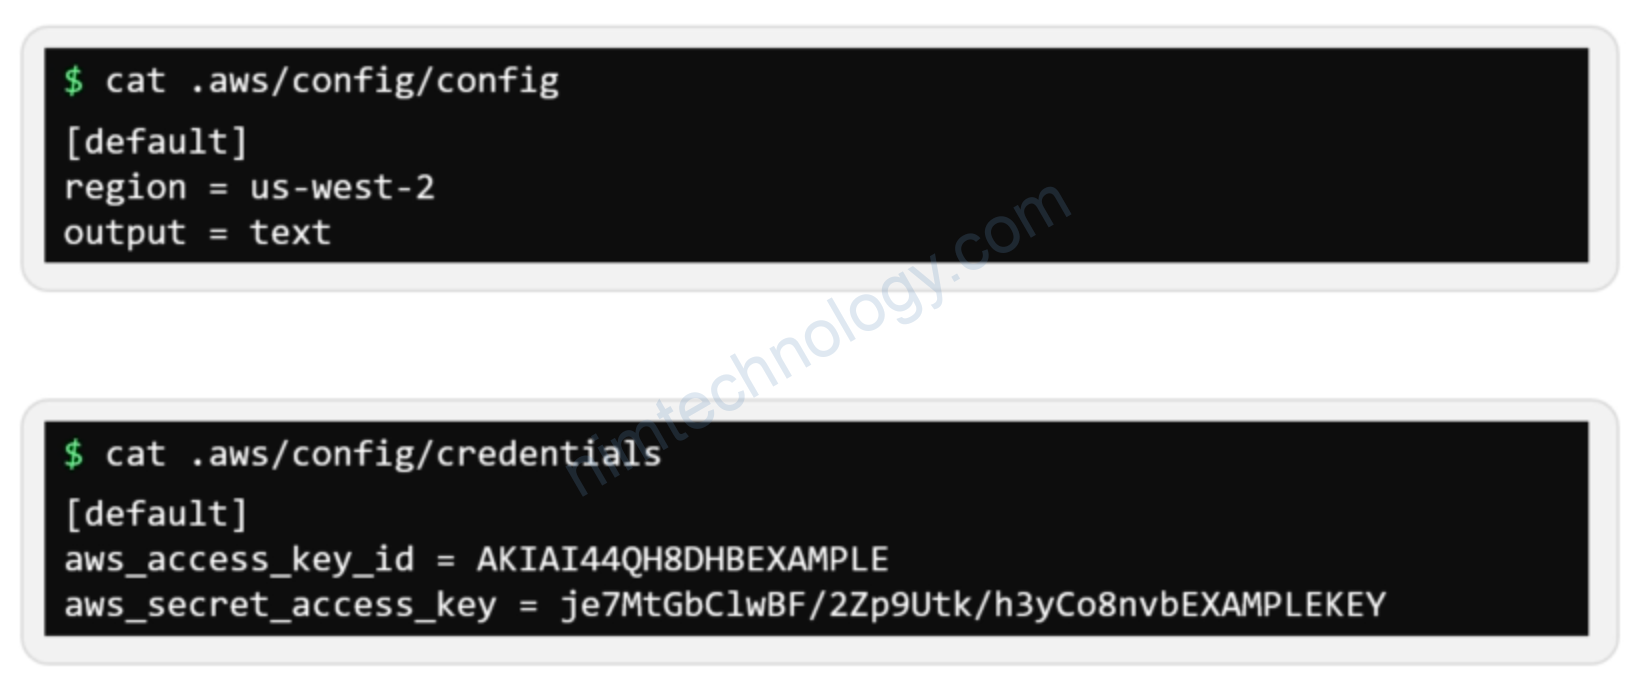
aws configure
AWS Access Key ID [None]: AKIATU2QSHII6XXXXX
AWS Secret Access Key [None]: rVGnya6x6VoLFgXYOGs0D2Ir+MXXXXXX
Default region name [None]: us-west-2
Default output format [None]: json
Bạn có thể kiểm tra lại configure
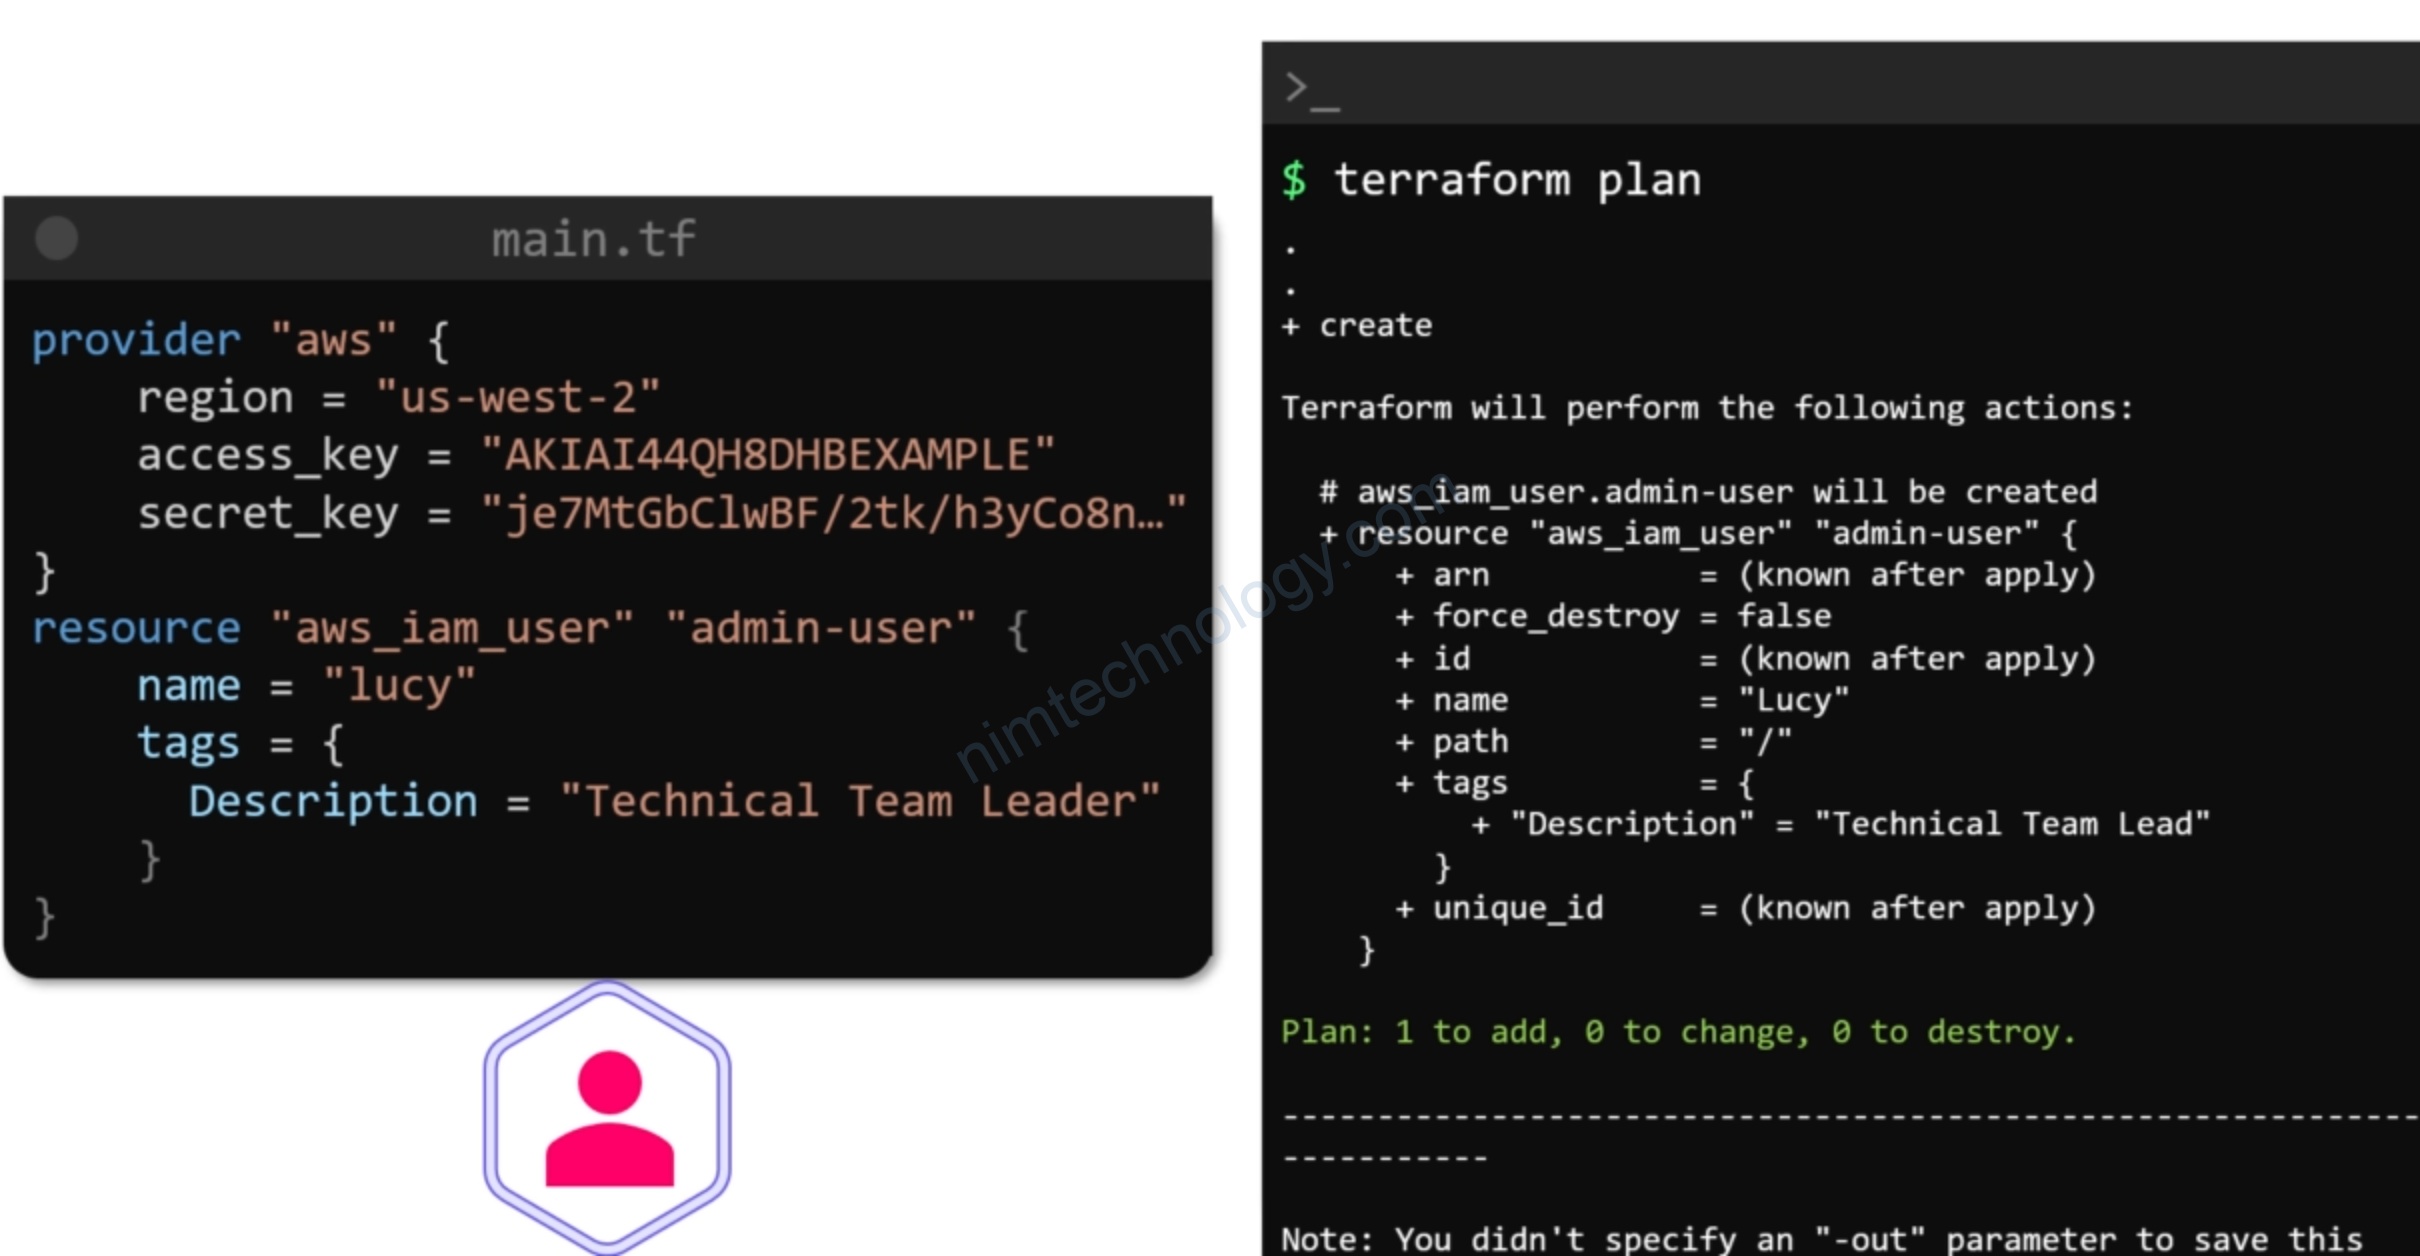
5) AWS IAM with Terraform
https://registry.terraform.io/providers/hashicorp/aws/latest/docs/resources/iam_user
Ngoài resource chúng ta còn cần cấu hình provider
https://registry.terraform.io/providers/hashicorp/aws/latest/docs#provider-configuration
provider "aws" {
  region     = "us-west-2"
  access_key = "my-access-key"
  secret_key = "my-secret-key"
}
provider "aws" {
region = "us-west-2"
access_key = "AKIATU2QSHXXXXXX"
secret_key = "rVGnya6x6VoLFgXYOGs0D2Ir+Mxxxxxx"
}
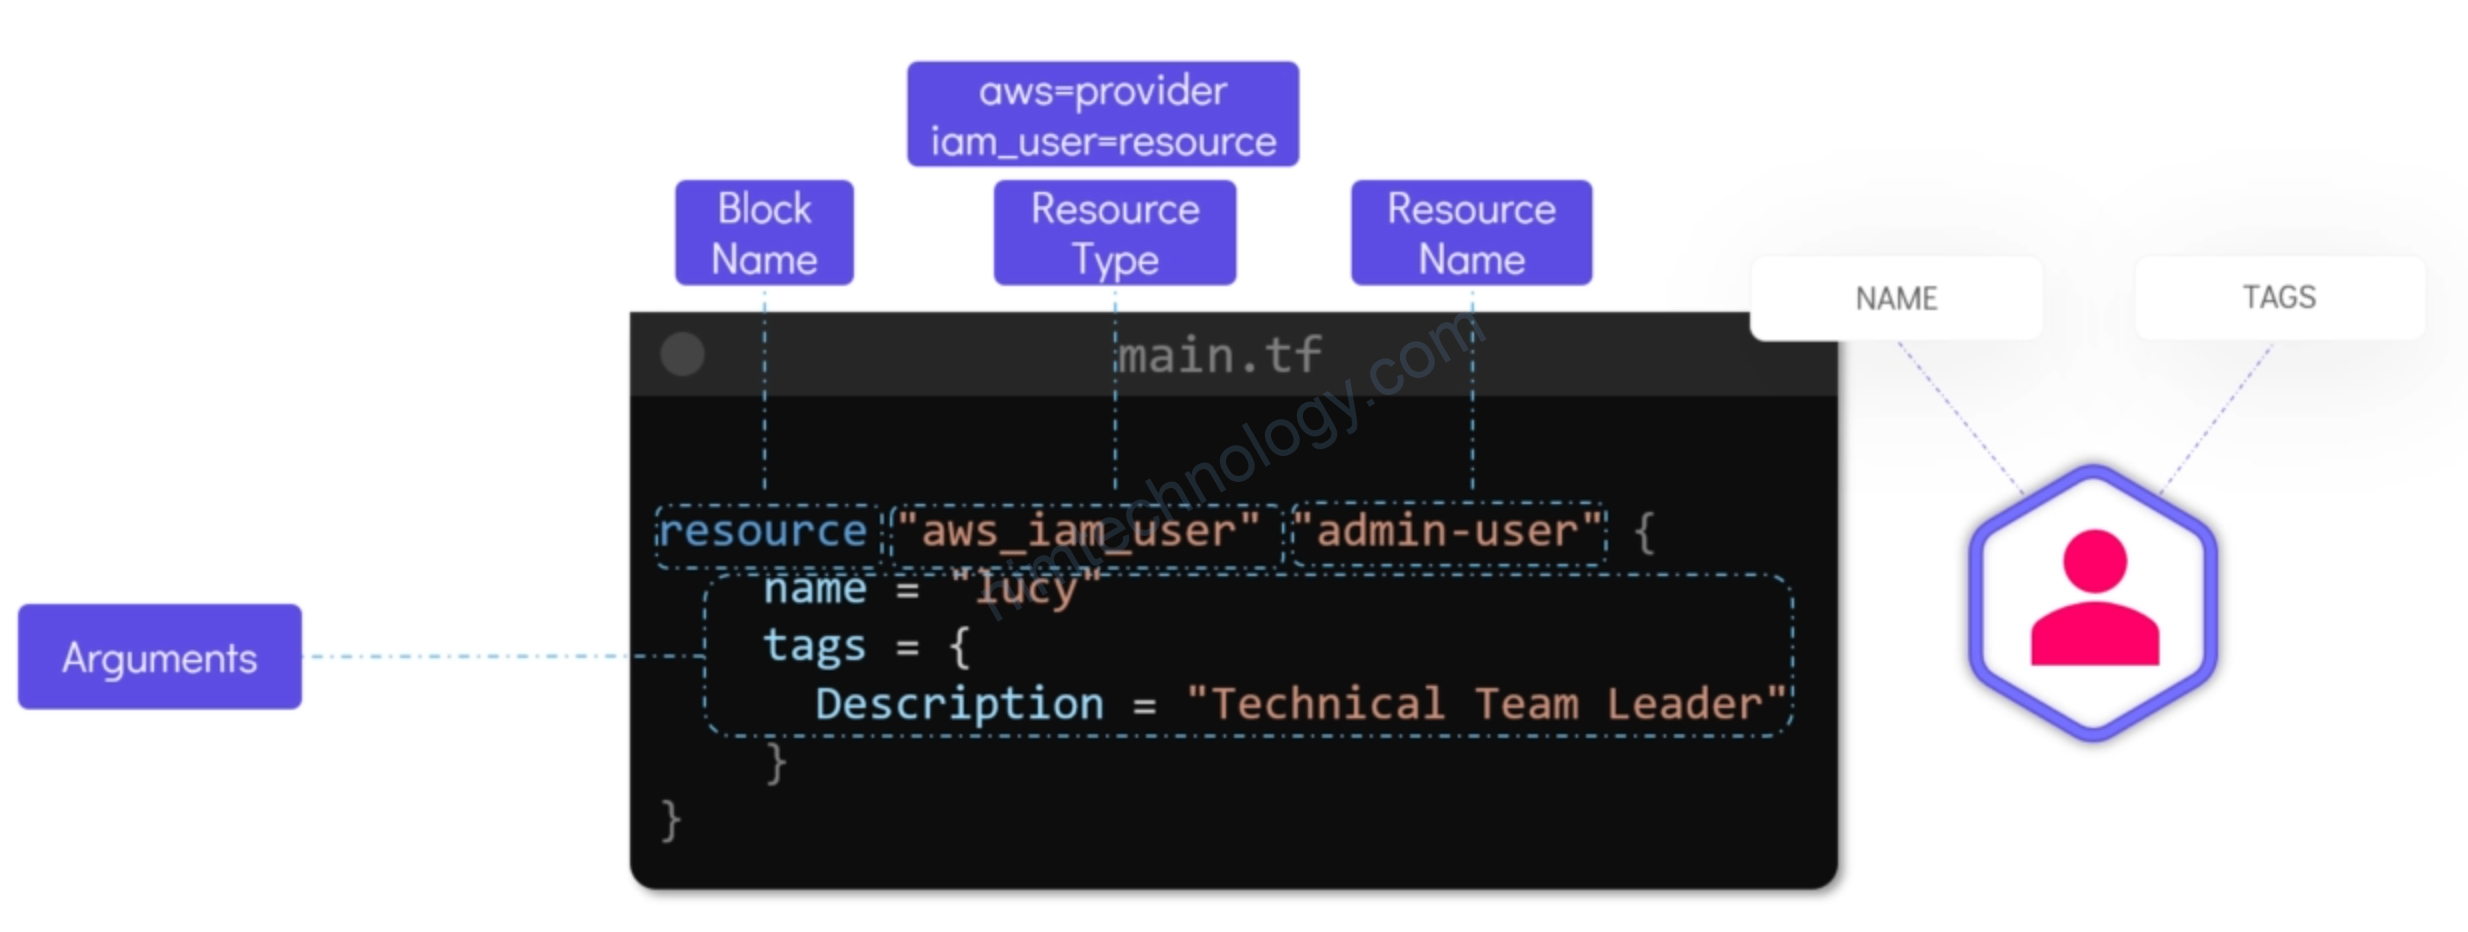
resource "aws_iam_user" "admin-user" {
name = "nim-admin"
tags = {
Description = "Devops Team Leader"
}
}
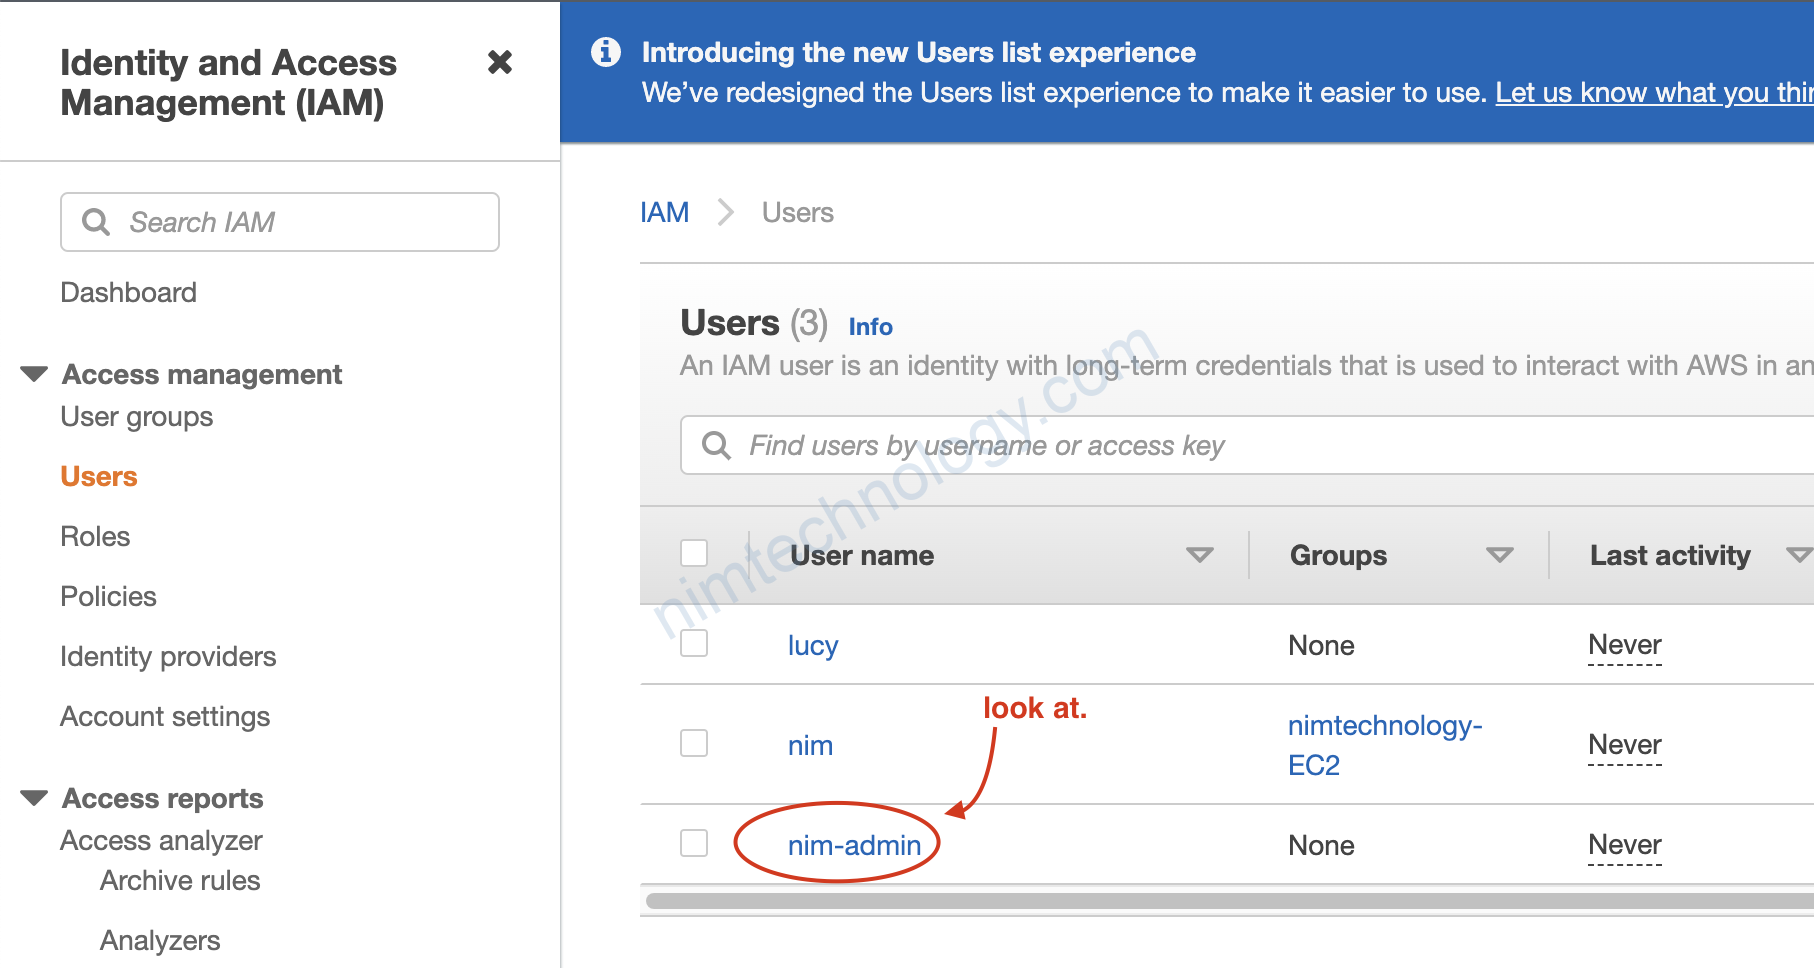
đã thành công!
Nhưng là để luôn access key và secret trên code thì hơi nguy hiểm?
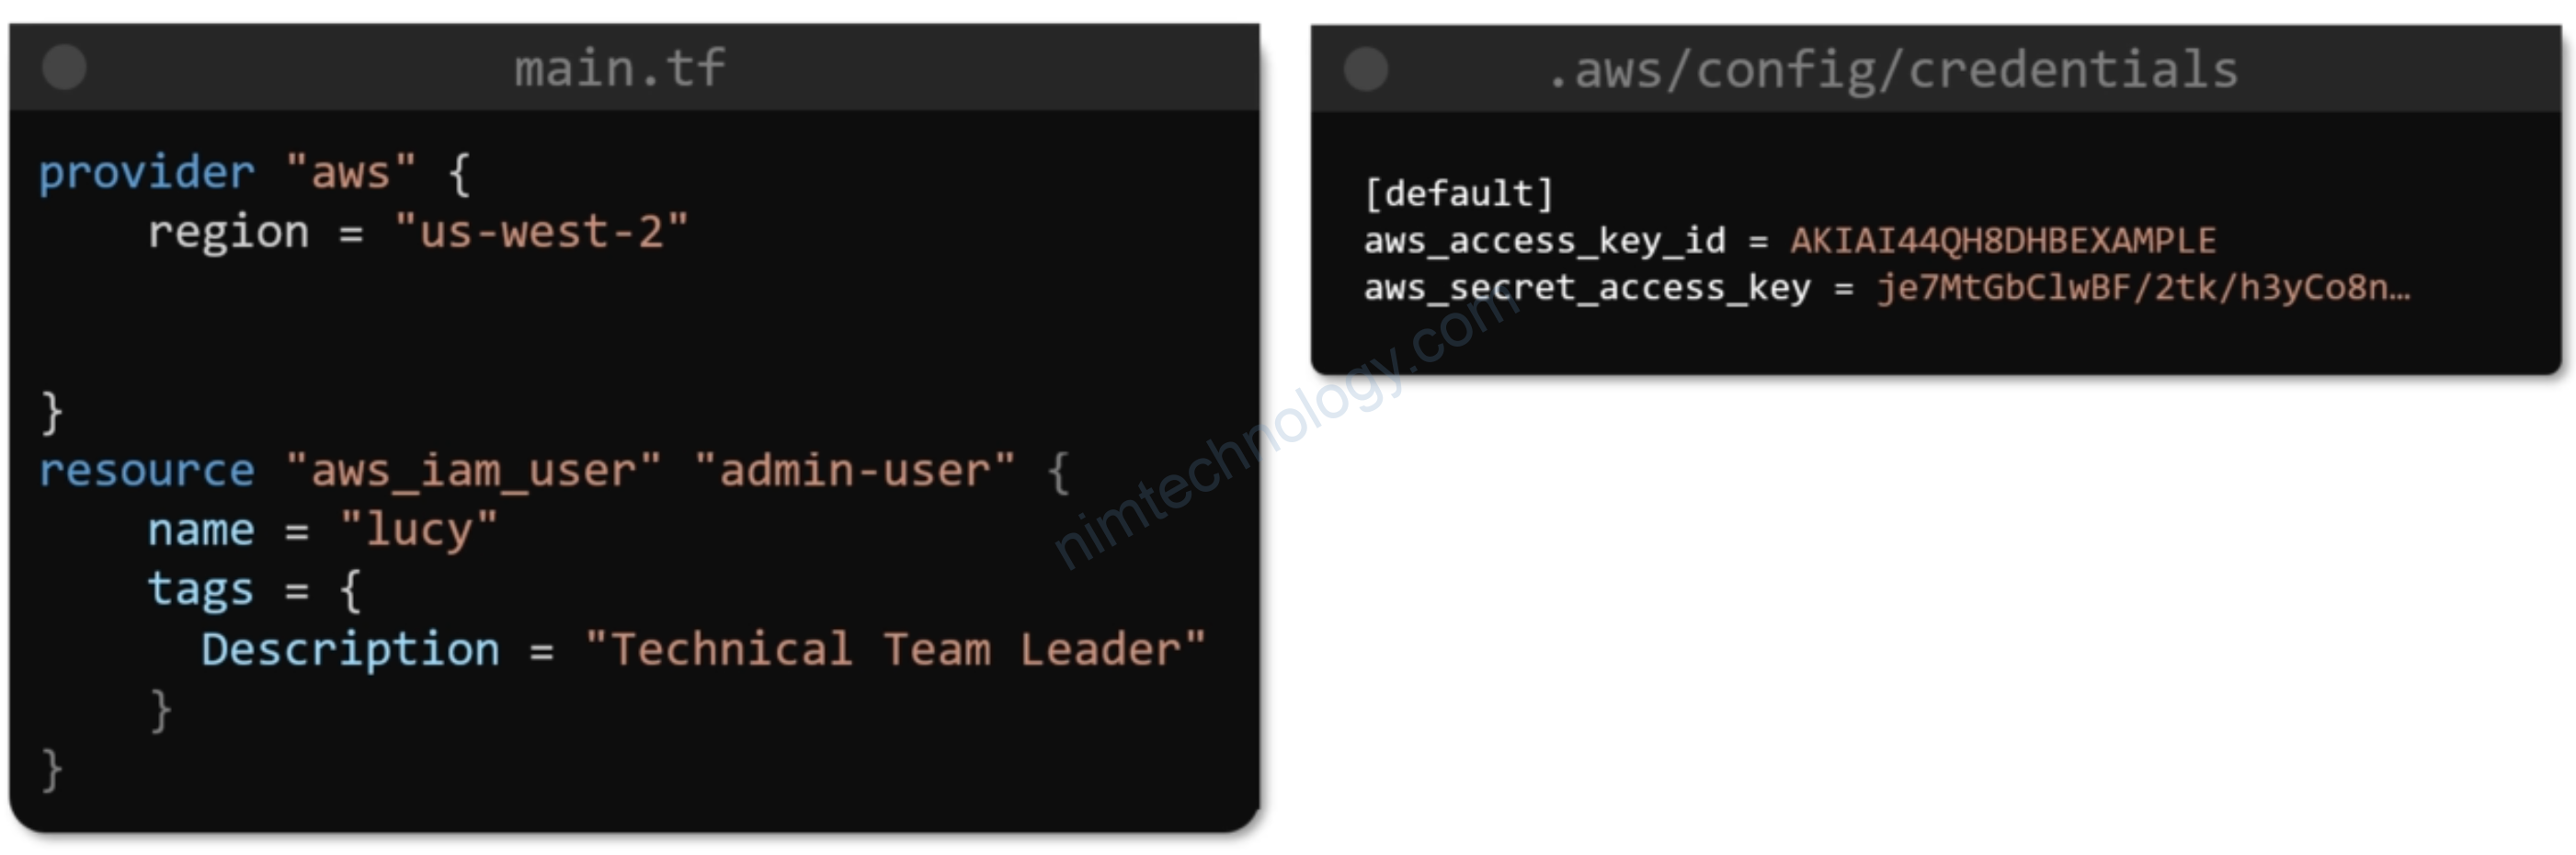
provider "aws" {
  shared_config_files      = ["/Users/tf_user/.aws/conf"]
  shared_credentials_files = ["/Users/tf_user/.aws/creds"]
  profile                  = "customprofile"
}
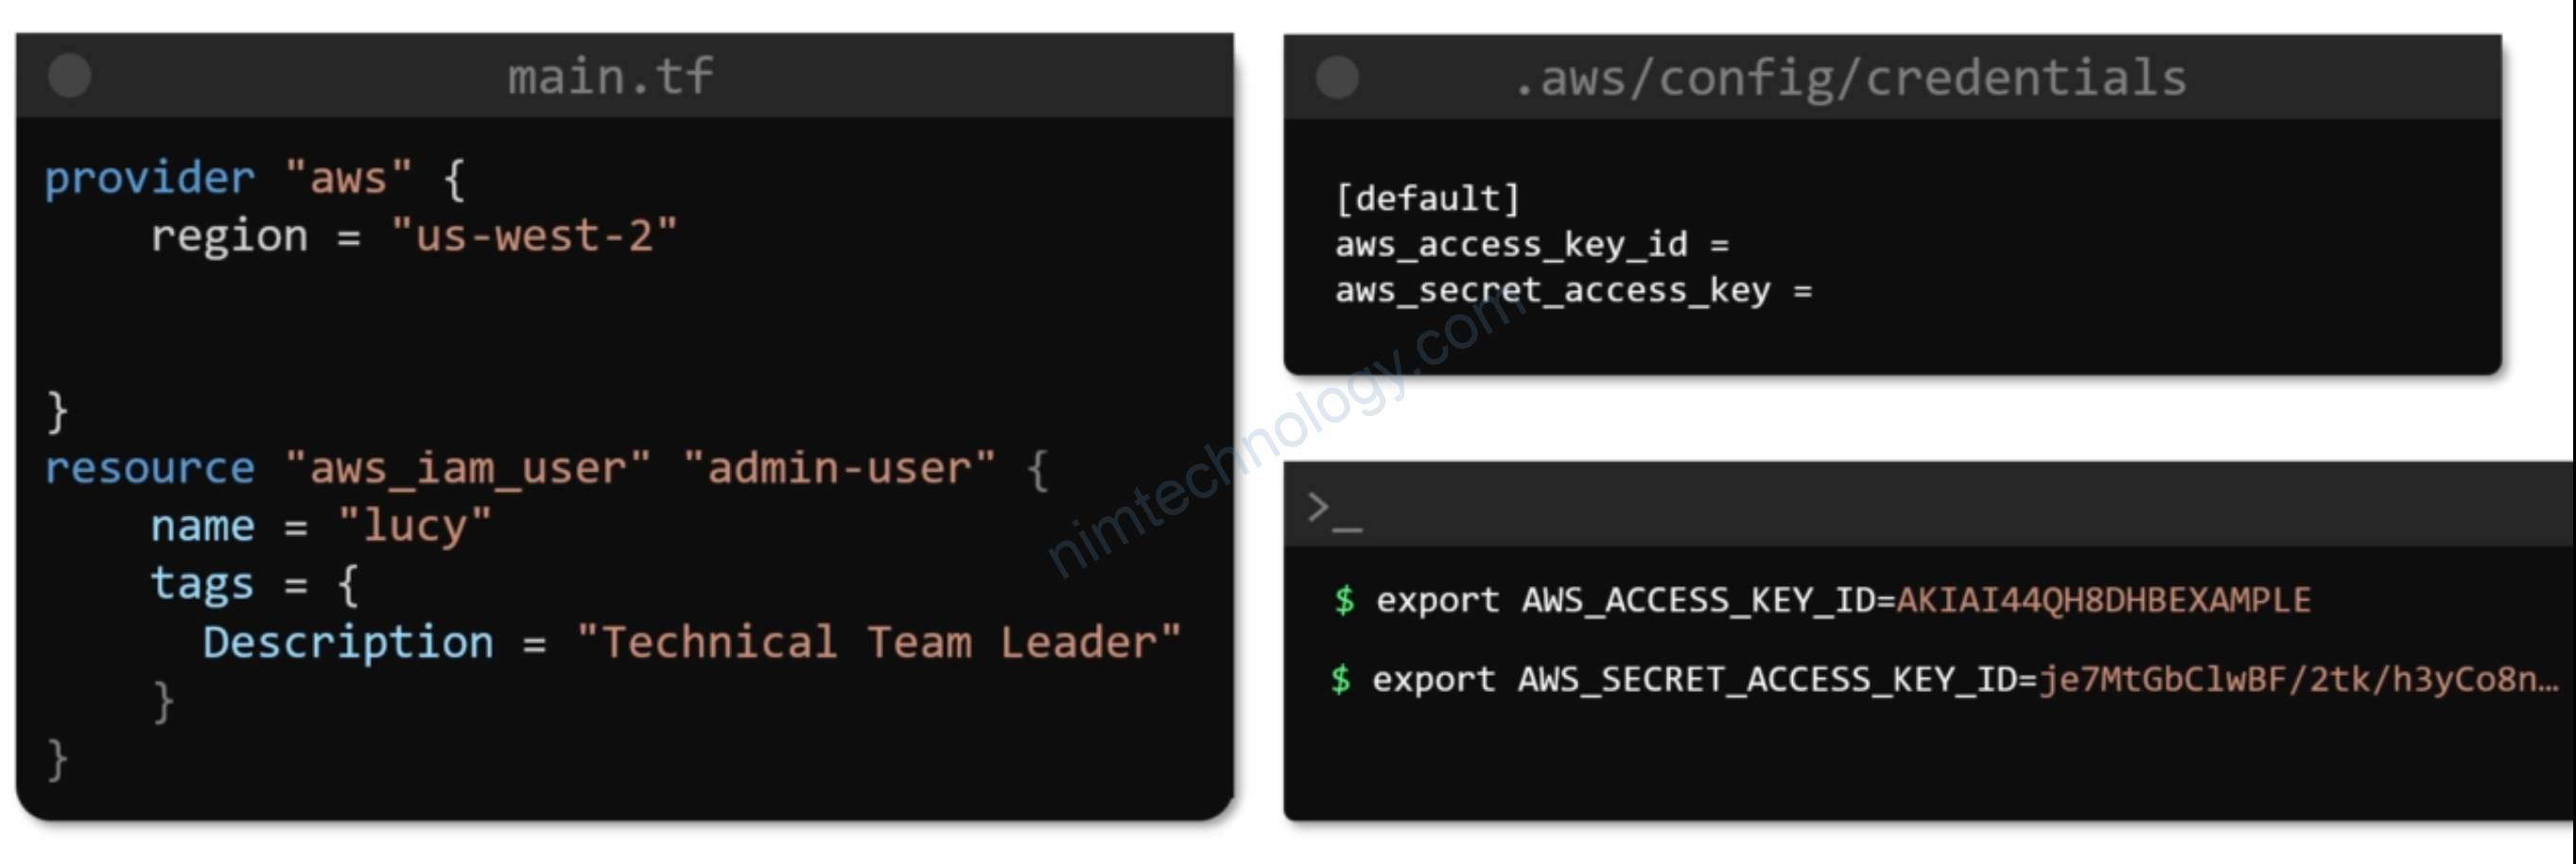
https://registry.terraform.io/providers/hashicorp/aws/latest/docs#environment-variables
provider "aws" {}
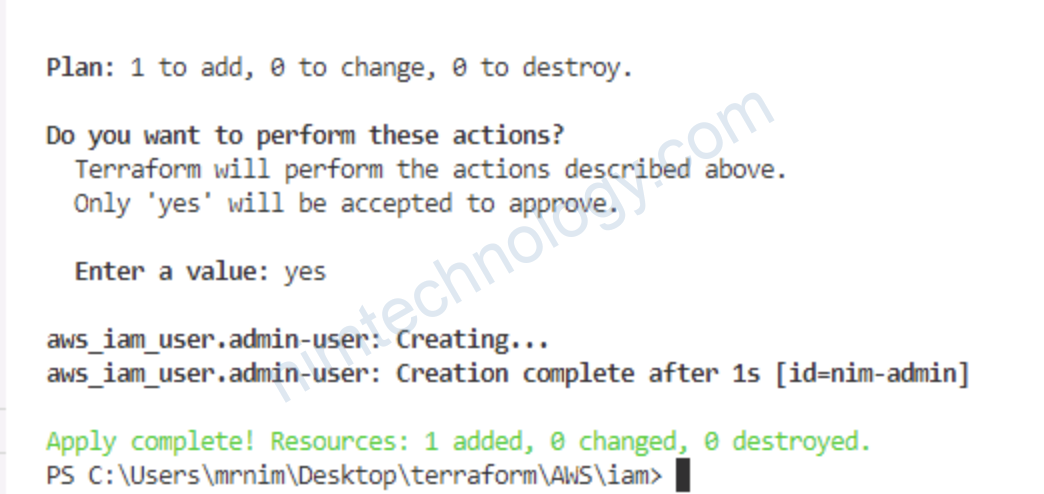
$ export AWS_ACCESS_KEY_ID="anaccesskey"
$ export AWS_SECRET_ACCESS_KEY="asecretkey"
$ export AWS_REGION="us-west-2"
$ terraform plan
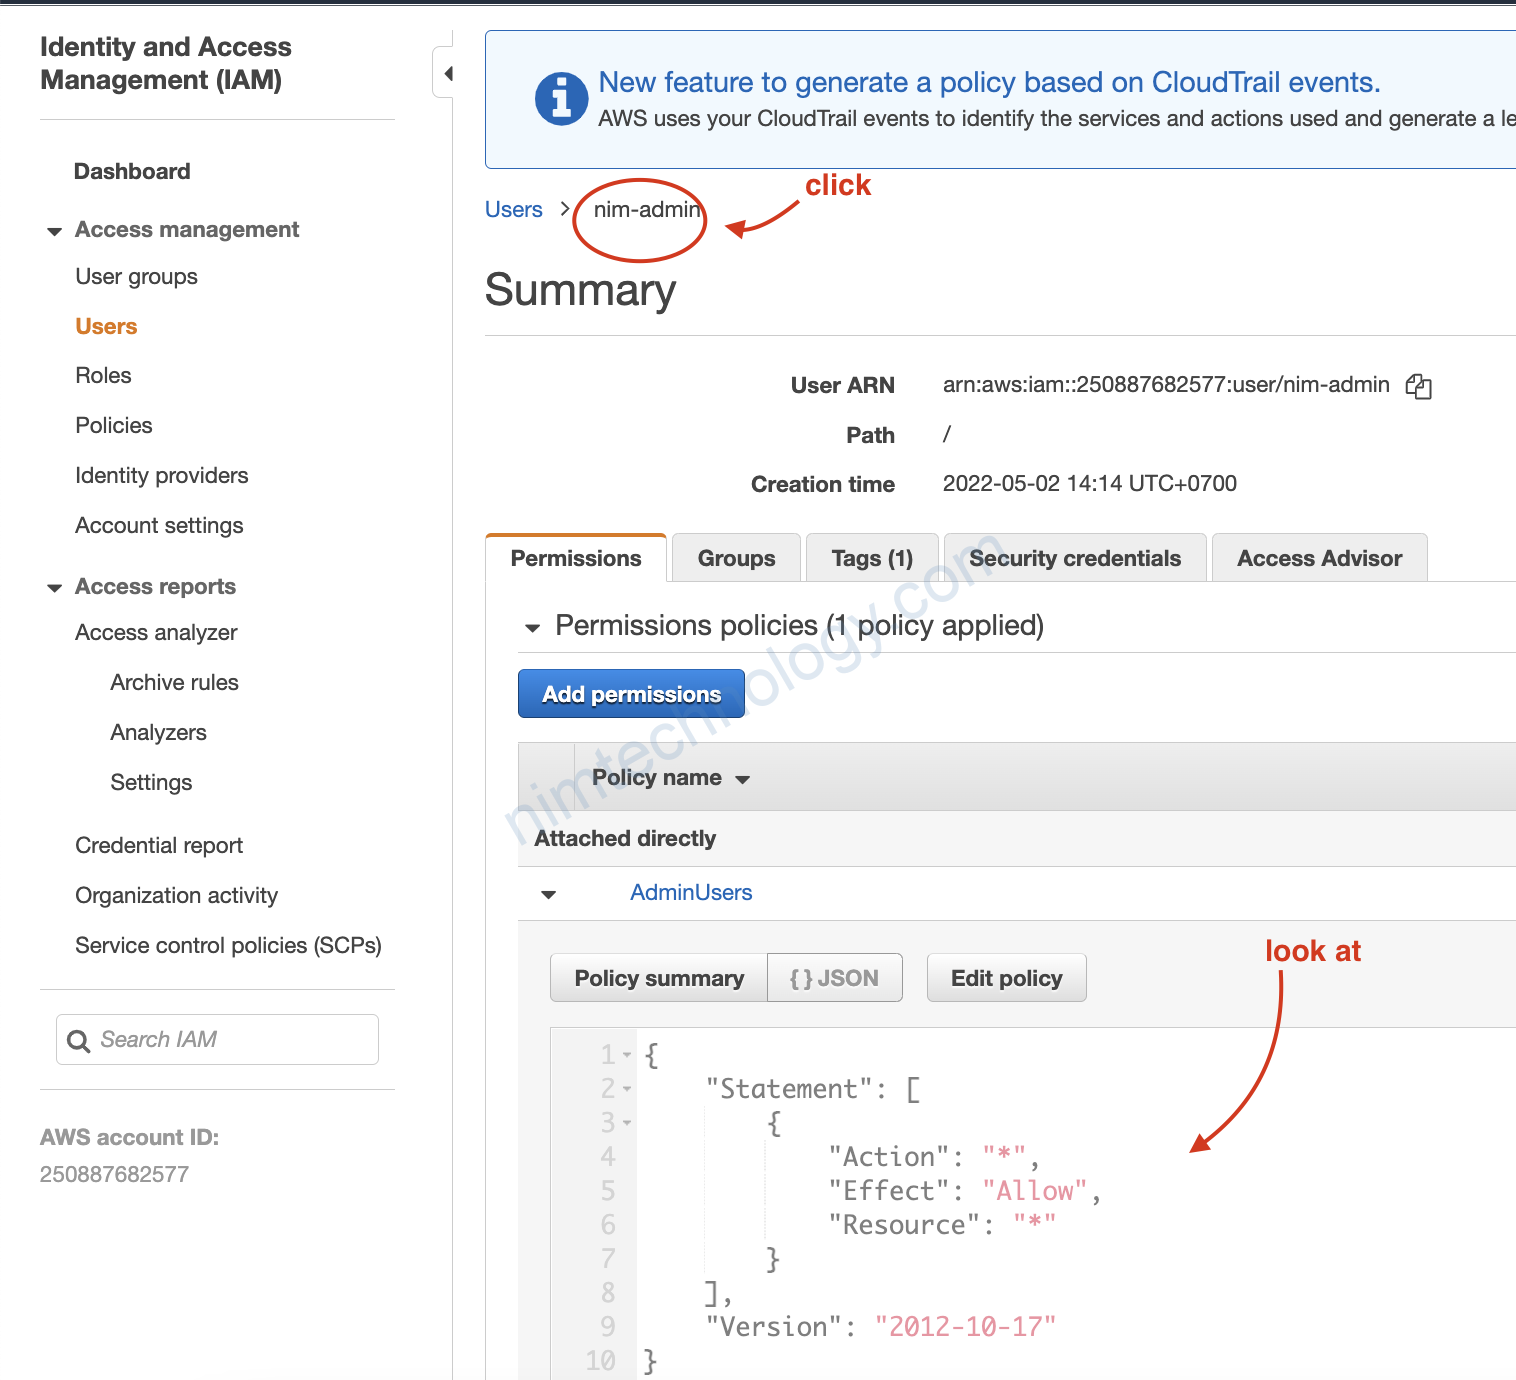
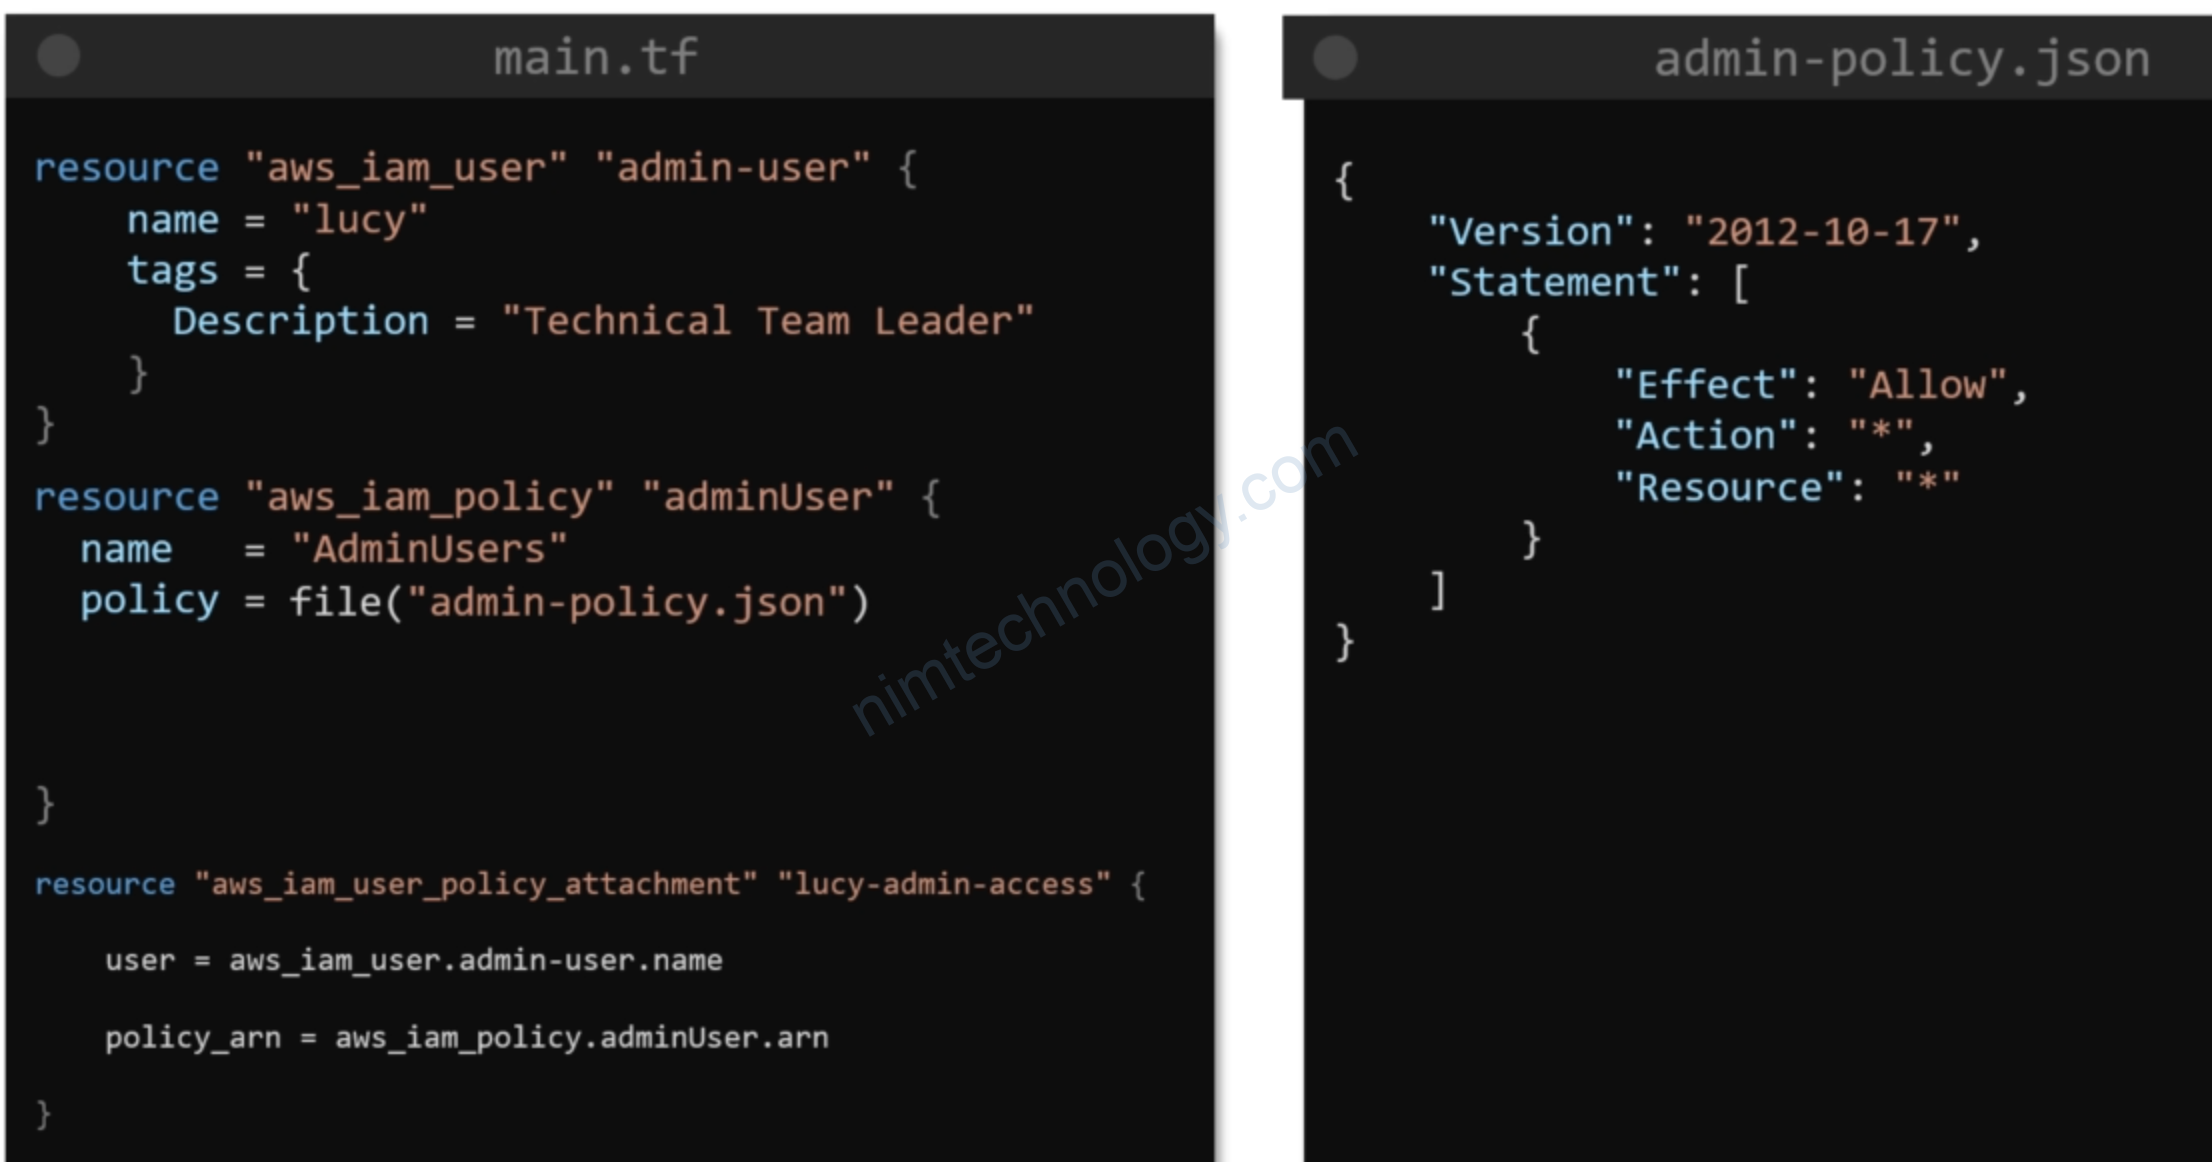
6) IAM Policies with Terraform
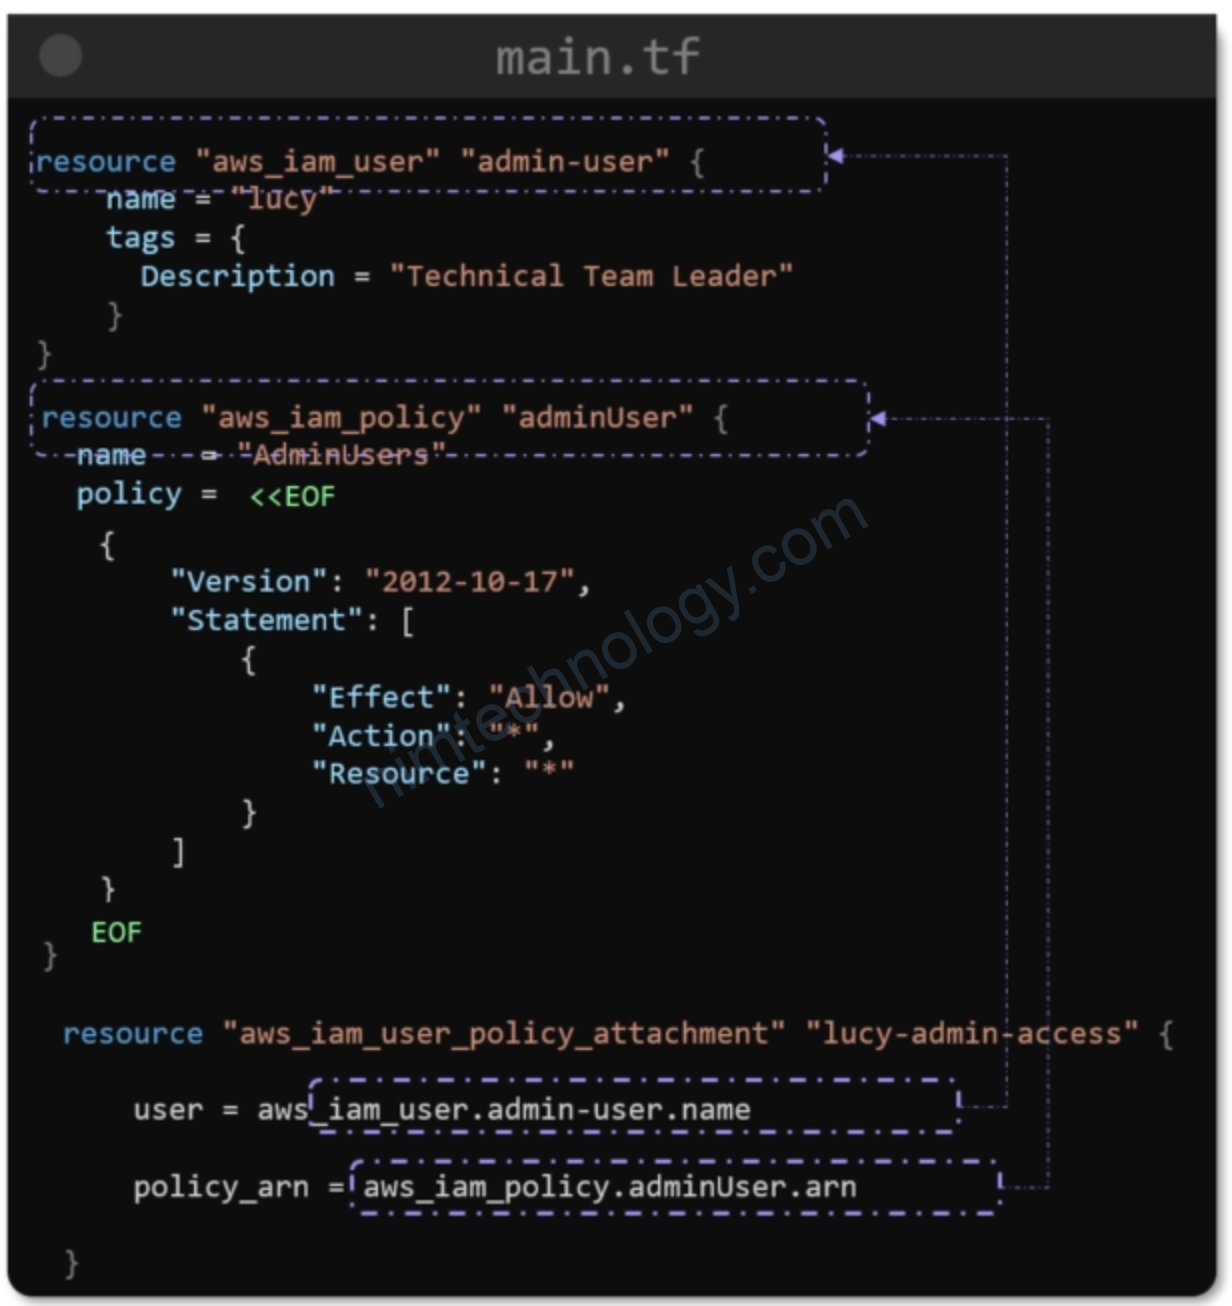
resource "aws_iam_user" "admin-user" {
  name = "nim-admin"

  tags = {
    Description = "Devops Team Leader"
  }
}

resource "aws_iam_policy" "adminUser" {
  name = "AdminUsers"
  policy = <<EOF
{
  "Version": "2012-10-17",
  "Statement": [
    {
      "Action": "*",
      "Effect": "Allow",
      "Resource": "*"
    }
  ]
}
EOF
}

resource "aws_iam_user_policy_attachment" "nim-admin-access" {
  user       = aws_iam_user.admin-user.name
  policy_arn = aws_iam_policy.adminUser.arn
}

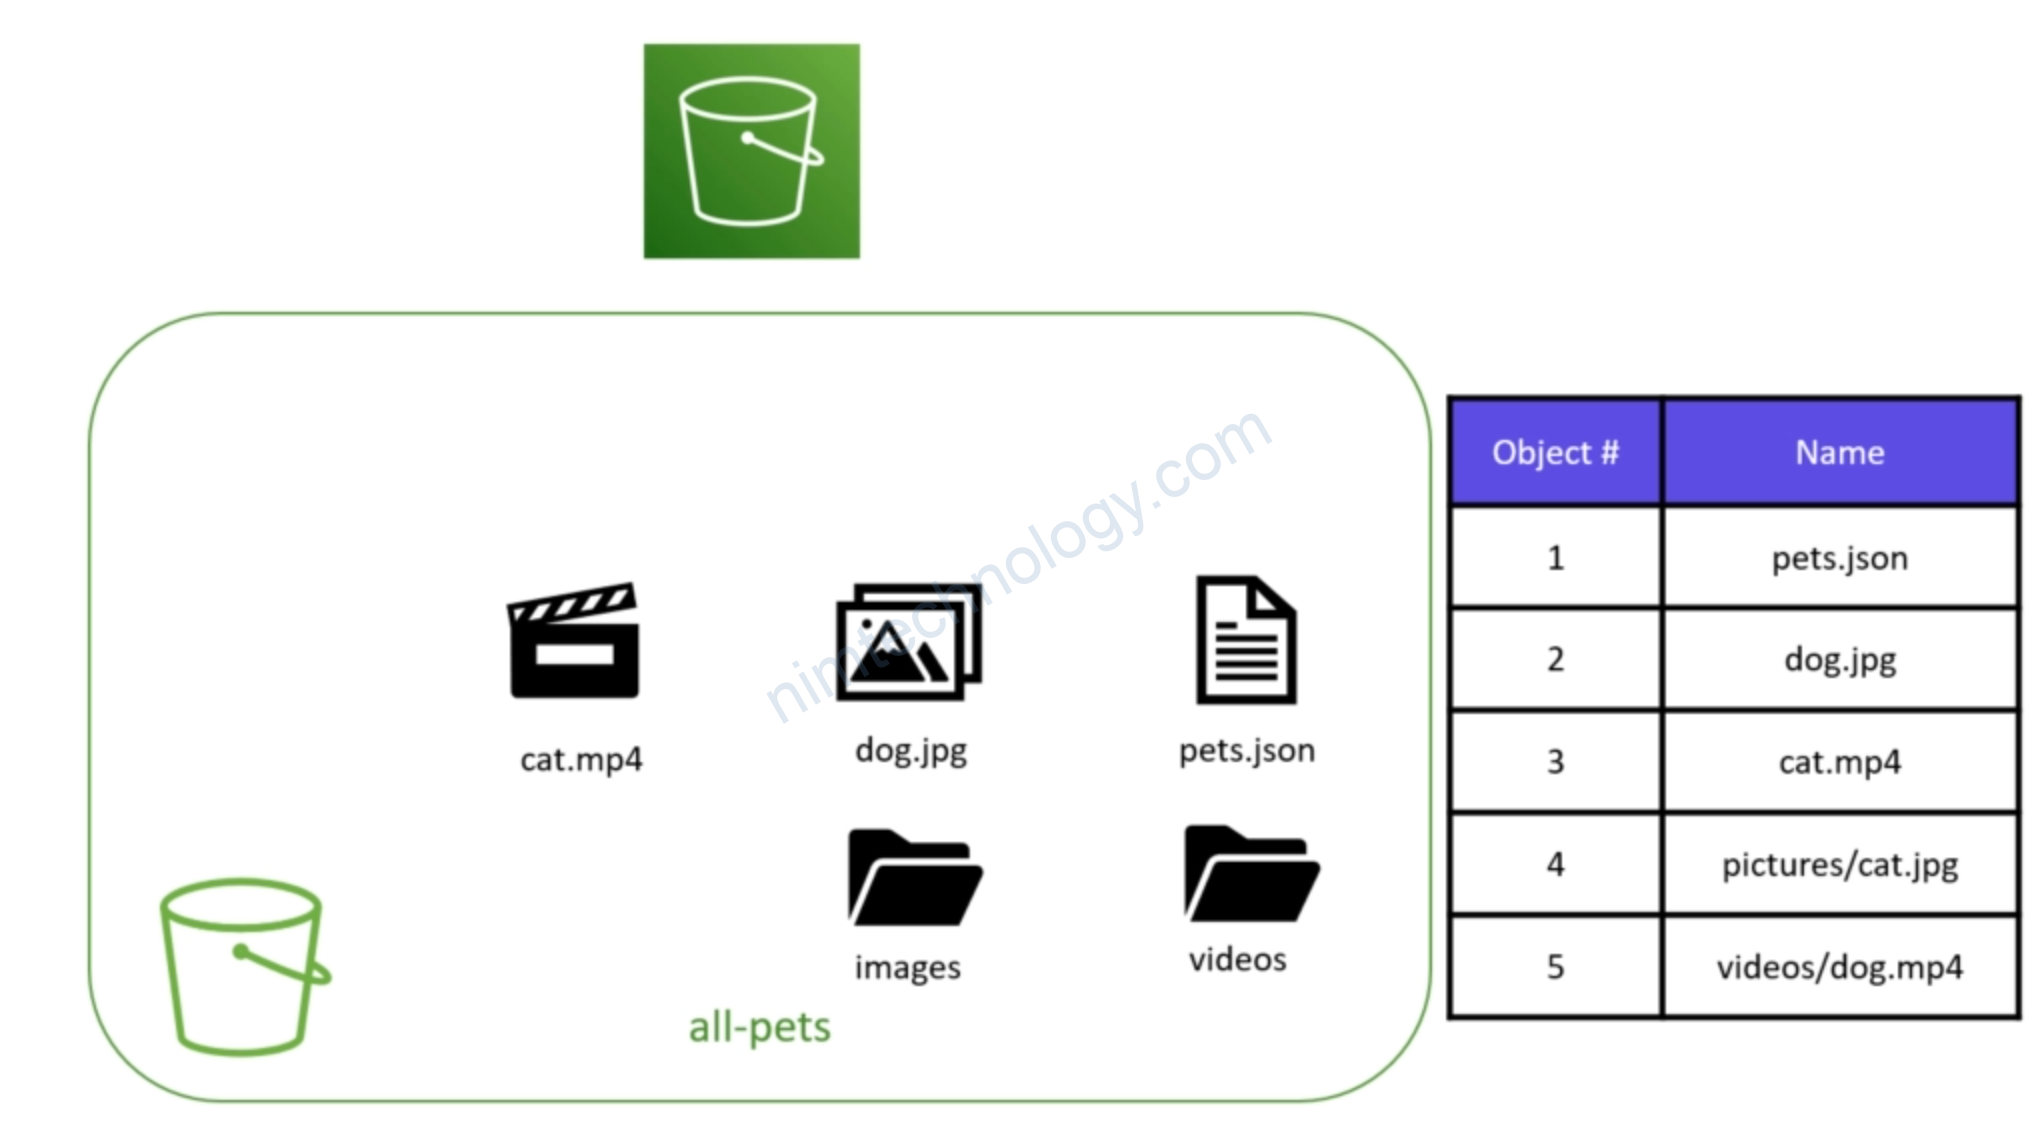
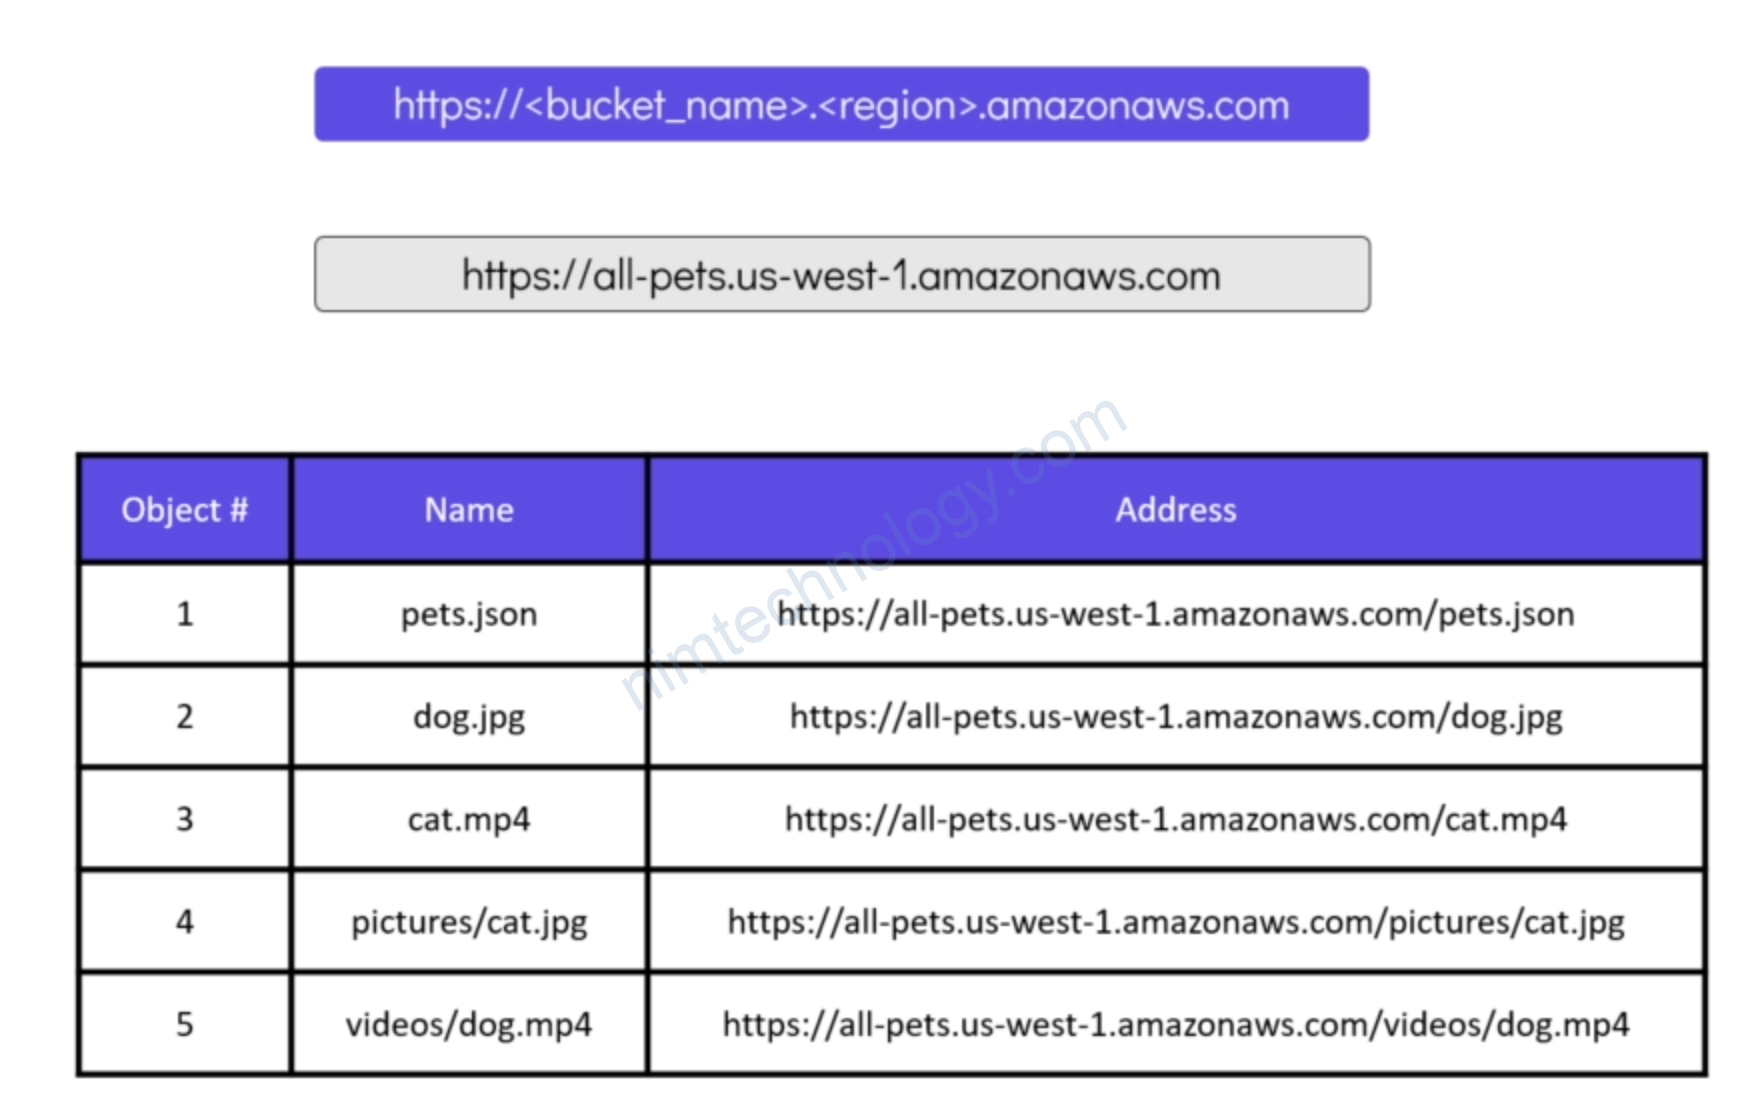
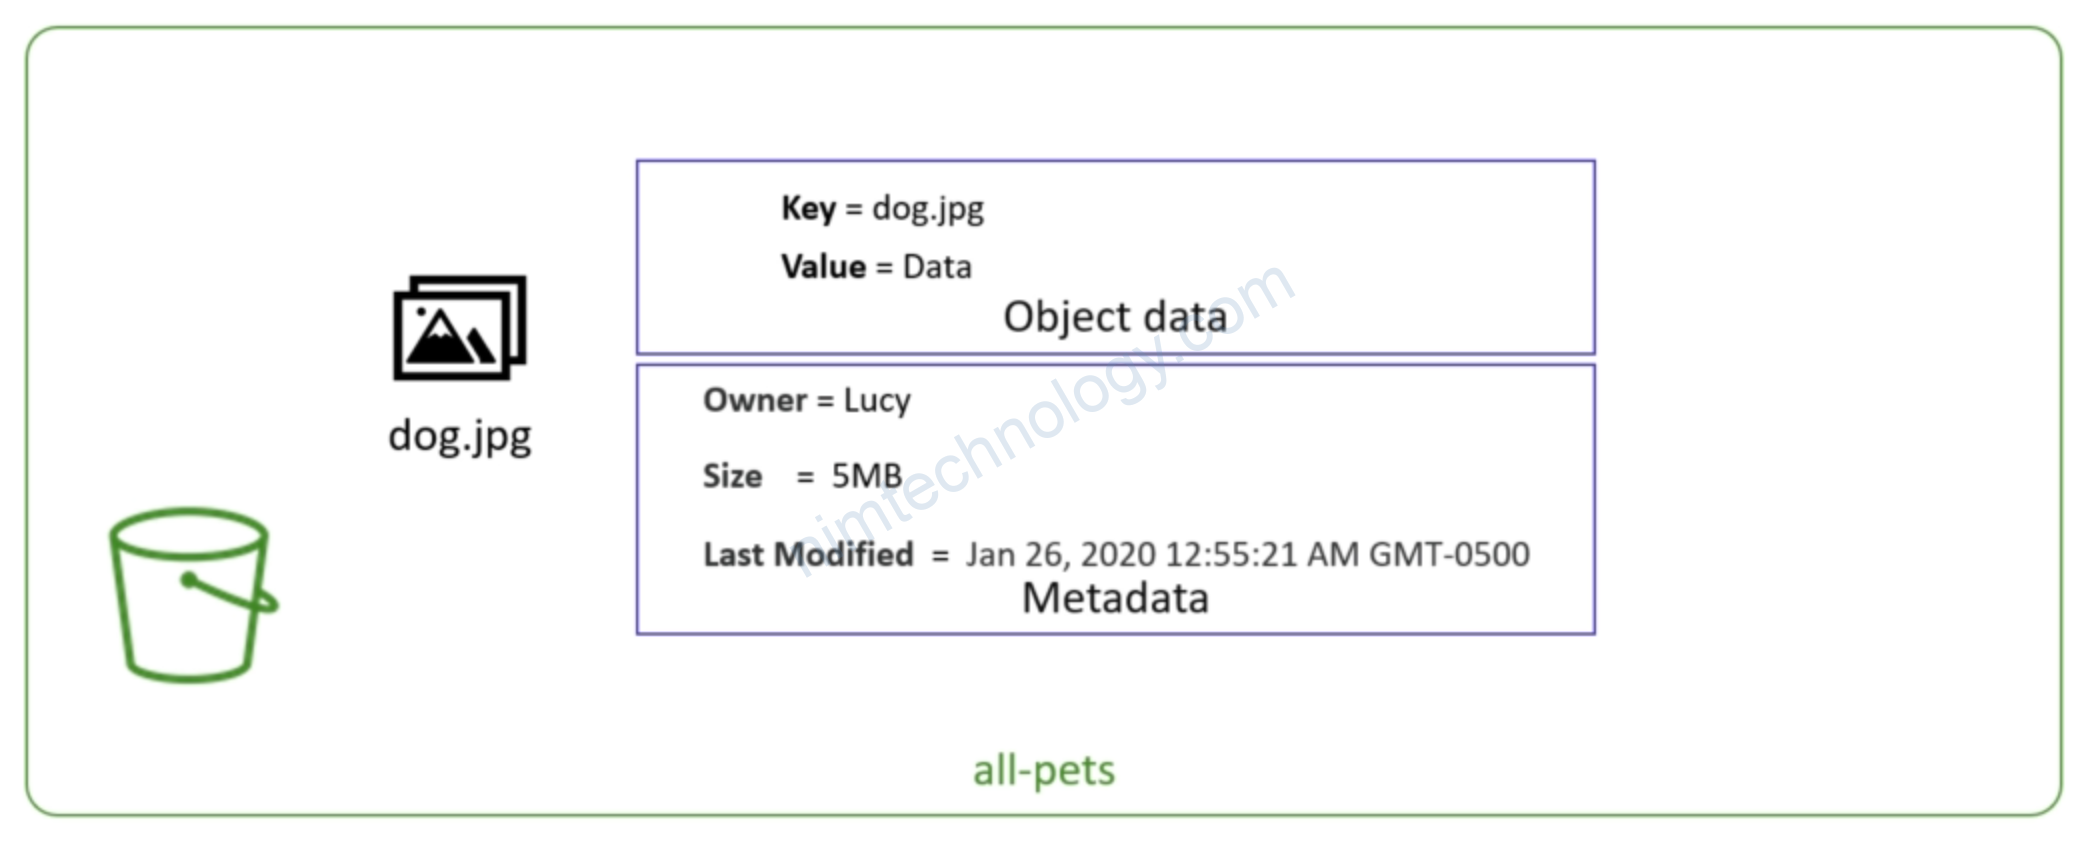
7) Introduction to AWS S3
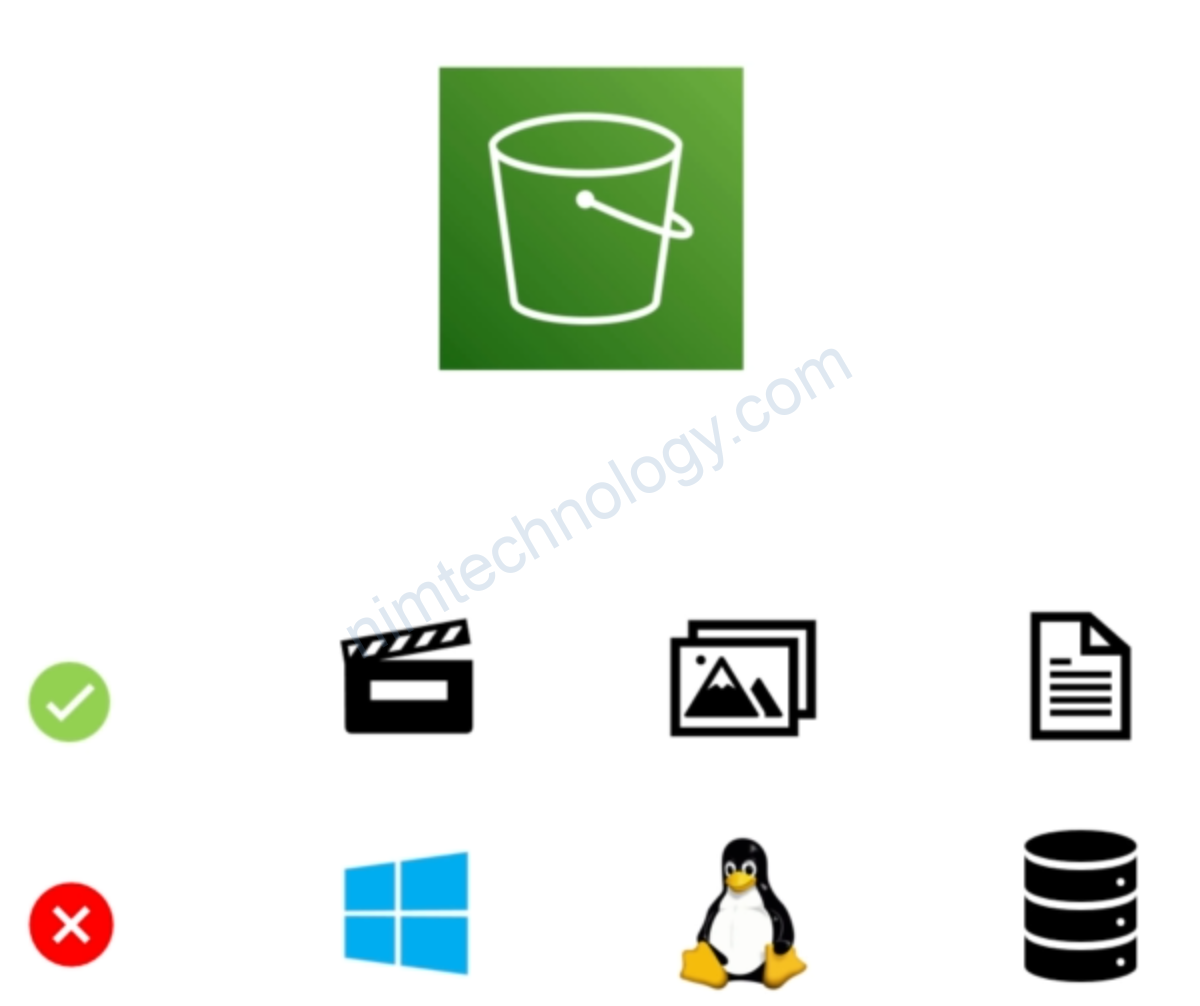
S3 thì bạn sẽ hiều nó object storage. S3 dùng chưa file và thư mục như film, ảnh, file docx,…
S3 sẽ không thể làm nơi chạy hệ điều hành, không làm ổ boot, hay ổ system.
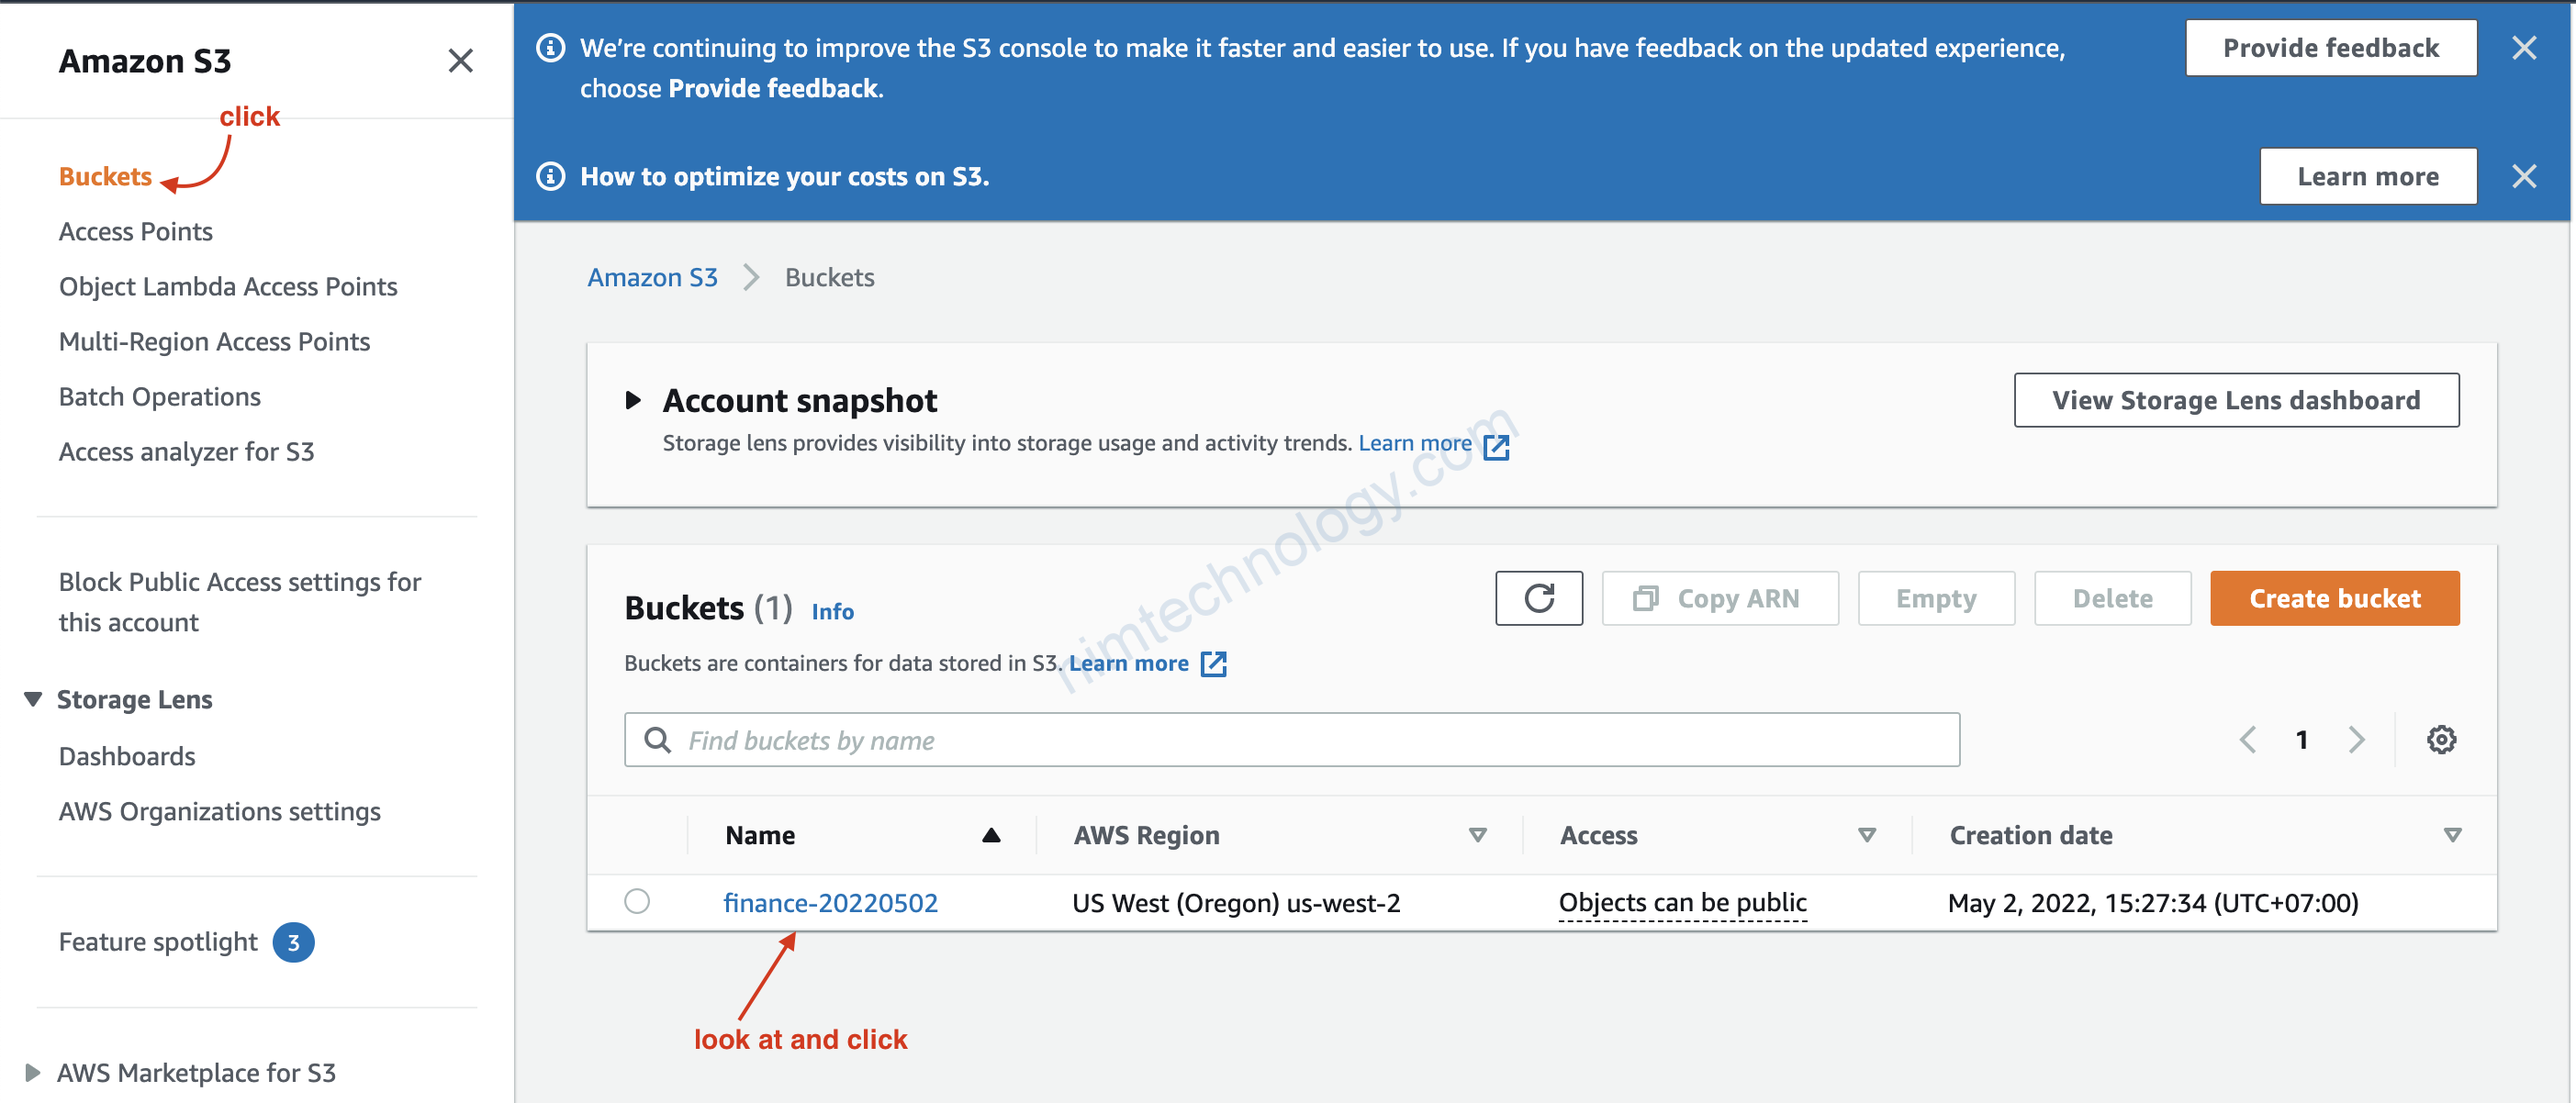
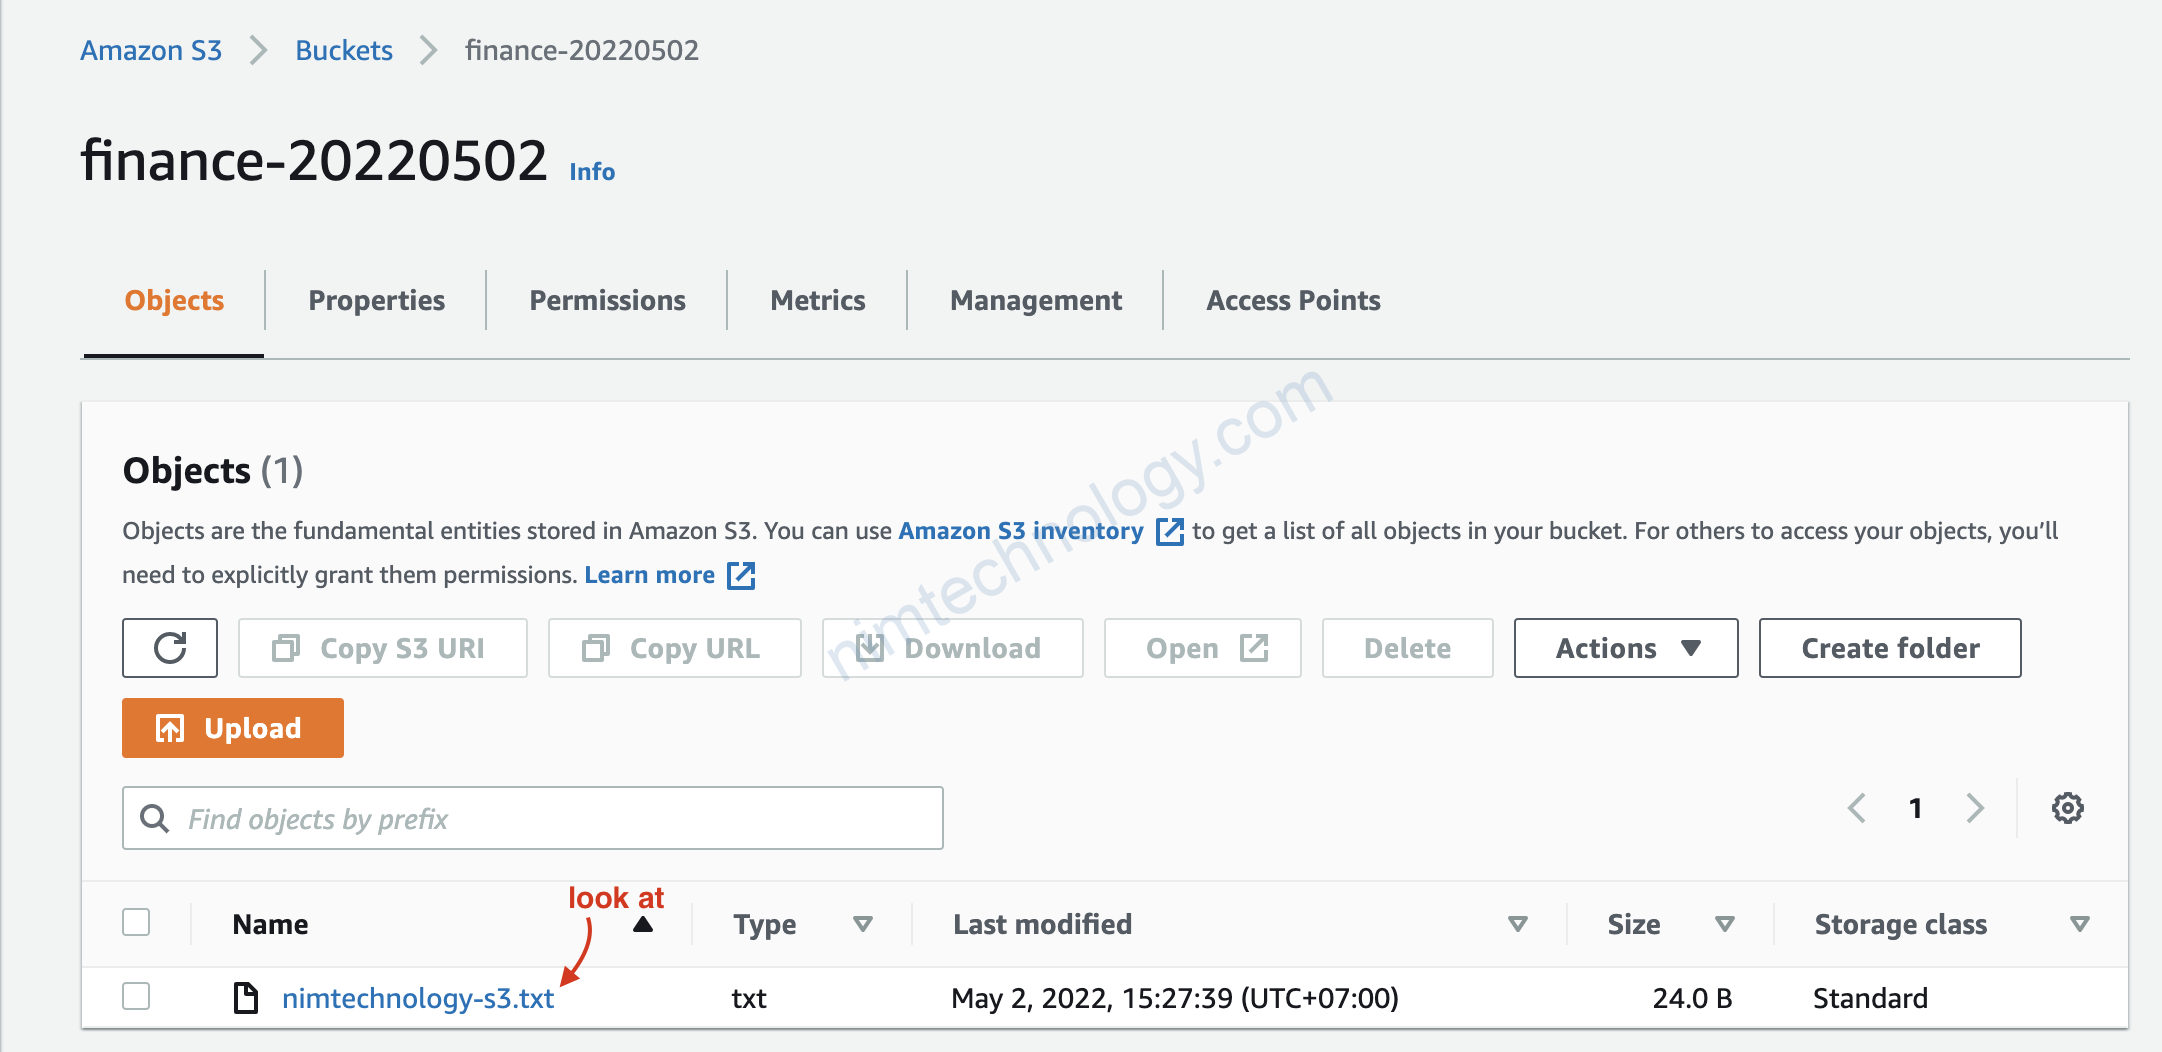
8) S3 with Terraform
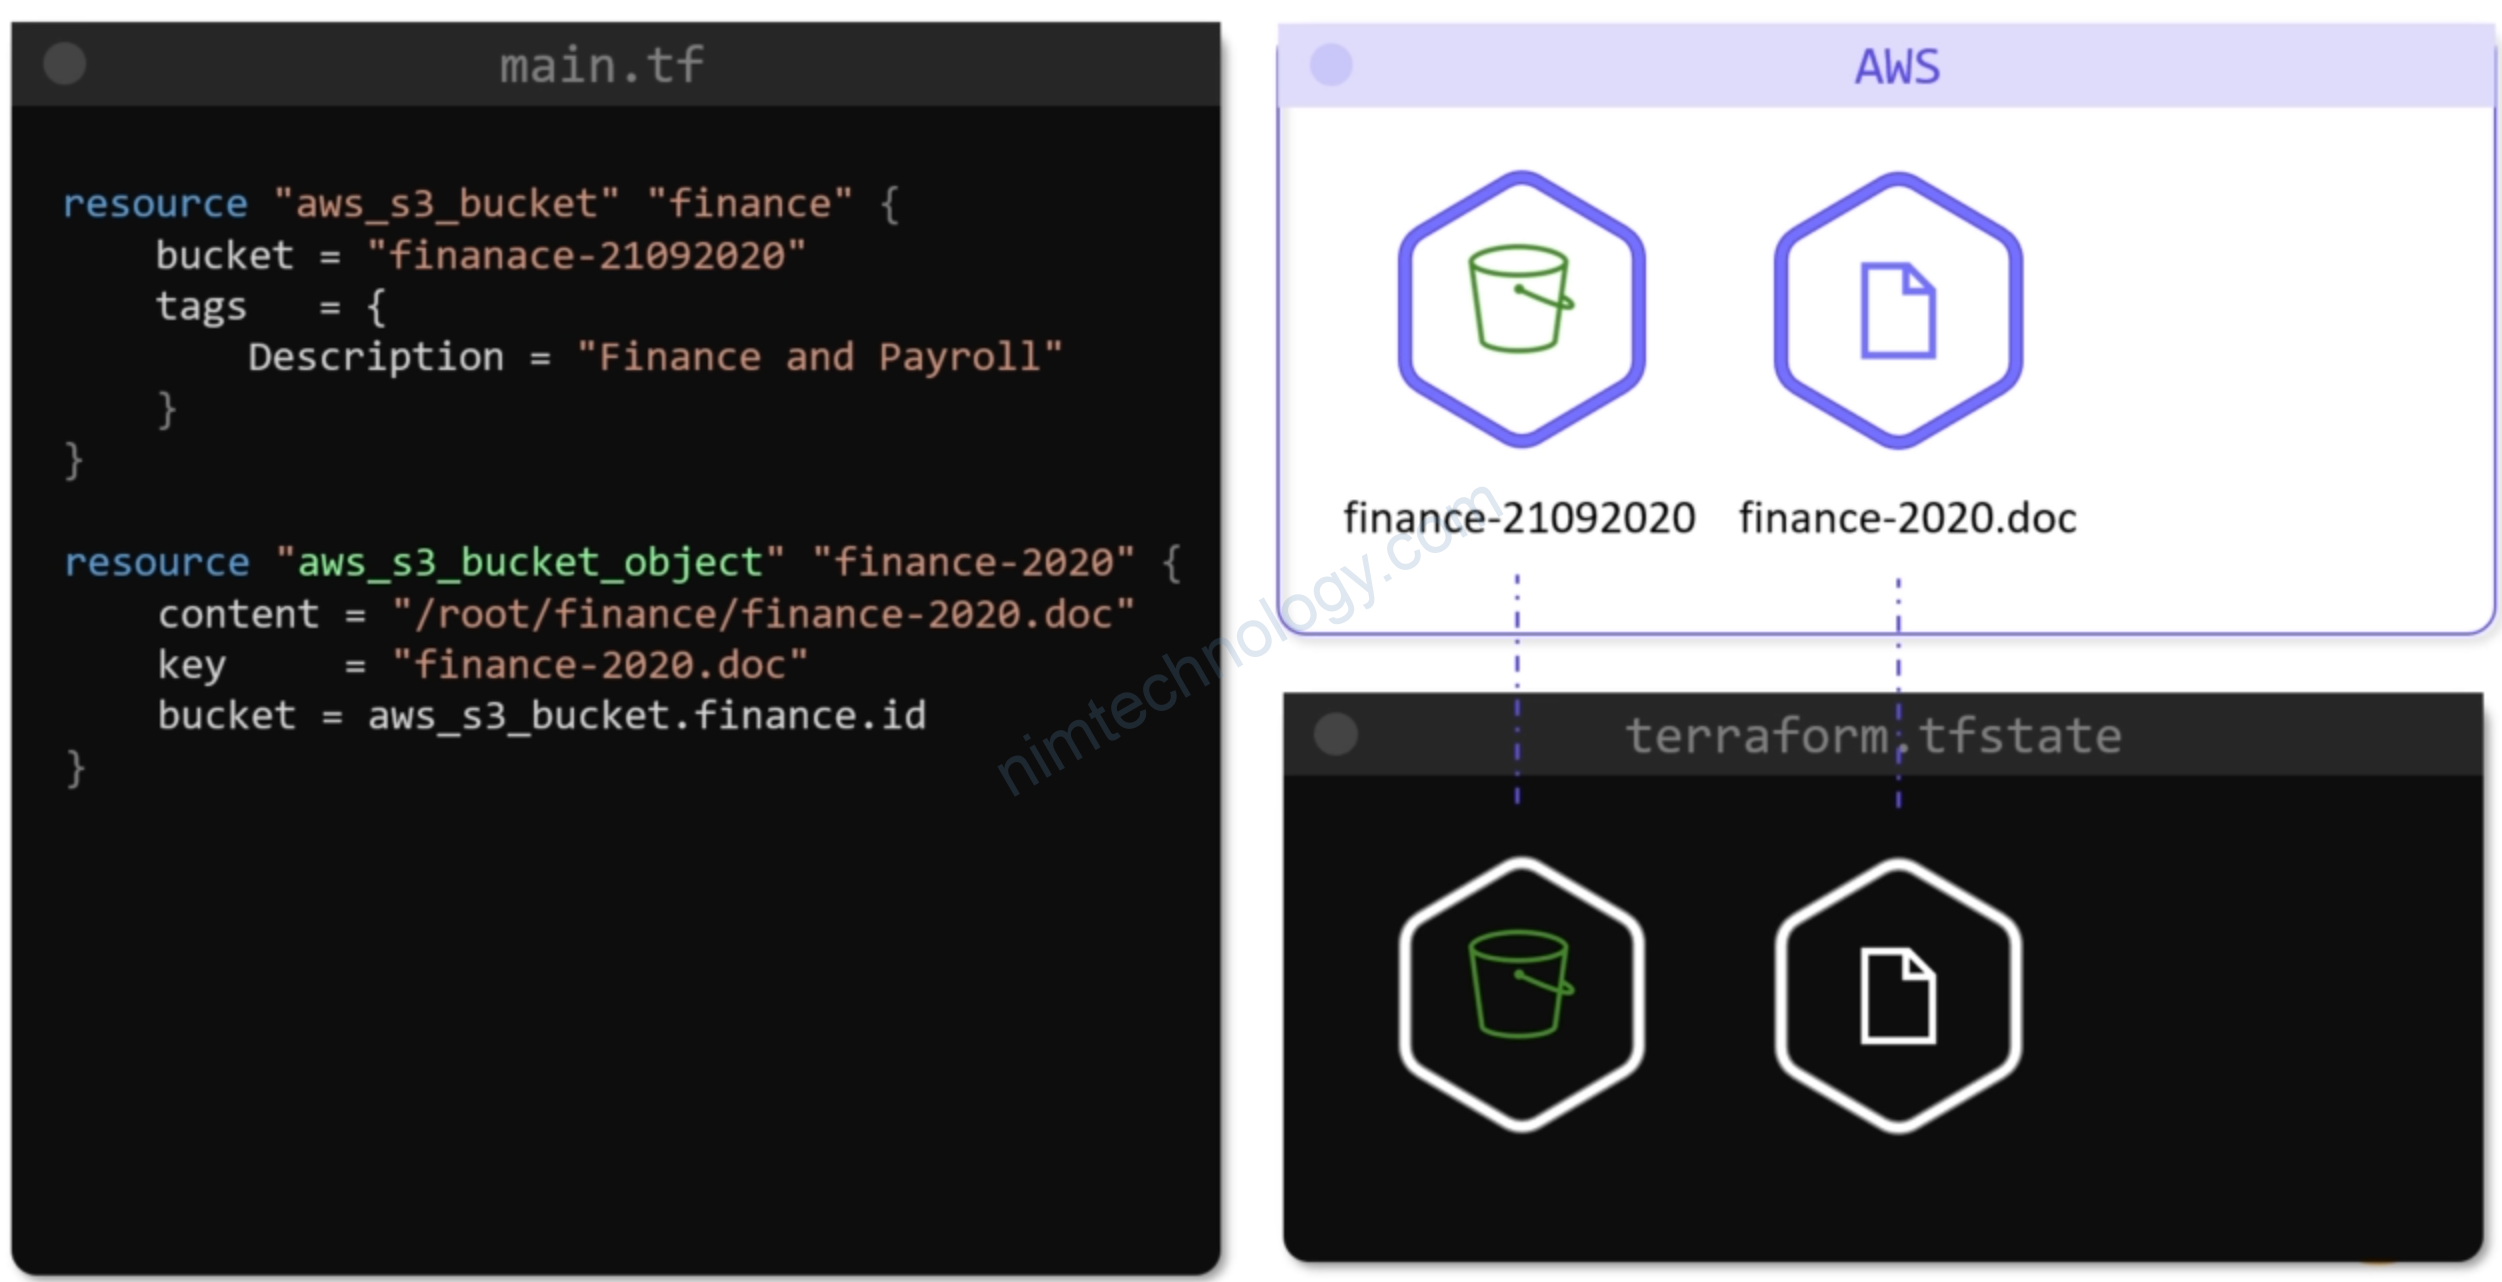
Và push 1 file lên bucket.
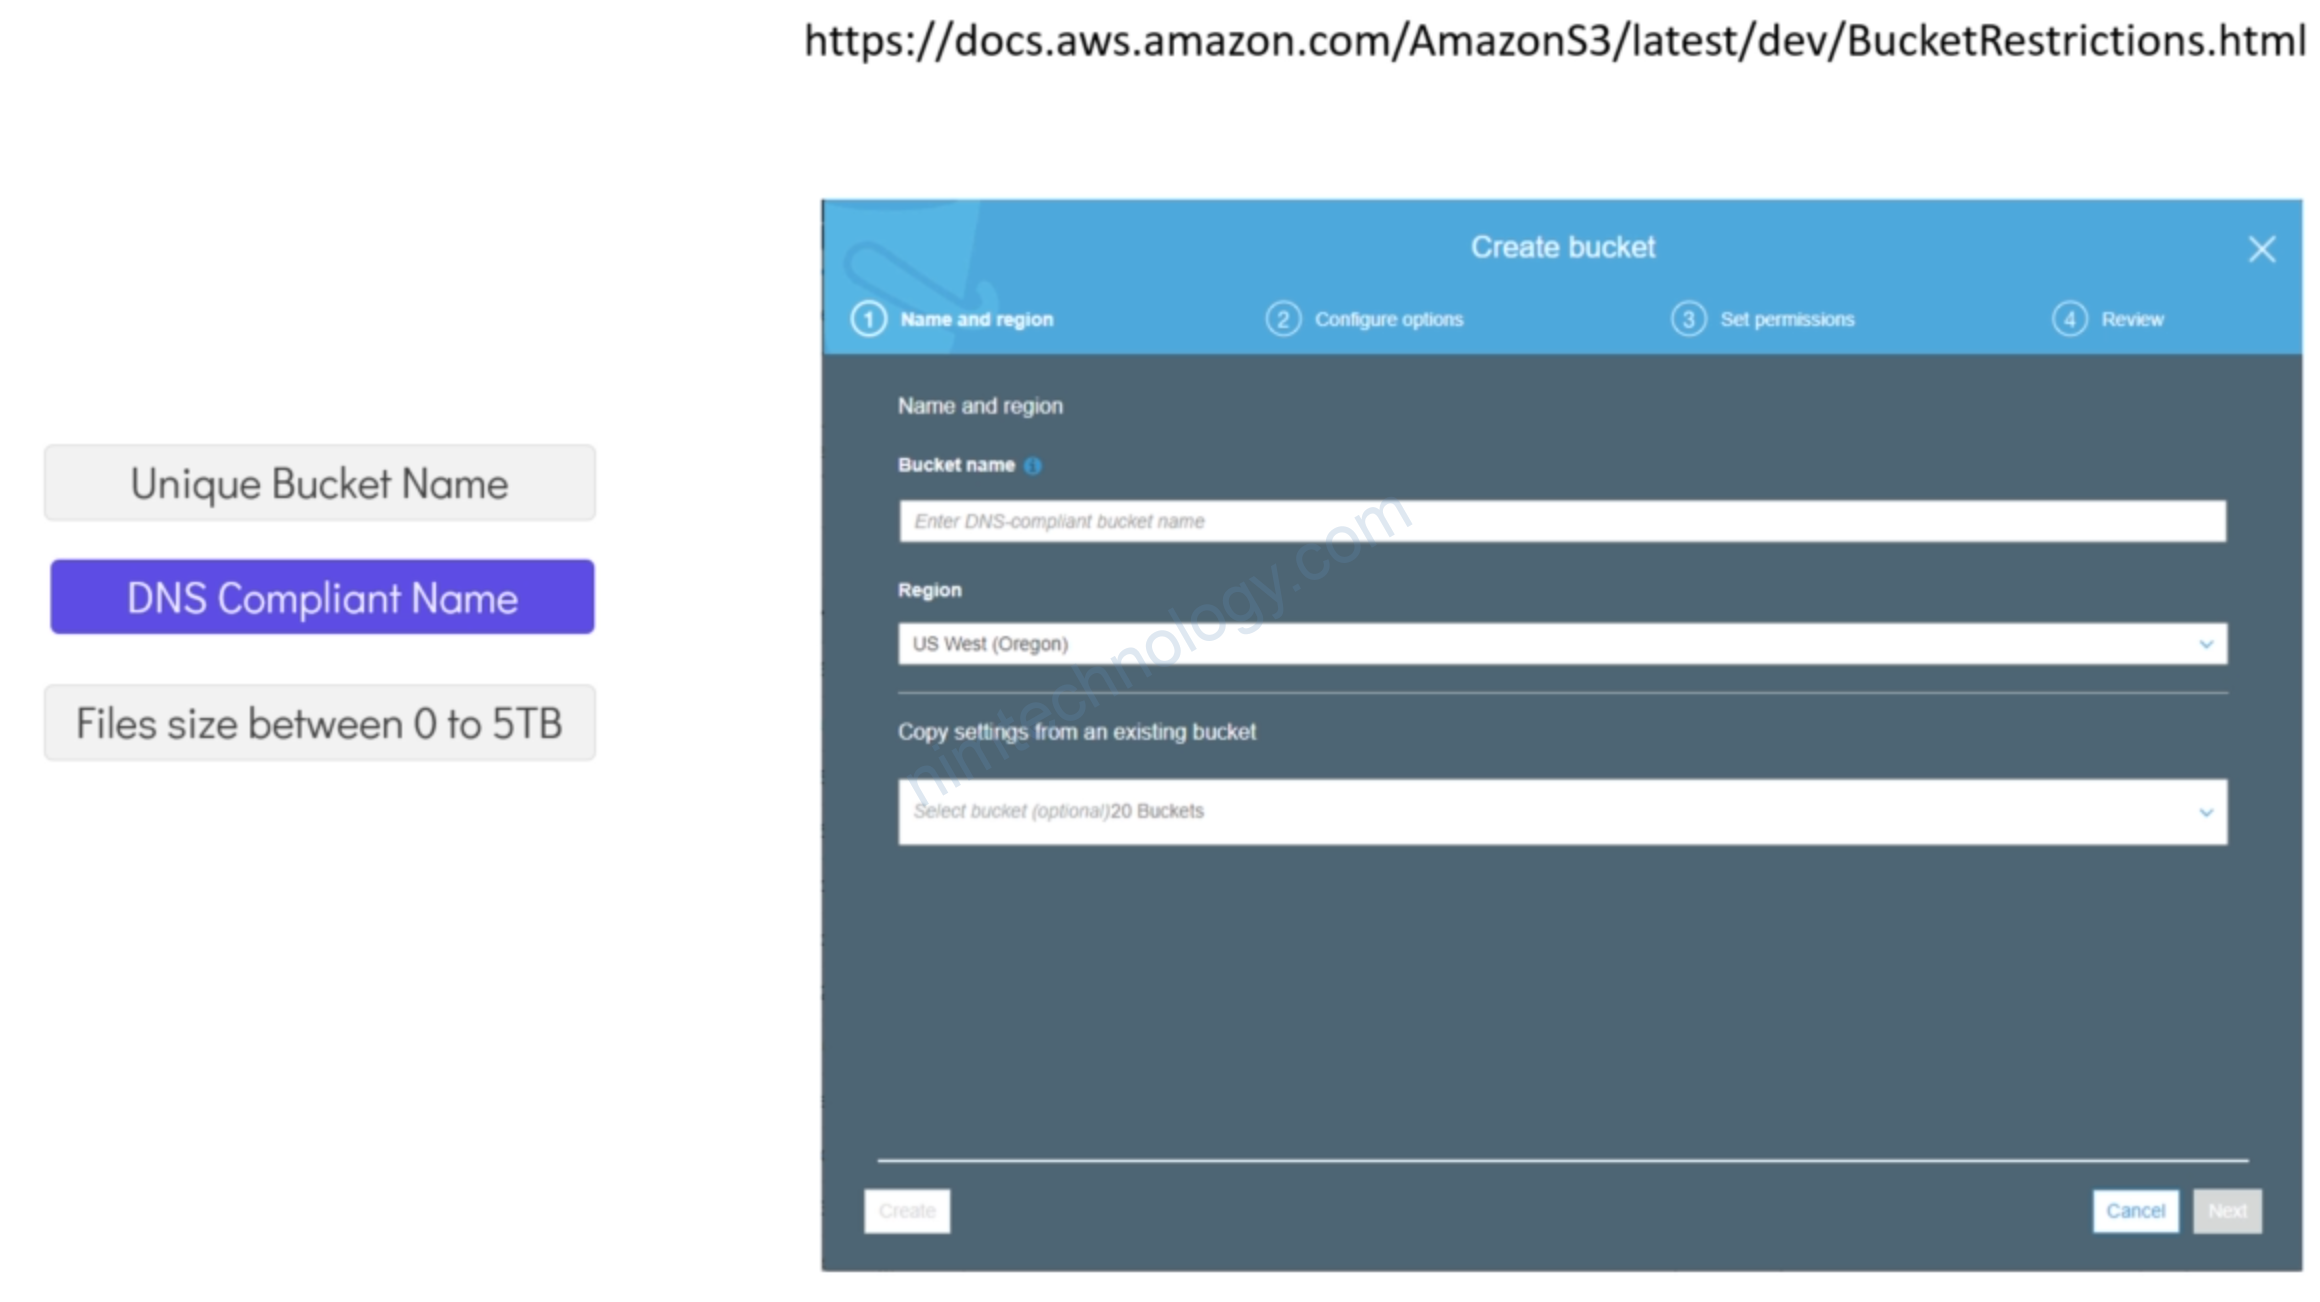
https://registry.terraform.io/providers/hashicorp/aws/latest/docs/resources/s3_bucket
resource "aws_s3_bucket" "finance" {
  bucket = "finance-20220502"

  tags = {
    Description        = "Finance and Payroll"
  }
}

resource "aws_s3_bucket_object" "finance-2022" {
  source = "nimtechnology.txt"
  bucket = aws_s3_bucket.finance.id
  key    = "nimtechnology-s3.txt"
}
Khi terraform plan:
Nhận được 1 warning:
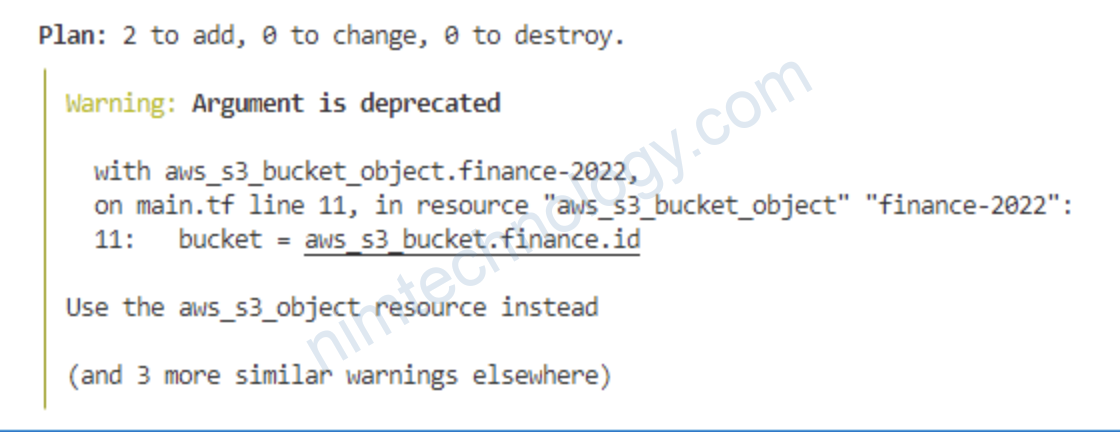
Vậy thay thế aws_s3_bucket_object bằng aws_s3_object
resource "aws_s3_bucket" "finance" {
  bucket = "finance-20220502"

  tags = {
    Description = "Finance and Payroll"
  }
}

resource "aws_s3_object" "finance-2022" {
  source = "nimtechnology.txt"
  bucket = aws_s3_bucket.finance.id
  key    = "nimtechnology-s3.txt"
}
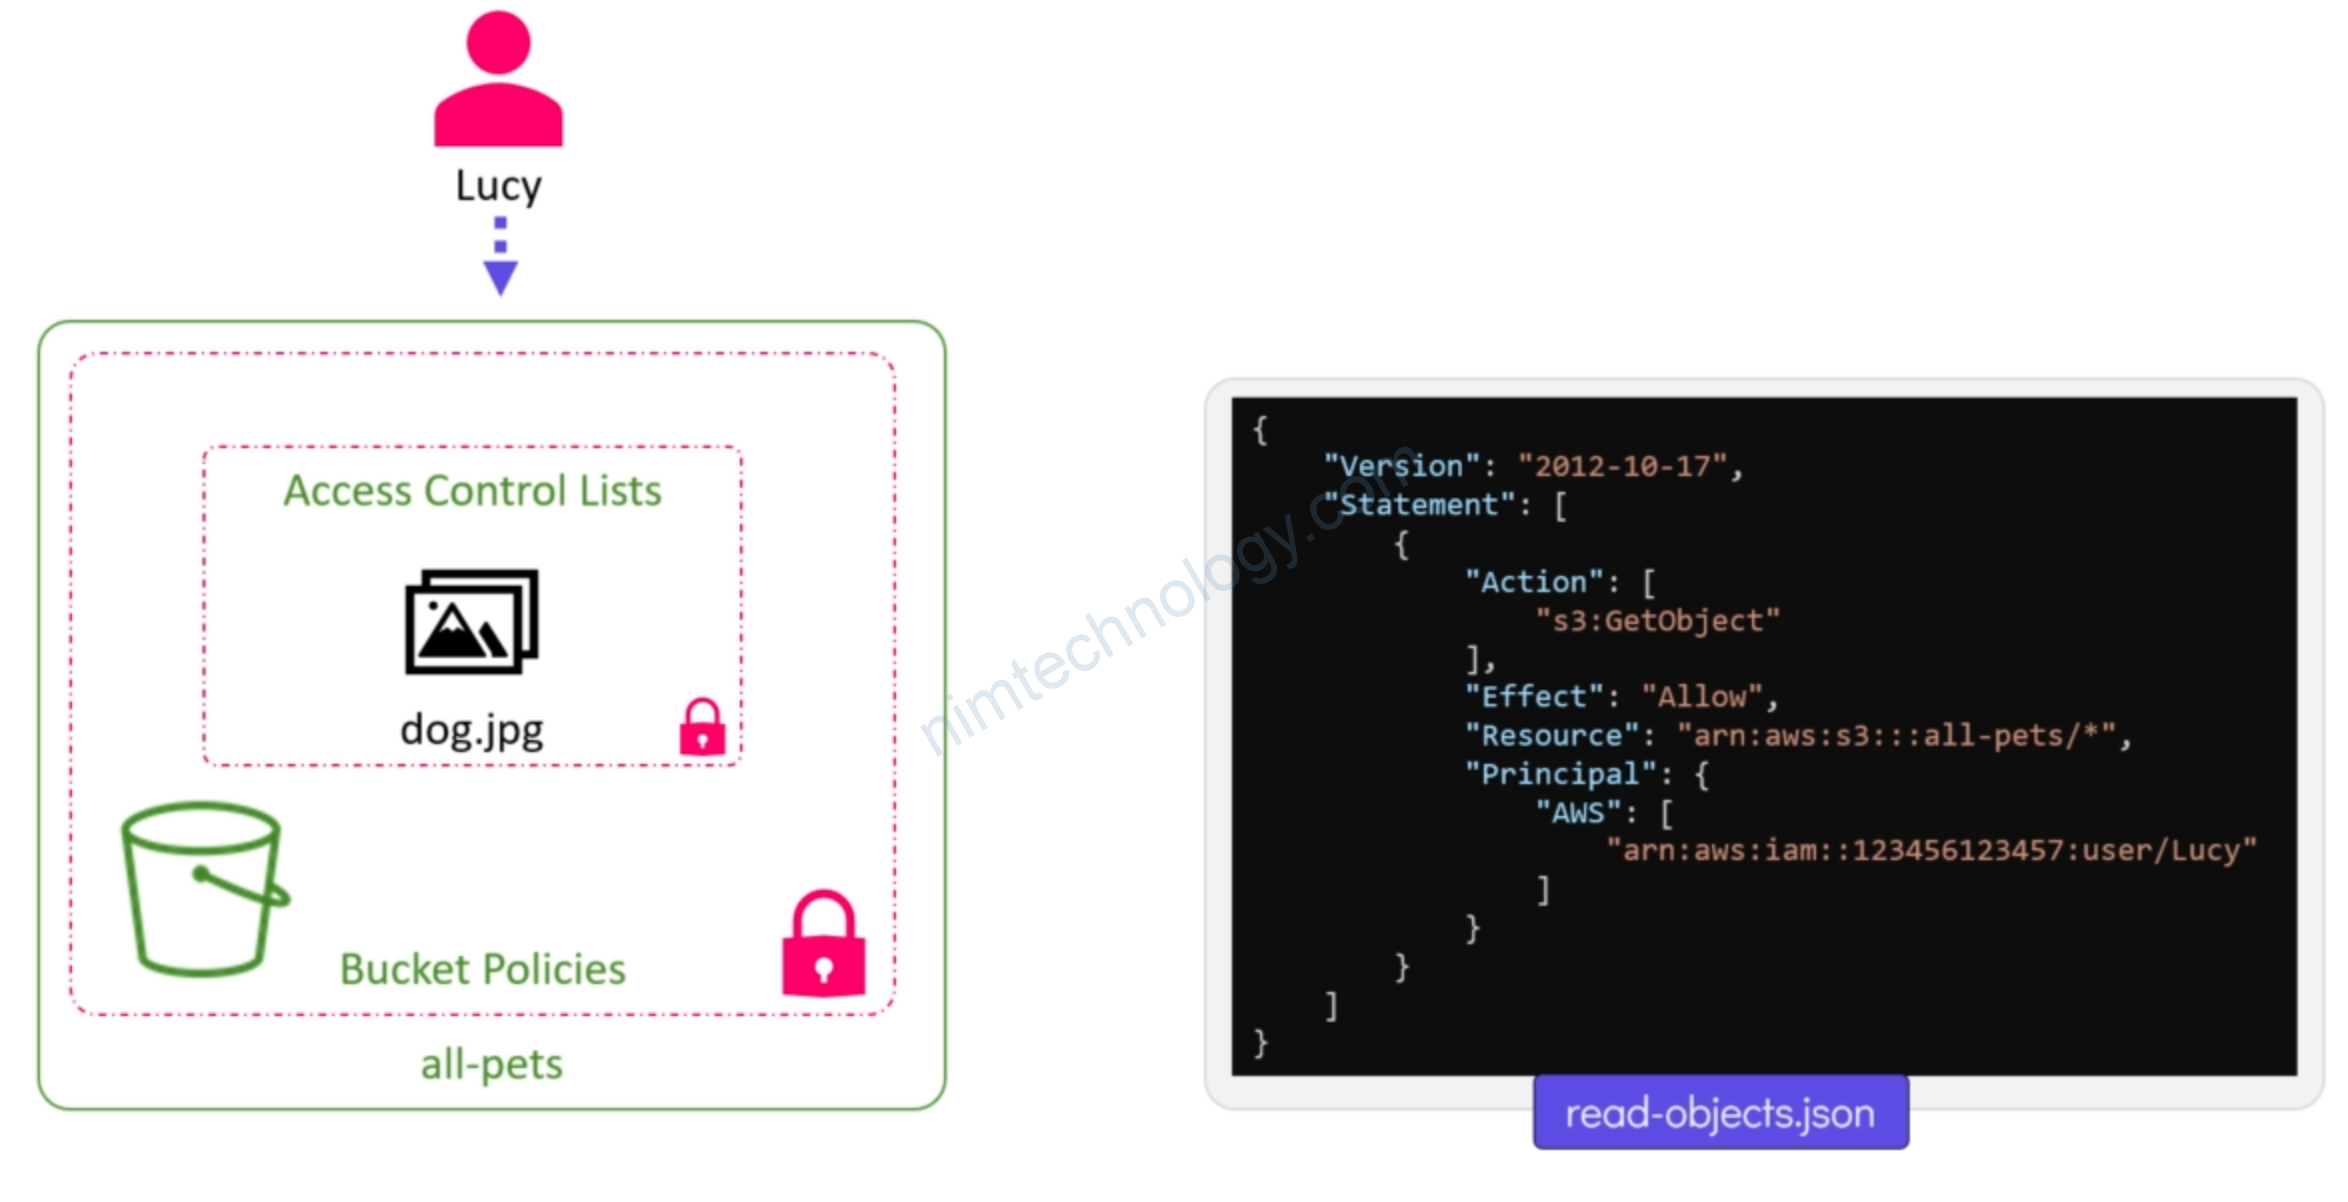
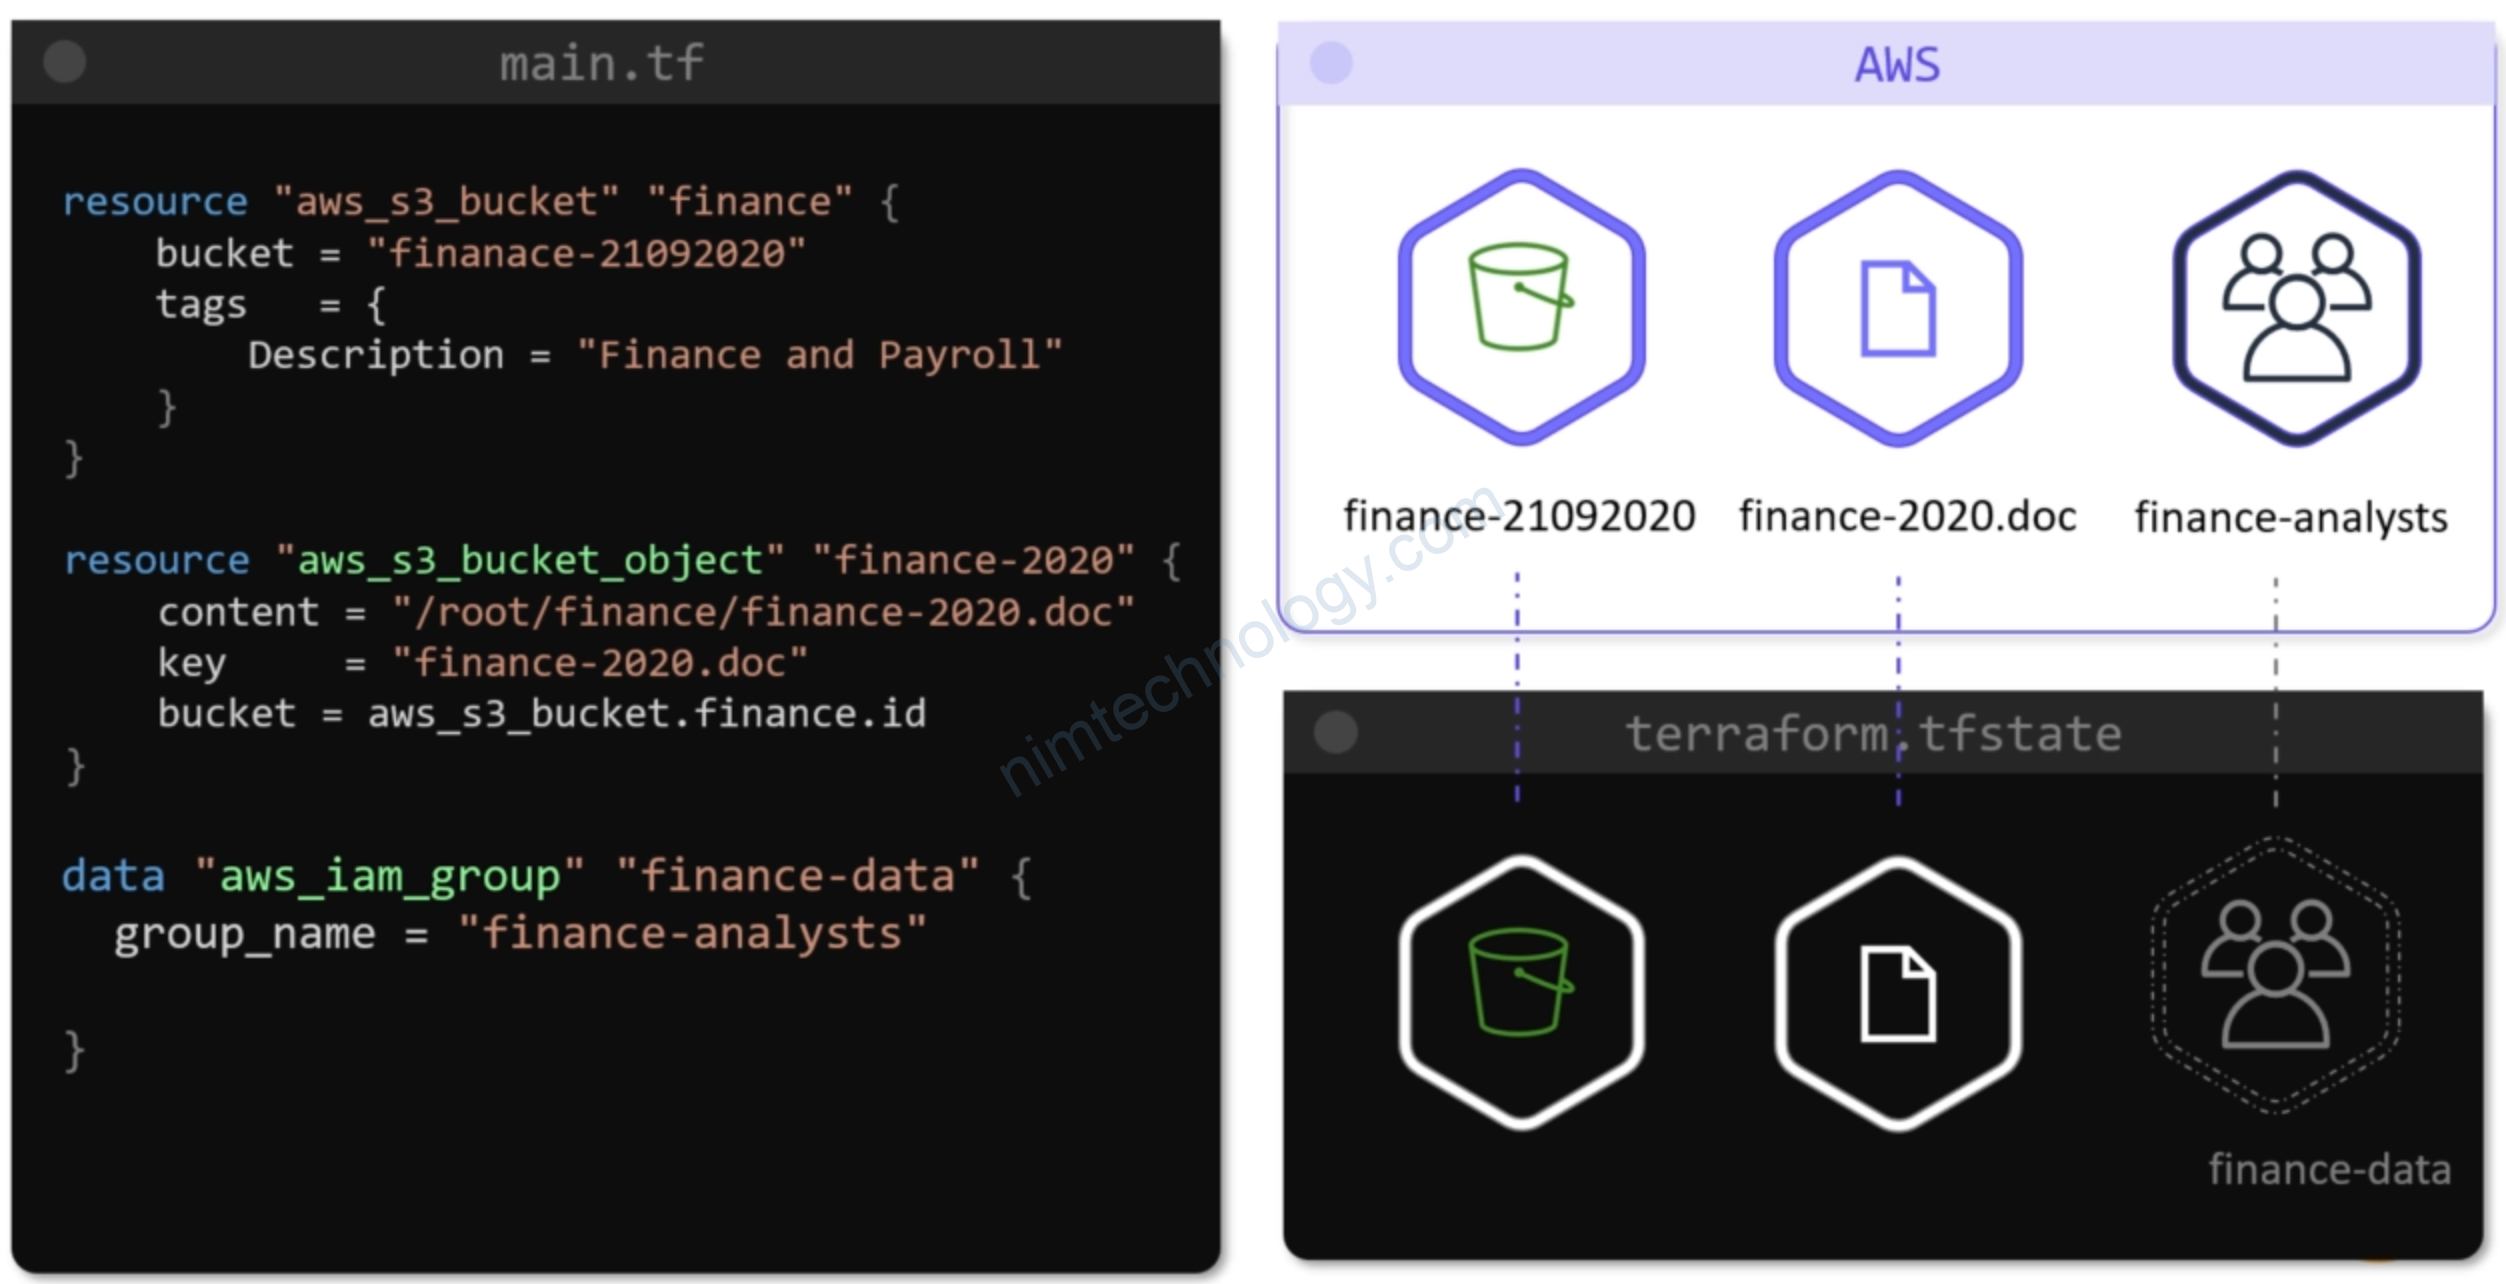
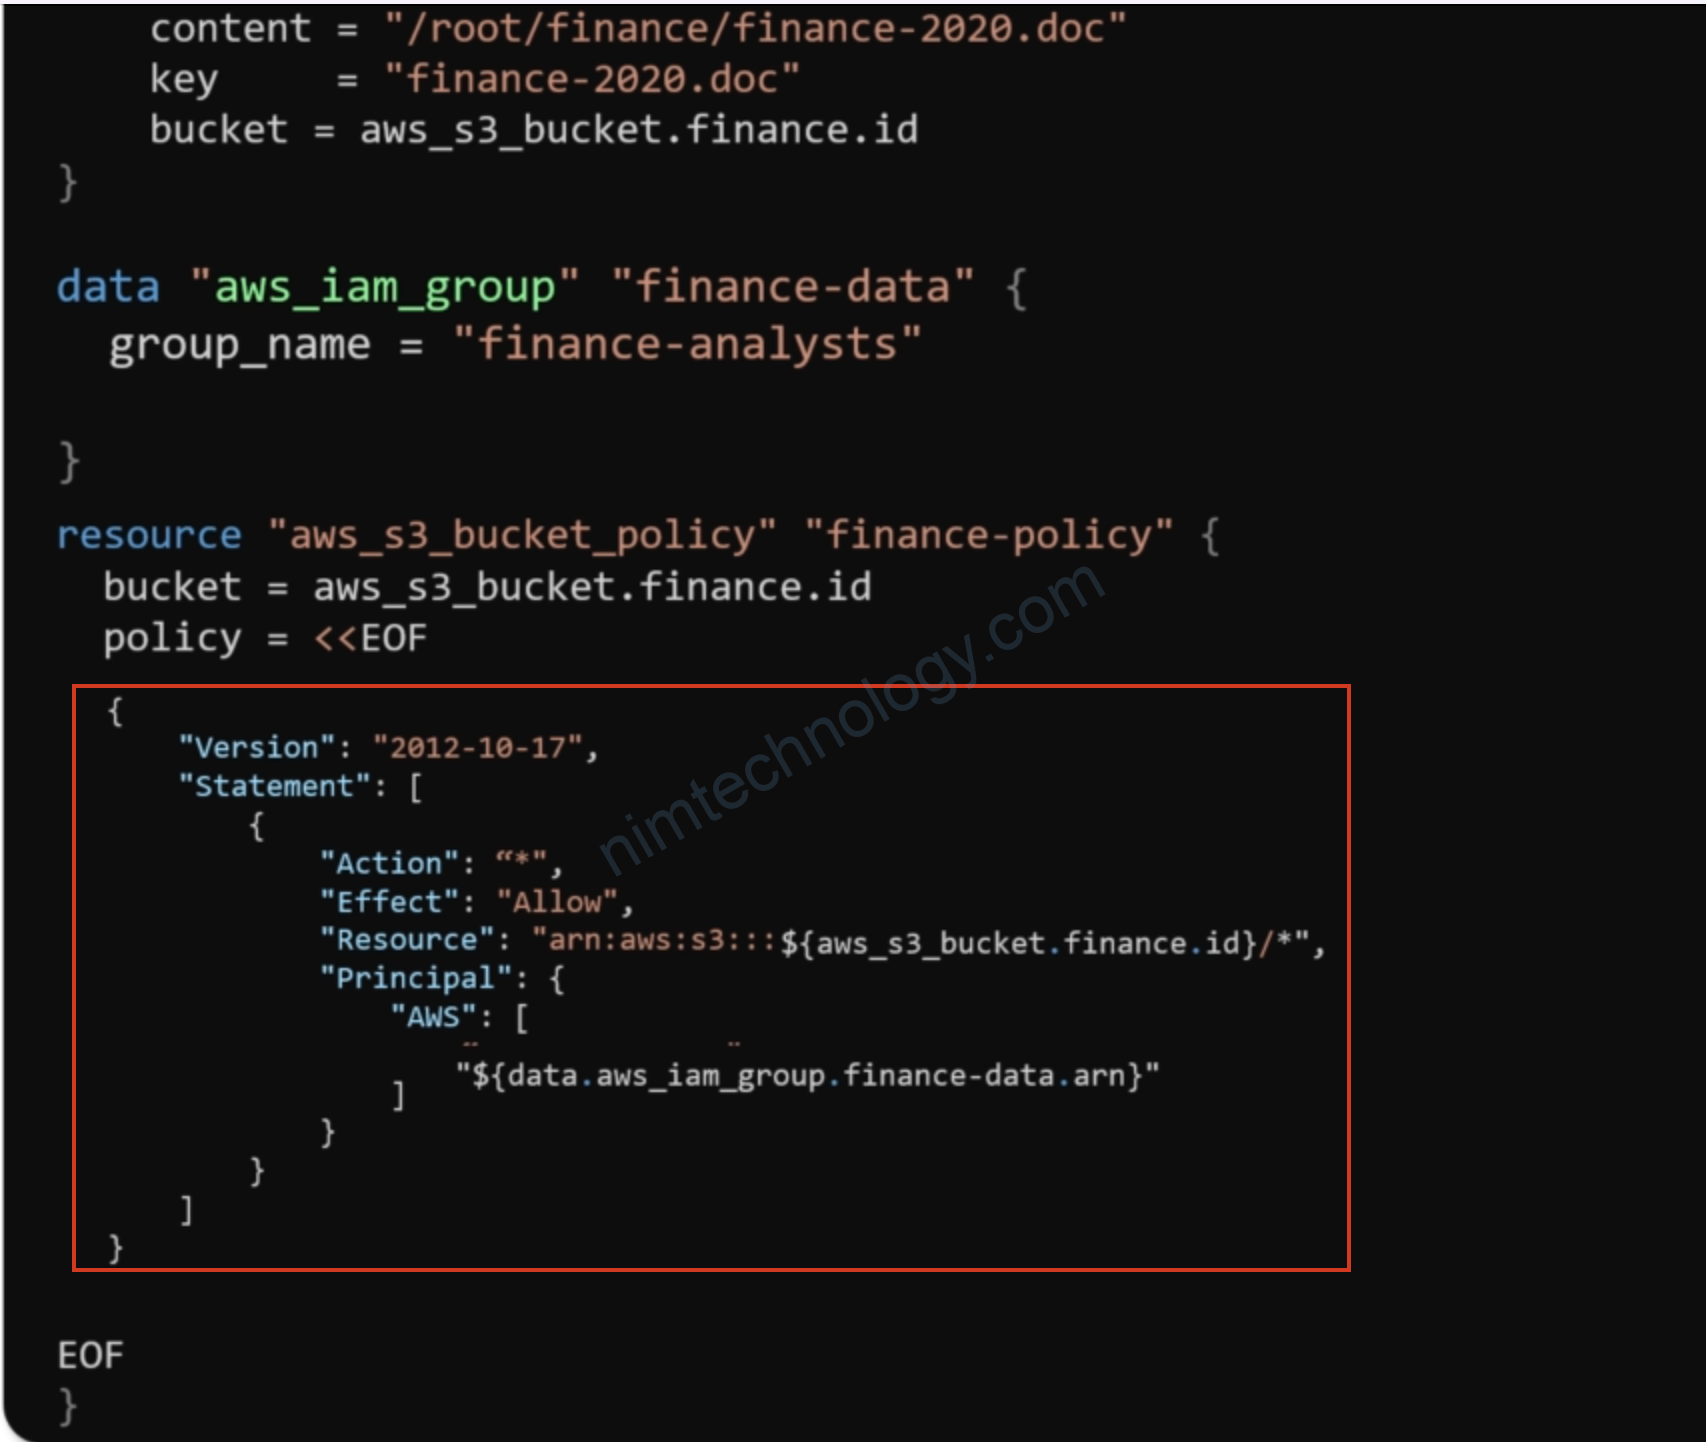
Phần này ta config để 1 group trong IAM có thể access và action trên bucket S3
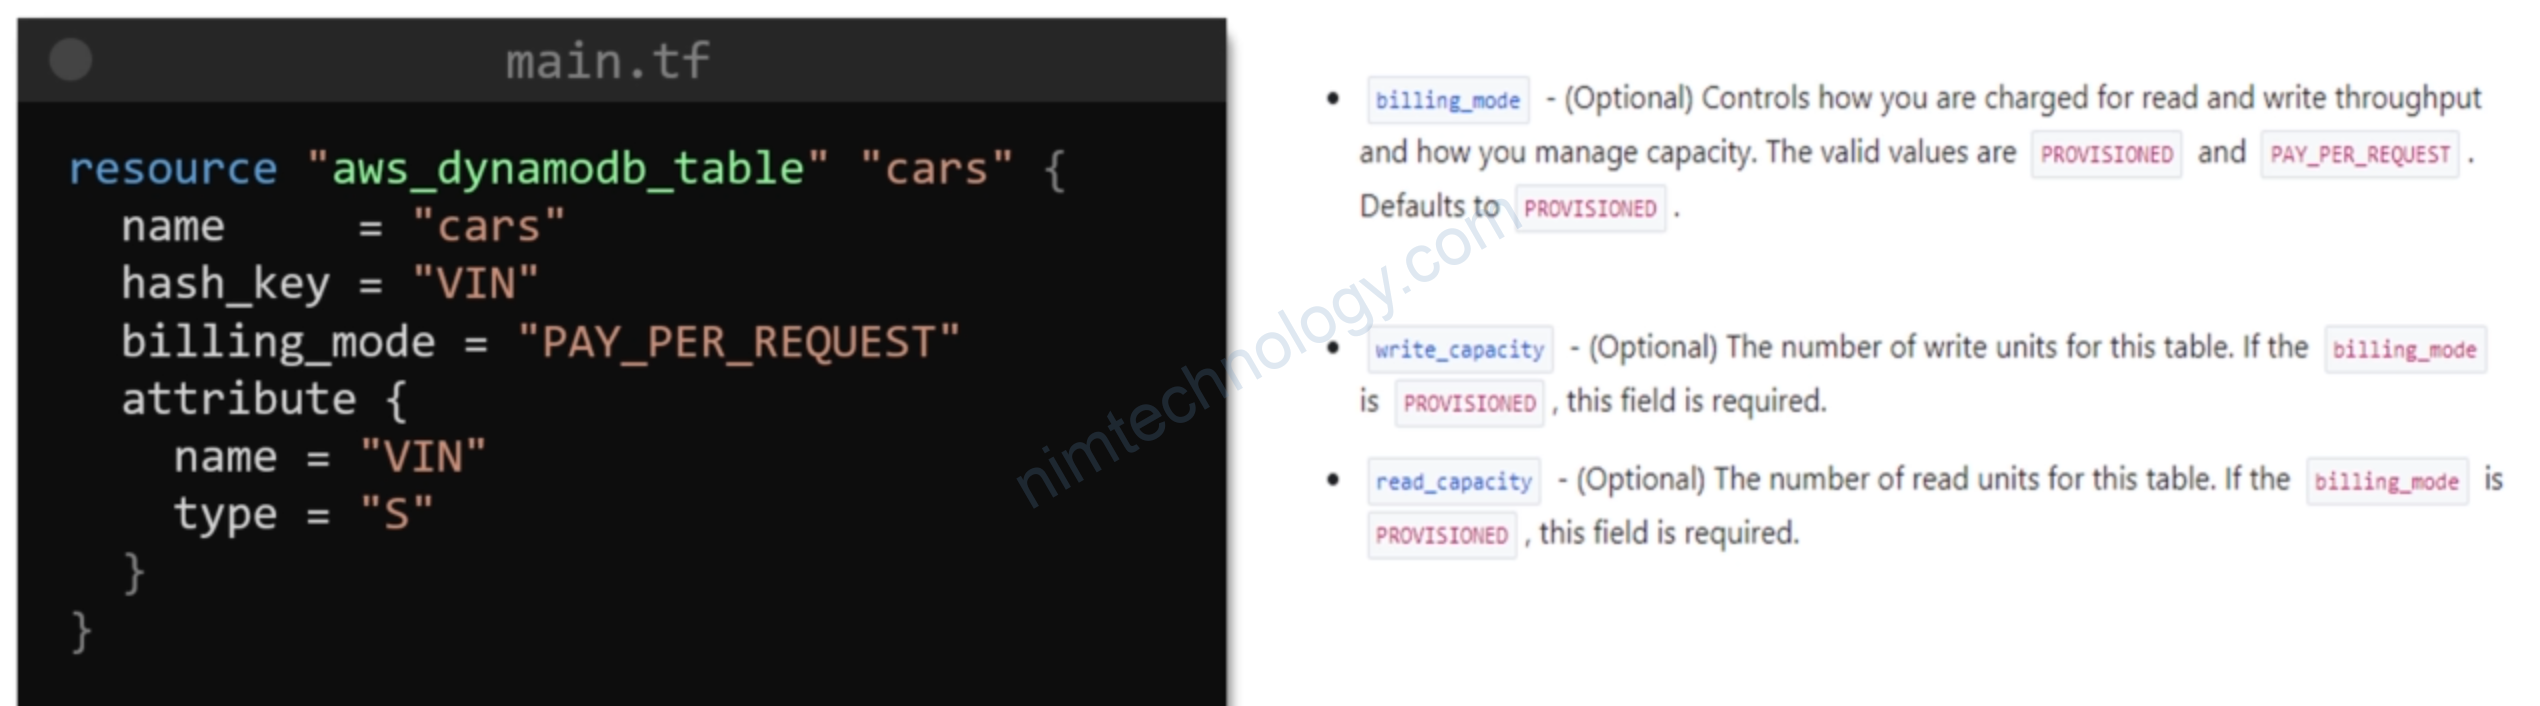
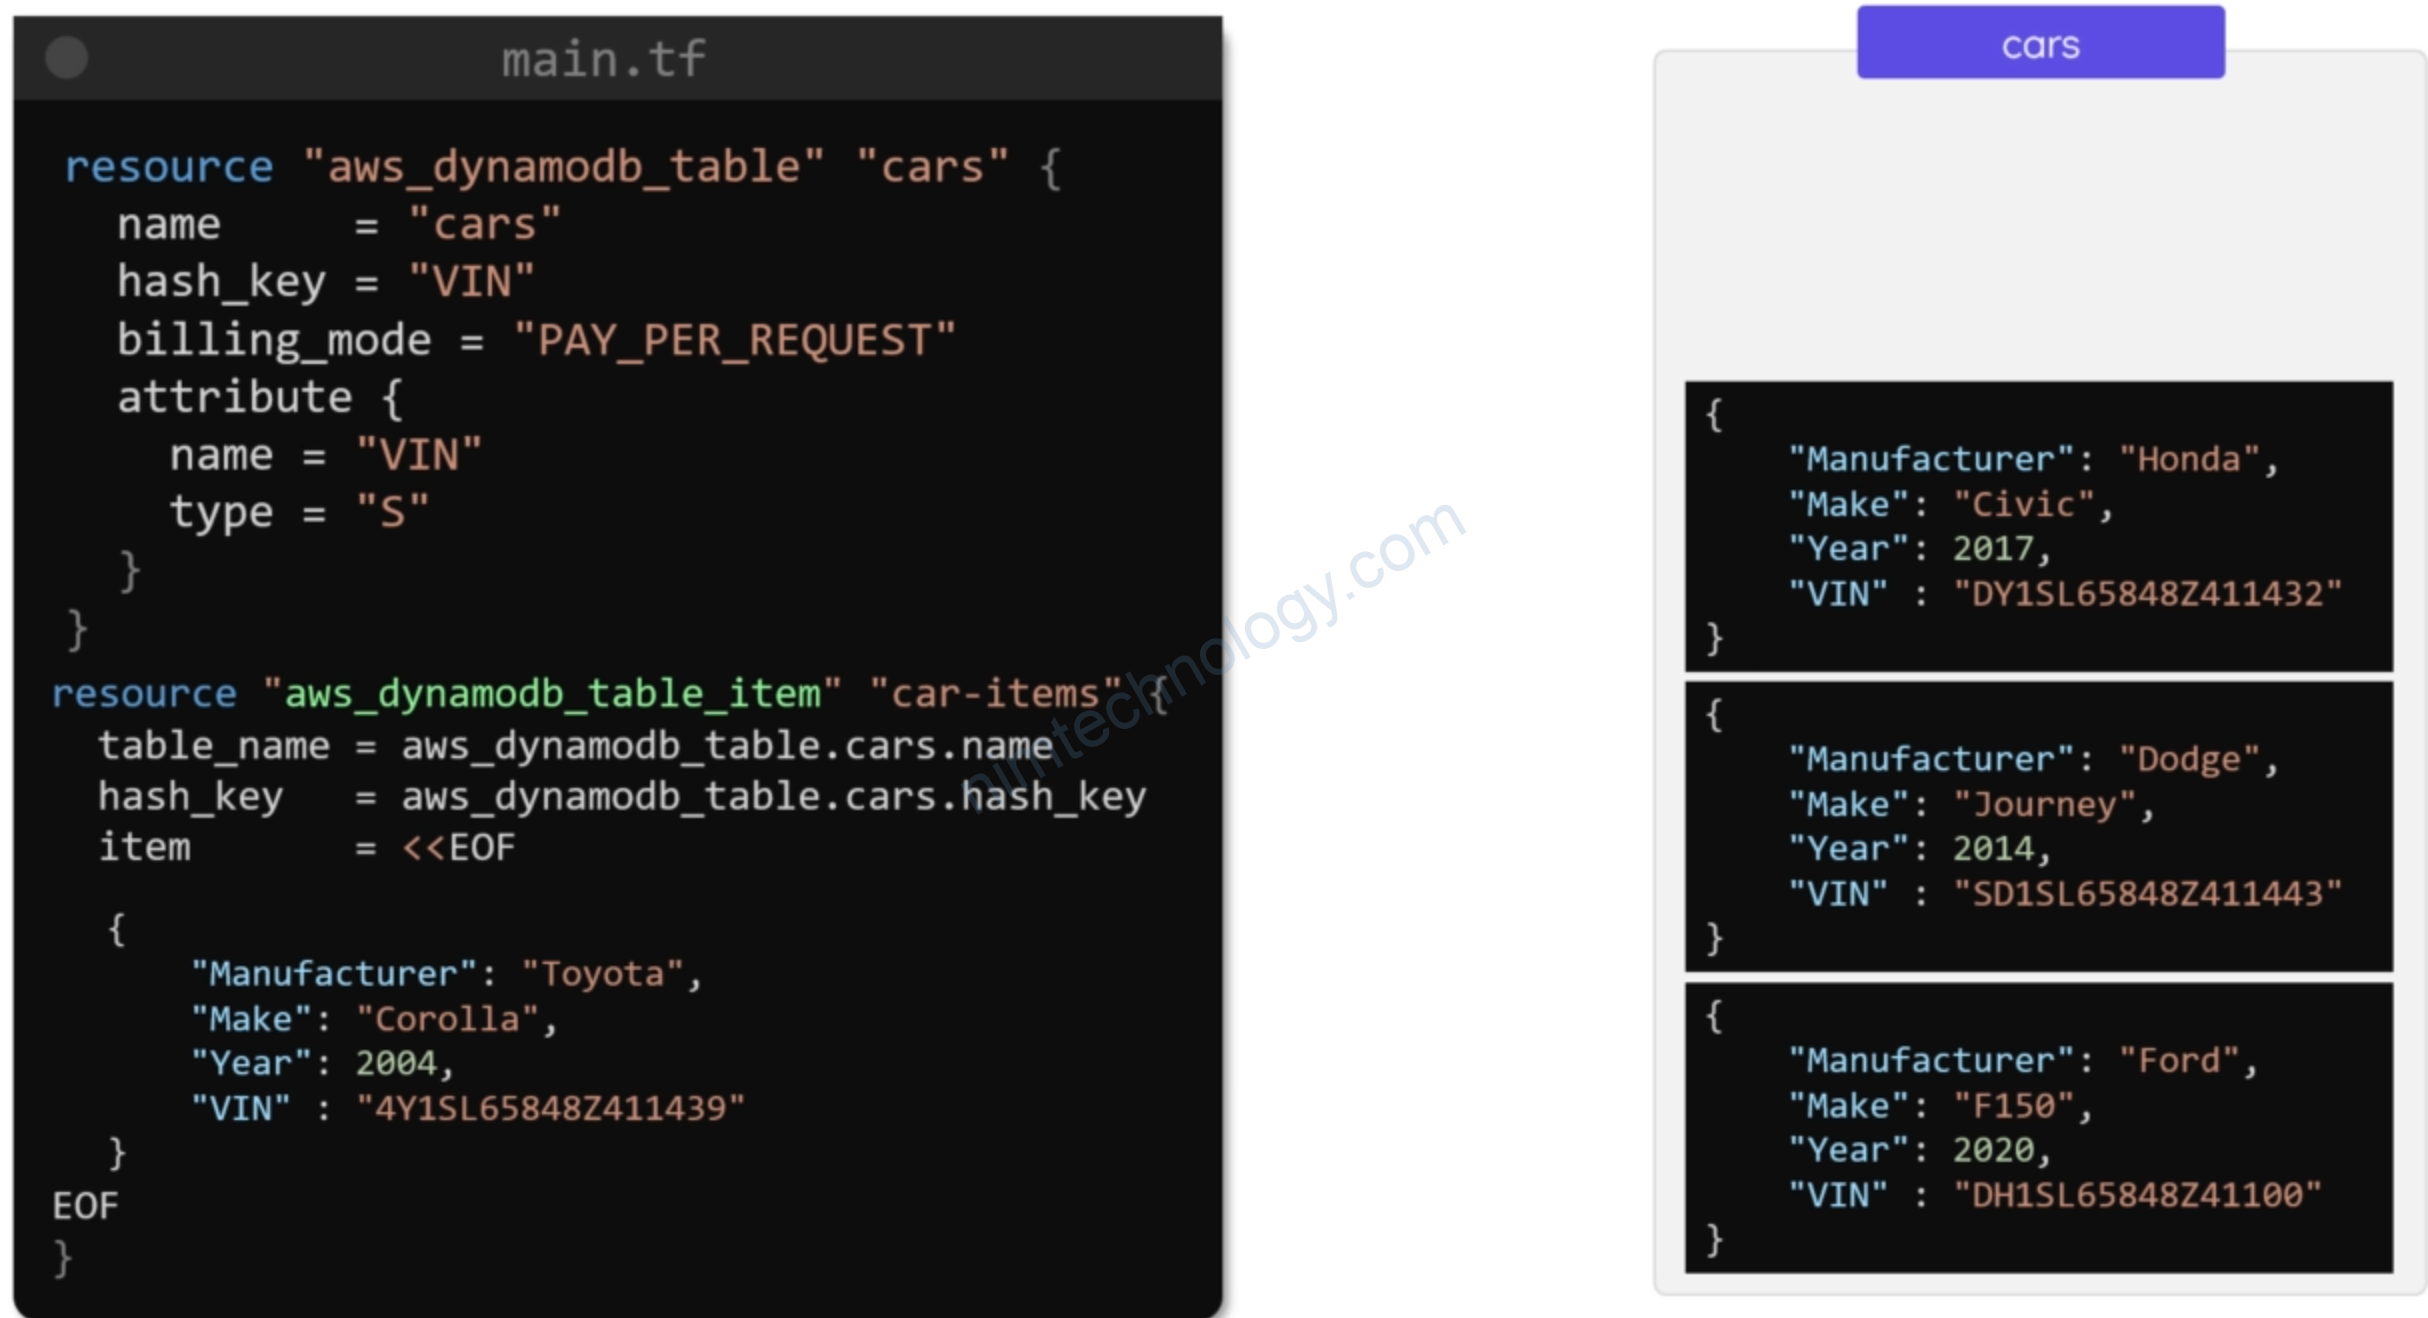
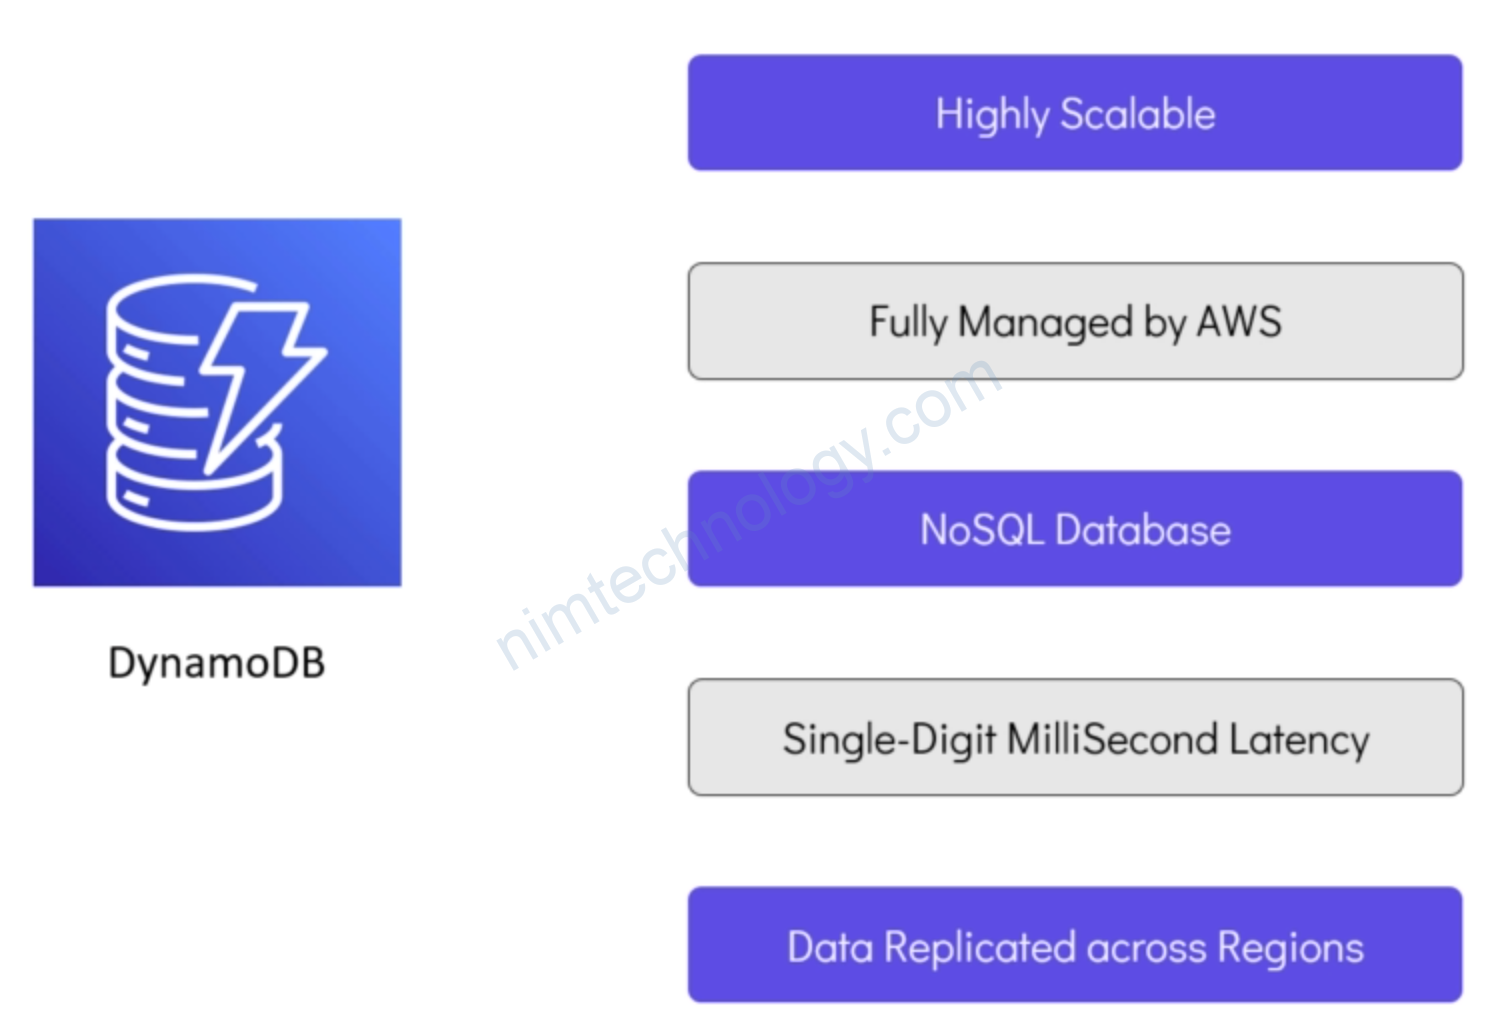
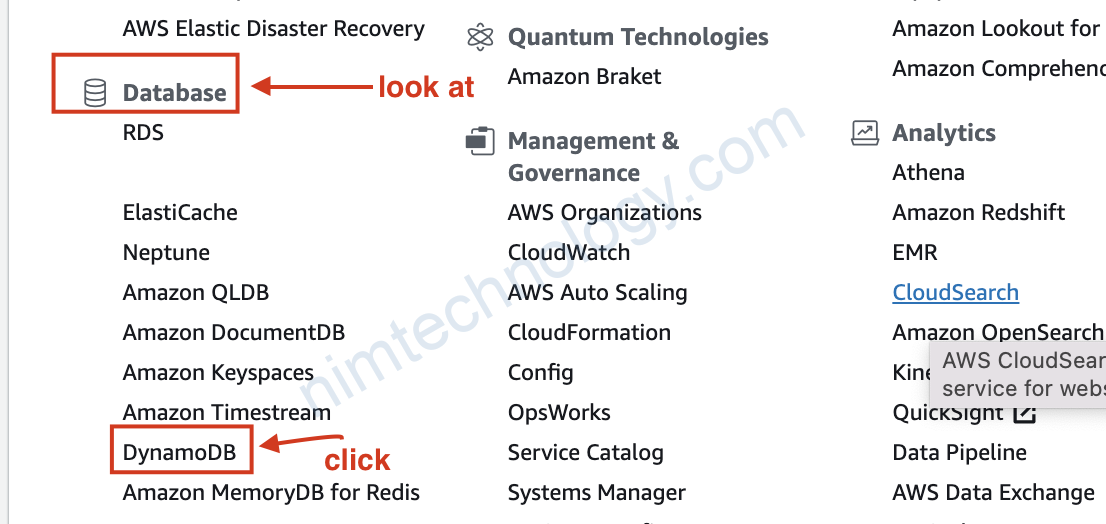
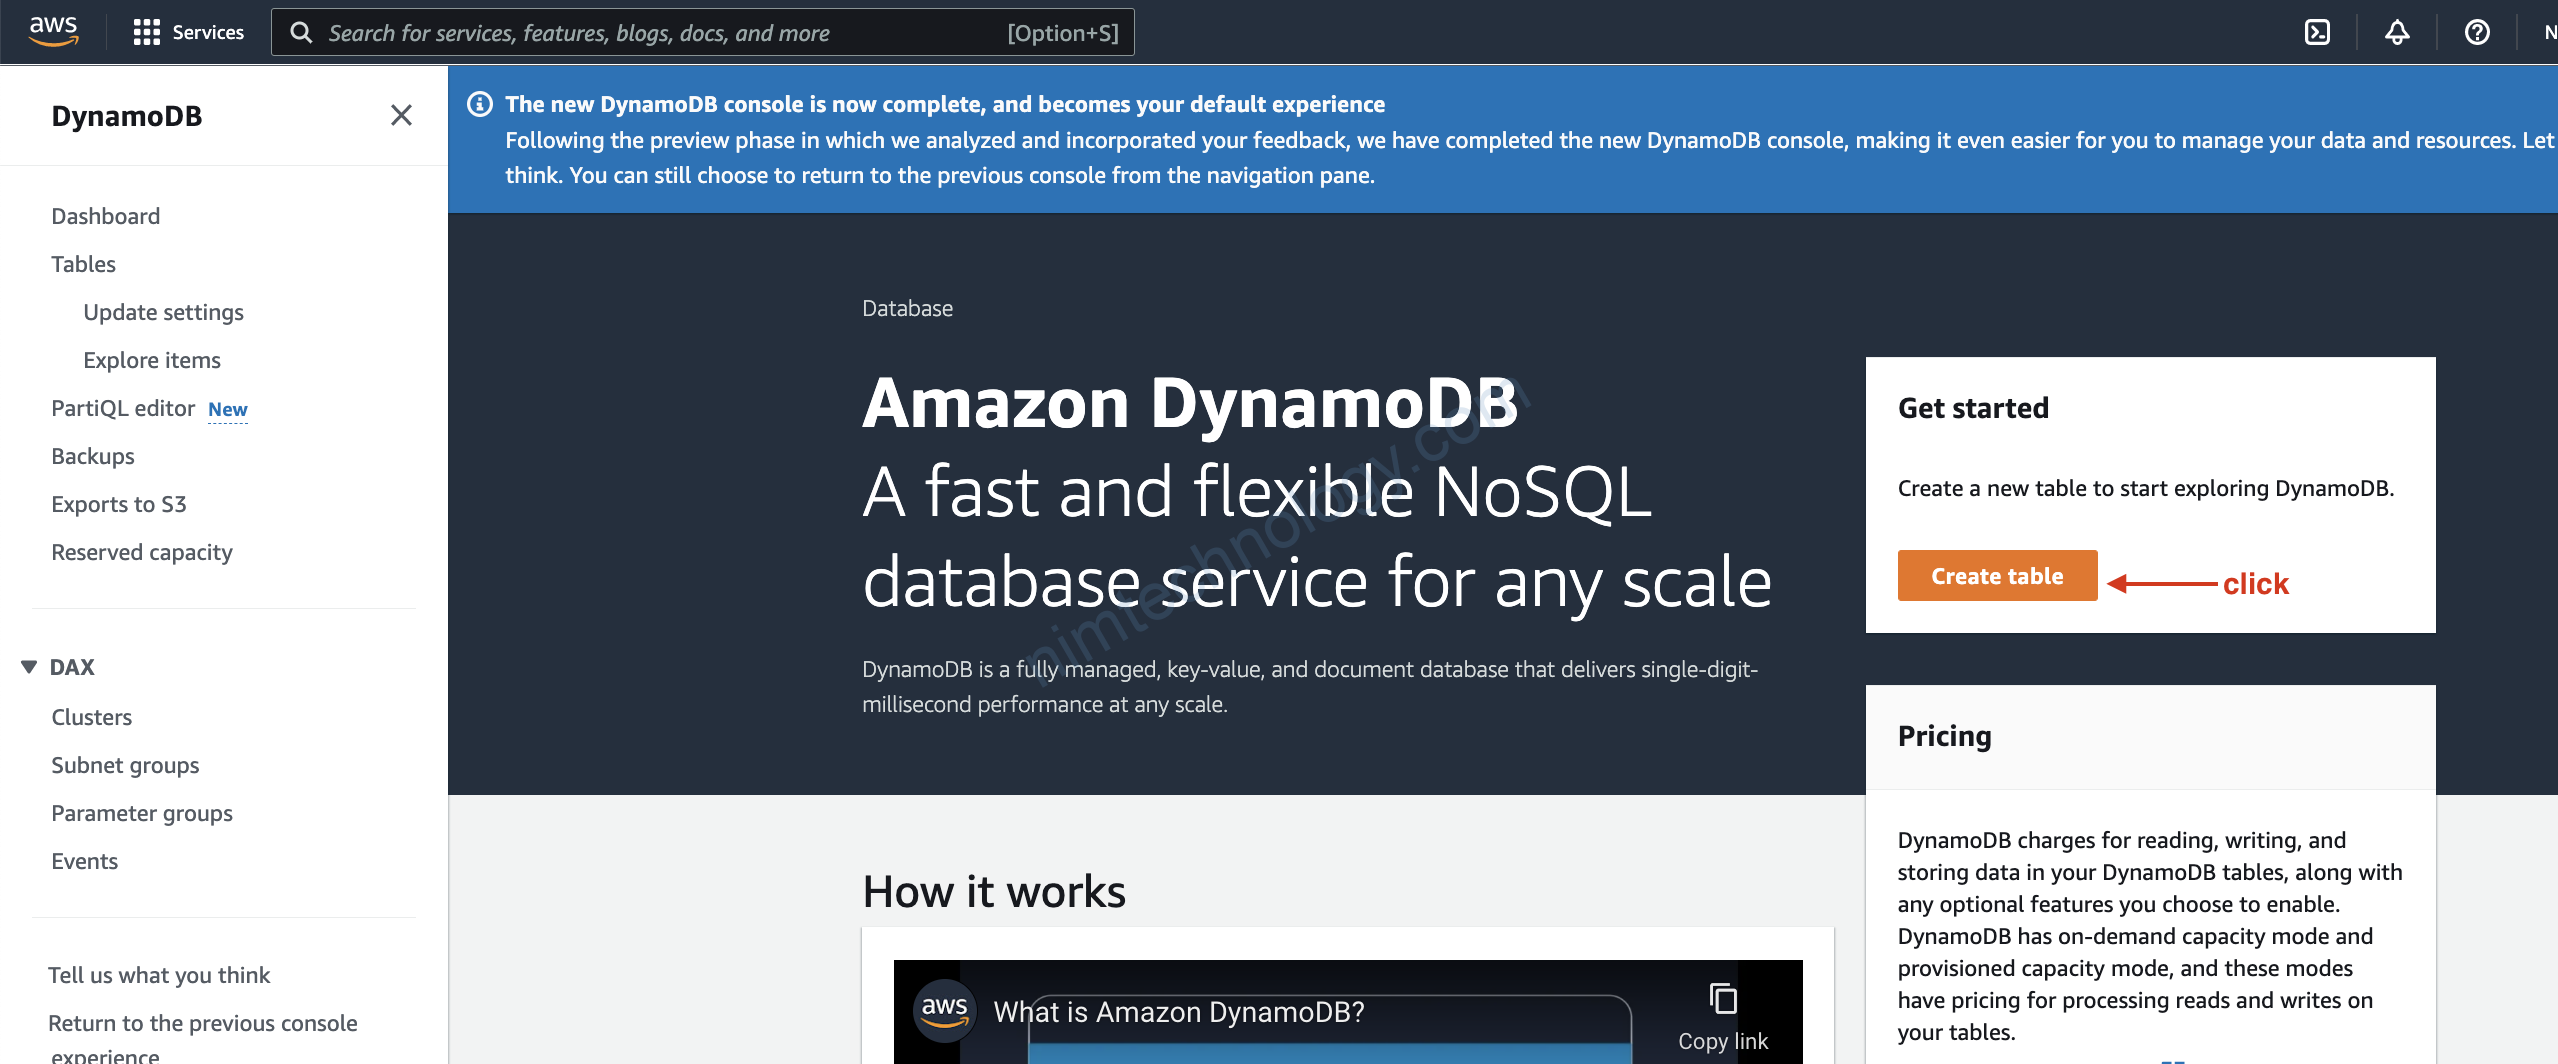
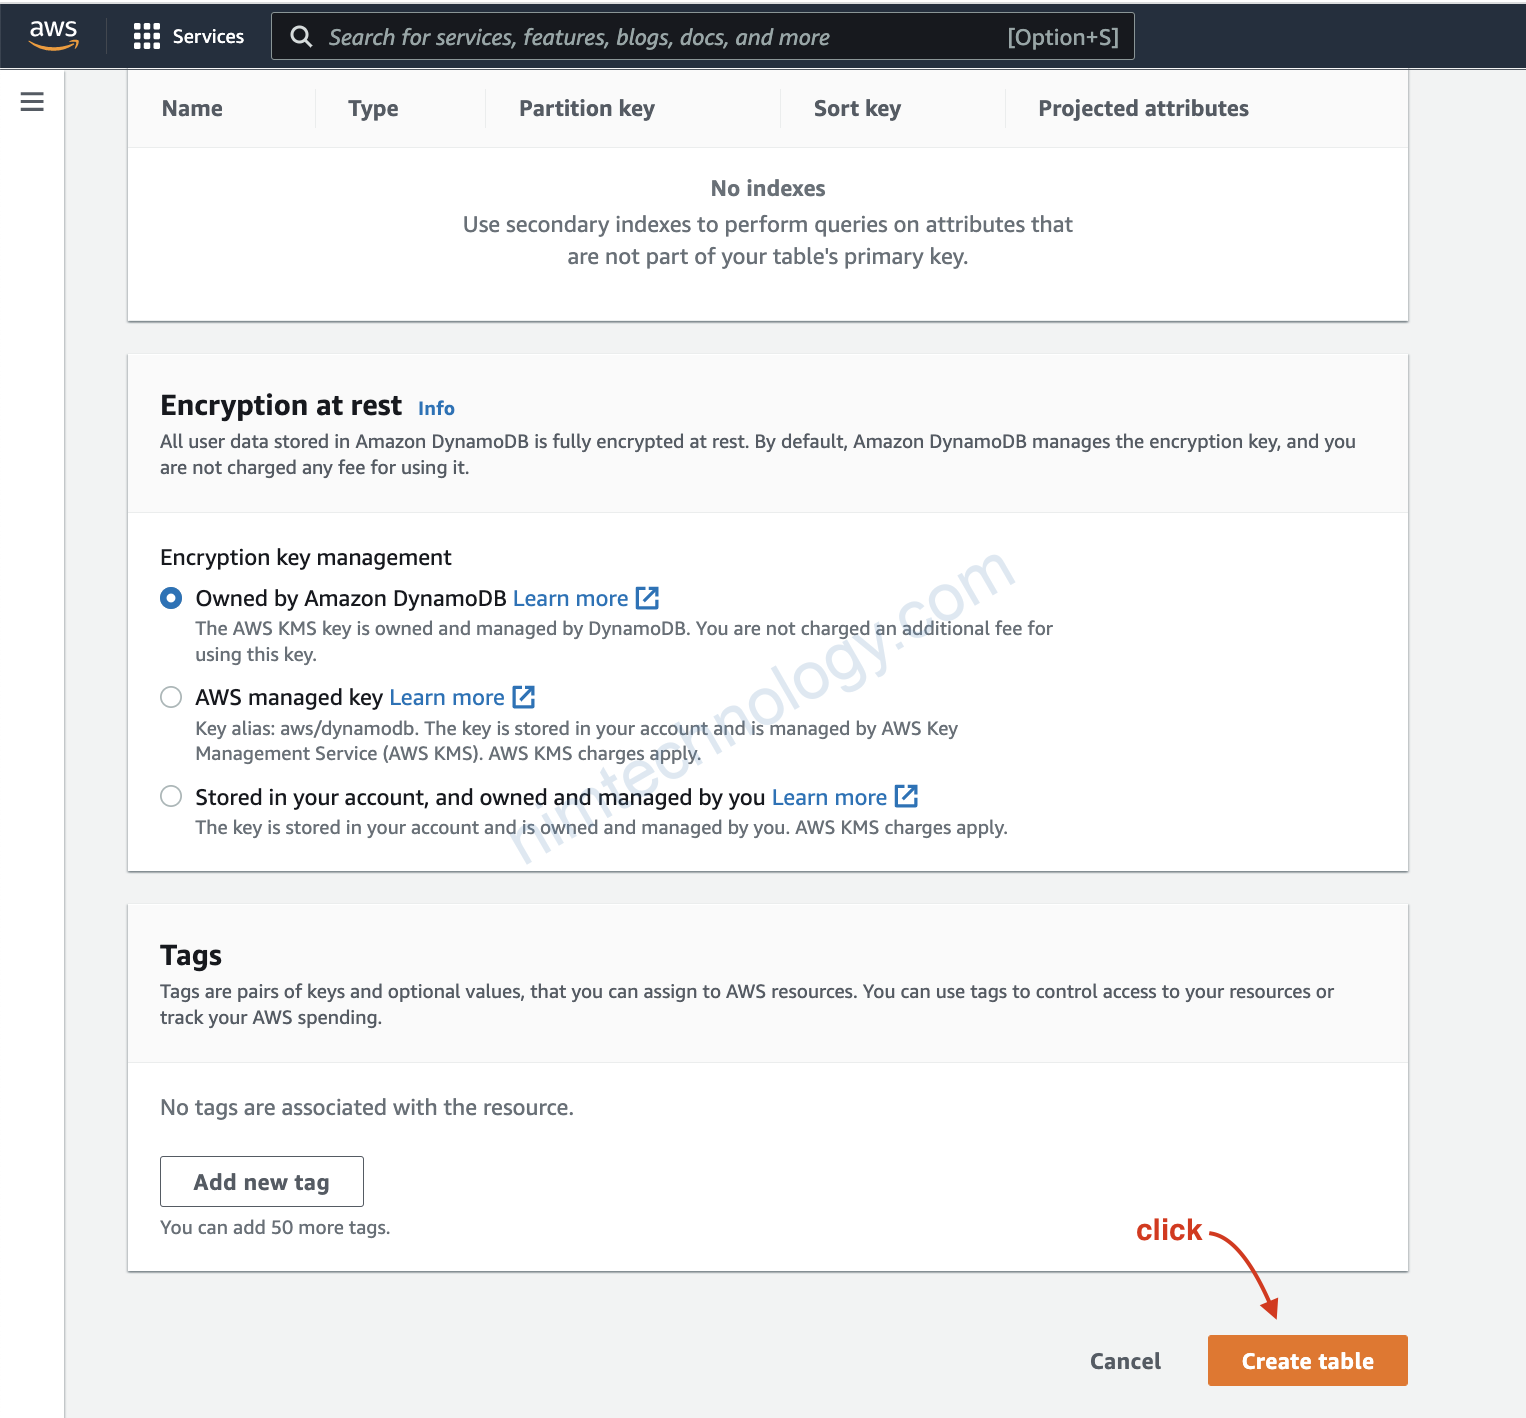
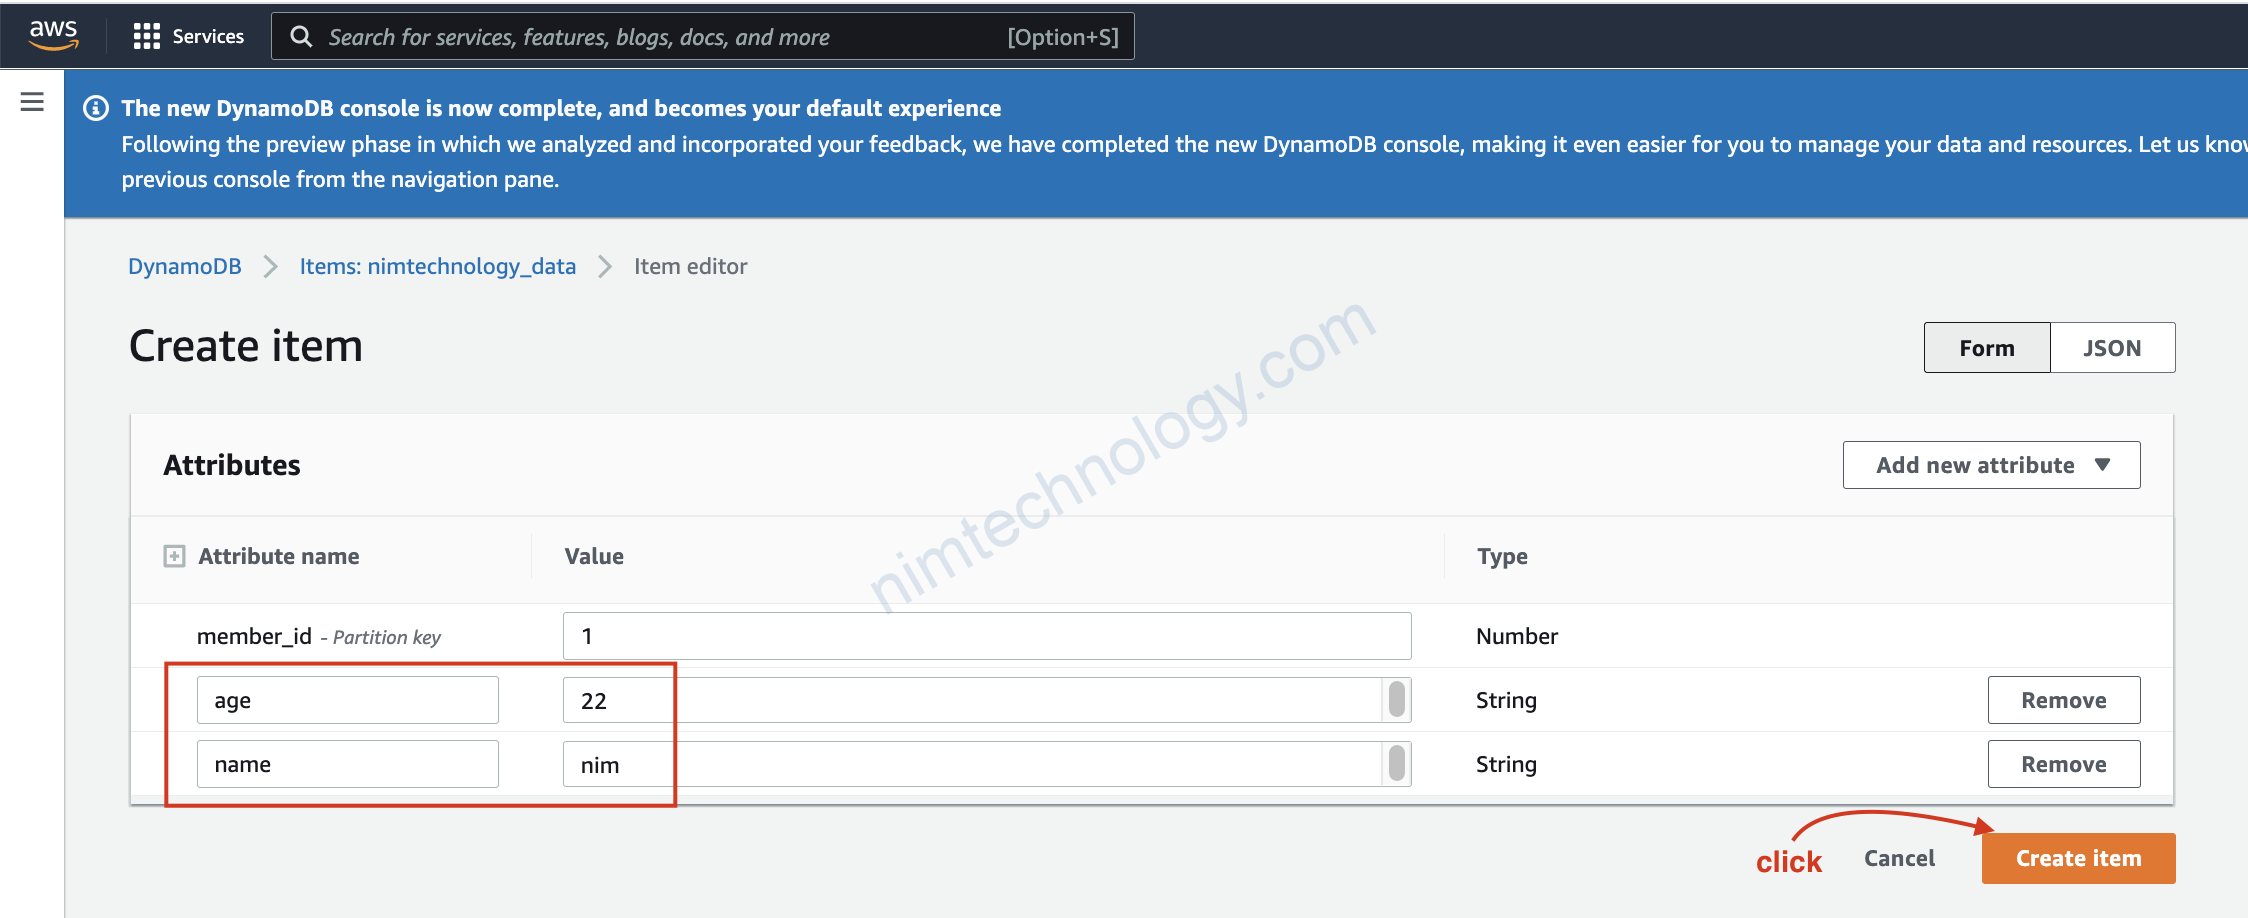
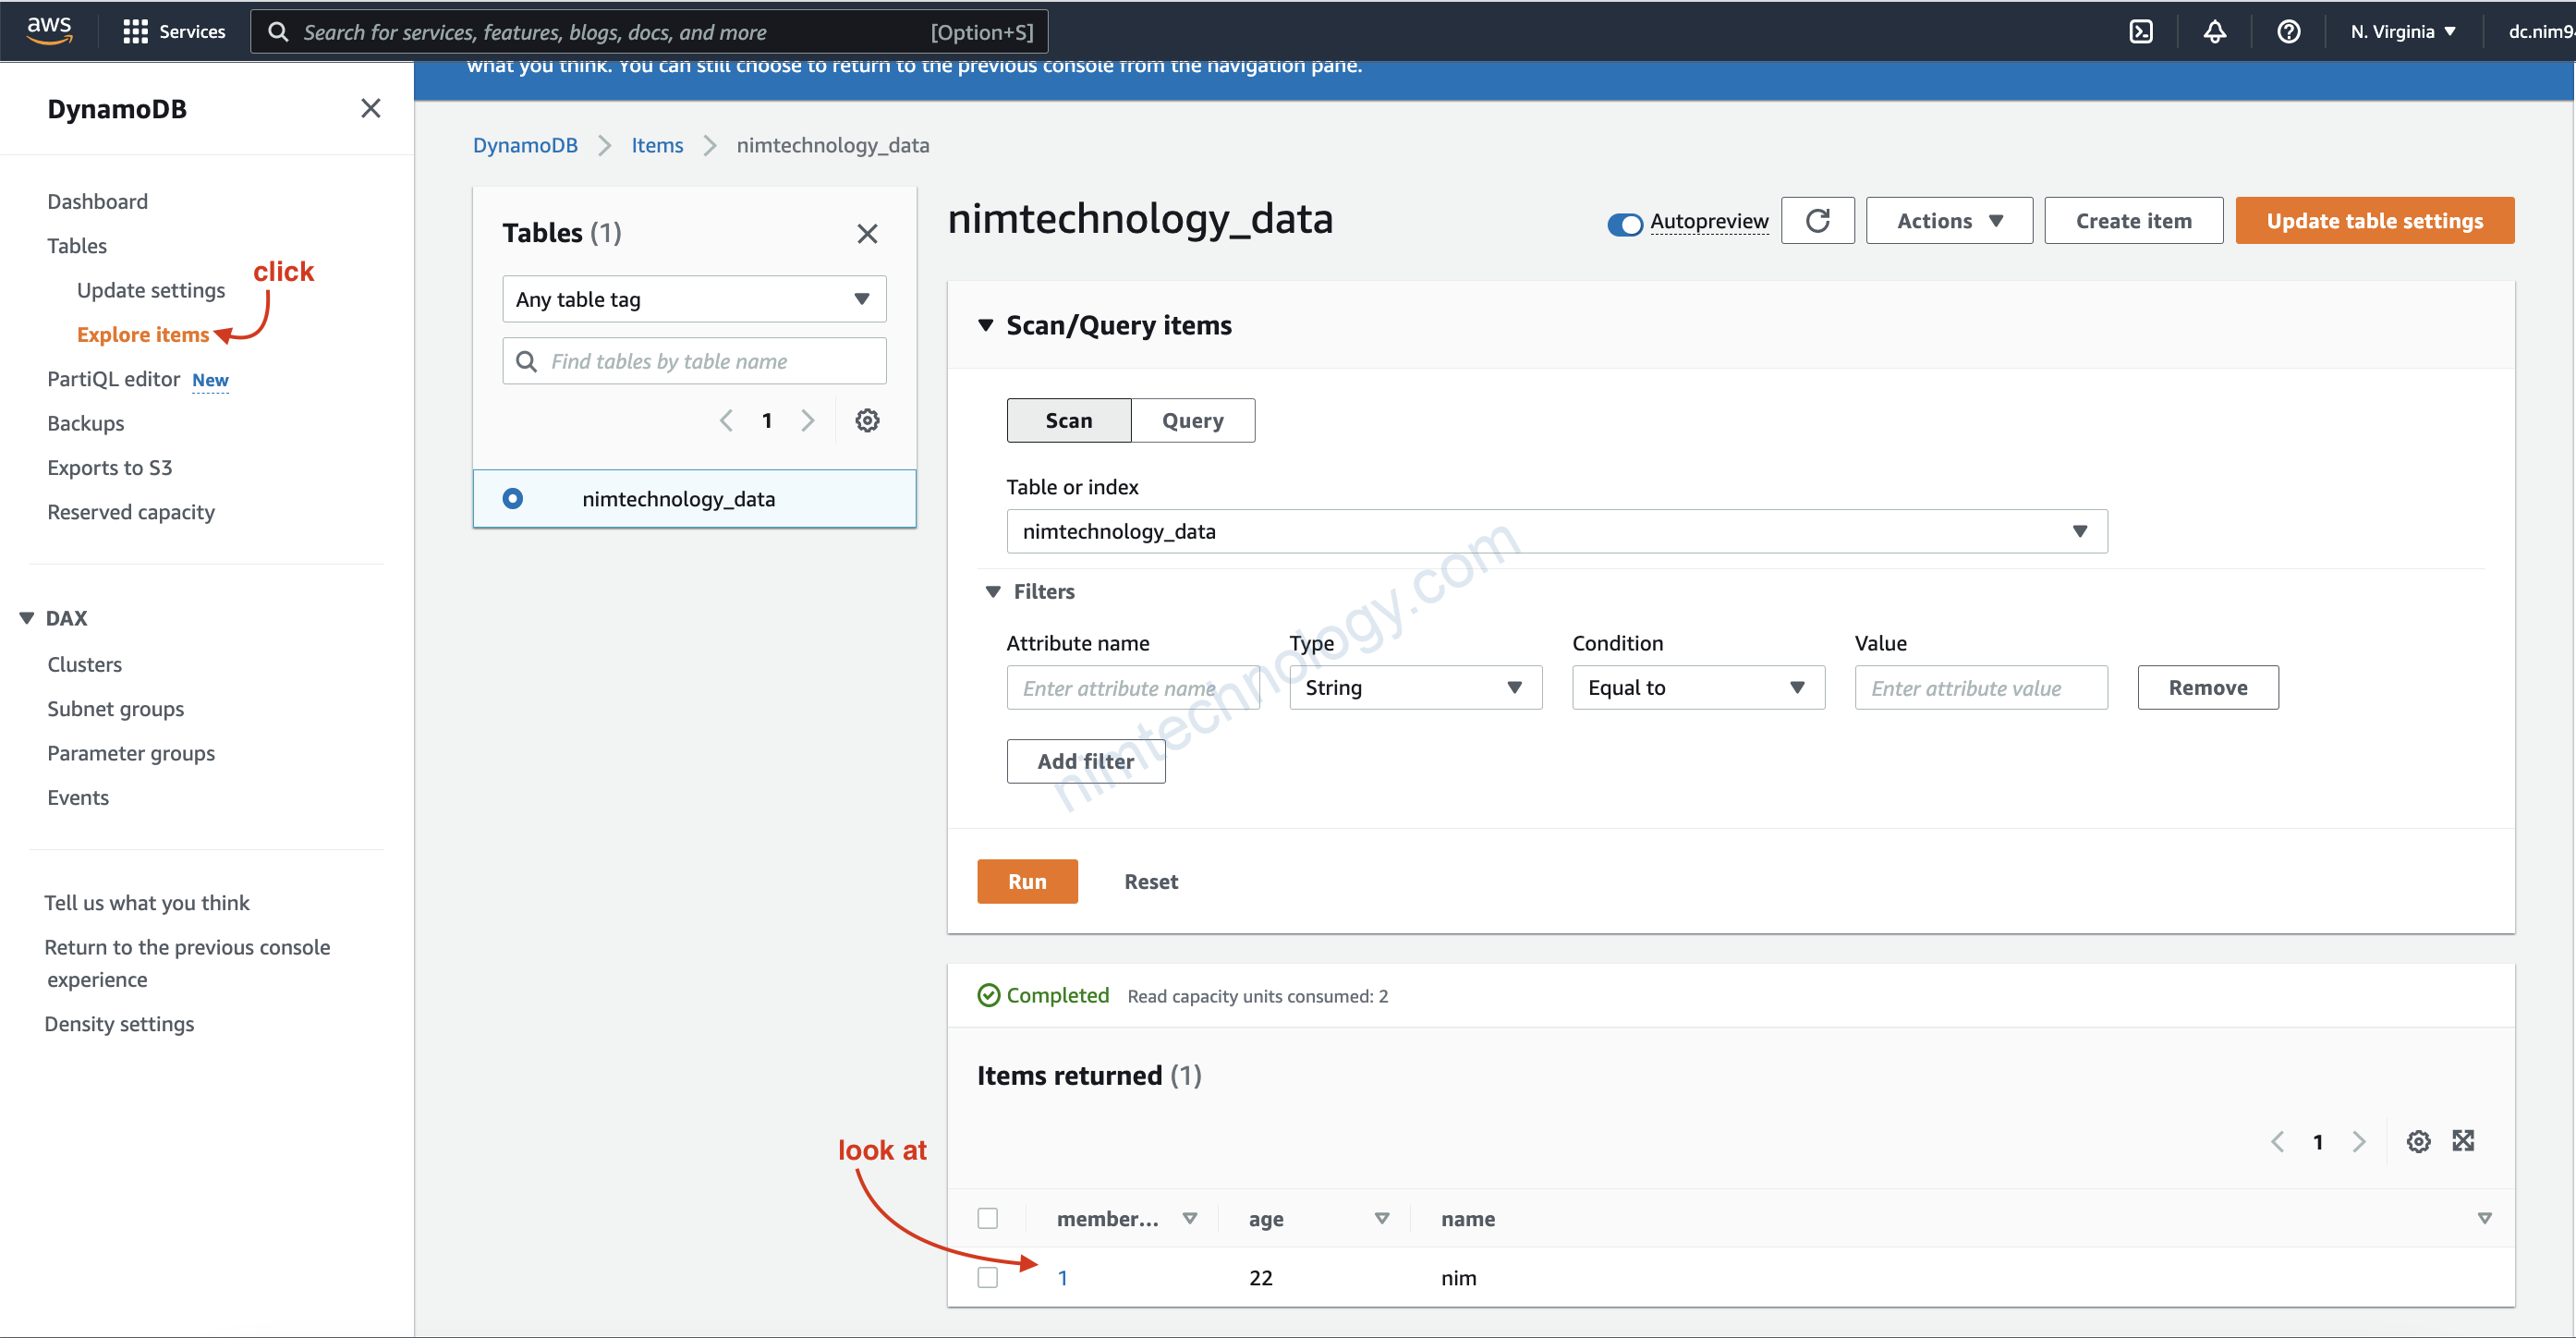
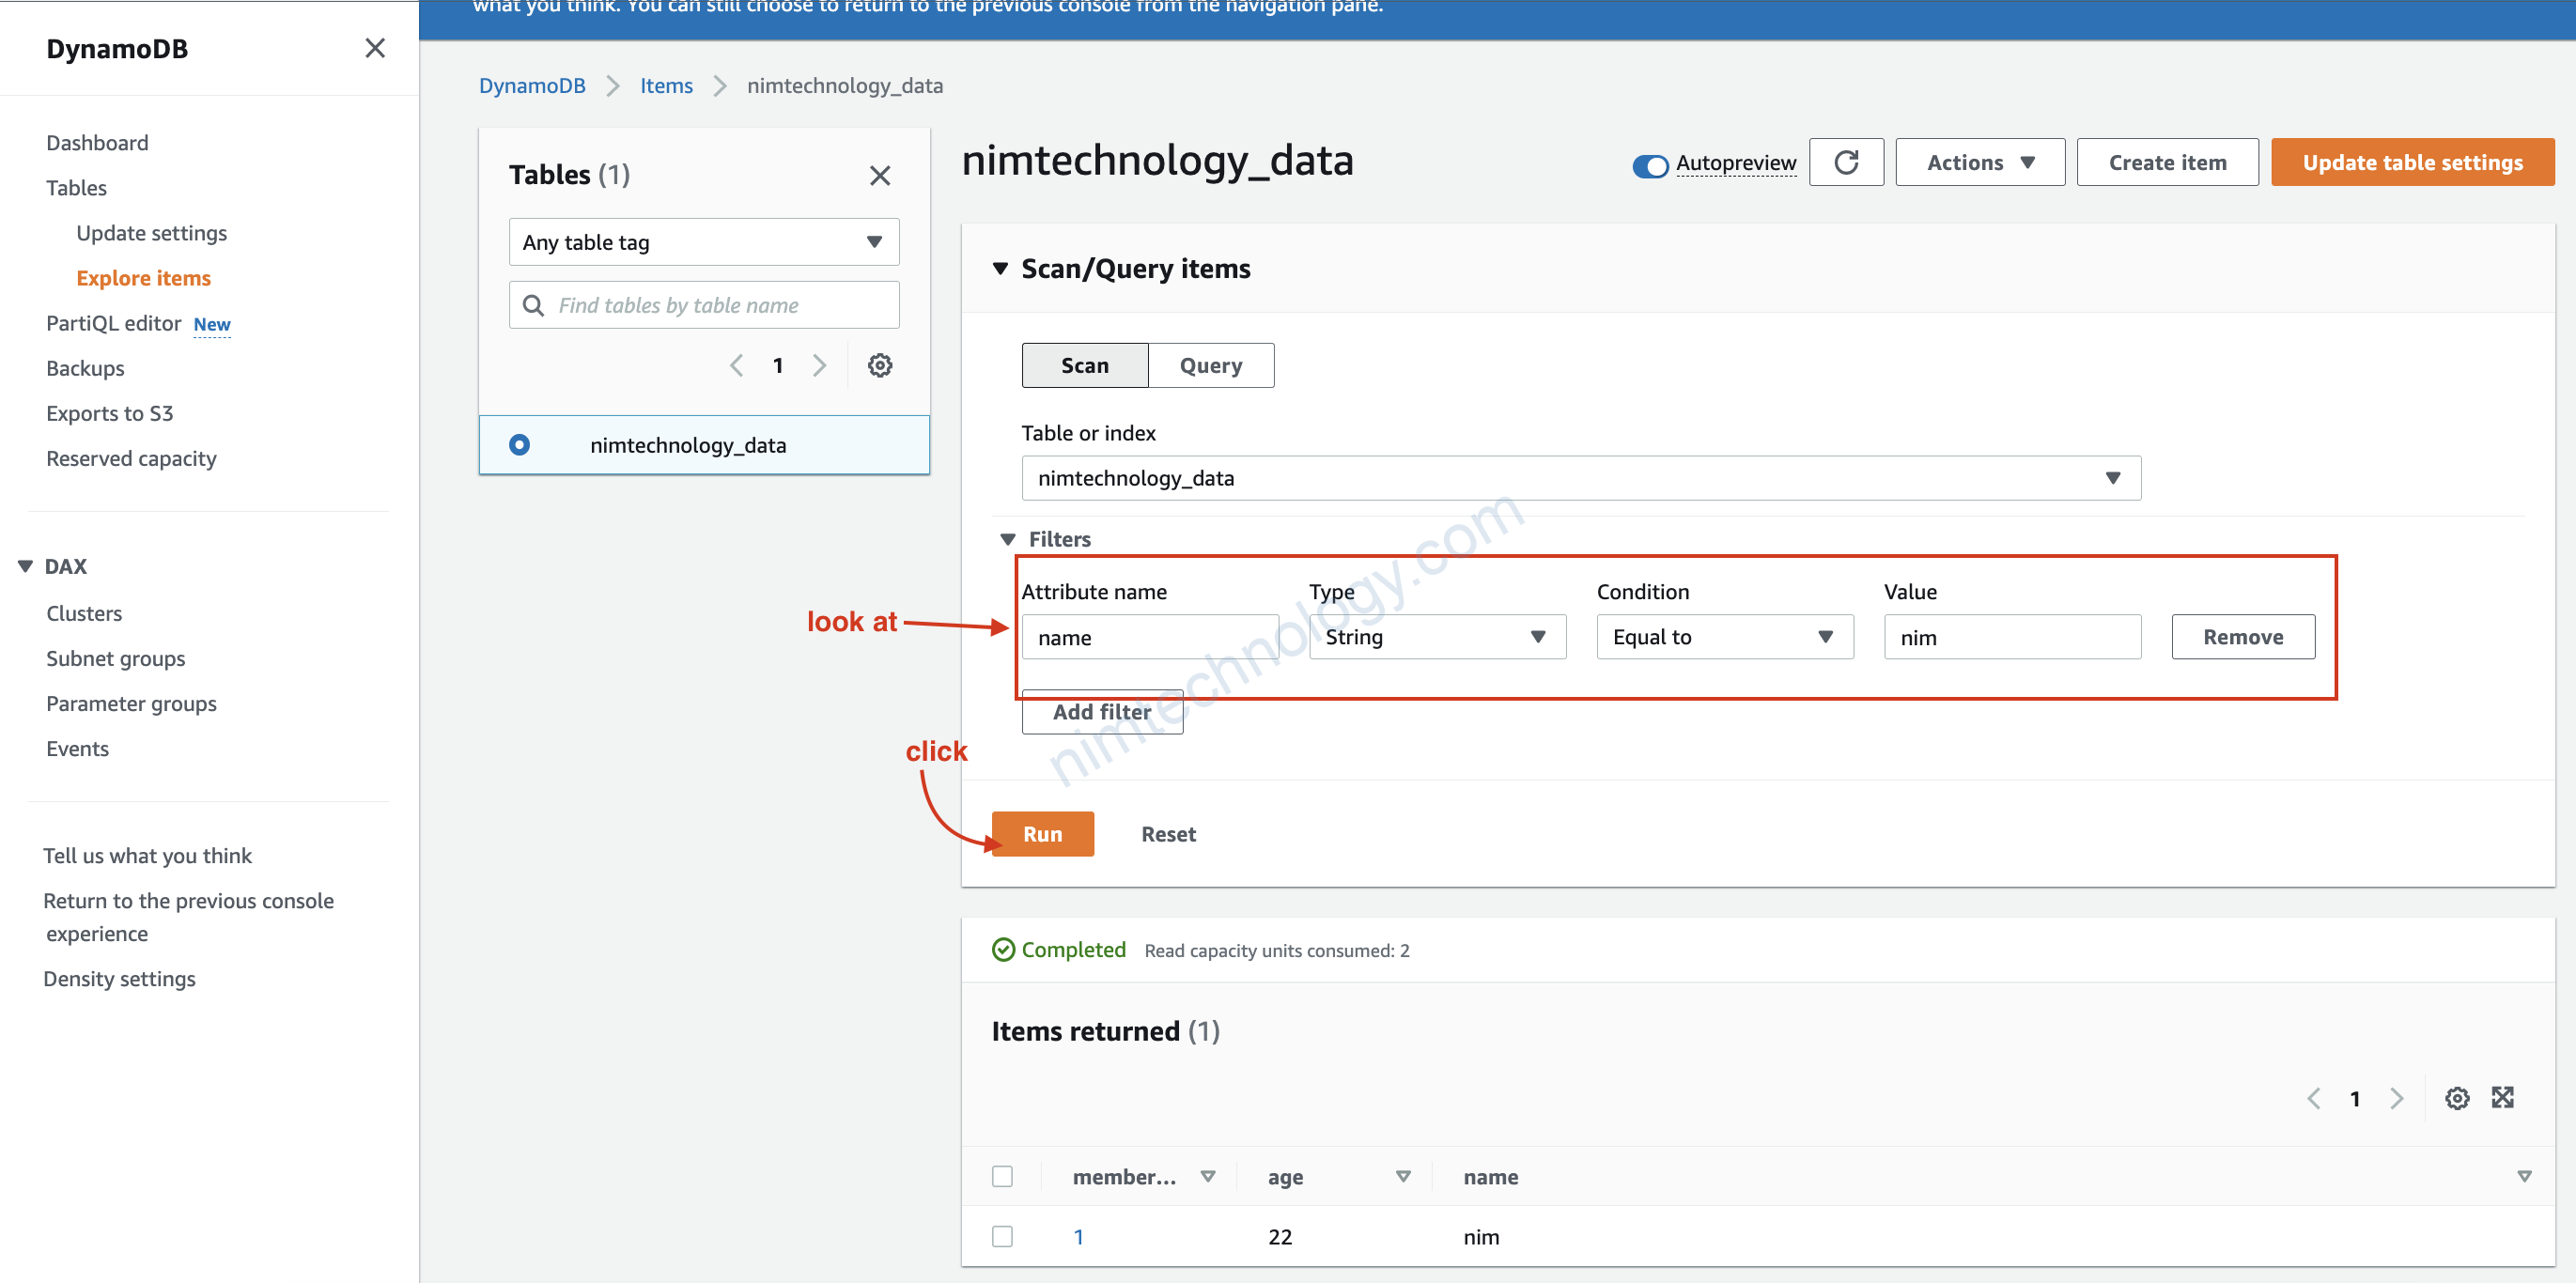
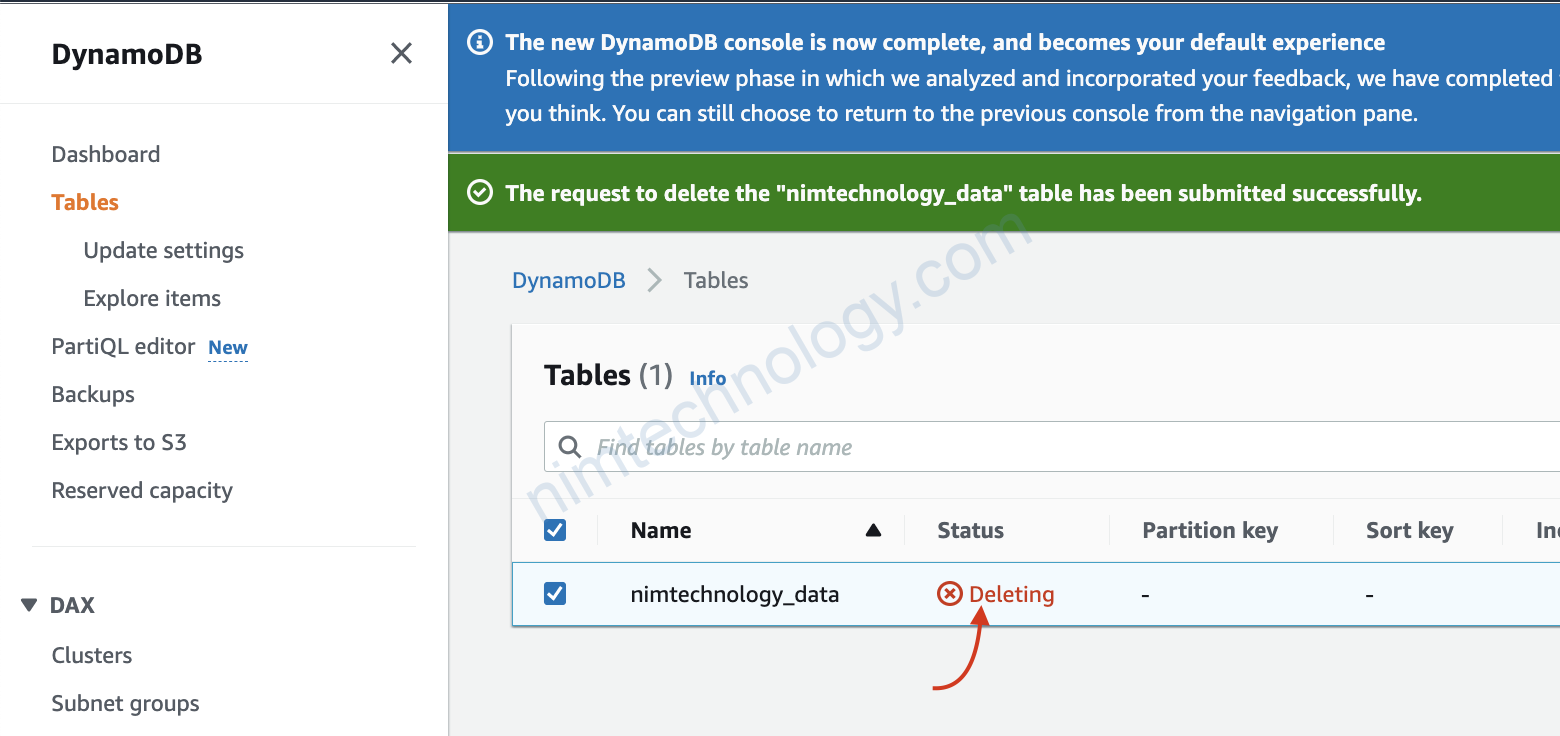
9 Introduction to DynamoDB
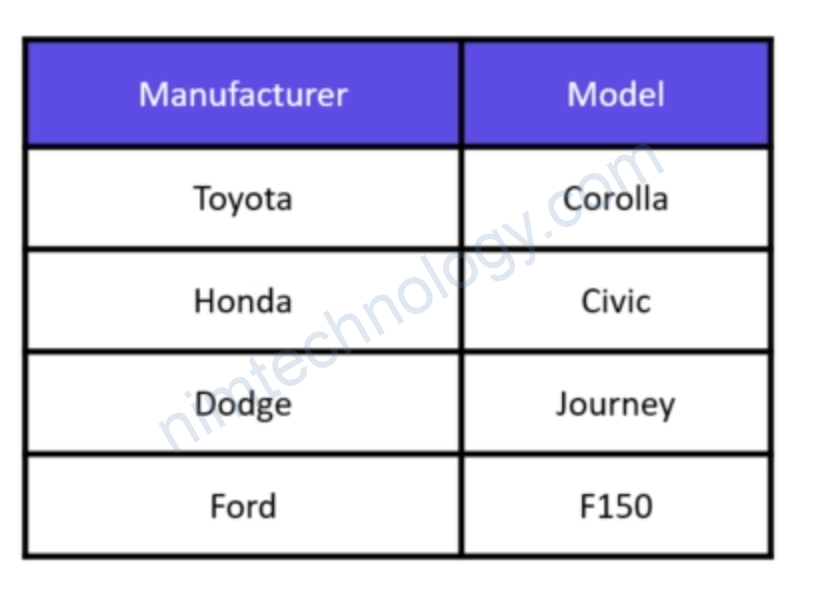
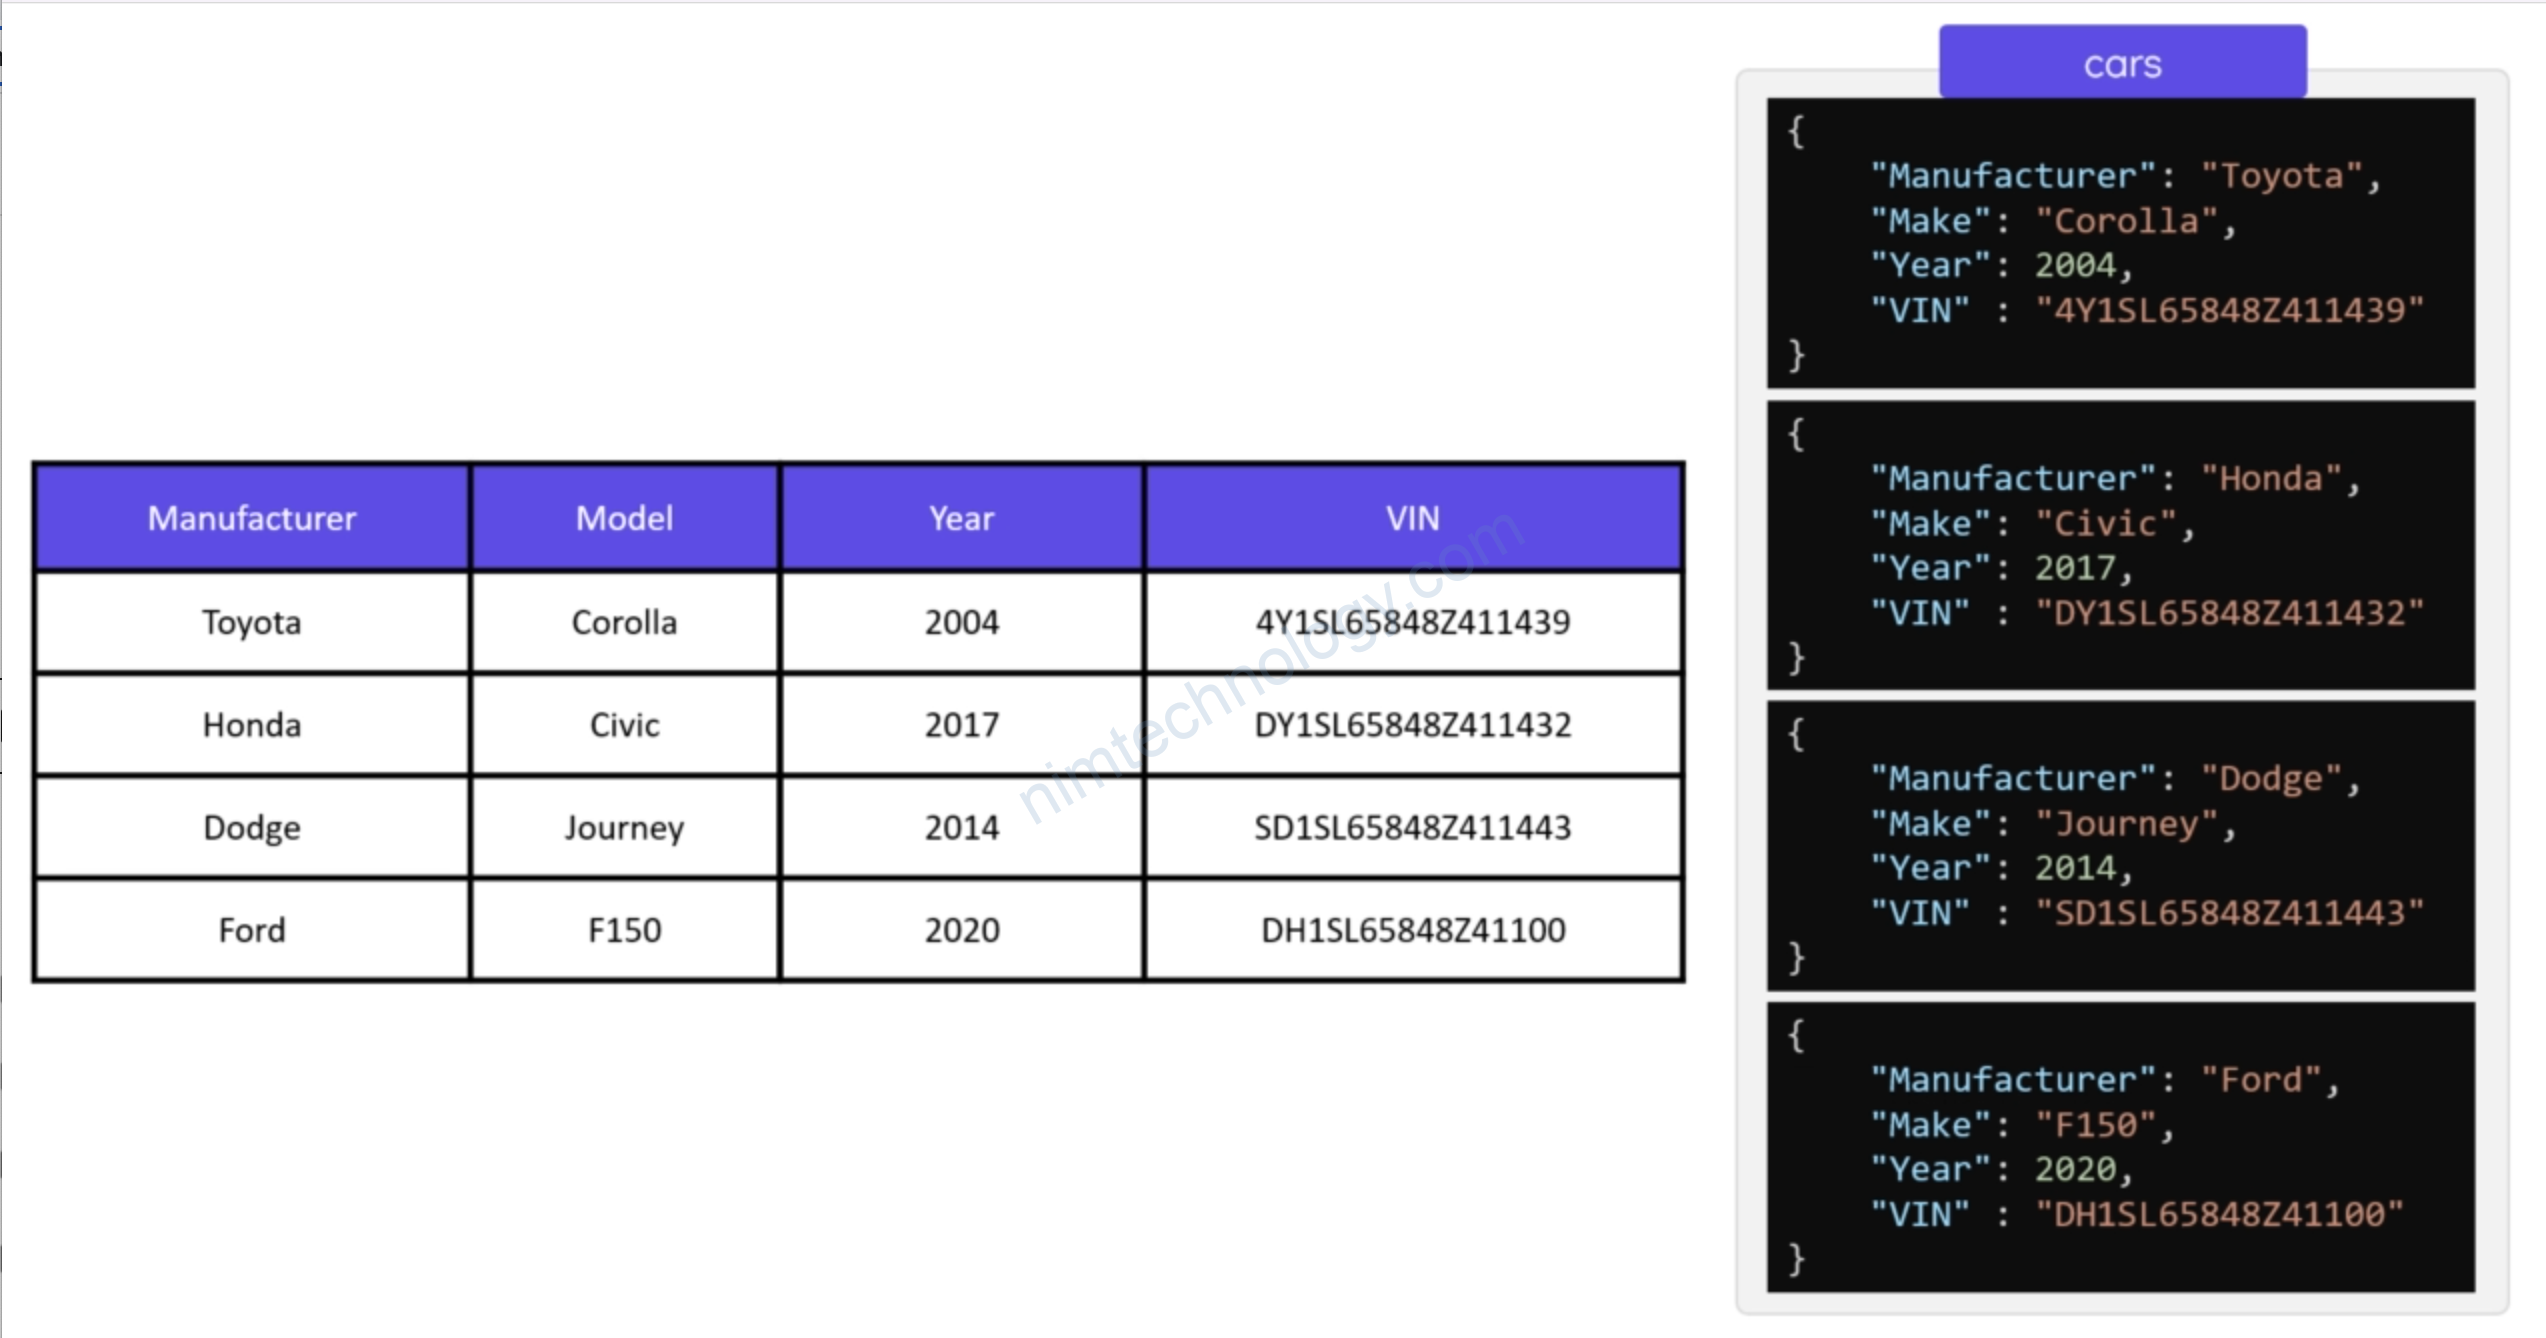
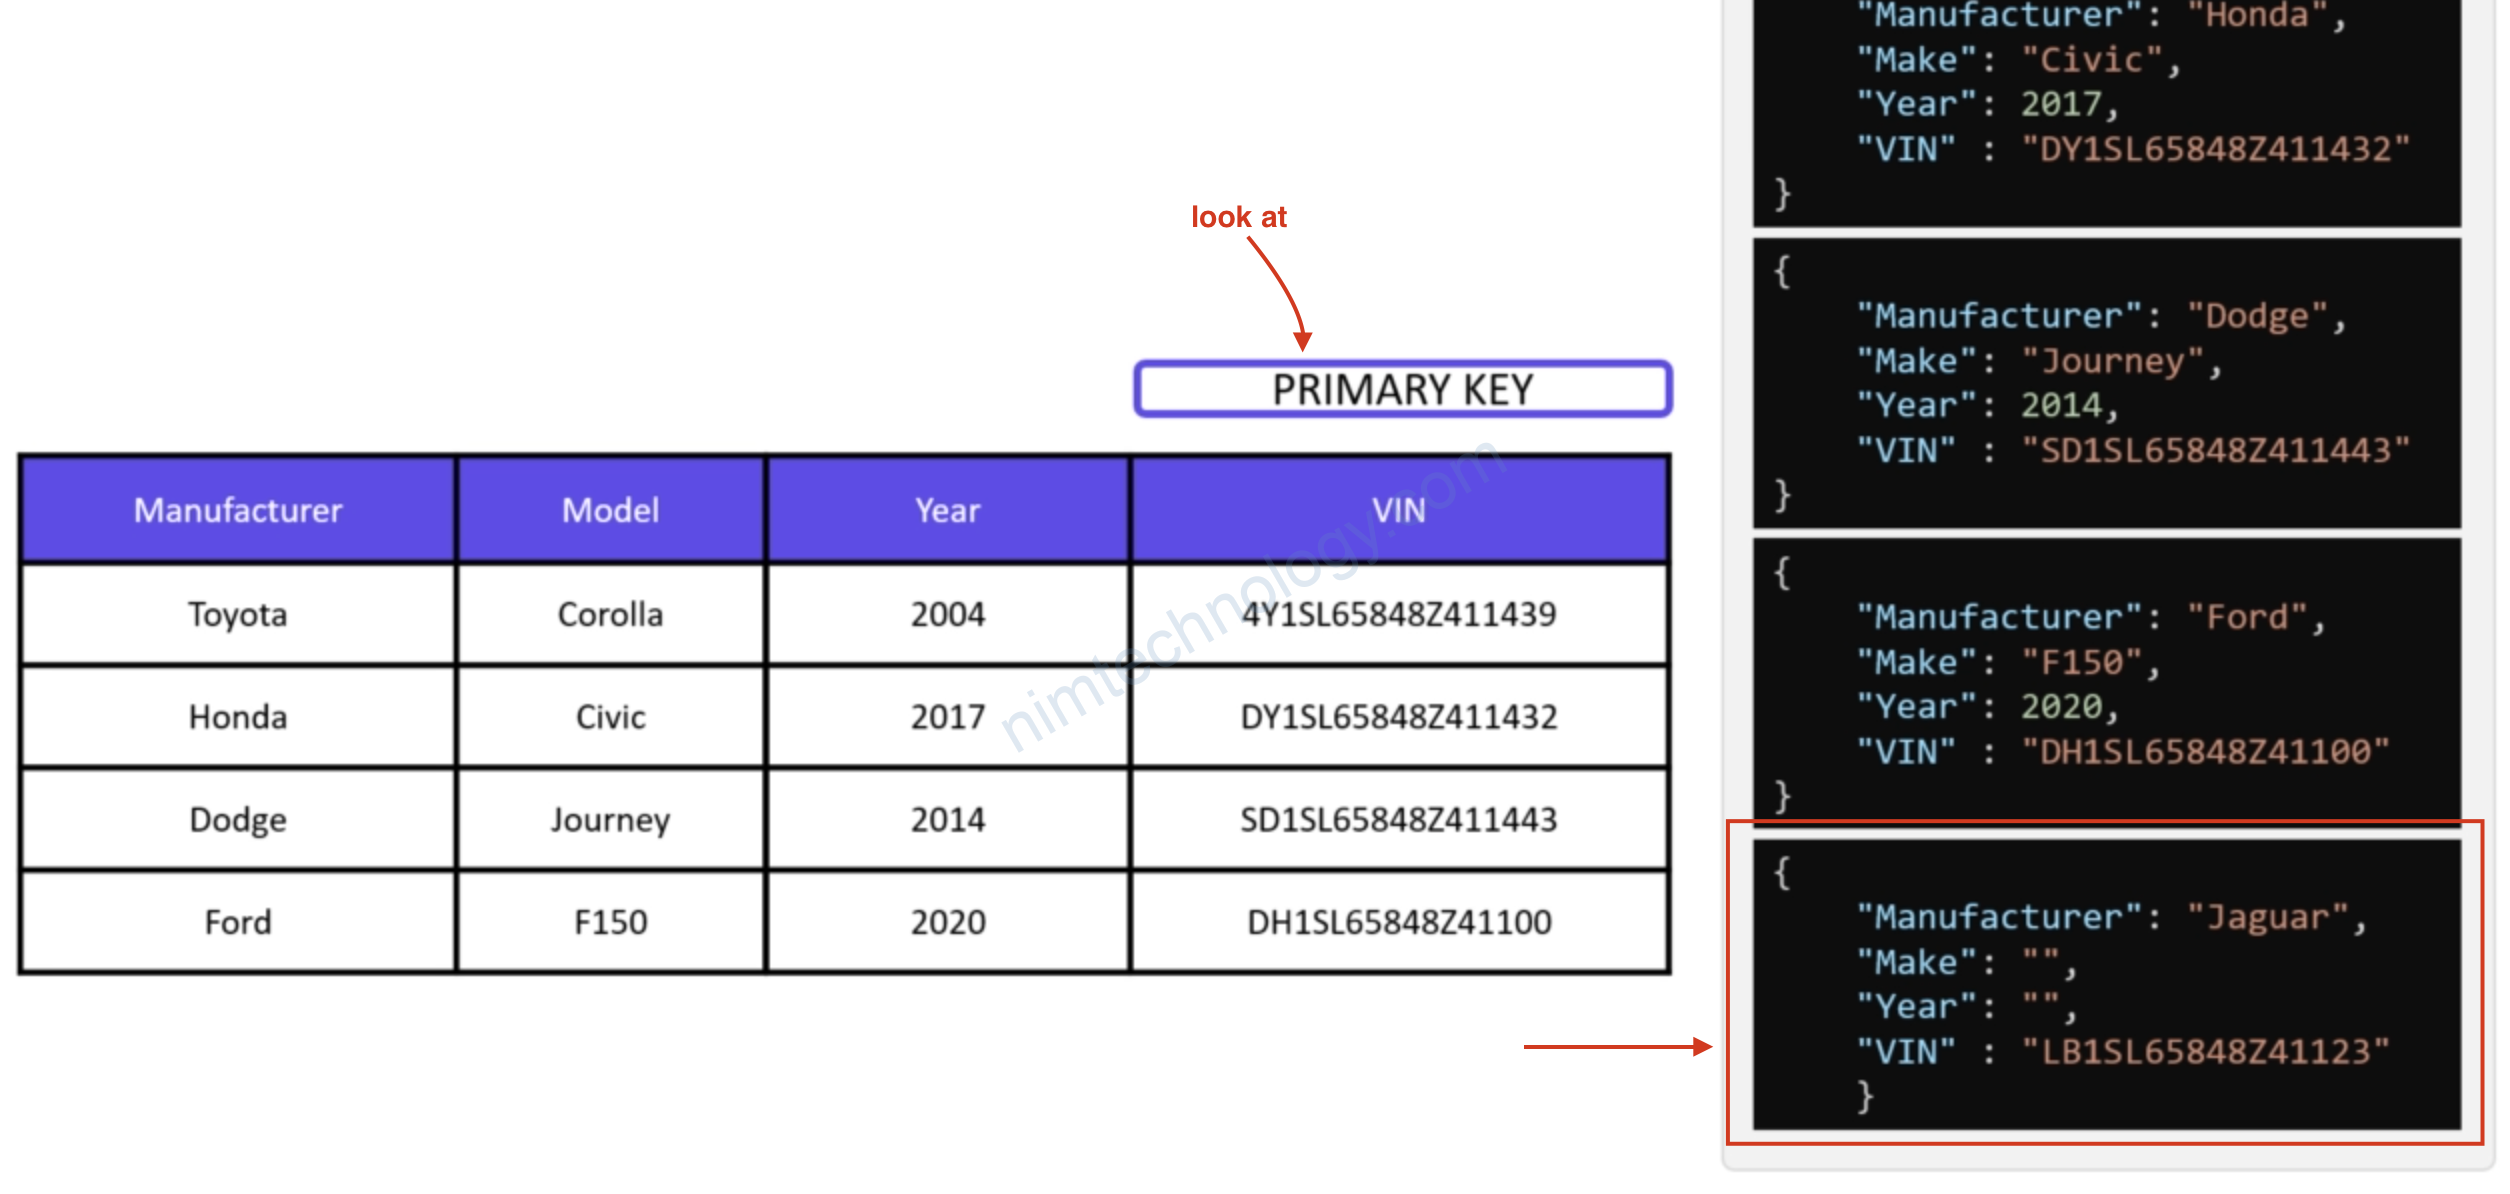
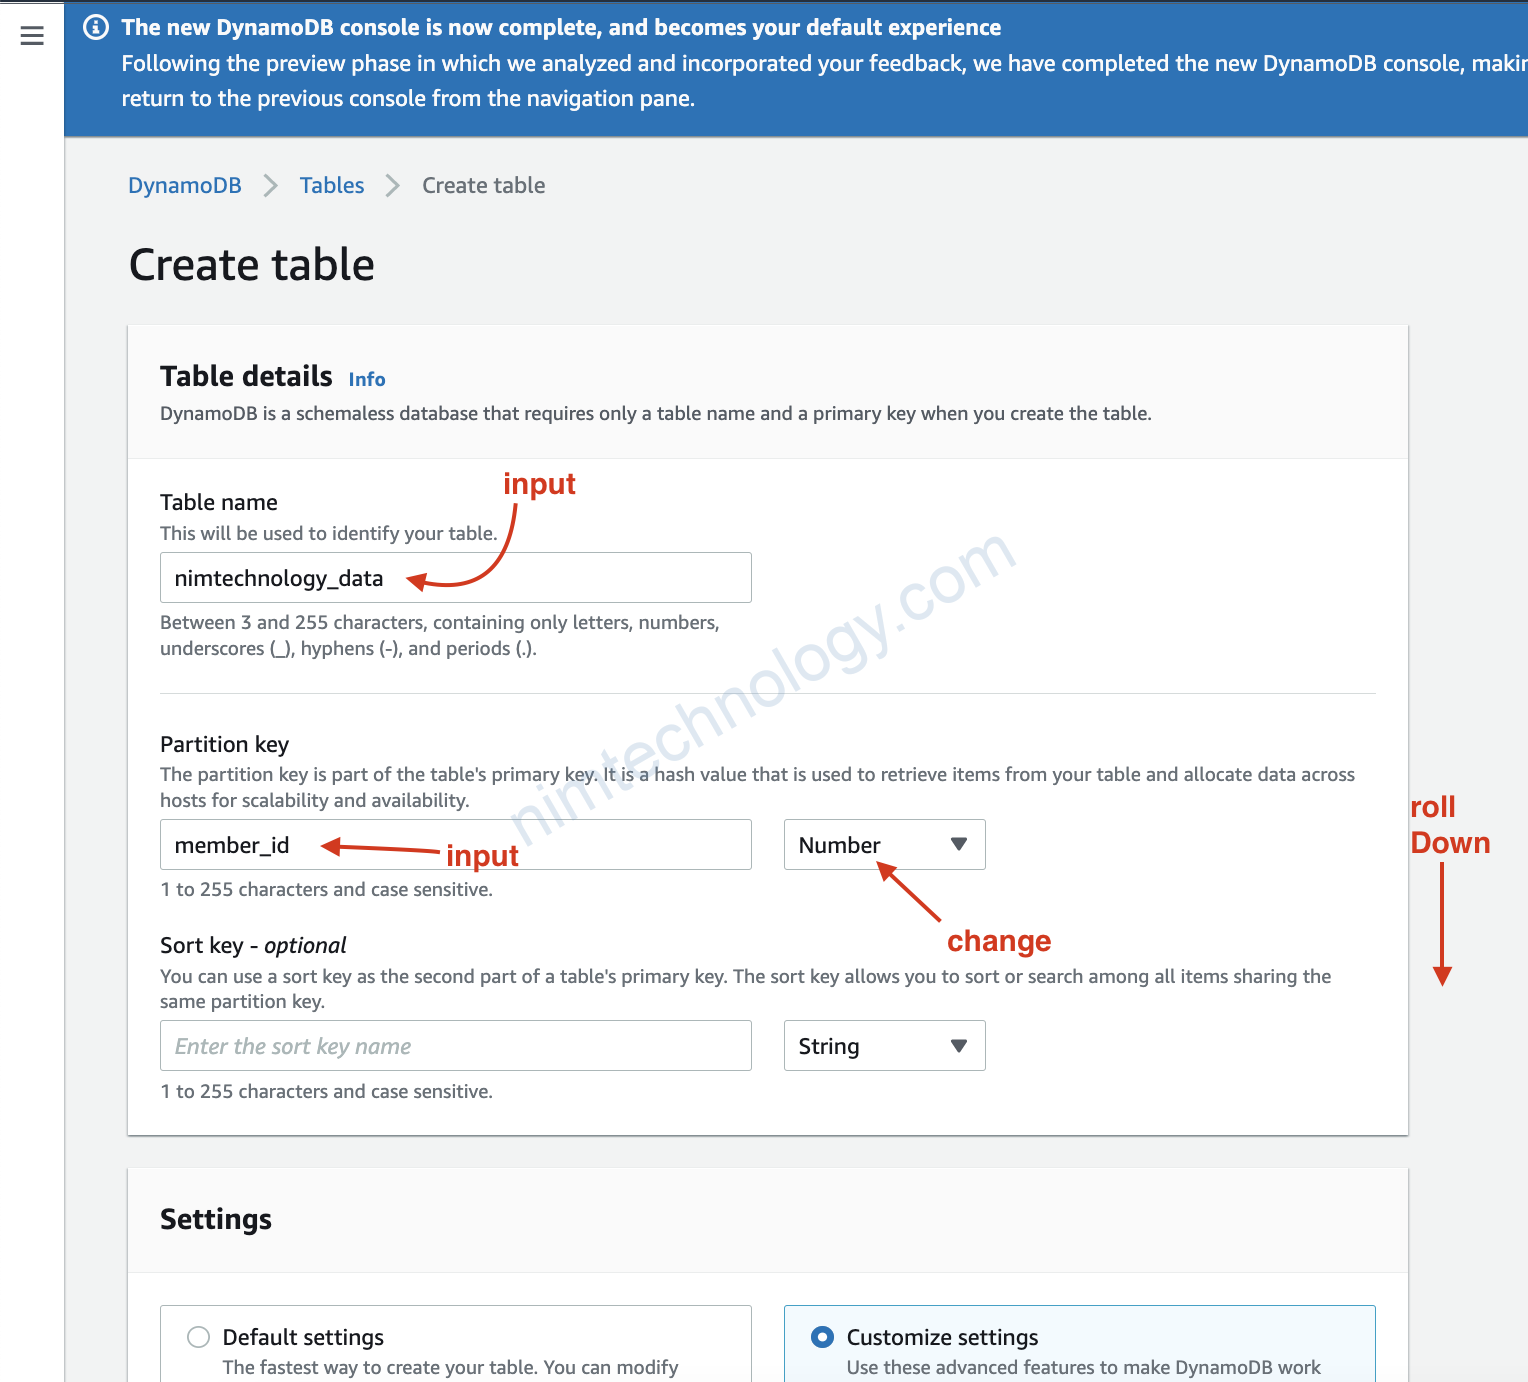
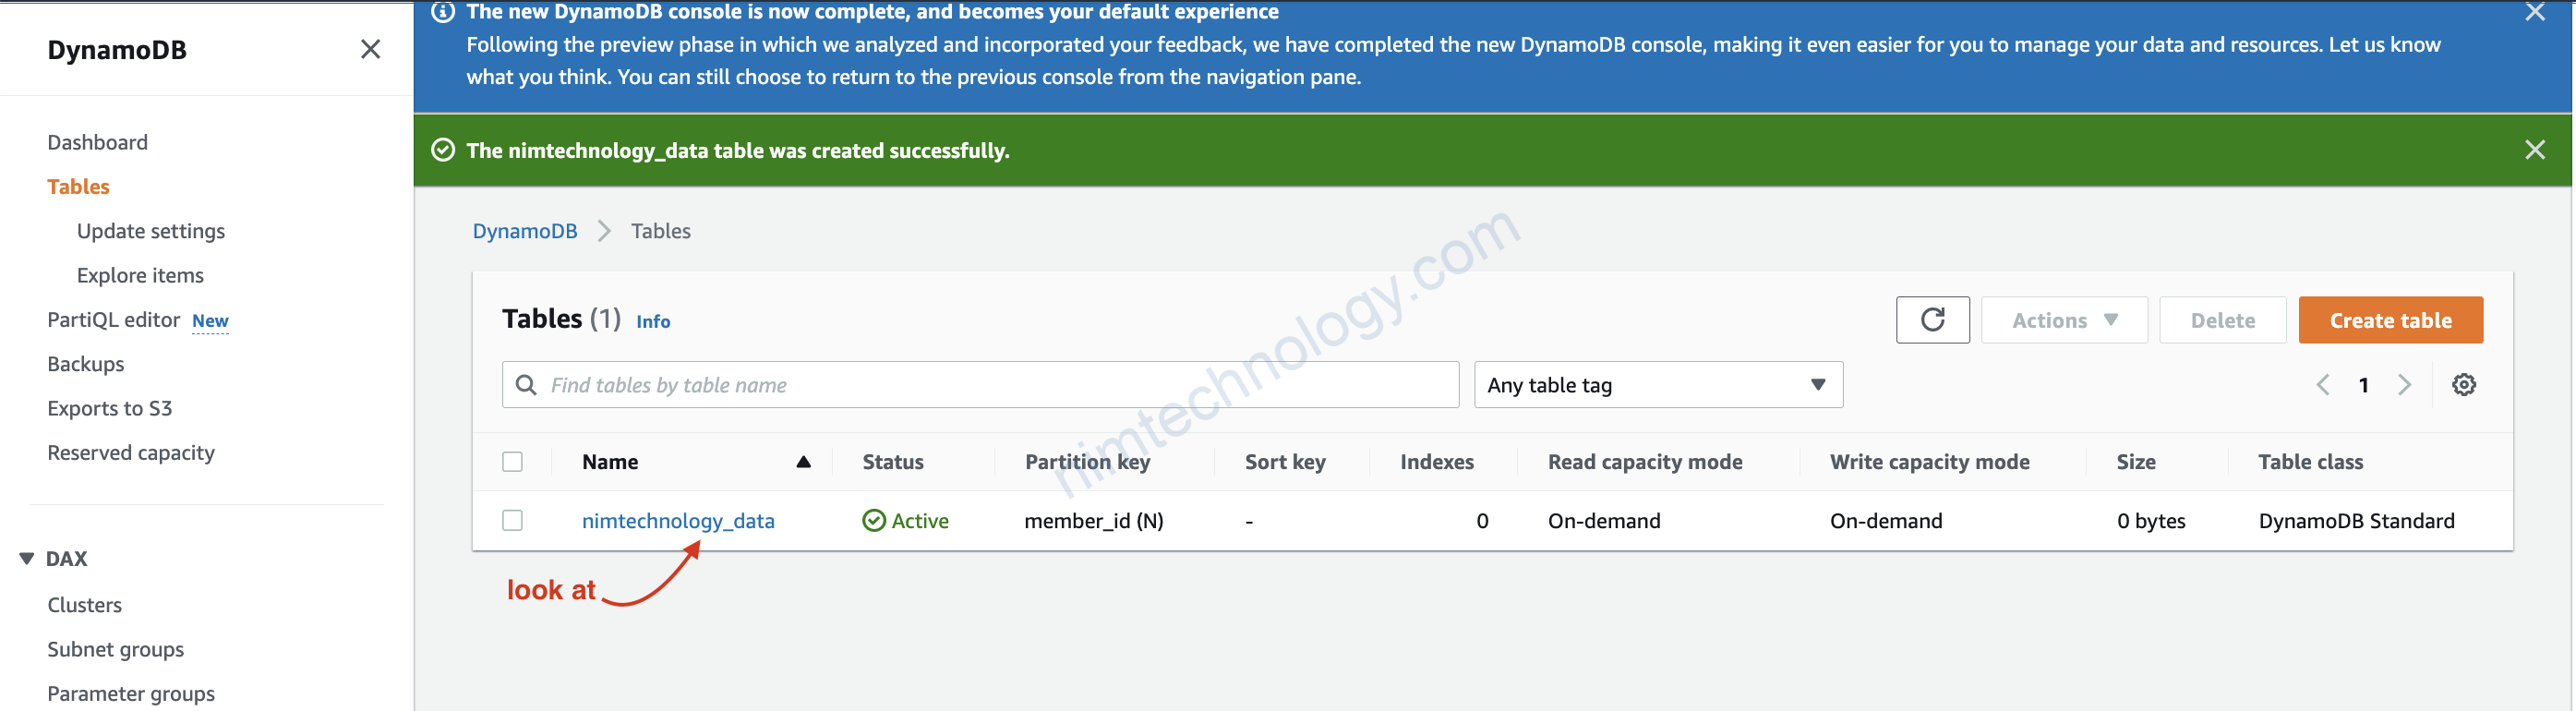

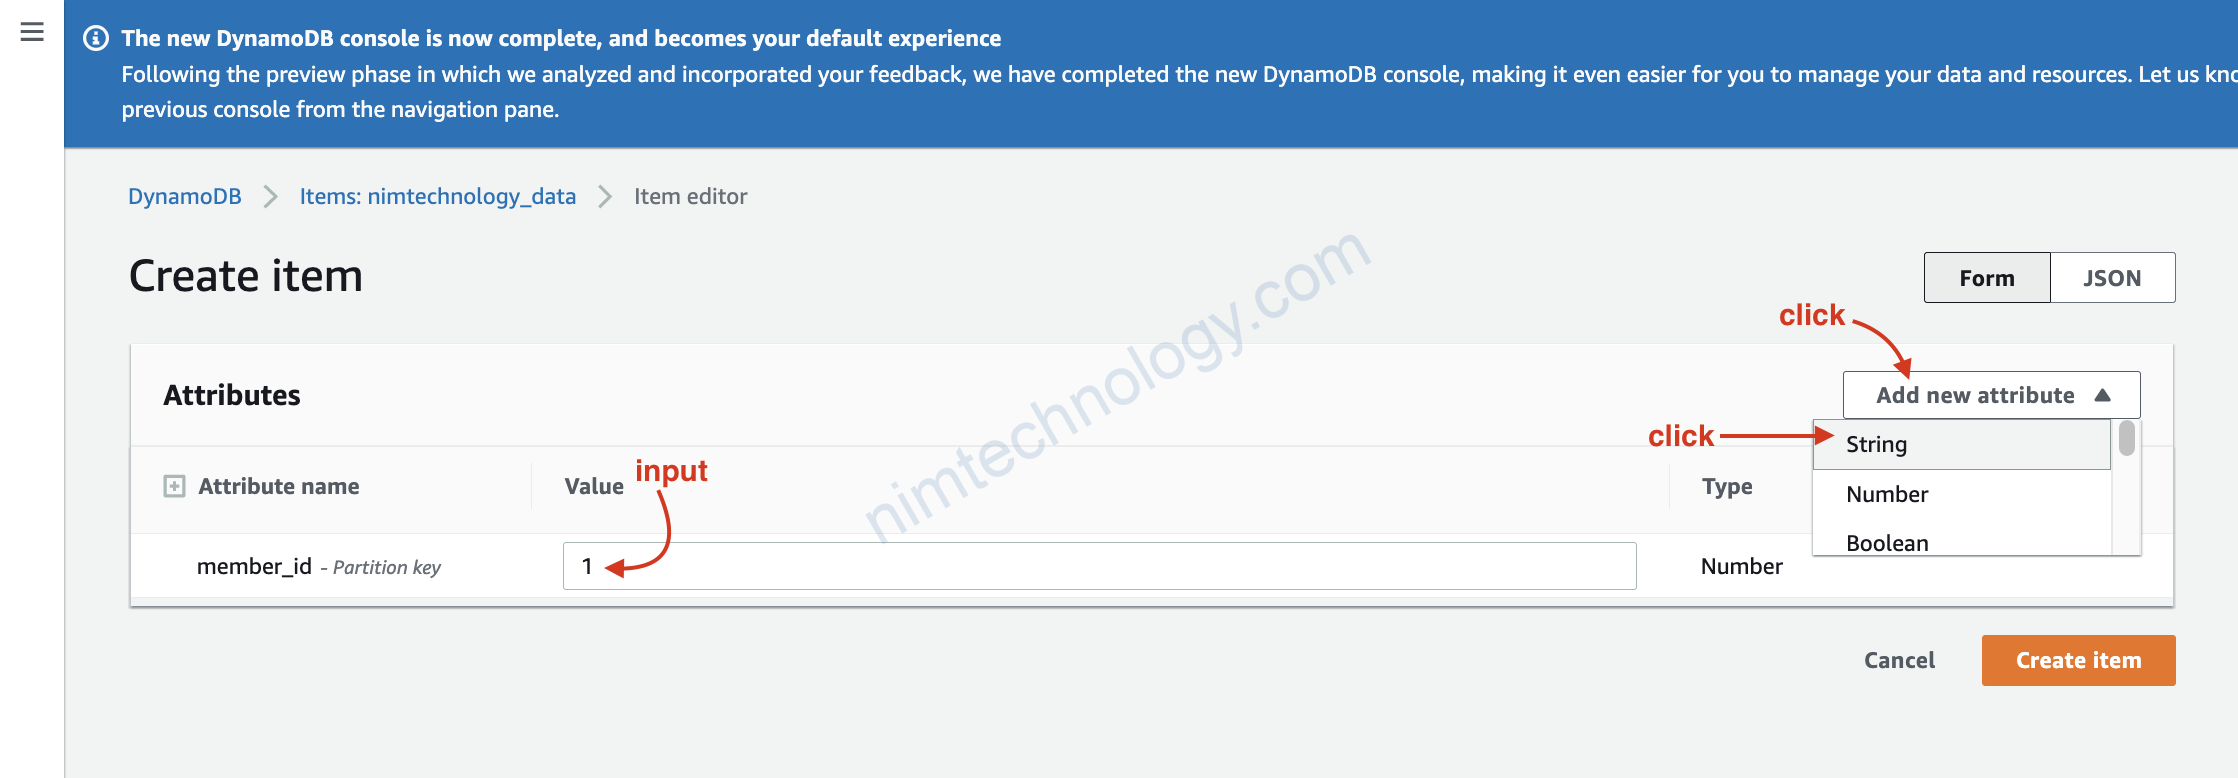
xong chúng tạo thêm các data như name, age,…
10) DynamoDB with Terraform